Heads up! This content is relevant for Clipchamp for personal accounts. Try this link If you're looking for information about Clipchamp for work accounts.
On this page
Want to create engaging and educational video tutorials your viewers will love?
Consumers are heavily relying on social media videos to learn, watching product demos, online FAQs and even review videos. With the number of video viewers expected to reach 3.5 billion this year and over 66% of consumers watching video content before buying, there’s no surprise video is one of the most favored ways to learn.
With the right combination of recording techniques and video editing, you can educate your viewers in no time whether you’re a content creator or brand selling a product or service.
Explore everything you need to know about creating engaging video tutorials using unique AI voiceovers and easy online webcam recording in Clipchamp video editor.
3 tutorial video formats to try
There are 3 different ways you can effortlessly create professional tutorial videos online with Clipchamp.
Screen and voiceover tutorial
If you want to create a demo video or online tutorial, record your screen in your web browser for free, to turn it into the perfect how to video. Capture your screen for up to 30 minutes with or without audio using your Windows or Mac device, then resize recordings to suit your social media platform. Level up your screen recording with versatile voiceovers, either record simultaneously with your screen recording using your own voice or create an AI voiceover.
Screen and webcam tutorial
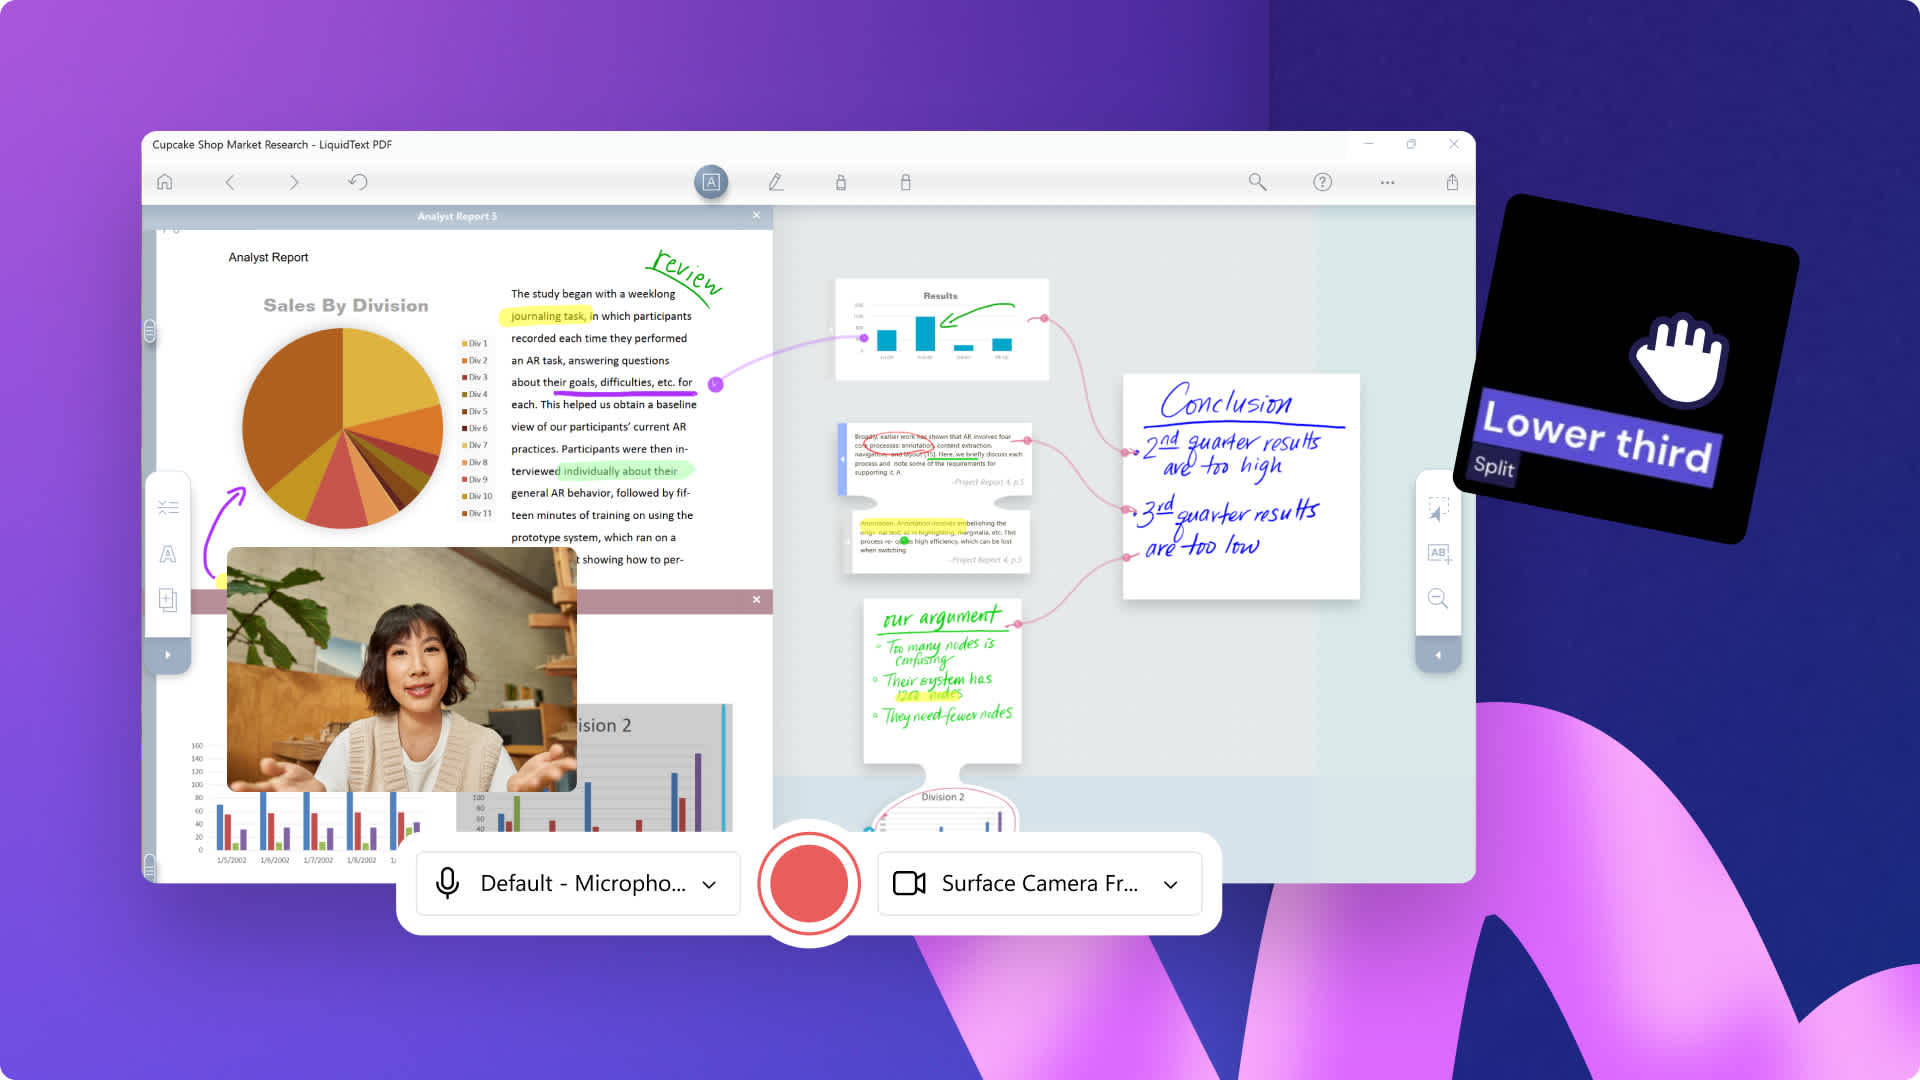
Creating training and tutorial videos? Let your viewers watch and learn virtually with online learning sessions or a tutorial video series. Easily record your screen and webcam all in one place with the screen and camera recorder. Simply trim away unwanted footage, awkward silences, and any mistakes in your recording with the split and trim tools. Personalize lessons with branding, color schemes, and logo animations.
Slideshow and voiceover tutorial
Enhance your study materials and create the best motion style slideshow tutorials to teach and learn. Arrange videos and images in order with dynamic transitions like slow zoom, spin, and fade. Emphasize the seamless flow of your video with the help of animated titles like the typewriter effect, stickers, and an informative AI voiceover.
How to plan a tutorial video
To create successful instructional videos, it’s important to plan your content by establishing your audience, topic, script, overall goal, and video sharing platforms. No matter the video topic or genre, exceptional planning means well-produced videos. Effectively plan and create a video tutorial that informs your viewers and engages with your target audience. Let’s explore how.
Decide who your target audience is and what the best ways are to communicate and connect with them.
Choose a topic, research, set a goal, and plan a script for your tutorial video with an easy-to-follow layout.
Explore how you are going to easily record and create your tutorial video.
Review social media platforms and select a platform that best suits your instructional content.
Elements of a great video tutorial
Informative visuals
Use clear and good quality video shots so viewers can easily understand your demo.
Import videos, images, and GIFs to convey your tutorial message and support main video visuals.
Personalize your instructional videos with graphic annotations like arrows and circles to highlight key parts of the tutorial.
Background audio
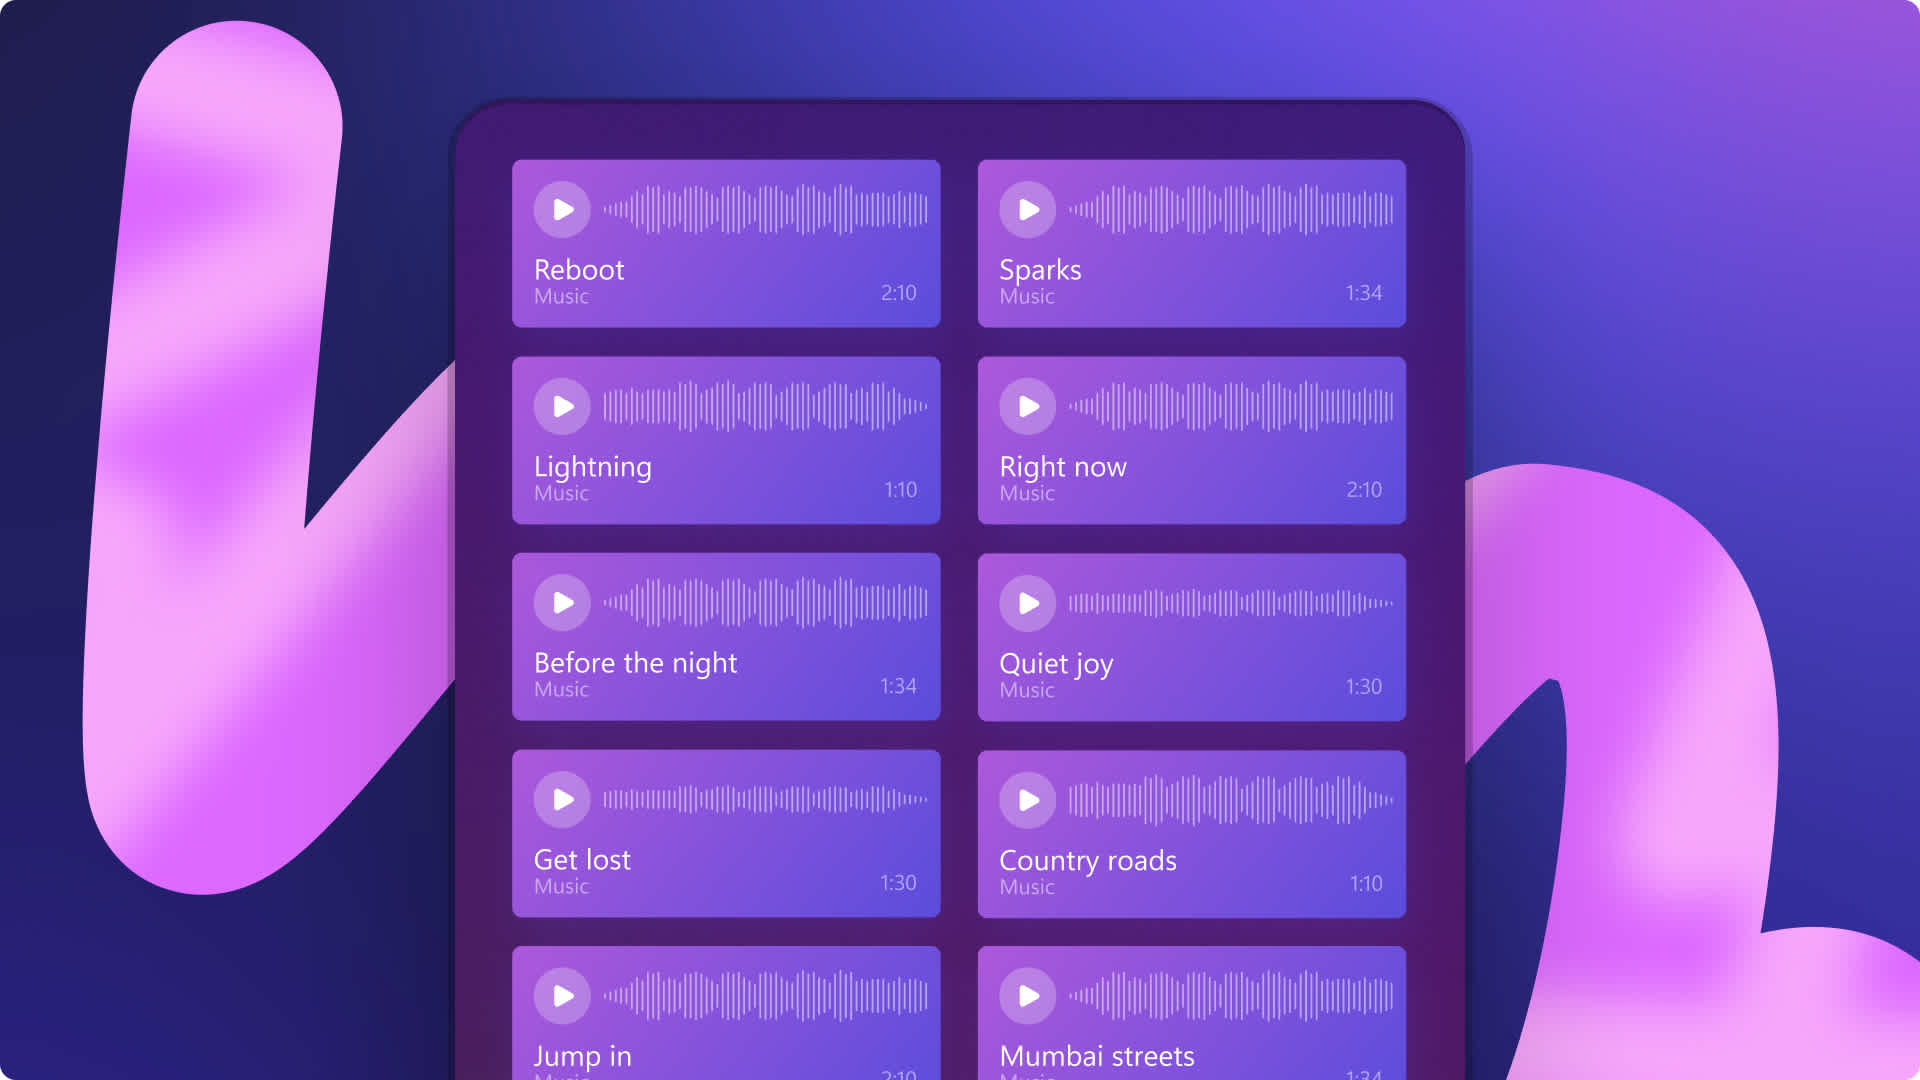
Use soft background music to engage viewers without distracting from the tutorial content.
Create authentic and clear voiceovers to capture attention on social media and make your tutorial video easier to follow on.
Add unique sound effects to specific sections within the tutorial video to highlight messages or keywords.
Video accessibility
Refine your how to videos with subtitles to help viewers understand your content on mute with autocaptions.
Add on screen lower third titles and text options to define tutorial steps and introduce subjects or teachers.
Place ASL video stickers side by side with your video content or as standalone video clips to convey meaning to the deaf and hard of hearing community.
Video editing techniques
Use the picture-in-picture effect to overlay images and videos onto your tutorial to help teach your lesson.
Record high quality screen and camera recordings to create professional and easy to watch content.
Save your tutorial video in high definition 1080p video resolution for the best quality.
How to edit a tutorial video
Step 1. Import videos, select stock footage, or record a video
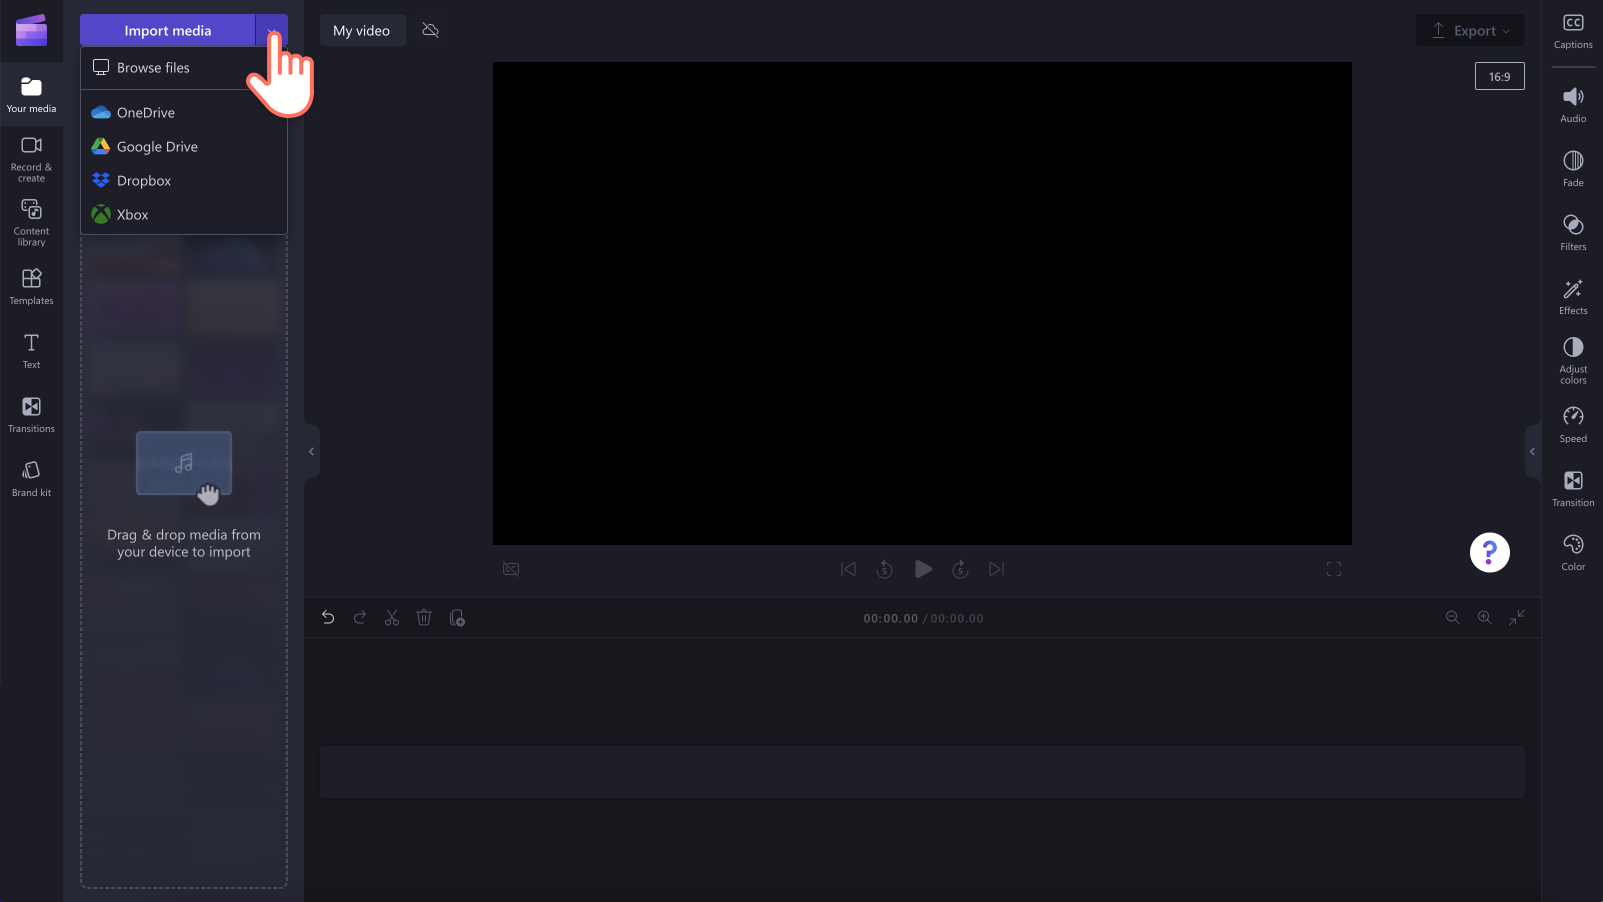
To import your own pre-recorded videos, click on the import media button in the your media tab on the toolbar to browse your computer files, import videos from your phone, or connect your OneDrive.
You can also use royalty-free stock media. Click on the content library tab on the toolbar and click on the visuals drop down arrow, then videos or backgrounds. Search through the different stock categories using the search bar as well.
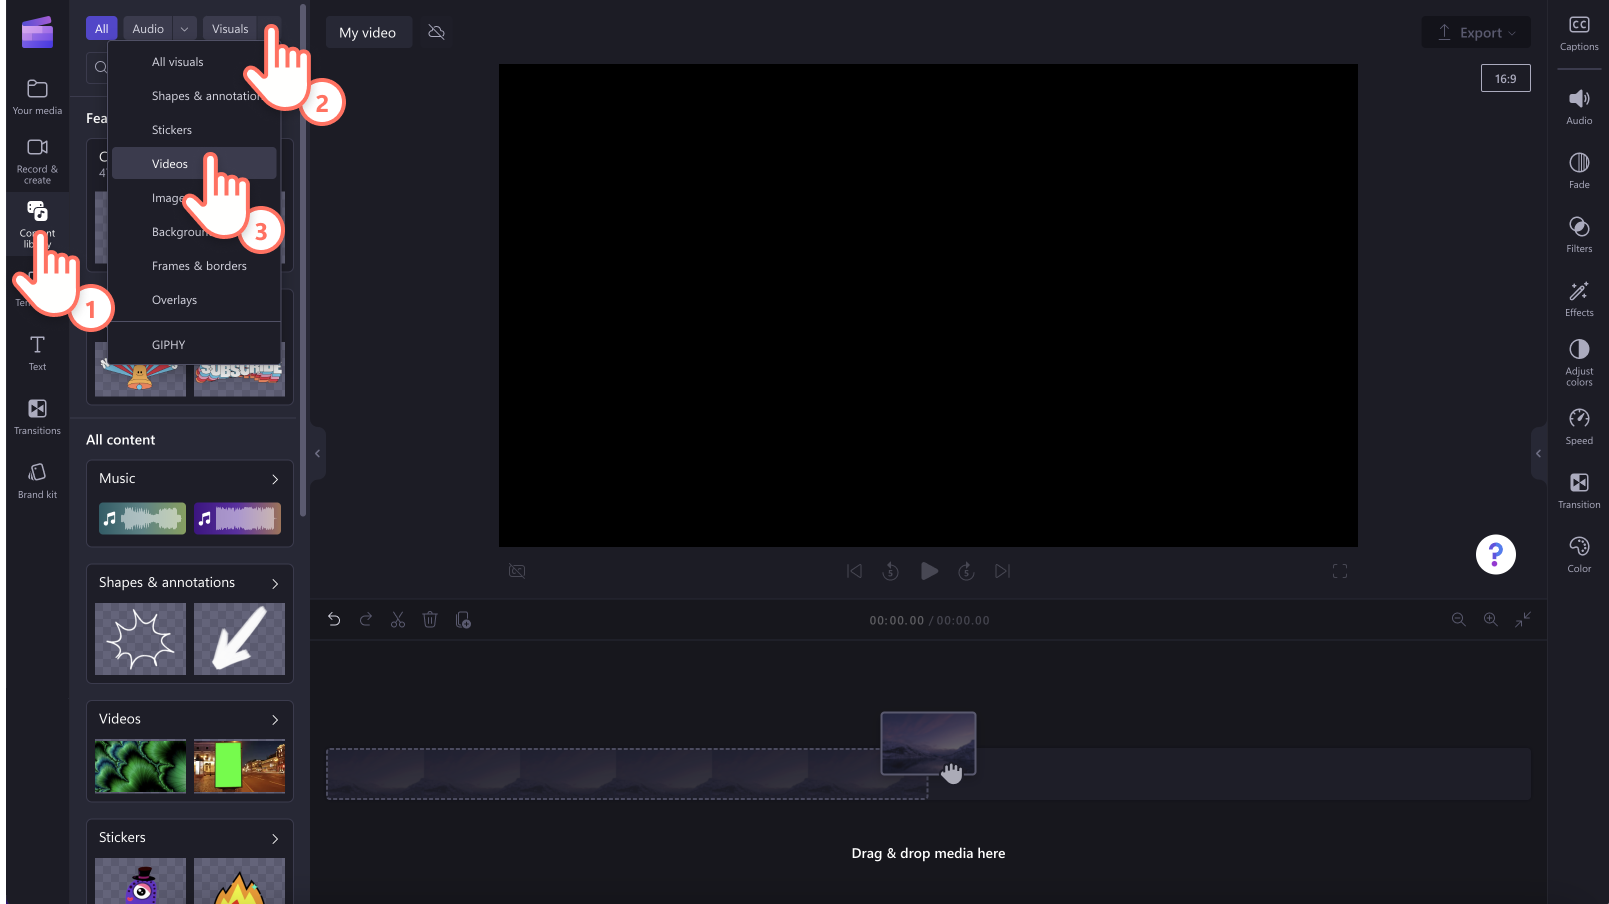
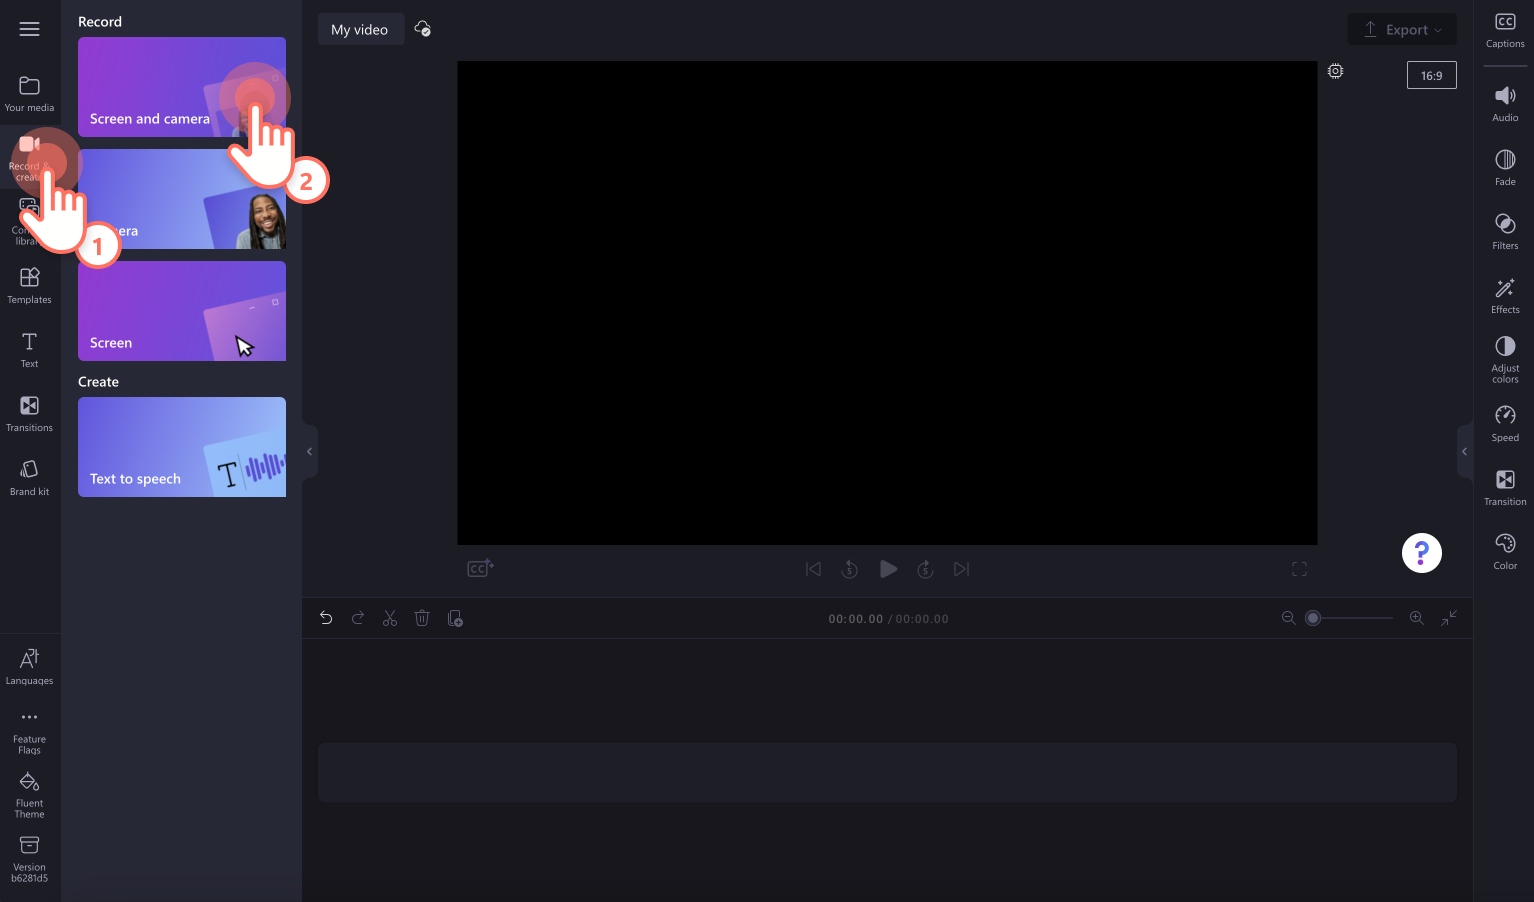
If you would like to create your tutorial video using the screen and camera recorder, click on the record & create tab, then click on the screen and camera recorder option. Record your screen and webcam using the onscreen prompts. Once you’re finished, the recording will automatically be added to your timeline.
For more help, check out the screen and camera recording blog.
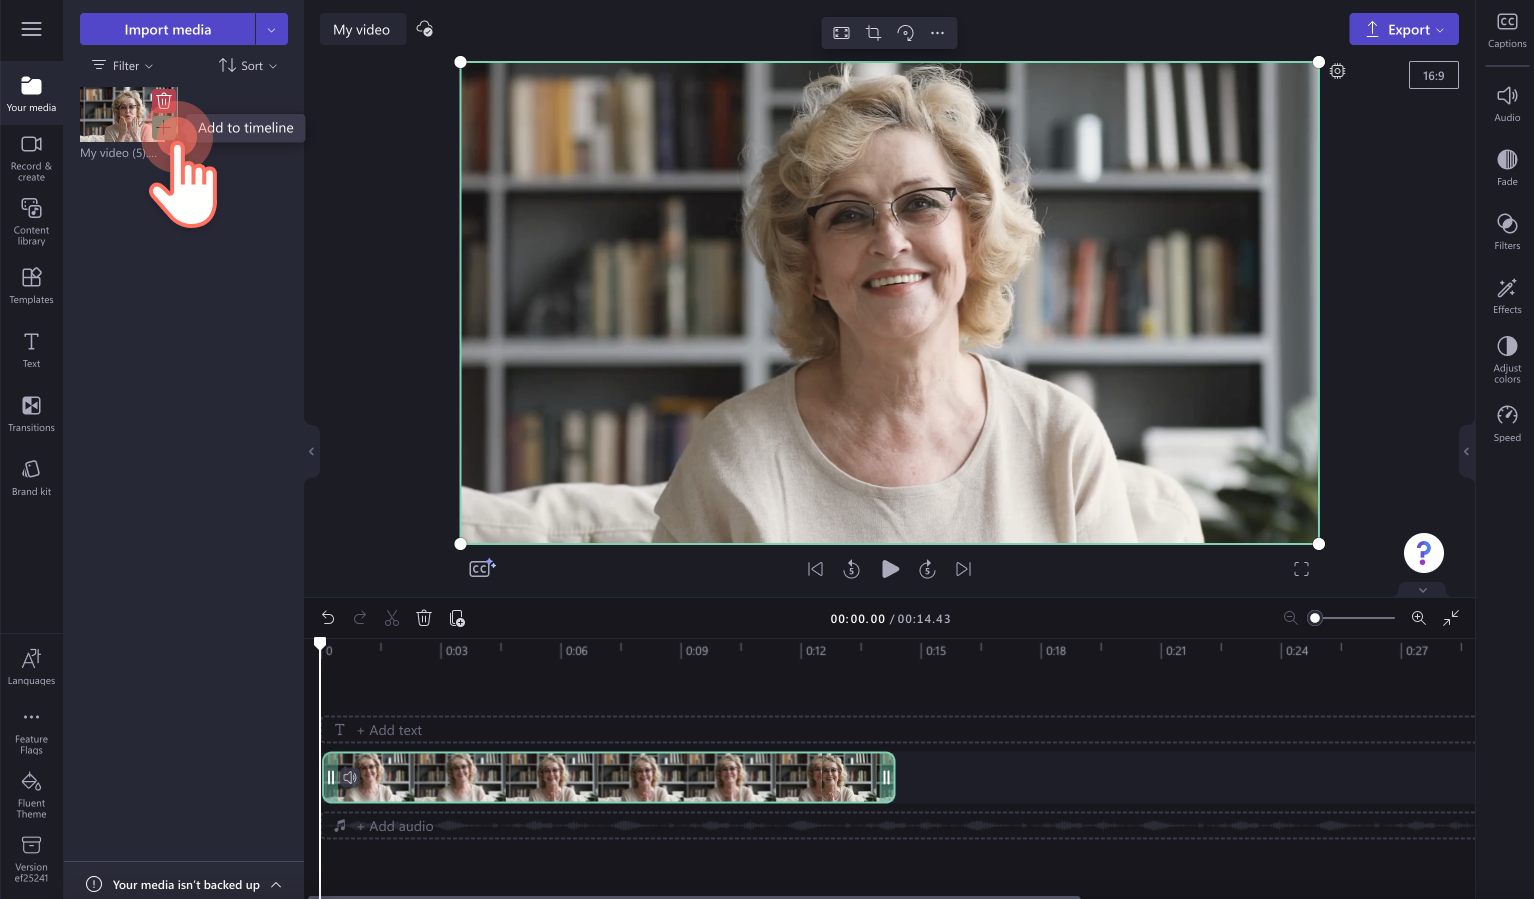
This tutorial will use footage from a webcam recording.
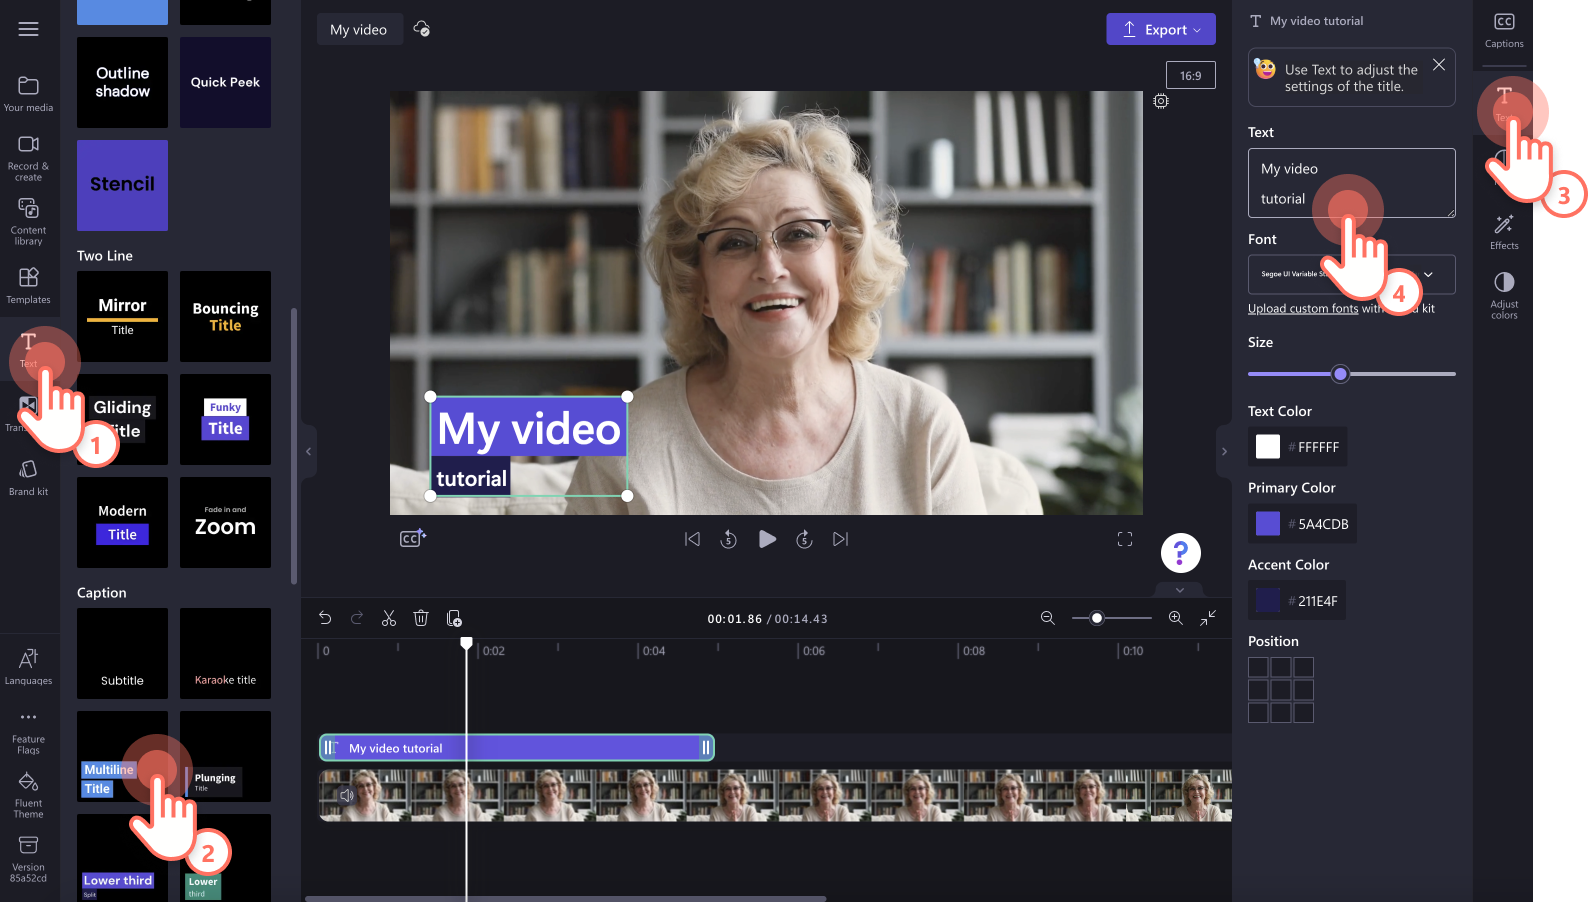
Step 2. Add visuals like text, stickers, and annotations
To add text to your instructional video, click on the text tab on the toolbar, then select a title that best suits your video tutorial. We recommend using the lower third title. Drag and drop the title onto the timeline, then edit your text in the text tab on the property panel.
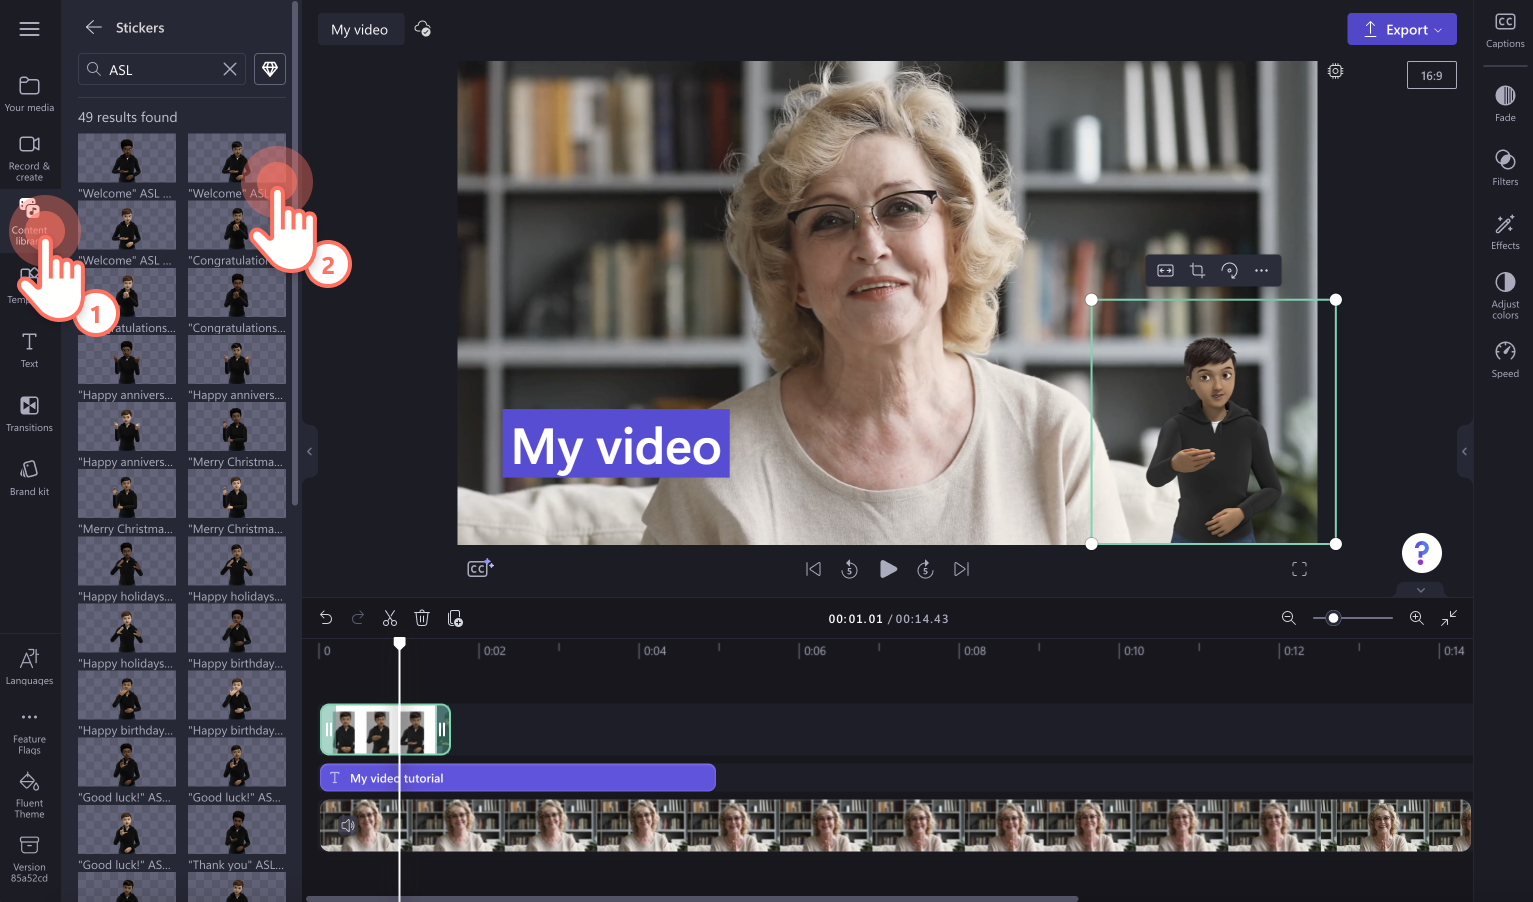
To add emojis or ASL stickers, click on the content library tab on the toolbar, then search a keyword like ASL or emotions like happy. Drag and drop a sticker onto the timeline.
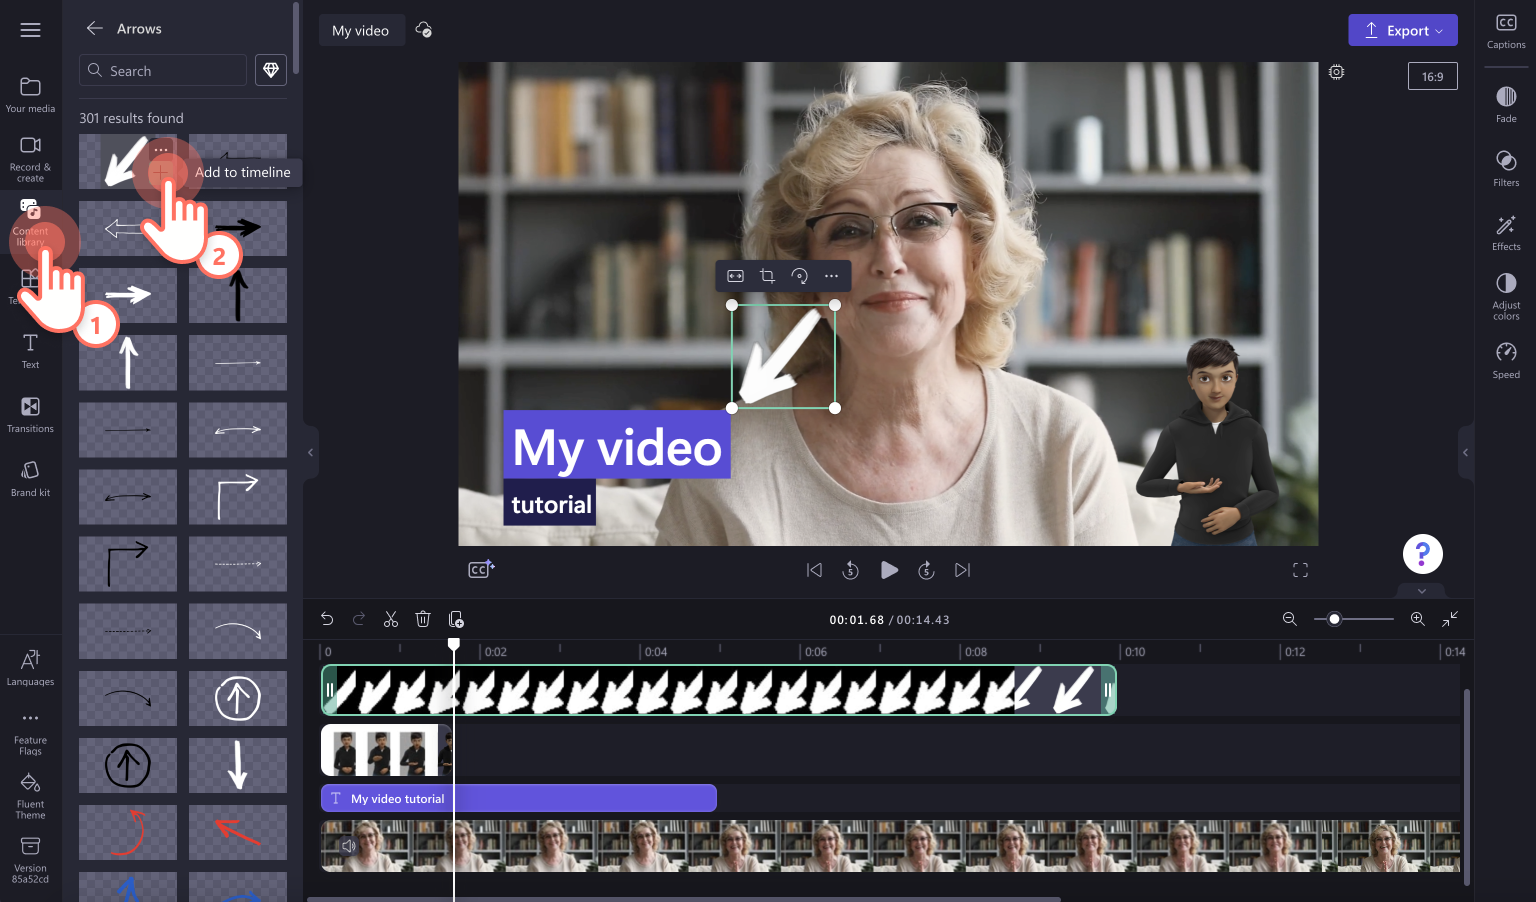
To add annotations like circles, arrows, and underlines, click on the content library tab on the toolbar, then click on the visuals tab in the drop-down menu. Drag and drop an annotation onto the timeline.
Step 3. Add background music to your video tutorial
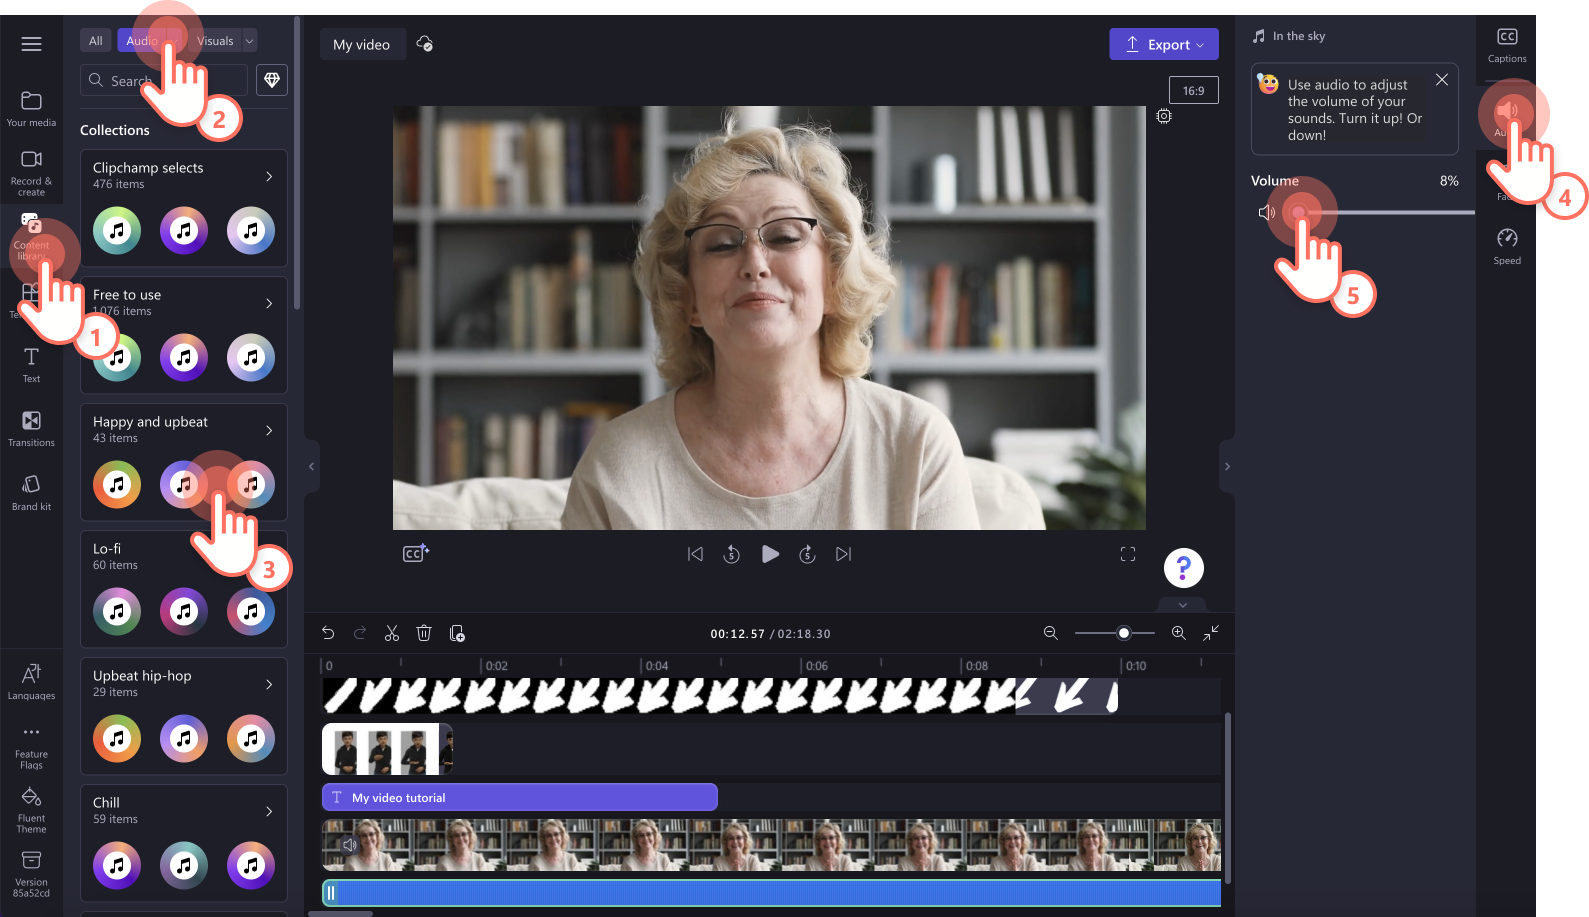
Click on the content library tab on the toolbar, then click on the music drop-down menu. Search using keywords or scroll through the curated categories. Drag and drop your stock audio onto the timeline. Make sure to turn down the volume of your audio track using the volume slider in the volume tab on the property panel.
Step 4. Preview and save your tutorial video
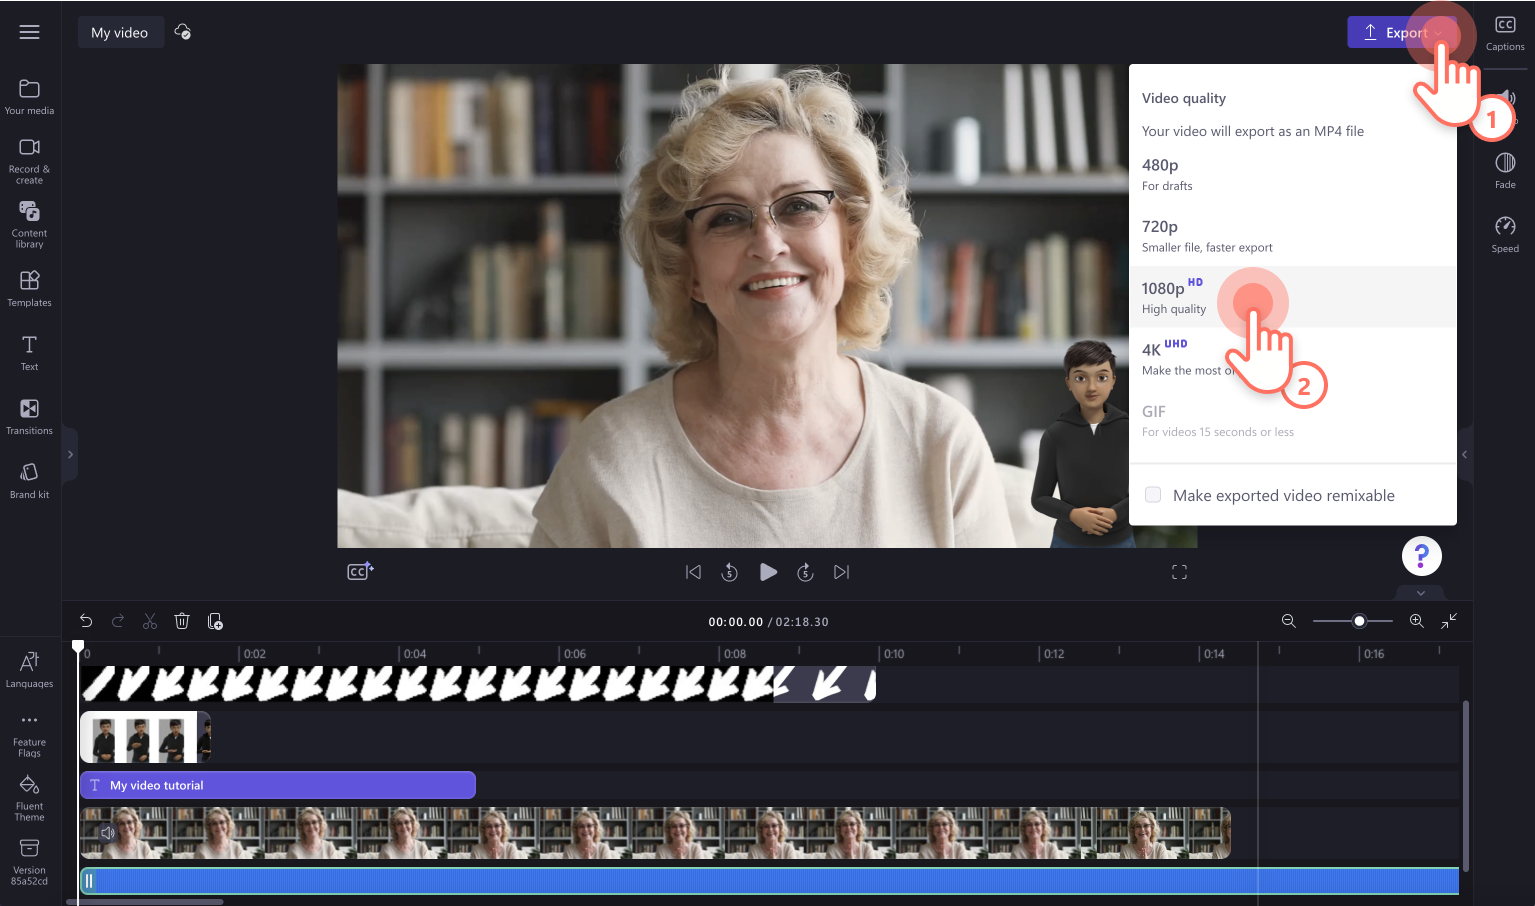
Before saving your new instructional video, make sure to preview by clicking on the play button. When you’re ready to save, click on the export button and select a video resolution. We recommend saving all videos in 1080p video resolution for the best quality. Paid subscribers can save in 4K video resolution.
How to create a tutorial video voiceover
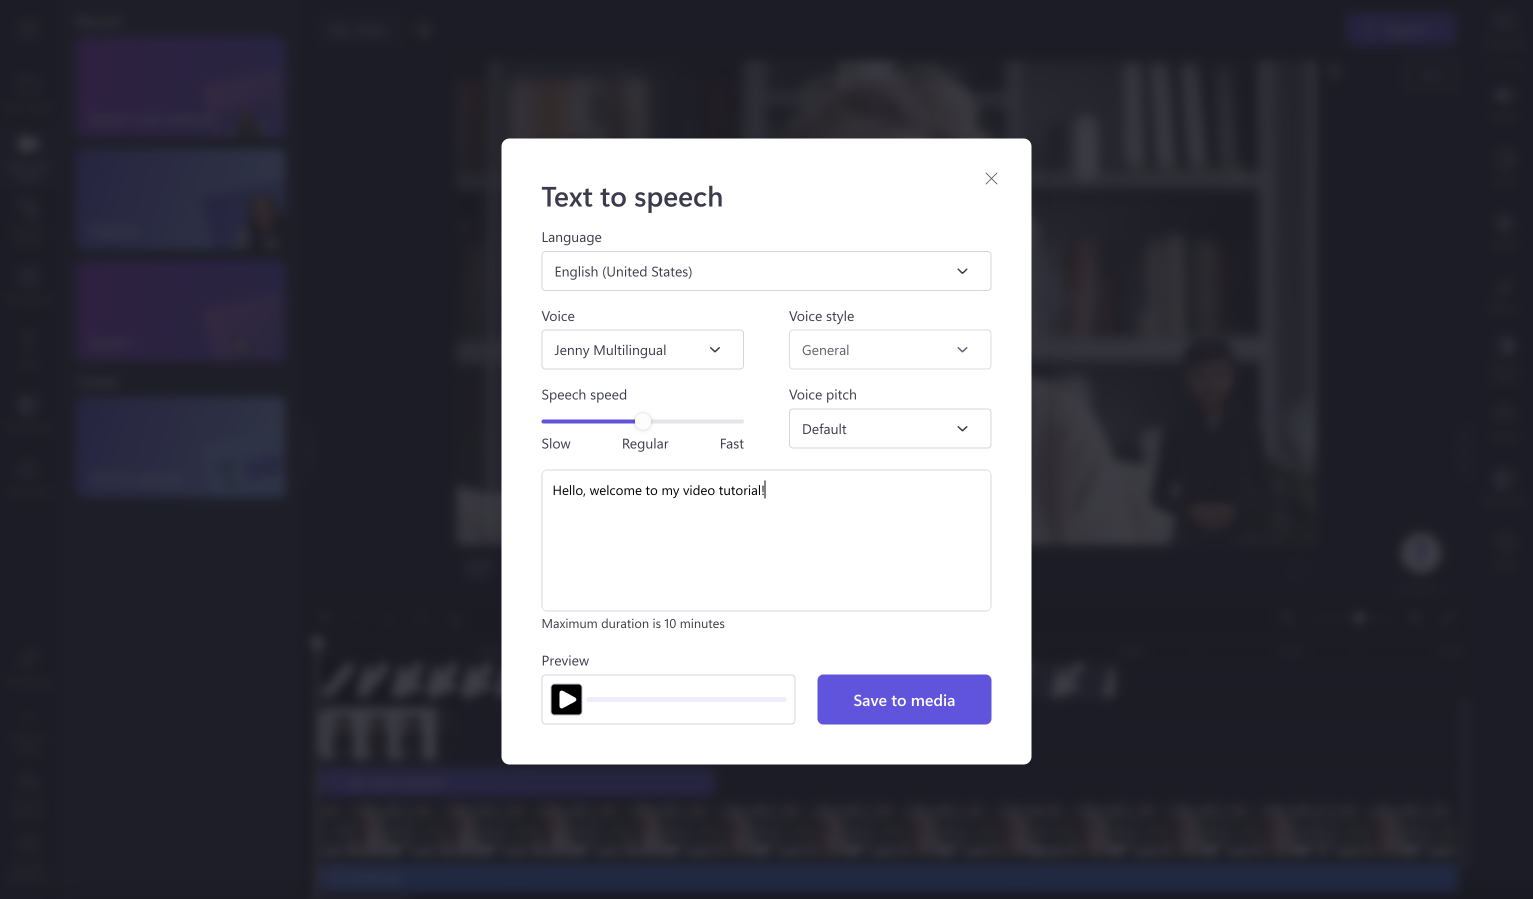
If you would like to add a AI voiceover to your video, follow the steps below.
Click on the record & create tab on the toolbar.
In the pop-up window, pick your language, voice and speed.
Type in your text to generate a voiceover.
Preview your video using the play button.
Save your voiceover.
Drag and drop your voiceover onto the timeline below your video.
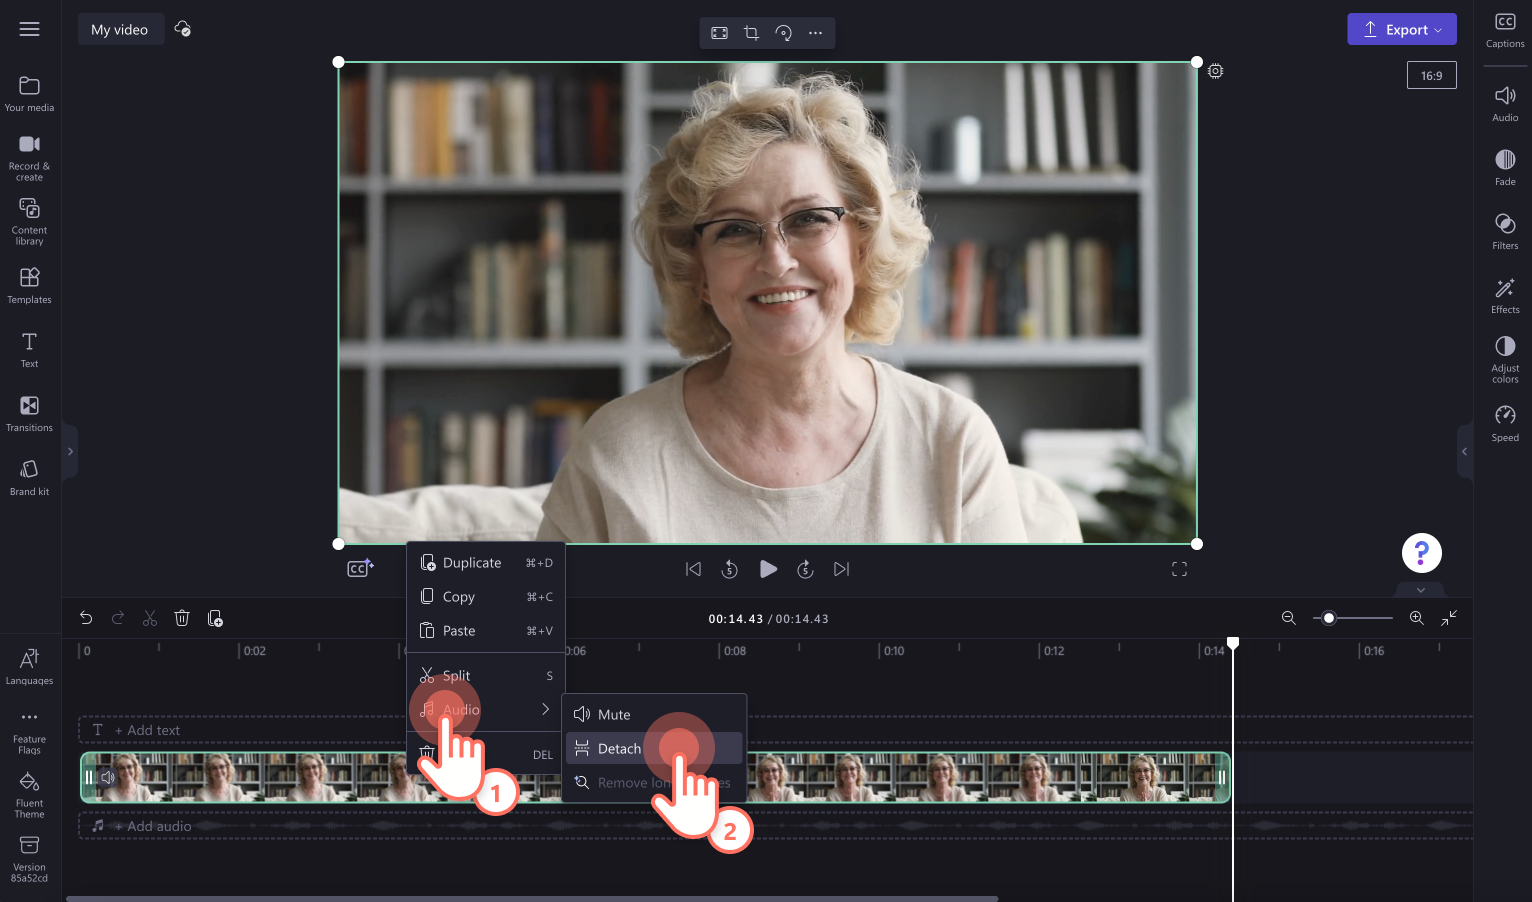
To use your own voice as a voiceover, follow the steps below.
Record yourself talking using the webcam recorder.
Save and add your webcam recording to your timeline.
Detach the audio from your video recording by right clicking on the video on the timeline, then click detach.
Your audio file will now appear separate from your video on the timeline. Delete the video file to keep the audio only.
How to create subtitles for a tutorial video
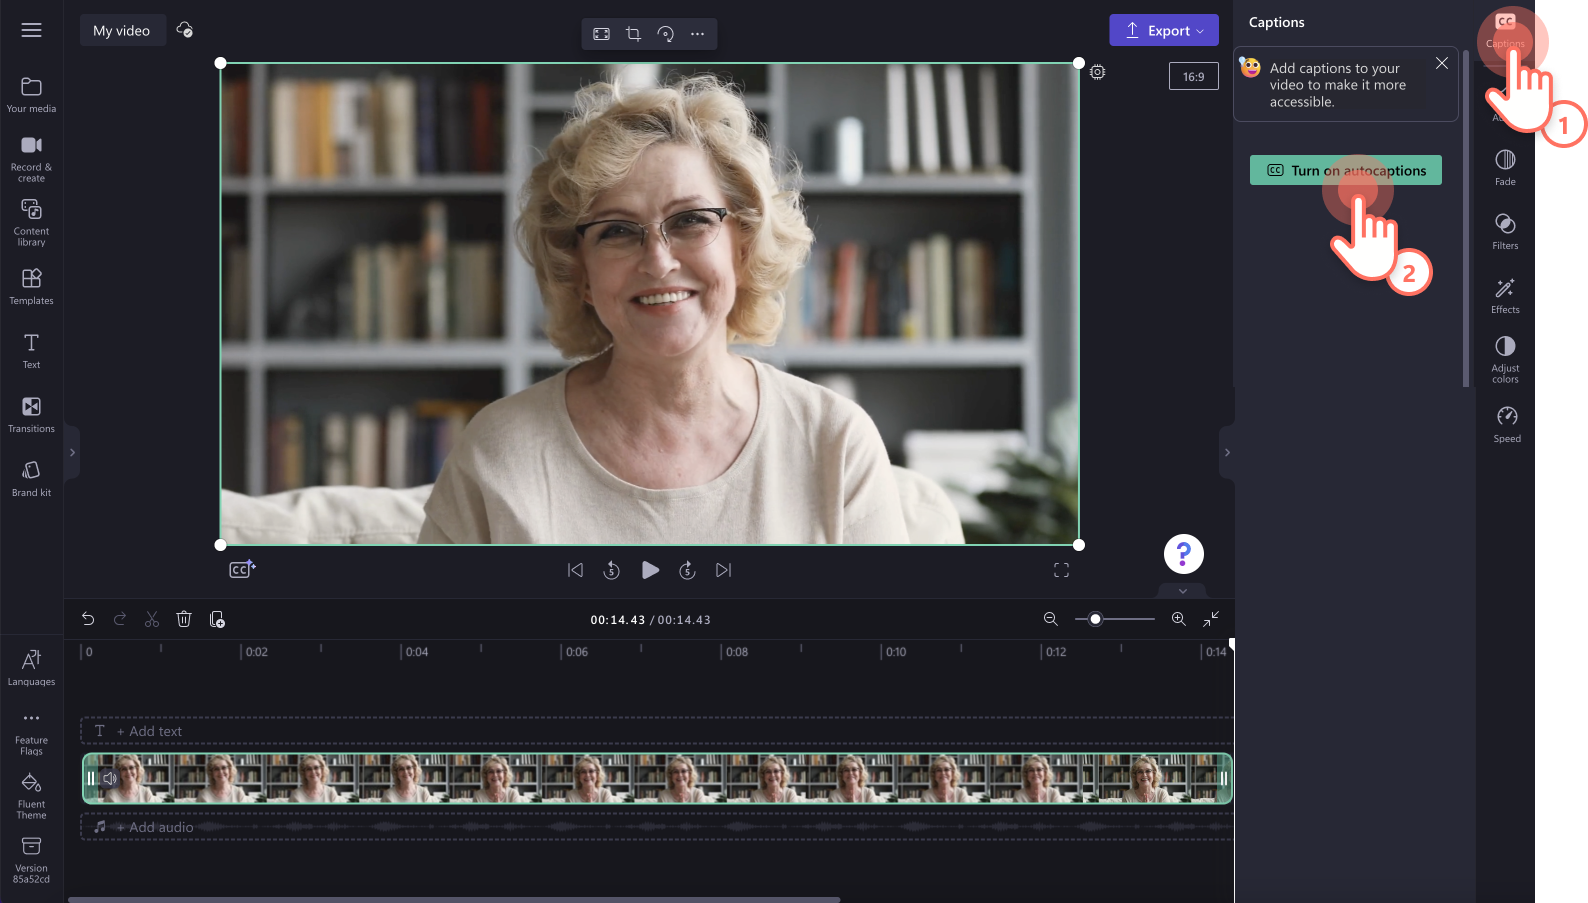
Adding subtitles to your video tutorial is essential for accessibility. Follow the steps below to learn how to add autocaptions.
Click on your video on the timeline so it’s highlighted green.
Click on the autocaptions tab on the property panel.
Click on the turn on autocaptions button.
You will automatically head back to the editor with autocaptions appearing in the captions tab.
Edit your transcript and captions using the captions tab.
Learn more ways to create educational content like slideshow videos and how to put two video side by side.
Start editing today with Clipchamp for free or download the Clipchamp Windows app.

