On this page
Any video animation can grab a viewer's attention in an instant. With moving text, you can tell your story, share valuable information like names and places in a dynamic and engaging way.
Choosing a moving title that fits your video look and feel is important, and so is easy customizable video editing. Effortlessly drag and drop a moving title onto your video clips, then edit with unique fonts, colors, and sizes using an online video editor like Clipchamp video editor.
Learn how to add moving text to videos for free and explore best practices to create professional-looking moving text in a few minutes.
How to add moving text to video for free
Step 1. Import videos or select stock footage
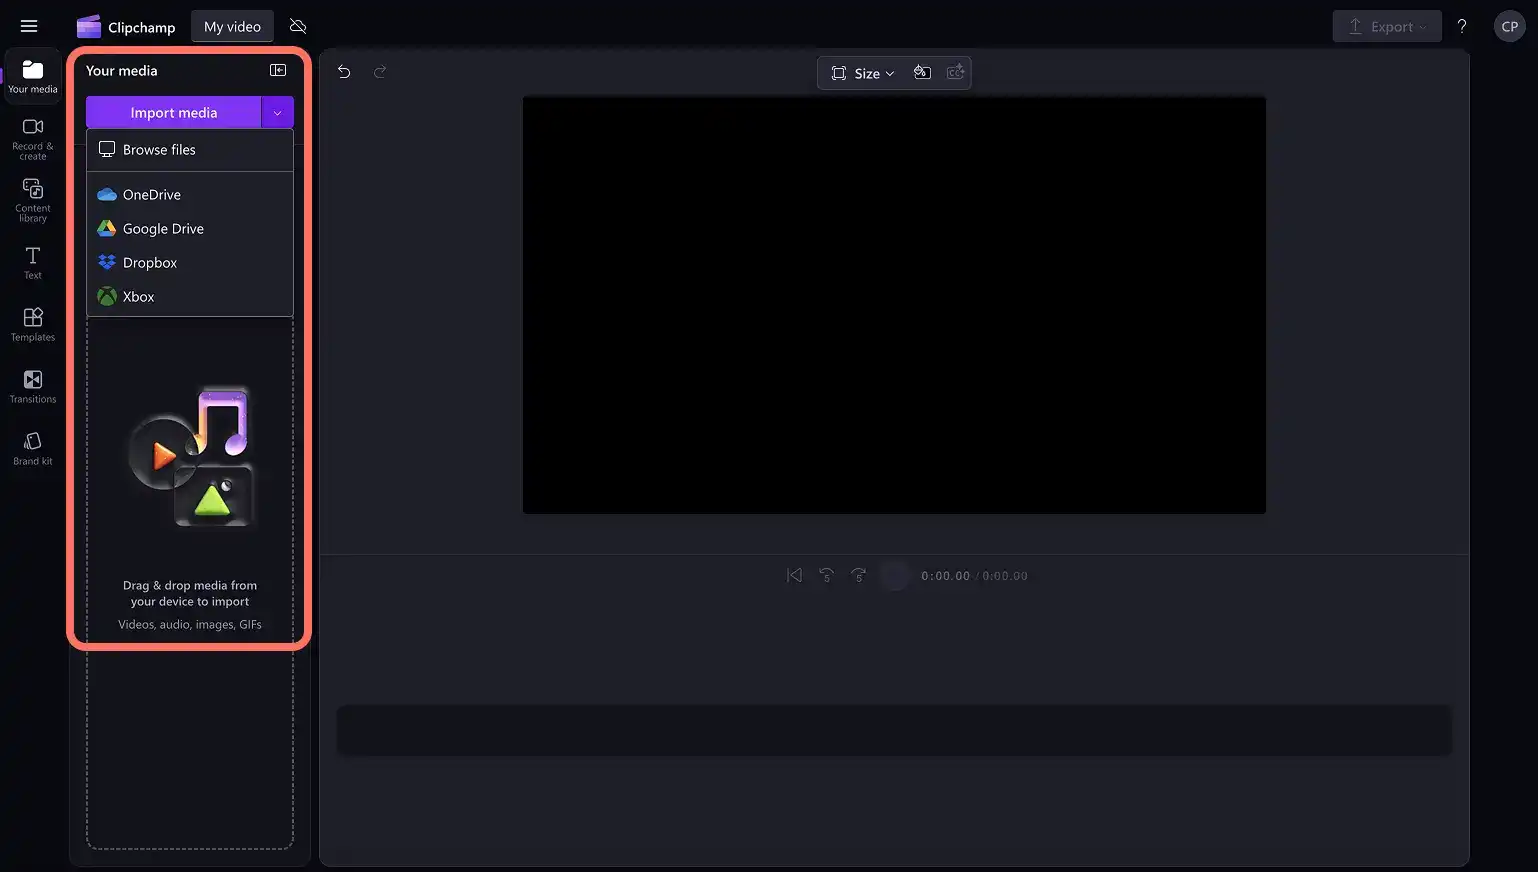
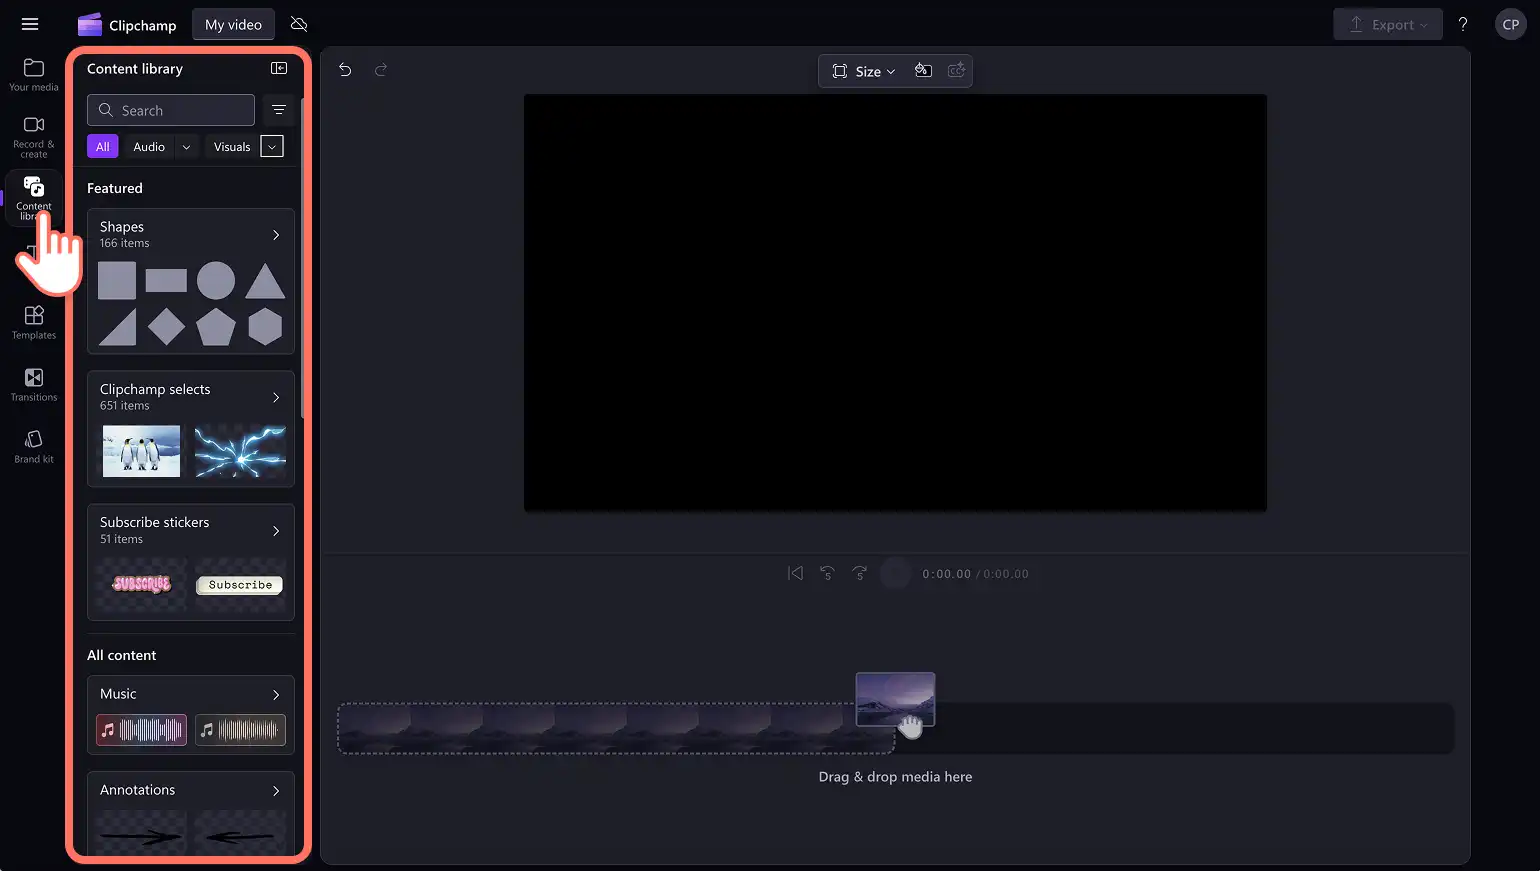
To import your own videos, photos, and audio, click on the import media button in the your media tab on the toolbar to browse your computer files, or connect your OneDrive.
You can also use free stock media like video clips, video backgrounds, and stock music. Click on the content library tab on the toolbar and click on the visuals drop down arrow, then videos. Search through the different stock categories using the search bar as well.
Drag and drop your videos onto the timeline to create a video that suits your needs, ranging from a slideshow video, training video and even a promo video.
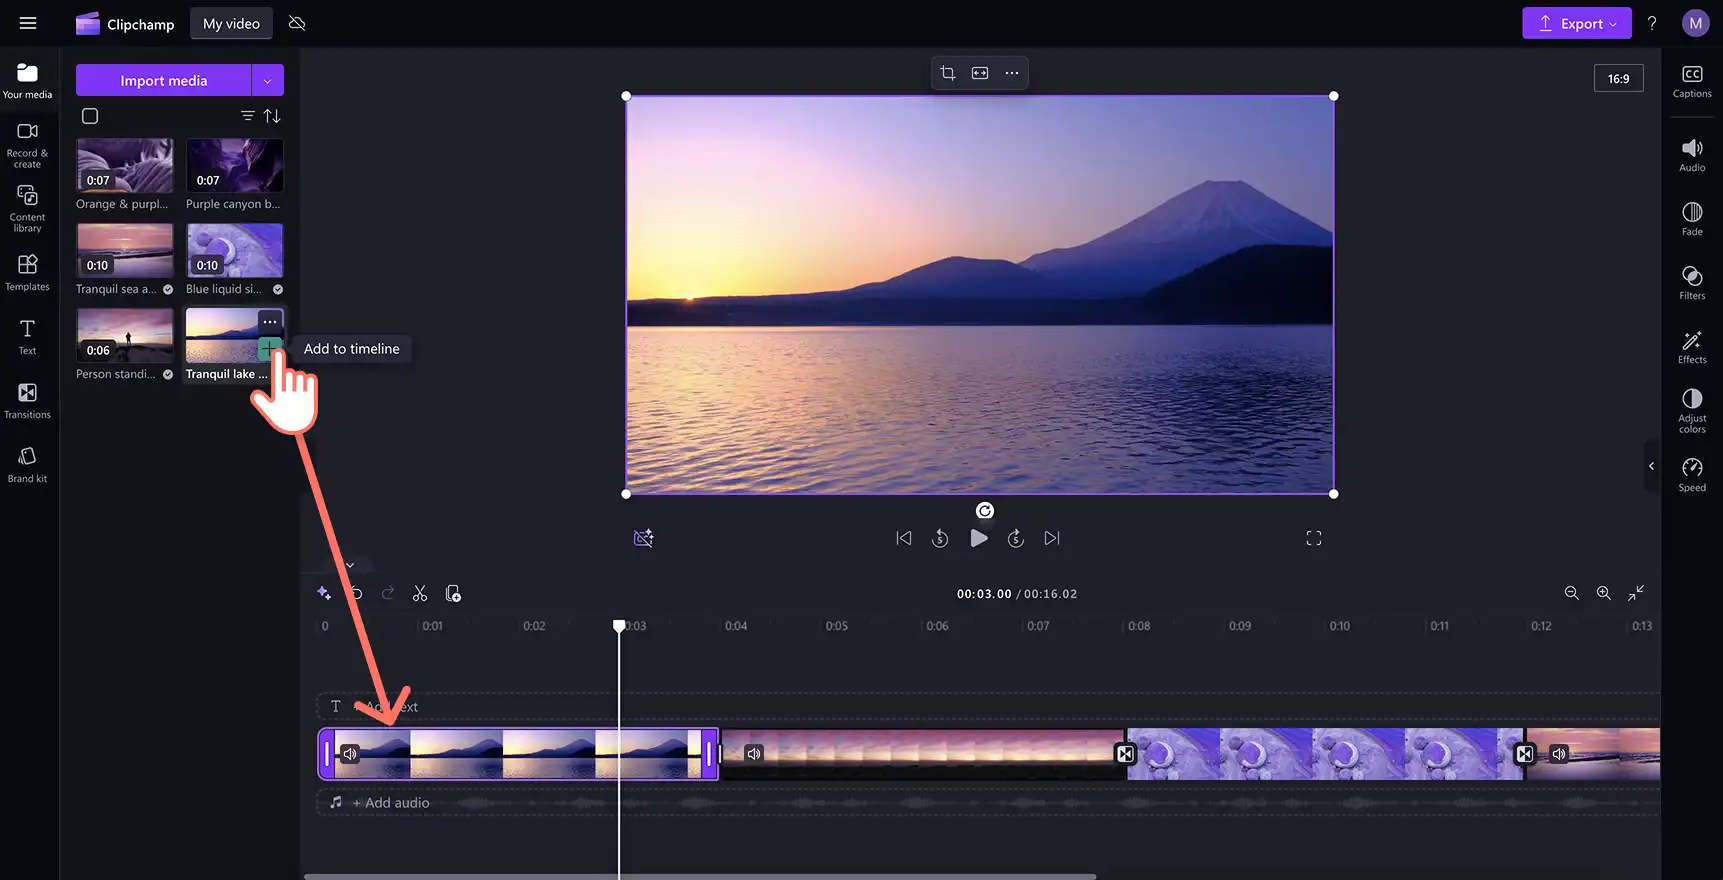
Step 2. Add text to your video, GIF or slideshow
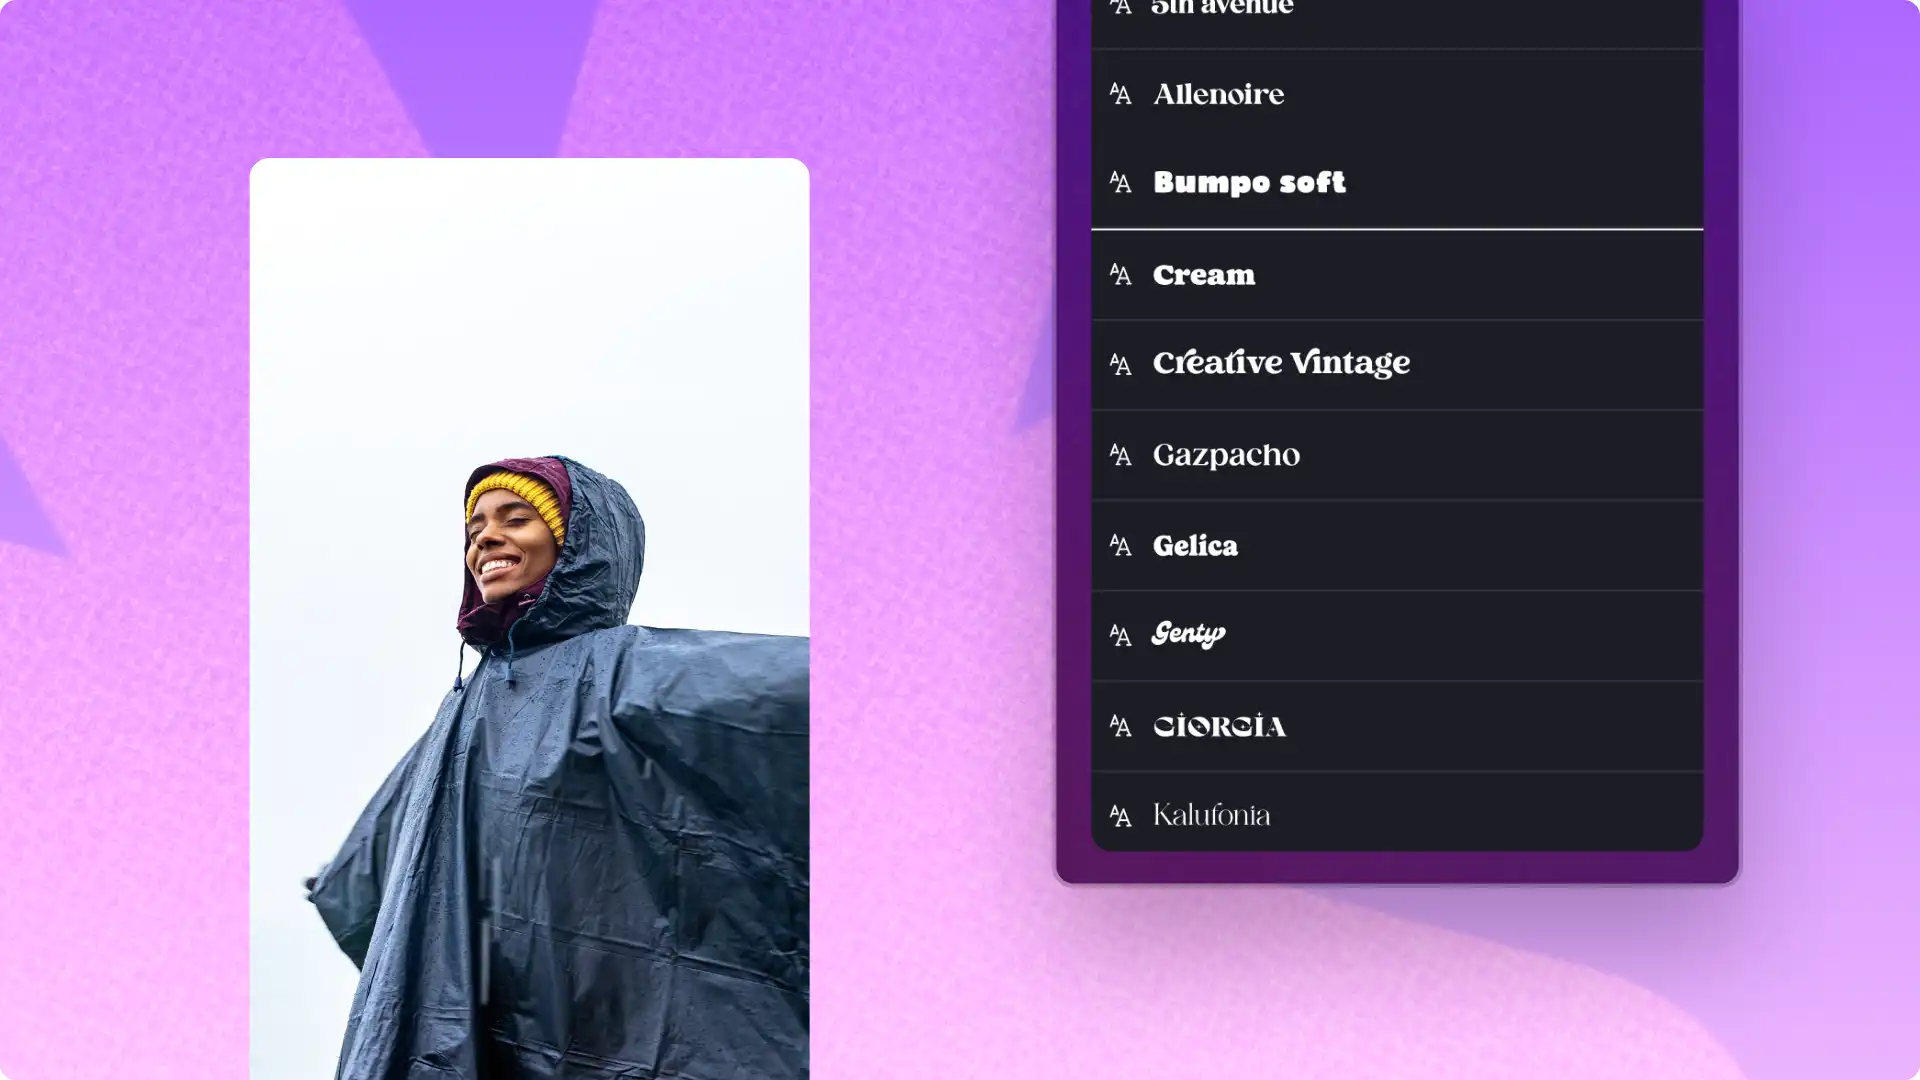
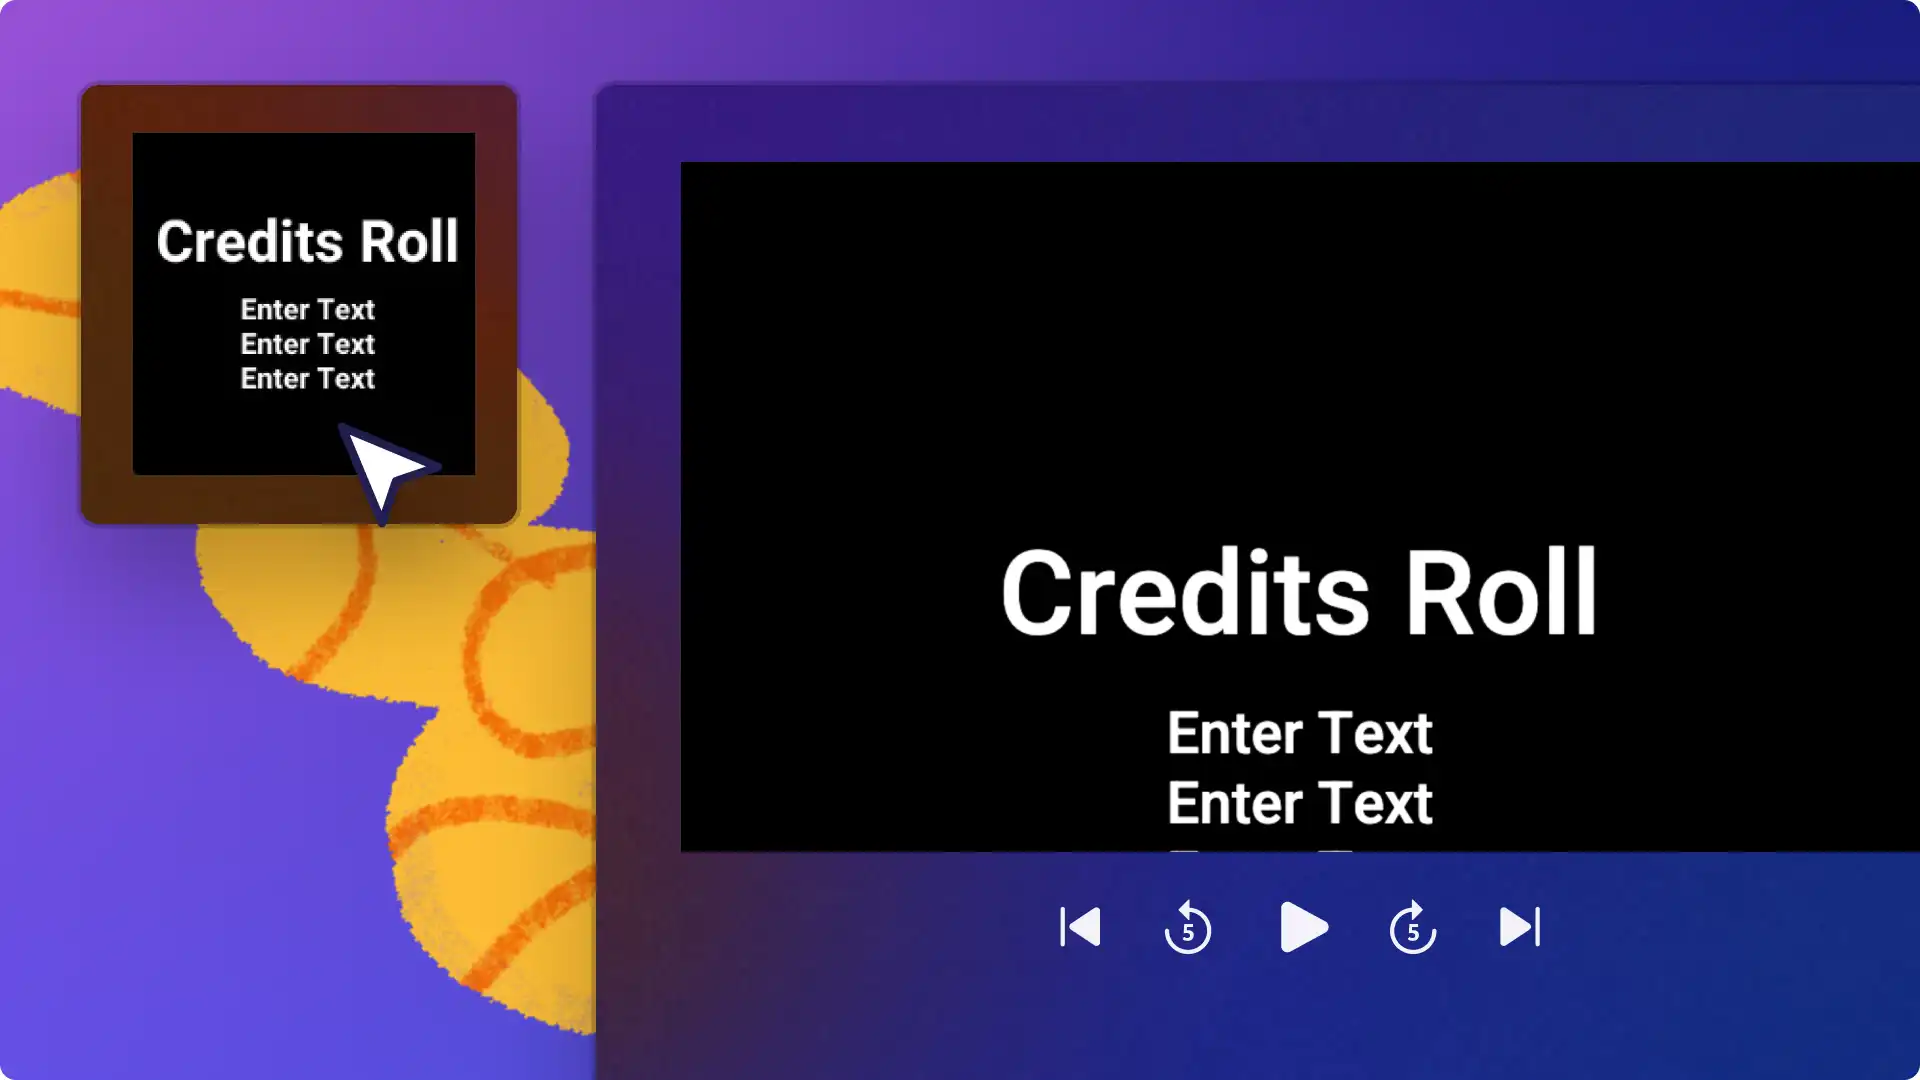
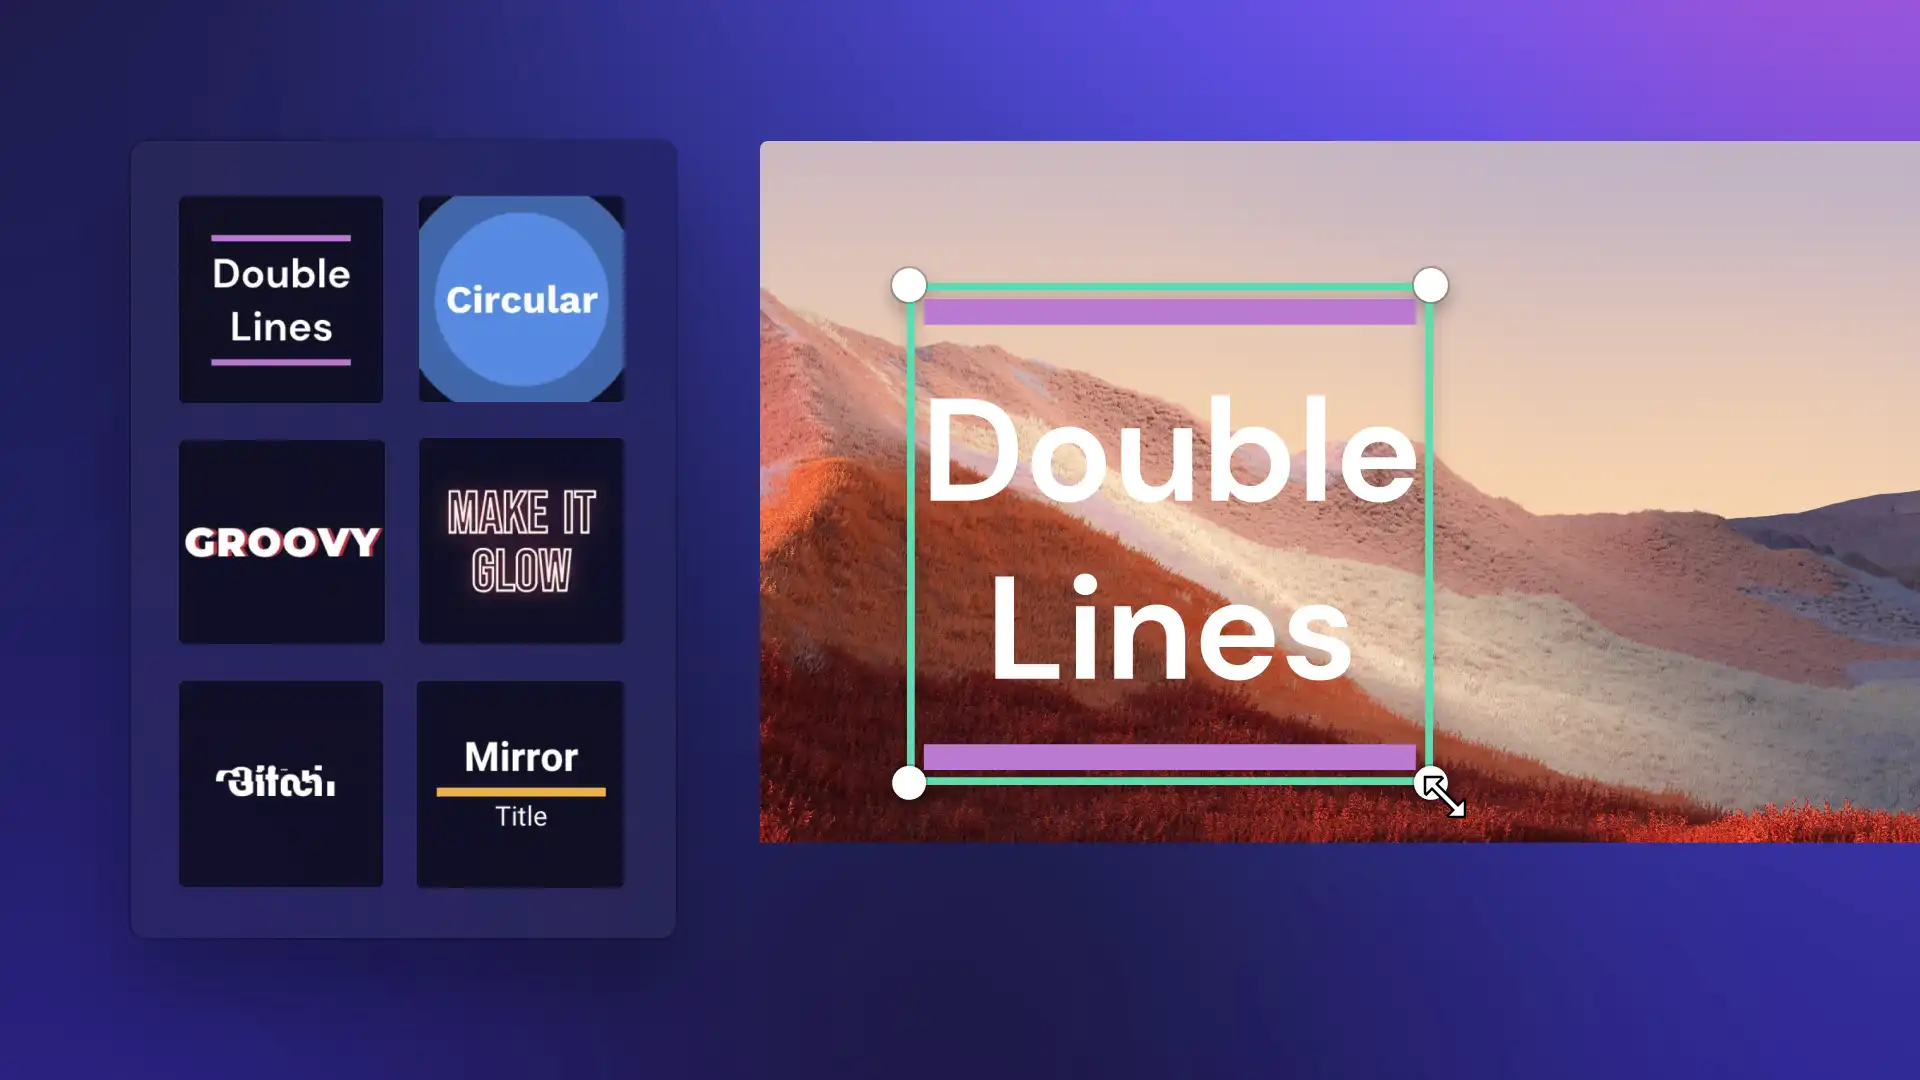
To add moving text to video, click on the text tab on the toolbar to find all of the animated text, title and text style options. To preview a title, hover over an option to view the text motion and style. When you're ready to add text to your video, drag and drop a title onto the timeline above your video or click on the add to timeline button.
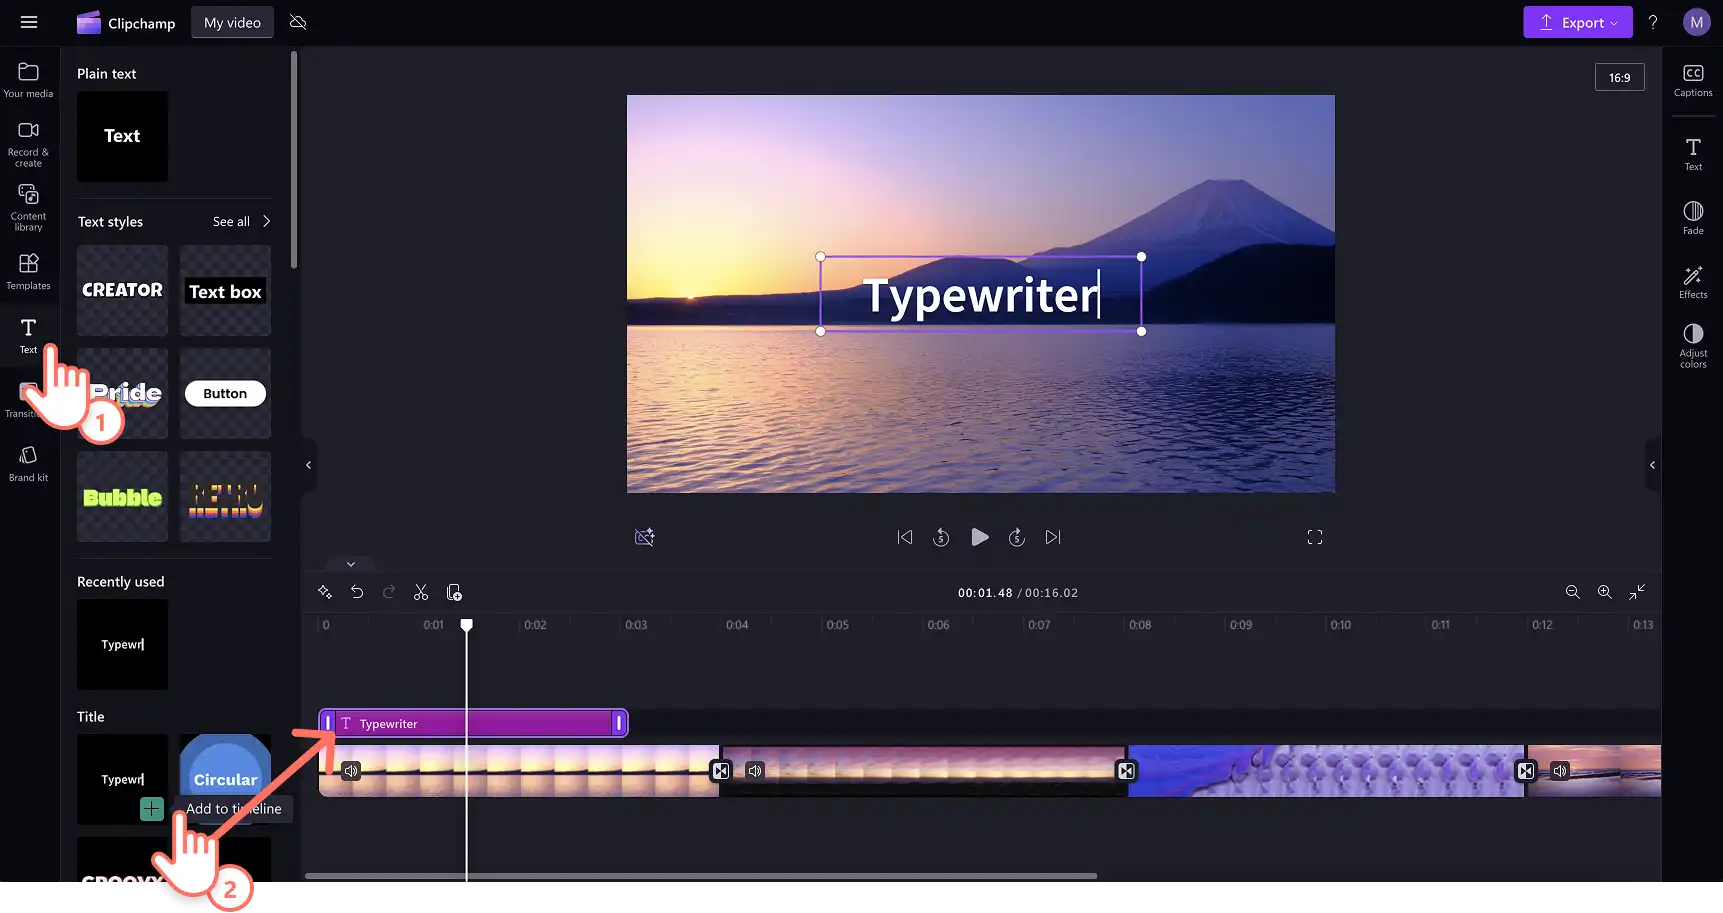
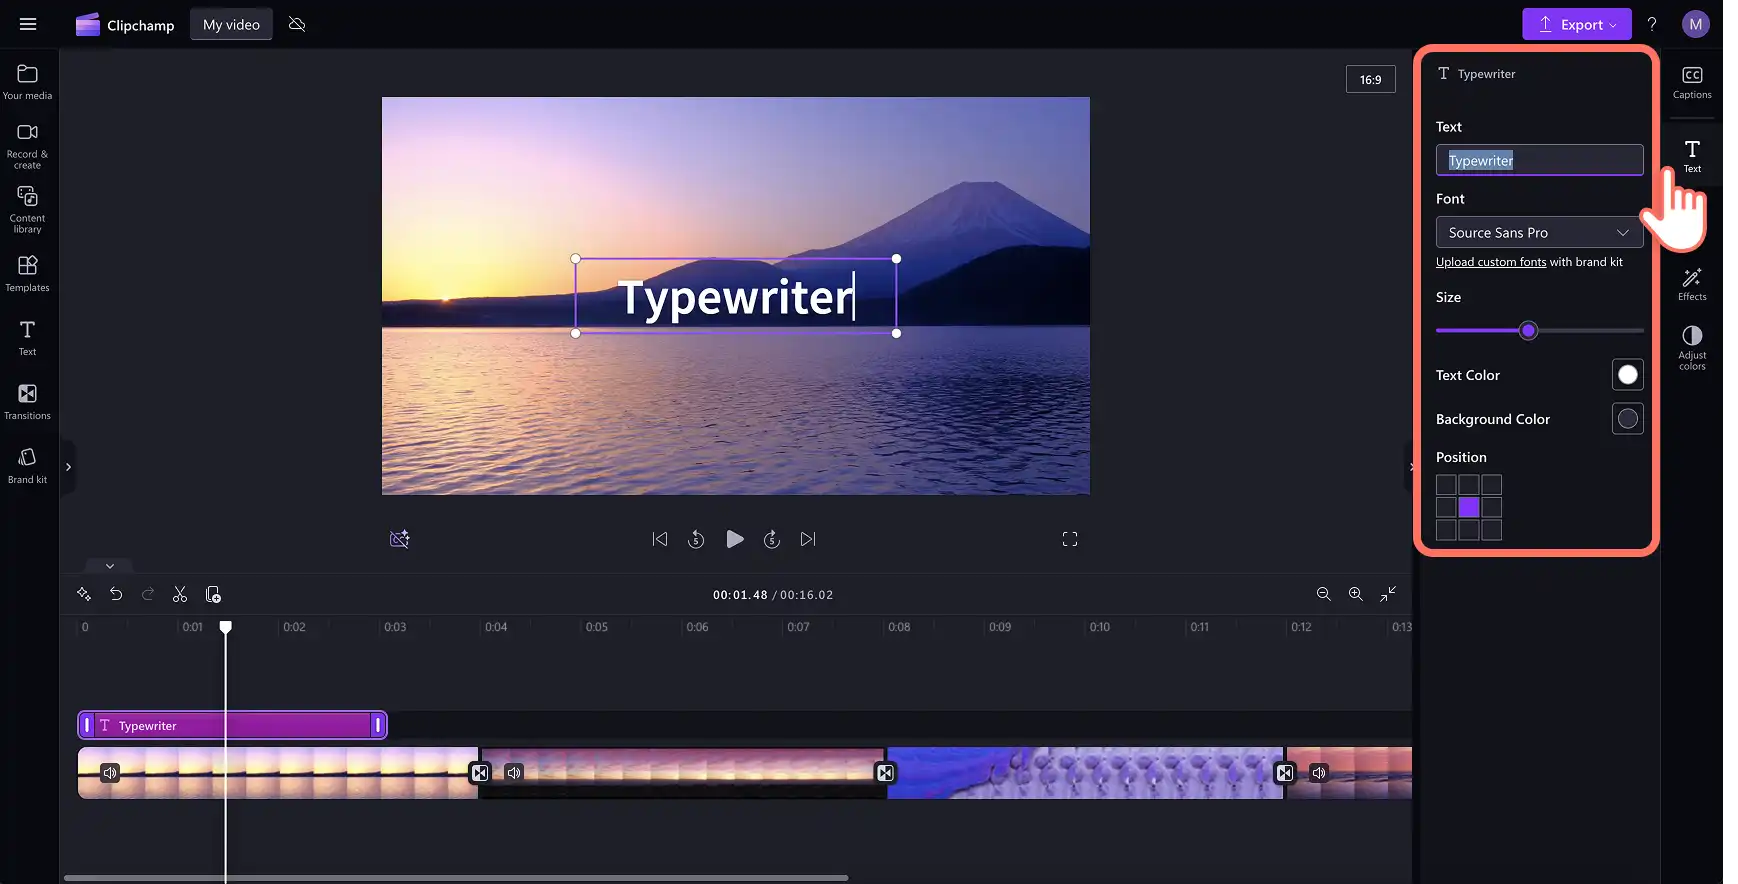
Next, edit what your title reads by selecting your title in the timeline and clicking on the pencil icon in the text menu inside the stage, or by clicking on the text tab on the property panel. Just highlight the default title and type over with your desired text. Depending on which title you have selected to use, the text tab may look slightly different with altered editing options. Here, you can edit what your text reads, the font, size, alignment, colors, and position.
Step 3. Move your text to a specific timestamp
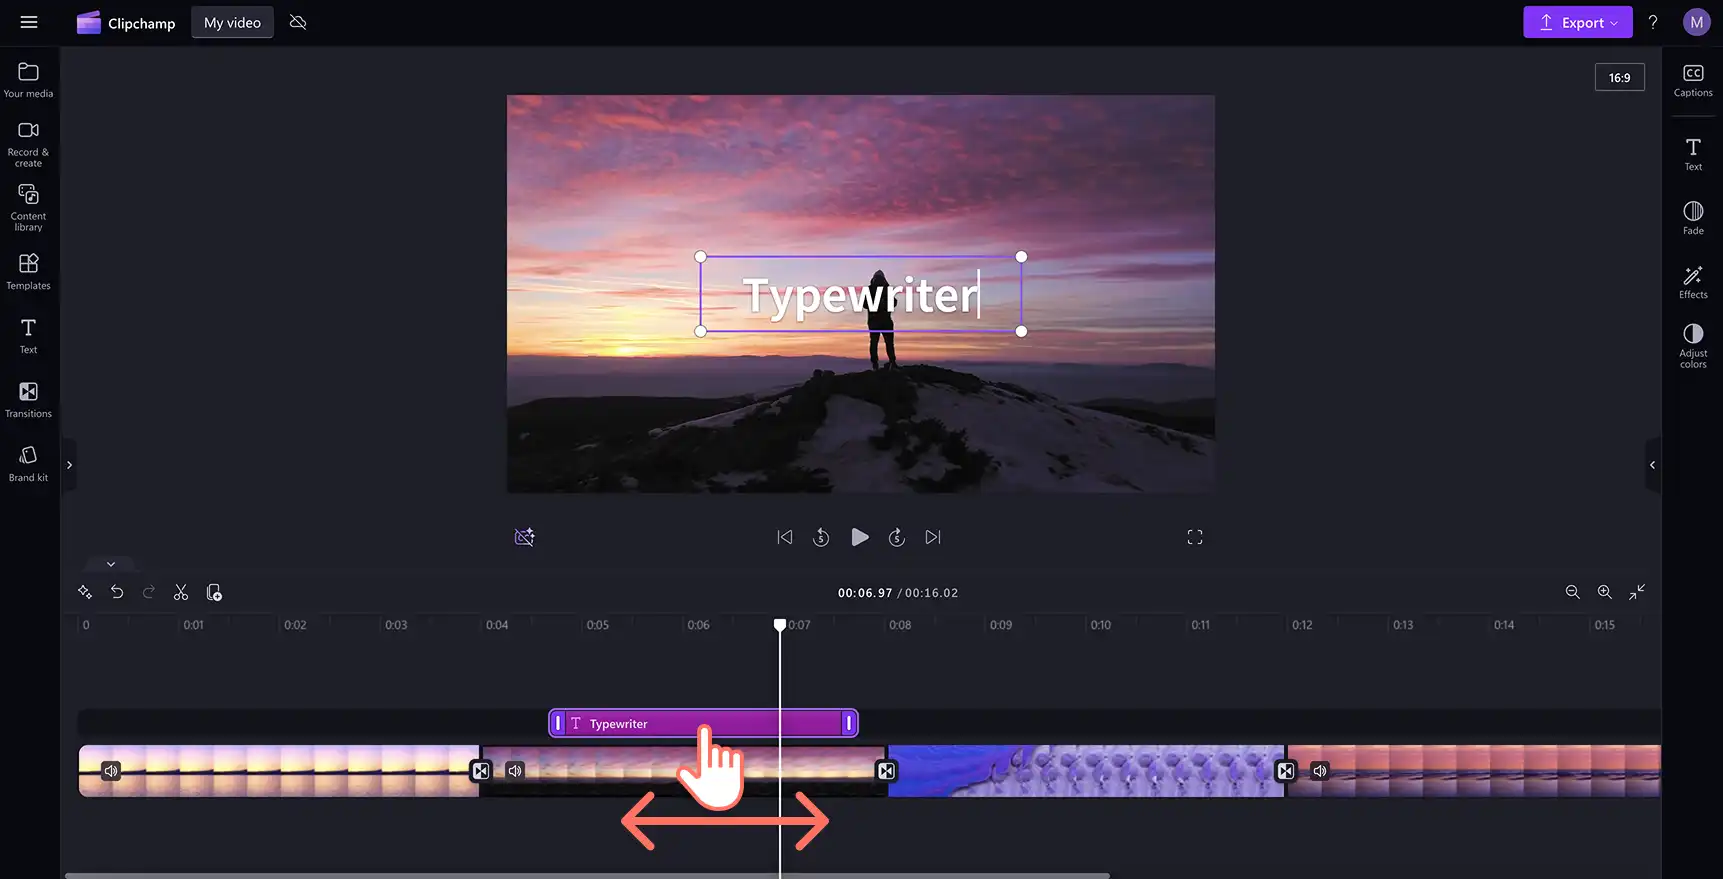
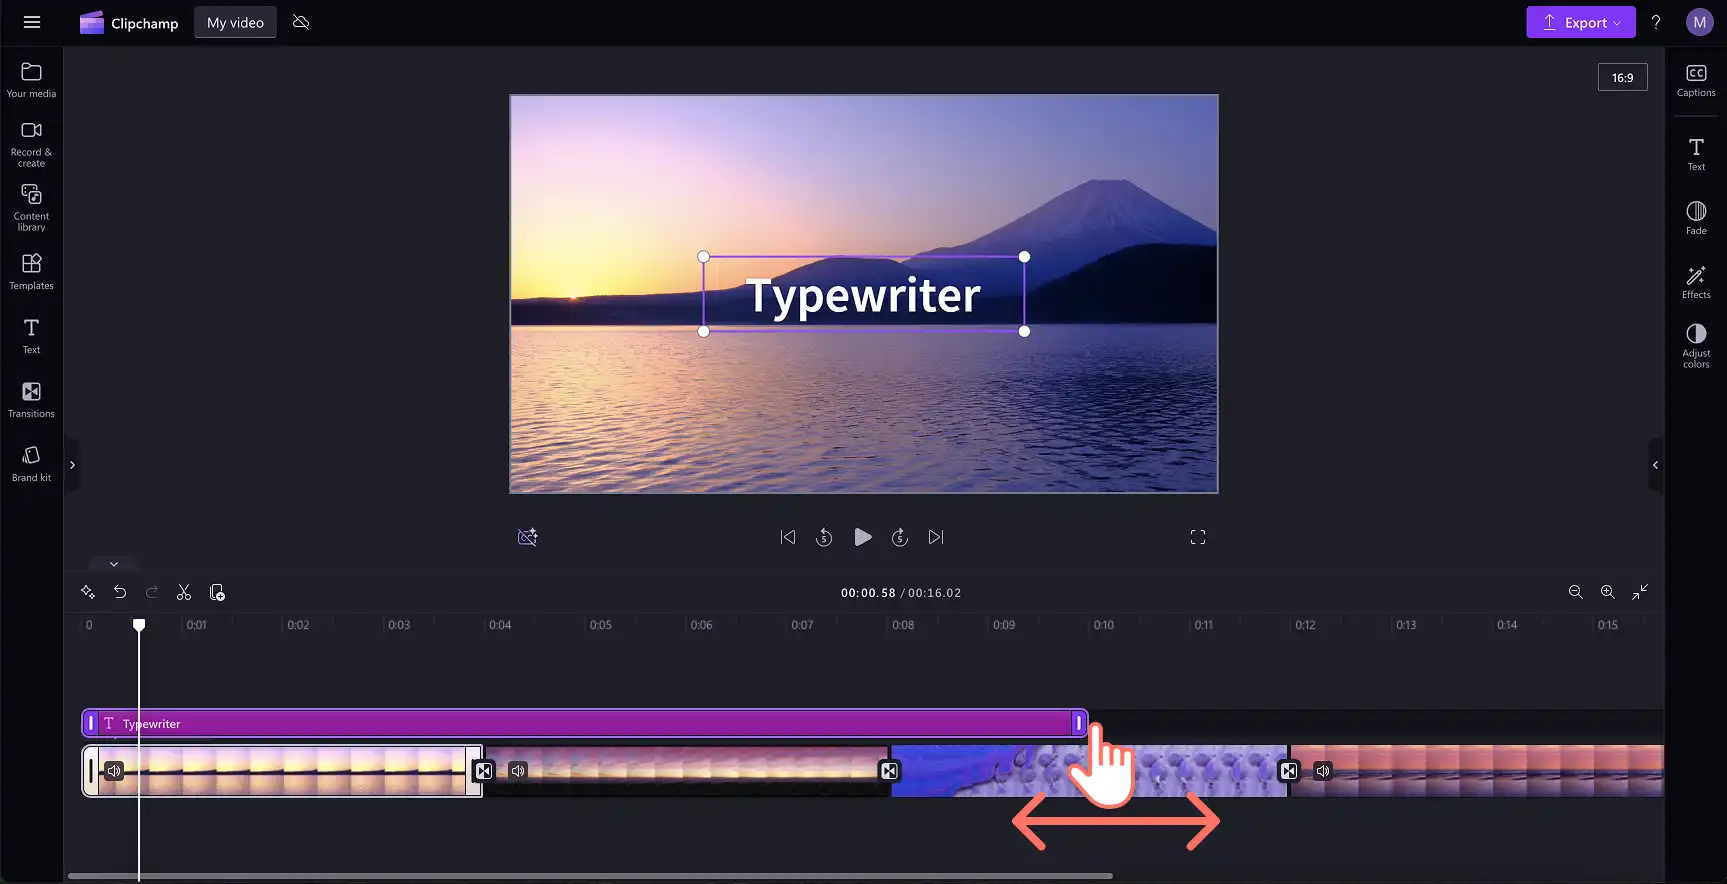
If you would like your moving text to be played at a specific point in your video, just click on the text box on the timeline, then drag and drop it to the correct timestamp.
Step 4. Edit the length of your text
Edit the duration of your moving text by dragging the handles to the left to shorten, or drag to the right to add length.
Step 5. Save your slideshow video
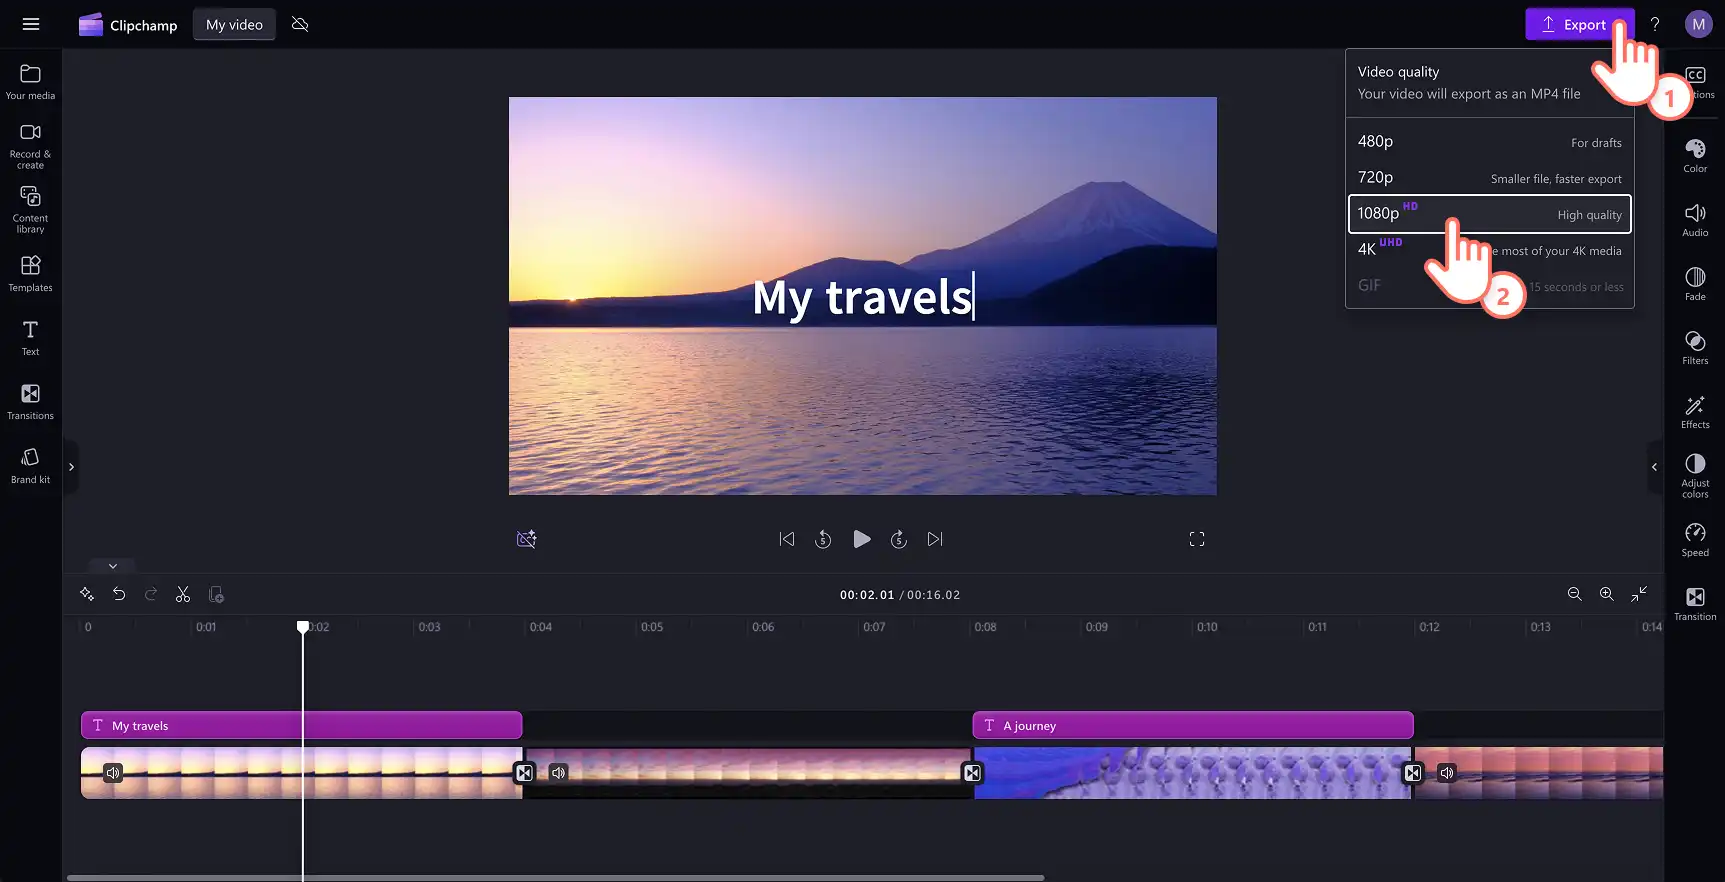
Make sure to preview your video before saving by clicking on the play button. When you’re ready to save, click on the export button and select a video resolution.
Tips to add moving text on videos like a pro
Search through the text tab on the toolbar to find the title that best matches your video aesthetic.
Choose high contrast colors for your moving text so they stand out on your video footage instead of blending in.
Adjust the font and letter spacing so your moving text is easy to read in a fast-paced video.
Place text and titles on the timeline at the correct timestamps to complement your storytelling.
Use the duplicate button to copy a moving text and use it multiple times across your video while keeping the same size, font and position properties.
Add sound effects to your moving text, stickers and transitions to enhance your video editing.
Use alternating font styles for titles and subtitles to make your video look polished and planned.
Best moving text styles in Clipchamp
Lower third split title
The lower third split title is ideal for adding value to educational video or YouTube videos on travel and unboxing videos to express key information like a heading, speaker name, location, or chapter. To use the lower third split title, click on the lower third split title inside the text tab in Clipchamp.
Make it glow text
This glowing text is a modern and exciting moving title that can liven up promo videos, gaming videos and Reels. To use this title, select the make it glow title in the text tab on the toolbar. You can even pair your animated text with chimes and sound effects to make your videos more engaging.
Gliding moving title
The gliding title is a two-line moving text that is essential for titles, names, or highlighting text at the start of your montage and slideshow videos. Find the gliding title in the text tab on the toolbar.
Ready to create a masterpiece by adding moving text to videos for free online using desktop or an iPhone? Start editing today with Clipchamp or download the Clipchamp Windows app.
To learn more video editing basics, check out how to add video transitions and create eye-catching video collages for YouTube and Instagram.
Heads up! The screenshots in this article are from Clipchamp for personal accounts. The same principles apply to Clipchamp for work and school accounts.