On this page
If you're new to Microsoft Clipchamp or looking for a quick refresher, you’re in the right place. Consider this your go-to guide for navigating the video editor interface with ease.
In just a few minutes, familiarize yourself with the video editor layout, including the toolbar, property panel, floating toolbar, and timeline so you can edit videos with confidence.
Read on to learn more about how to navigate video editing tools in Clipchamp video editor.
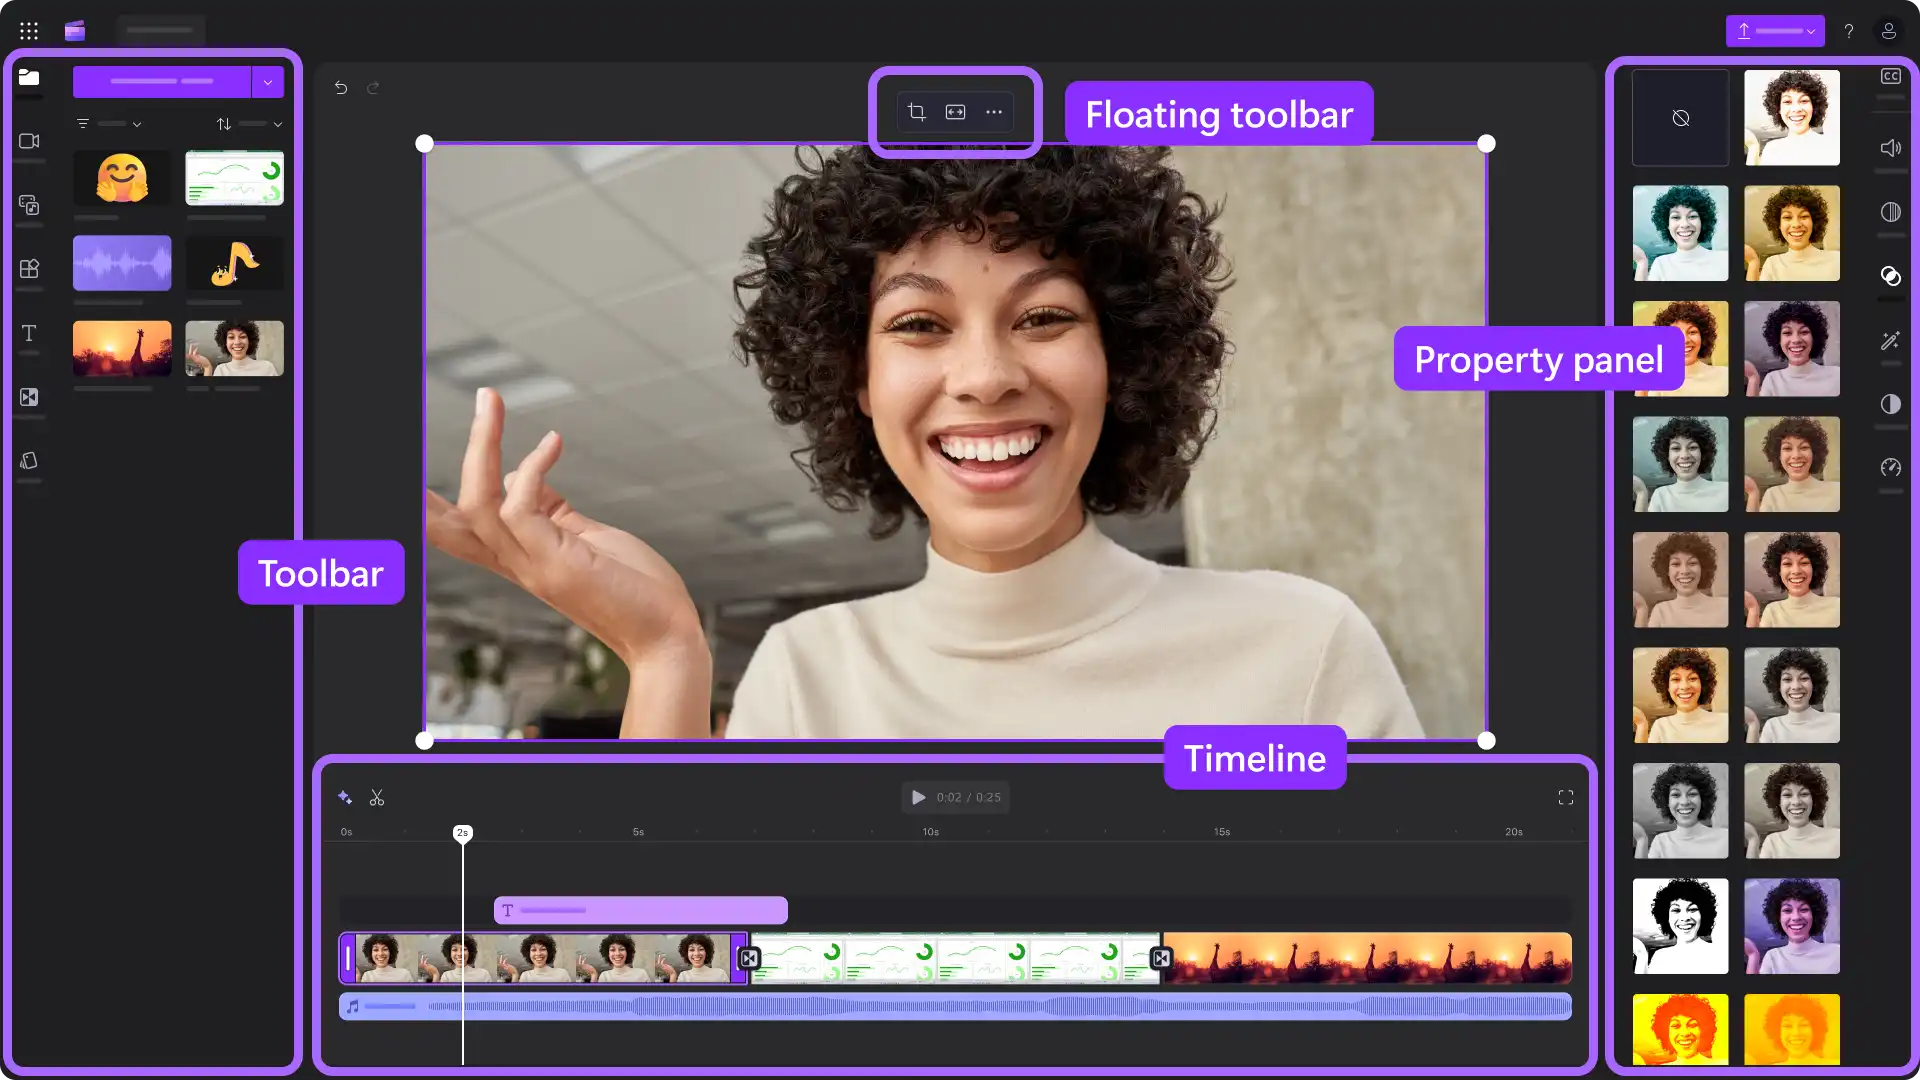
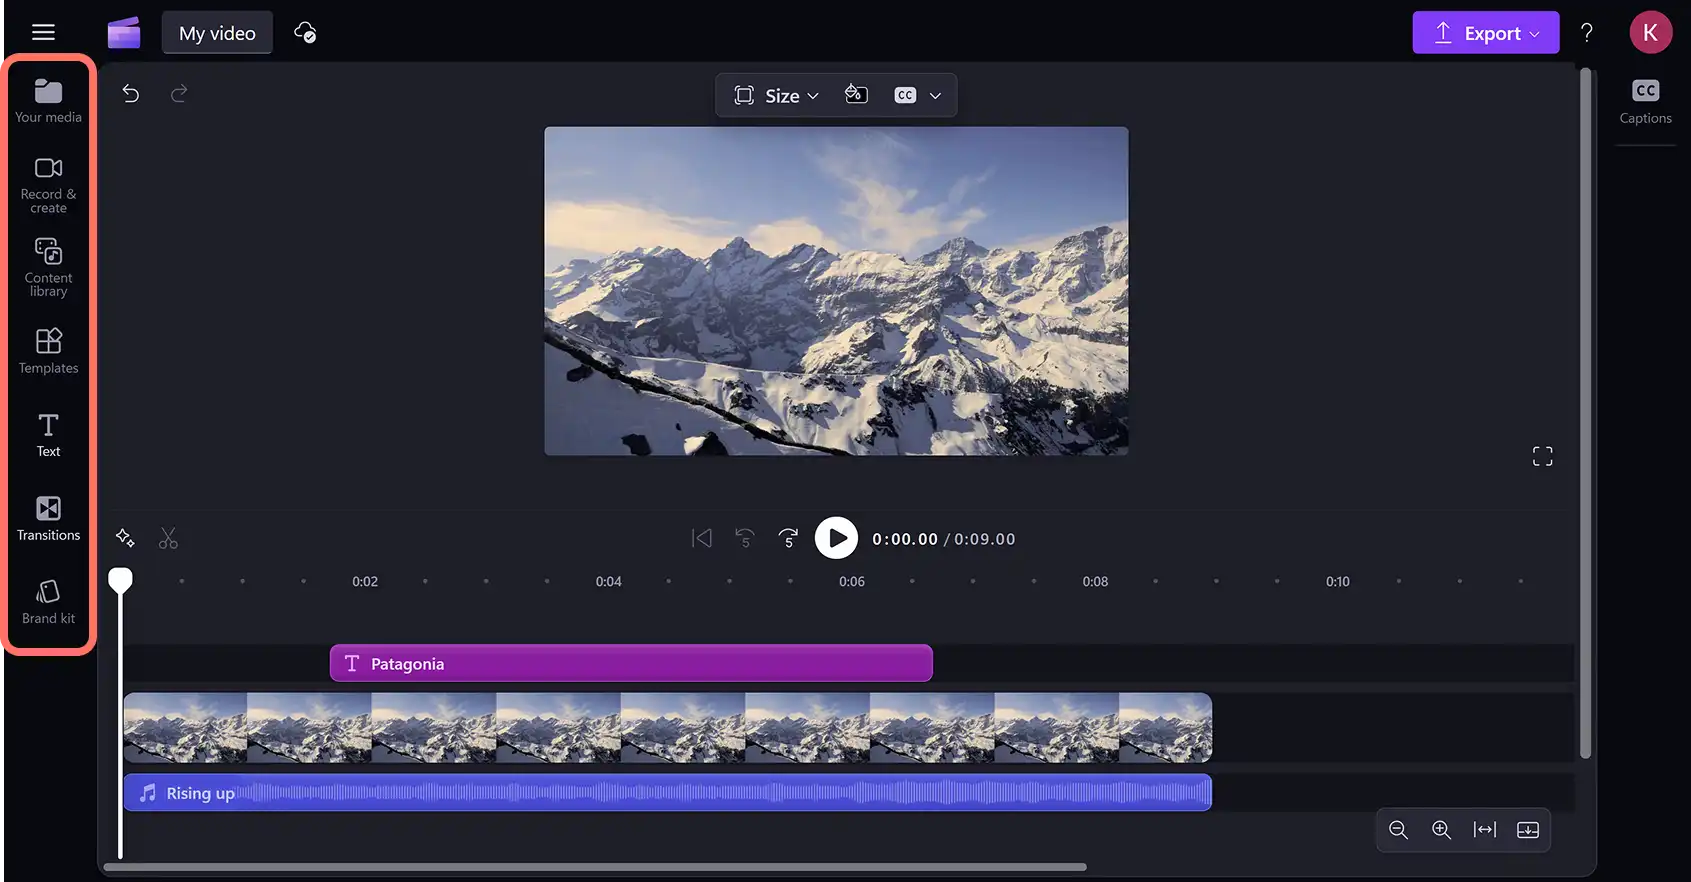
Navigating the toolbar
Located on the left side of the video editor, the toolbar contains various tools for importing and creating media and accessing stock content.
Your media: upload media files including images, video, and audio from your hard drive or linked cloud storage like OneDrive, Google Drive, Dropbox, and Xbox. This tab also automatically stores any selected stock assets from the Clipchamp content library. You can easily drag and drop any files from the your media tab onto the editing timeline to start editing.
Record and create: make video and audio recordings with in-built tools. Choose from recording options like screen and camera, screen and audio, webcam, voice recorder, or create AI voiceovers. Click on a record and create option then follow the pop-up prompts.
Content library: access royalty-free assets inside the high-quality content library. You’ll find audio assets including music and sound effects, and a wide range of visual stock including stickers, videos, images, backgrounds, overlays, and GIFs. Search by keyword or browse the themed collections.
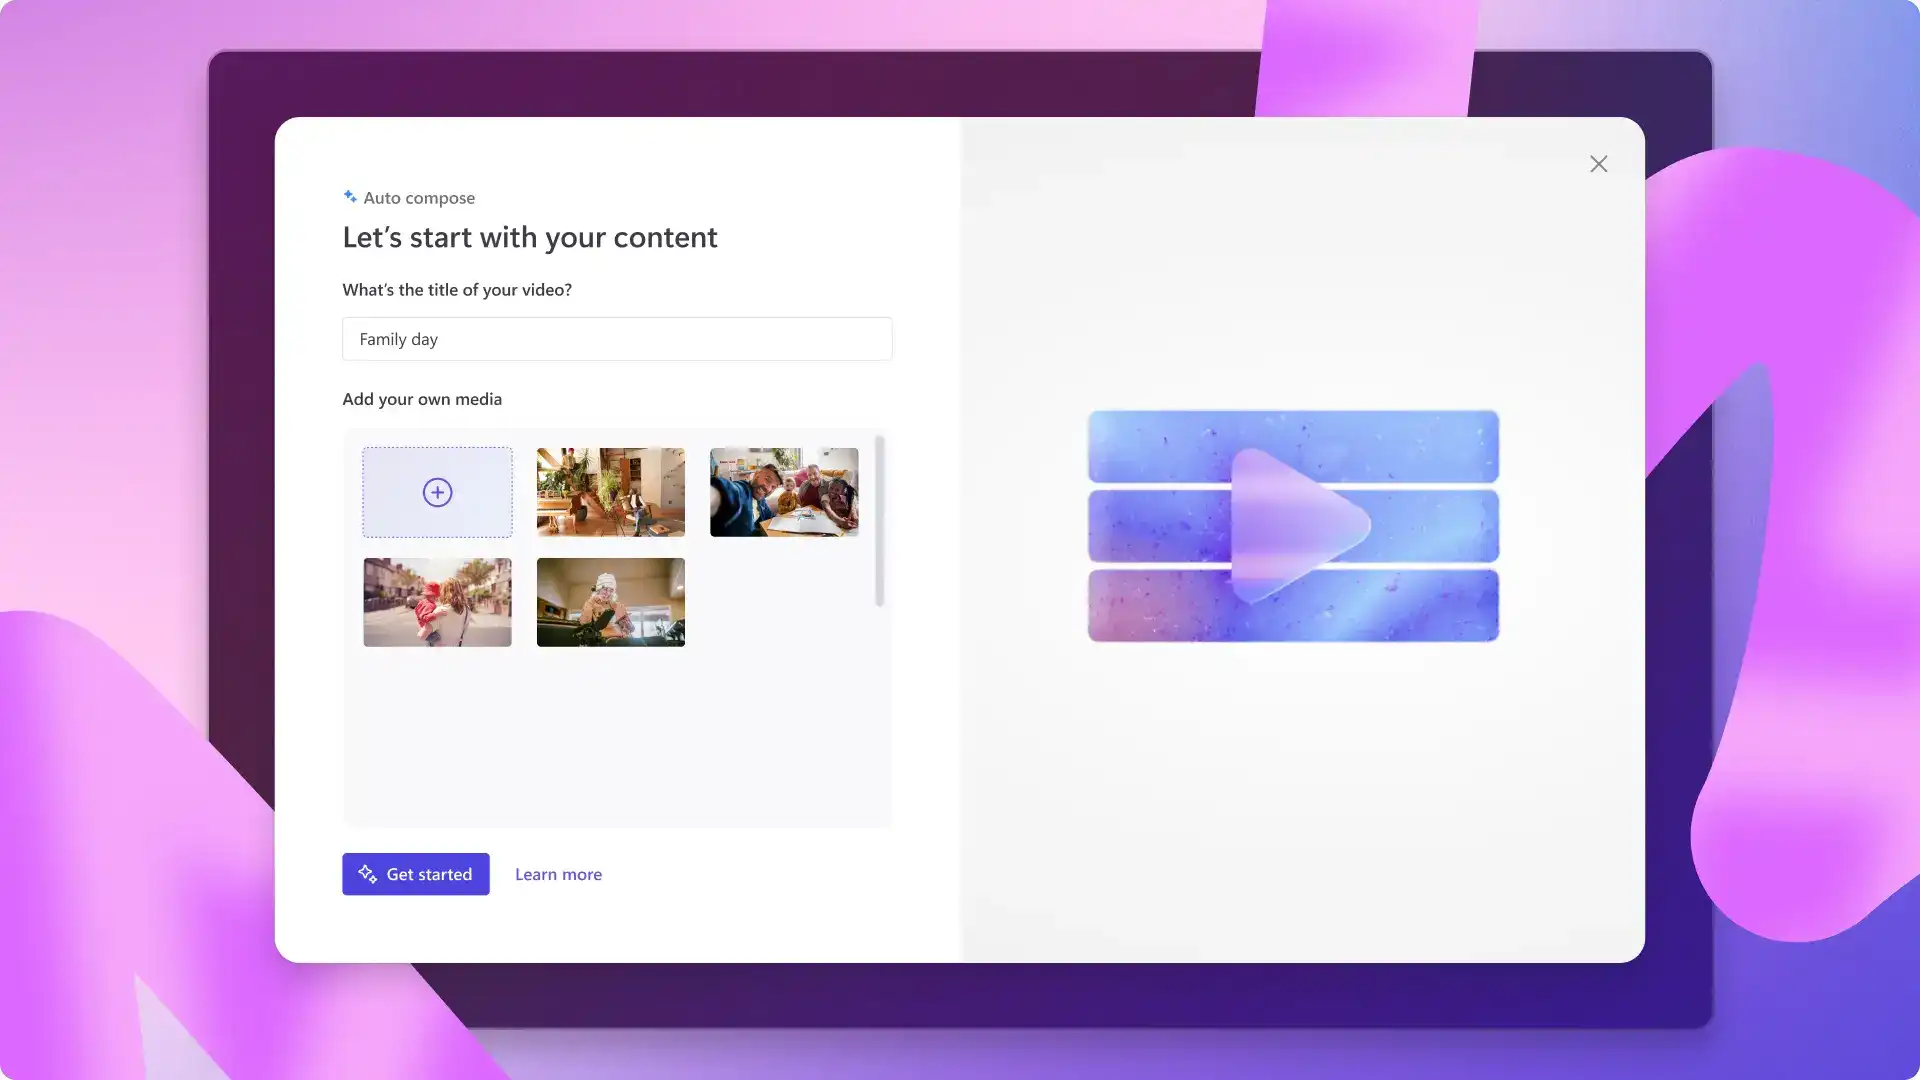
Video templates: start editing videos with customizable video templates containing media assets and preset aspect ratios. Select video templates for popular social media platforms or browse by theme or event.
Text: create still and animated text overlays in assorted styles including lower-thirds, captions, and other presets. Just add to the timeline then enter text and customize font, size, color, position, and other settings.
Transitions: add video transitions between clips on the timeline. Choose from fades and blurs, wipes, or special animations like cartoons and 3D. Drag and drop any transition between two video clips then adjust the settings in the property panel.
Brand kit tool: store and organize professional brand assets for quick and convenient access when editing any video. Import logos, color palettes, and fonts to consistently create on-brand videos for your business or social media handle.
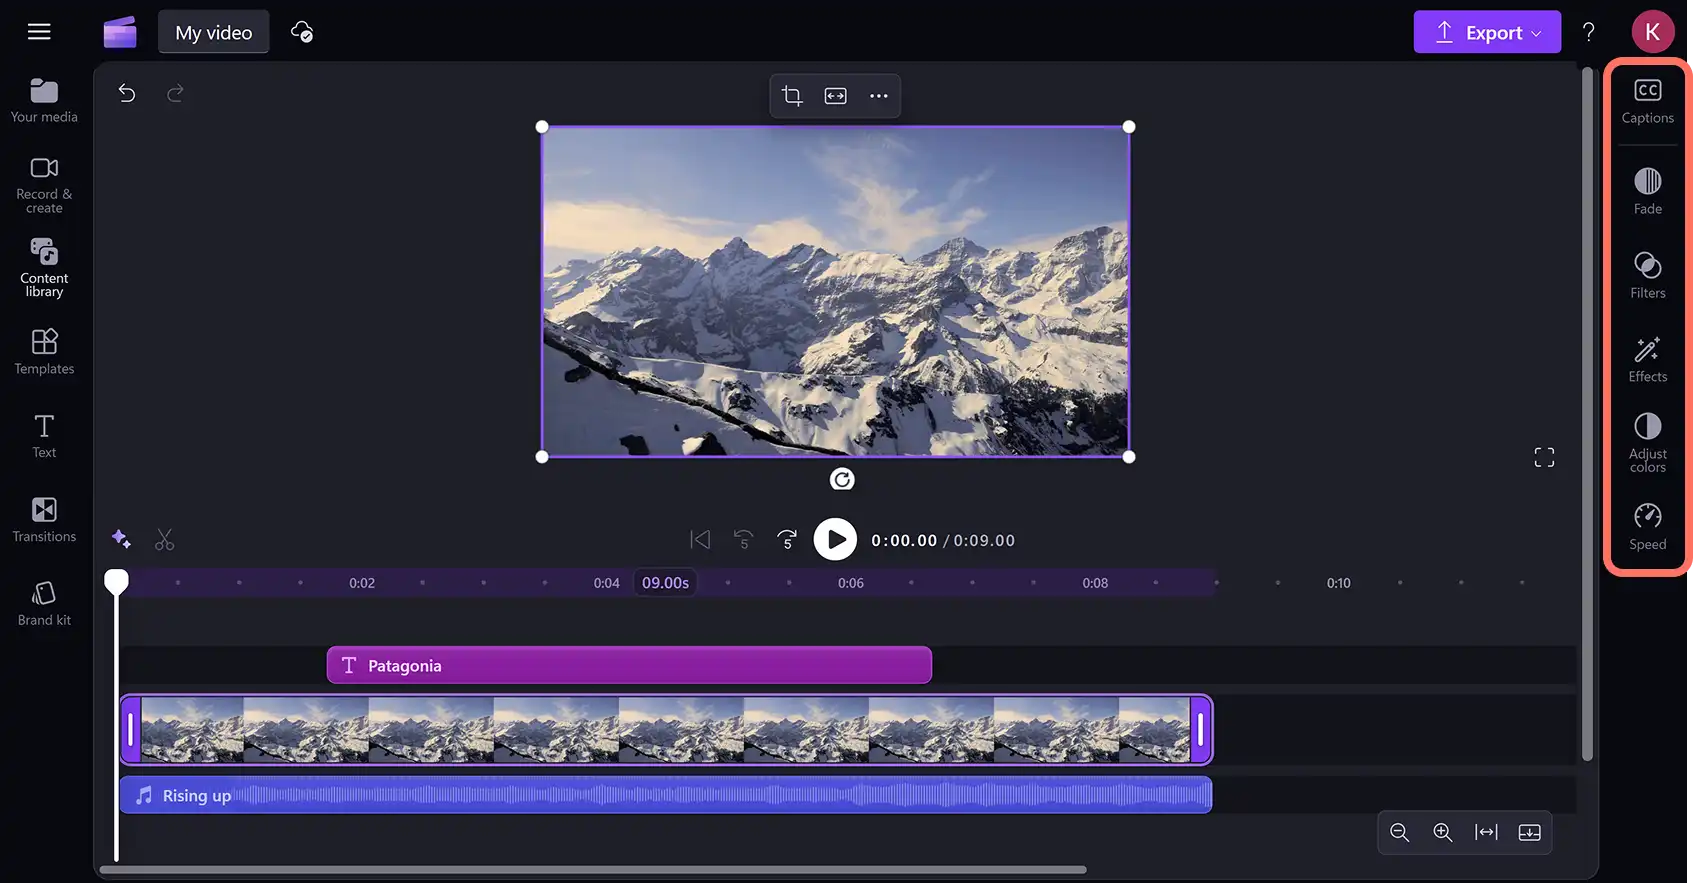
Navigating the property panel
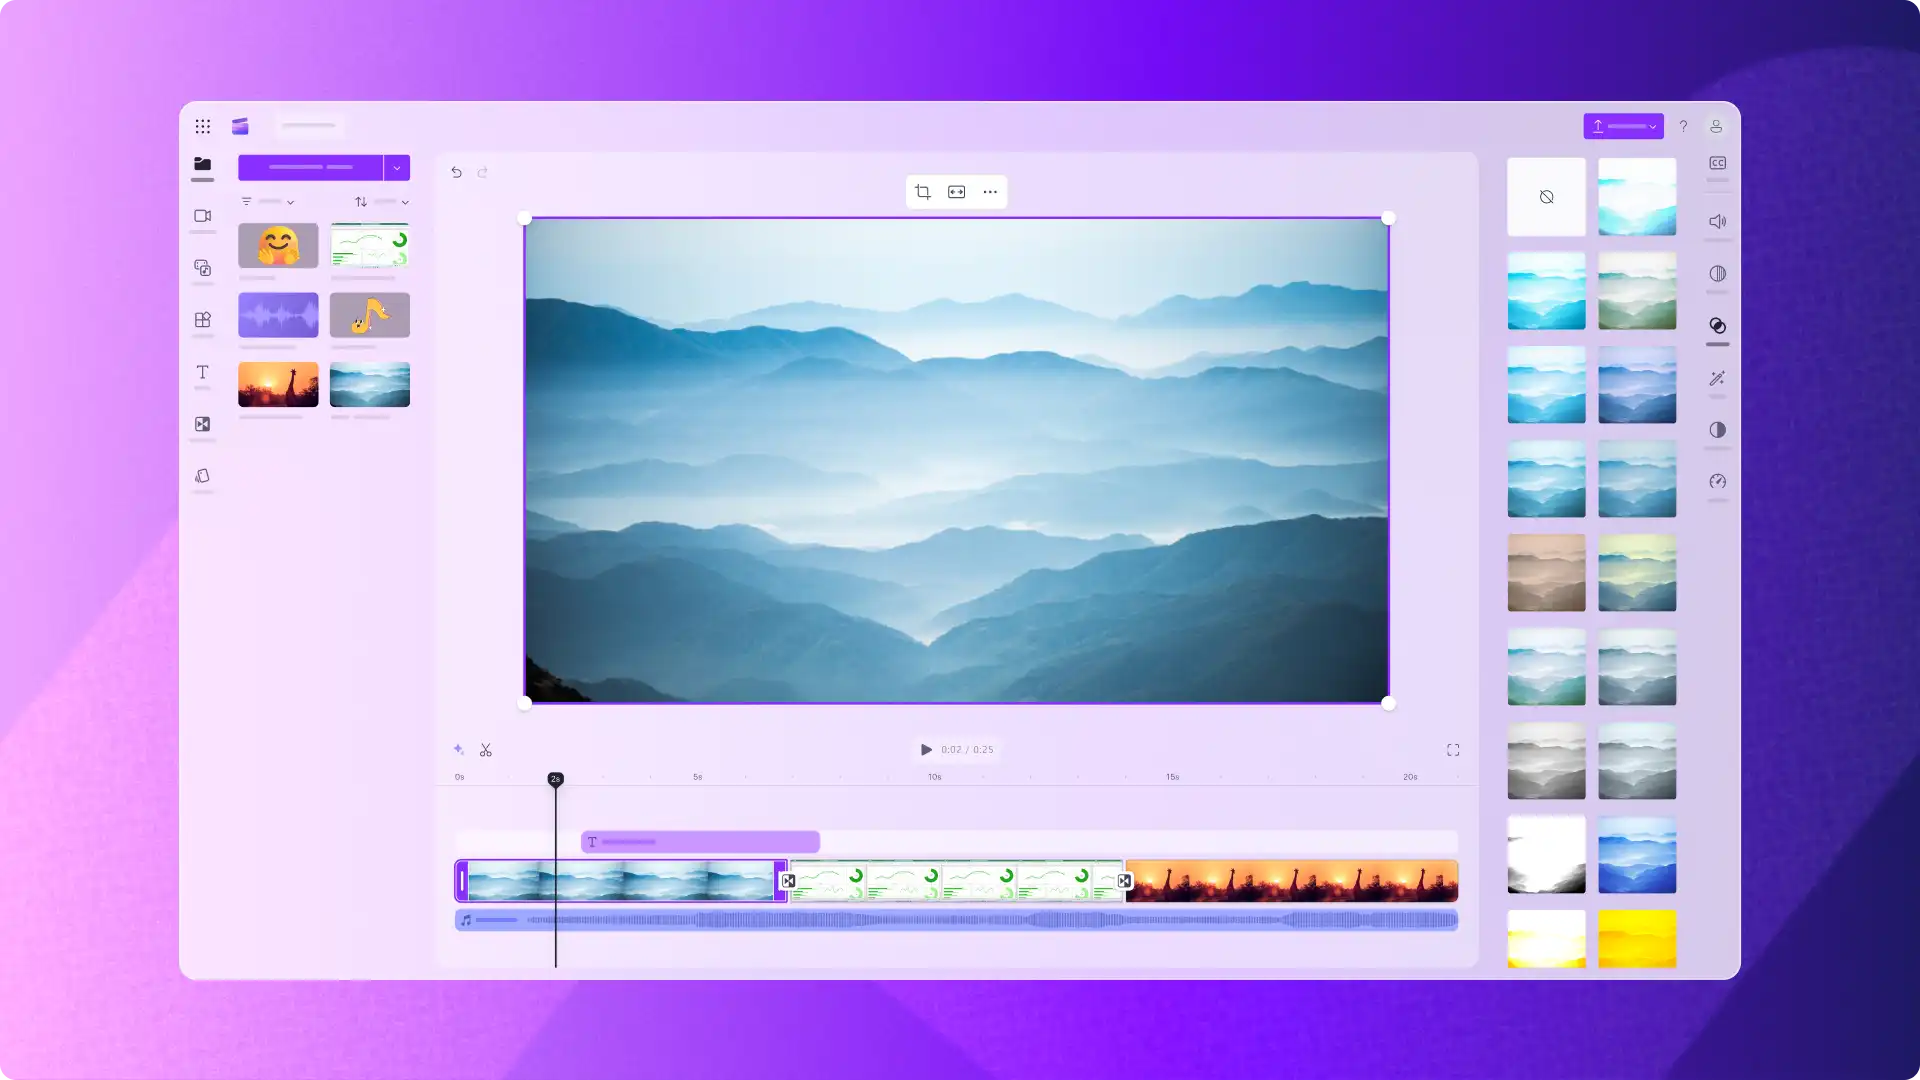
Running down the right side of the interface, the property panel contains various editing options. Different tabs will display depending on the media selected on the timeline, like video and audio.
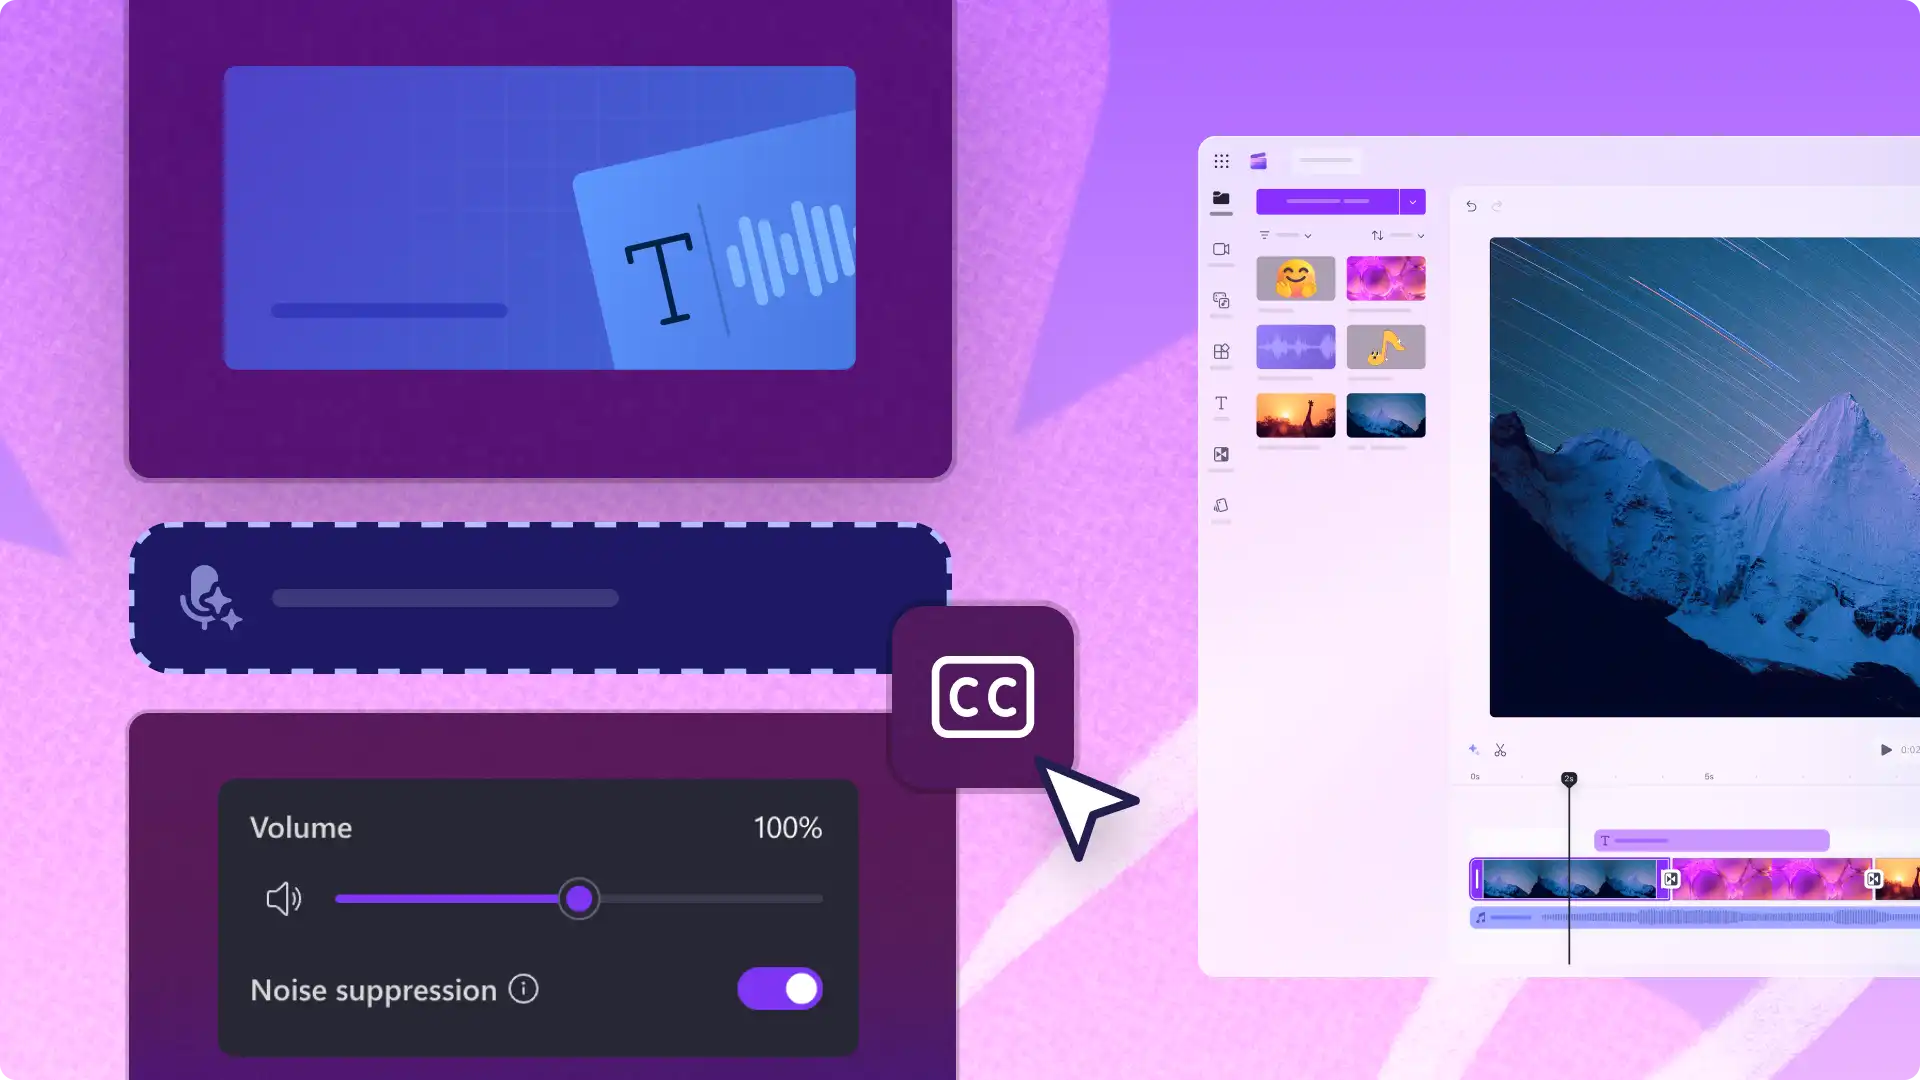
AI captions: generate AI subtitles for video and audio assets containing dialogue using AI. Choose a language, set preferences, then generate subtitles and an .SRT video transcript automatically.
Audio: adjust sound levels using the volume slider and separate audio with the detach audio button to edit sound independently to video.
Fade: create simple transitions between audio and video clips by adding a fade in or fade out.
Filters: change visual aesthetics by adding lighting and color filters to individual assets or the entire video.
Effects: add dynamic visual effects to media assets like bokeh and glitch then customize unique settings for each effect.
Adjust colors: customize a video's hues and tones by manually color correcting a video's exposure, contrast, saturation, and other settings.
Speed: speed up or slow down the video and audio by adjusting the frame or bit rate using the speed controller.
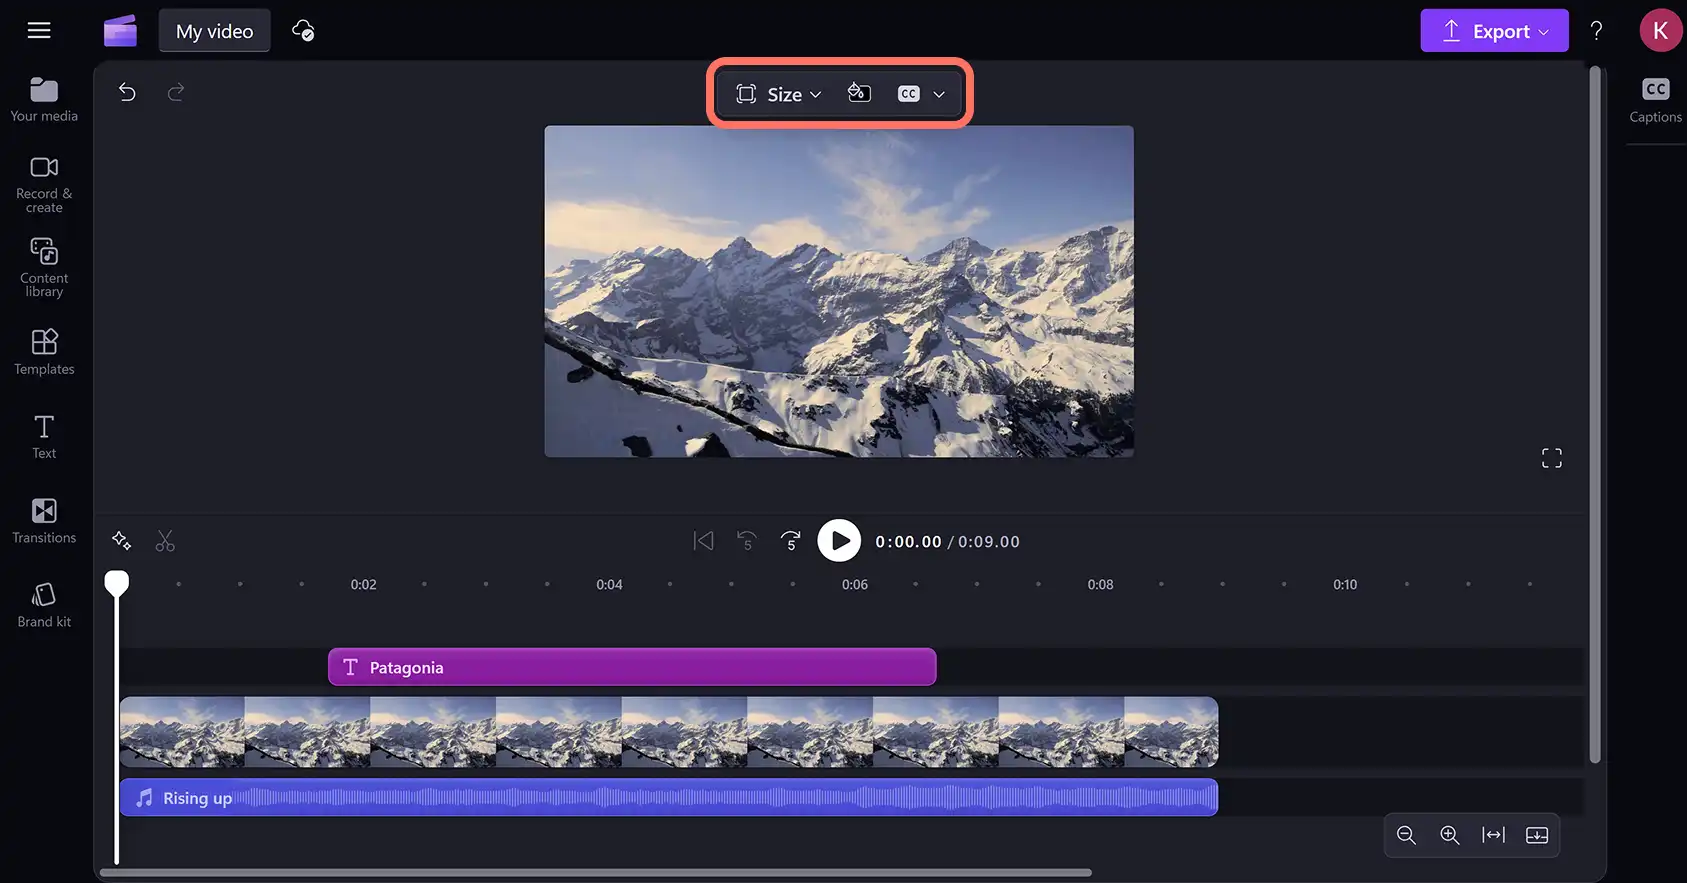
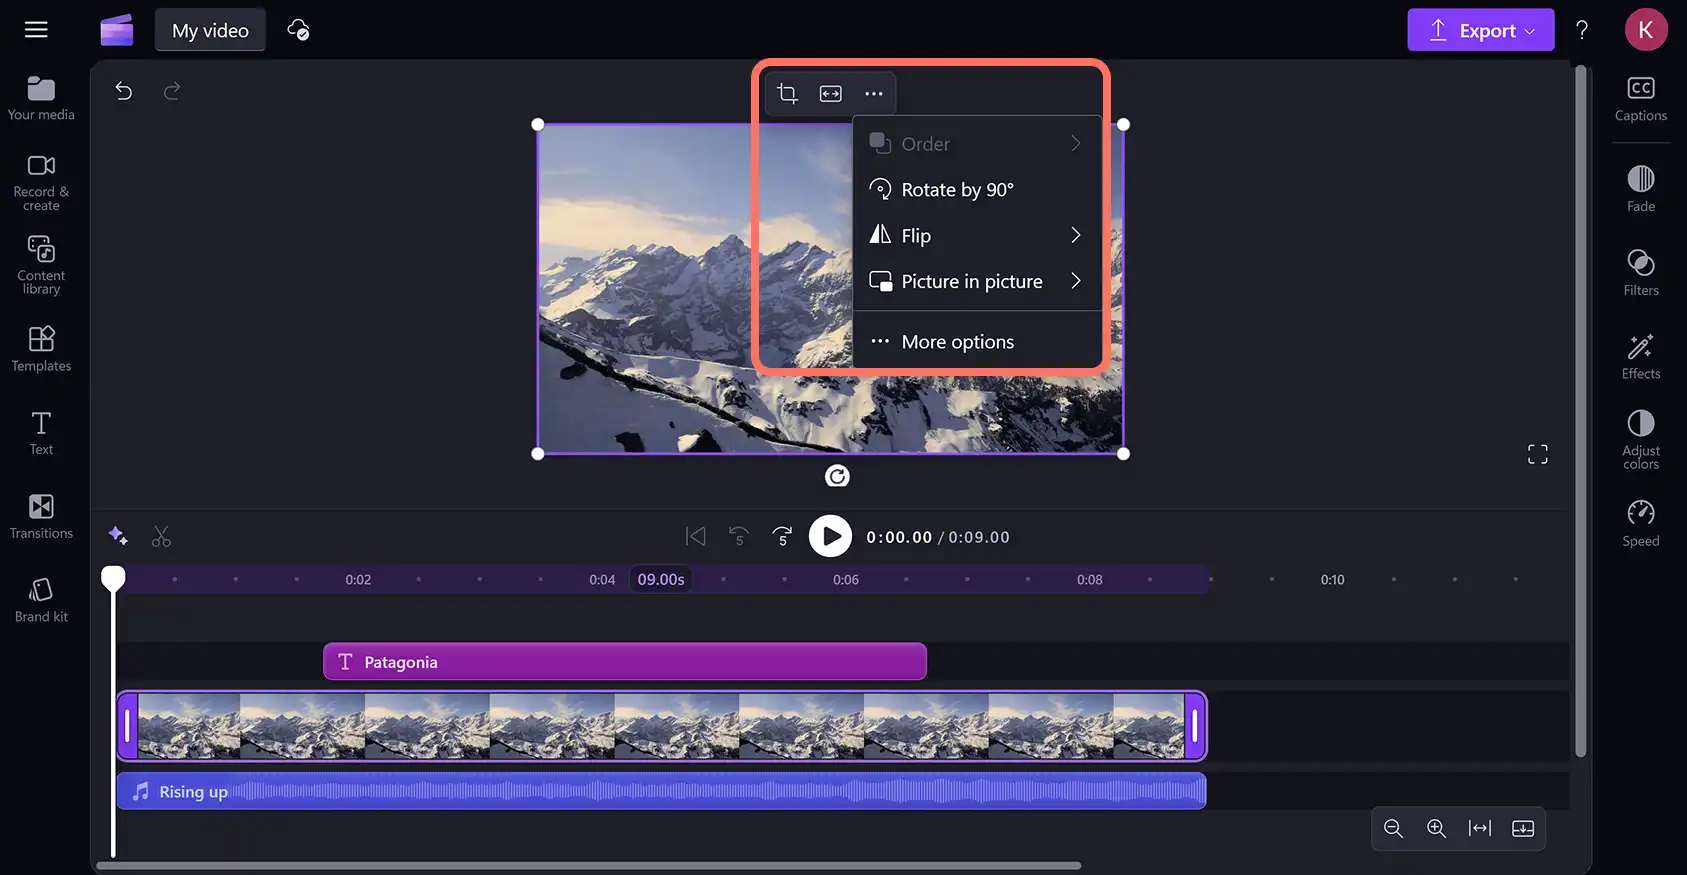
Navigating the floating toolbar
Located above the video preview, the floating toolbar includes shortcuts to edit an entire video and individual assets. The floating toolbar will display different options depending on if an asset is selected or not on the timeline.
No assets selected on the timeline
When you haven’t selected any timeline assets, the floating toolbar will display options that will apply to the whole video.
Size (aspect ratio presets): change the video aspect ratio to the preset dimensions for popular social media and video hosting platforms.
Background color: add a solid or gradient color to the video's background using default options, the HSV color picker, or enter the HEX code.
AI captions: enable and edit AI autocaptions and video transcripts.
Video, image, or graphic selected on the timeline
When you’ve selected an asset and it’s highlighted on the timeline, the floating toolbar will display options that will only apply to the selected asset.
Crop: manually resize video, image, and other assets to match the aspect ratio and remove any unwanted visuals with the crop button.
Order (optional): bring visuals to the front or send to the back when you have multiple visual assets stacked on top of each other on the timeline.
Fit/fill: fit video or image assets inside an aspect ratio without changing their dimensions or fill the frame so you have no black borders using the fit and fill buttons.
Rotate by 90 degrees: turn an asset to the side in right-angle increments.
Flip: overturn visual assets horizontally or vertically using the flip buttons.
Picture-in-picture: overlay two or more visuals within the same frame in different positions using the picture-in-picture button.
More options: open the property panel sidebar on a selected asset for more editing and customization options.
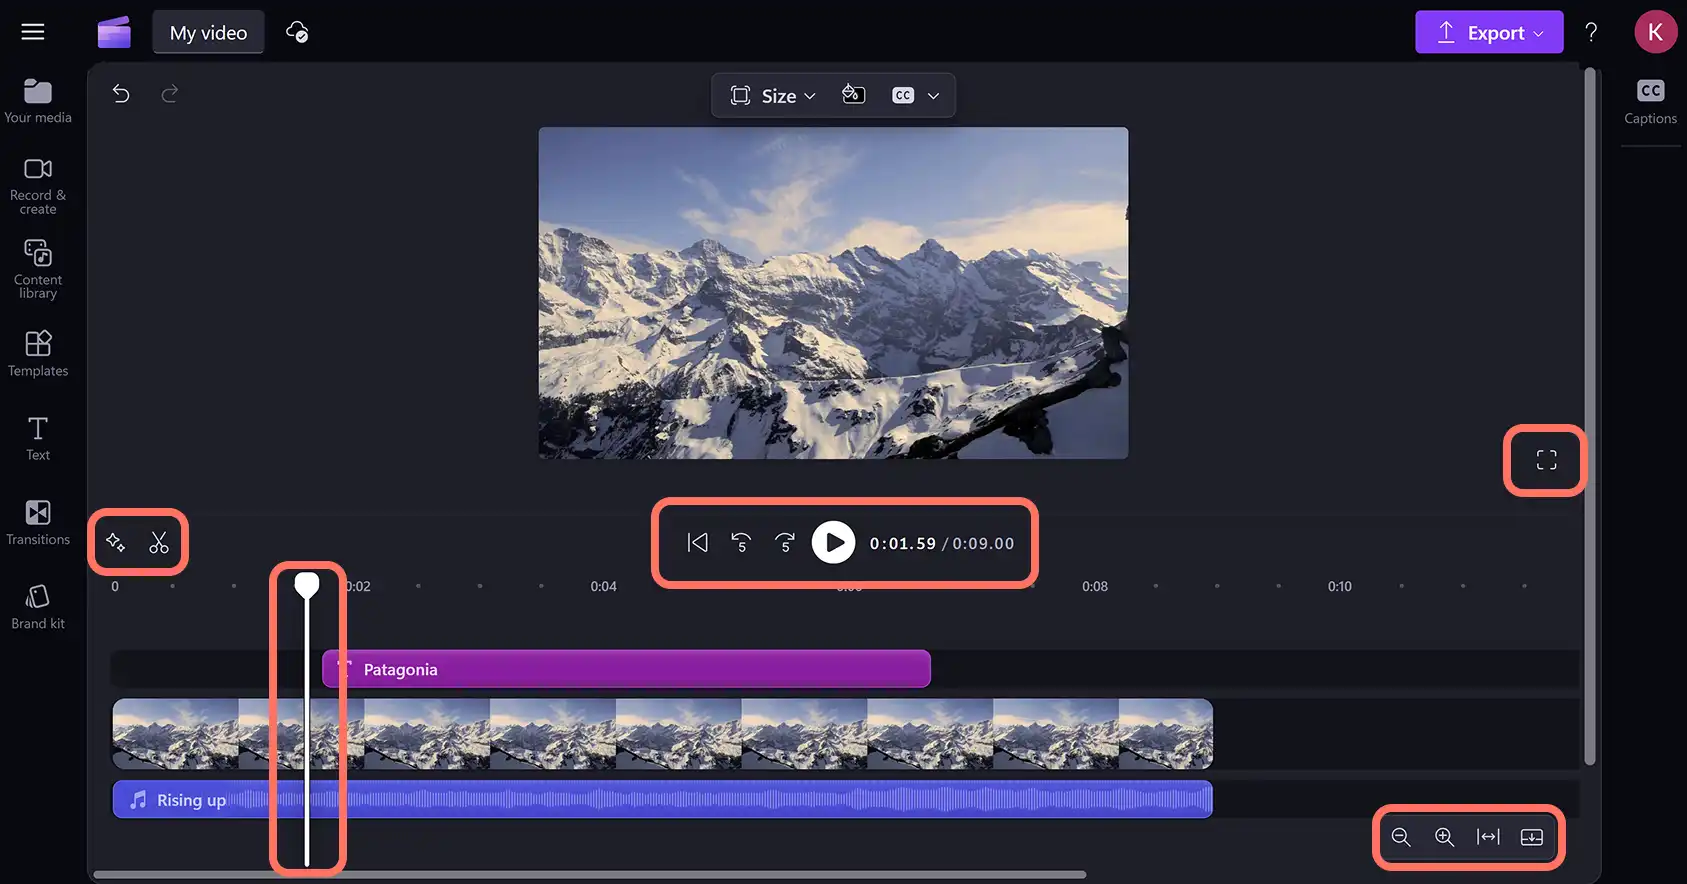
Navigating the timeline
Found at the bottom of the video editor, the timeline is the main workspace where you arrange and edit a video. What you see on the timeline is what will be exported as the finished video.
AI suggestions: automatically identify and remove unwanted silences in video and audio with AI-powered auto cut.
Split button: remove excess visuals or audio and cut media assets into multiple parts using the split button.
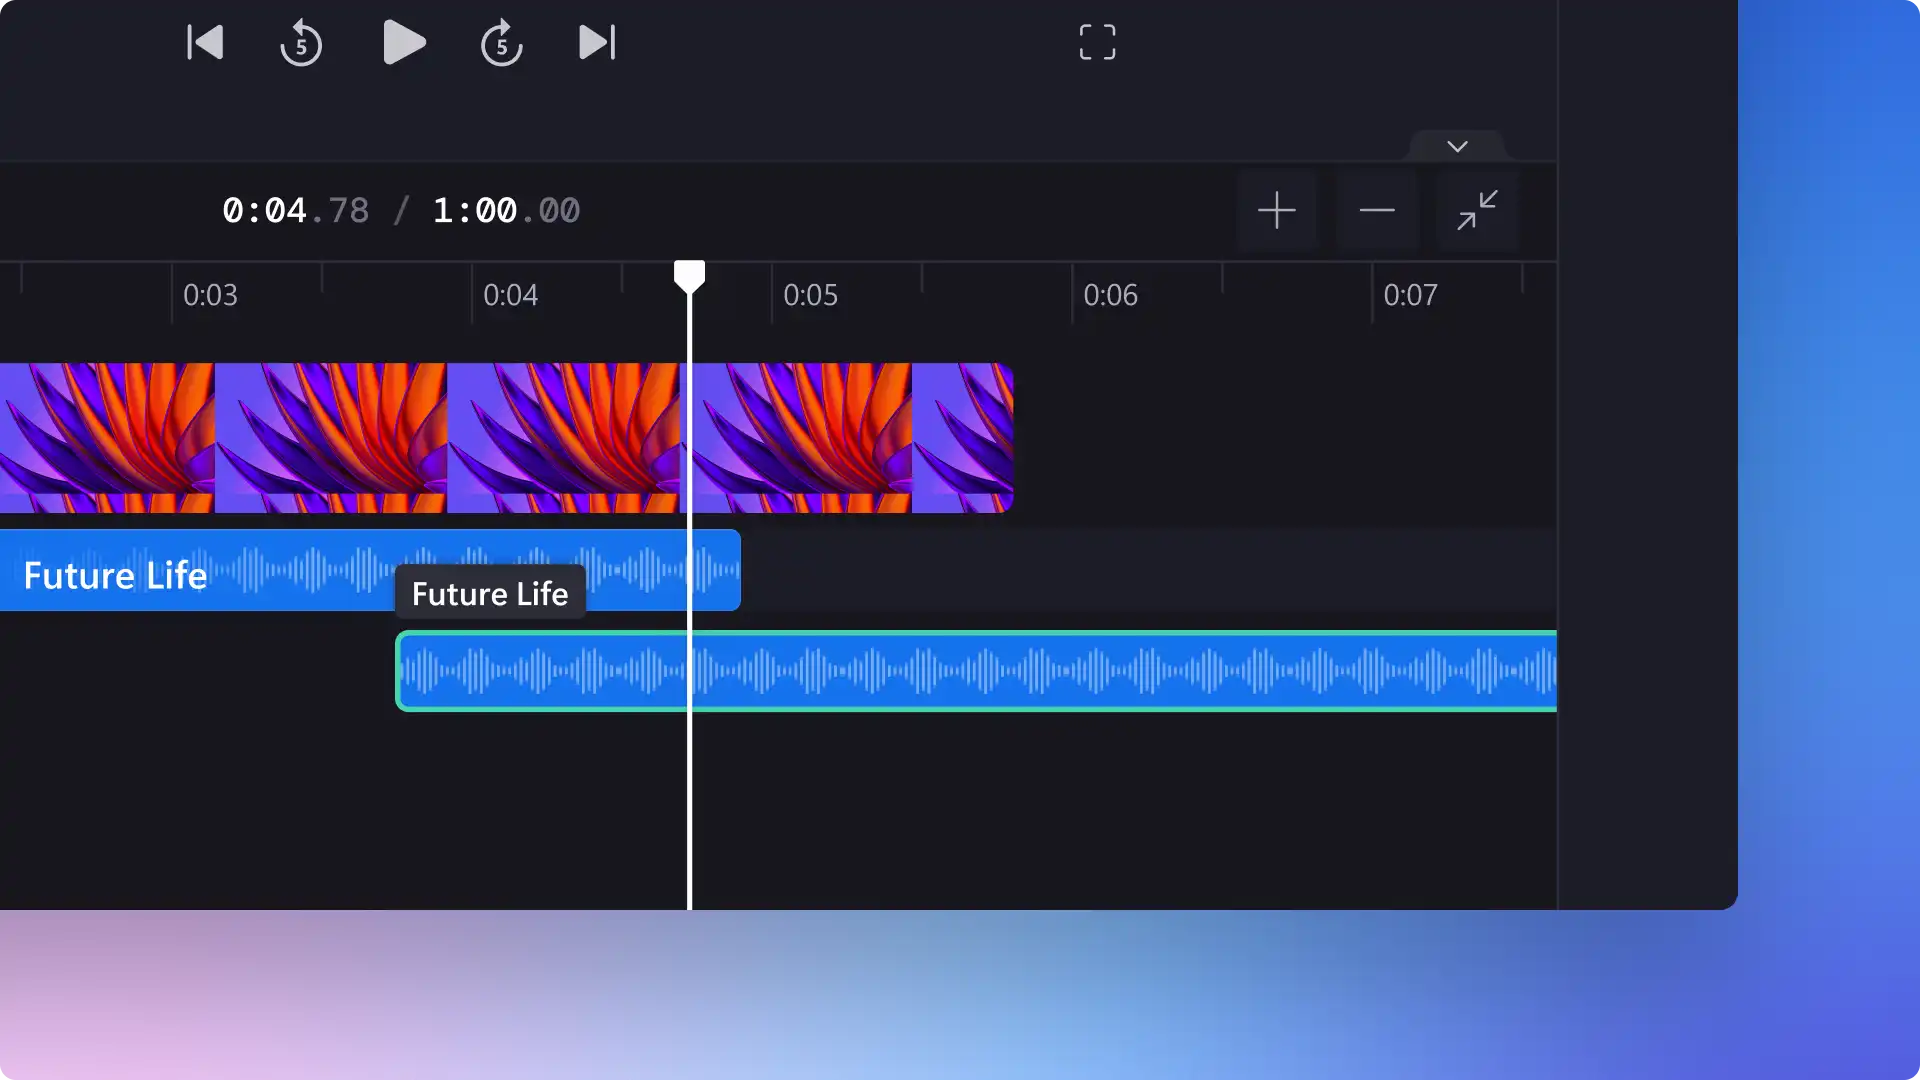
Play button: preview the video inside the stage while editing or in full screen view.
Seeker: the vertical line that represents the exact timestamp of where you are currently previewing or editing assets on the timeline.
Seek to start: snap the seeker to the start of the video at the 0:00.00 timestamp.
Seek back and forward 5 seconds: automatically drag the seeker backward or forward five seconds on the timeline to make edits or check the visual in the preview window.
Full screen preview: expand the video preview so it fills your entire screen.
Timeline search: zoom in and out on the timeline for a closer or wider view of all the media assets. You can also collapse the timeline to expand the video preview size without opening full screen preview.
Watch the YouTube video tutorial
Learn how to use the Clipchamp video editor in this beginner’s how to video.
Keep learning how to make the most of the online video editor with these helpful keyboard shortcuts or visit the training center for more tutorial videos and articles.
Create, edit, and enhance videos for free online with Clipchamp or download the Clipchamp Windows app.
Heads up! The screenshots in this article are from Clipchamp for personal accounts. The same principles apply to Clipchamp for work and school accounts.