On this page
Clean up videos by removing unwanted audio without the need to re-record. Whether it is poor-quality sound, background chatter, or outdated voiceovers, audio can be detached and replaced with a polished voice recording, royalty-free music, or an AI voiceover.
Here’s how to remove audio from video, mute video audio, or enhance sound using Clipchamp video editor.
How to remove audio from video for free
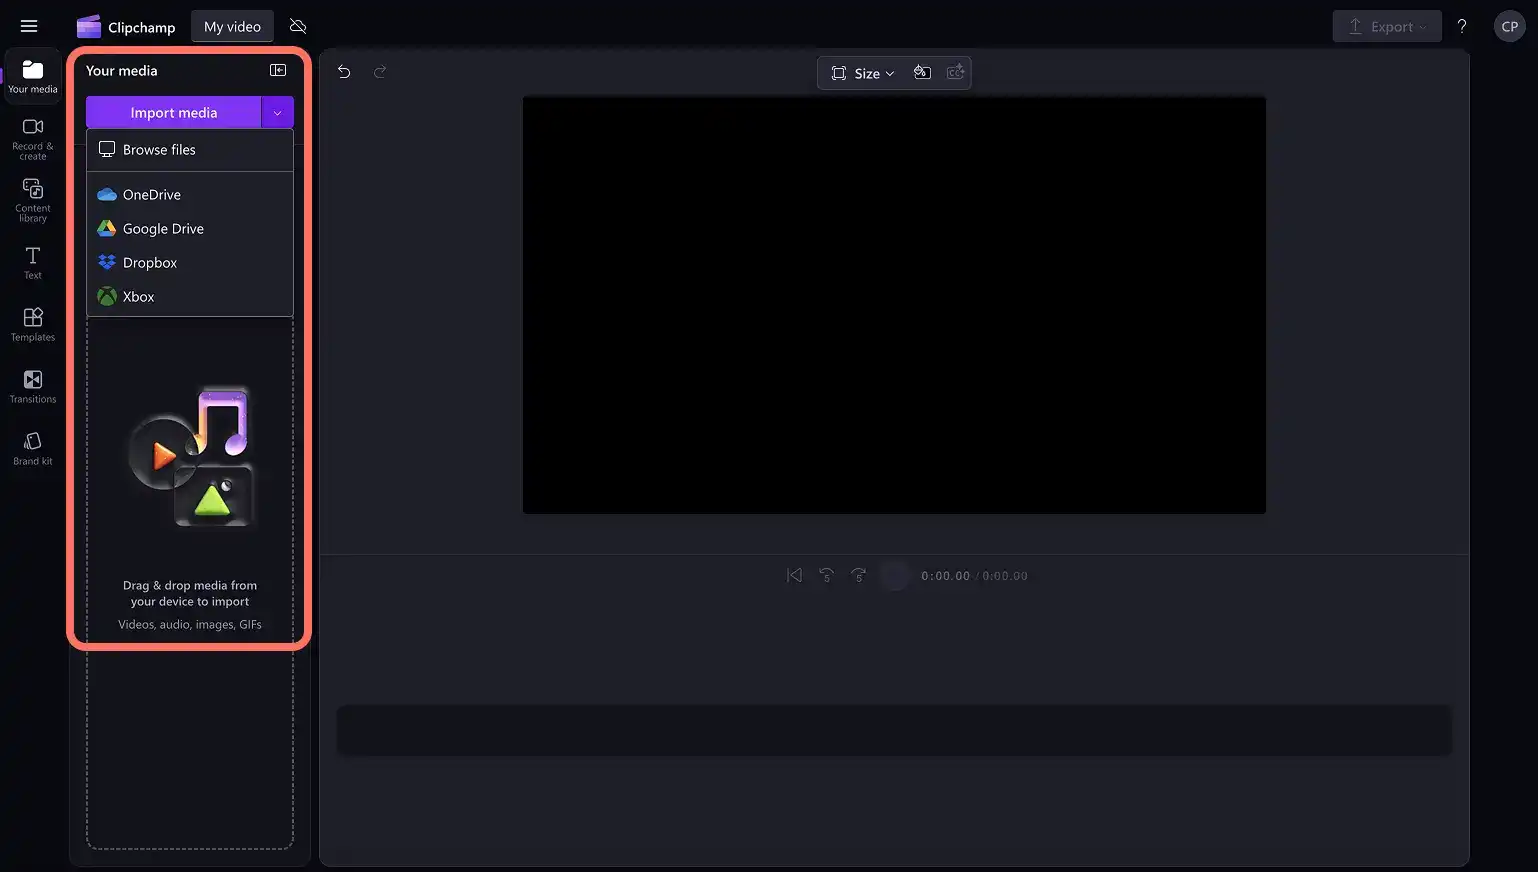
Step 1. Import a video with audio
To upload video footage, click on the import media button in the your media tab on the toolbar then browse computer files, or connect a OneDrive account.
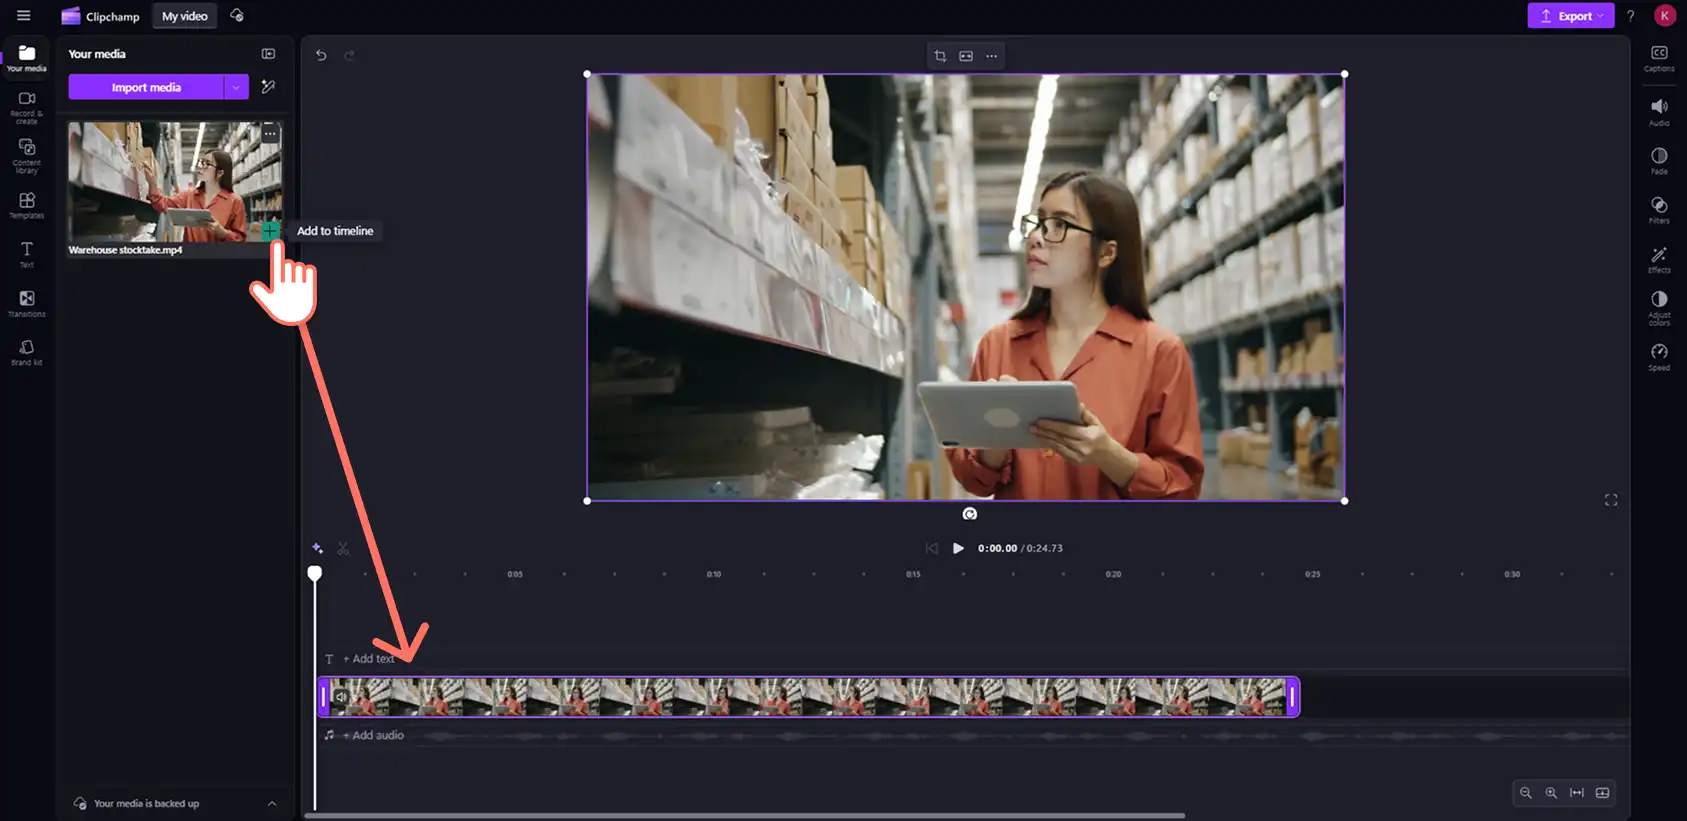
Next, drag and drop videos containing audio onto the timeline.
Step 2. Remove audio from video
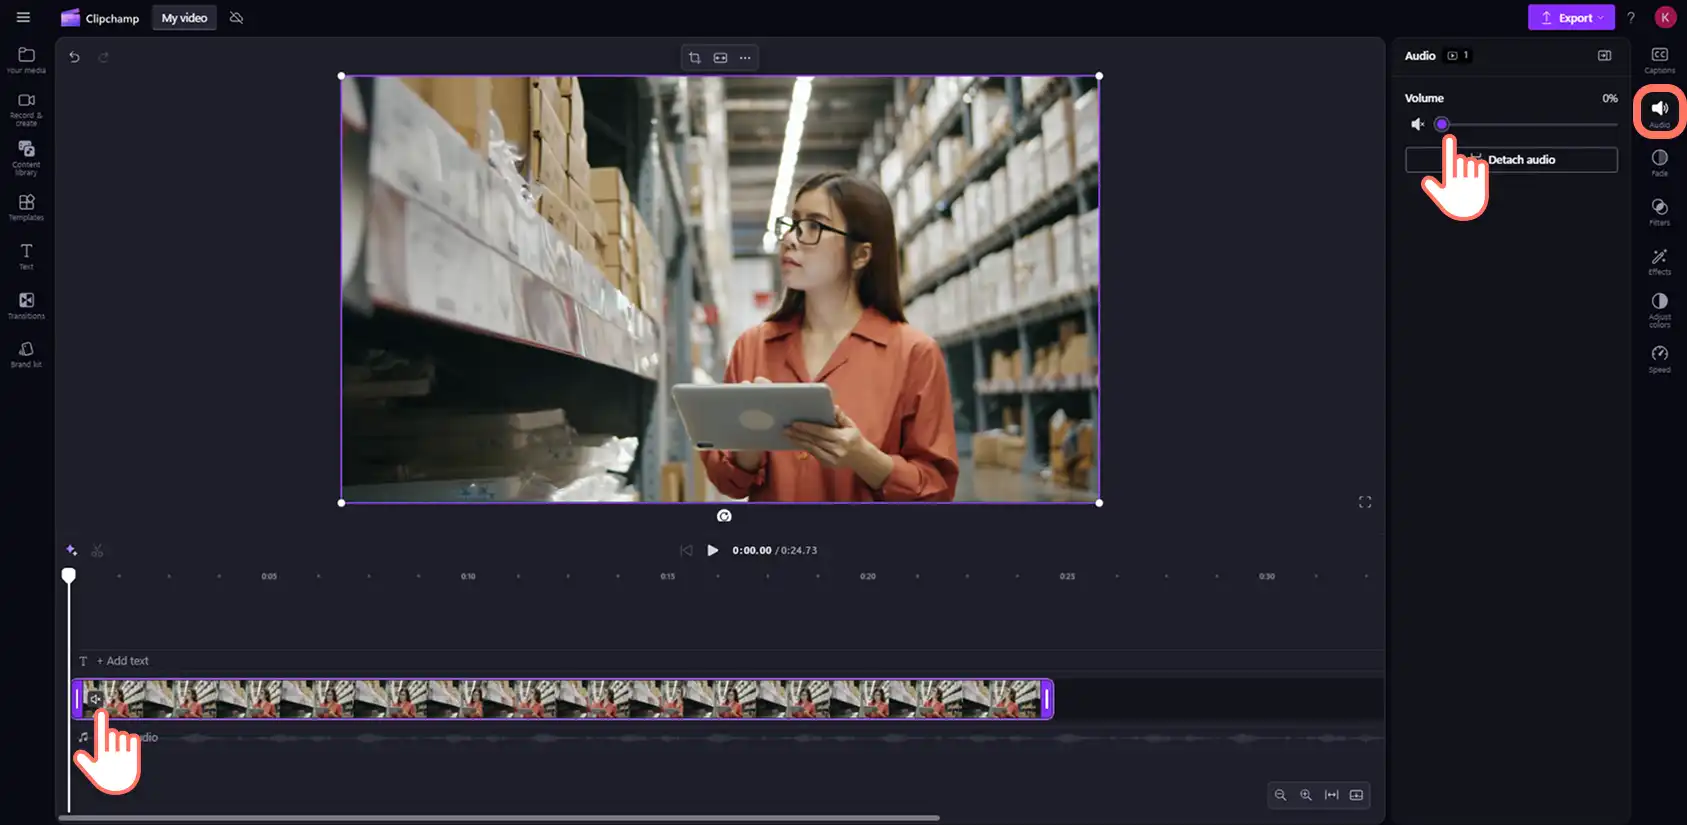
Click on the video on the timeline, then click on the audio tab on the property panel to open the audio remover. Next, click on the detach audio button.
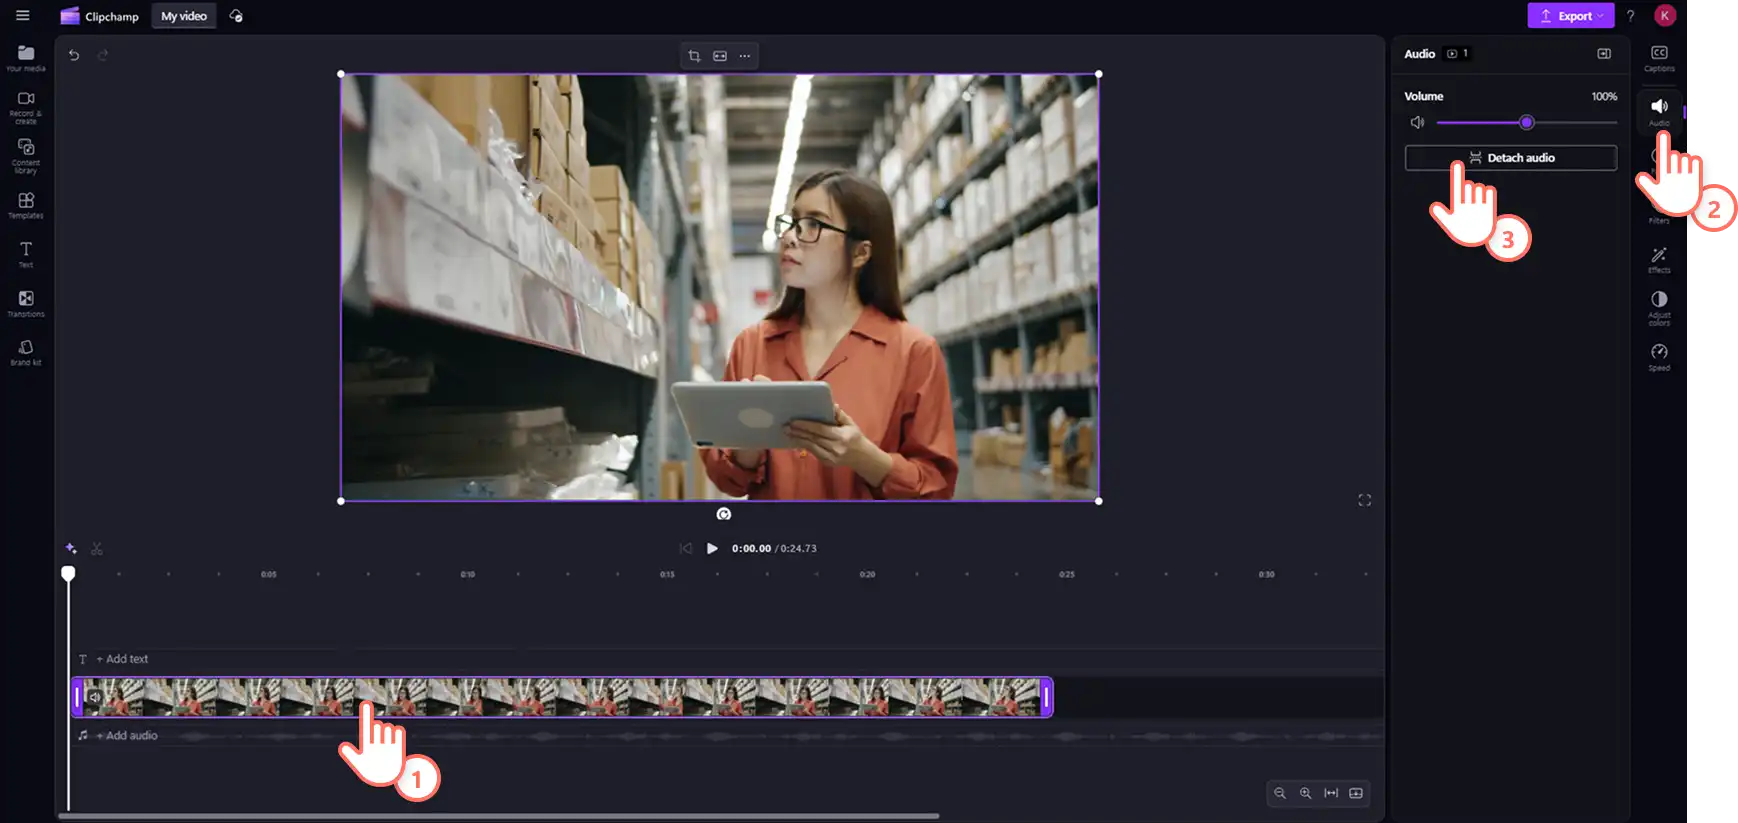
The video audio will automatically detach and appear as two separate assets on the timeline.
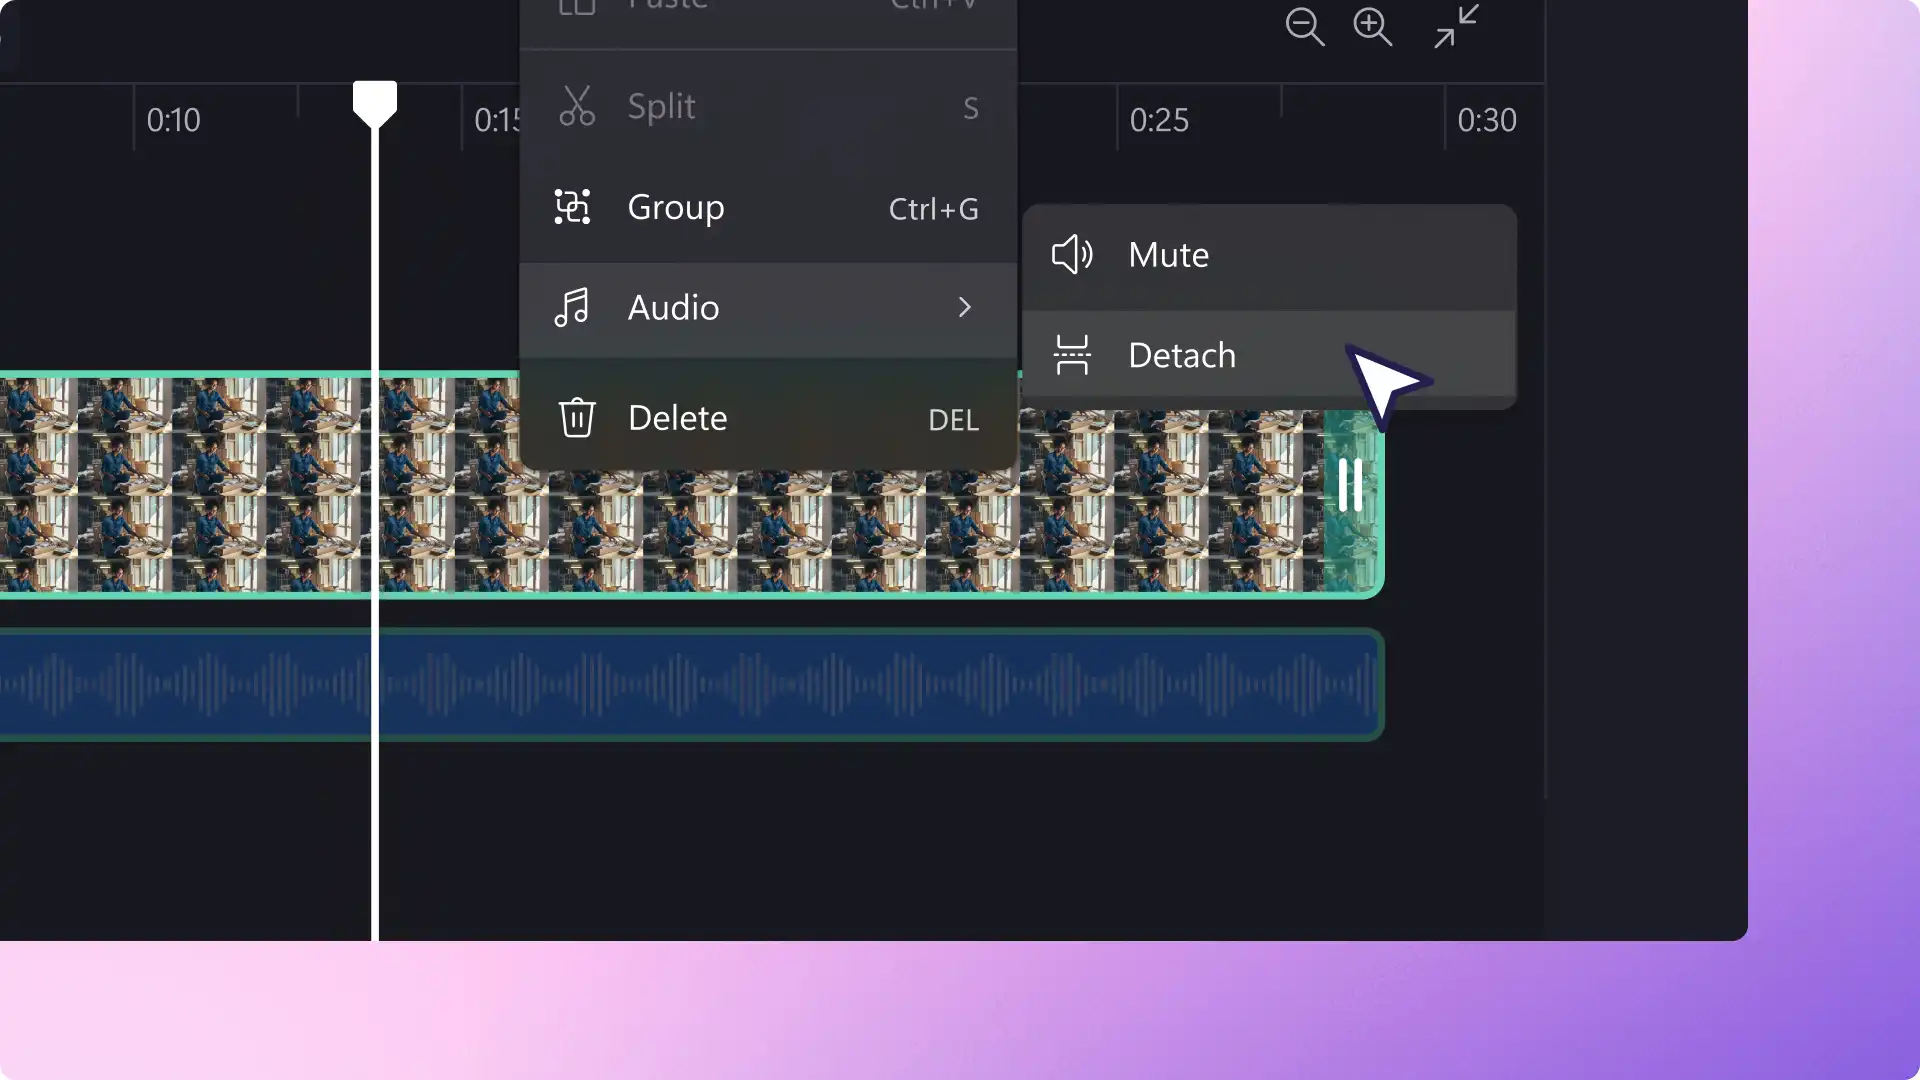
Alternatively, detach or remove audio from videos by right-clicking on the video preview on the timeline, then clicking the audio button, then detach audio. The audio will then appear under the video asset on the timeline as a separate asset. Mute vides by deleting the separated audio track or using the mute button on the audio tab on the property panel.

Step 3. Replace detached audio with a voiceover or music
Add an AI voiceover to video
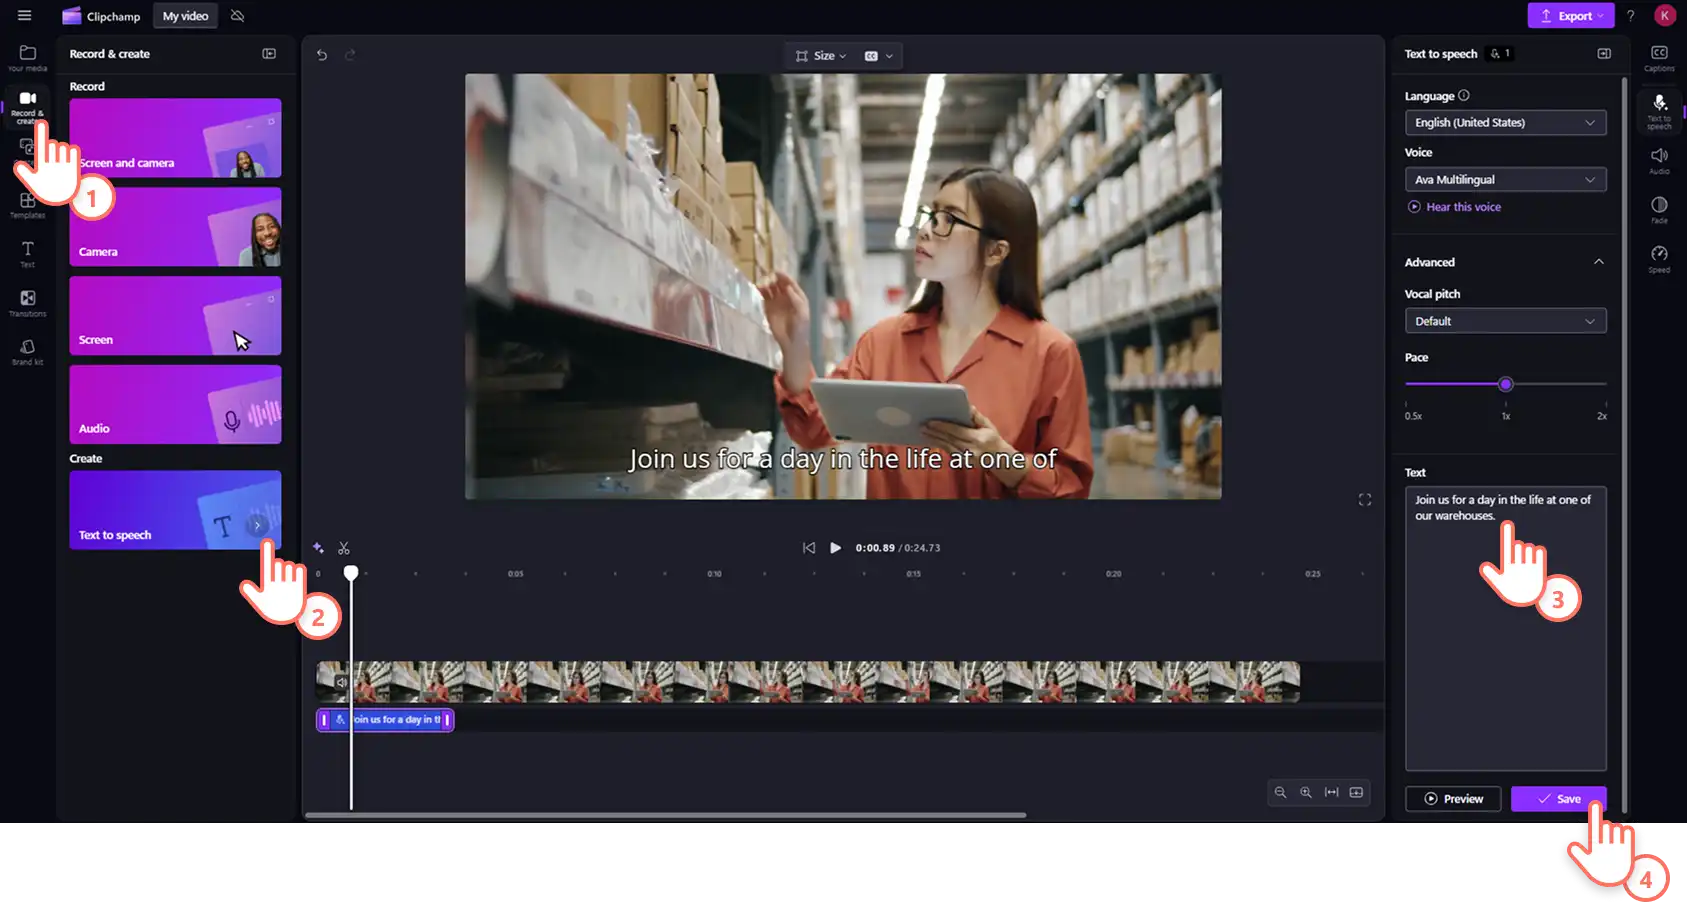
Swap out video audio with lifelike AI voiceovers using the text to speech generator. Click on the record and create tab on the toolbar then select the text to speech option. Select a language and voice, type script into the text box, then click on the save button.
Add a voice recording to video
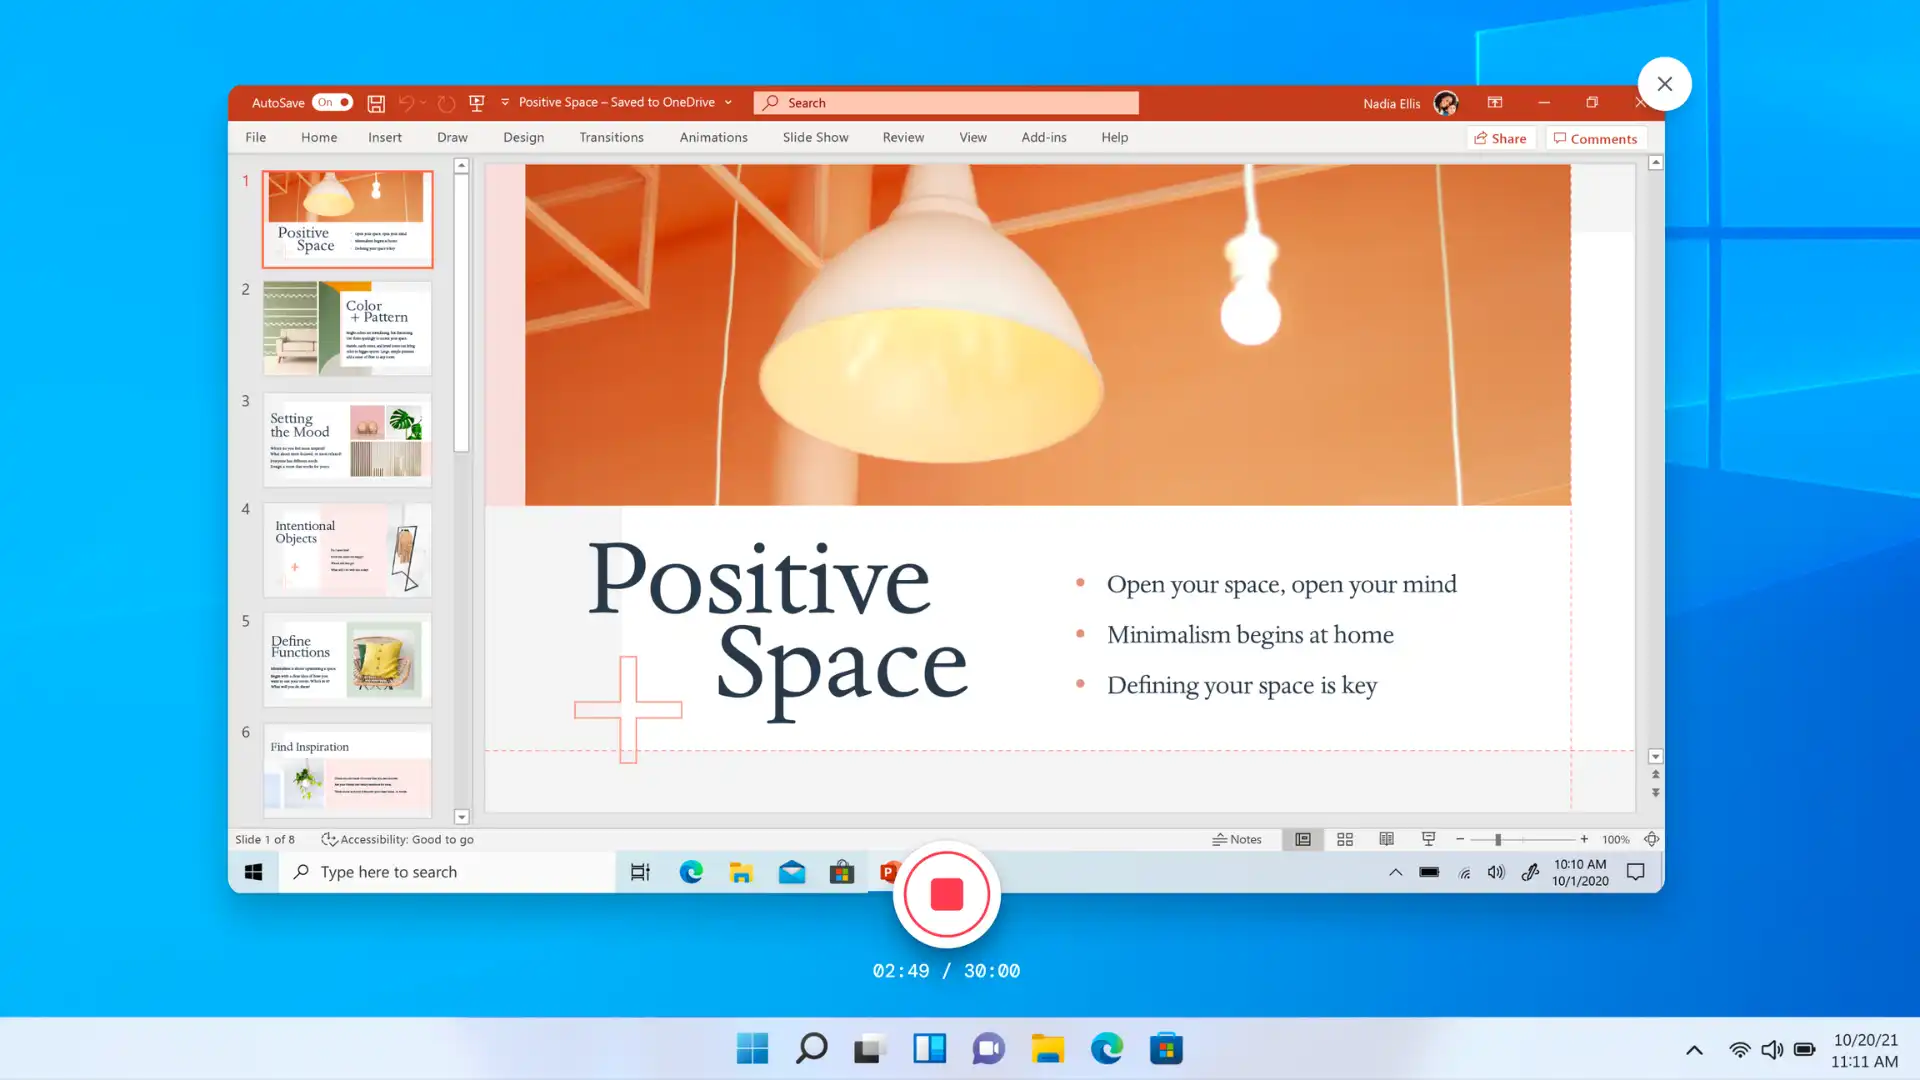
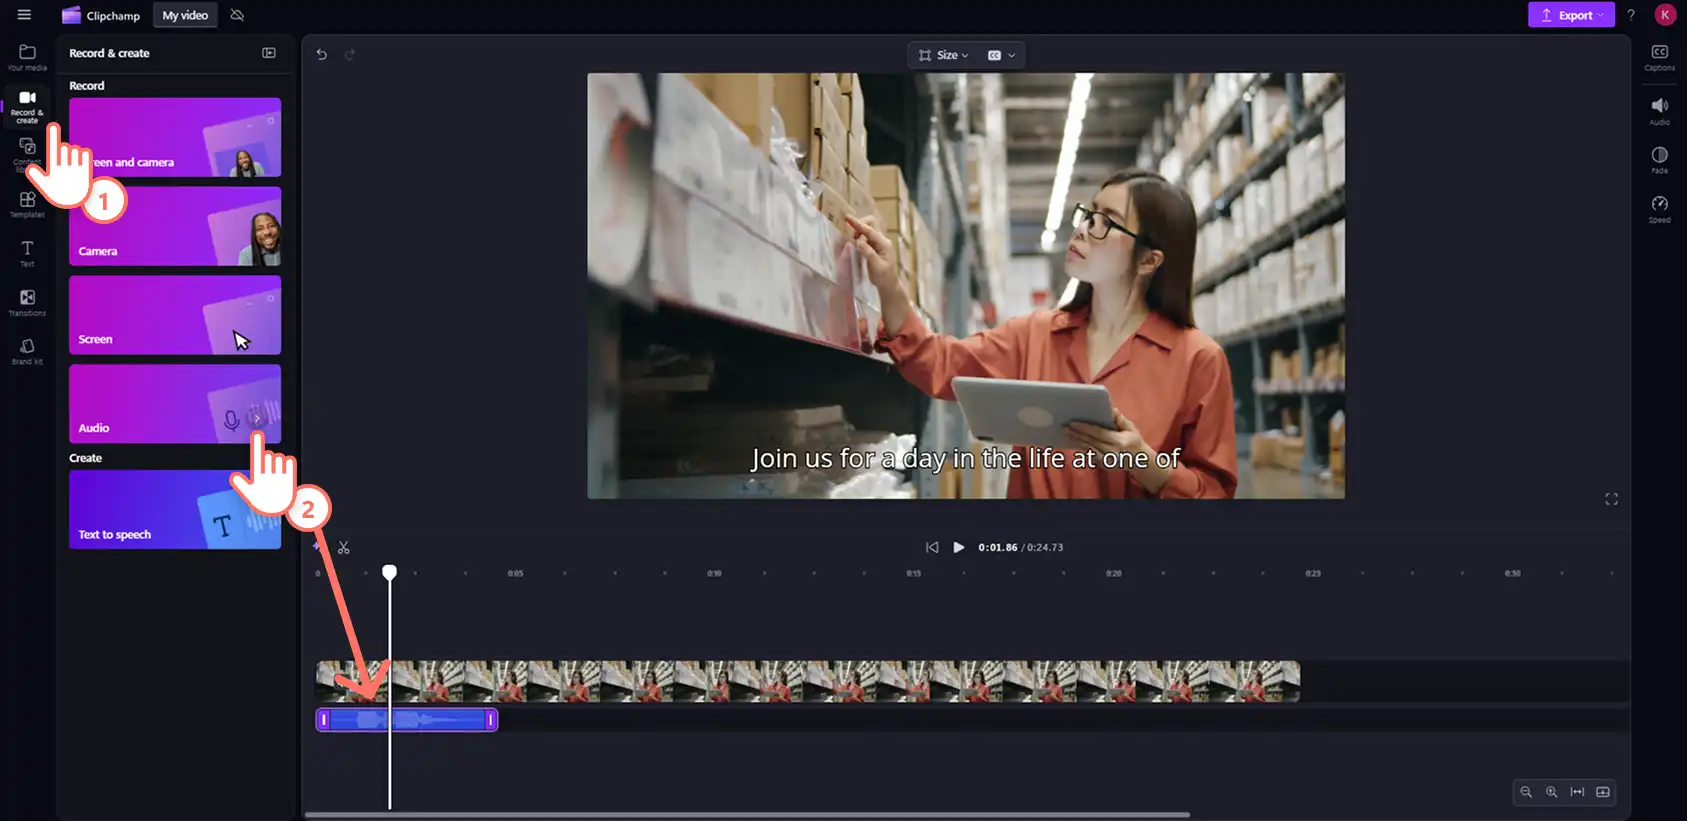
Record a voiceover right from your laptop using the free online voice recorder. Click on the record and create tab on the toolbar, then select the audio option to open the mic recorder tool. Record up to 30 minutes of audio to add to any video.
Add background music to video
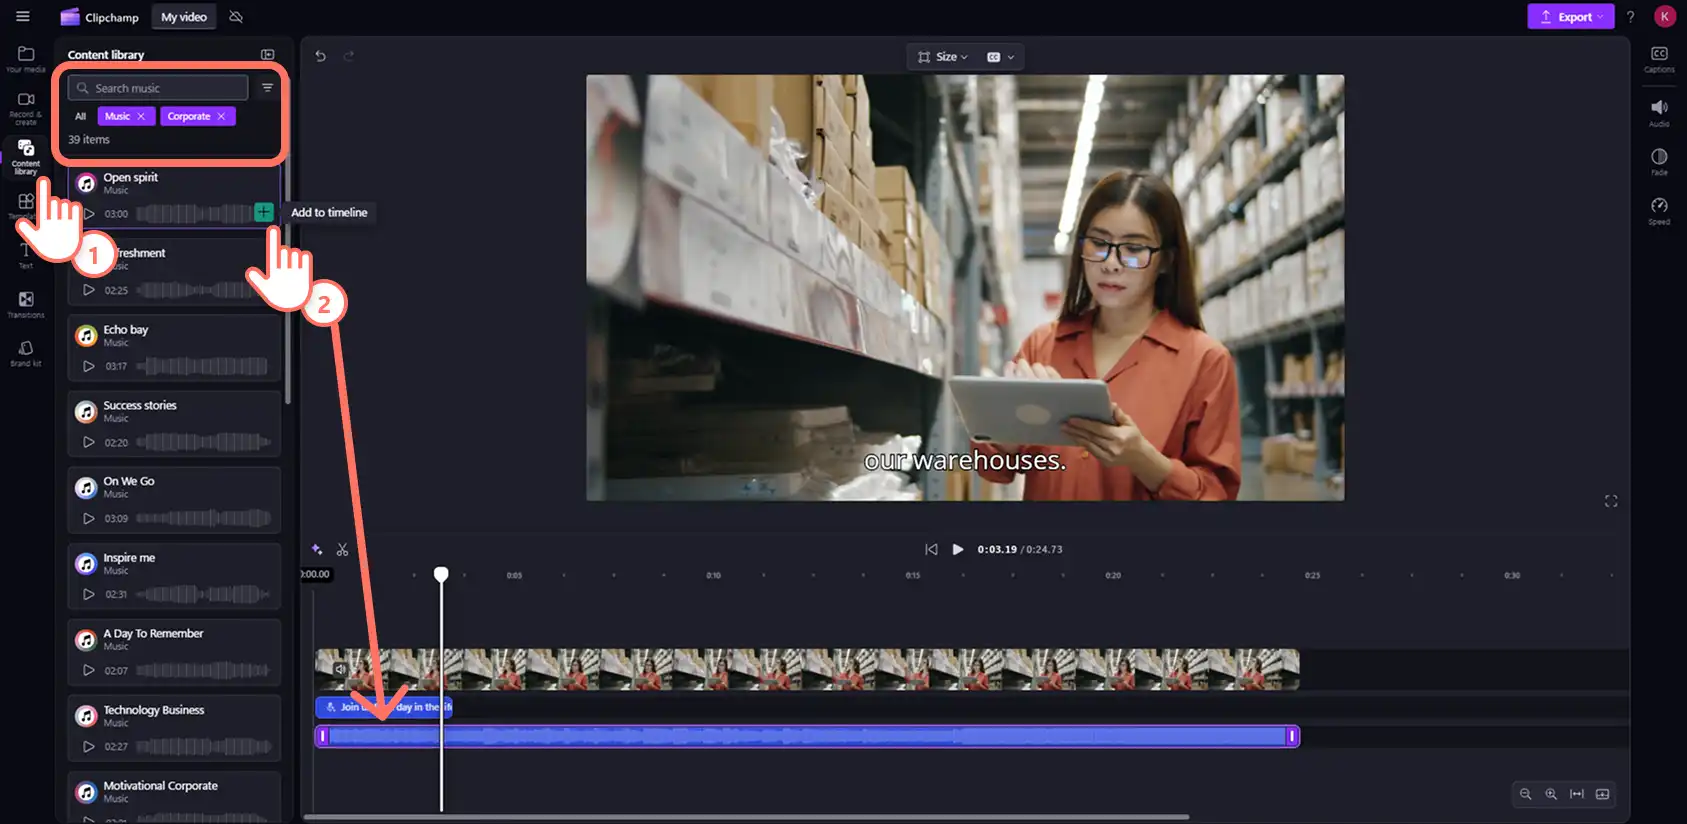
Enhance the mood for your video by adding royalty-free background music. Click on the content library tab on the toolbar then select music from the audio drop down arrow. Search the stock music collections by genre and theme, then drag and drop your music onto the timeline below your video and voiceover tracks.
Step 4. Preview and save your video
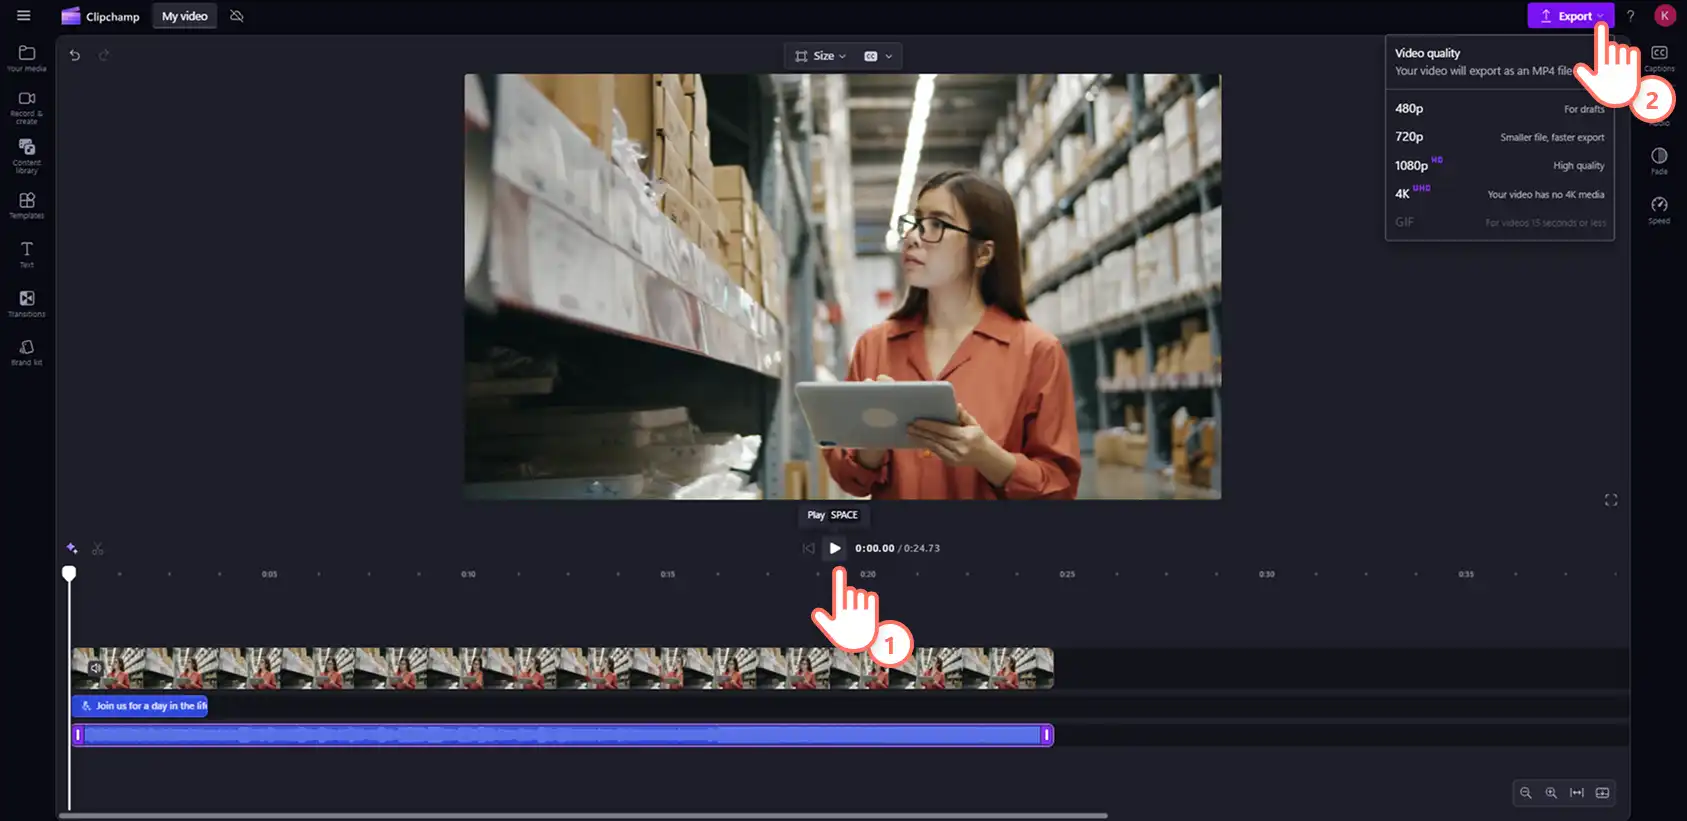
Before exporting a video, preview by clicking on the play button. Next, click on the export button and select a video resolution.
Watch how to detach audio from video and export audio only
For more help detaching audio from video, watch the step-by-step video tutorial.
How to mute video audio in seconds
Remove audio entirely or from specific sections of your video with the mute button. For more help, watch the video tutorial.
Click on a video asset on the timeline so it’s highlighted.
Click on the audio button found on the video asset in the timeline. This will change the audio symbol from on to off to show that the video and audio has now been muted.
Alternatively, mute the audio by clicking on the audio tab on the property panel then turn the volume down manually or click on the audio symbol to toggle volume on and off.
How to detach audio from part of a video
Break up your video into different individual parts then remove the audio from specific timeframes to make room for sound effects, AI voiceovers, and royalty-free background music. For more help, watch the video tutorial.
Click on the video on the timeline, then right-click to open the asset options.
Click on the audio button and select the detach button. This will separate the audio from the video as a separate layer on the timeline, it will also save as a new asset in the your media tab.
Now that the audio is separated, click on the audio asset on the timeline so it’s highlighted.
Move your cursor to the specific timestamp where you want to edit the audio and click the split button. This will cut audio into two separate assets.
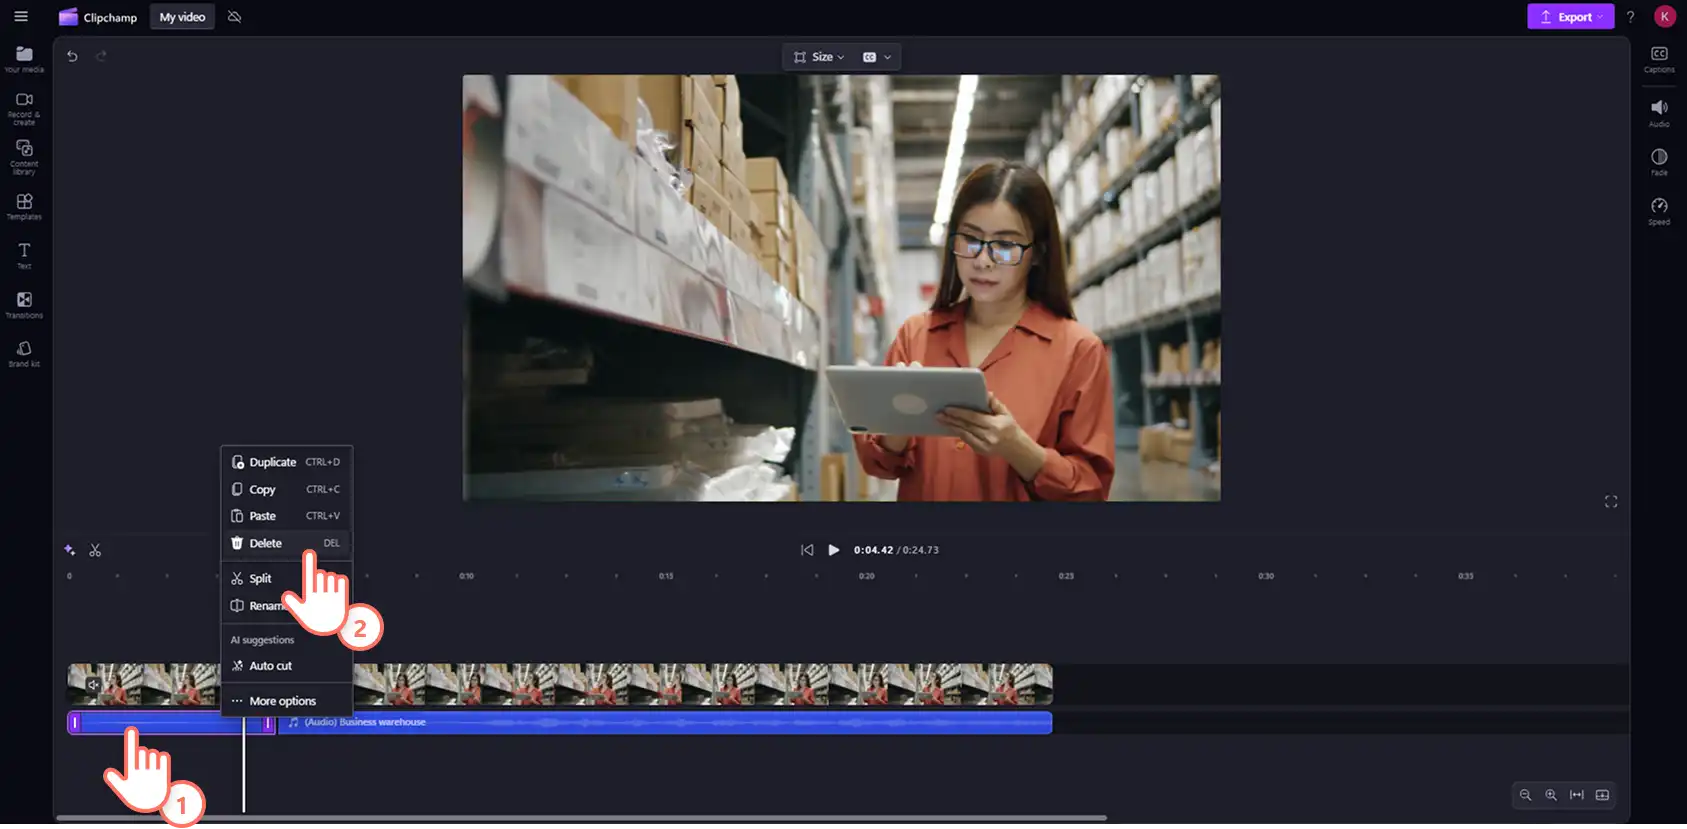
Click on the audio clip you want to remove, right-click then select delete. Your unwanted audio clip will now be removed from the timeline.
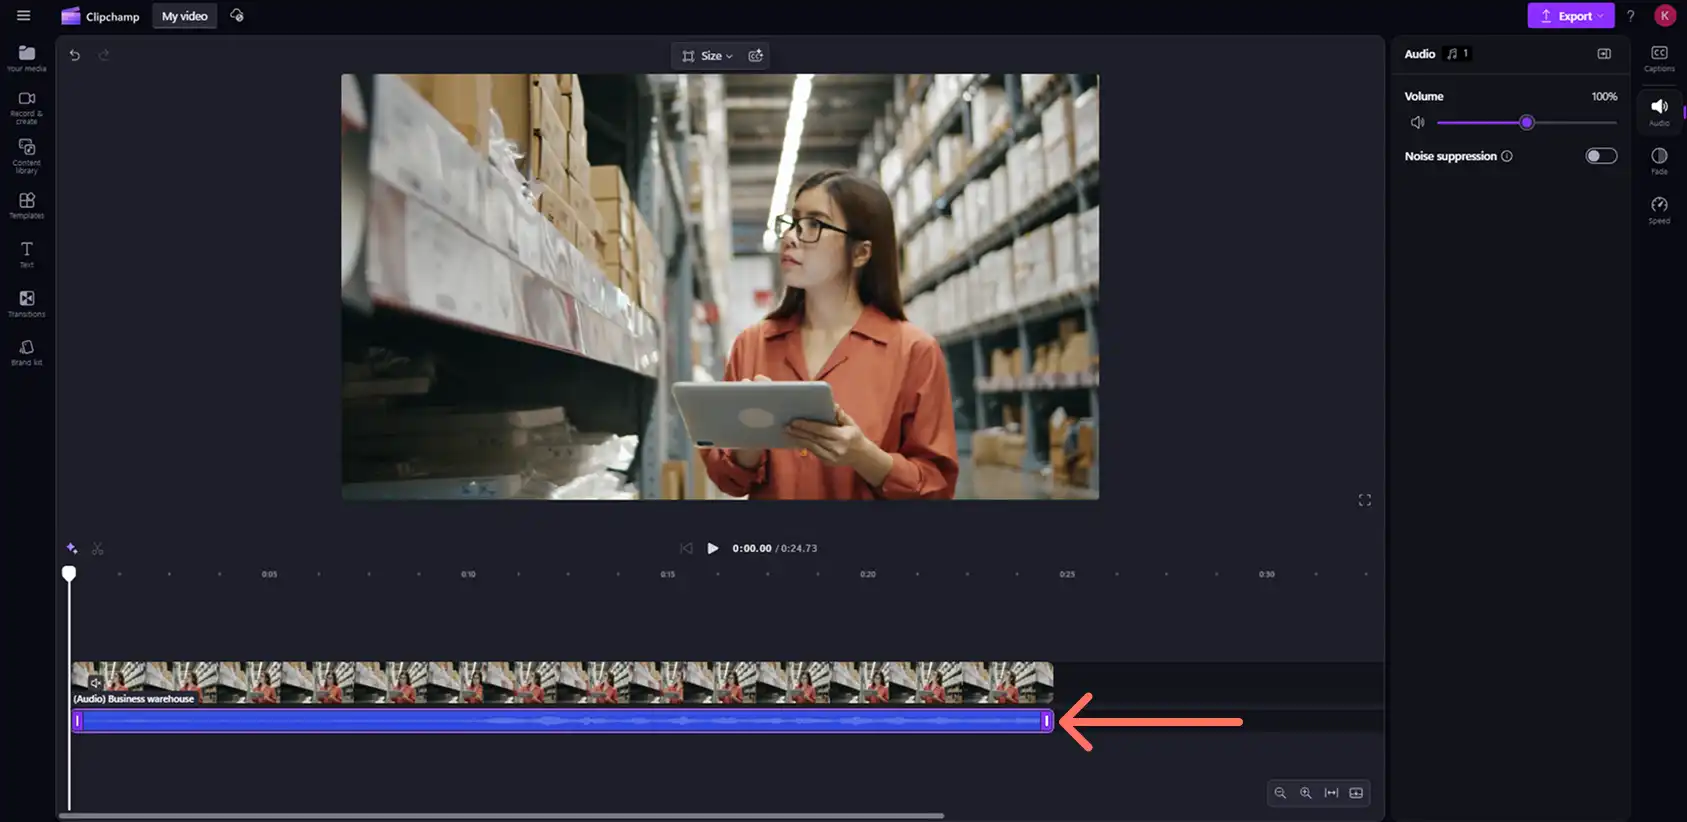
How to remove background noise from video
Automatically improve your audio quality and filter out unwanted background noises like hums and pops with AI noise suppression. For more help, watch the video tutorial.
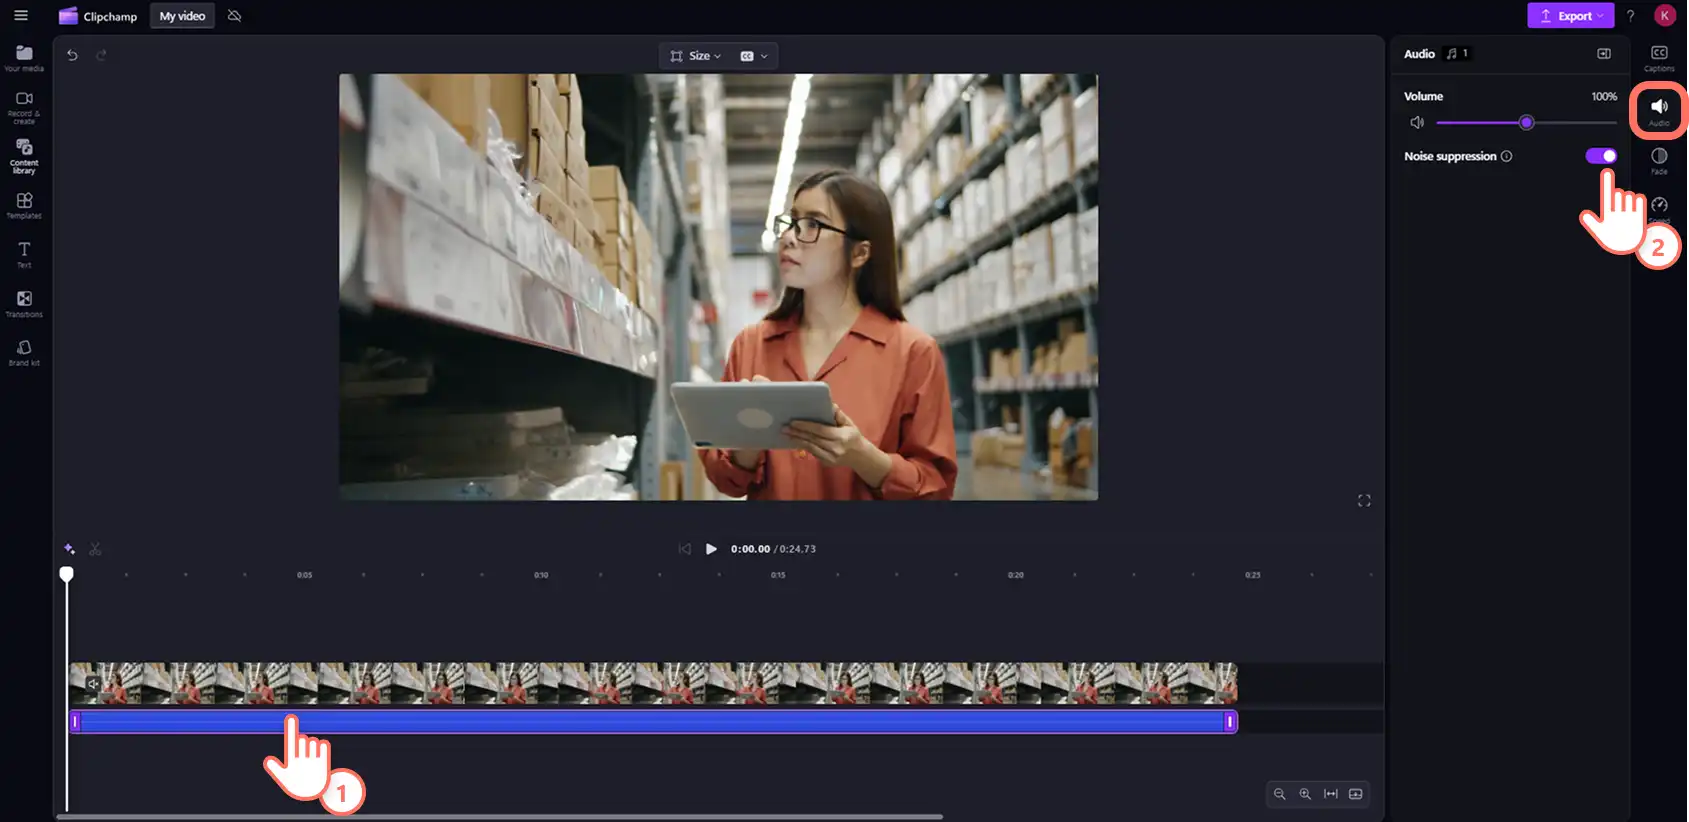
Click on the audio asset on the timeline so it’s highlighted.
Click on the audio tab on the property panel.
Click on the noise suppression toggle.
Click on the play button on the stage to listen to the new audio.
Popular reasons to remove audio from video
Download audio only or MP3 version of the video automatically to your device by removing the audio track using Clipchamp video editor.
Repurpose long-form YouTube videos into Shorts and Reels by extracting audio from videos, and downloading audio only.
Trim away mistakes in AI voiceovers or voice recordings without needing to start over.
Delete distracting or loud background music and sound effects attached to video clips.
Export videos in high-quality 1080p or 4k video resolution with and without sound.
For more video audio editing advice, learn how to use AI noise suppression when refining recordings, or check out top tips for selecting the best background music for video.
Start editing videos today with Clipchamp video editor or download the Microsoft Clipchamp Windows app for free.
Frequently asked questions
How to remove audio from video on Windows 10 and 11?
Windows 10 and 11 users can remove audio from video using Microsoft Clipchamp is the free official video editor for Windows. You can download the Windows application to your device or use the web-browser based version on Microsoft Edge or Google Chrome.
How to remove audio from YouTube videos?
Remove audio from lawfully downloaded YouTube videos using the steps in the above tutorials. There are also various ways you can save audio directly from YouTube videos. Read up on YouTube’s terms of service and local copyright laws to avoid any legal issues.
How to speed up and slow down audio in Clipchamp online?
Use the audio speed changerin Clipchamp video editor to easily adjust the speed of any audio asset or video audio.
Heads up! The screenshots in this article are from Clipchamp for personal accounts. The same principles apply to Clipchamp for work and school accounts.