From demo videos and sale promos to long-form tutorials and intro videos, elevate video content with personalized colors, fonts, or even add a watermark or logo to video using the brand kit tool. Just upload your customized logos, color palettes, and fonts, then store all of your branding assets in the one place to create consistent content quickly.
Read on to explore everything you need to know like what is a brand kit and how to create a brand kit in Clipchamp video editor. Please note that the brand kit feature is exclusively available to premium Clipchamp subscribers.
Where to find the brand kit feature
Find the brand kit from the homepage
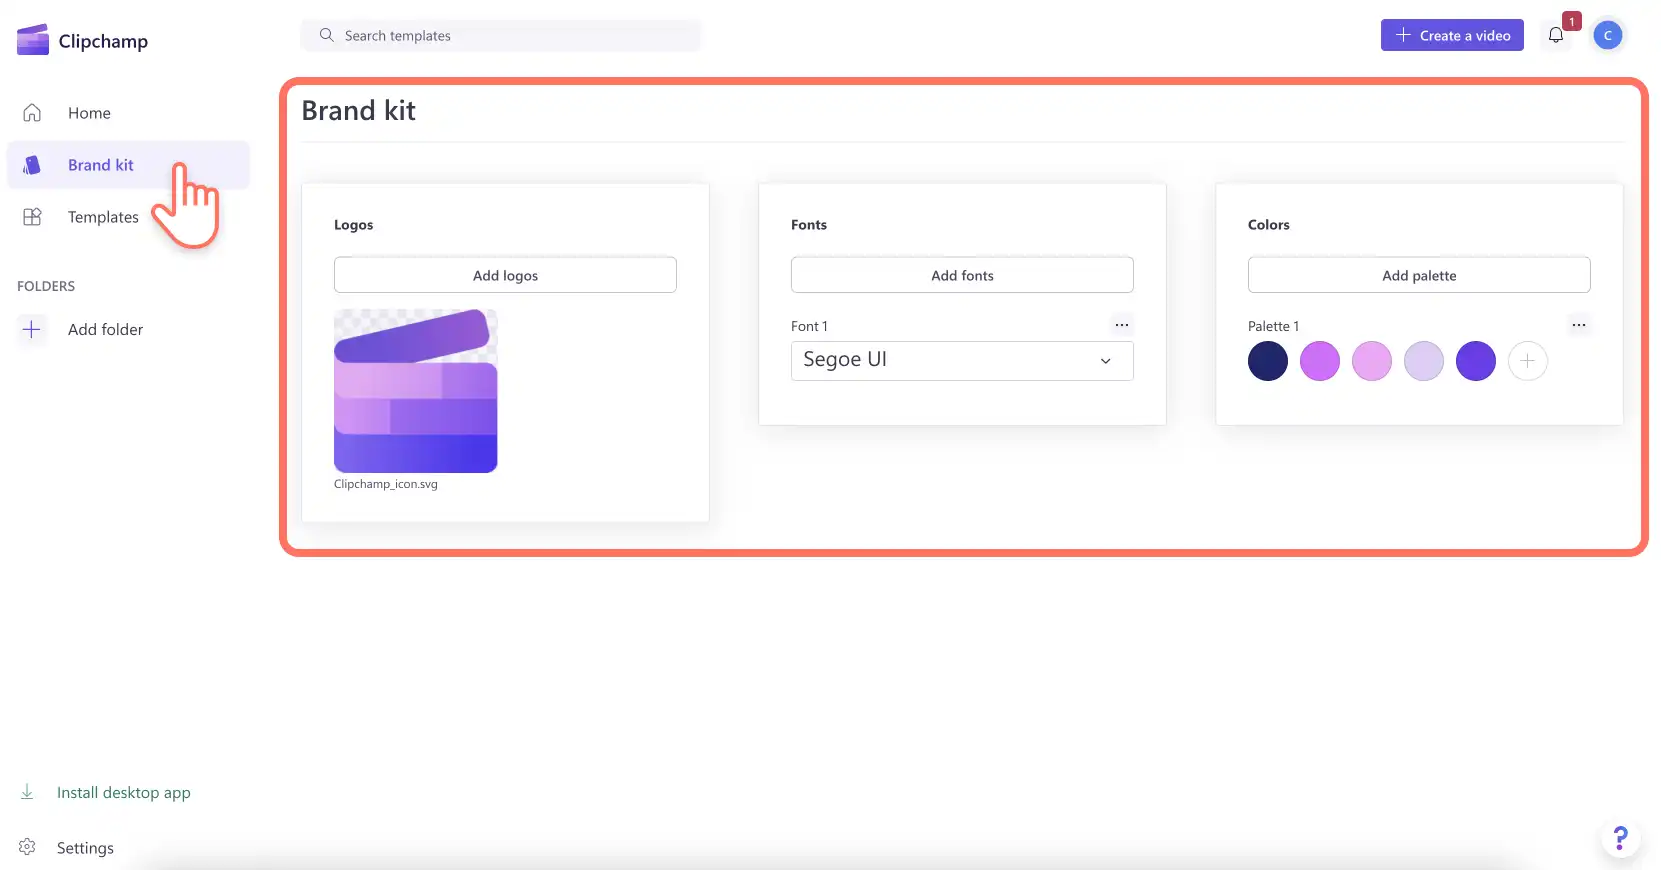
Inside the video editor homepage, click on the brand kit tab to access your brand logos, fonts, and colors.
Find the brand kit inside the editor
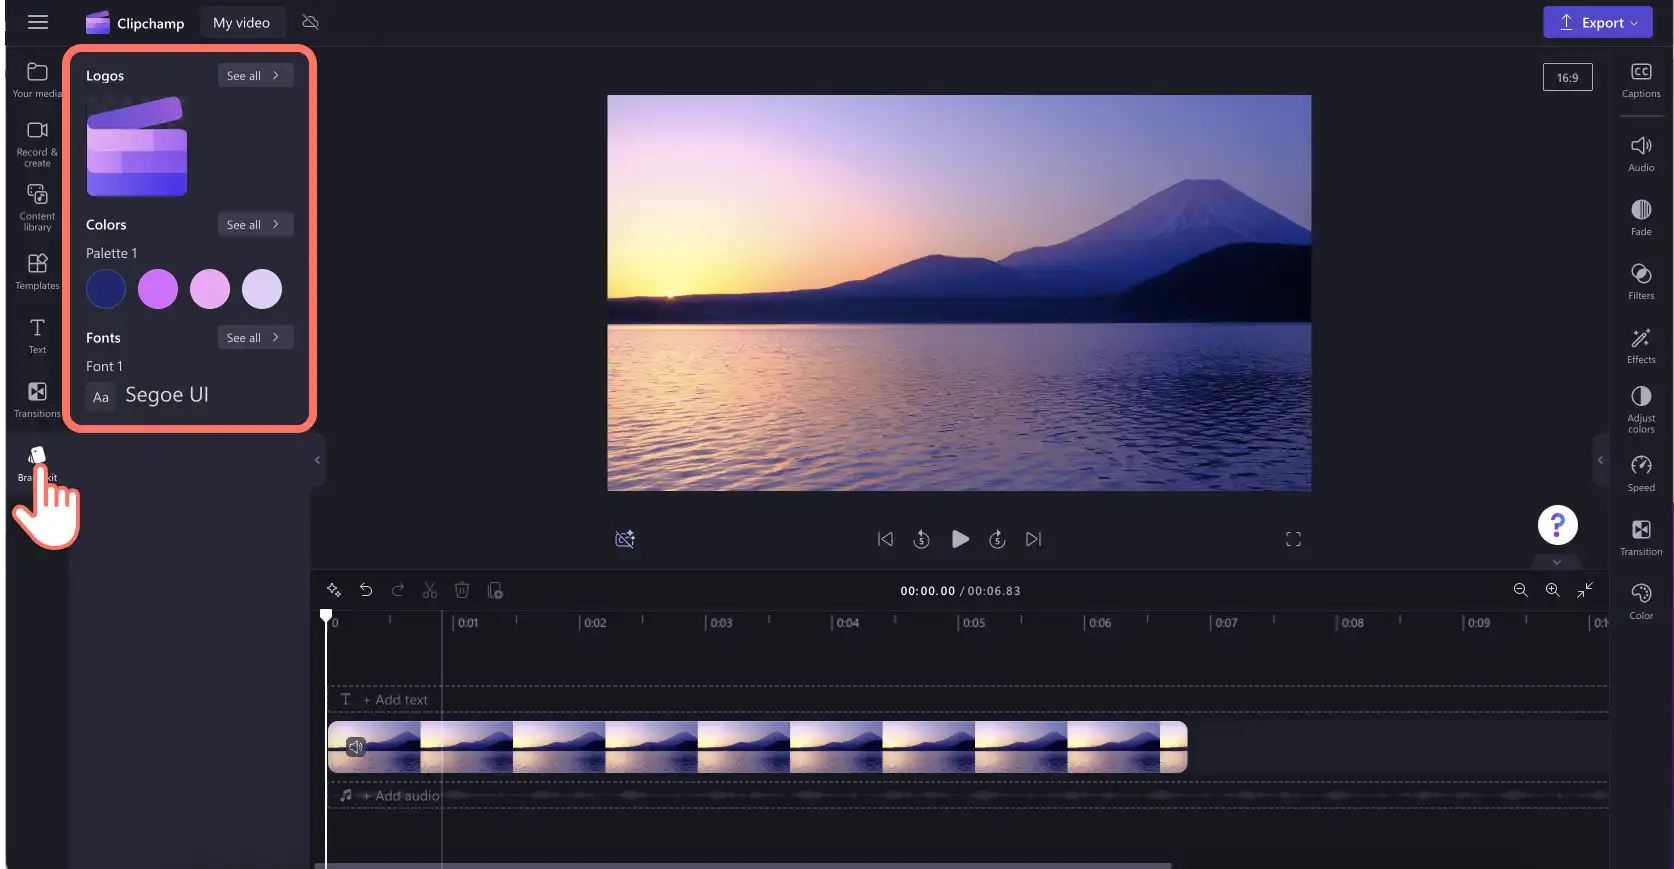
Inside the video editor, click on the brand kit tab on the toolbar to locate brand logos, fonts, and colors.
How create a brand kit in minutes
To add branding logos, fonts, and colors to your brand kit, users require a premium Clipchamp subscription. Either upload your branded assets to the brand kit via the homepage or from inside the editor using the brand kit tab. This tutorial will showcase adding branding via the homepage.
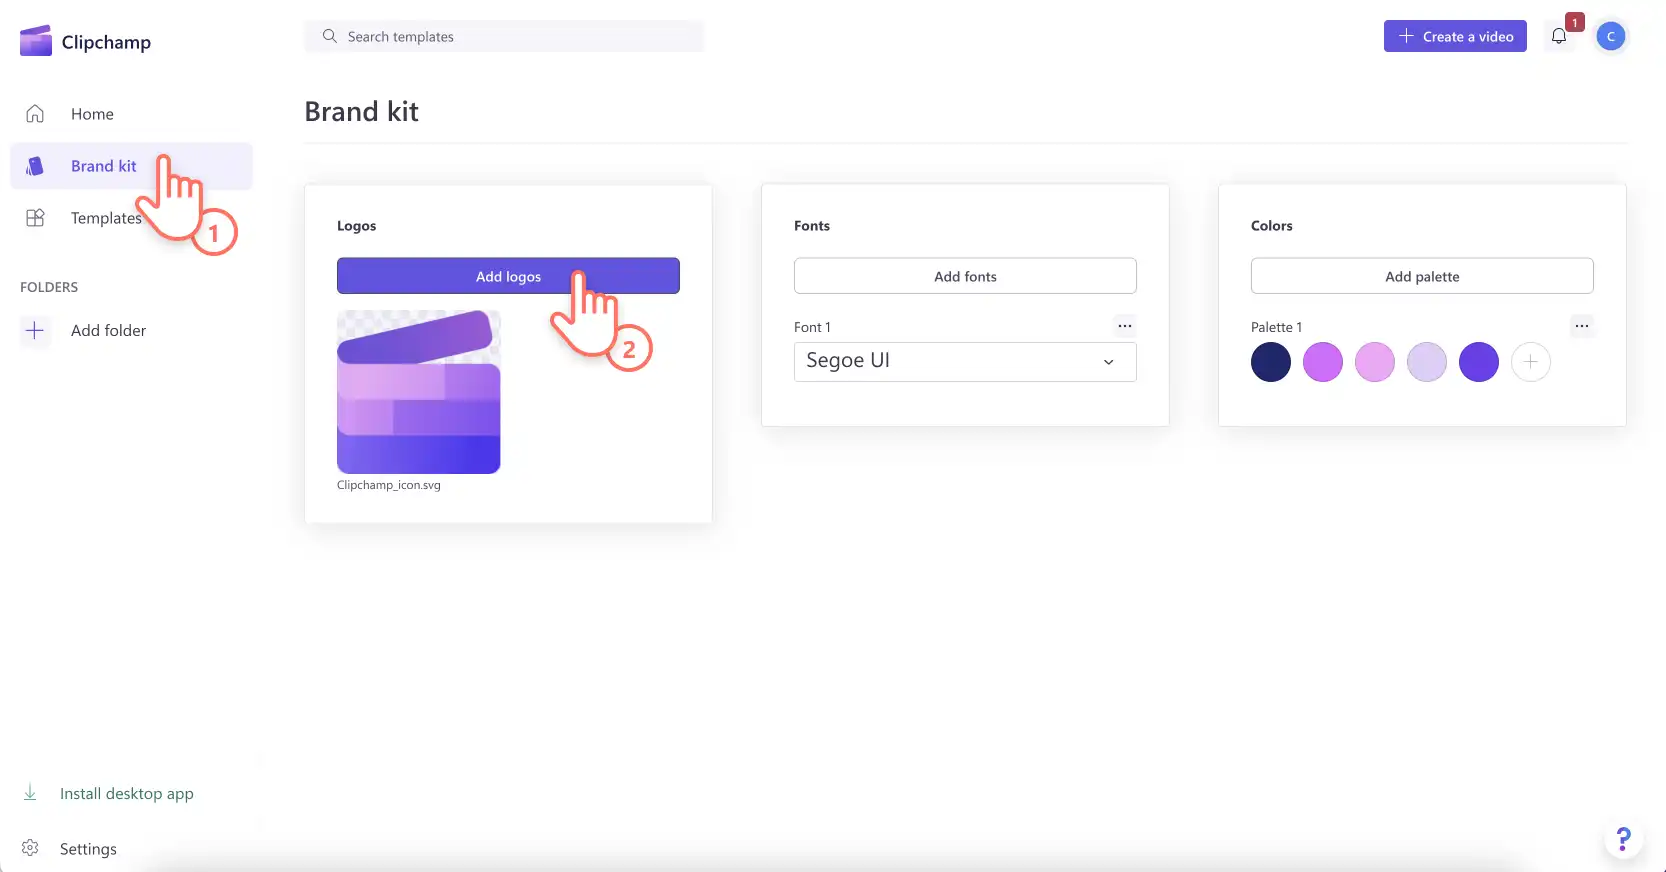
Step 1. Add brand logos
Click on the add logos button to select your logo from your computer files. Your computer files will automatically open. Select your logo, then click on the open button. All logos must be a PNG, JPEG or SVG file types with a maximum size of 10MB.
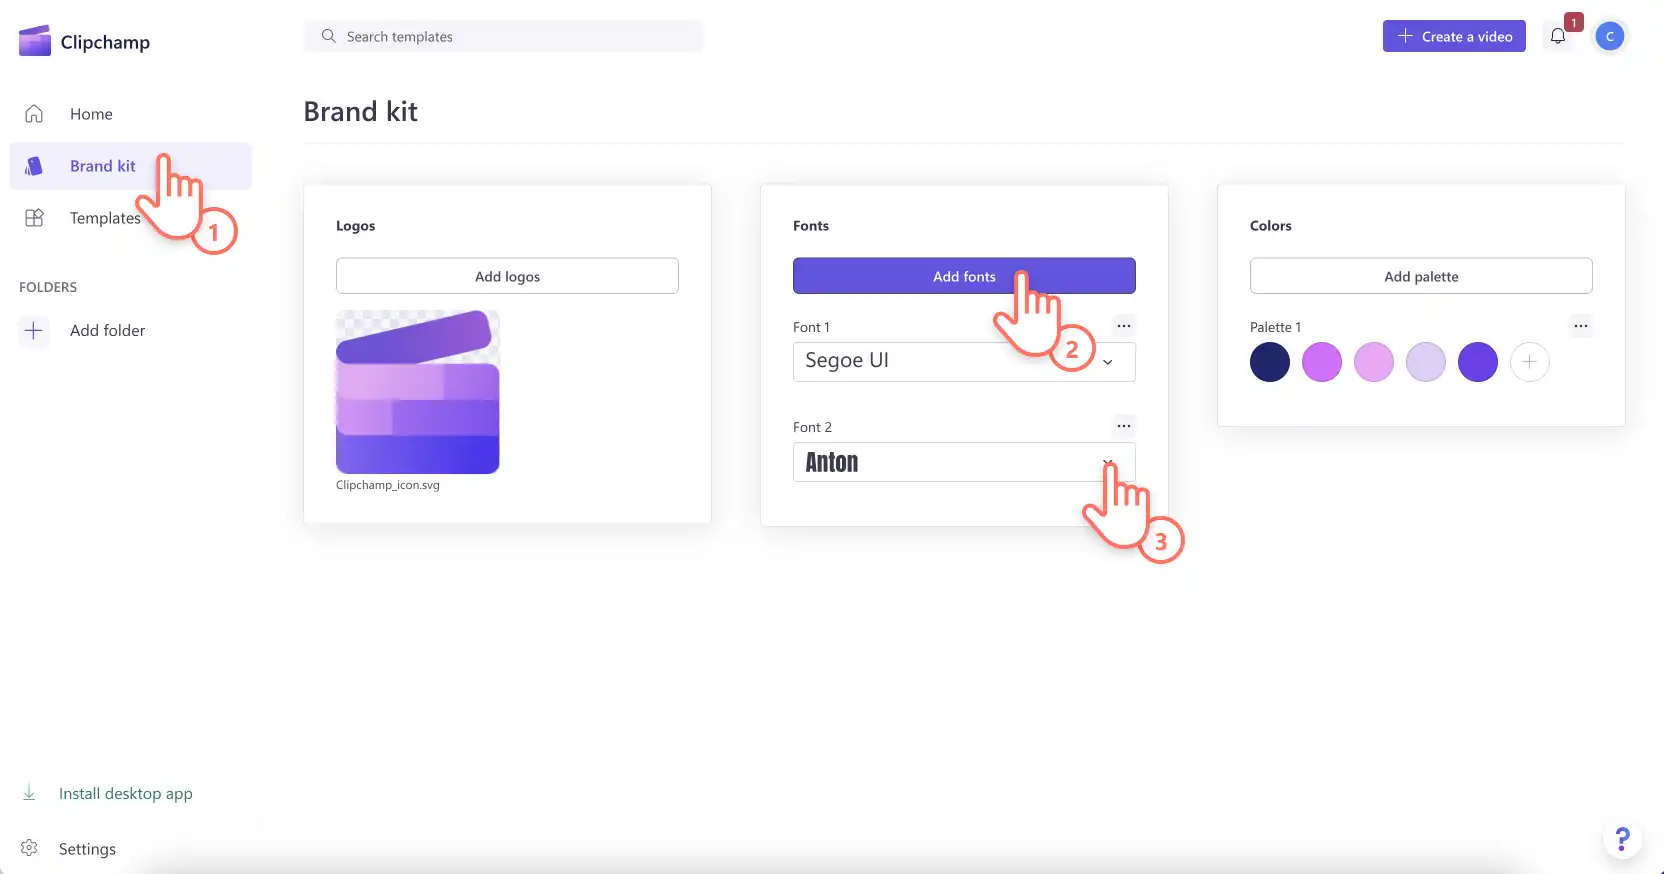
Step 2. Add brand fonts
Click on the add fonts button to upload your customized fonts. A new font option will appear. Click on the drop down arrow to select an existing font or import your own font file. You can rename your font by clicking on the three horizontal dots then clicking rename. All fonts must be OTF, TTF or WOFF. file types with a maximum size of 10MB.
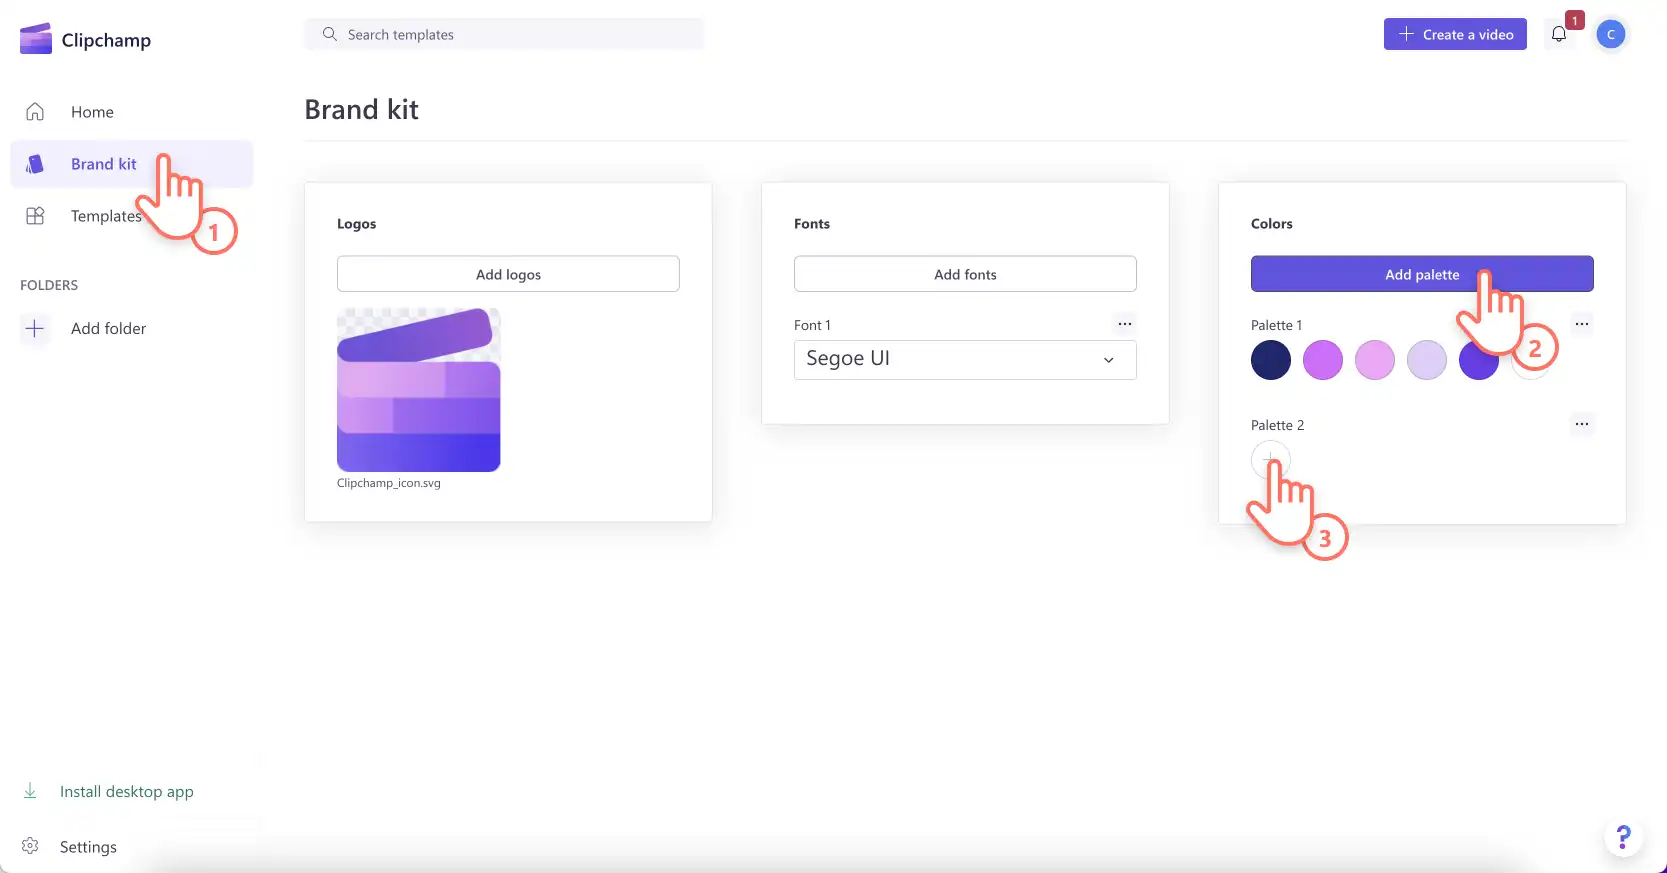
Step 3. Add brand color palette
Click on the add palette button to upload your personalized color palette. Next, click on the plus button to add a color. Here, you can type in a Hex code, select a color from the color picker, or choose an existing color option using the palette button.
How to add branding to your videos
Step 1. Click on the brand kit tab on the toolbar
To use the brand kit, click on the brand kit tab on the toolbar. Here, you will be able to add logos to video, use brand fonts, and colors.
Step 2. Add your logo to video
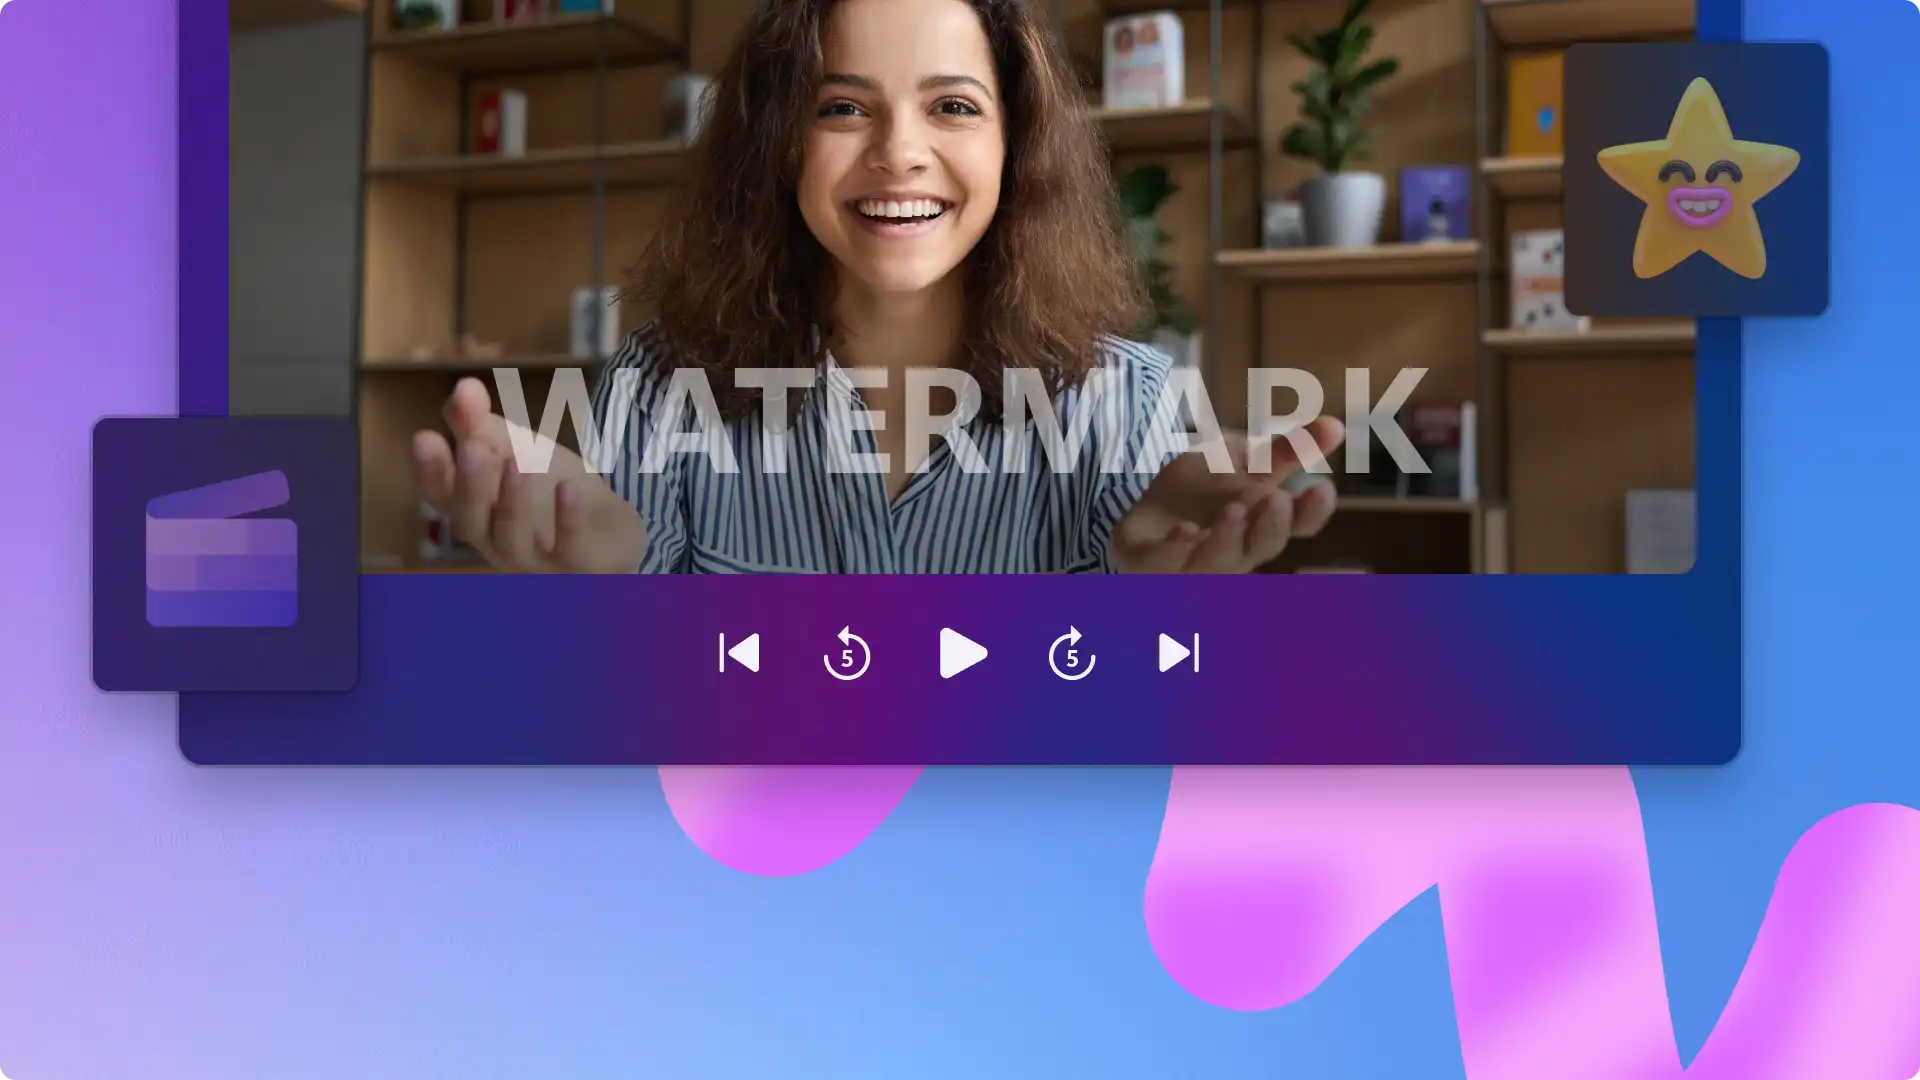
To add a logo to video to create a watermark effect or video overlay, drag and drop your logo onto the timeline above your video clip or click on the + button to add to the timeline.
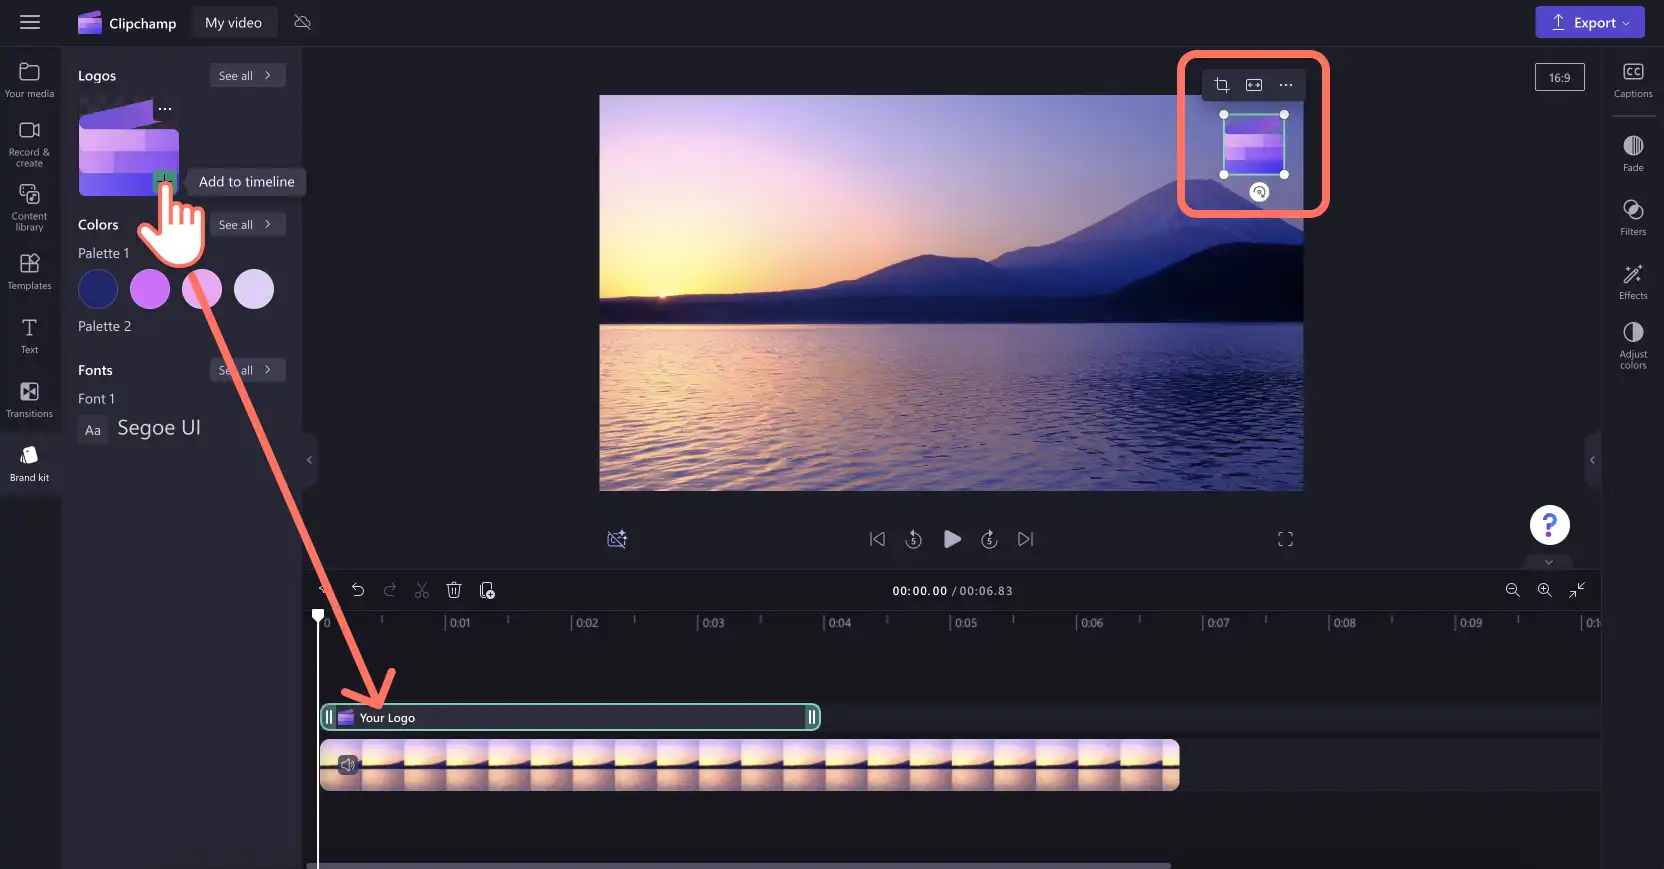
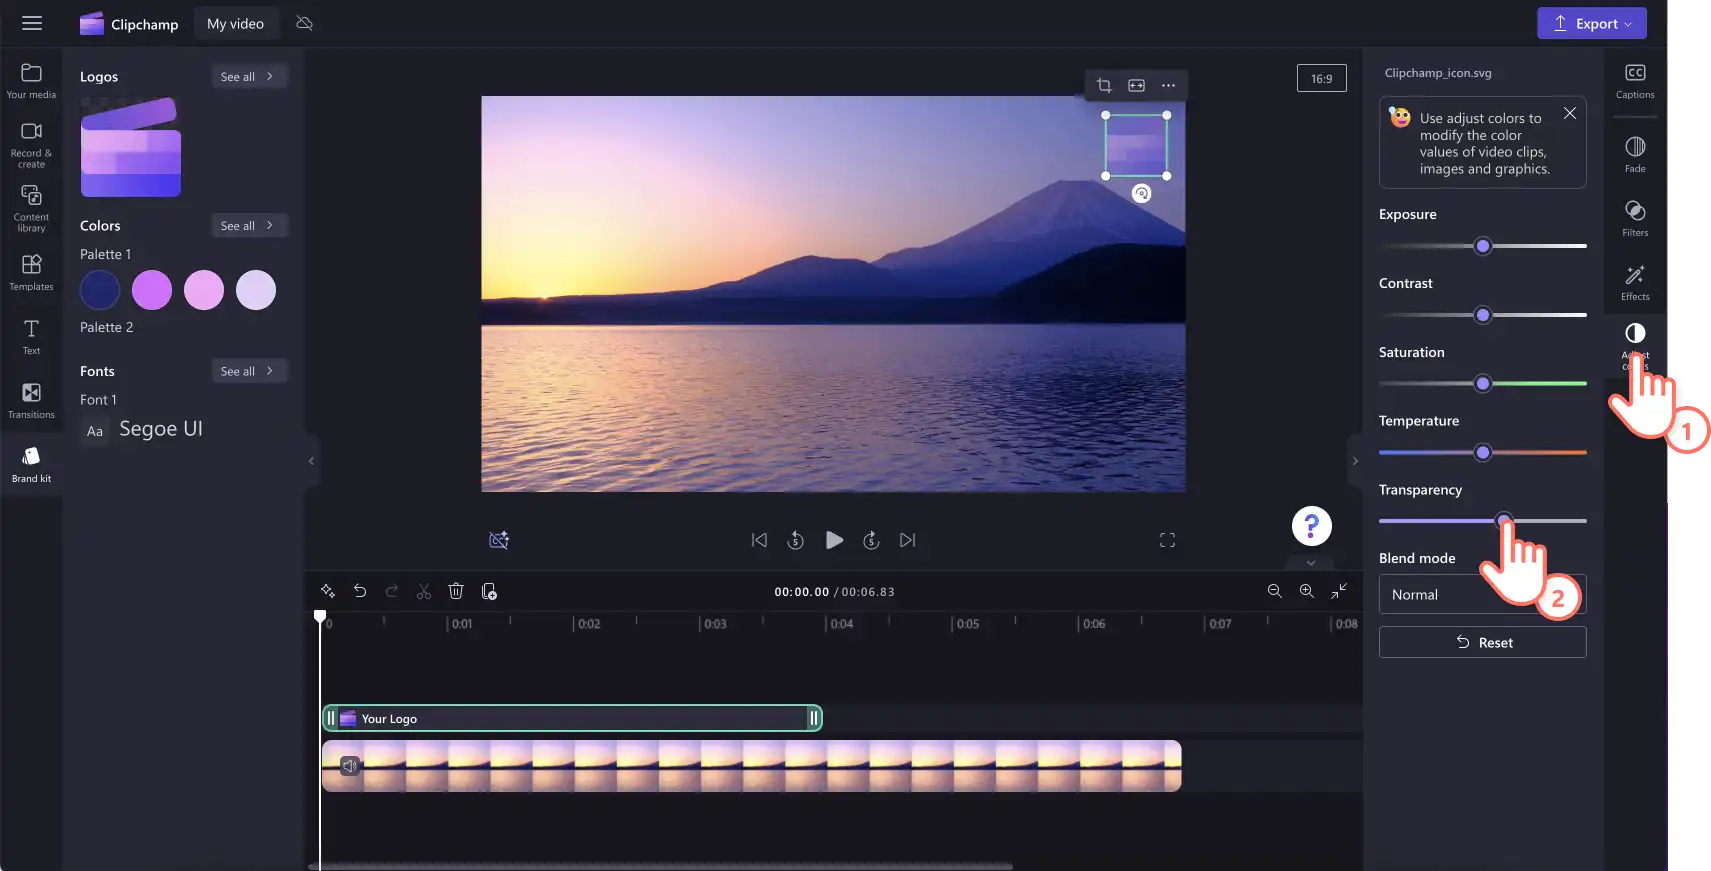
Next, to make your logo a watermark, use the transparency option inside the adjust colors tab on the property panel. Click on the adjust colors tab then drag the transparency slider to the right to increase the transparency.
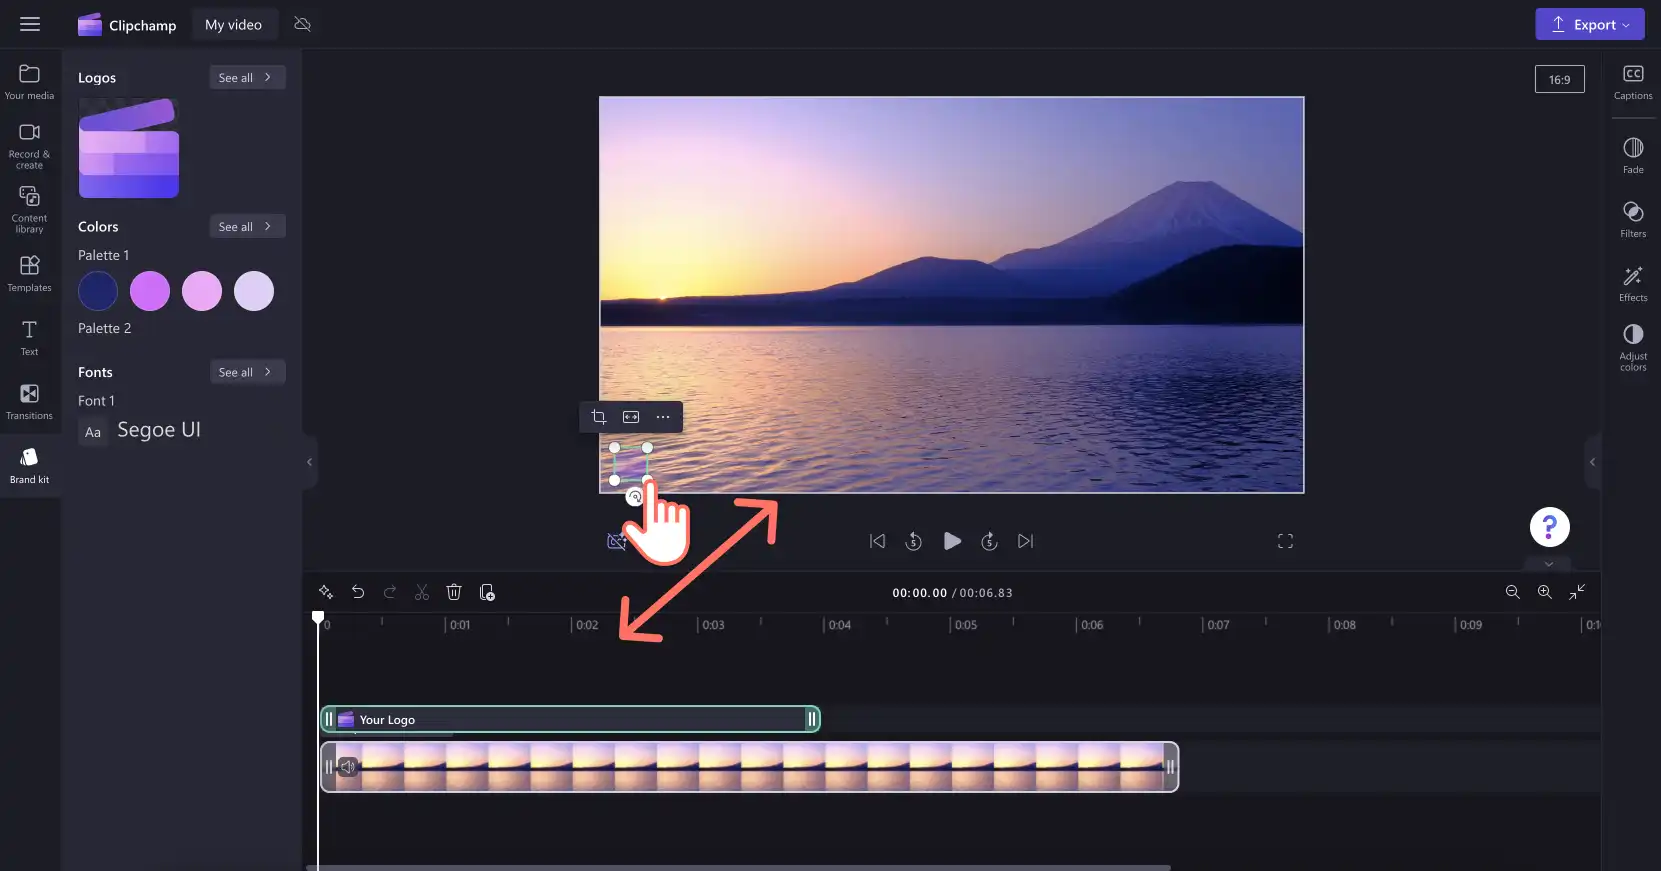
To edit the size and location of your logo by dragging in and out the corners to resize, or freely click to move the logo around the video preview screen.
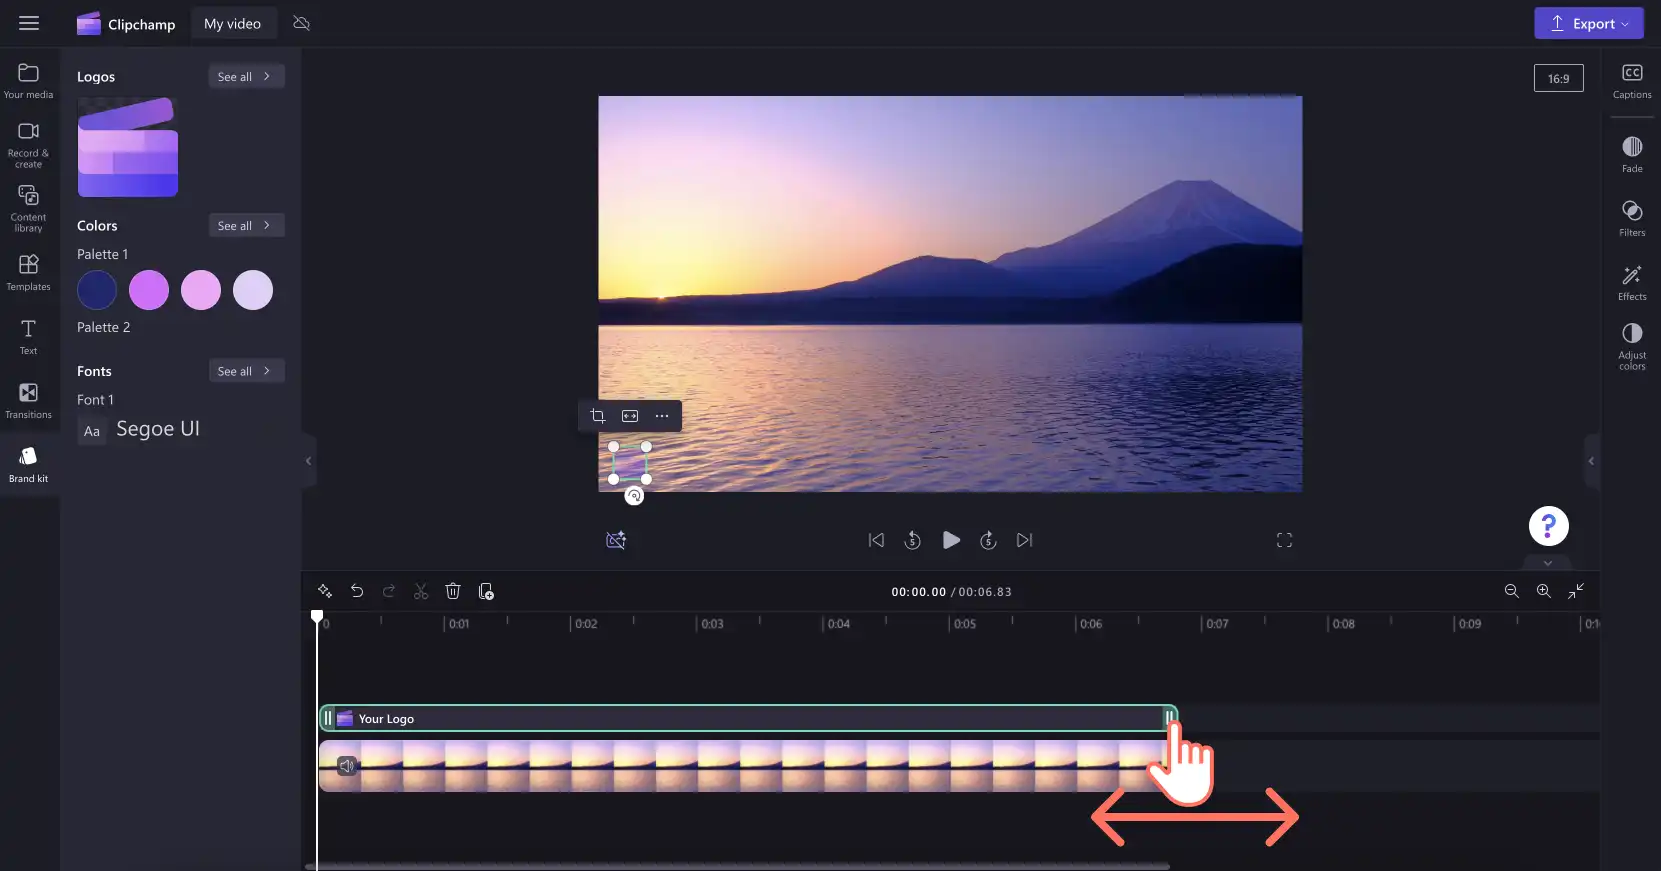
Don't forget to edit the duration of your logo to match the length of your video. Drag the green handles to the right to increase the length, or drag the green handle to the left of the timeline to decrease.
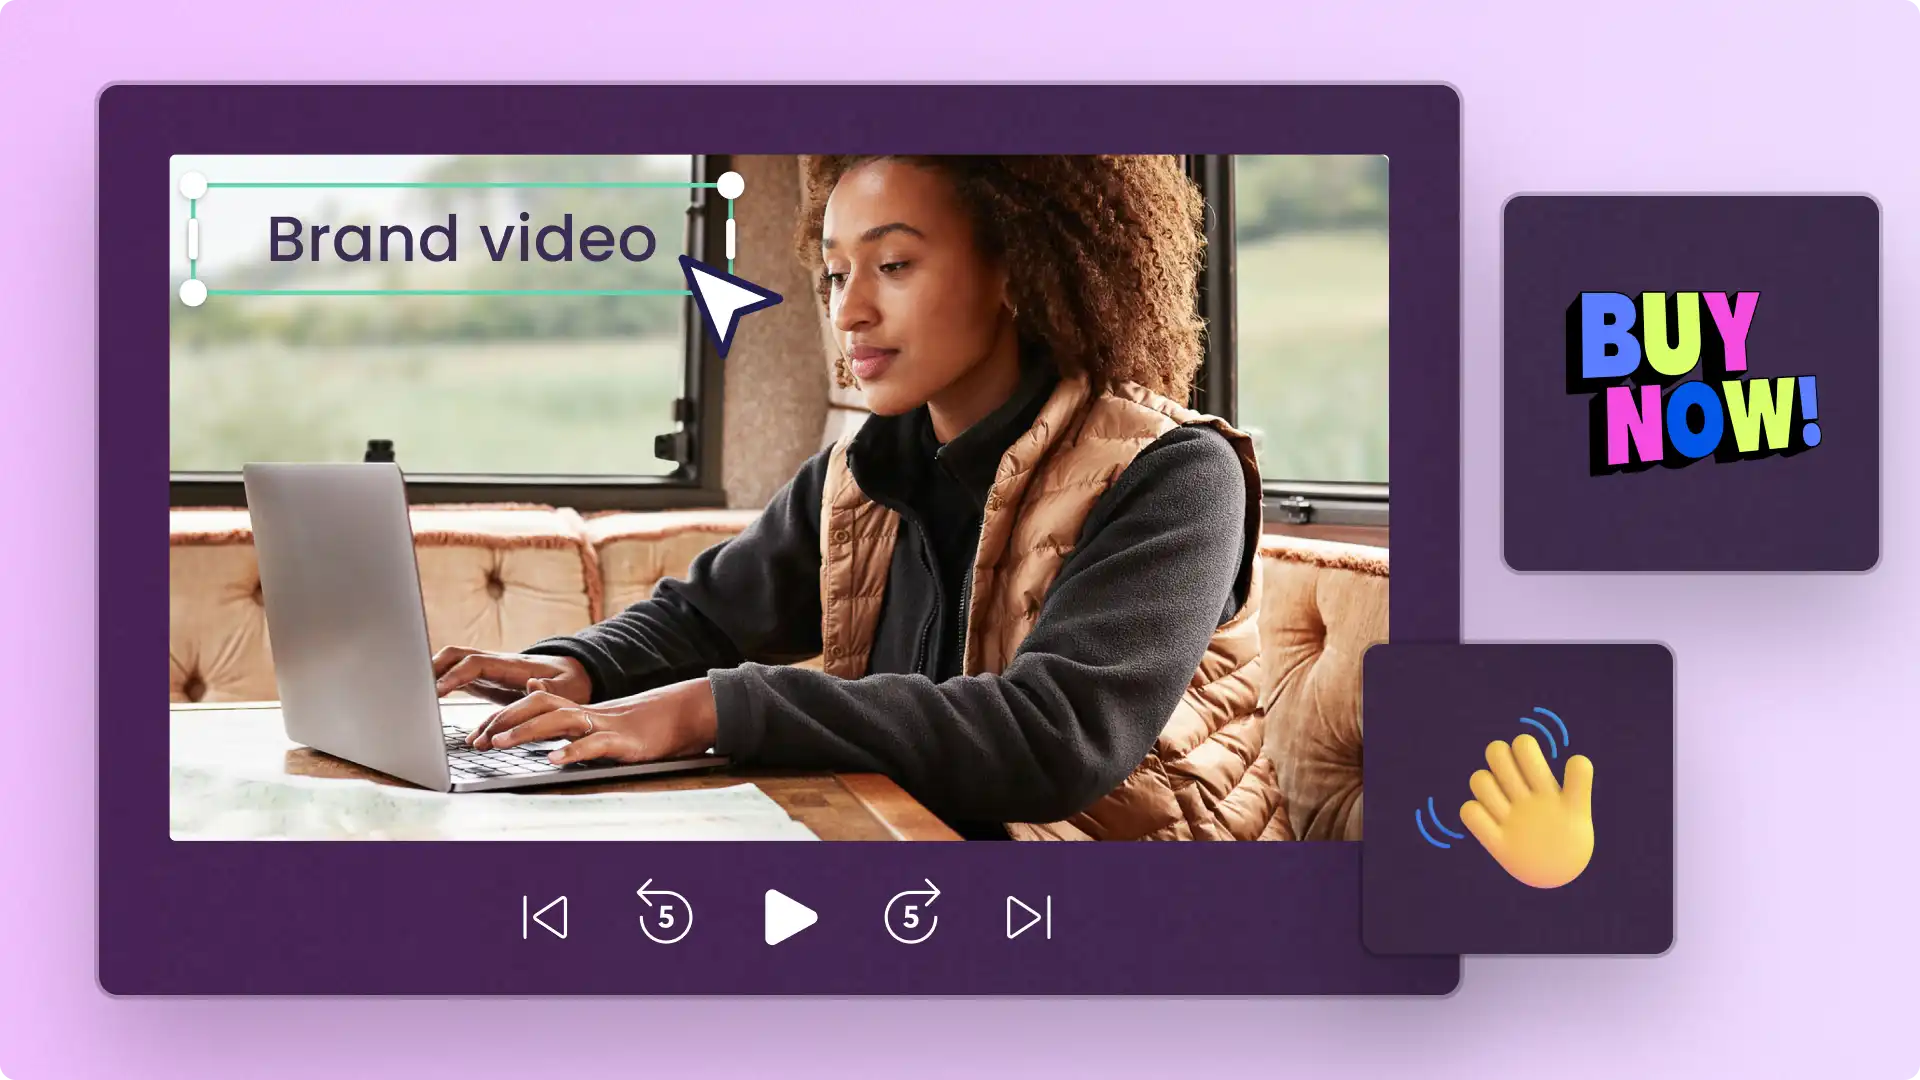
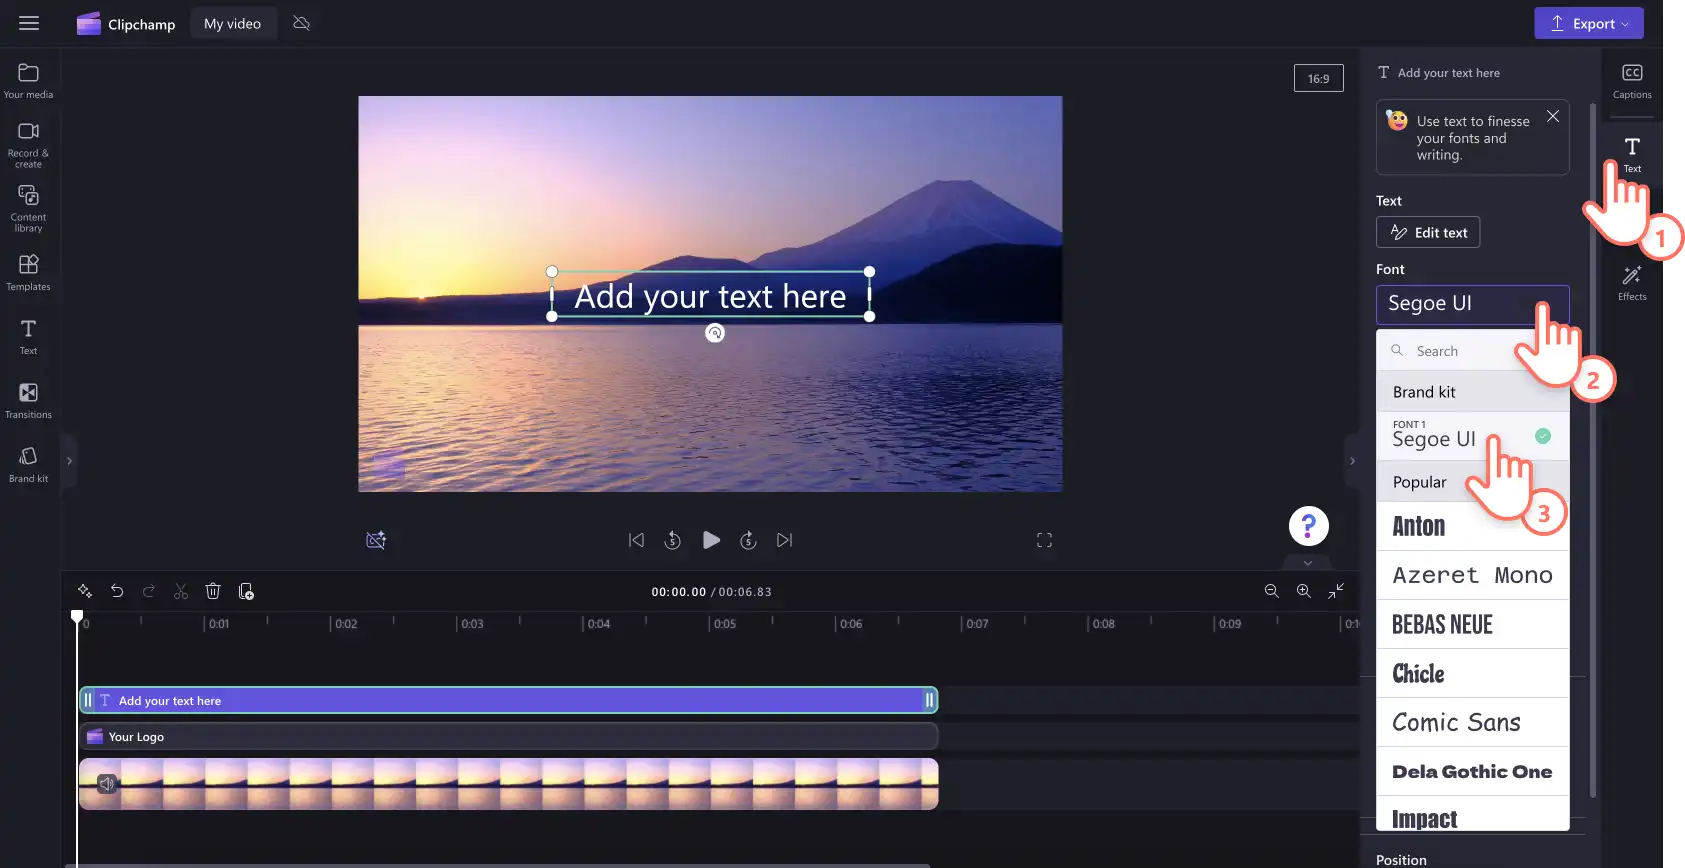
Step 3. Add personalized font to video
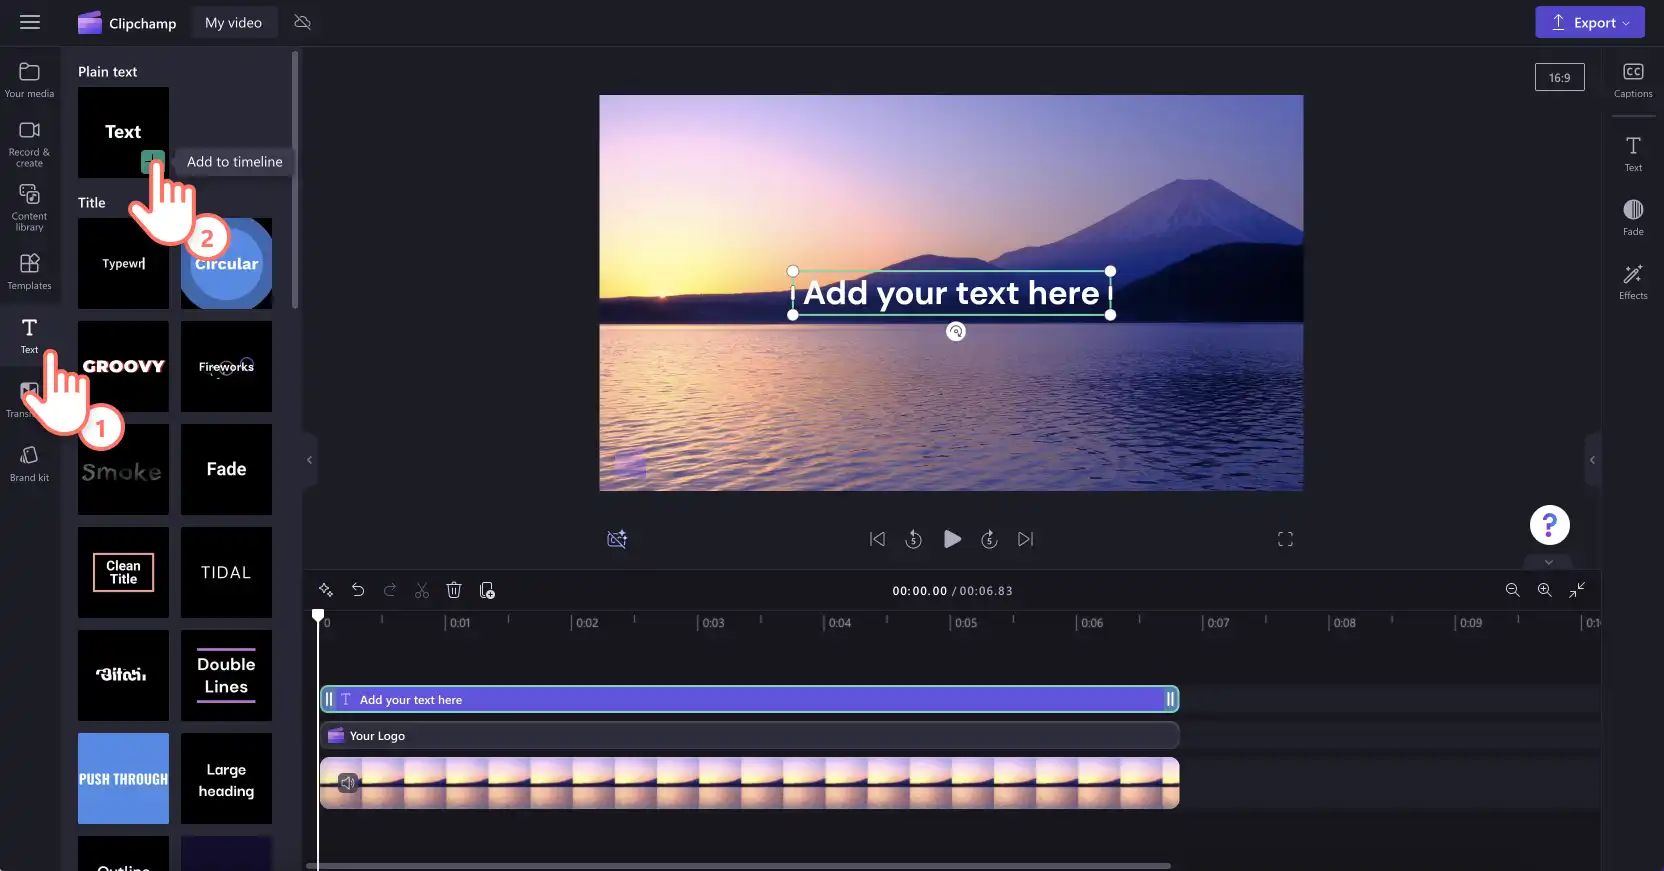
To use your customized font, just add a text animation to your video. Click on the text tab on the toolbar, then drag and drop a title onto the timeline.
To edit the font of your motion title, click on the text tab on the property panel, then click on the drop down arrow to select your brand kit font. Your brand kit font will be at the top of the fonts list.
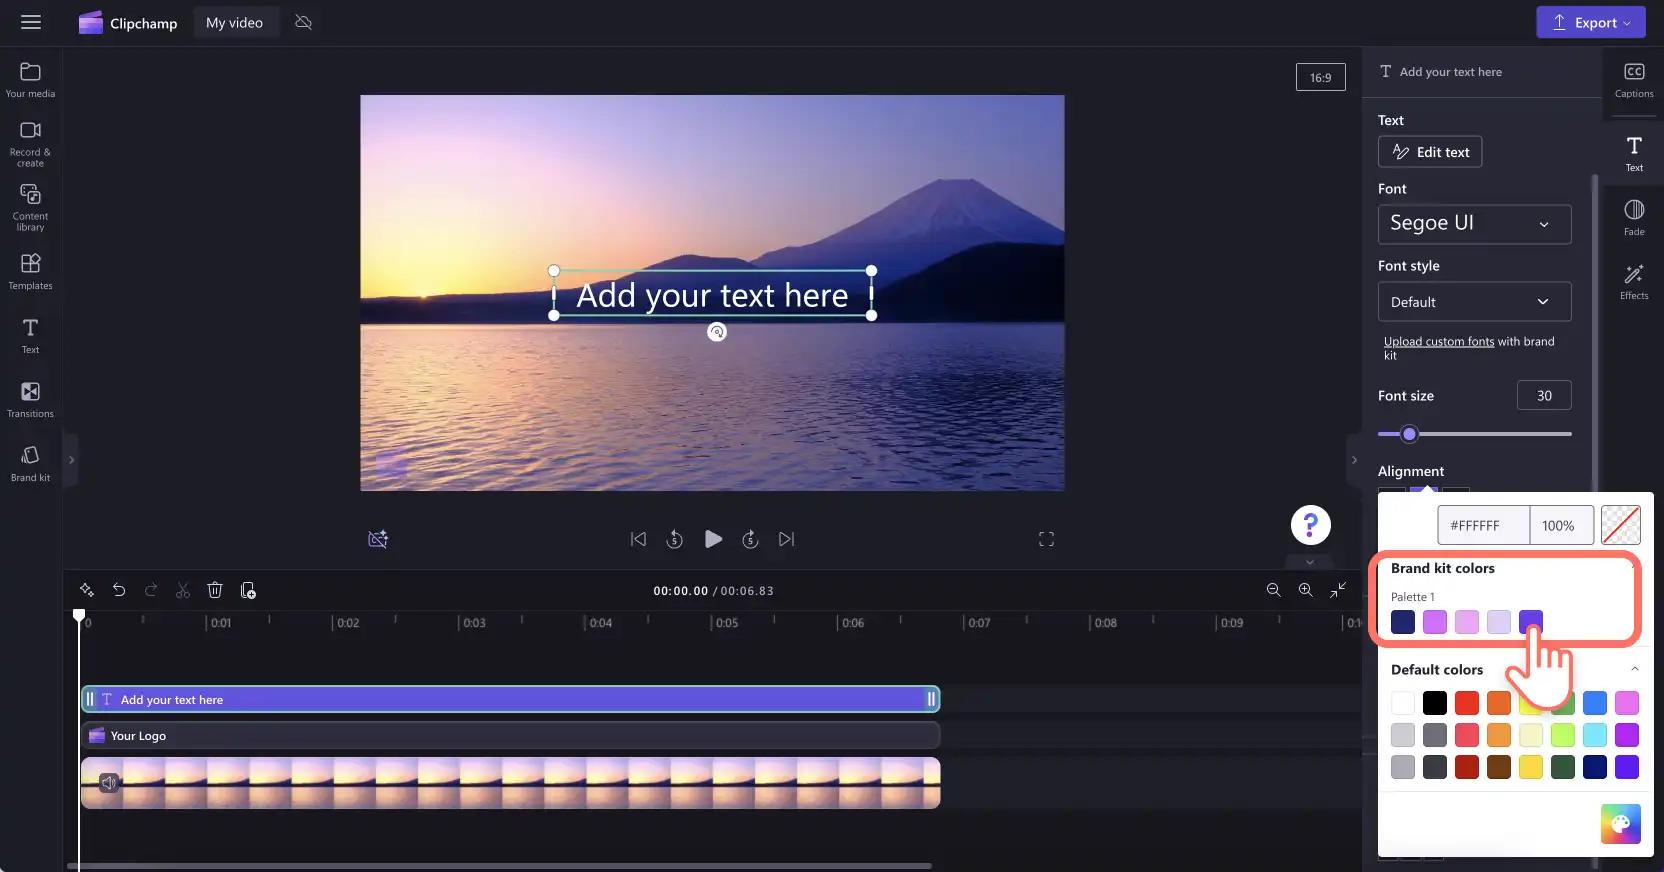
Step 4. Add brand colors to video
To change the color of your text with your brand color palette, click on the text tab on the property panel. Next, click on the color button.
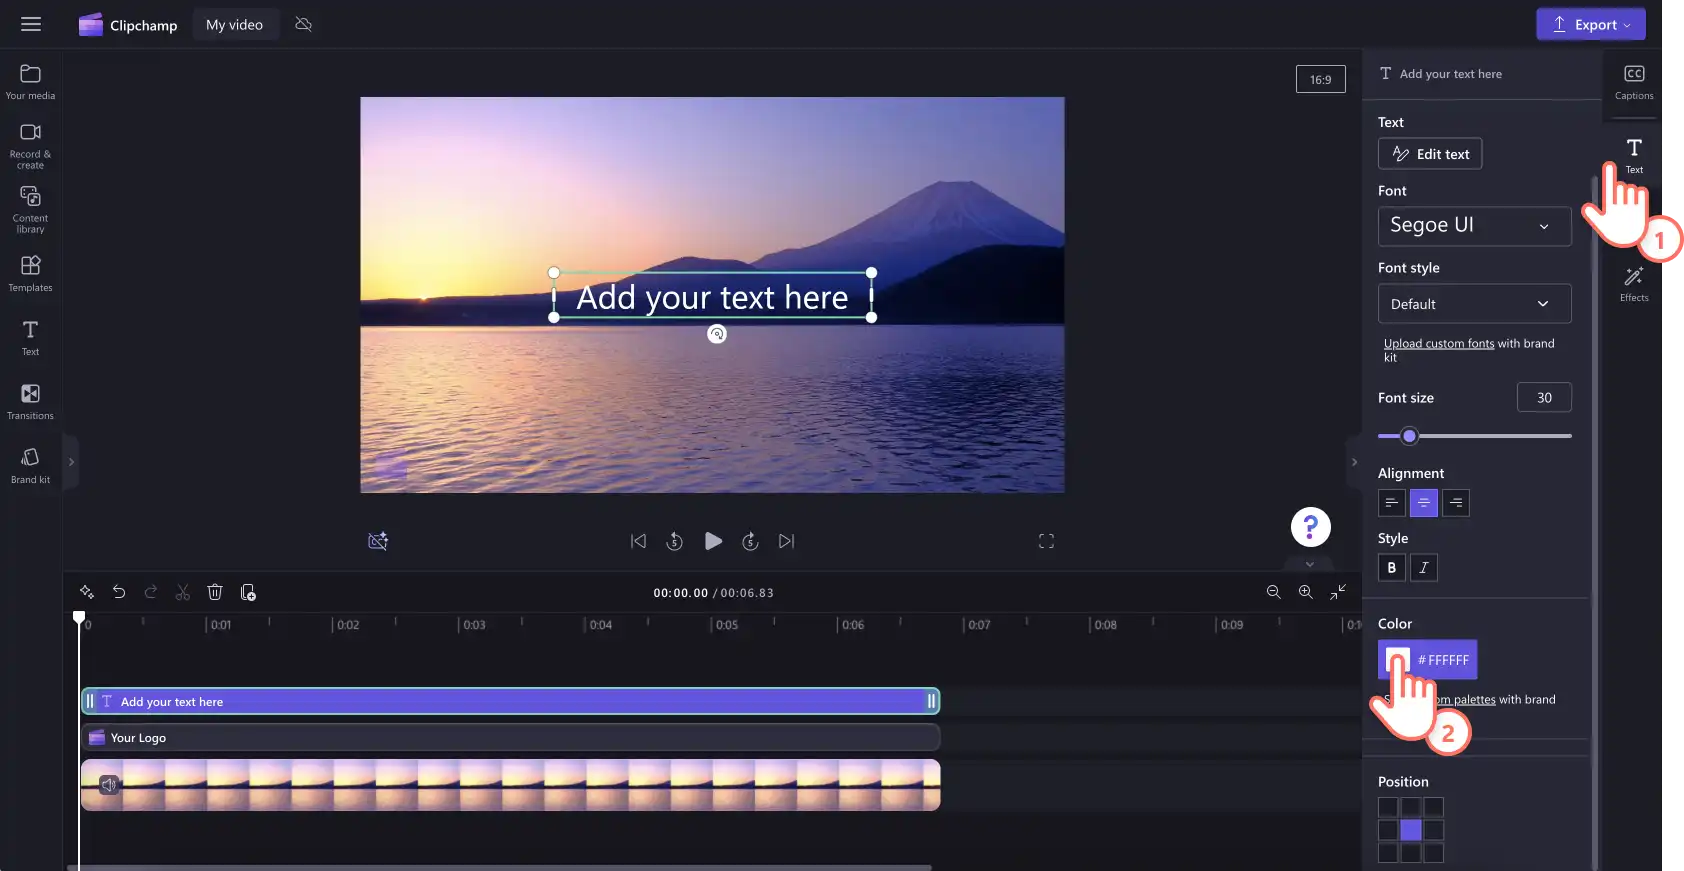
Inside the color options, select a color from the brand kit color palette. Your text will automatically change color to your selected brand kit color.
For more help, check out our help article.
Watch the brand kit tutorial on YouTube
7 reasons to add branding and logos to videos
Build brand recognition, follow brand guidelines, and make your promotional videos stand out on social media.
Make demo videos and explainer videos more professional and on-brand.
Generate trust and credibility on all video content by adding personalized branding.
Keep YouTube videos consistent and aesthetic with branded intros and outros.
Encourage viewers to take the next step in marketing videos by adding logos and strong CTA text.
Make slideshow videos and podcasts identifiable and consistent using branded font and colors.
Ensure your LinkedIn videos are always driving brand awareness and lead generation when your content is reshared.
Easily create consistent and recognisable videos for your brand with the help of the brand kit. For more ways to elevate your video content, check out audio editing hacks.
Start editing today with Clipchamp for free or download the Clipchamp Windows app.
Frequently asked questions
- Is the brand kit free in Clipchamp?
The brand kit feature is exclusive to paid Clipchamp subscribers. Free Clipchamp users can still add logos to videos, but they will be required to import a PNG or JPEG image to the media tab, then use the background removal tool to remove any white logo backgrounds.
- Can I add multiple logos to my brand kit?
Yes! Easily upload unlimited assets to the brand kit if you have multiple different branding options. We recommend to only use one style of logo throughout a single video.
- How do I add a logo to an entire video?
To add a logo to video, drag and drop the logo asset onto the timeline. Make the duration the same as the video duration by dragging the green handles. Don't forget to edit the transparency to make your logo a watermark.
- What is the difference between brand kit and brand guidelines?
A brand kit and brand guidelines are both very important when creating video content. The brand kit is a collection of all of your branding assets in the one place ready to use in videos. Whereas brand guidelines are a set of instructions and rules creators should follow when creating branded content.
Heads up! The screenshots in this article are from Clipchamp for work accounts and the same principles apply to Clipchamp for school accounts. Clipchamp personal account tutorials may differ. Learn more.