On this page
Give your videos a personal touch, get the credit your deserve, and make your content more recognizable by adding a watermark to video.
Whether you're creating YouTube videos, promo and demo videos, or tutorials for the workplace, watermarks can be the perfect addition to any video. You can turn your logo into a watermark, or even use a stock graphic asset or text.
Read on to learn how to add a watermark to video for free with Clipchamp.
How to add a watermark to video for free
There are many different ways you can add a watermark to video inside the video editor. Either use your stored logo inside the brand kit, import a personal image or logo, use stock media like stickers, or create a watermark using text and titles.
Step 1. Import a video or select stock footage
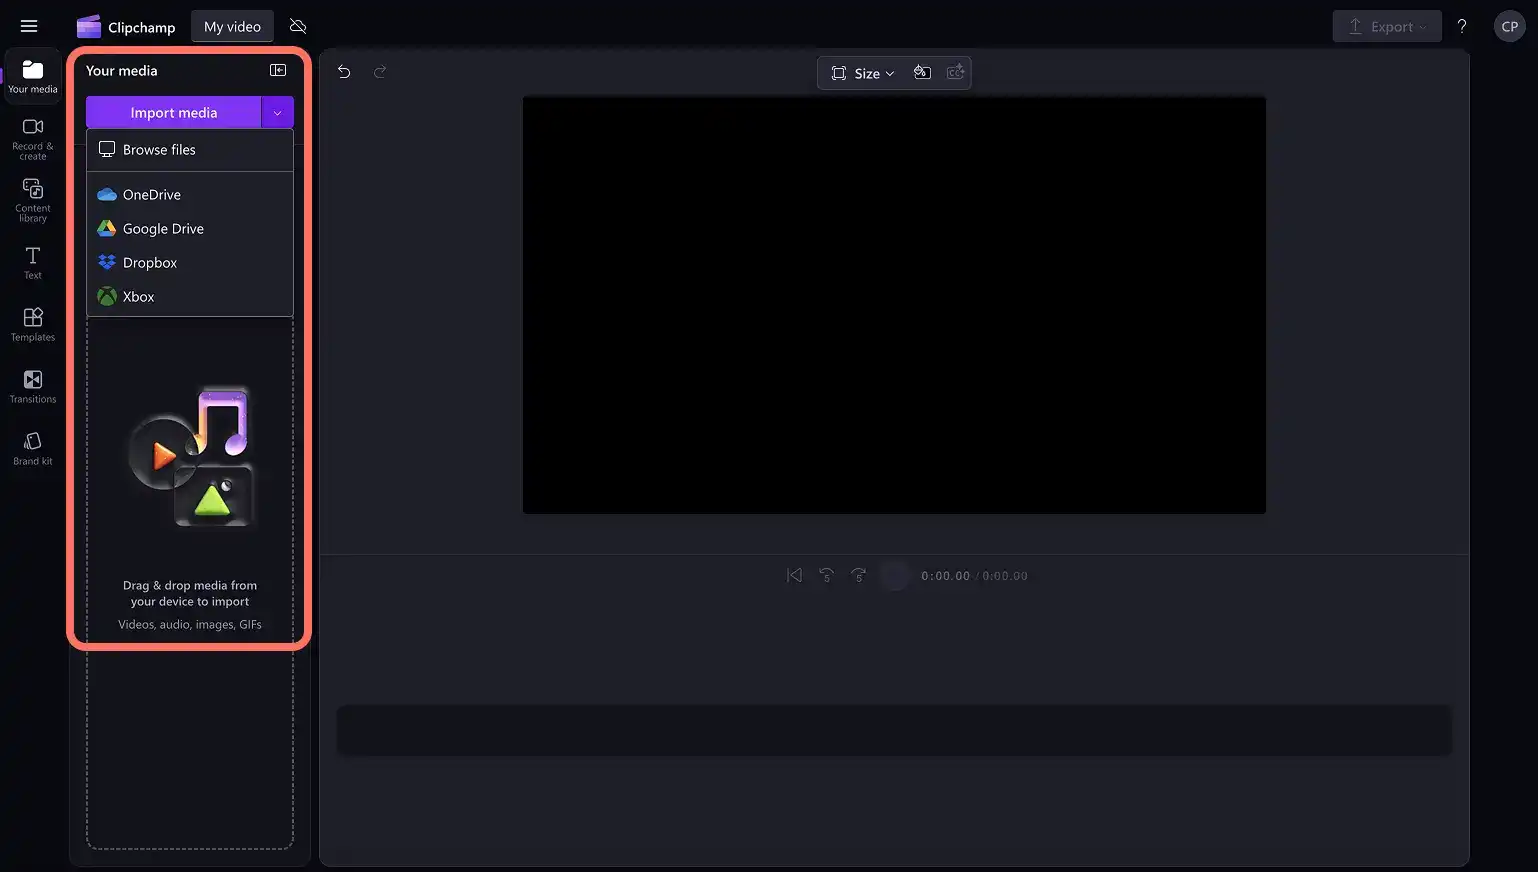
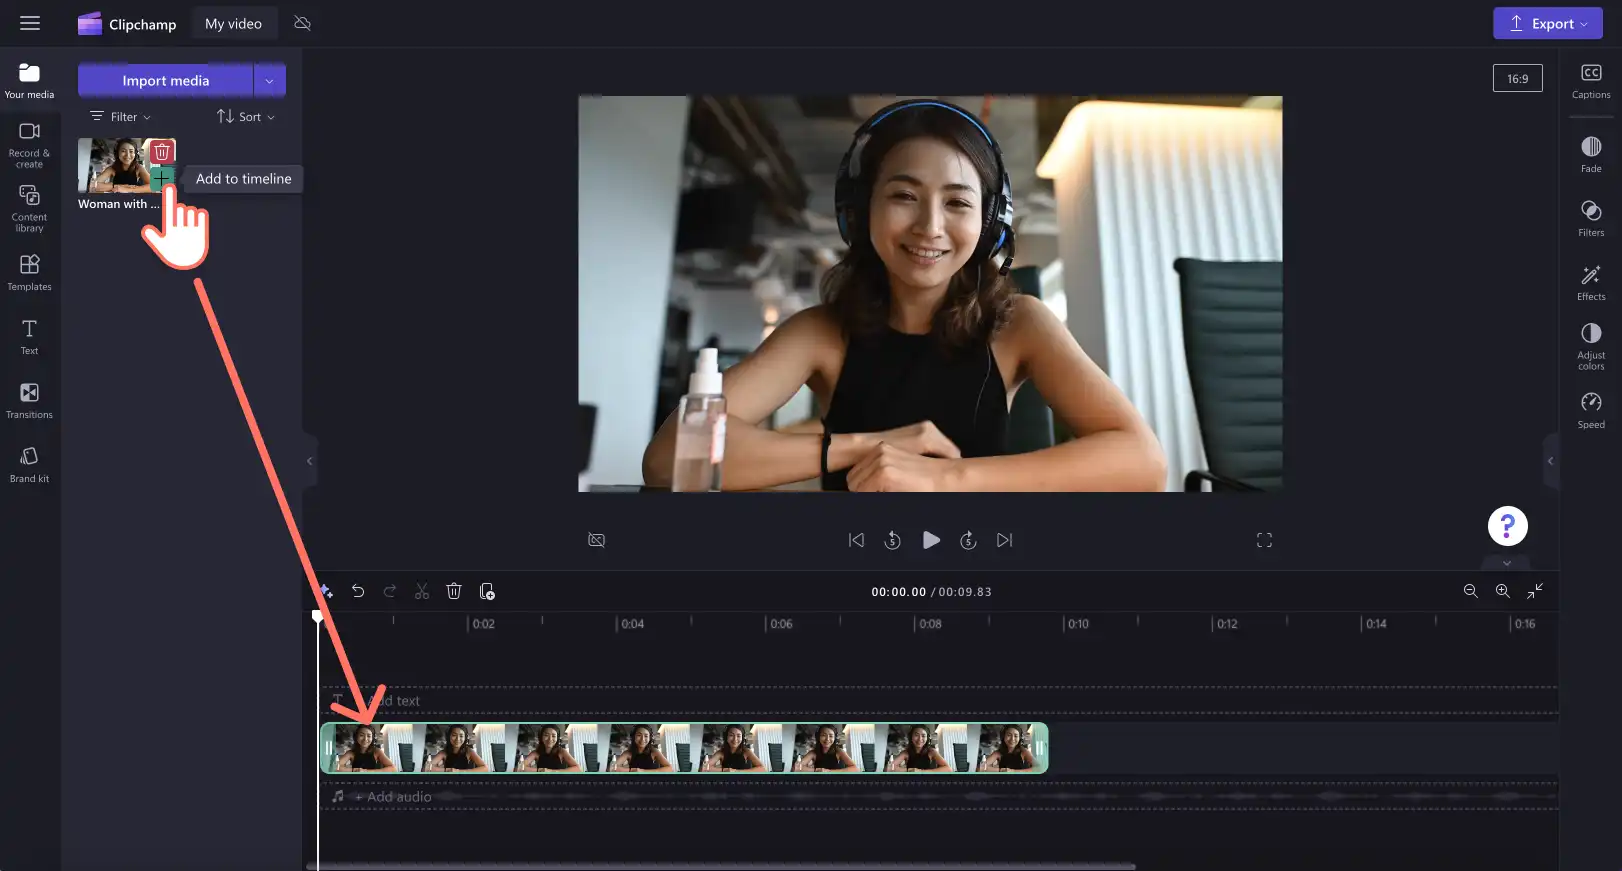
To import your own videos, images, or graphics click on the import media button in the your media tab on the toolbar to browse your computer files, or connect your OneDrive.
If you would like to use stock media, click on the content library tab on the toolbar, then select a stock video asset.
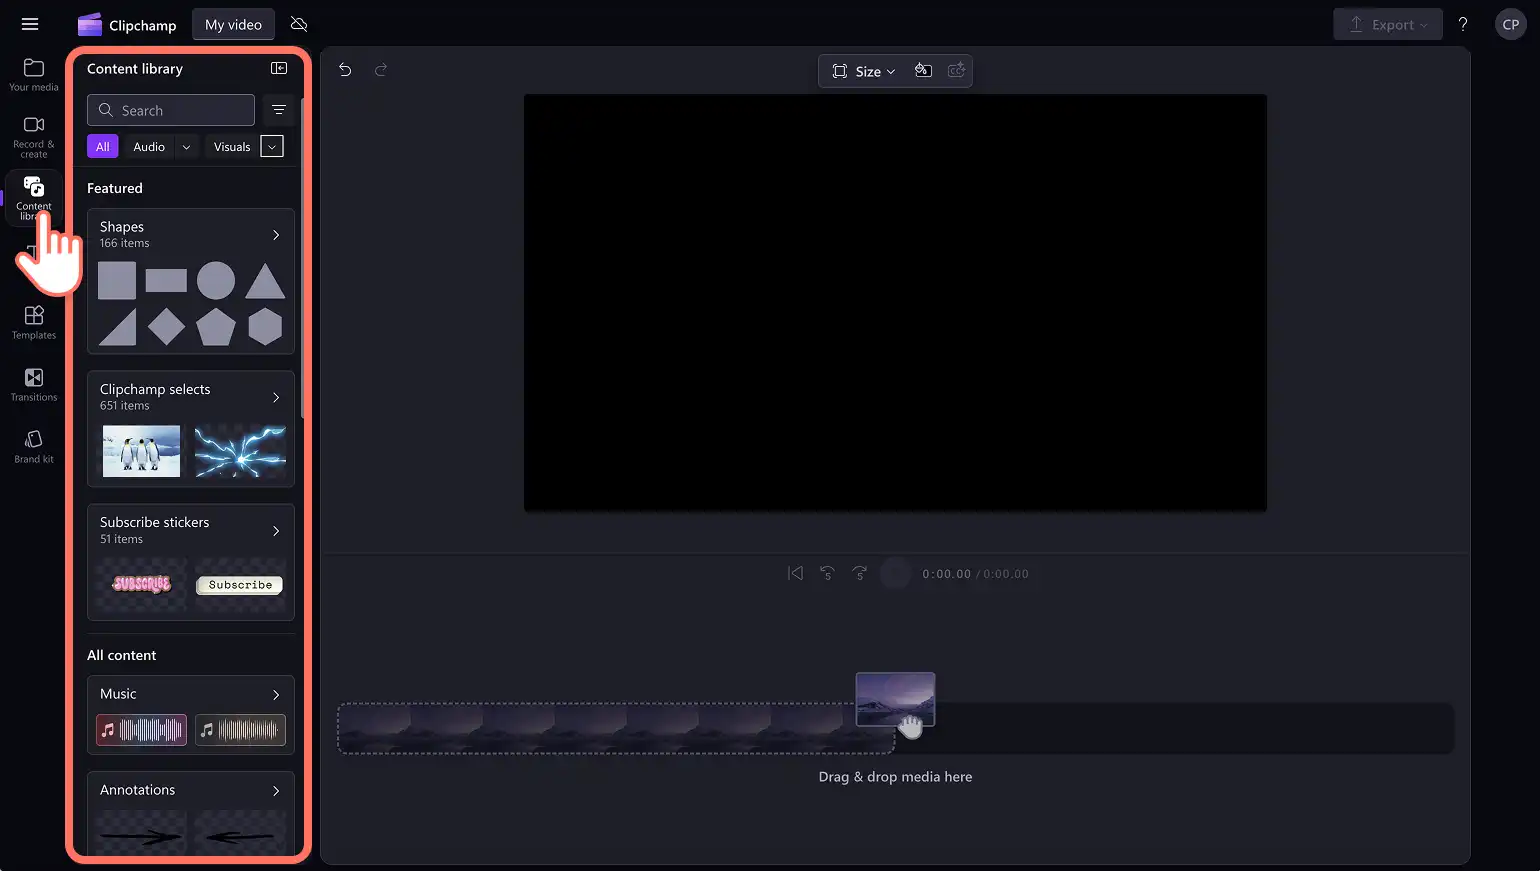
Drag and drop your video or image asset onto the timeline to begin.
Step 2. Add a watermark to video
Adding a text watermark to video
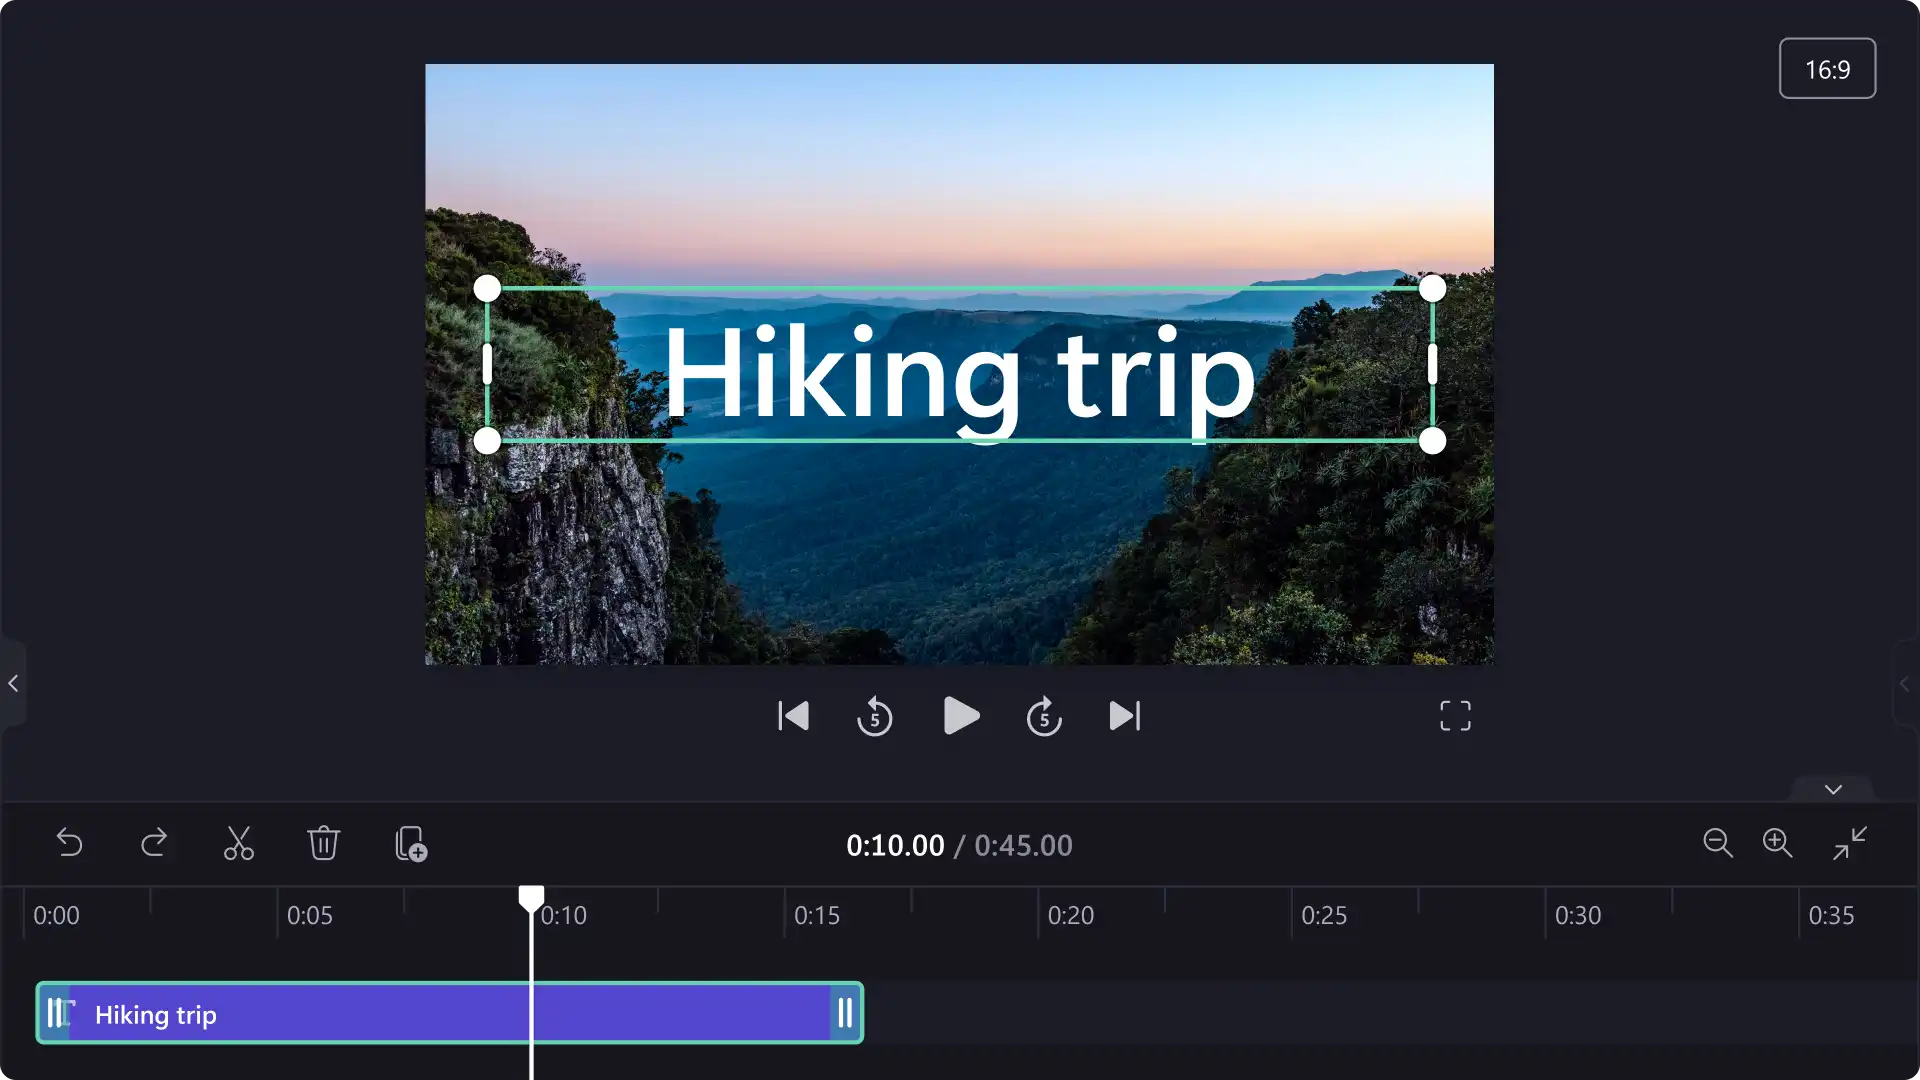
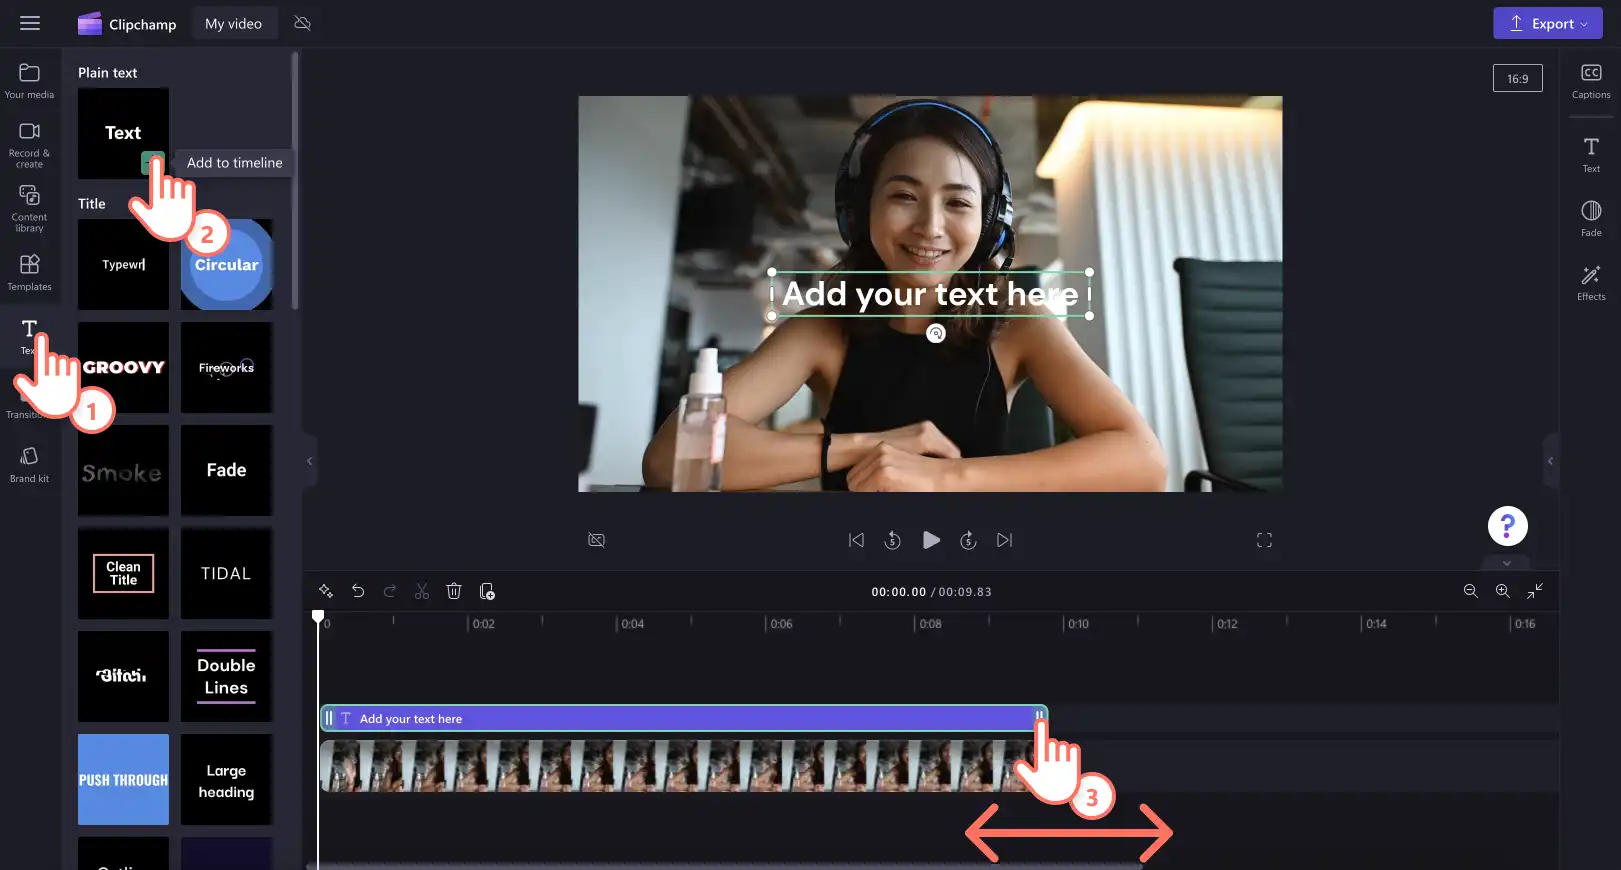
Click on the text tab on the toolbar, then drag and drop the plain text option onto the timeline above your video preview. Make sure to adjust the length of your text to match your video duration using the handles.
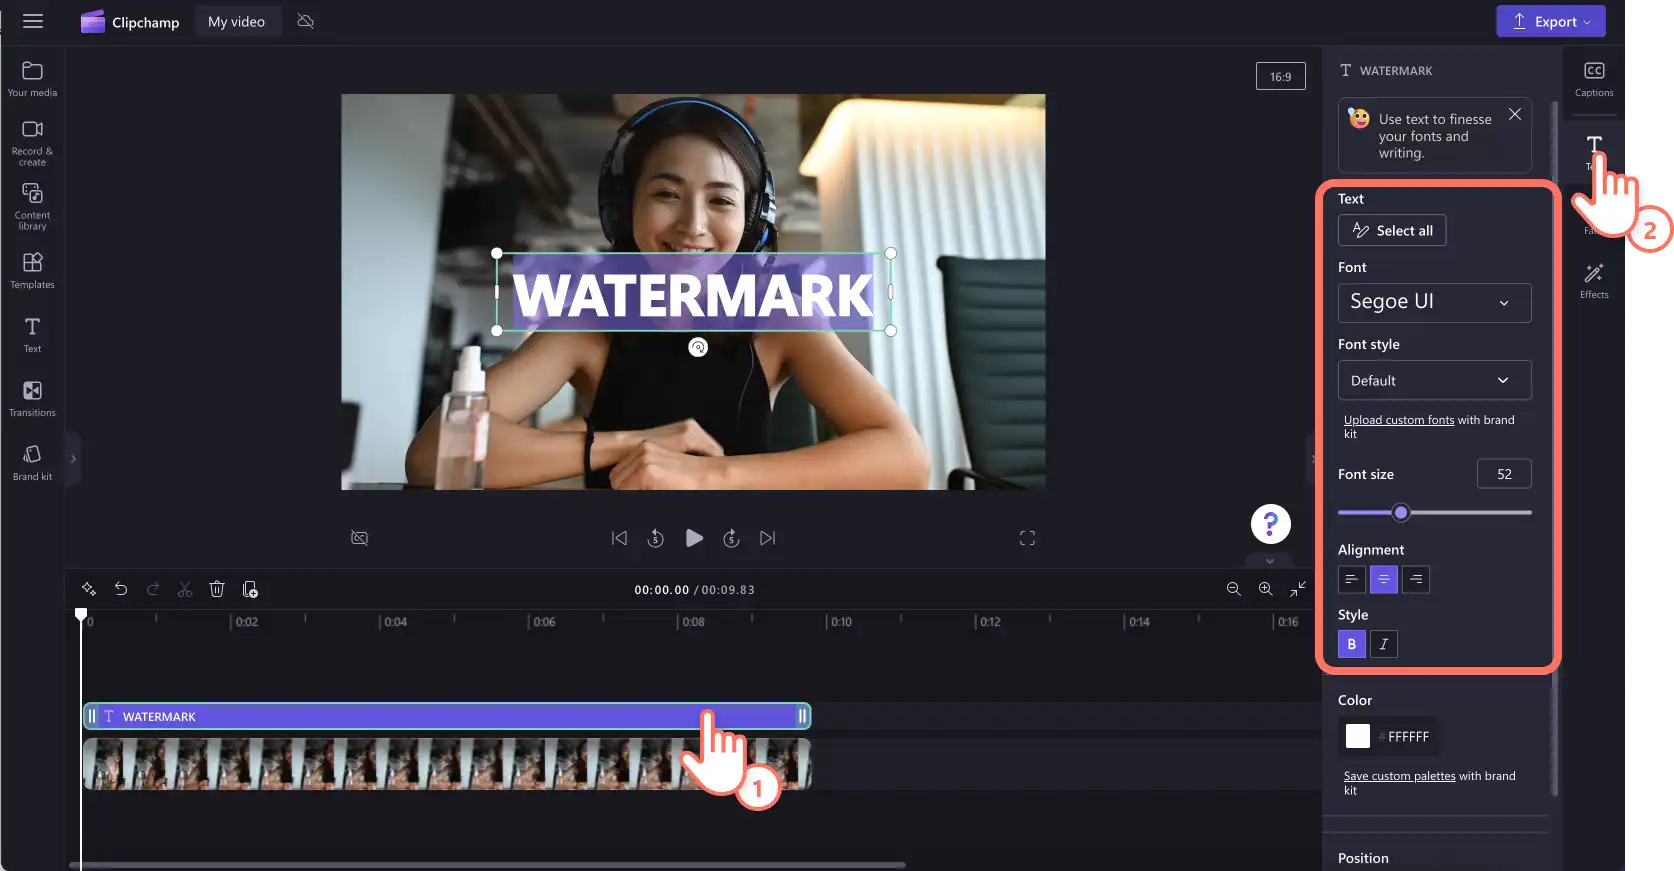
To make your text a watermark, you'll need to customize the text first. To do this, click on the text tab on the property panel, then adjust the text in the edit text option. Once your text has been edited, select different fonts, sizes, positions, and more.
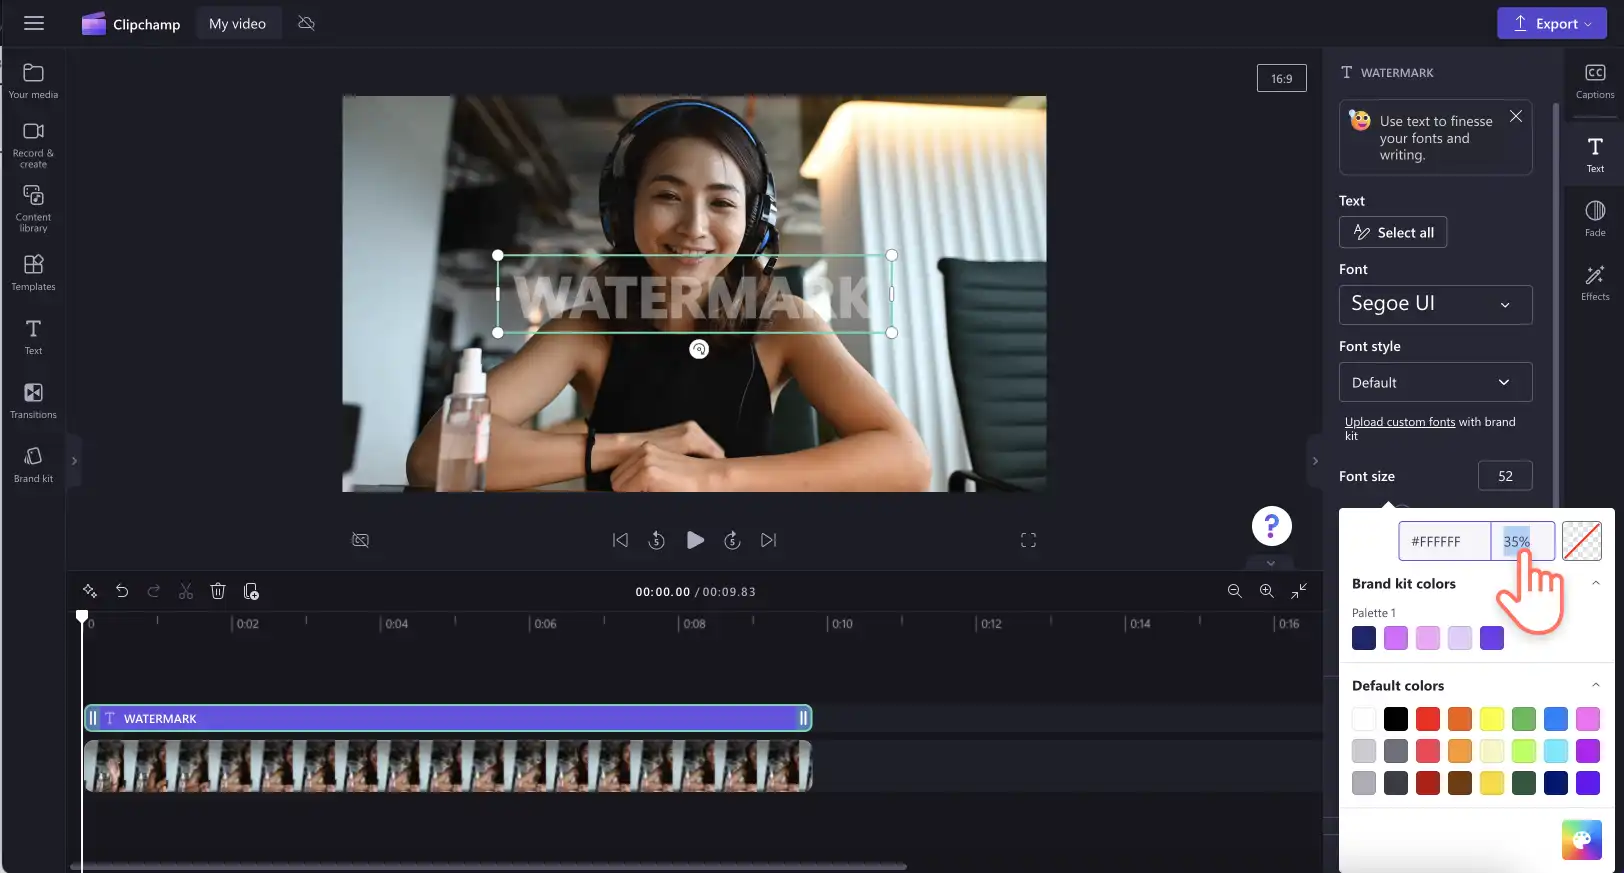
Now, edit the color and transparency of your watermark text. Click on the color button then select a new color or keep the default white color. Next, reduce the percentage or transparency slider on the color palette to make your watermark see through.
Adding a logo watermark to video
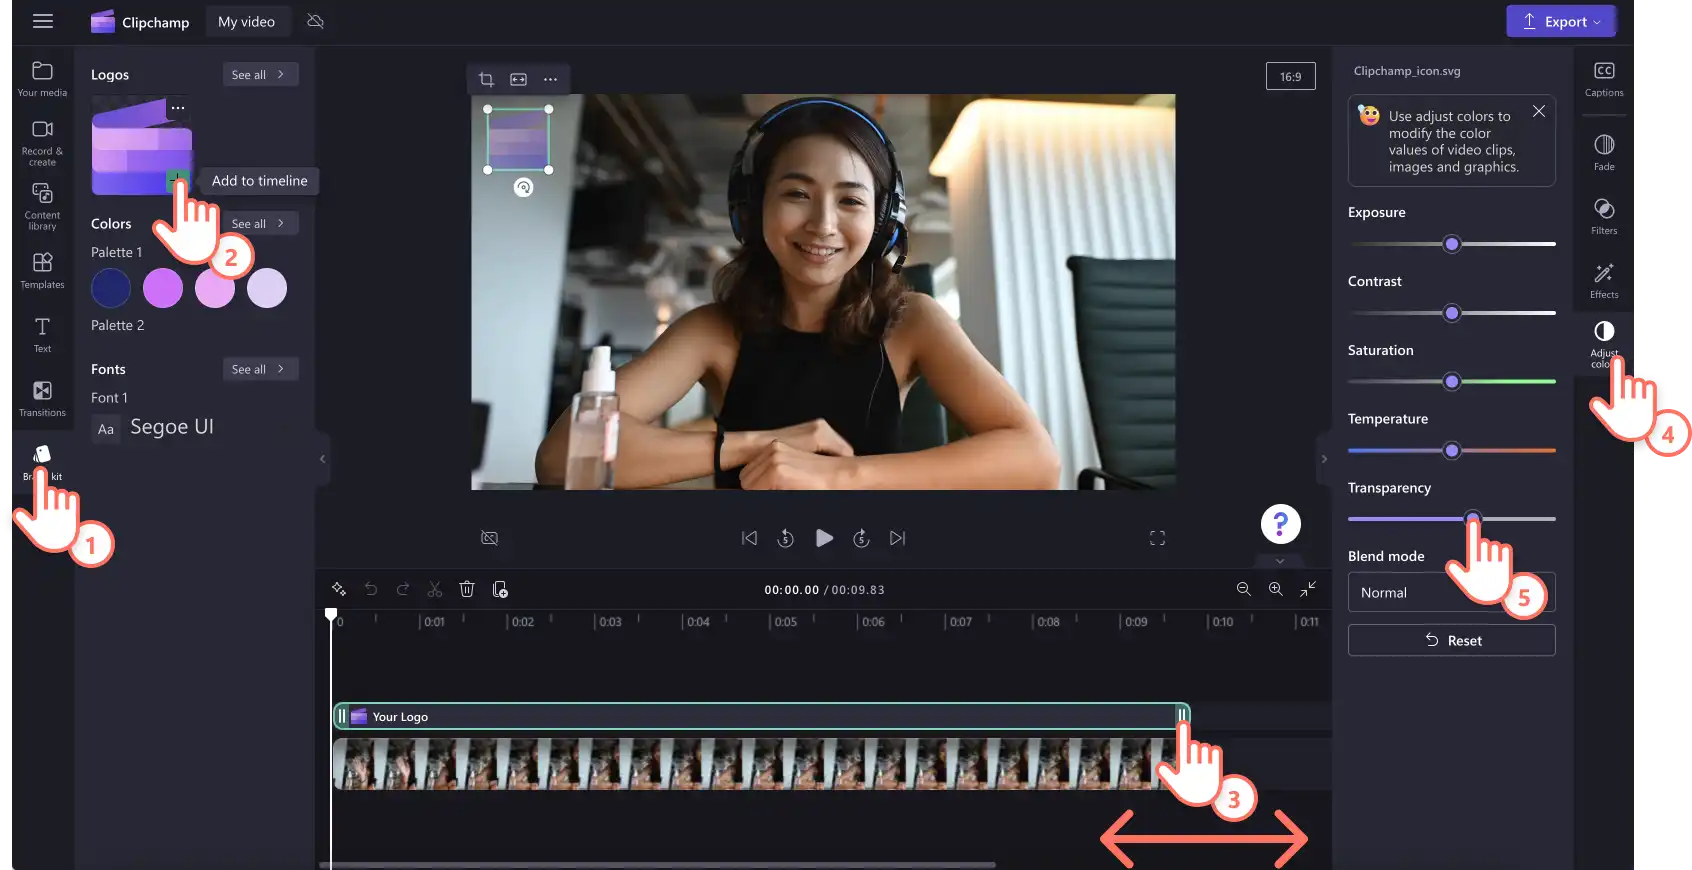
Click on the brand kit tab or import a PNG or JPEG image of your logo with a transparent background. Drag and drop your logo onto the timeline above your video. Make sure to adjust the length of your image asset to match your video duration using the green handles. Next, click on the adjust colors tab on the property panel, then use the transparency slider to make your logo a watermark. For more help, take a look at our YouTube tutorial.
Adding a stock sticker watermark to video
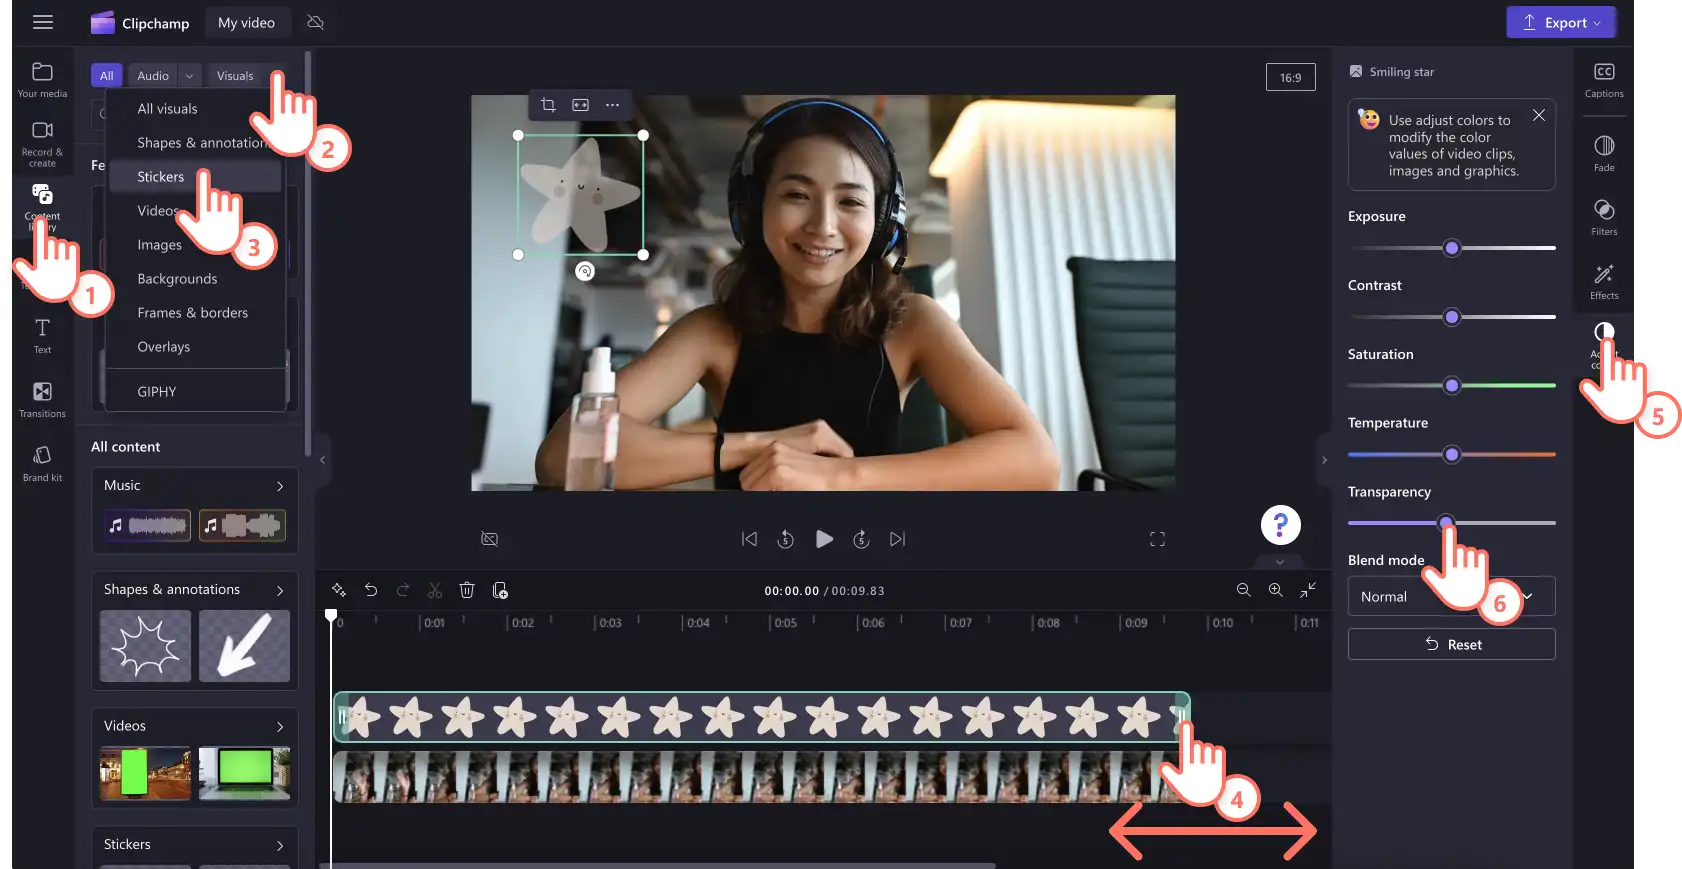
click on the content library tab on the toolbar, then click on the drop down arrow, then choose stickers. Here, you can browse through potential watermark options for your video like cartoons, numbers, floral, words, and more. Drag and drop a sticker onto the timeline above your video. Make sure to adjust the length of your sticker to match your video duration using the green handles. Next, click on the adjust colors tab on the toolbar, then use the transparency slider to make your sticker a watermark.
Step 3. Preview and save your watermark video
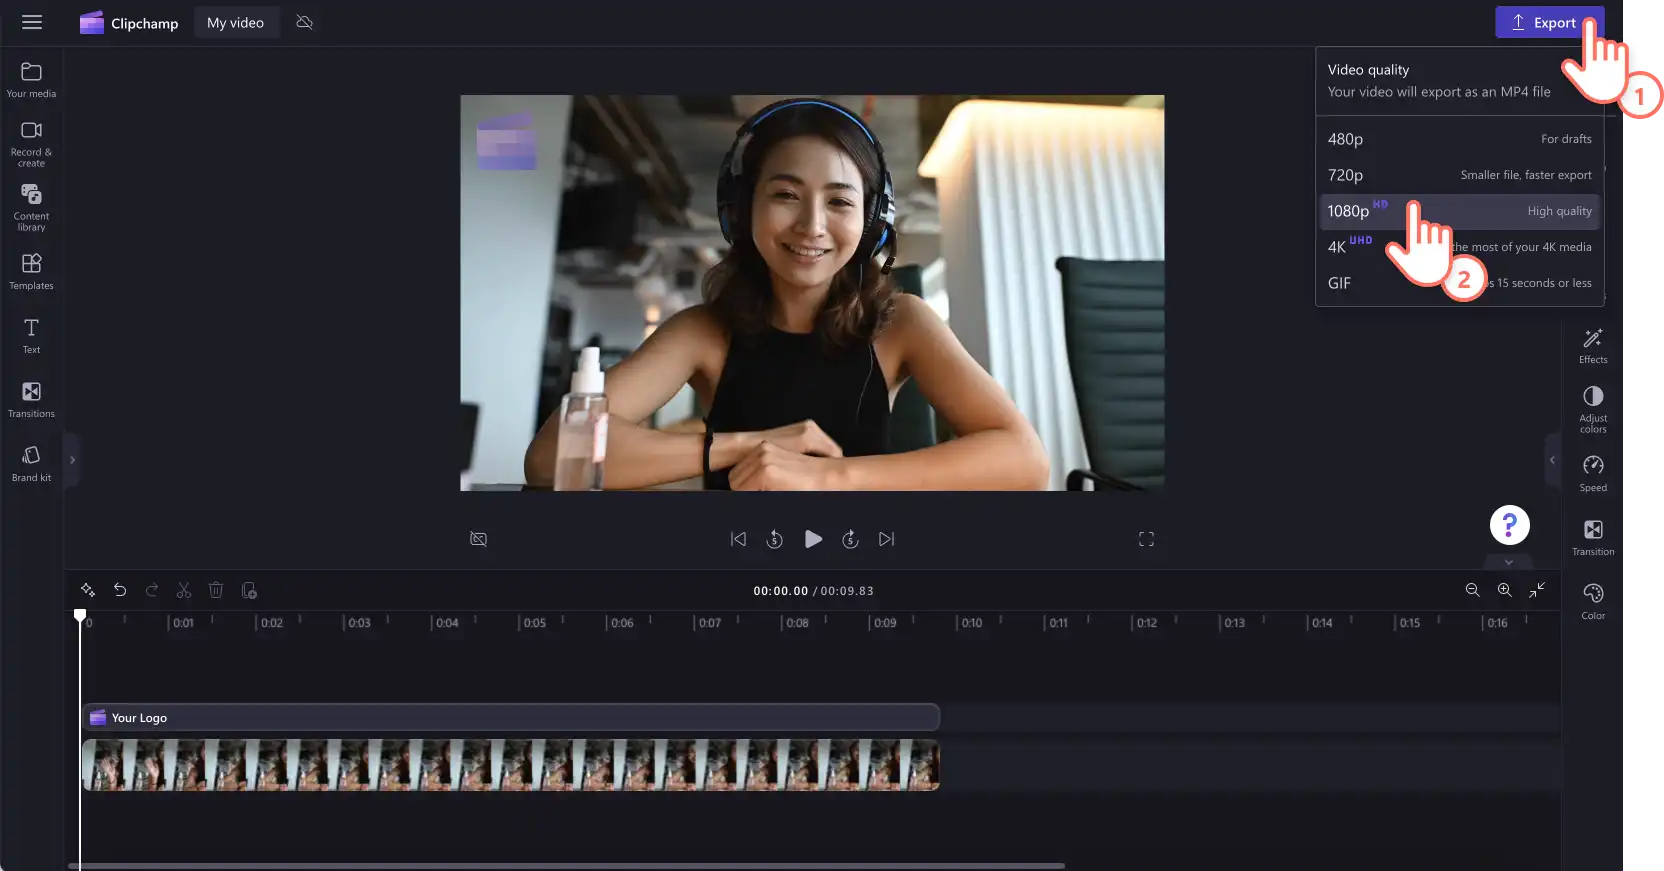
Before saving your new video with a watermark, make sure to preview by clicking on the play button. When you’re ready to save, click on the export button and select a video resolution. Your video will automatically start exporting.
For more help, take a look at our YouTube tutorial.
5 reasons to add watermarks to videos
Protect videos against unauthorized use by making it more difficult for other creators to claim ownership or pass off content as their own using text watermarks.
Display your branding to make your promotional videos easier to identify on social media by adding logo watermarks .
Create a clear identifier that your video belongs to you or your brand with transparent logo watermarks.
Generate brand awareness and recognition by adding a watermark to video so viewers are more likely to remember your content.
Help maintain integrity when other brands or viewers embed your videos on their own platforms with text and logo watermarks.
Watch the watermark to video tutorial
Frequently asked questions
How do I create my own watermark?
Create your own free watermark using logos, stickers, or text online with Clipchamp video editor.
How do I make a transparent watermark for free?
All you have to do is adjust the transparency of your watermark using Clipchamp watermark maker to create your watermark transparent for free.
How to add watermark to a YouTube video?
We recommend editing your YouTube videos with our YouTube video maker to easily add watermarks for free.
Find more ways to elevate your videos by enhancing the video quality.
Start adding watermarks for videos today with Clipchamp for free or download the Clipchamp Windows app to get started.
Heads up! The screenshots in this article are from Clipchamp for work accounts and the same principles apply to Clipchamp for school accounts. Clipchamp personal account tutorials may differ. Learn more.