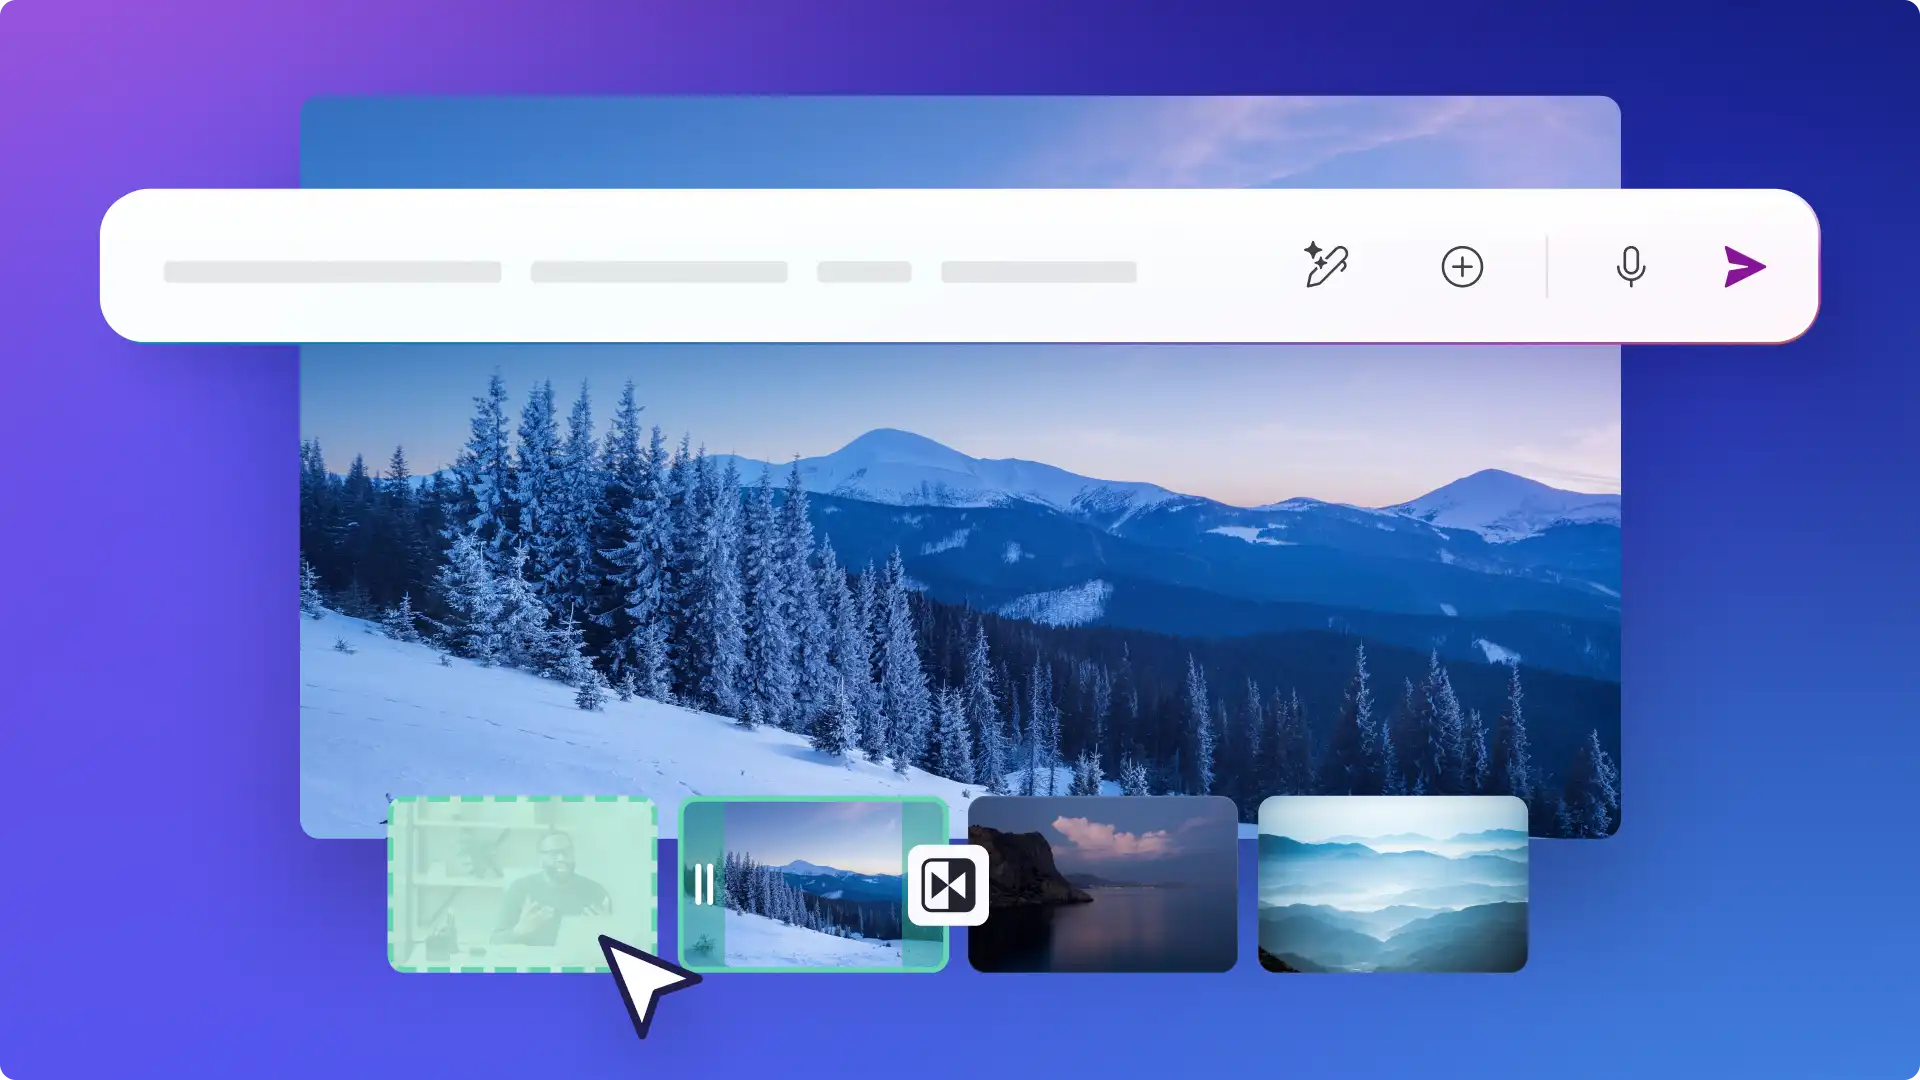
Bring your photos to life by creating videos that can be shared with family, friends and followers to enjoy. Tell stories by combining personal photos and clips from Microsoft Photos into eye-catching videos using the easy Microsoft Clipchamp Windows app.
Quickly create birthday videos, travel highlight videos, or an engaging daily vlog, with this helpful integration available inside Windows 11 to empower your creativity. Learn three simply ways to start making a video with Photos and Clipchamp—no editing experience required.
How to make a video with the Photos app
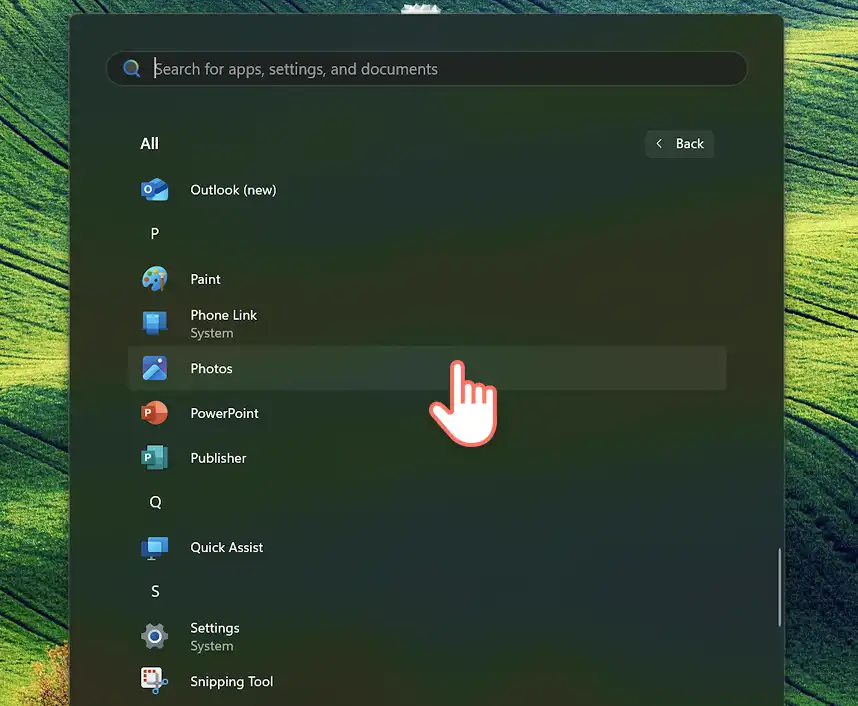
Step 1. Open the Photos app
Select the Windows Start button and choose Photos to launch the app.
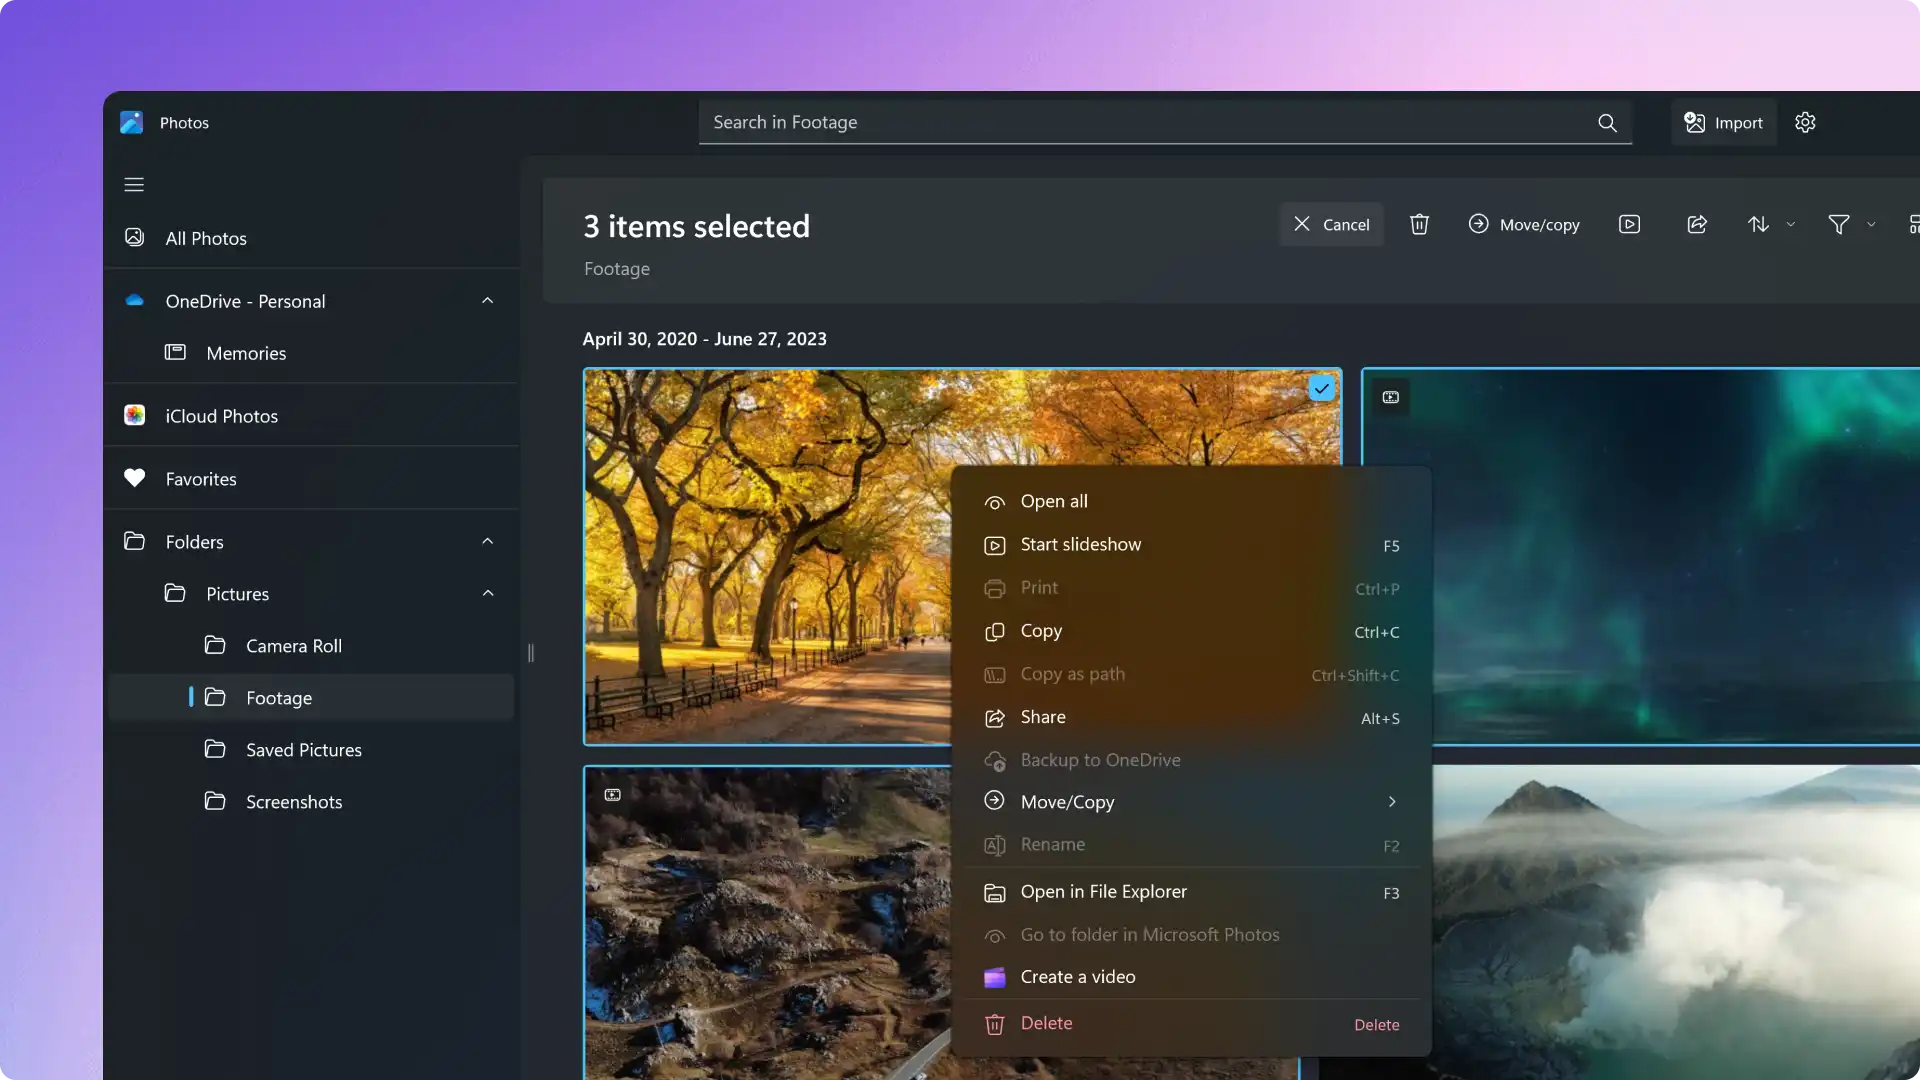
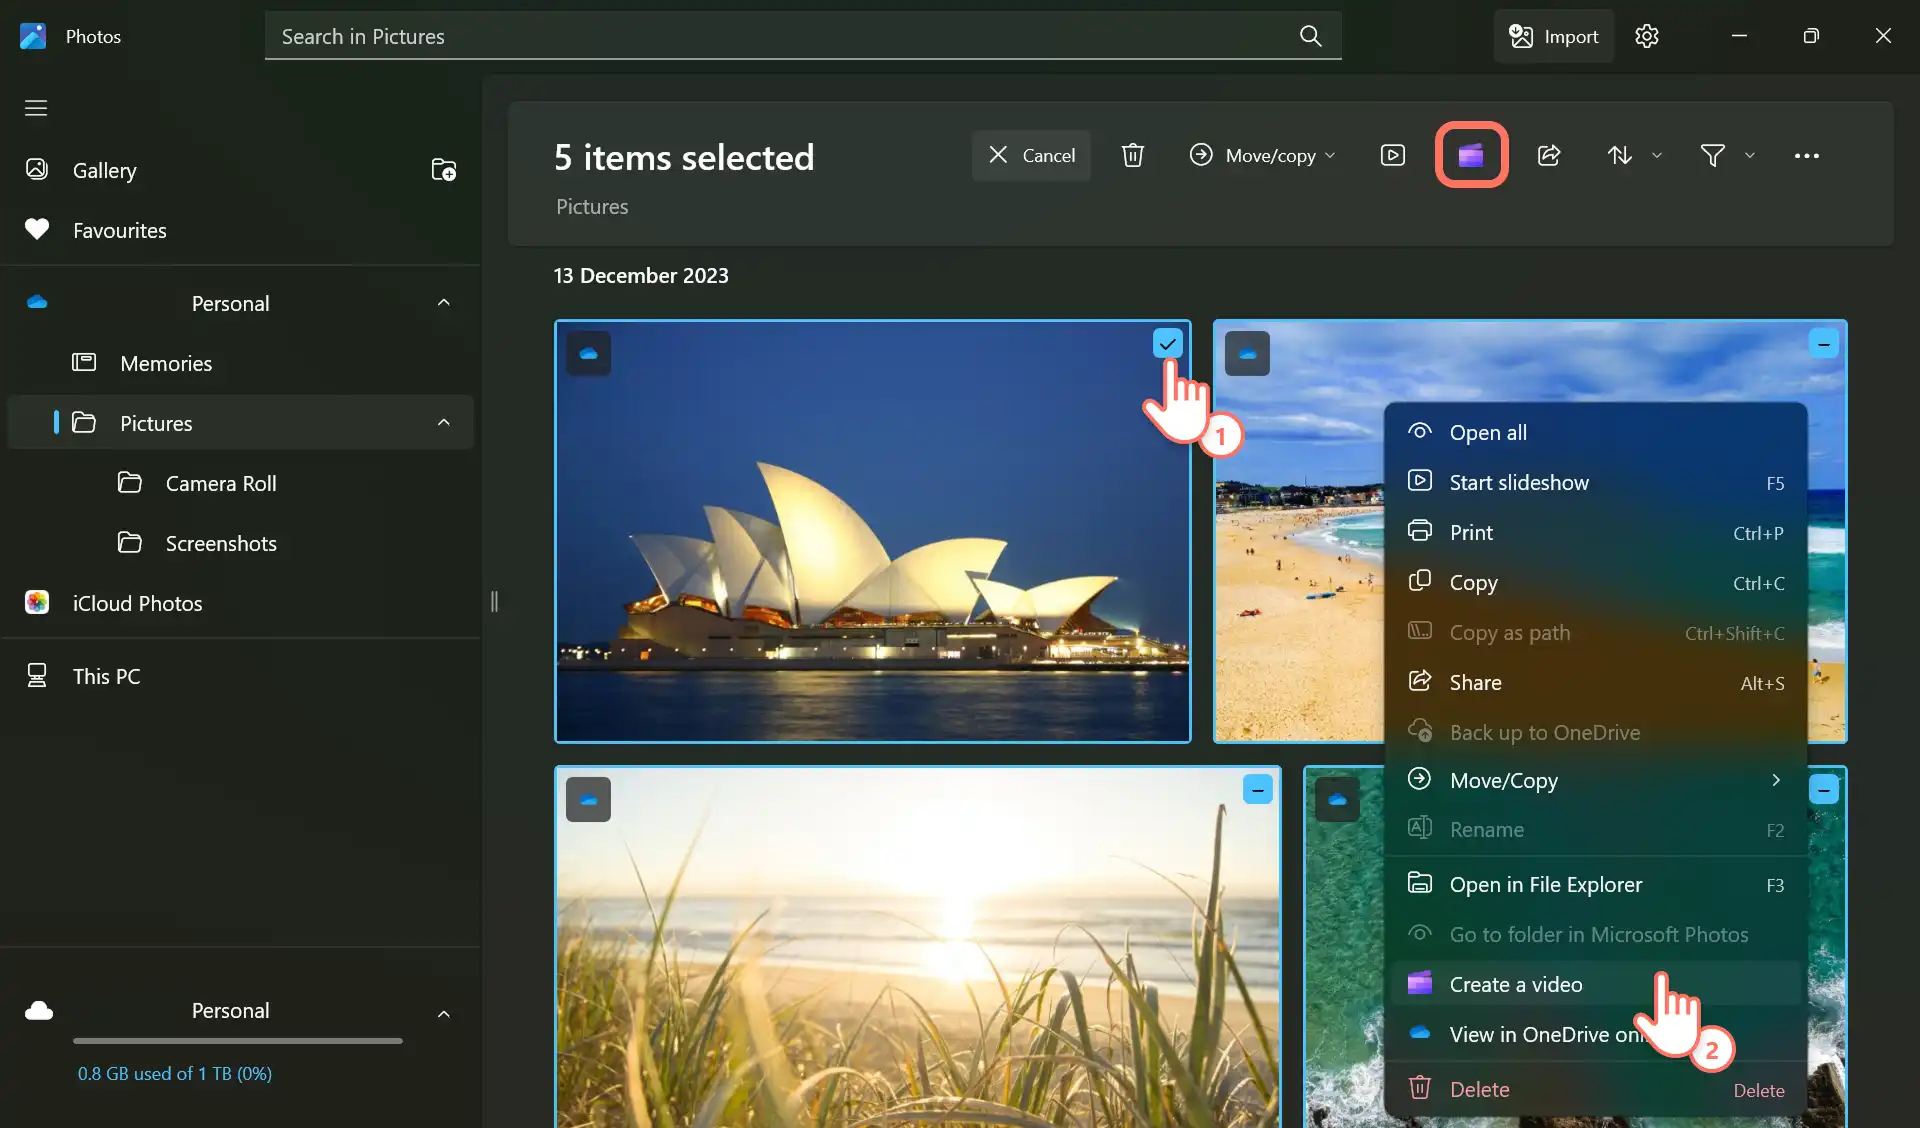
Step 2. Open the Photos footage gallery to select media
Select the pictures folder from the left sidebar in the Photos app. Thumbnails of all the media on your device will appear.
There are three options to start editing a video from this gallery.
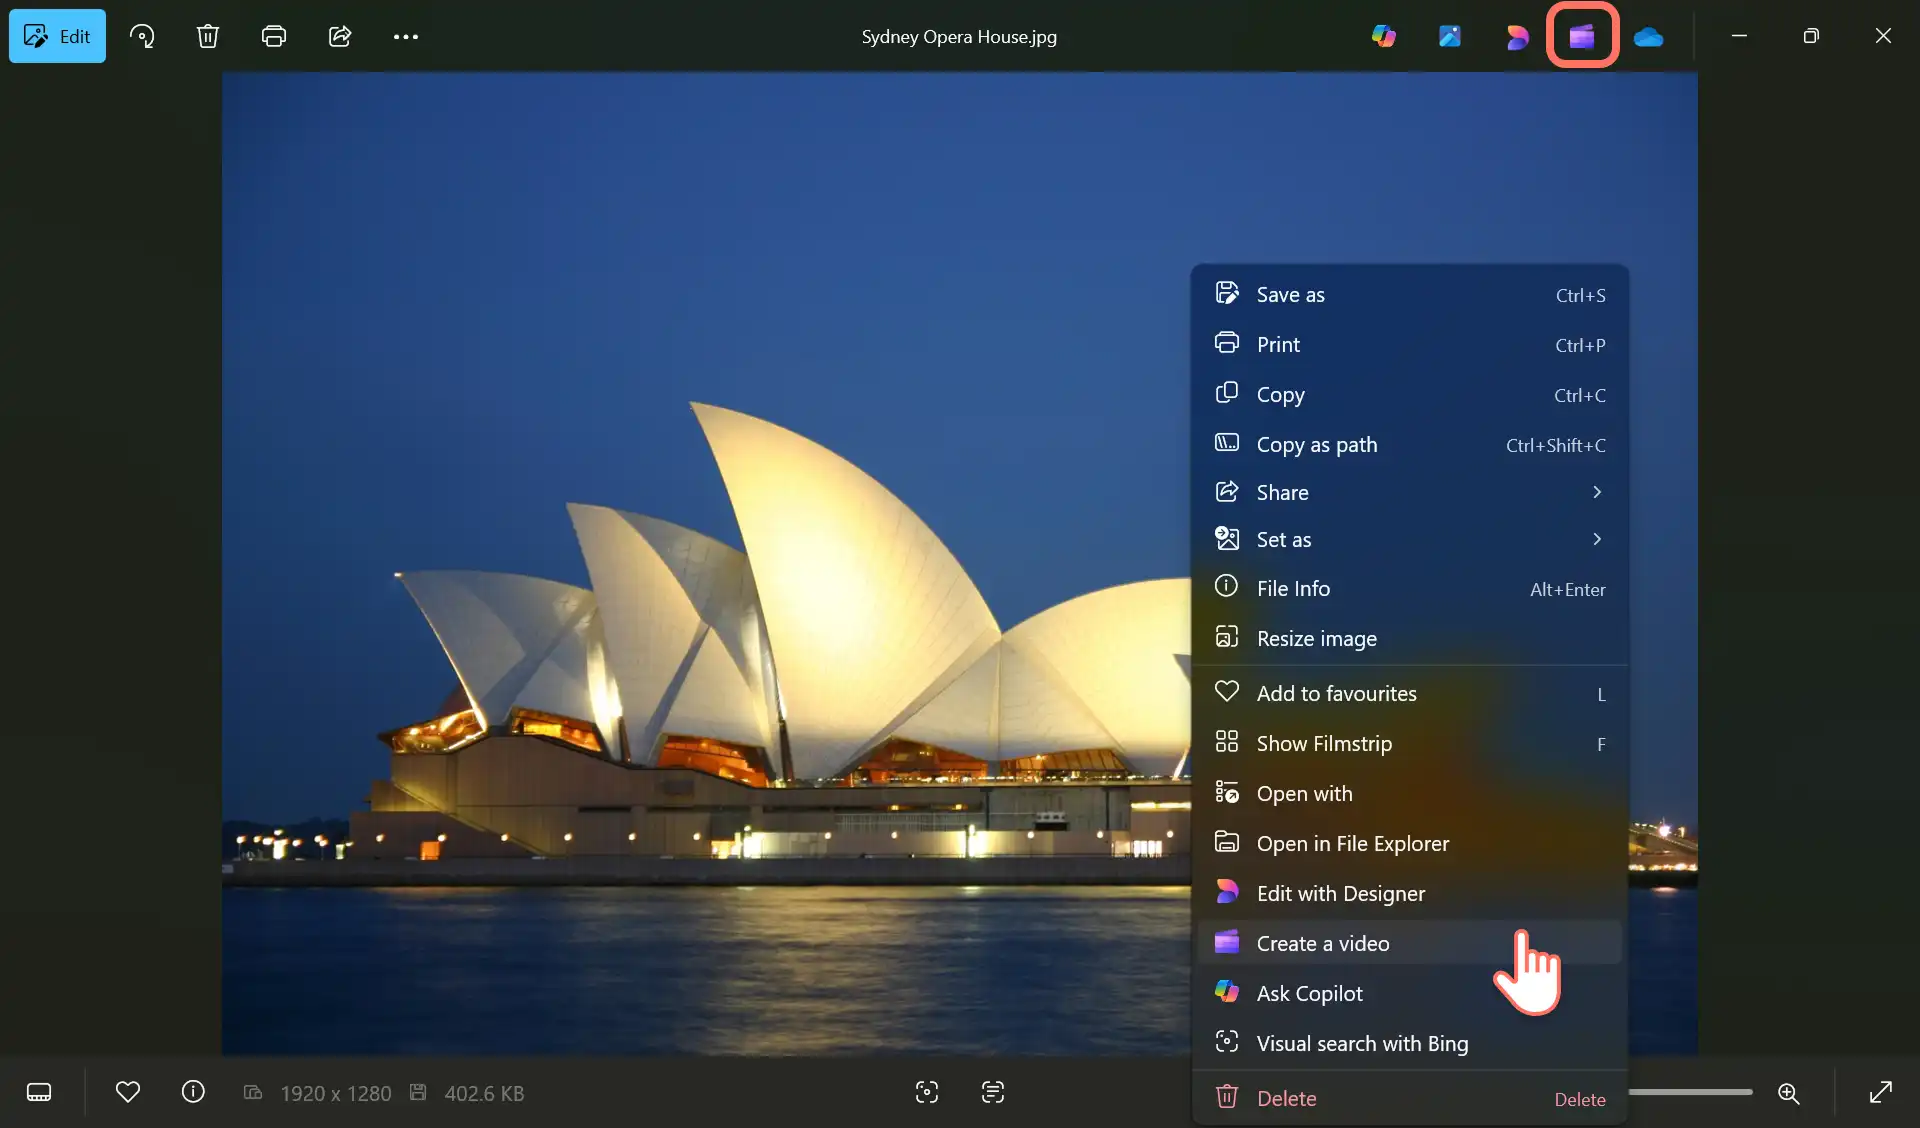
Option 1. Edit with Clipchamp from gallery
Select one or multiple videos you would like to use by clicking the checkbox then right-click to reveal a properties menu. Select create a video from the menu to open your video in Clipchamp video editor. Alternatively, select the Clipchamp icon shortcut.
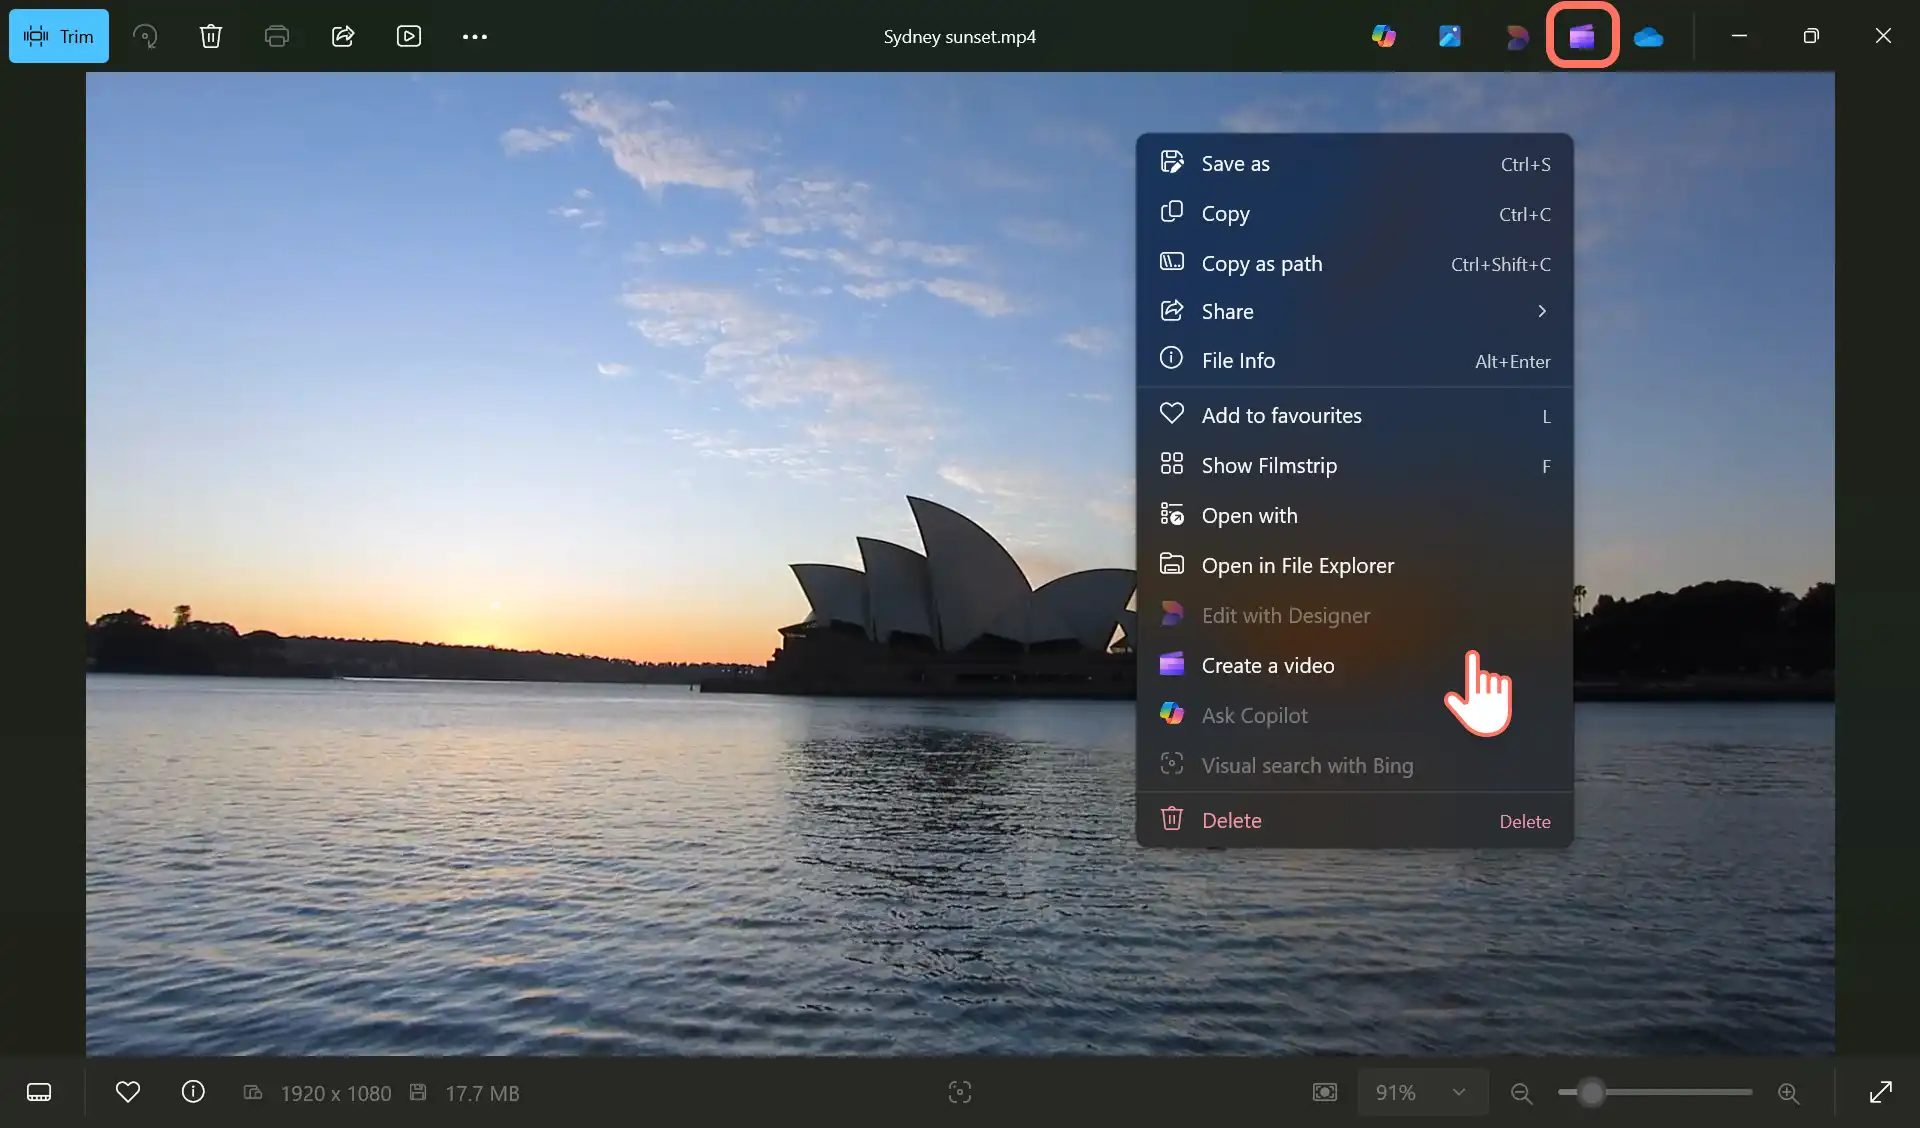
Option 2. Edit with Clipchamp from video preview
Double-click to open and play the video you would like to edit then right-click to reveal a properties menu. Select Create a video from the menu to open your video in Clipchamp video editor. Alternatively, select the Clipchamp icon shortcut.
Option 3. Edit with Clipchamp from Photos trim tool
If you’ve started trimming your video in the Photos app, continue editing in Clipchamp by clicking the Clipchamp icon shortcut, or right-click and select Create a video from the properties menu.
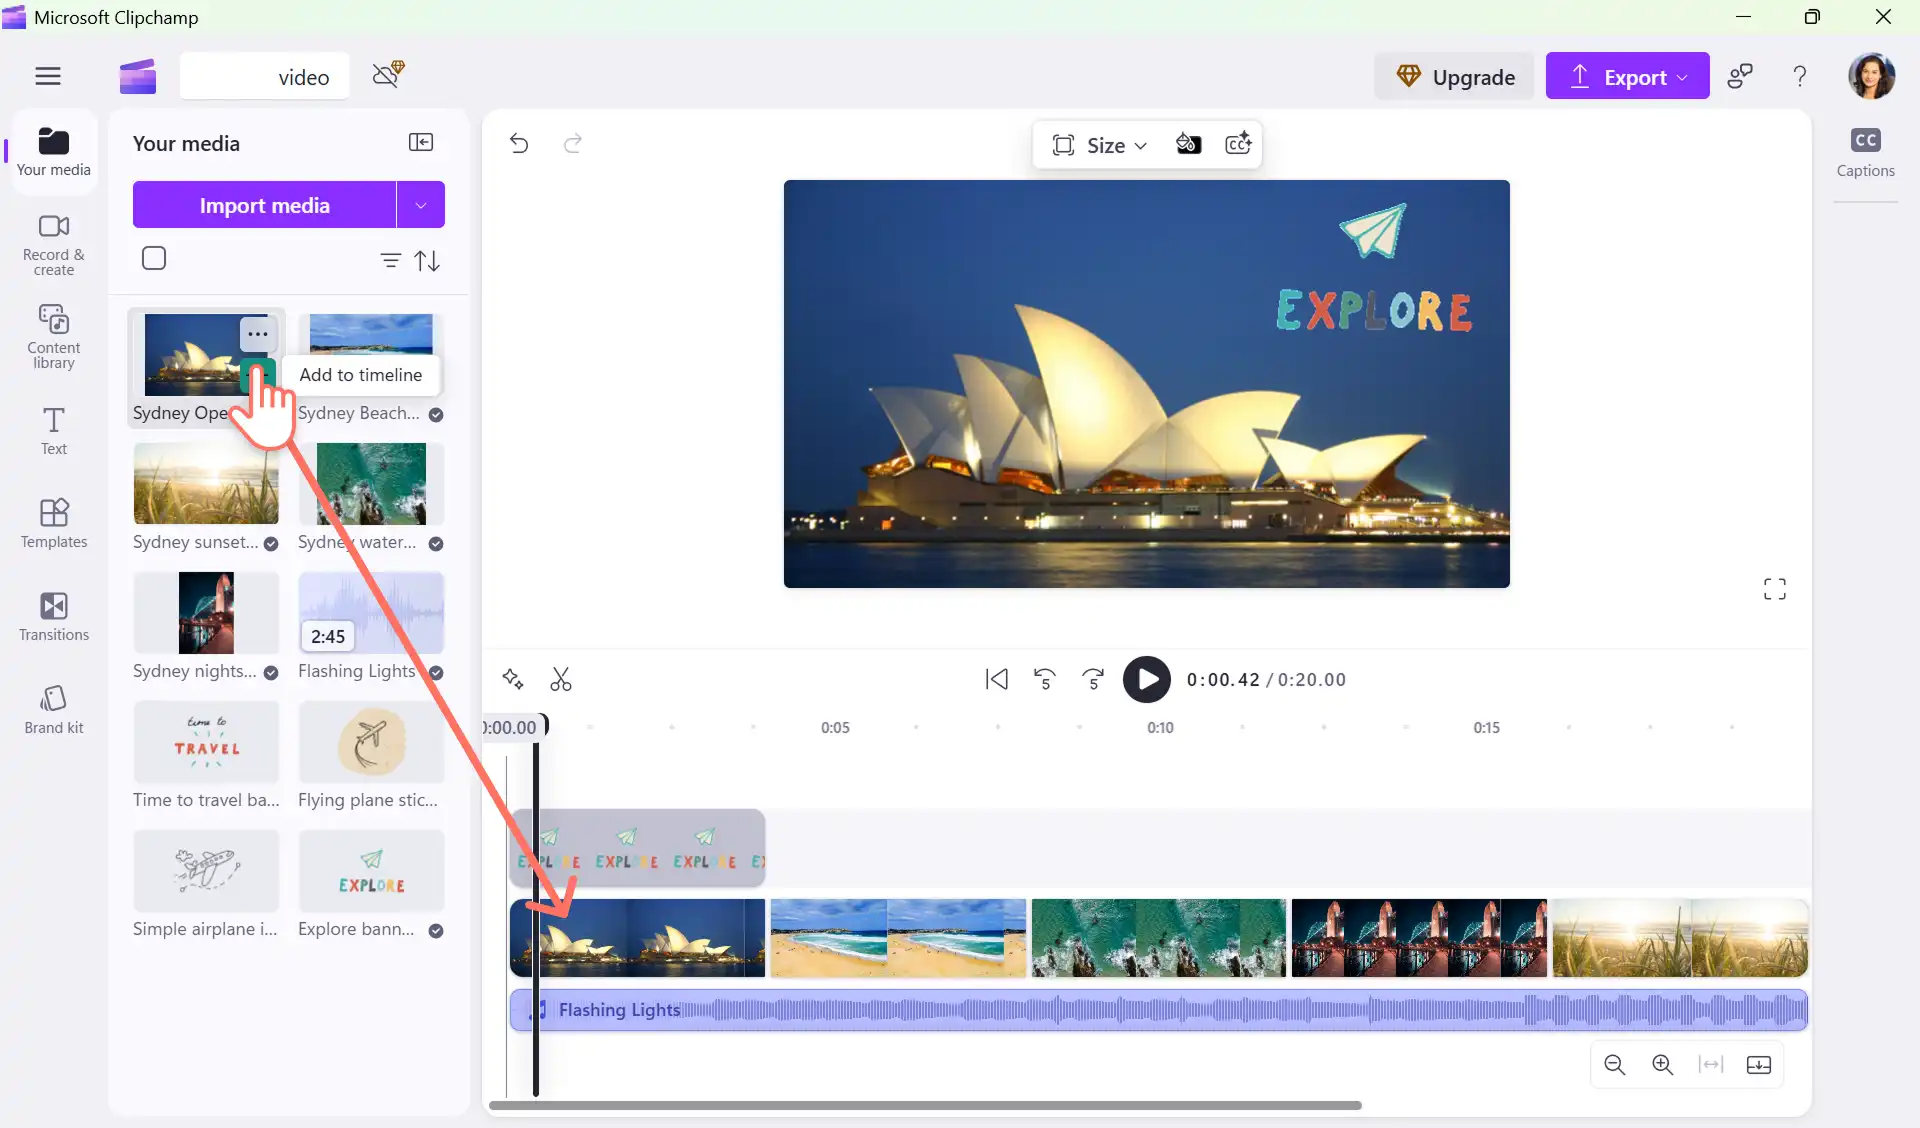
Step 3. Start editing your video in Clipchamp Windows App
The Clipchamp Windows app will automatically add your video to the your media tab. Drag and drop your videos to arrange them on the timeline. Select a clip to trim, rotate and even speed up or slow down video. Drag and drop transitions to connect your video clips and enhance the mood of your video with royalty-free background music.
Polish your video with filters, effects and animated text. When you're ready to save, click on the export button and select a video resolution.
Upload more media assets to create a slideshow video.
Master video editing with Microsoft Clipchamp
Clipchamp features empower anyone to create videos fast and is available on all Windows 11 devices. Explore how to start editing with this tutorial that showcases how to trim a video, crop and resize, as well as add music to videos.
Confidently create memorable slideshows and social media videos in high quality. Continue learning how to create AI slideshow videos with Photos to speed up your video editing, or learn how to record and embed video in Microsoft Outlook.
Get started with the Clipchamp Windows app.
Frequently asked questions
- How to access Clipchamp on Windows 10?
Windows 10 users can also try video editing by downloading the app from the Microsoft Store. A browser-based version of Clipchamp can also be accessed by typing https://app.clipchamp.com/ in Microsoft Edge or Google Chrome.
- Is there a file size limit when uploading media to Clipchamp?
Make sure to keep all media files (videos, photos, and music) under 4GB file size per asset to edit in Clipchamp.
- What video formats can I use in Clipchamp video editor?
Clipchamp video editor accepts MP4, MOV, WEBM, AVI, DIVX, FLV, 3GP, WMV, VOB, DCM, and MKV video files, as well as a wide variety of video codecs. Learn more.
Heads up! The screenshots in this article are from Clipchamp for work accounts and the same principles apply to Clipchamp for school accounts. Clipchamp personal account tutorials may differ. Learn more.