Heads up! The screenshots in this article are from Clipchamp for personal accounts. The same principles apply to Clipchamp for work and school accounts.
On this page
Add your own videos, photos, and audio recordings into Clipchamp faster and easier with the Google Drive integration. Create new videos using your own footage then export to securely store them in your Google Drive.
Store and access your phone or digital camera footage from anywhere to create your next video. Prepare a new video marketing campaign or create a classroom presentation from anywhere more easily by connecting your Google Drive with Clipchamp.
Read on to discover how the Google Drive integration can help you work more efficiently in Clipchamp.
How to use the Google Drive integration
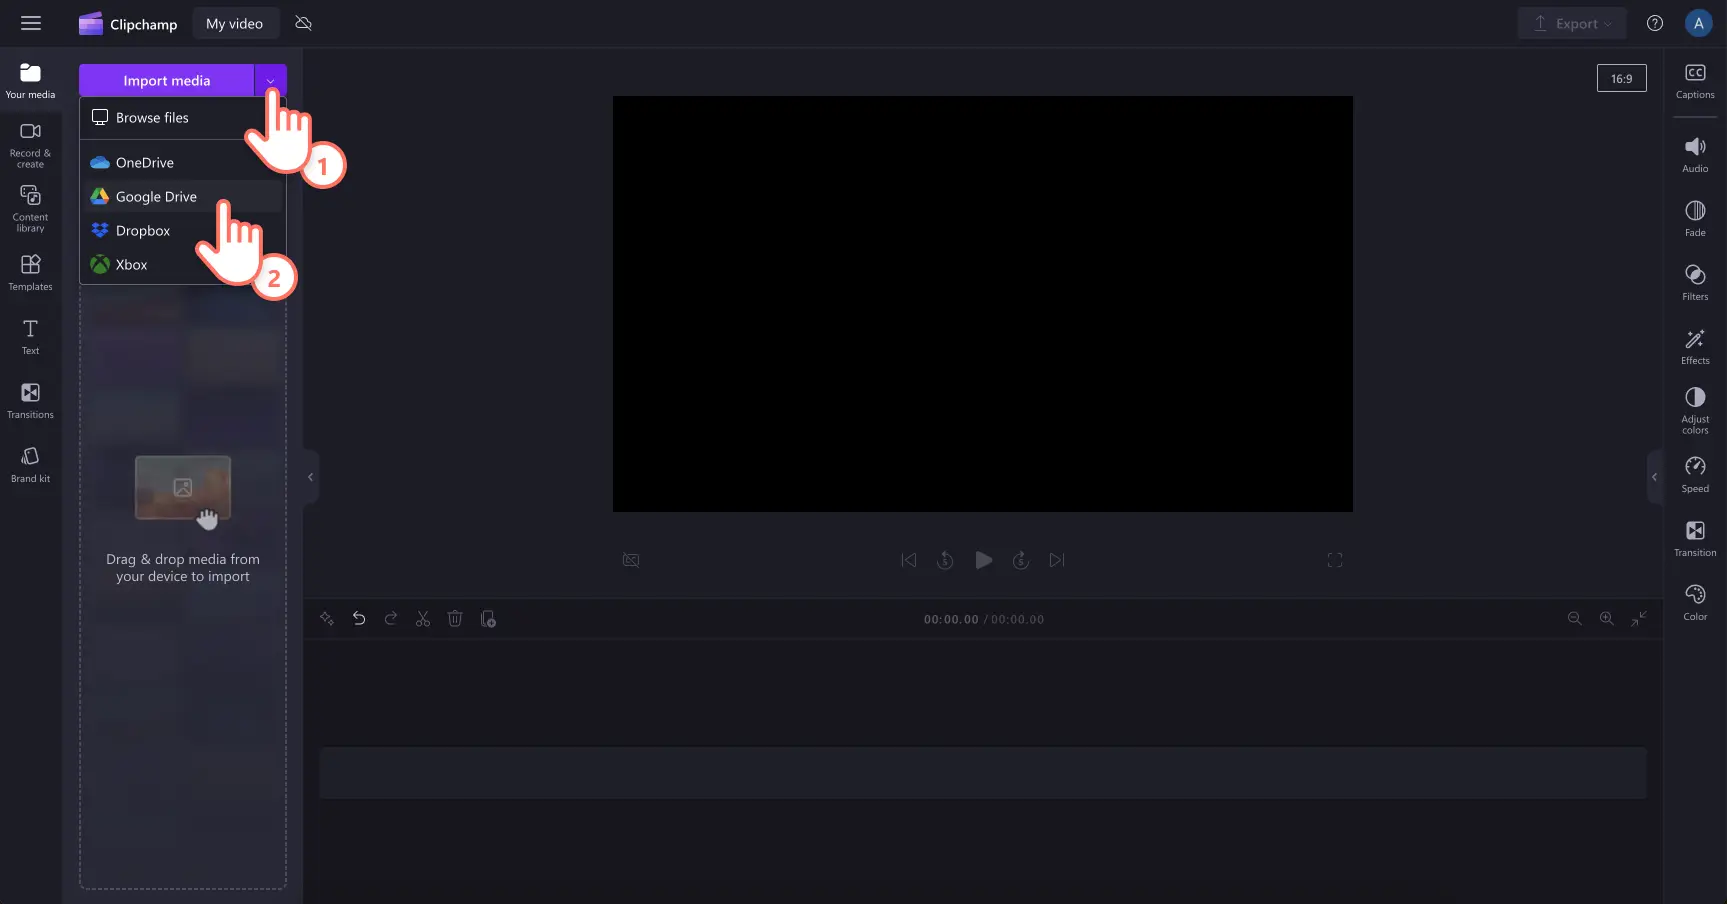
Step 1. Select the import media button
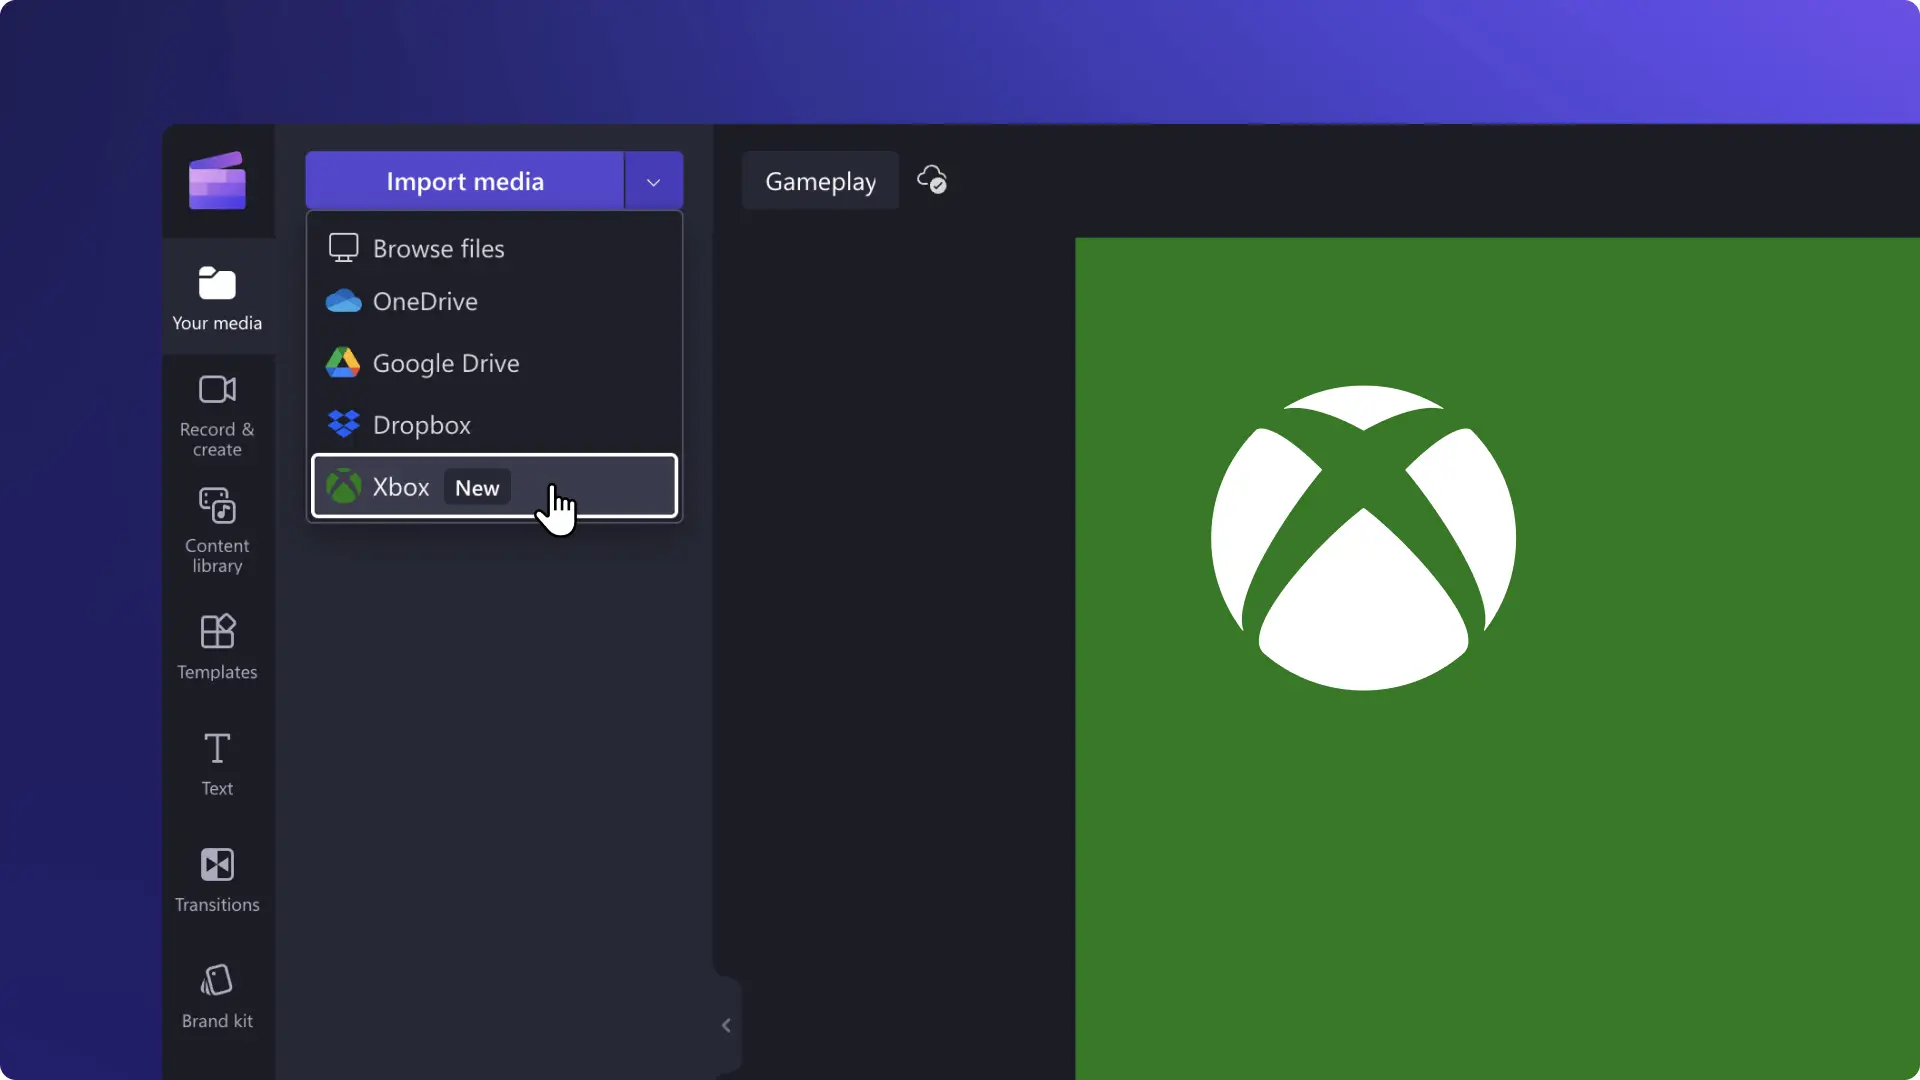
In the your media tab, click on the drop-down arrow on the import media button then select Google Drive.
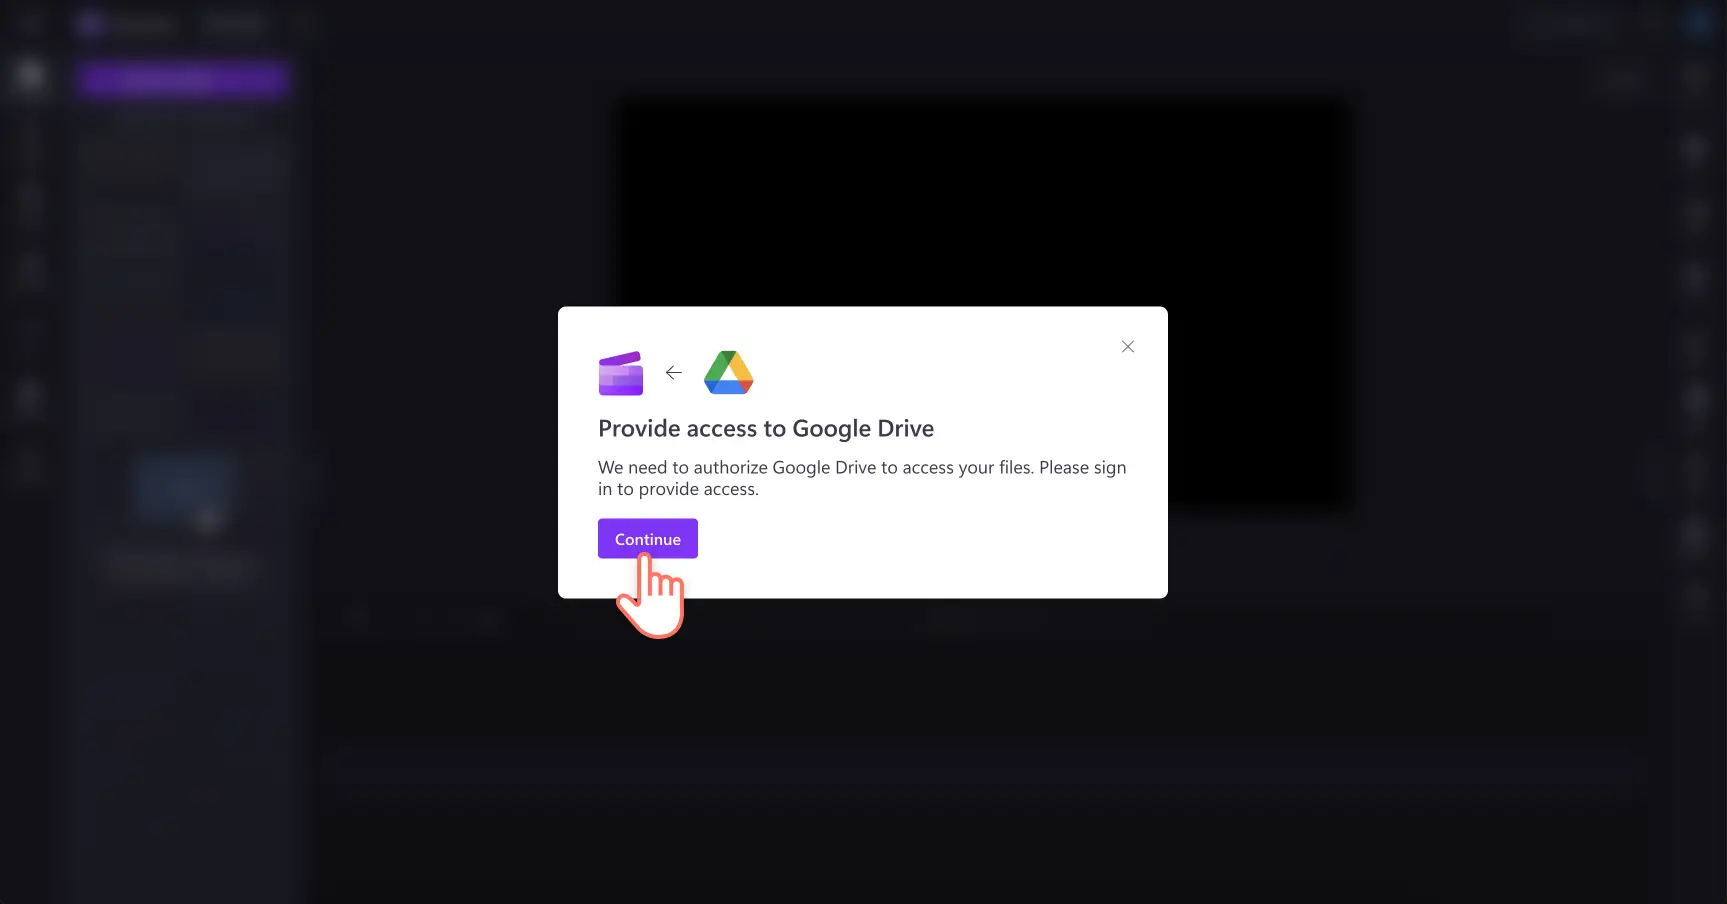
Step 2. Enable access and sign in to Google Drive
A popup will appear asking you to provide access to Google Drive. To authorize Clipchamp to access your files on Google Drive, click the continue button.
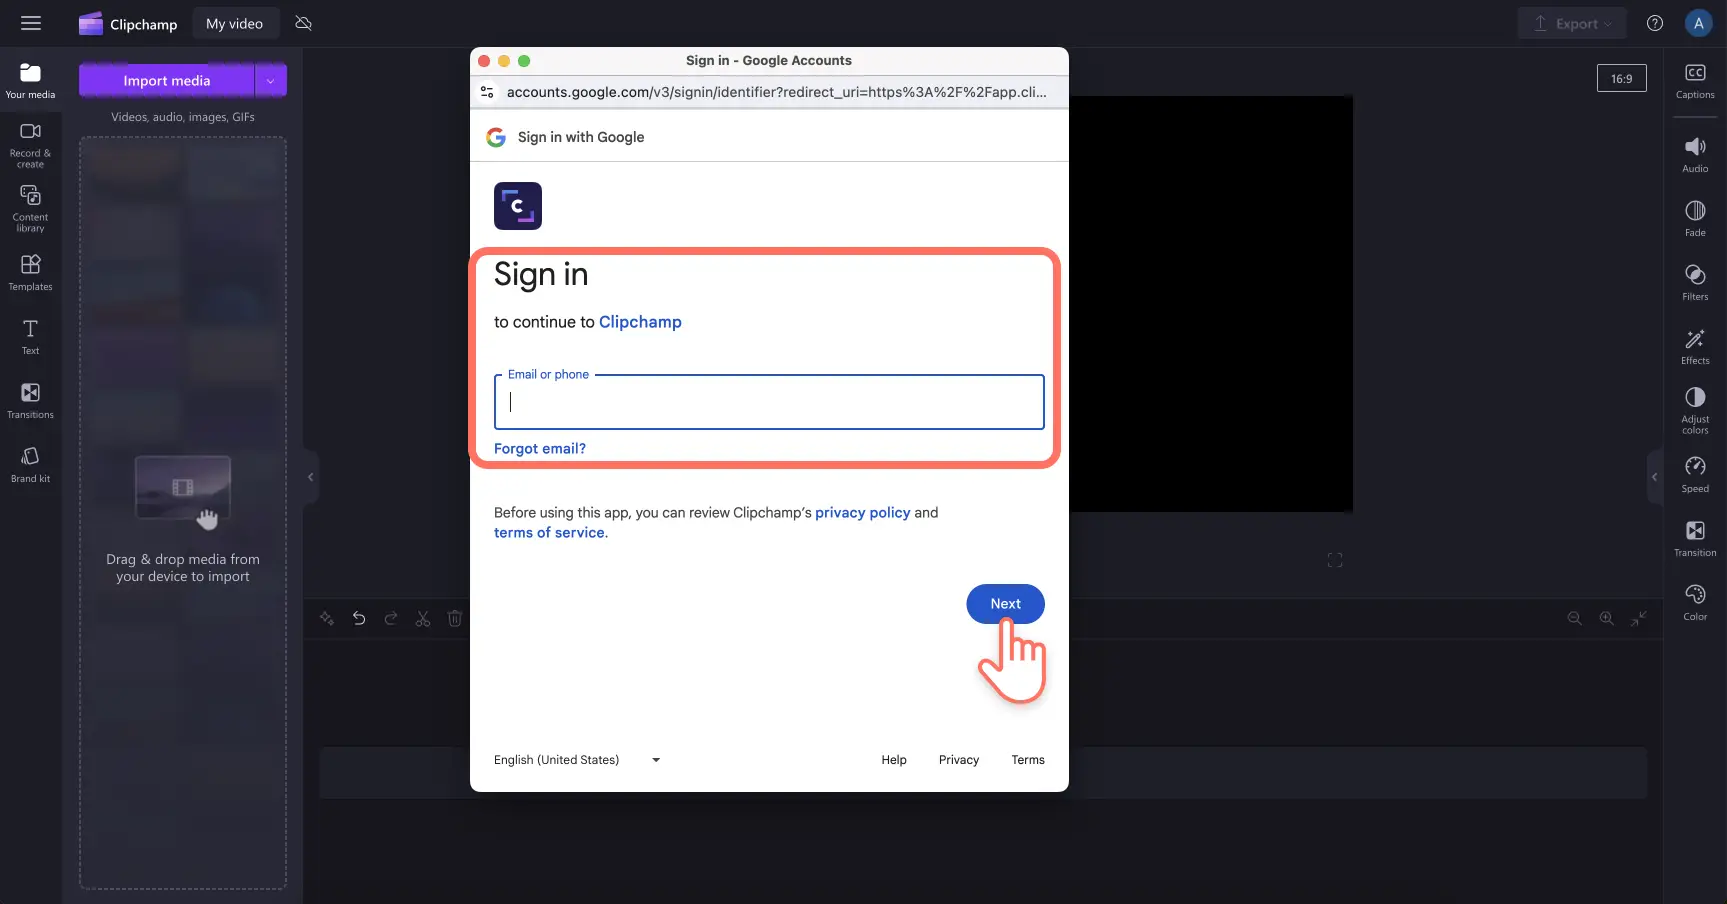
Sign into your Google Drive account with your email address, then click on the next button to continue.
Step 3. Select photos and videos from Google Drive
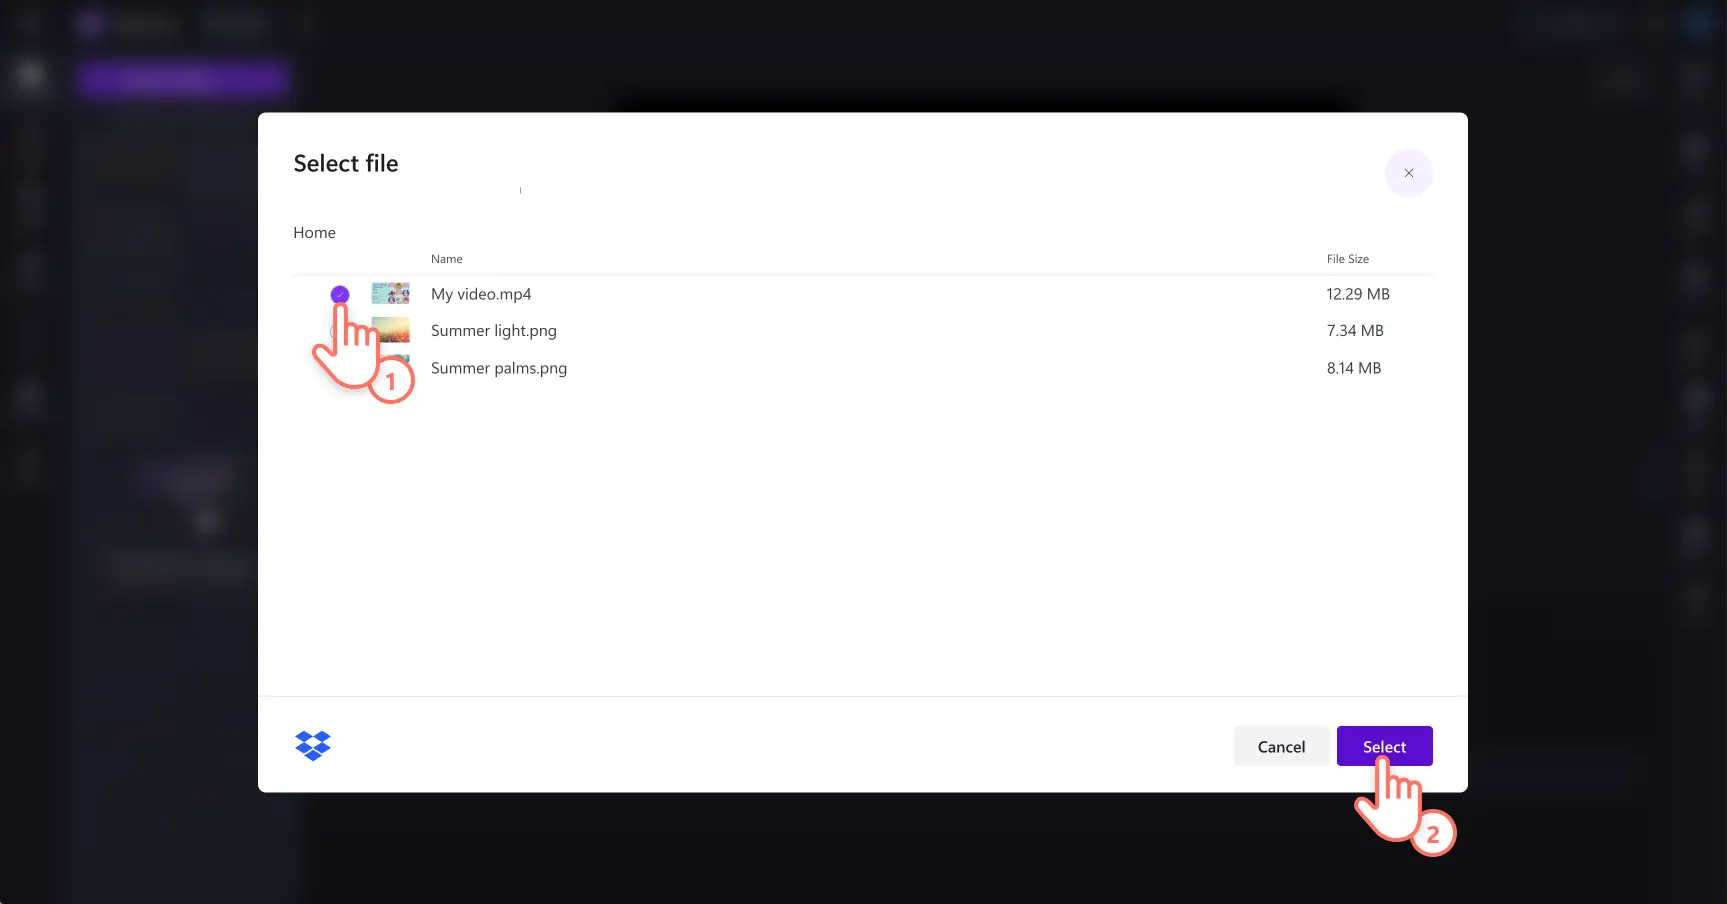
Find the assets you want to import to Clipchamp and click on the checkboxes. Then click the select button to add them to the your media tab in Clipchamp.
Step 4. Edit and export your video
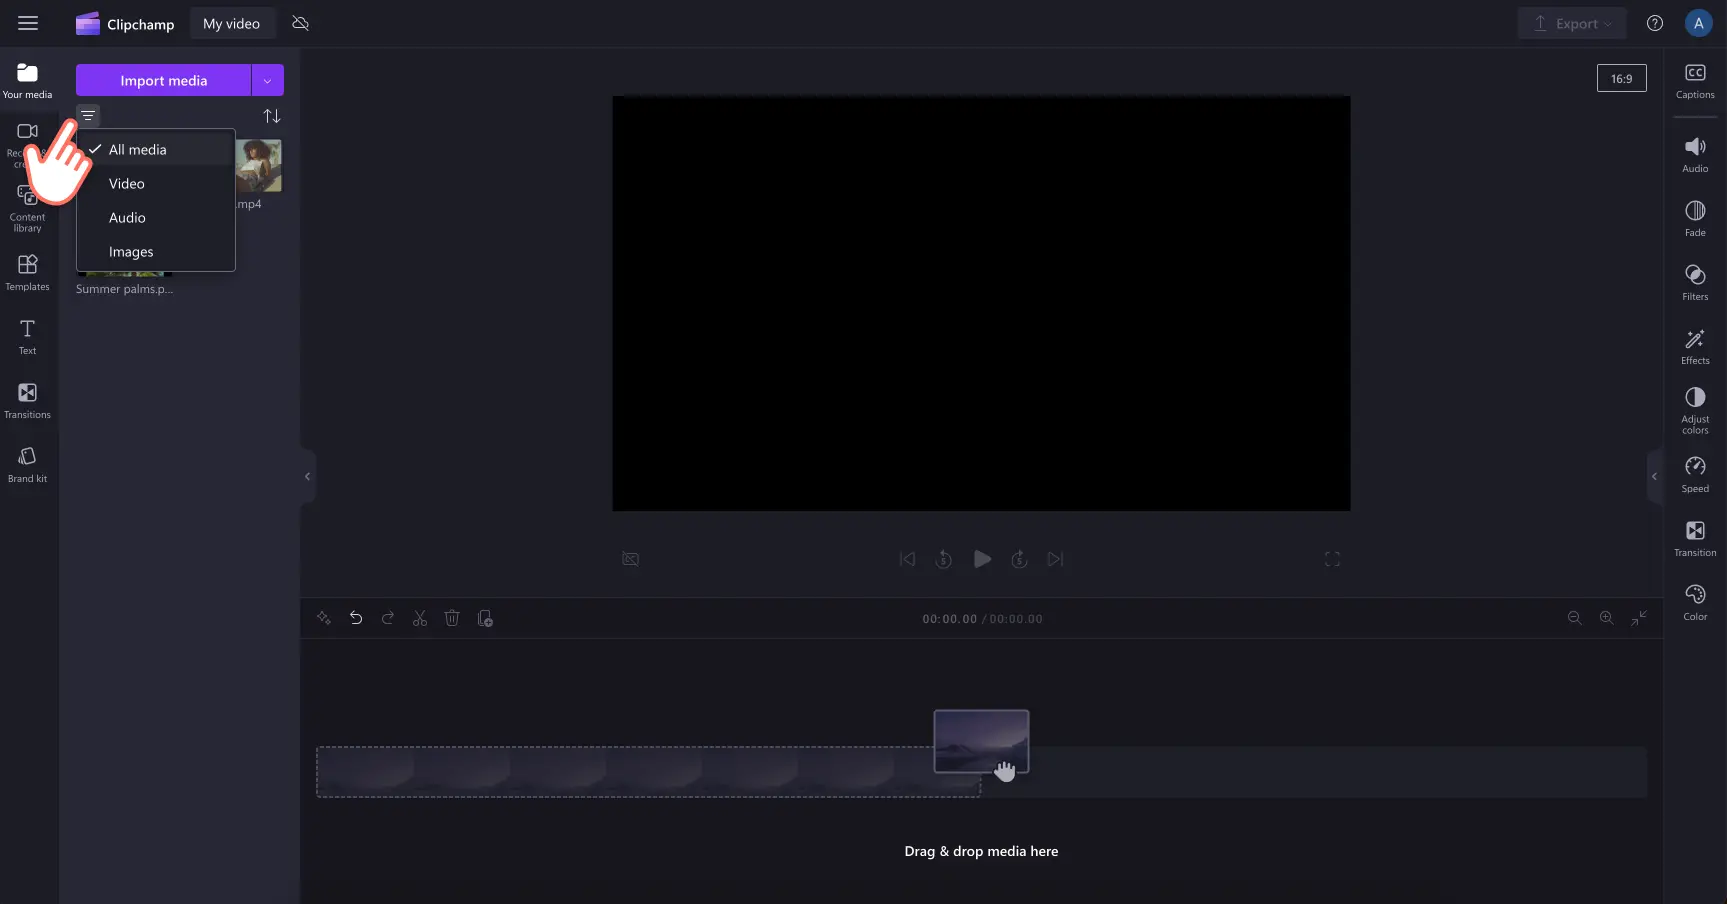
Find your newly imported assets in the your media tab. Filtering your media by type such as video, audio, and images to find them faster.
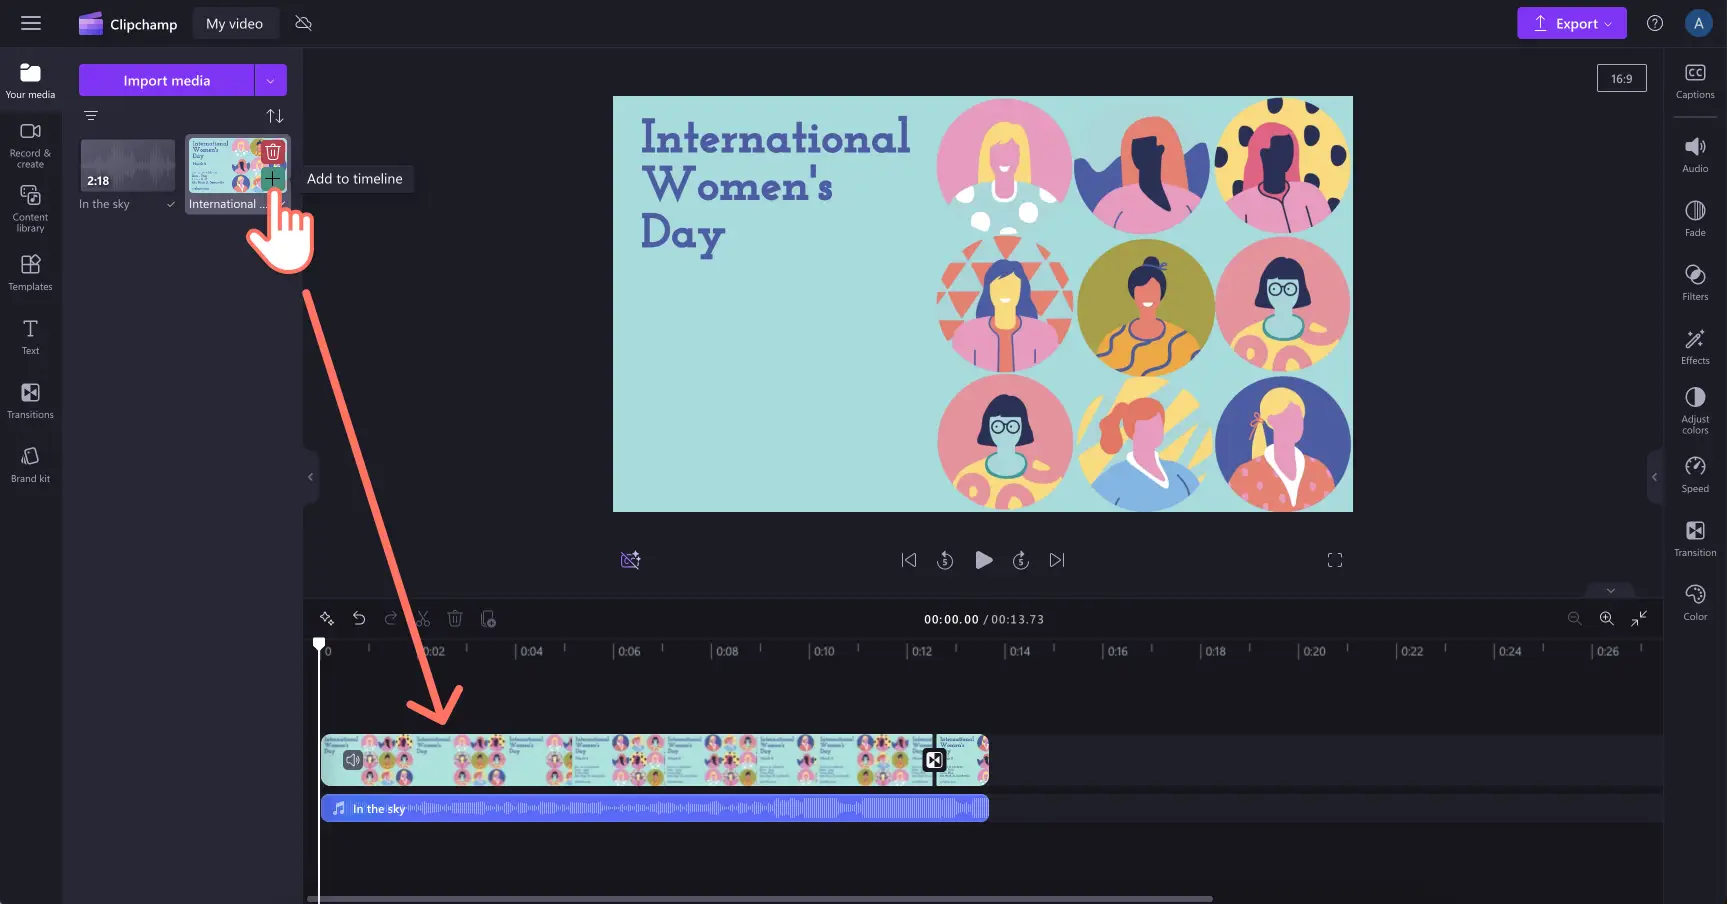
When you’re ready to start editing, drag and drop your video, audio and image clips to the timeline. You can then enhance your videos by adding transitions and background music too.
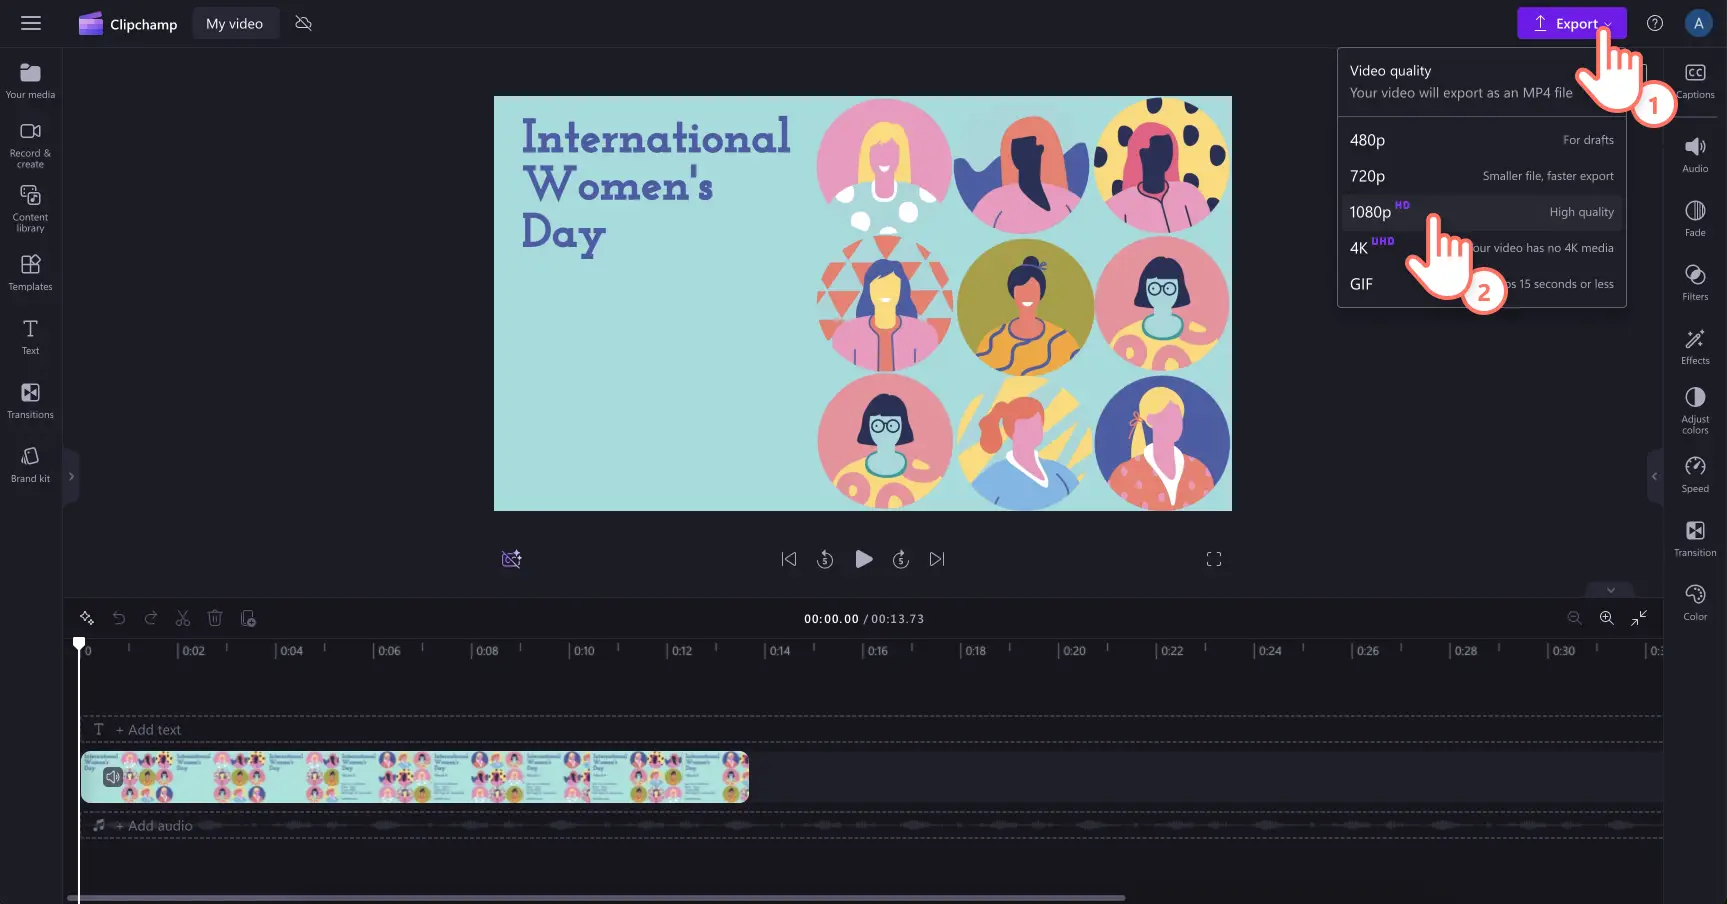
To export your videos, click on the export button, then select the video quality.
Step 5. Save straight to Google Drive
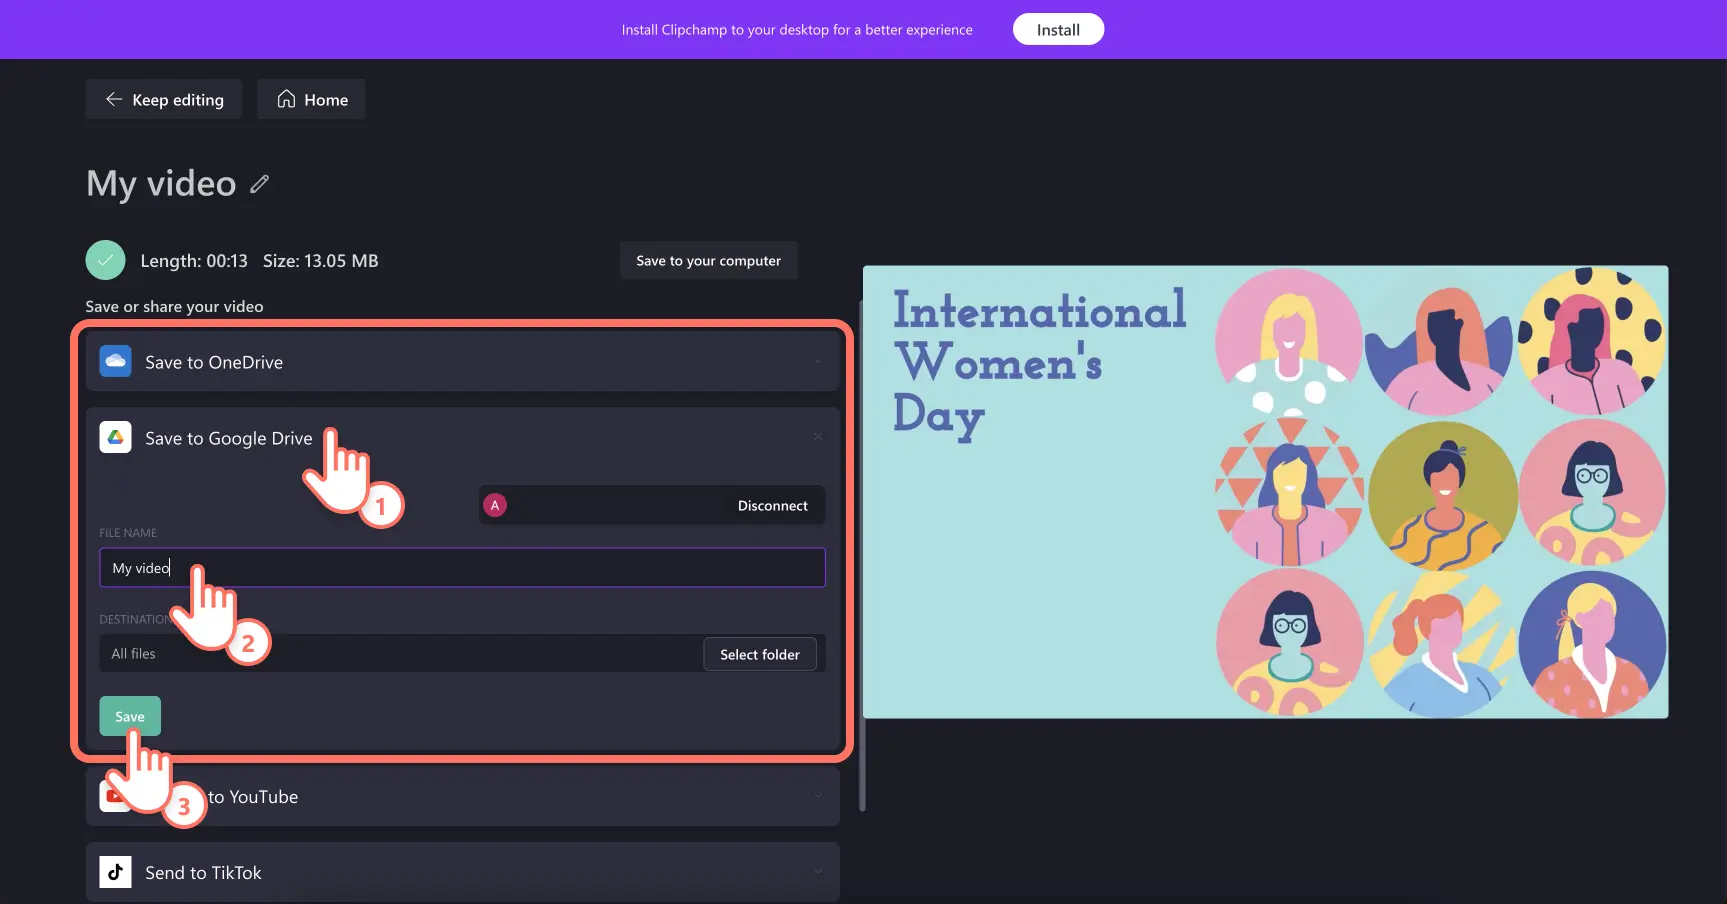
Your video will automatically save to your device when you export it. To save a copy to your Google Drive, click on the save to Google Drive button. You can rename your video then click the save button. Once your video is successfully saved, a file link will appear for easy sharing.
Frequently asked questions
Can I import photos from Google Drive?
Yes. You can import photos into Clipchamp from Google Drive by going to the your media tab, clicking the import media button then Google Drive. Select the photos you want to import and click select to import them into Clipchamp.
How to download media from Google Drive?
You can download media from Google Drive for use in Clipchamp without using the integration if you’d like. Simply download the videos, photos or audio from your Google Drive then import them into Clipchamp.
How to import from Google Drive on Chromebook?
To import media from Google Drive into Clipchamp on a Chromebook, click on the your media tab in the toolbar then the import media button. Click on the Google Drive button, then allow access to connect it to Clipchamp. Browse the assets saved in your Google Drive, then click on the assets to import. Videos, images, and audio assets will appear in the your media tab in the toolbar.
How to get in touch with Clipchamp support team?
If you’re experiencing technical issues with an importing or exporting integration in Clipchamp, request help via the chat widget in the bottom right corner of the video editor. This suggestion applies to Clipchamp for personal accounts.
Explore more ways to import and export media into Clipchamp with OneDrive and Dropbox.
Make your video editing workflow easier using the Google Drive integration on the Clipchamp video editor or the Microsoft Clipchamp Windows app.
