Heads up! The screenshots in this article are from Clipchamp for personal accounts. The same principles apply to Clipchamp for work and school accounts.
On this page
Share the holiday spirit and gather your loved ones with a creative video invitation. Inviting guests virtually with a holiday video invite is the perfect way to generate excitement less traditionally, while saving paper at the same time.
From Christmas and Hanukkah to Diwali or Thanksgiving, no matter the holiday you’re celebrating, Clipchamp has a professionally designed video invite template for you to use for free. Just customize the video invitation details, personalize with your favorite audio track, then share the mobile friendly video directly on social media.
Learn how to invite friends, family, and colleagues to celebrate a holiday in an environmentally friendly way using a video invitation in Clipchamp.
How to make a holiday video invitation for free
Step 1. Select a video invitation template
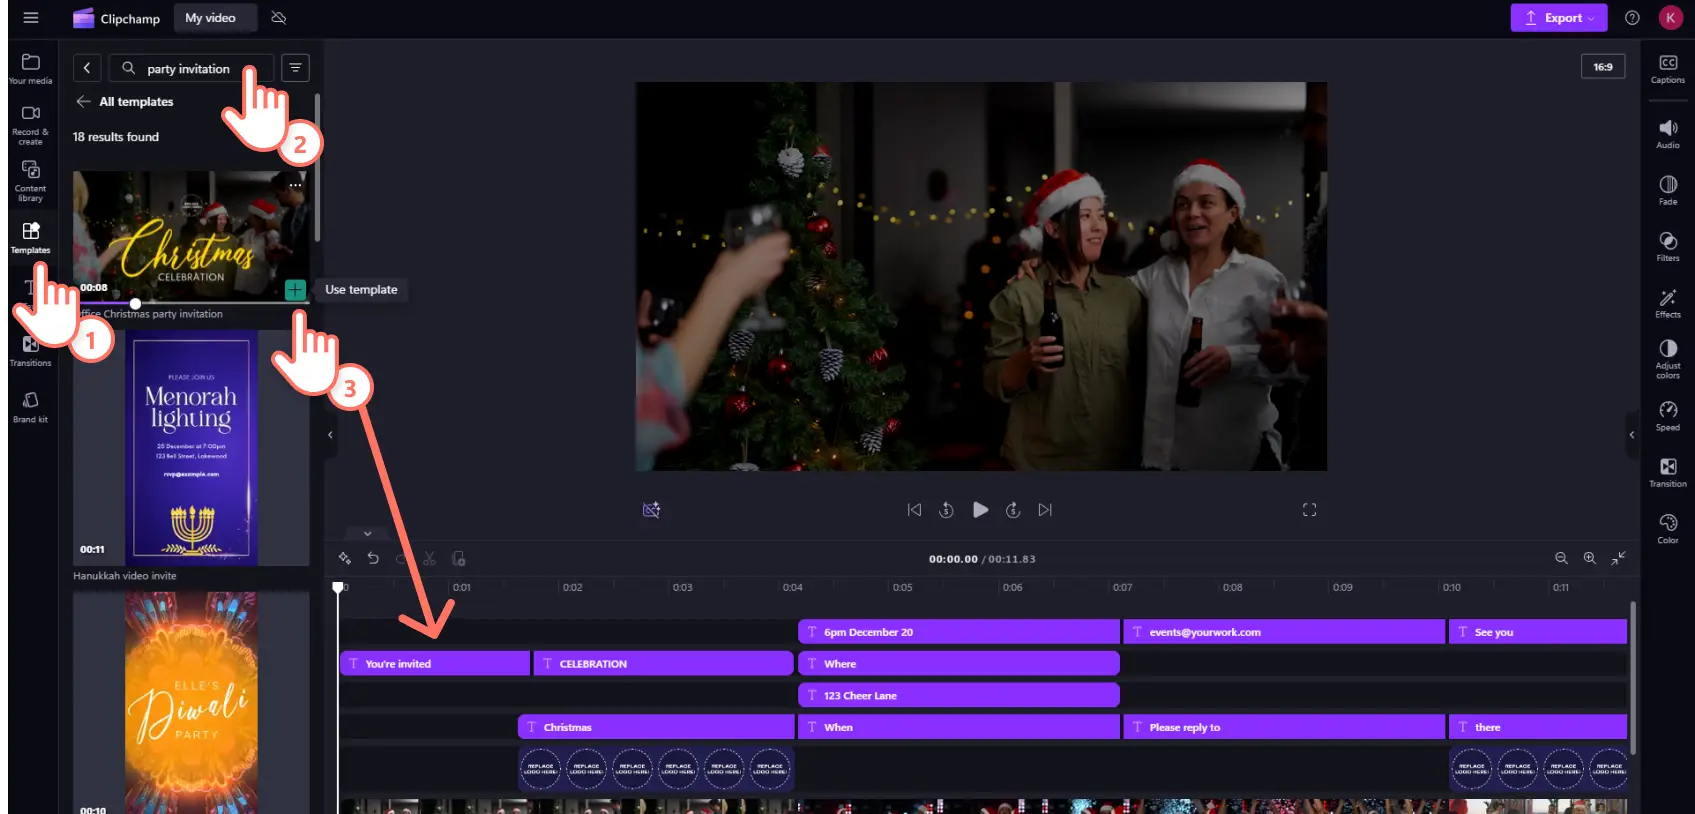
Get started with a holiday party invitation template. They come pre-loaded with stock footage, animated text, and royalty-free music. Click on the templates tab on the toolbar and scroll through the template collections or use the search bar to find a specific theme. The following tutorial features a video invite template for an office holiday party.
Step 2. Personalize the video invitation text and graphics
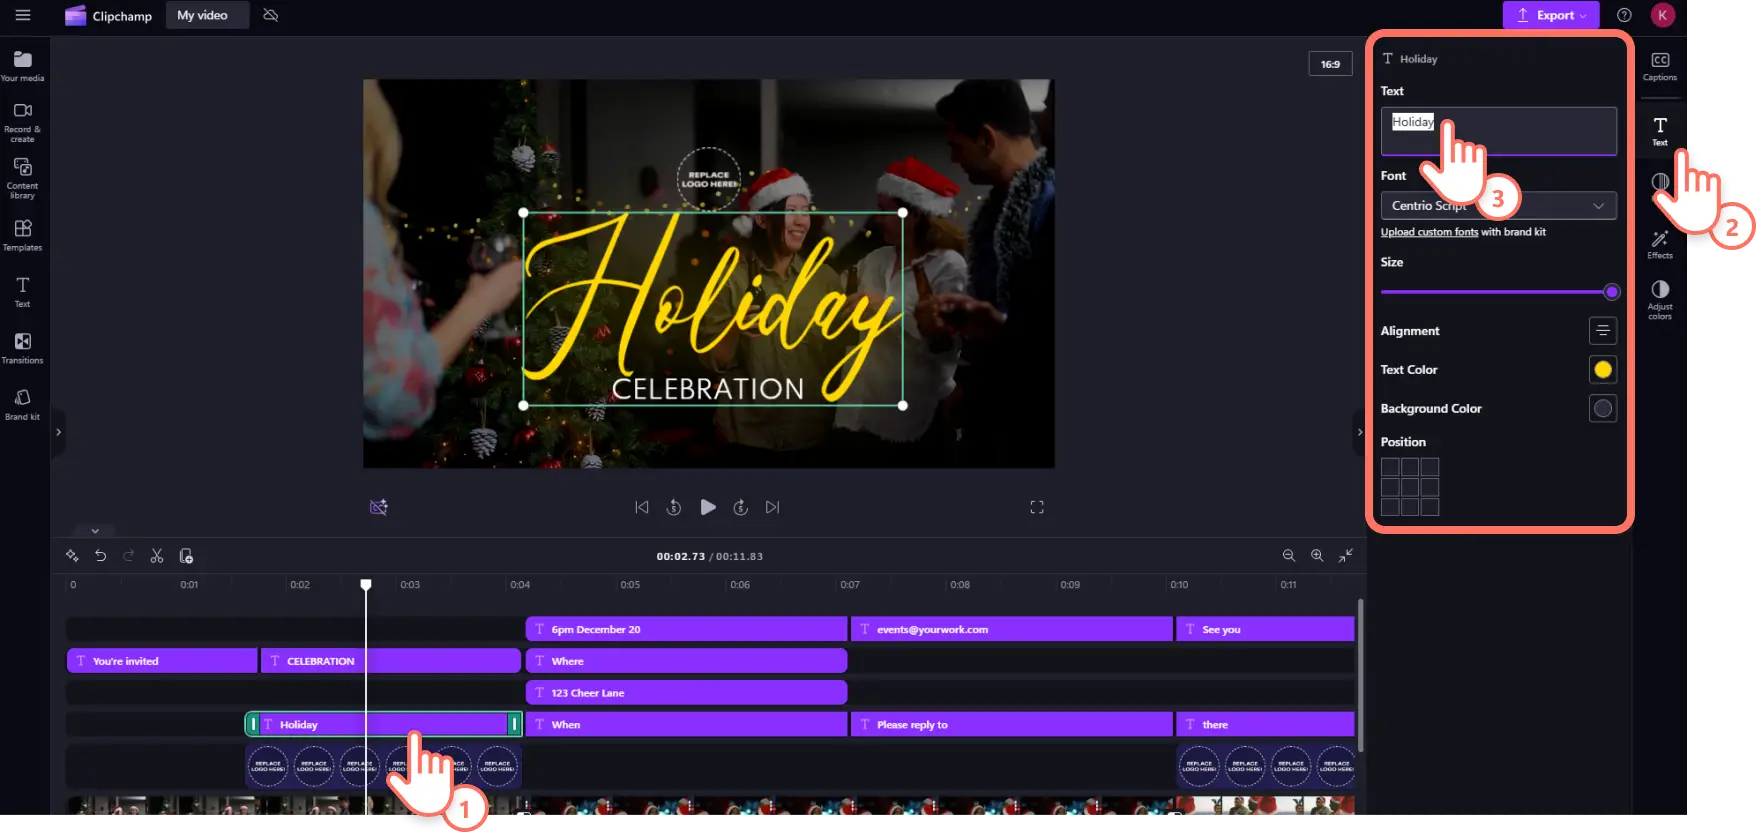
You can change any text asset within a video template. Customize text and titles by typing in your event’s details like the date, time, and location. Click on the text asset on the timeline so it’s highlighted then click on the text tab on the property panel. Next, click on the text field and enter your event information. You can also customize the font, size, color, and other text settings.
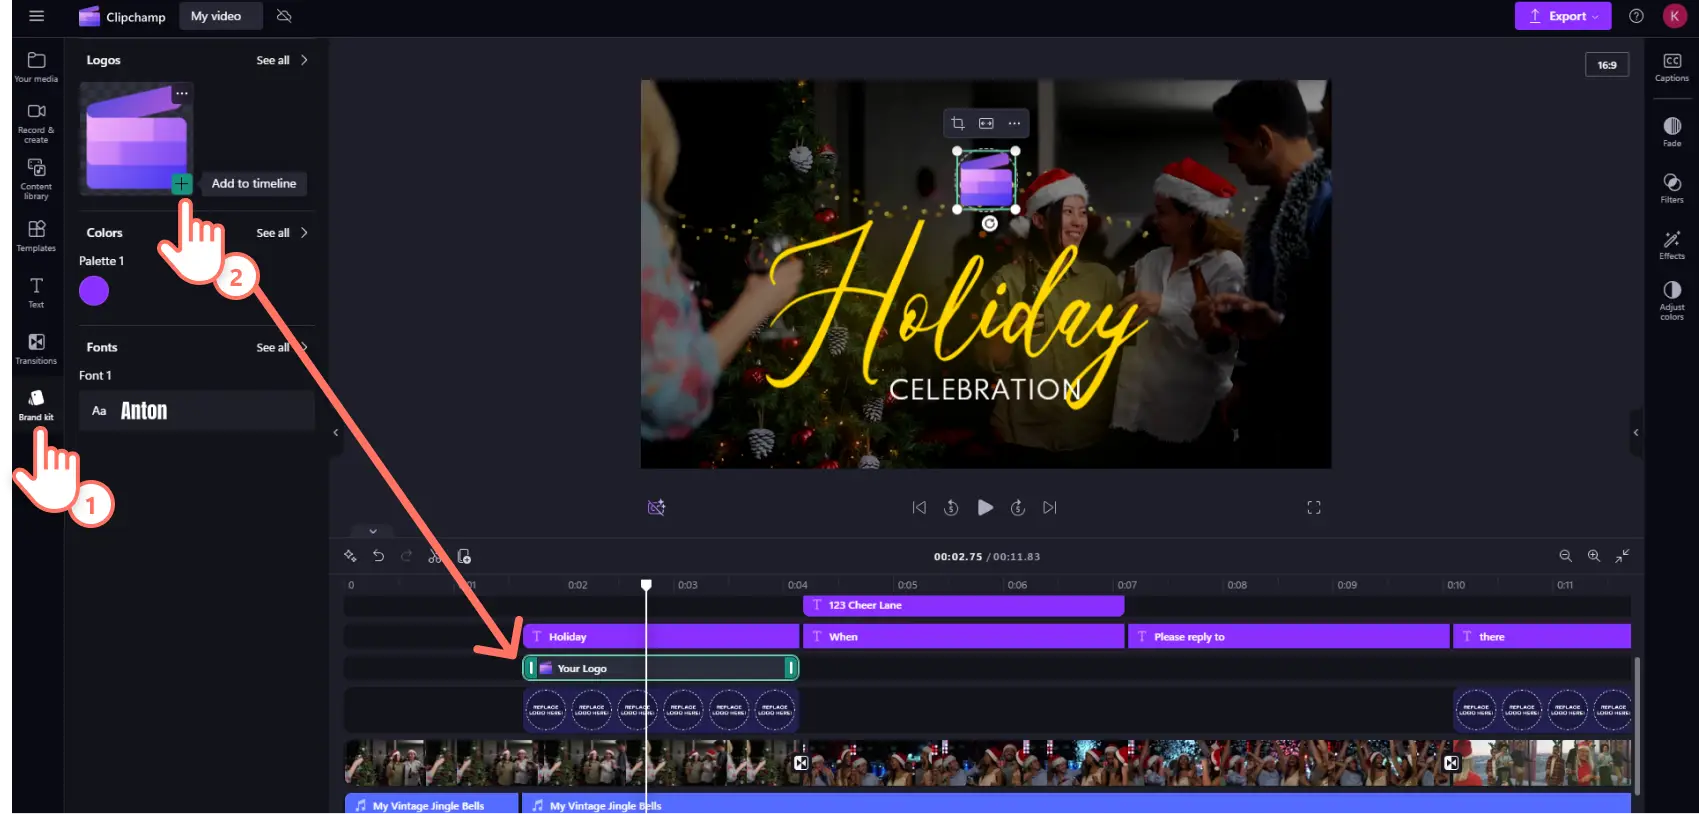
For work events like end of year celebrations, you can overlay a company logo and other brand assets with the brand kit tool. Click on the brand kit tab on the toolbar then drag and drop your stored logo onto the timeline. You can also change the font and color to match your company’s branding.
Step 3. Replace stock video and background music
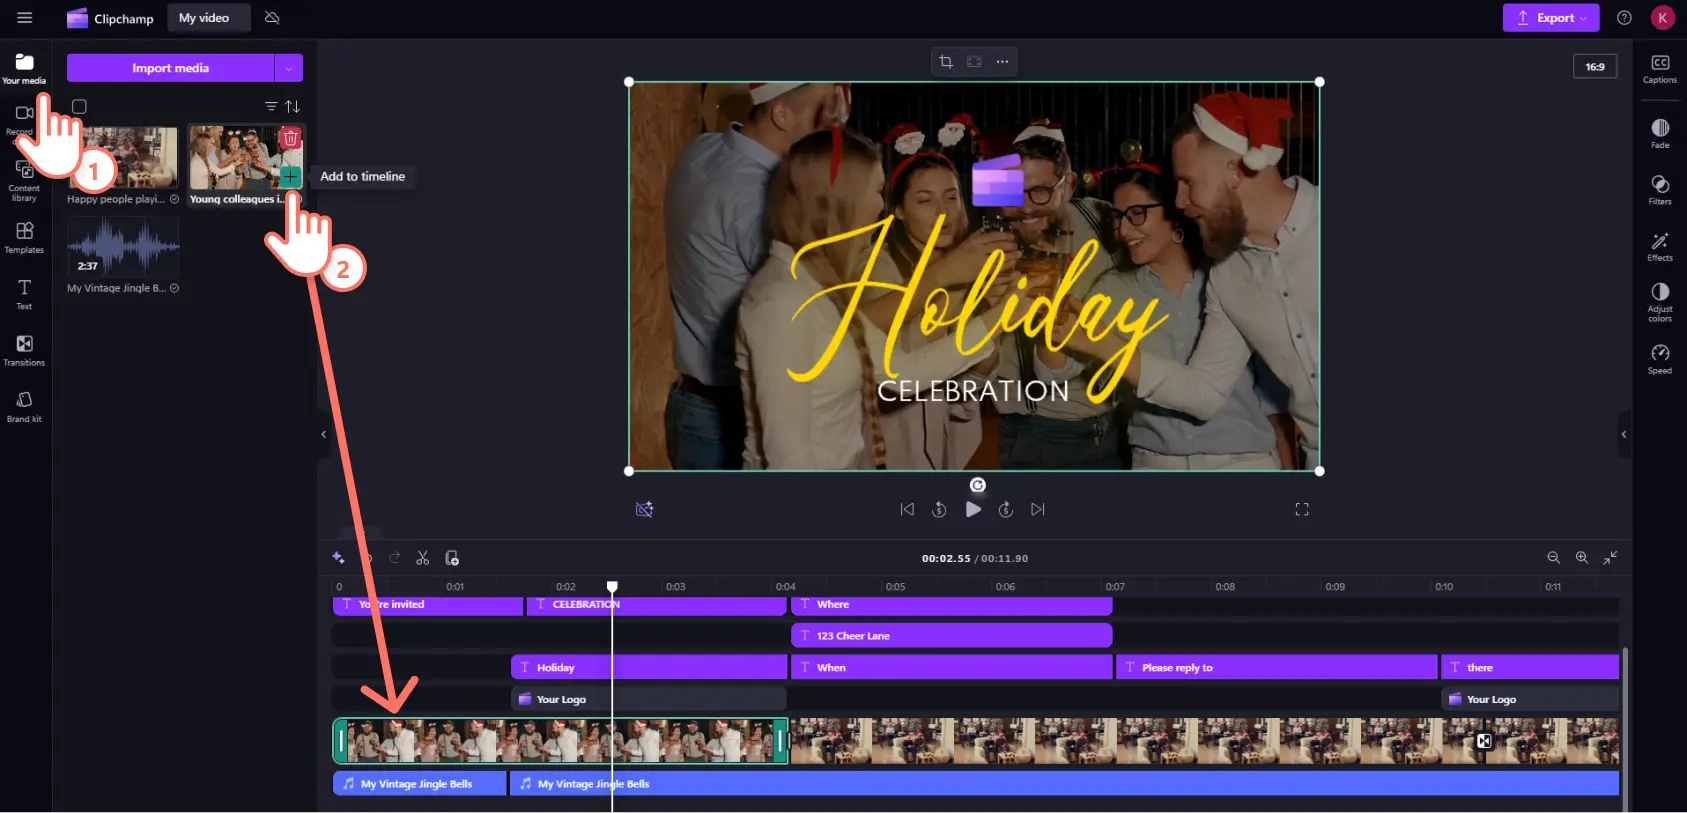
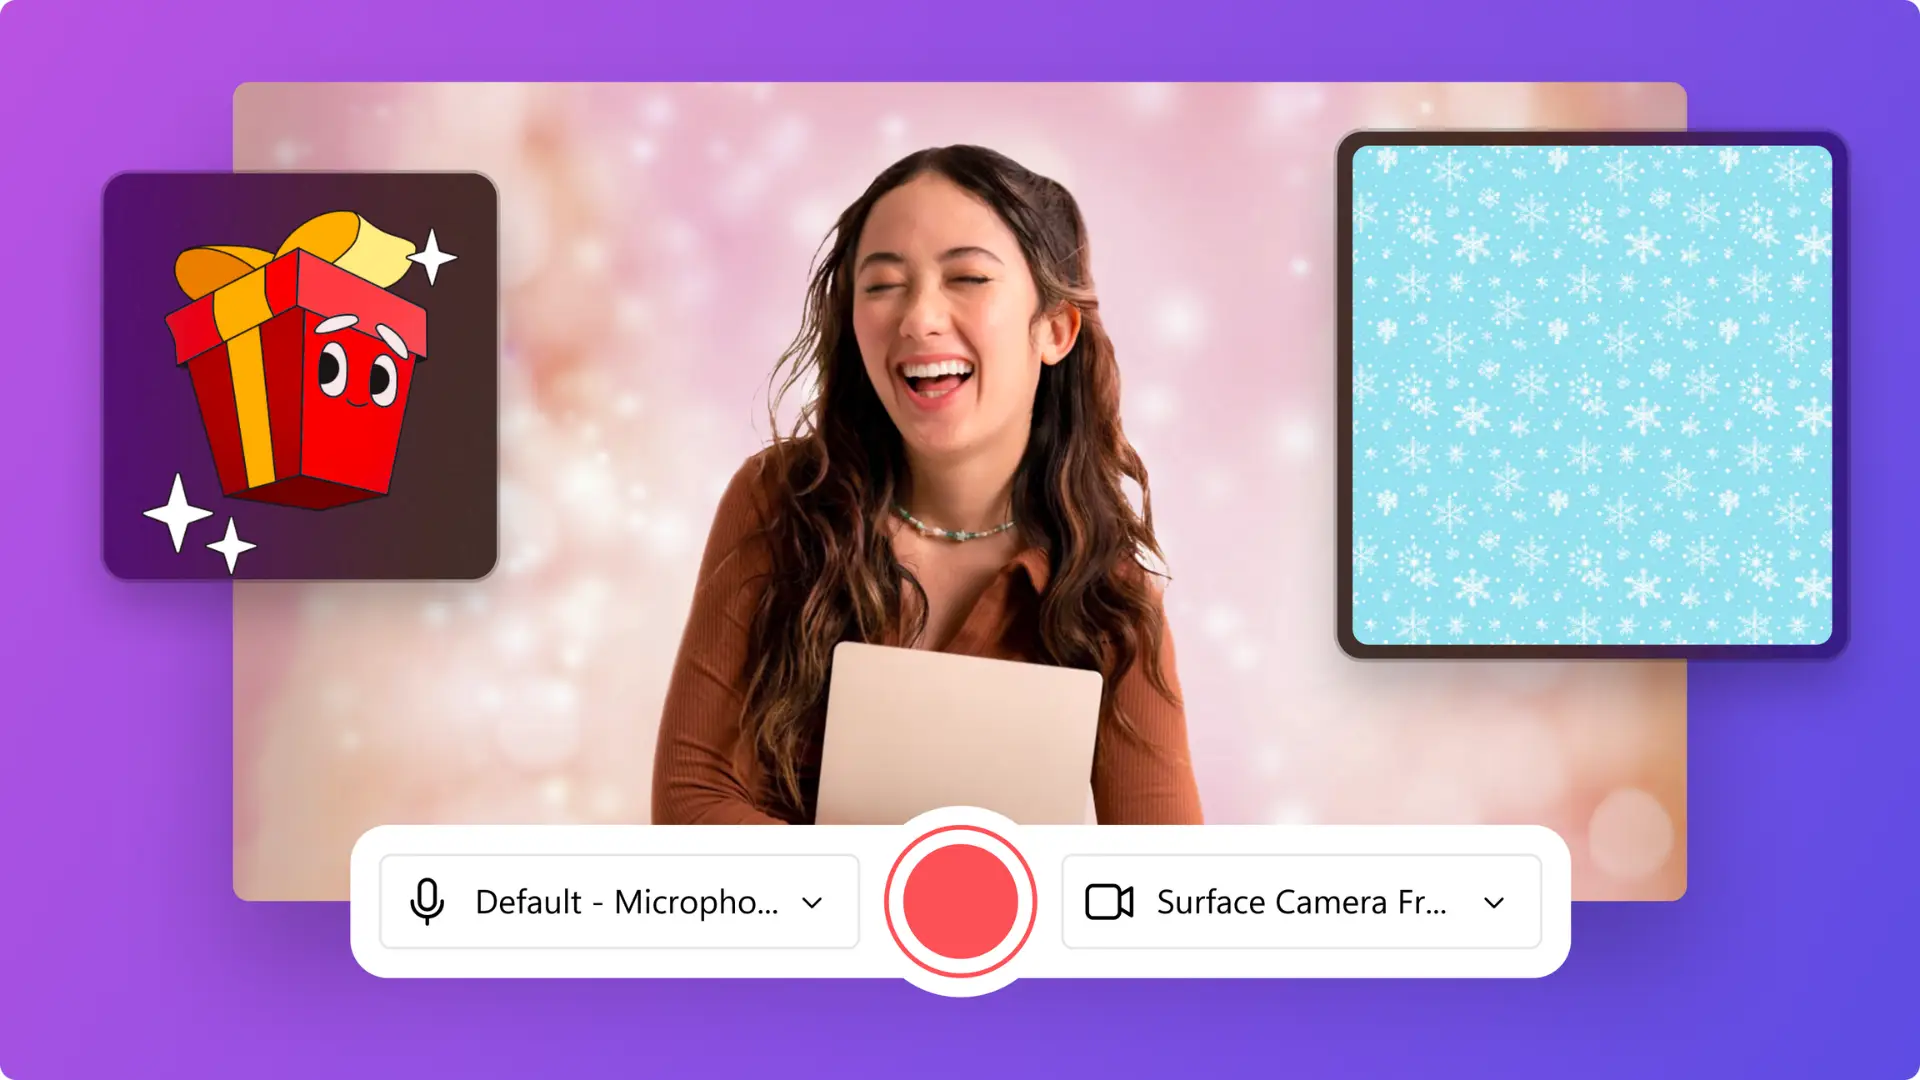
Upload your own media assets into the your media tab or scroll through other stock videos to replace the default template video footage. Drag and drop your media directly over the template video assets on the timeline to instantly replace them.
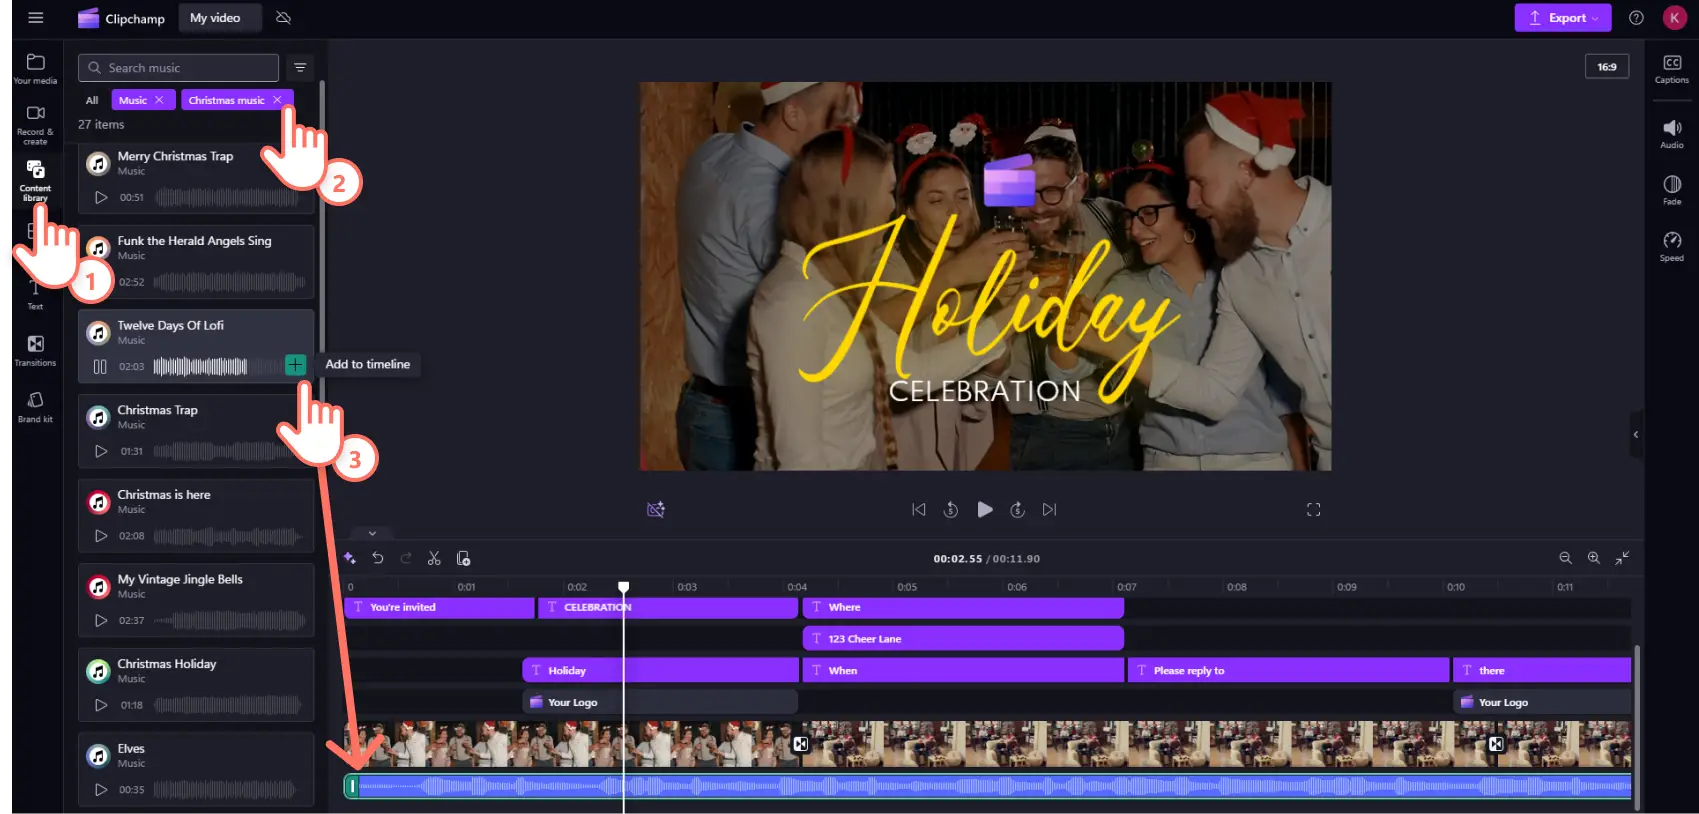
Holiday music can be any genre of your choice. Edit the template background music with a wide range of royalty-free audio found in the content library. Click on the content library tab on the toolbar and select the music option from the audio drop down arrow. Browse through collections by style and mood or use the search bar to type in a keyword. Preview a song by clicking on the play button, then drag and drop your audio asset onto the timeline over the top of the template music to replace it.
Step 4. Save and share with your recipients
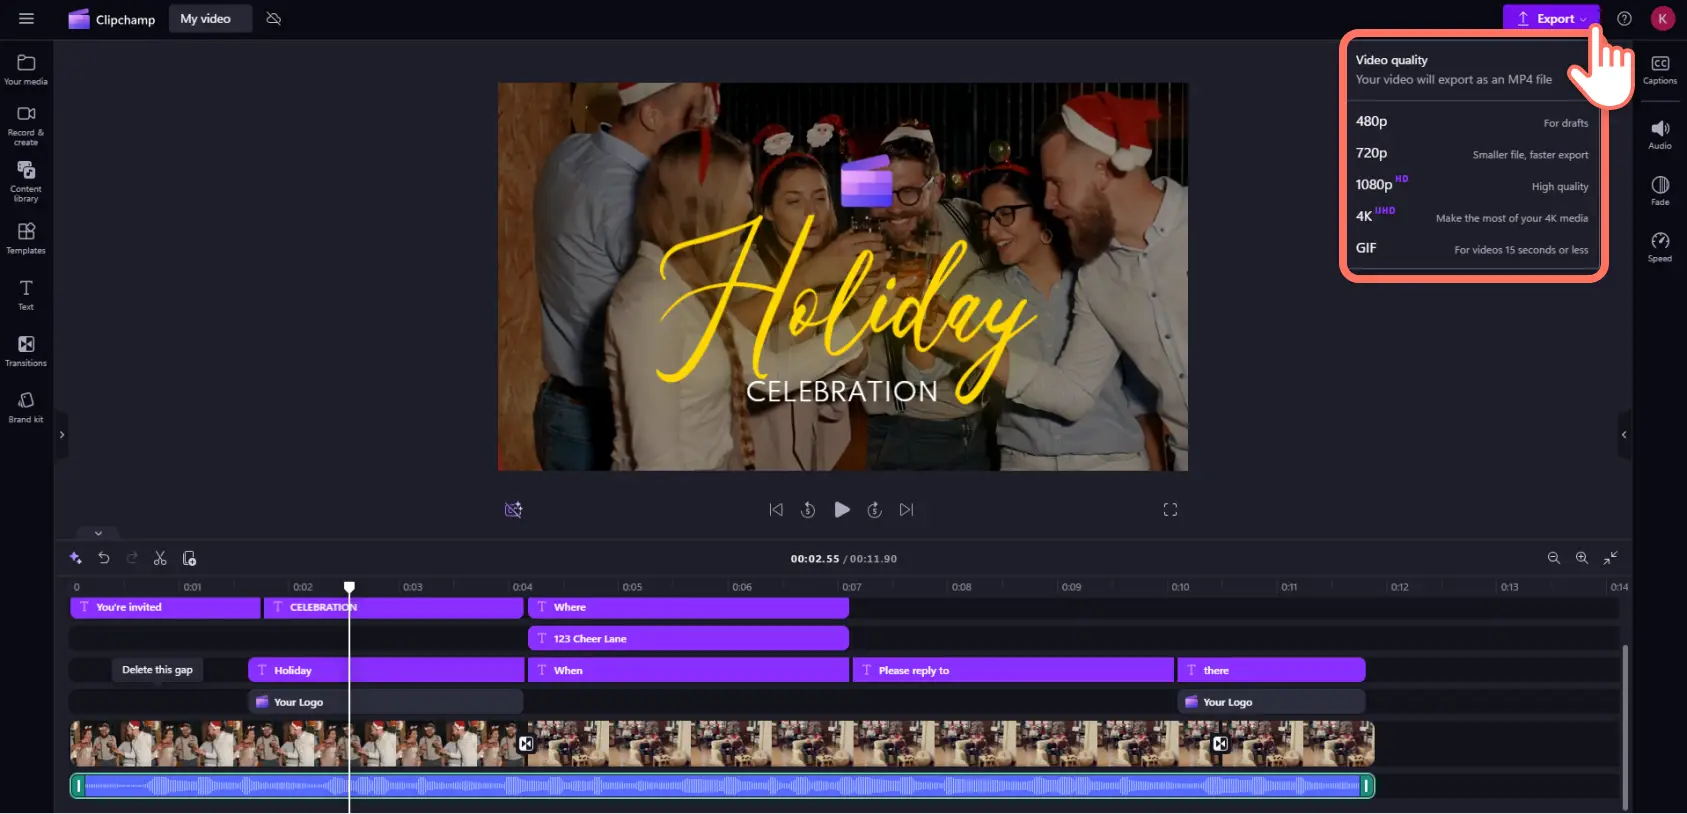
When you’re ready to watch and save your final video, preview your party video invite by pressing the play button in the preview window, then click on the export button. Next, select a video resolution like high-quality 1080p. You can then save the video to your device or use one of the integrations to instantly upload to cloud storage.
10 holiday party invitation ideas with video templates
Office Christmas party video invitation
This classically themed work party invite is perfect for corporate and small businesses when it’s Christmas time. The video template includes animated text and prompts for your company logo so you can keep the event on-brand while celebrating.
Christmas lunch video invite
Prepare your friends and family for a feast of turkey, ham, pudding, and all your holiday favorites with this Christmas lunch online invitation template. The short and sweet virtual invite is loaded with fun festive sticker animations and text. Just customize with your lunch details!
Birthday party video invitation
Get ready to cut the cake and celebrate another year rotating around the sun with this colorful birthday party video invitation. Remix this template for any birthday or party occasion by customizing it with GIFs and celebration backgrounds from the content library.
Easter video invite
Everybody get set for the Easter Egg hunt with this cartoonish Easter event template. Easter Bunny and other fun animations make this perfect for everything from family gatherings to school and community Easter parties.
Halloween invite
Celebrate the spooky season and invite your friends to your Halloween event with this unique template. A retro VHS filter dresses up this invite with the right amount of Halloween darkness. It’s complete with ghosts, Jack-o’-lanterns, and fire animations to capture the trick-or-treat spirit.
Hanukkah video invitation
Welcome friends and family to your menorah lighting with this Hanukkah video invitation. This template includes respectful Hanukkah music and a Hanukkiah graphic to engage your invitees. The portrait ratio makes it perfect as a mobile invitation, so all you need to do is add in your event details and share directly to social media.
Diwali party invite
Prepare for the Hindu festival of lights with this mesmerizing Diwali party invite template. Get mouths watering for a feast of gulab jamun or nolen gurer sandesh with the on-theme 3D background and modern Mumbai streets music.
Thanksgiving dinner invite
Share gratitude and give thanks this Thanksgiving by inviting your friends and family for a Turkey and stuffing feast. Gather your loved ones for all the Thanksgiving favorites followed by an NFL or CFL watch party.
New Year’s Eve event invitation
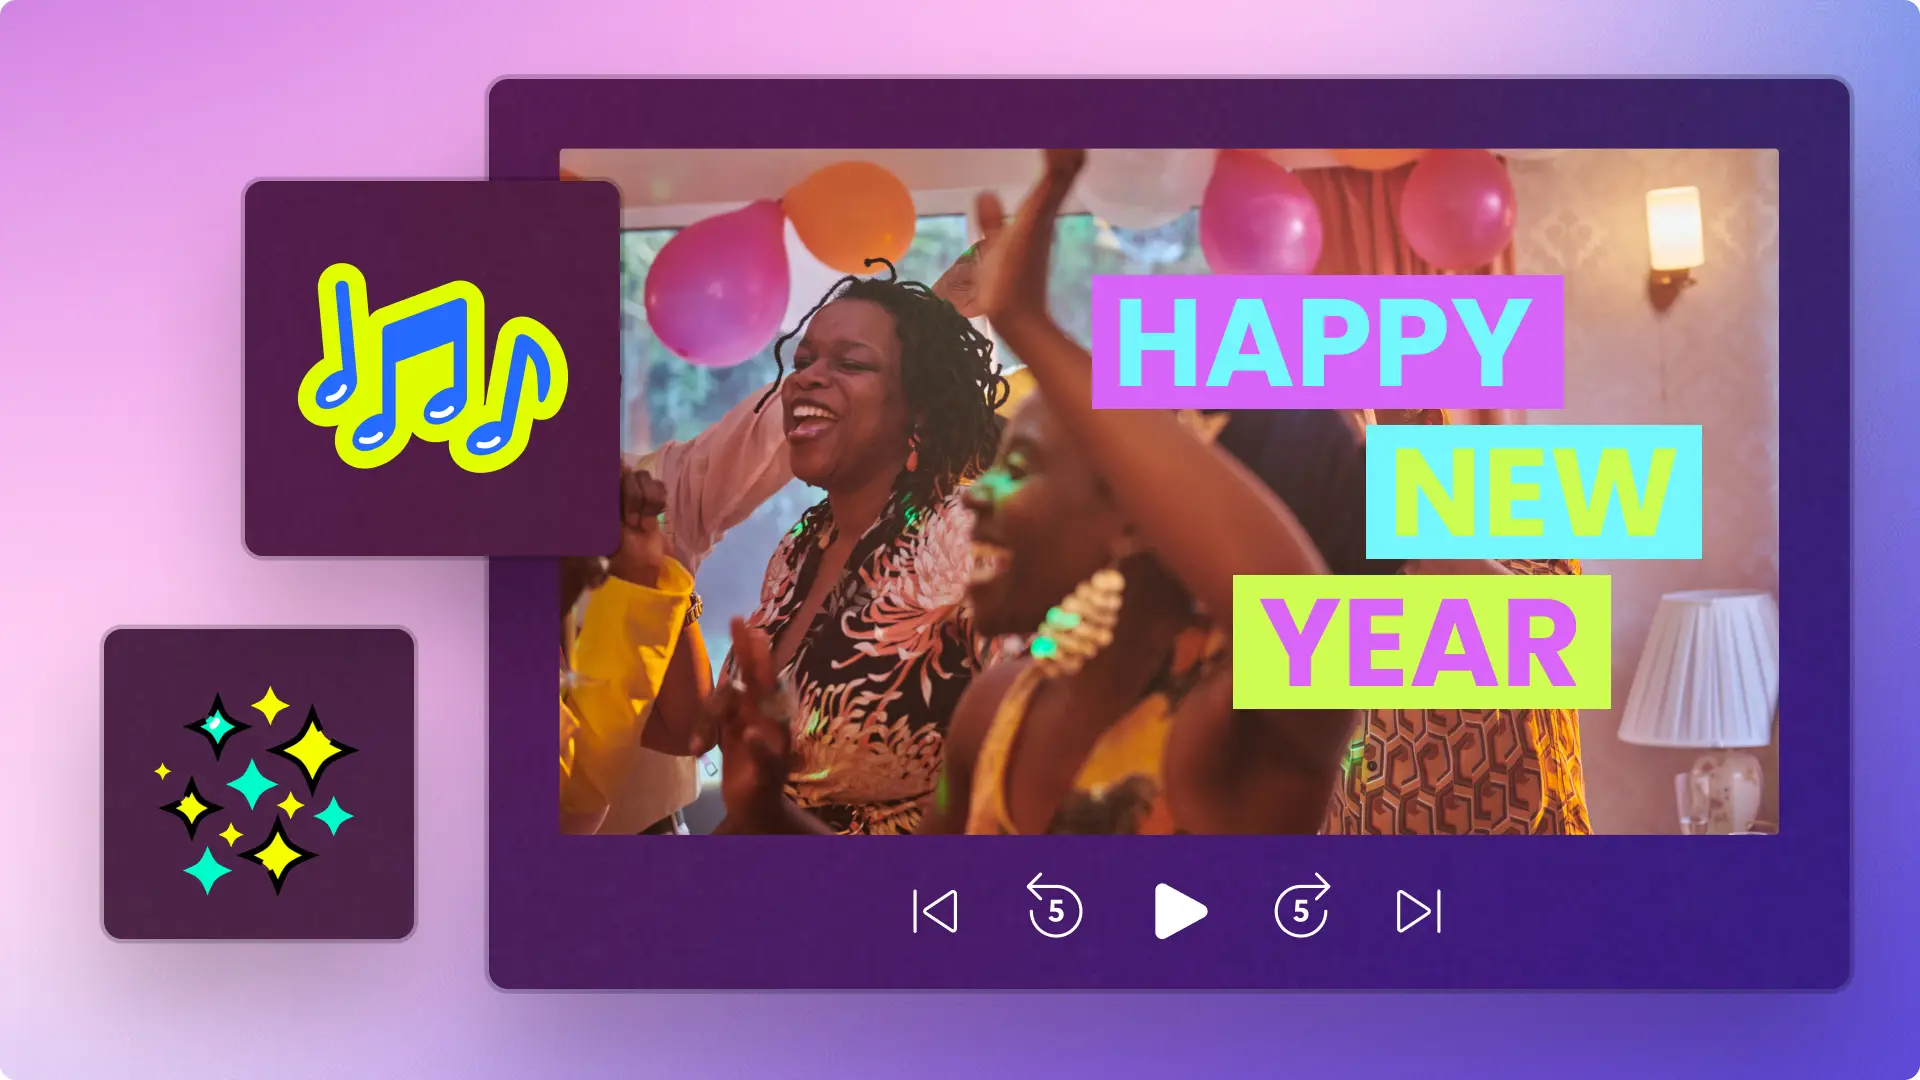
Ring in a fresh set of 12 months with this New Year’s Eve party invite. The colorful text and 3D bubble animations pair seamlessly with the energetic party music to get your besties hyped for your New Year’s Eve party.
New Year party video invitation
Celebrate the New Year season with friends or work colleagues using this New Year party online invitation. Kick back and chill or clear the dance floor and get your groove on by spreading the celebration vibes with this well-rounded invite for any New Year occasion.
Get further inspired for holiday season with these video ideas for Christmas and Hanukkah.
Create holiday party video invites today for free with the Clipchamp video editor or download the Microsoft Clipchamp Windows app.

