Heads up! The screenshots in this article are from Clipchamp for personal accounts. The same principles apply to Clipchamp for work and school accounts.
On this page
Are your video clips too dark, over exposed, or lacking color? Say goodbye to uneven lighting and shadows by easily editing the appearance of your video with our beginner-friendly color correction tool.
There’s no need to re-record dull landscapes, poor quality webcam videos, or not use dark vlog footage. Just adjust the exposure, contrast, brightness, and temperature of your videos using the simple sliders. You can even reveal the hidden beauty in your video clips, intensify your video’s mood, tone, and highlight key elements just by enhancing video quality and colors.
Explore everything you need to know about color correction vs color grading and learn how to use color correction in video editing with Clipchamp.
Video color correction vs. color grading
Not sure what the difference between color correction and color grading is in video editing? Let’s break it down.
Color correction
When a user color corrects a video online, the aim is to adjust the video's color to enhance the quality. Color correcting can include adjusting the brightness of your video, editing the contrast, saturation, exposure, and temperature.
Color grading
When you want to color grade a video, the aim is to change the video's tone, look, and mood by enhancing the colors using more advanced controls. Color grading is used for more creative purposes, whereas color correction fixes a technical issue. Both functions, however, can change your video’s mood and feel by adjusting colors.
How color correction can enhance your video
Determine a video tone: By adjusting the temperature of your video is an easy way to narrate different tones and themes. A cooler tone may convey suspense, melancholy, or winter themes, whereas warmer tones can emphasize romantic scenes and summer themes.
Consistent look and feel: If your video clips are recorded at different locations or times of the day, color correction tools can be used to keep your videos consistent and reinforce the intended mood throughout.
Emphasize key elements: Draw attention to certain scenes, important information, and different characters by adjusting the colors and making your video brighter.
Amplify mood: Just by adjusting the brightness and darkness of your video can instantly change the mood and feel of your video clip. A darker tone can suggest fear, mystery, and suspense, whereas a brighter video clip can emphasize happiness and positivity.
How to change the color of a video
Step 1. Import videos or record a video
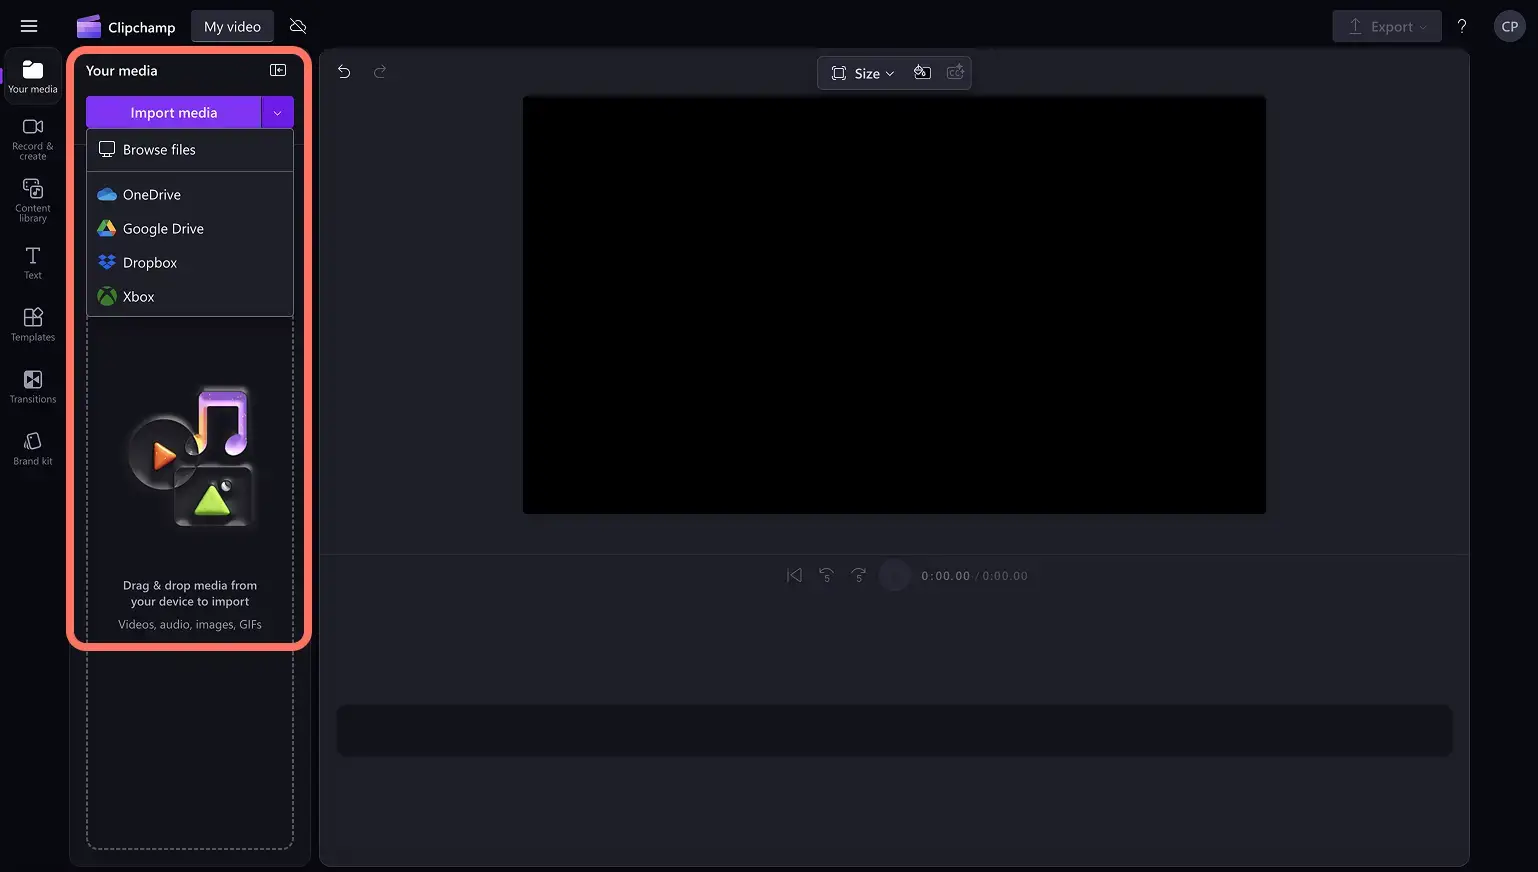
To import your own videos, images, and audio, click on the import media button in the your media tab on the toolbar to browse your computer files, or connect your OneDrive.
You can also record a webcam video directly inside the editor using the record & create tab, then screen, camera, or screen and camera.
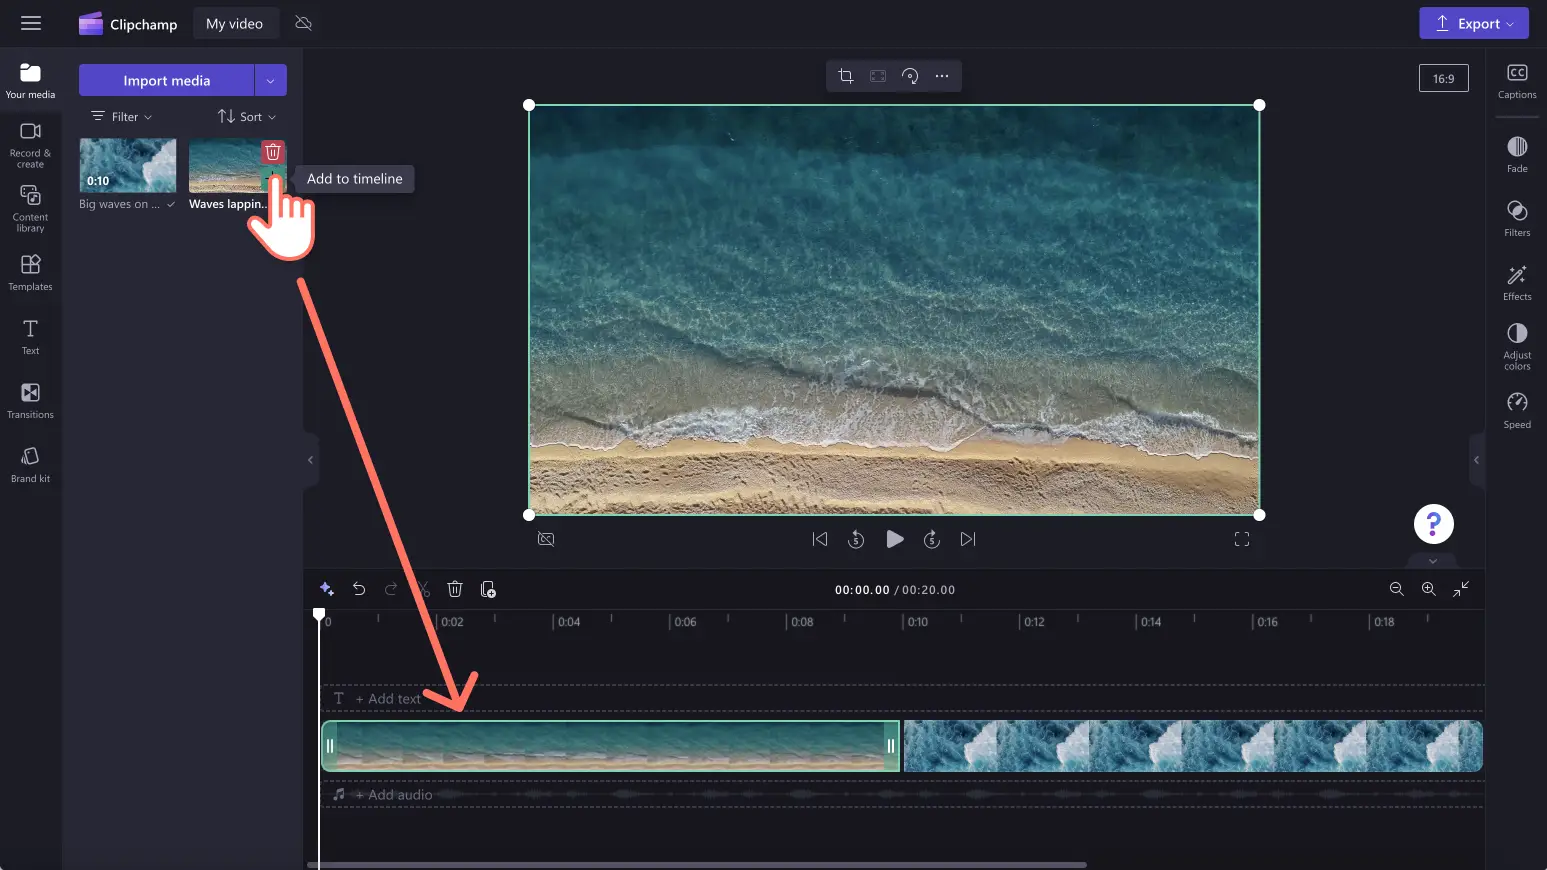
Next, drag and drop your media onto the timeline.
Step 2. Use the video color correction tool
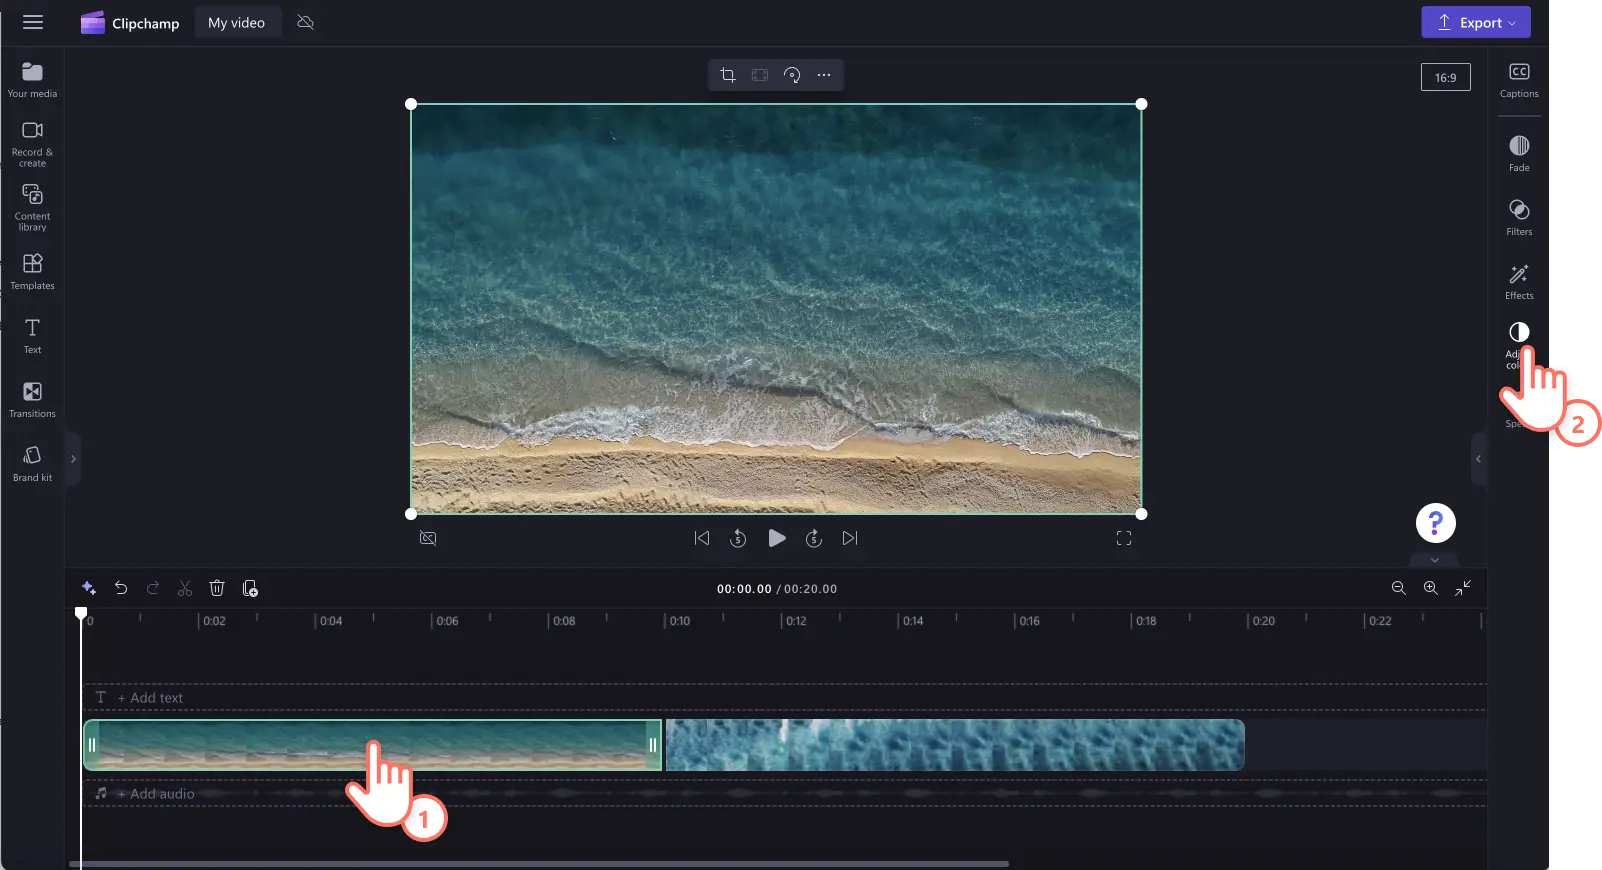
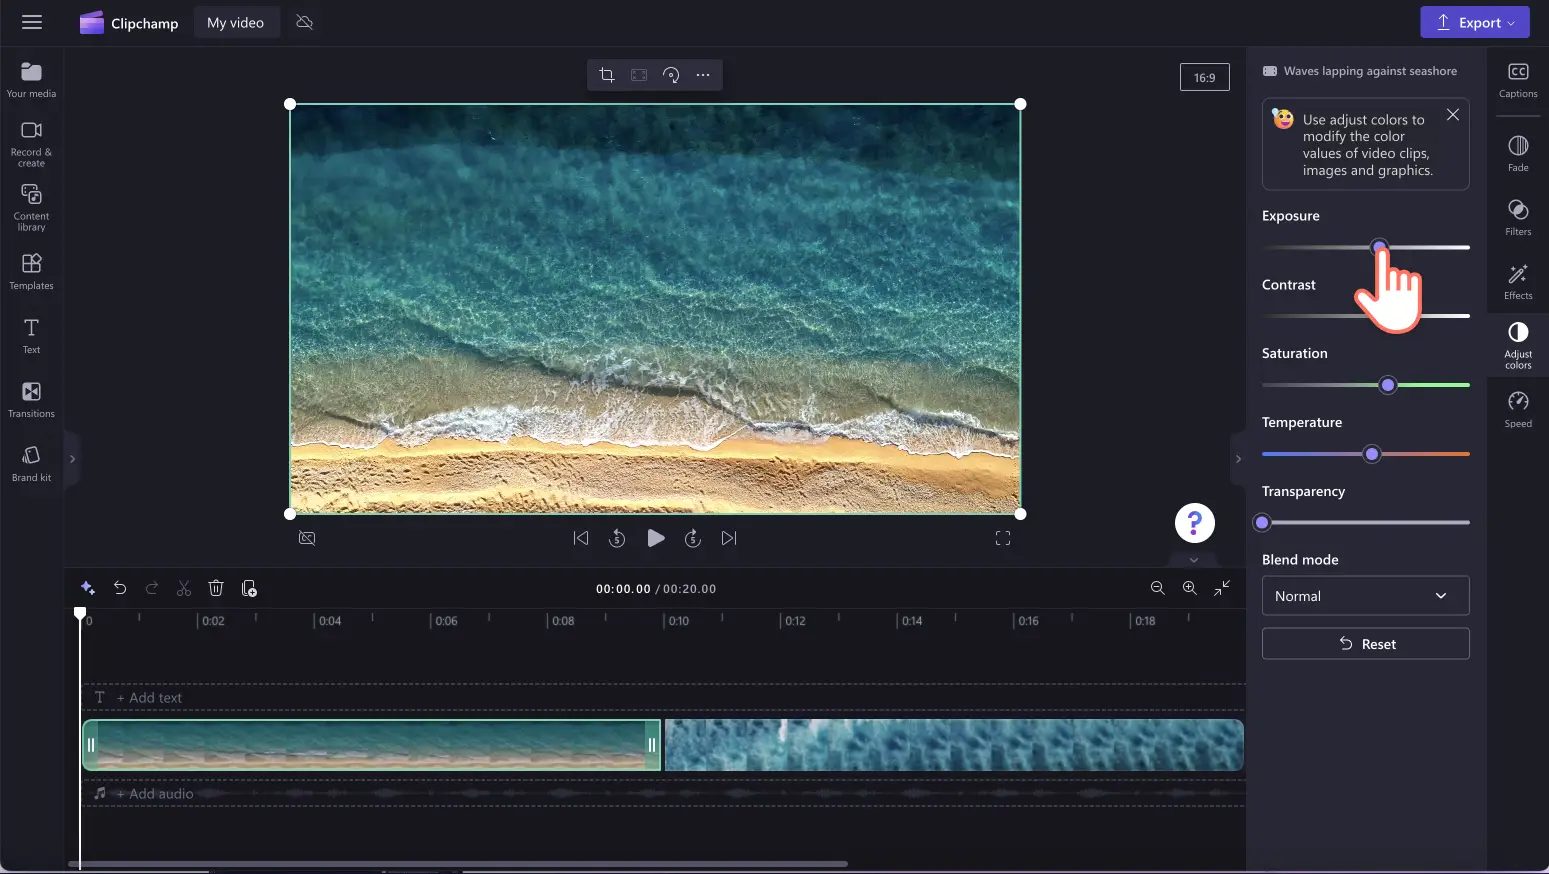
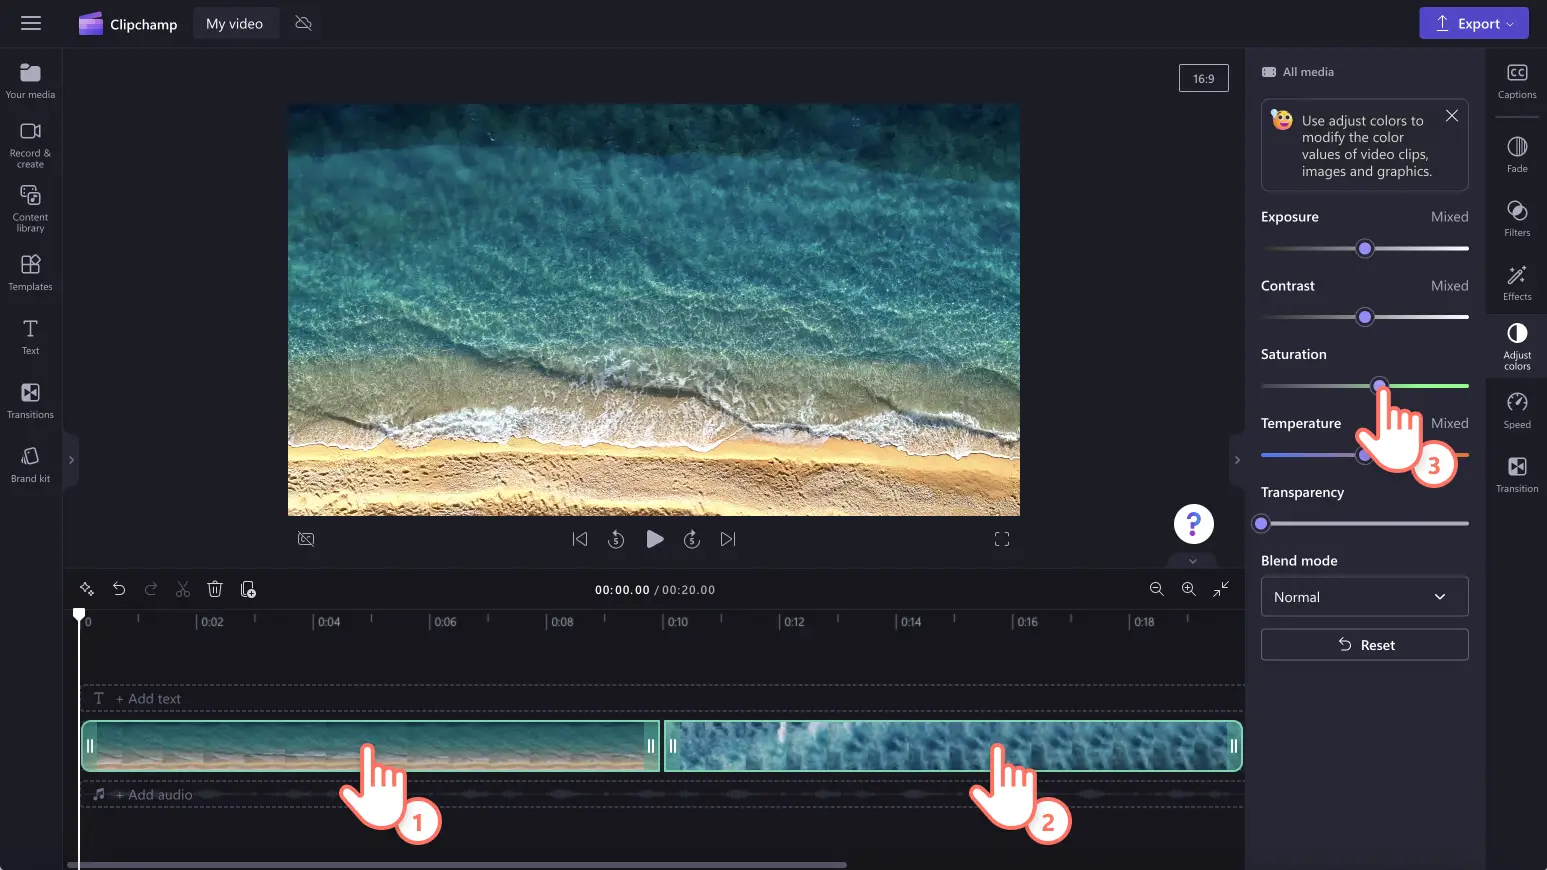
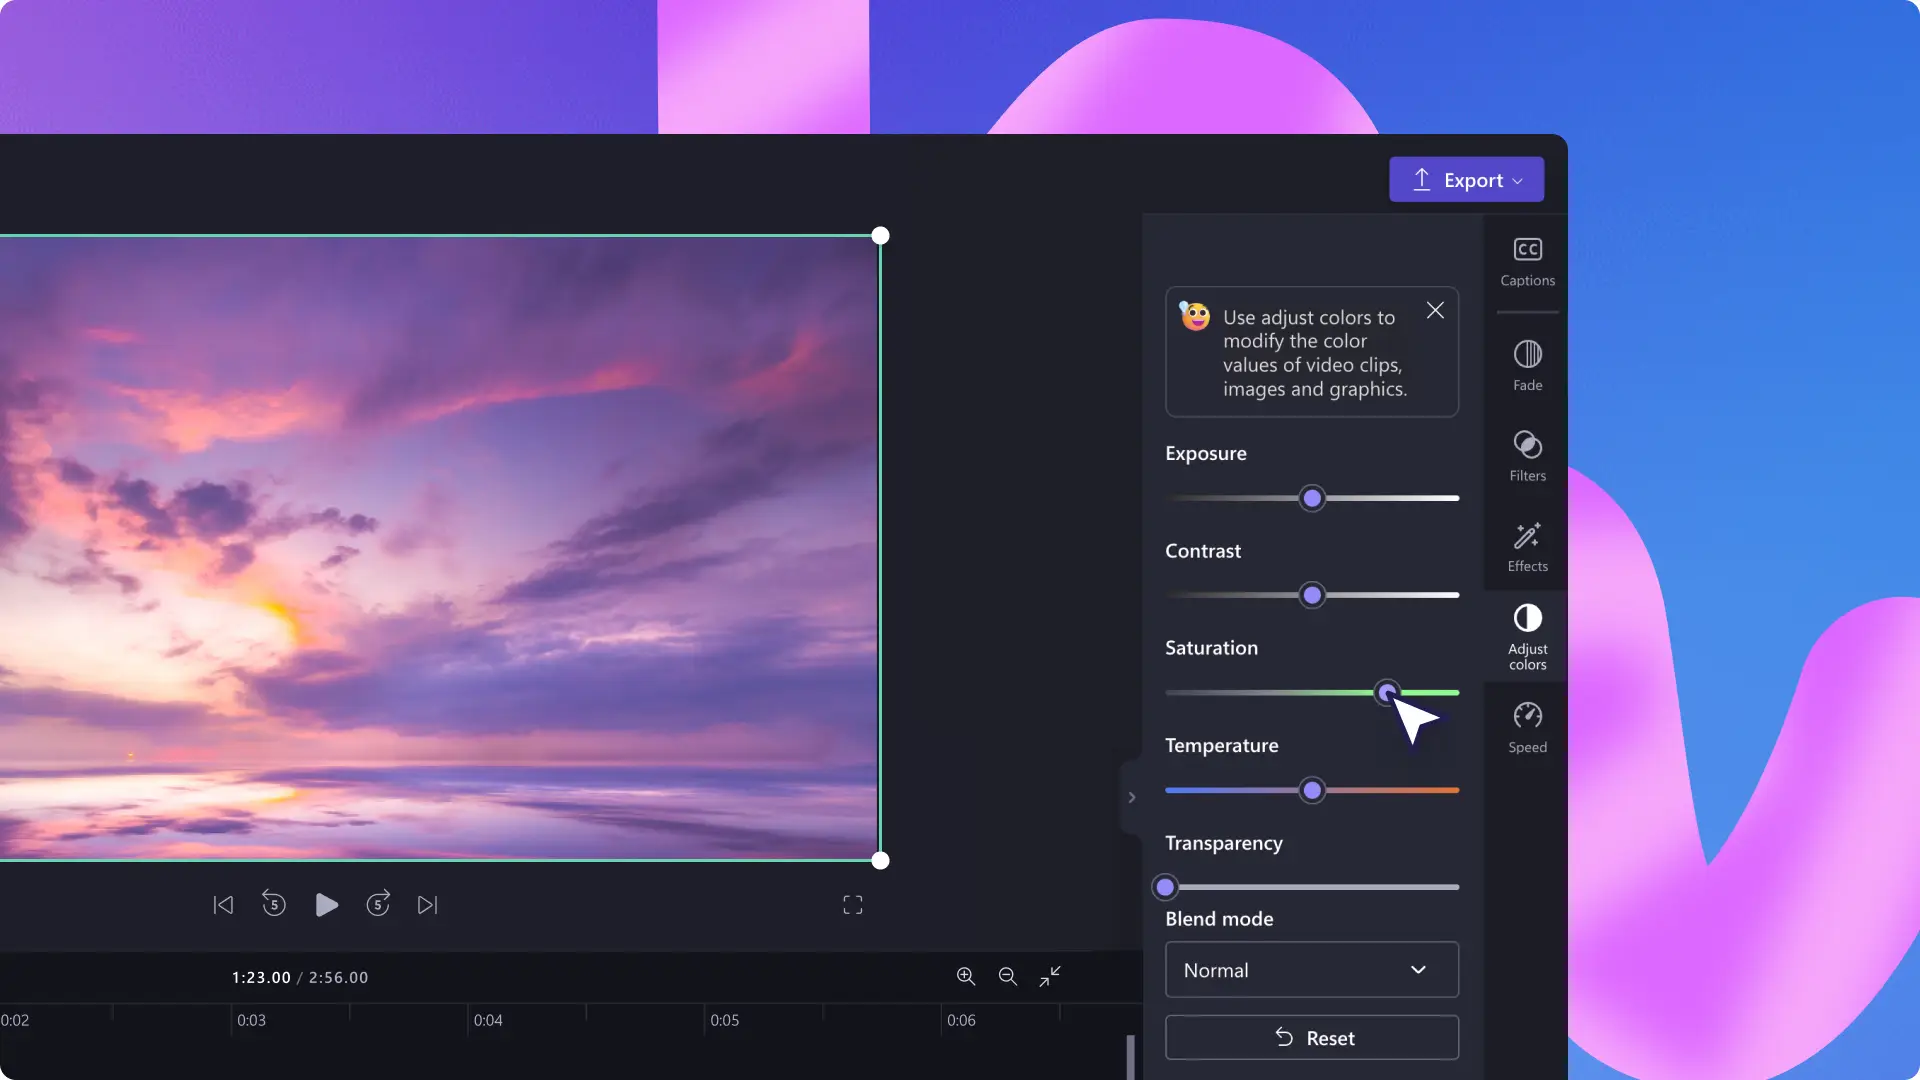
Click on your video or image on the timeline, then click on the adjust colors tab on the property panel. Inside the adjust colors tab you can color correct using the brightness, contrast, exposure, temperature, and saturation sliders.
Drag the color correction slider left and right to change the value or intensity. For example, to make your video brighter, drag the exposure slider to the right. If you would like to make your asset darker, drag the exposure slider to the left. You can use the color correction tool as many times as you like.
To adjust the colors of multiple assets, just use the multi-item editing tool. Hold down the shift key then click on your assets on the timeline. Next, use the color correction sliders to edit your video’s appearance.
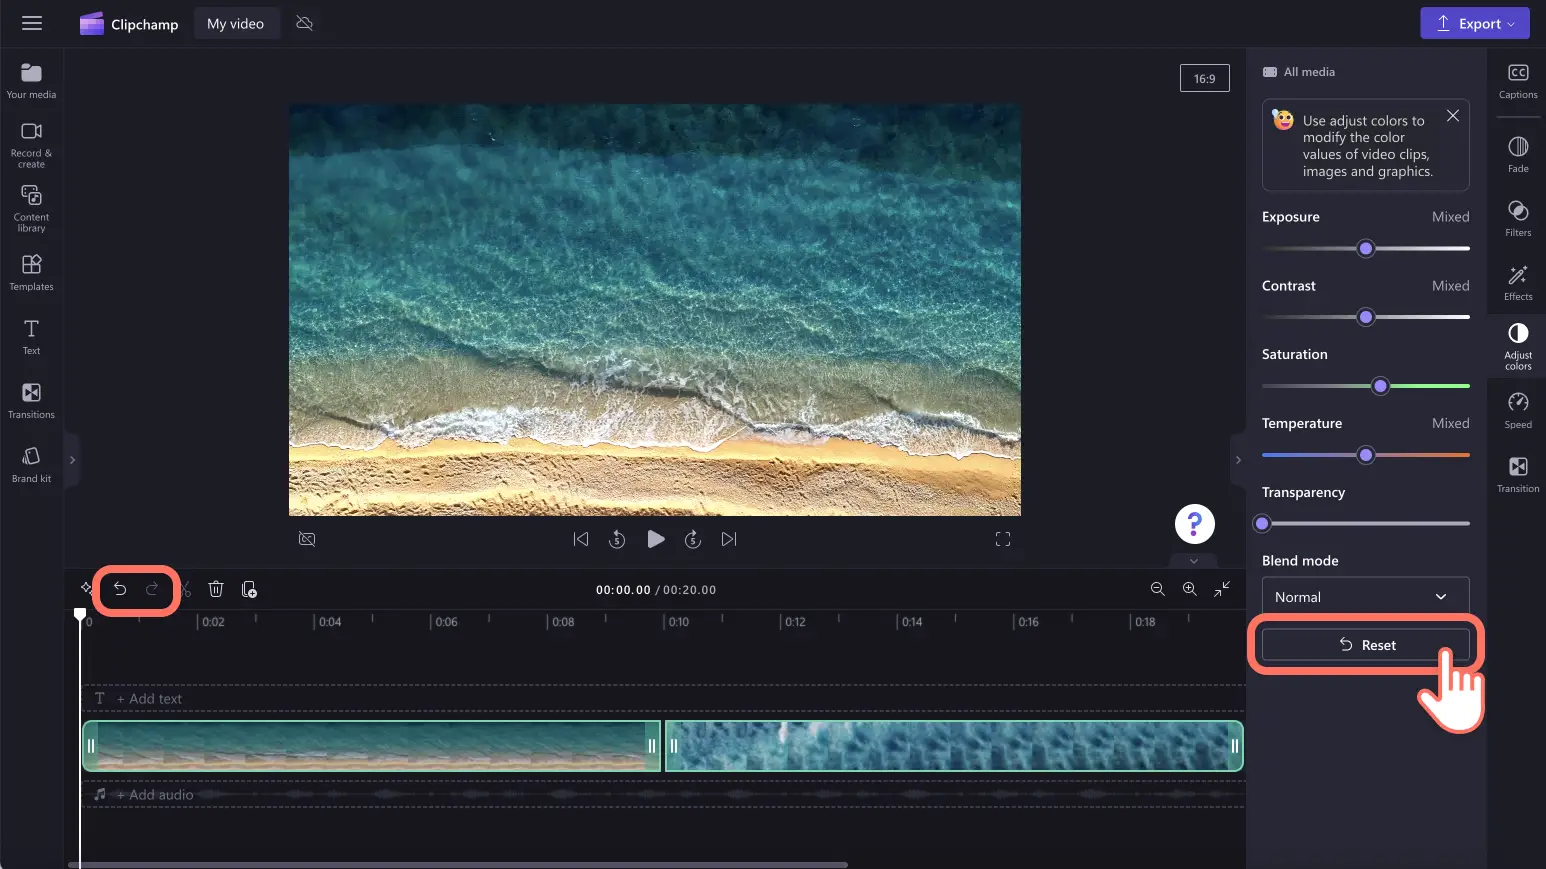
If you're unhappy with your color correction changes, just click on the reset button inside the adjust colors tab. This will reset your video back to its original state. You can also use the undo and redo buttons on the timeline or delete your asset and drag and drop the original asset onto the timeline.
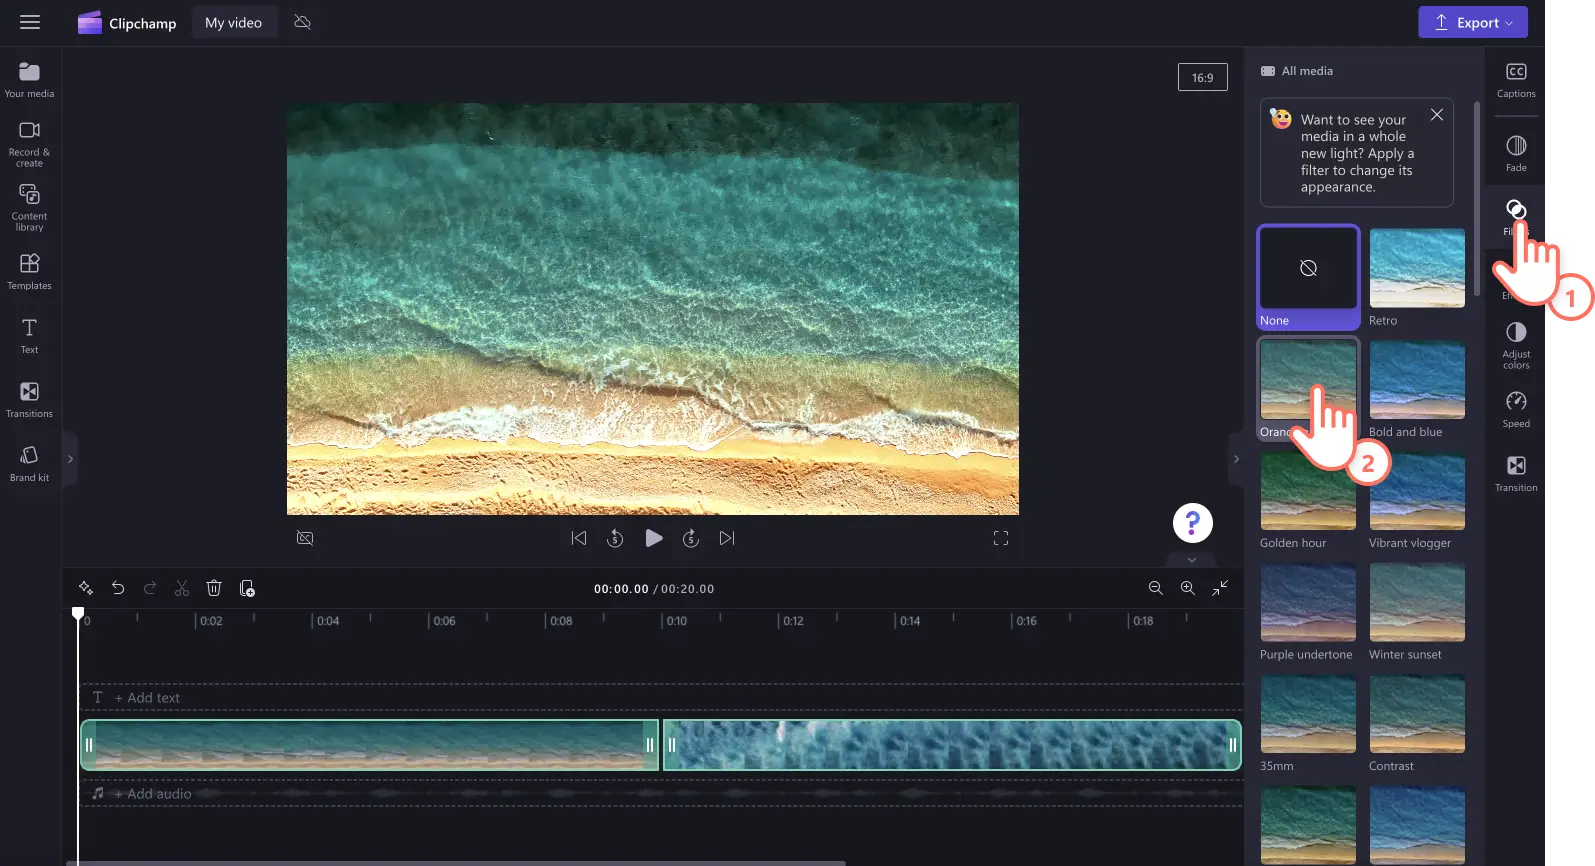
You can also use video filters to change the color of your assets. Just click on the filters tab on the property panel and hover over a filter to preview. Once you’ve chosen a filter, click on the filter to apply the change.
Step 3. Preview and save your video
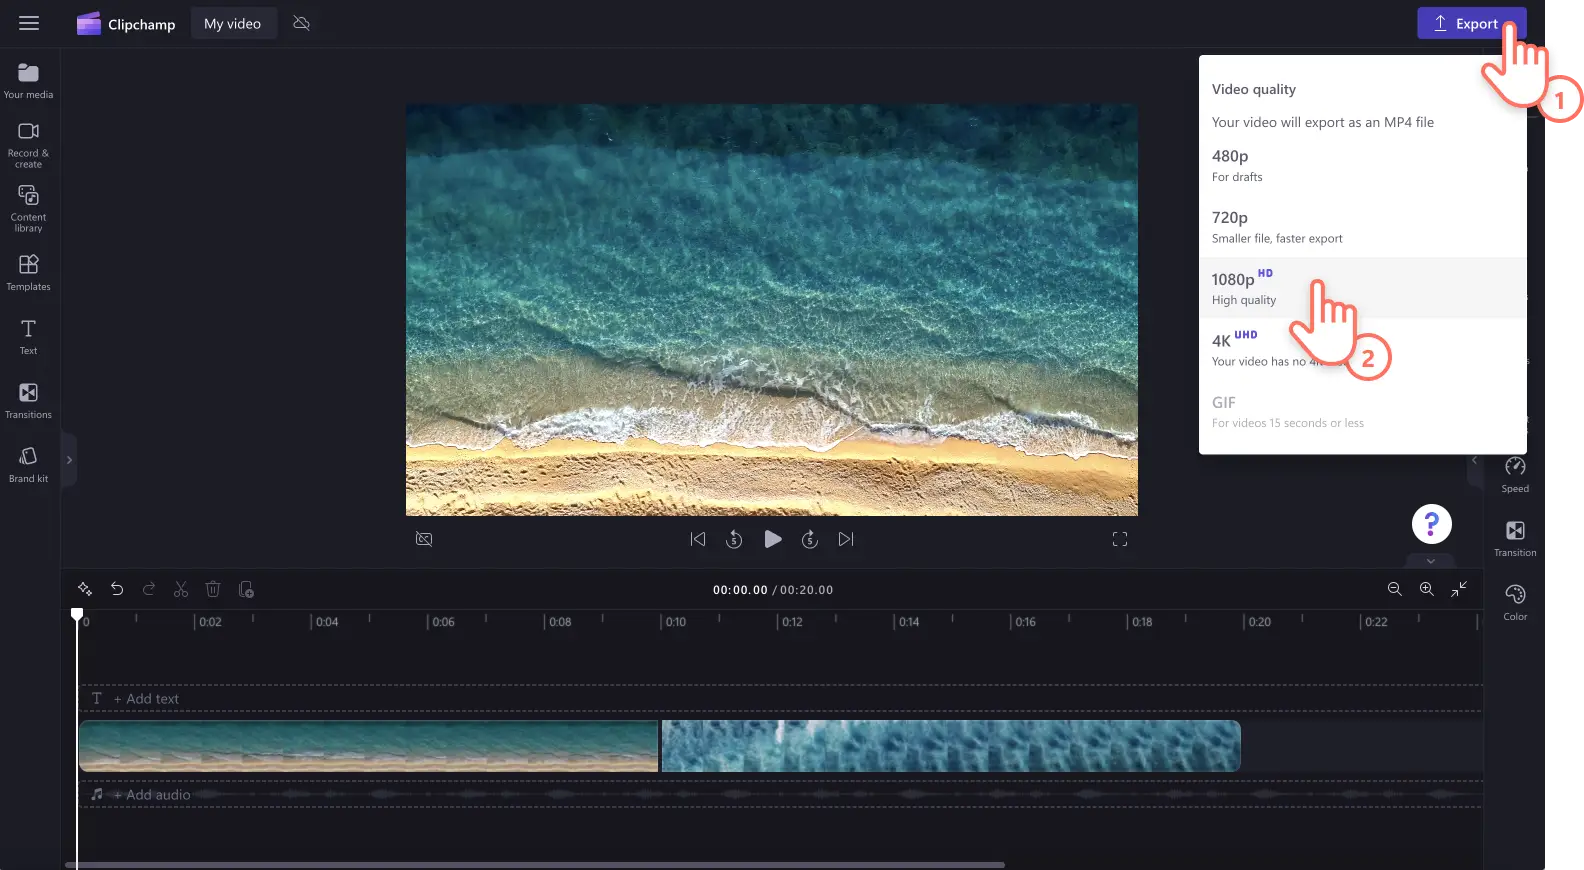
Before saving your new enhanced video, make sure to preview by clicking on the play button. When you’re ready to save, click on the export button and select a video resolution. We recommend saving all videos in 1080p video resolution for the best quality. Paid subscribers can save in 4K video resolution.
For more help color correcting videos in Clipchamp, check out our color correction or brightness and darkness help articles. You can also take a look at our YouTube tutorial.
Frequently asked questions
How can I change the color of a video for free?
Using the color correction tools inside the adjust colors tab in Clipchamp, you can change the colors of your video for free.
Can I brighten videos without losing quality?
Easily brighten your videos using the exposure slider without losing any video quality. Adjusting the colors of your video increases the video quality instead.
Will color correction change my videos aesthetic?
Adjusting the colors of your media using the video enhancer can easily change the vibe, mood, and aesthetic of your video. For example, if you turn down the brightness of your video, it can create a dark, mysterious feel. If you increase the saturation of your video, the colors will intensify making your video more vibrant and happier.
Explore other ways to enhance your videos like the double exposure effect and how to speed up and slow down audio.
Color correct your videos today with our video quality enhancer or download the Clipchamp Windows app.

