Heads up! The screenshots in this article are from Clipchamp for personal accounts. The same principles apply to Clipchamp for work and school accounts.
On this page
Let’s be real—keeping an audience hooked during a presentation can feel like trying to catch a butterfly with your hands. Whether you’re a teacher looking to make that history lesson pop or a business pro trying to pitch the next big idea, embedding YouTube videos into your Google Slides can make all the difference. Think about it: instead of just talking at your audience, you can show them exactly what you mean with a quick, engaging video.
In this guide, we’ll show you how to embed a YouTube video in Google Slides using three easy methods. And if you need to create the video yourself, easy YouTube video editing is just a few clicks away in Clipchamp. Let’s get started.
Why embed YouTube videos in Google Slides?
Ever had that moment in a presentation where words just aren’t enough? You’re explaining something crucial, but the audience’s eyes glaze over. This is where embedding YouTube videos in your Google Slides can be a real lifesaver. A well-placed video doesn’t just break up the monotony; it can make your point more transparent, engaging, and way more fun!
Embedding videos is like adding a splash of color to a black-and-white sketch. It brings your content to life, making it more dynamic and more accessible for your audience to connect with. Whether showcasing a product demo, sharing a quick tutorial, or throwing in a bit of humor to lighten the mood, videos help convey your message in a way that words alone often can’t.
This isn’t just anecdotal—there’s data to back it up. A recent Kaltura study found that:
97% of academic staff say that video is essential to the student experience
94% of staff noted an increase in student satisfaction
94% of staff reported an increase in performance
The same principles apply in business settings, where a well-chosen corporate video can be your secret weapon—delivering an informative and memorable pitch that helps you stand out in a sea of static presentations.
Plus, let’s not forget the time-saving element. Instead of spending ten minutes explaining a concept, you can show a two-minute video presentation that nails it perfectly. It’s efficient, impactful, and—most importantly—memorable. So, if you want your presentation to stick, adding a video or two might be the secret sauce you’re looking for.
How to add a YouTube video to Google Slides
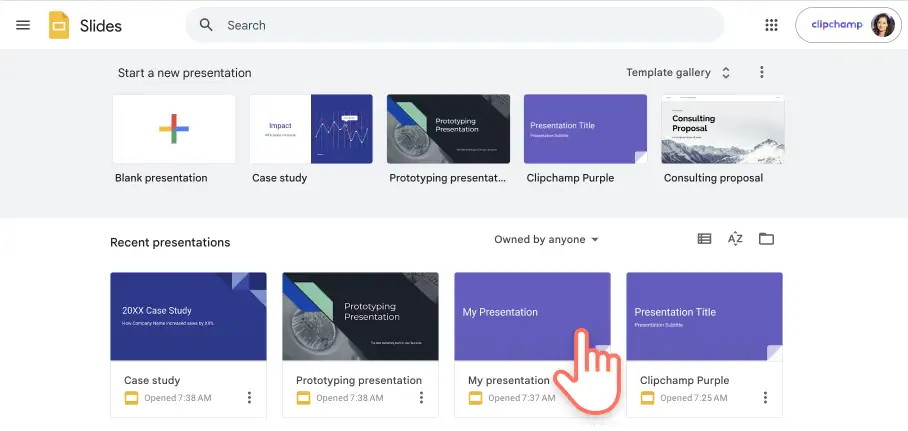
Step 1. Open your Google Slides presentation
Open the Google Slides presentation you would like to add videos to. Double click on your presentation to open it from your Google Drive gallery or Google Slides gallery.
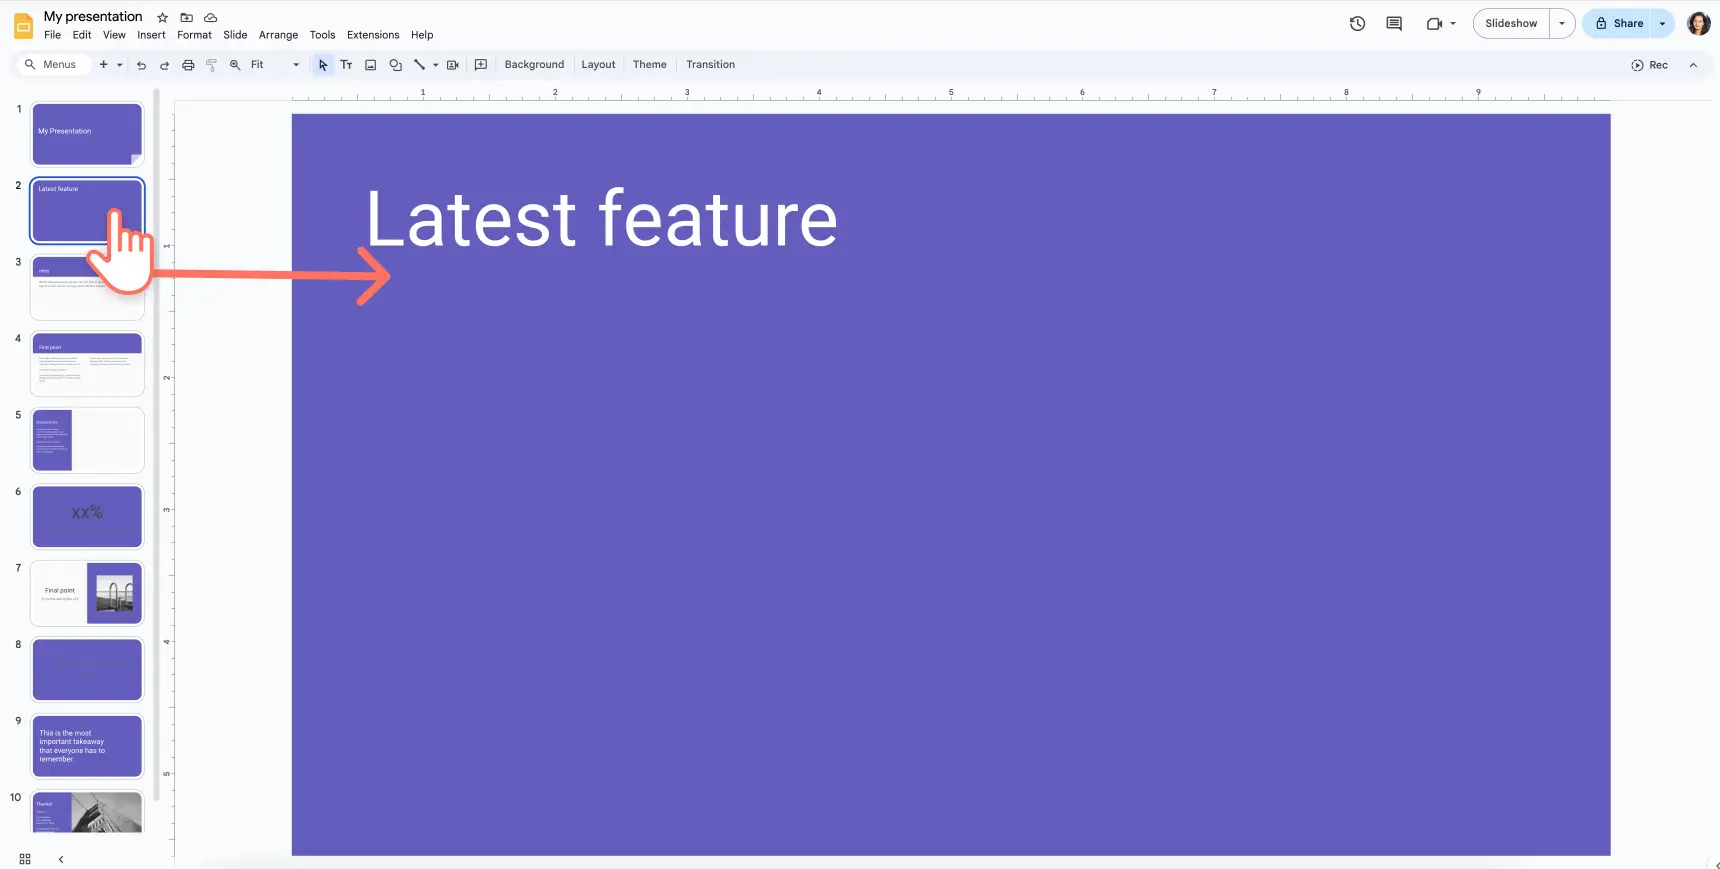
Step 2. Click on the presentation slide
Select the particular slide you would like to embed the video in.
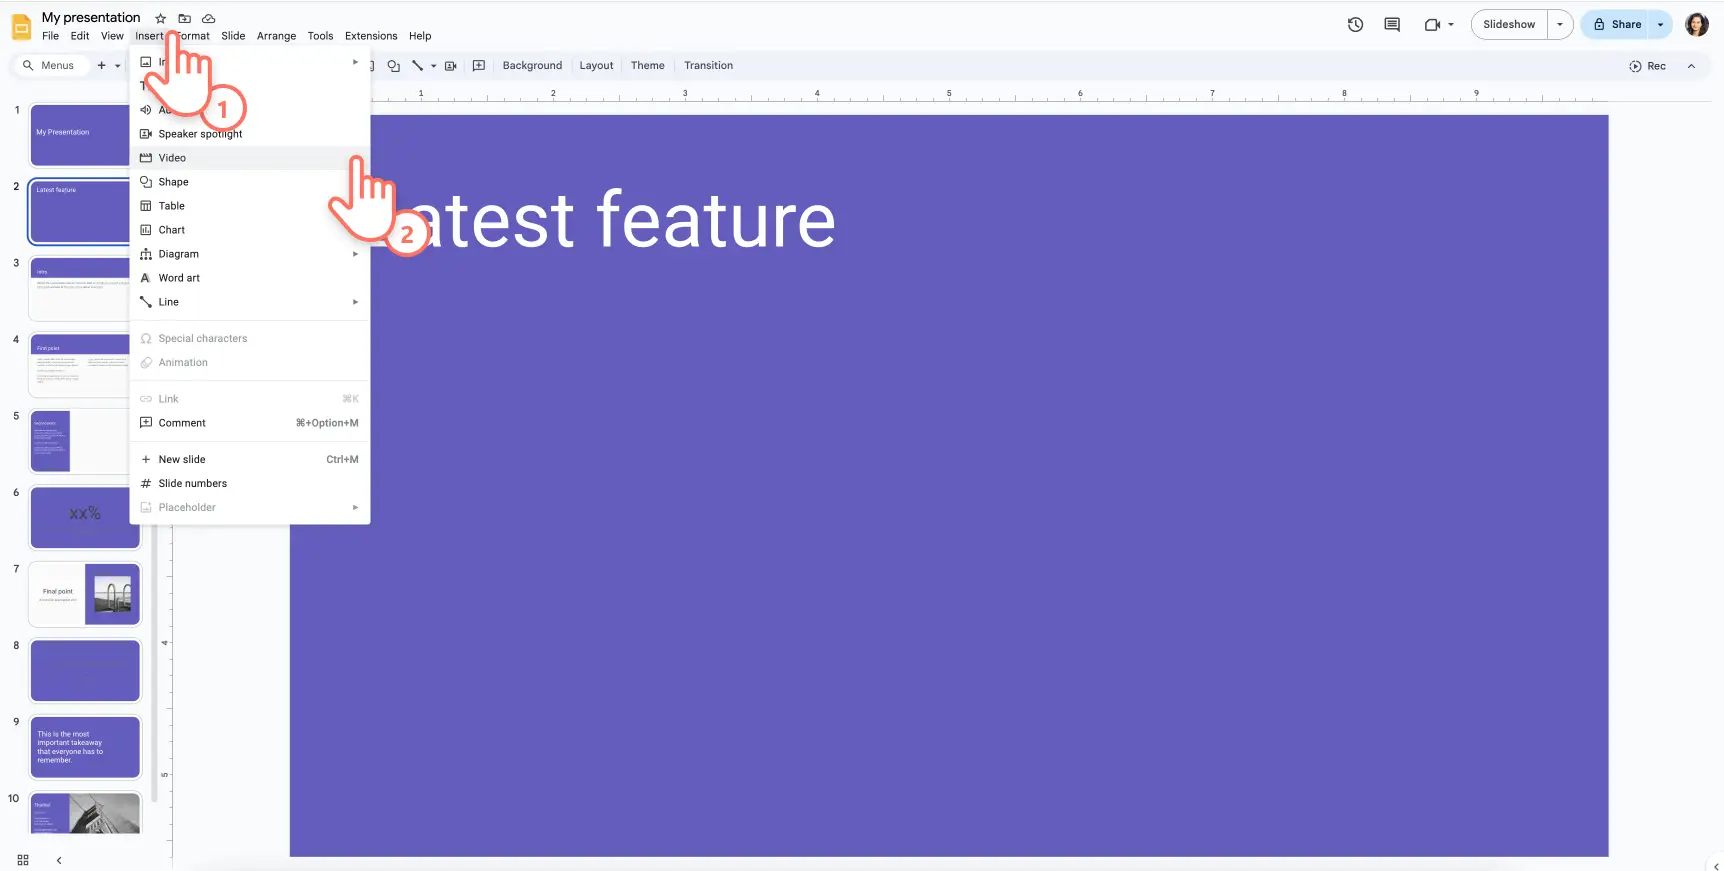
Step 3. Embed video to Google Slides
Click on the Insert tab on the top toolbar, then click on the Video tab.
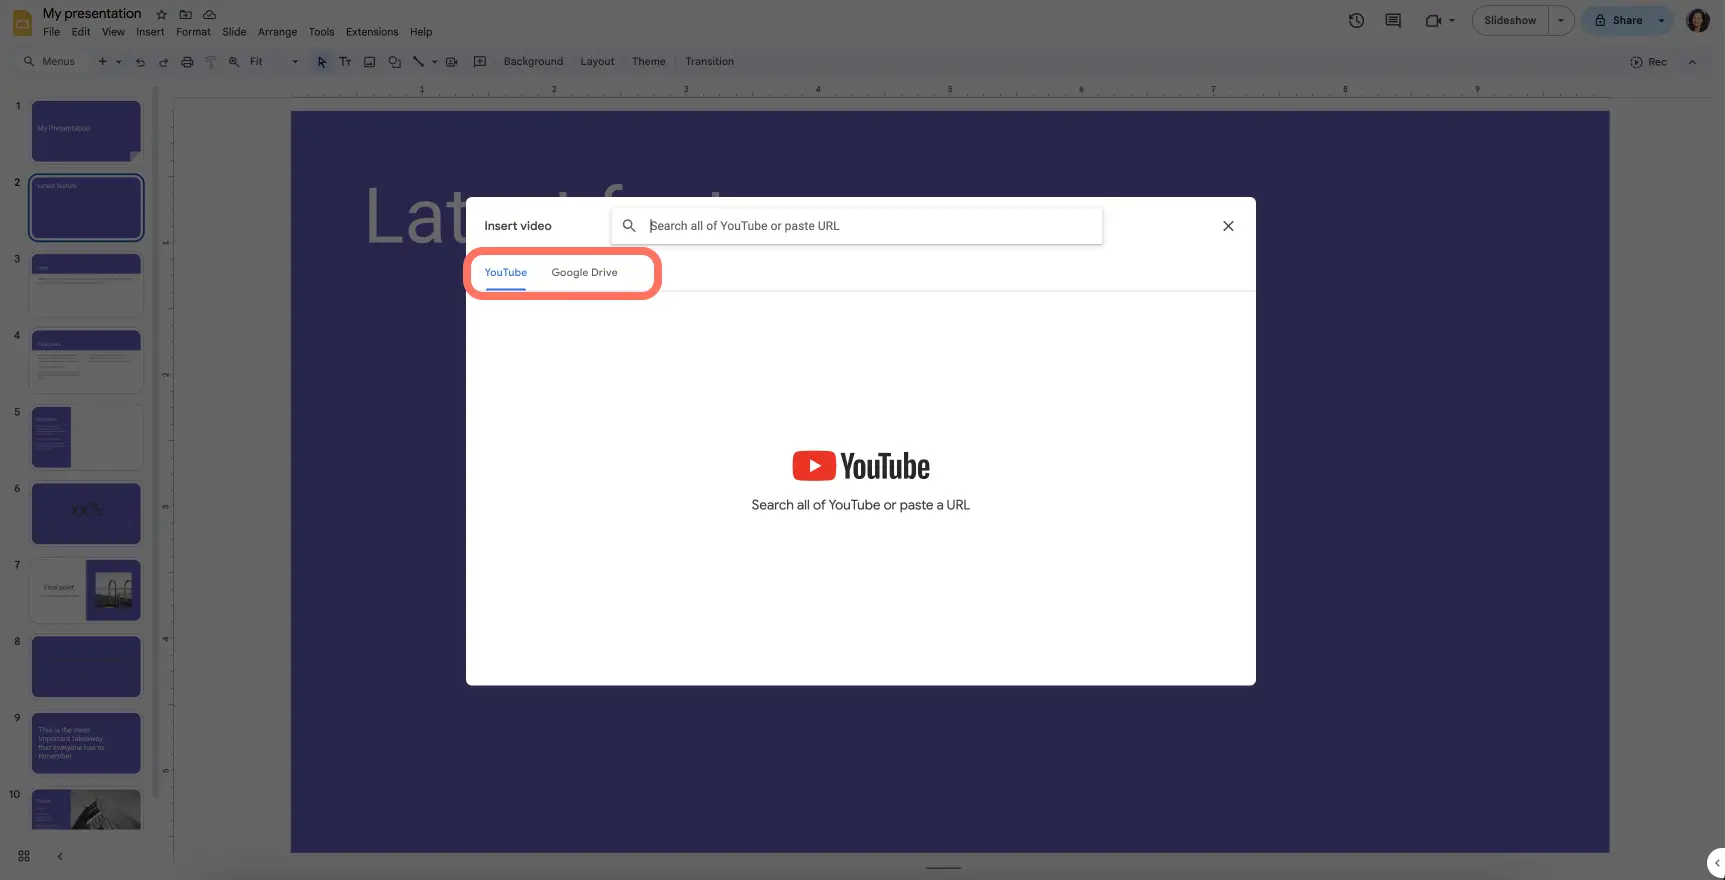
An Insert video box will appear on your screen, presenting you with two different embed video options.
Option 1. Insert YouTube videos
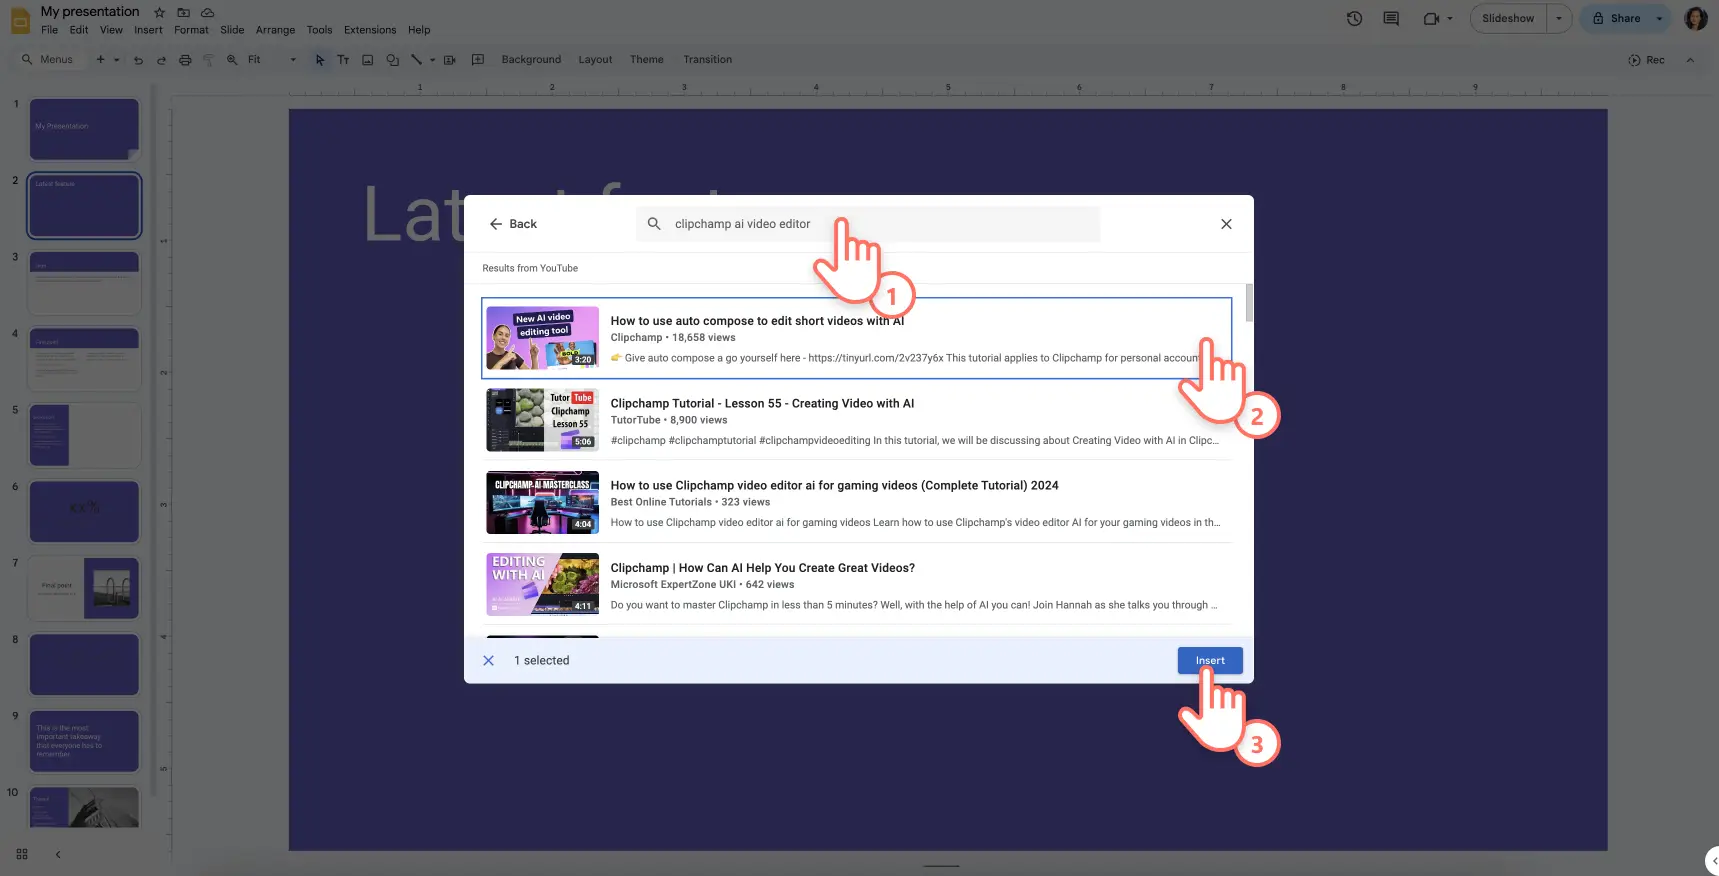
Click on the YouTube tab and in the search bar type a name to search for your desired YouTube video. Alternatively go to YouTube in another tab, copy the exact YouTube video URL and paste it into the search field.
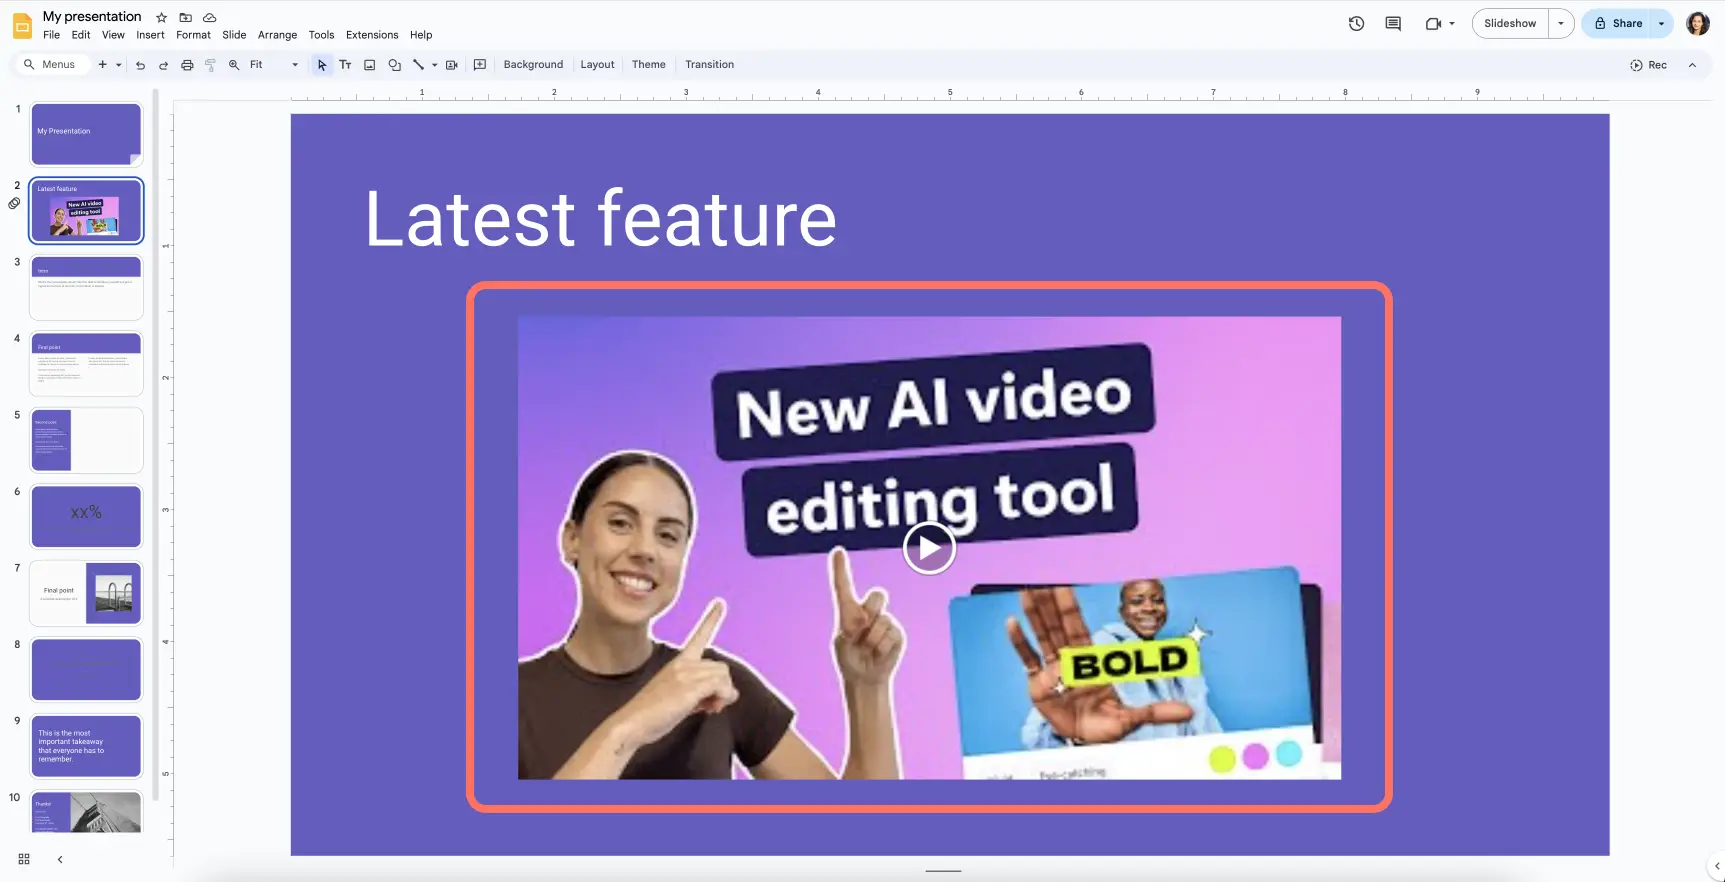
Click on your video to select it and then click Insert. It will be added to your slide.
Option 2. Insert video file from Google Drive
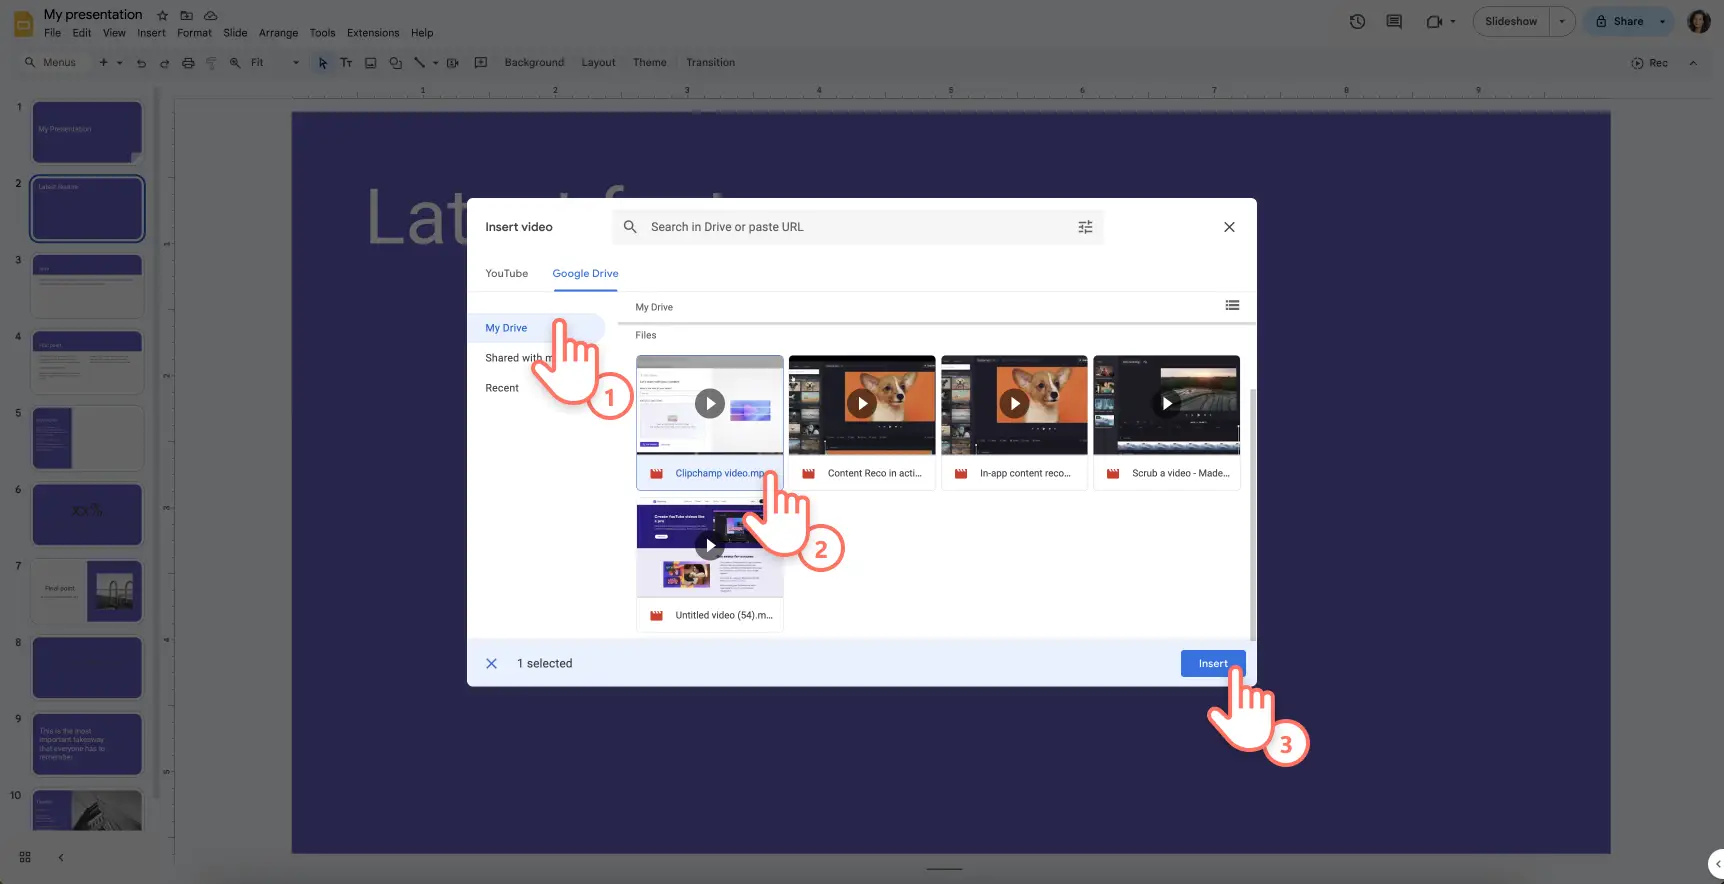
Click on Google Drive and navigate to your video. Then, select the Google Drive video and click Insert.
Step 4. Edit your embedded video
Now that your video has been embedded in your presentation, you’re able to move the thumbnail of the video preview around the Google Slide and change the size. A blue box with handles will appear around the embedded video. Drag and drop the video around your Google Slide to change its position, then drag and drop the blue handles to alter size.
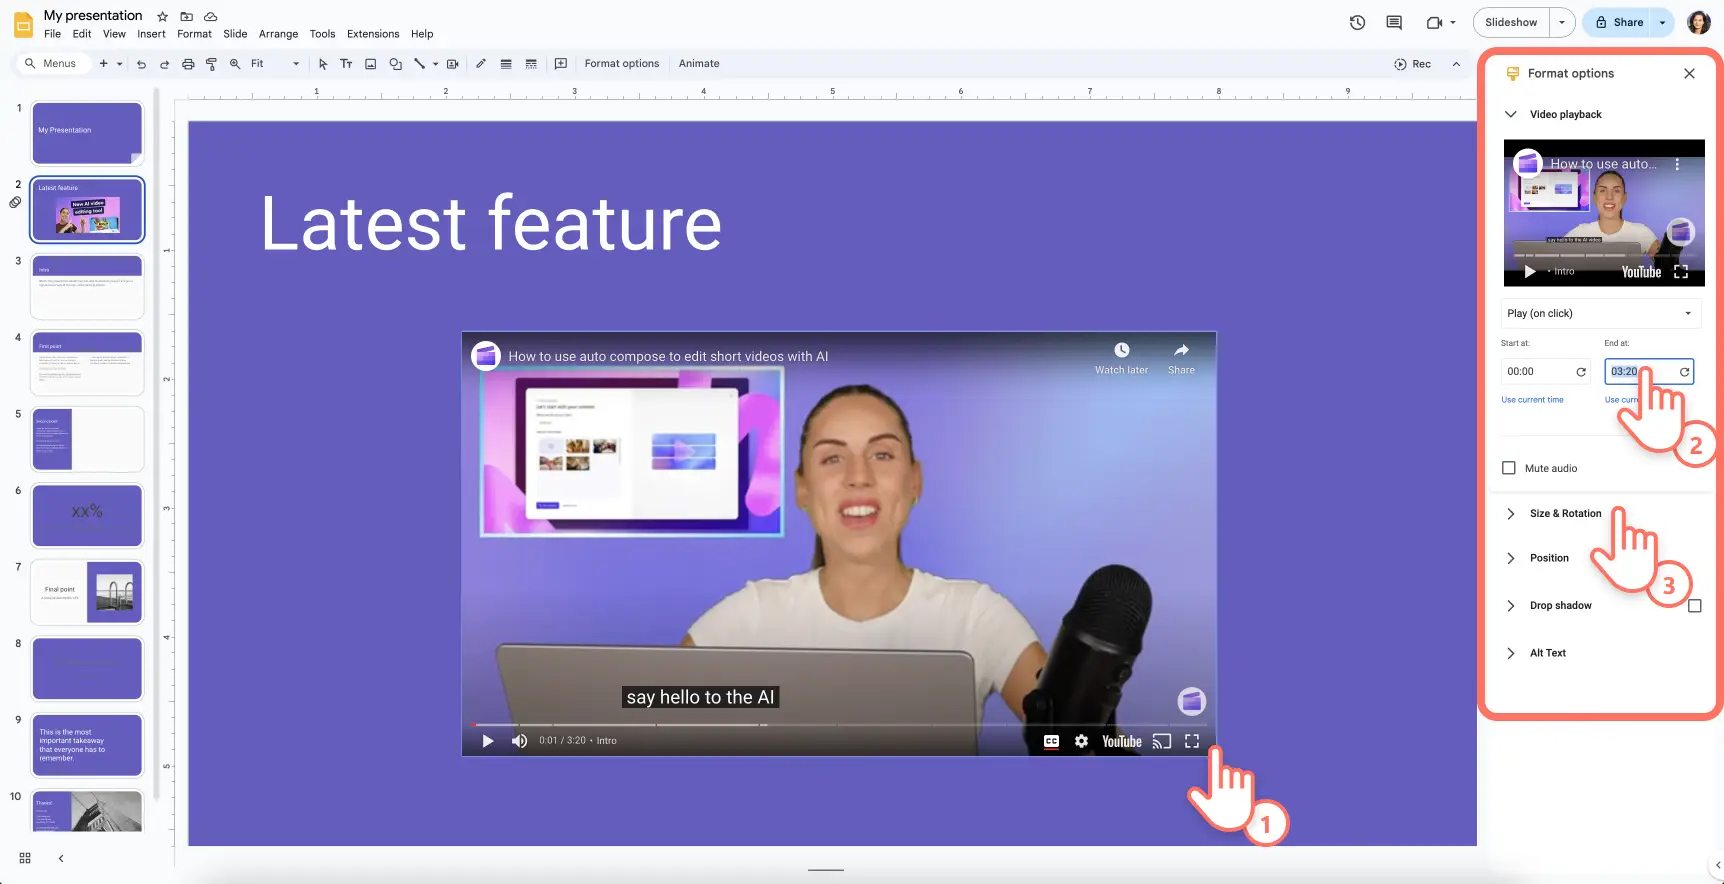
You can also edit the video under the Format options tab on the right toolbar. Here, you can set when your video plays (it may be annoying if your video plays automatically) and whether you want audio playback or not. You can also edit the size, position, drop shadow and mute the video audio here.
And you’re done! When you present your slide, the embedded YouTube video will be ready to play directly within your presentation. No need to switch tabs or interrupt your flow—just hit play and let the video do the talking.
How to link a video on Google Slides
You’ve learned how to add YouTube videos in Google Slides but what if you want to include a video without embedding it directly? Knowing how to link a video on Google Slides can be just as powerful, giving you flexibility while keeping your slides clean and organized.
Linking a video instead of embedding it can be useful when you’re working with large files, or if you want to maintain control over when and where the video is played. It’s also a great way to keep your presentation file size down, especially if you’re working with limited storage or need to share the presentation online.
How to link a video on Google Slides
If embedded videos aren’t the right fit for your presentation, linking is a simple alternative:
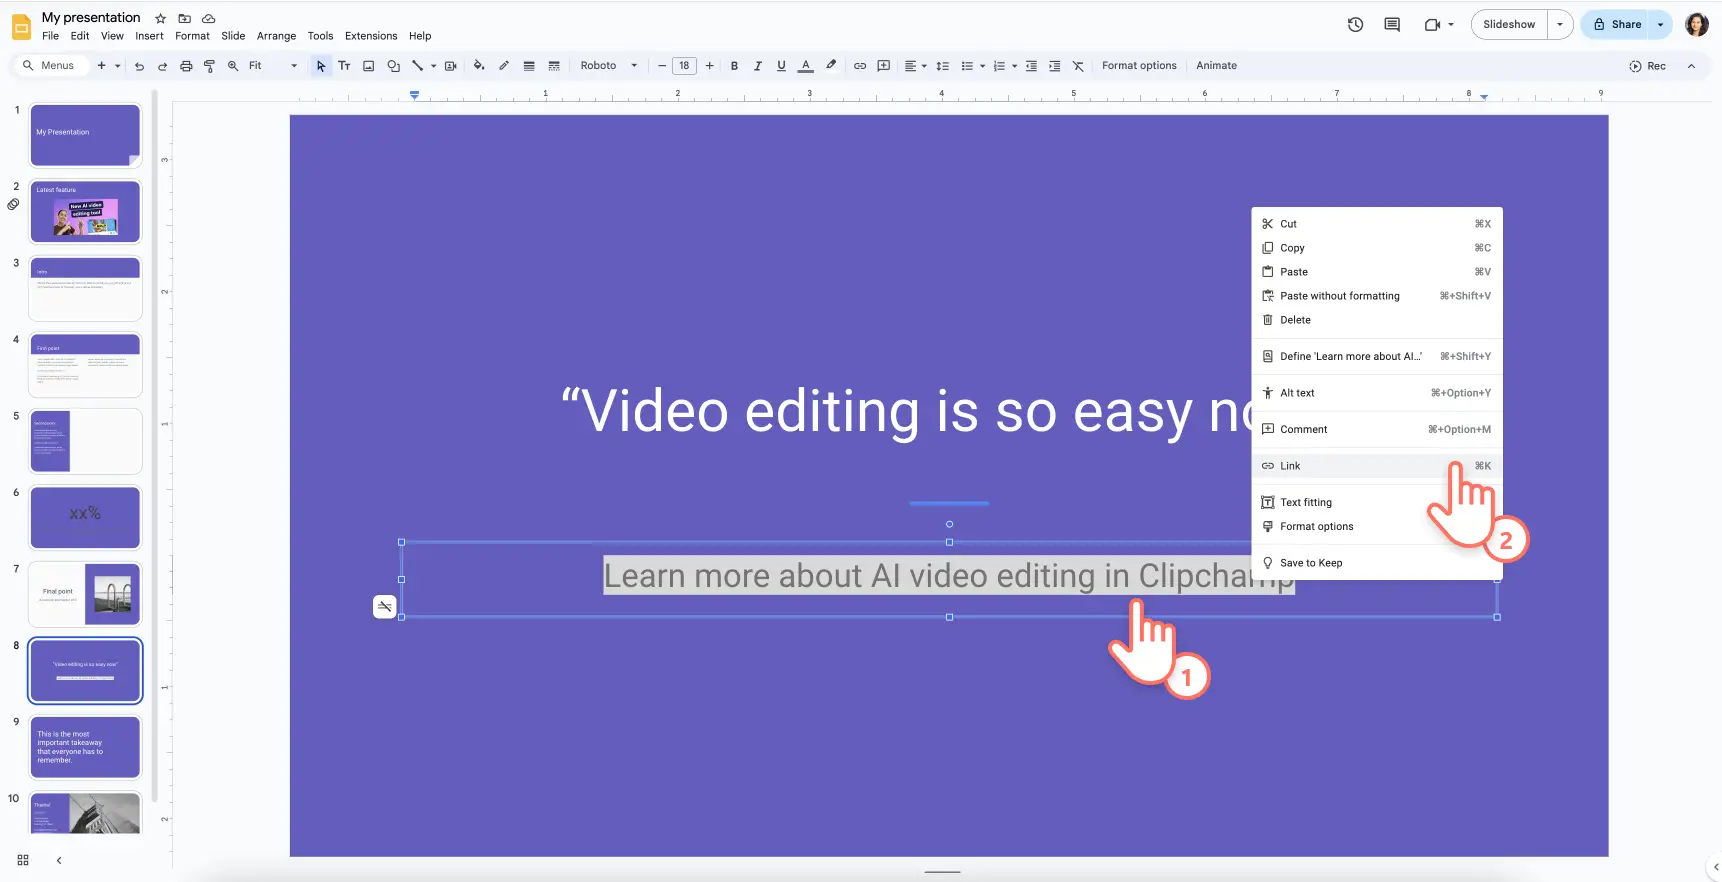
Highlight the text or object where you want to create a link.
Right-click and select Link from the dropdown menu.
In the link box, paste the YouTube URL of the video you want to link to (this could be hosted on another platform like Vimeo or Google Drive).
Click Apply and your link is ready to go. During your presentation, clicking on this link will open the video in a new tab or window.
Make a video for Google Slides with Clipchamp
Embedding a video into your Google Slides is just the beginning. To truly elevate your video tutorials and presentation, you might want to consider customizing your video content before adding it to your slides. Whether you need to trim down a lengthy clip, add captions, or create something entirely from scratch, the right tools can make all the difference. This is where Clipchamp can help you.
Clipchamp is a powerful, user-friendly video editor that makes it easy to create professional-looking videos, even if you’re not a video editing expert. It’s particularly handy for those in the workplace who need to produce high-quality video content without spending hours learning complicated software. With Clipchamp, you can:
Trim and cut videos to highlight only the most important sections.
Add text overlays and captions to make your videos more informative and accessible.
Incorporate transitions and effects to keep your audience engaged.
Use video templates to quickly create polished videos for various purposes, from presentations to social media. And so much more!
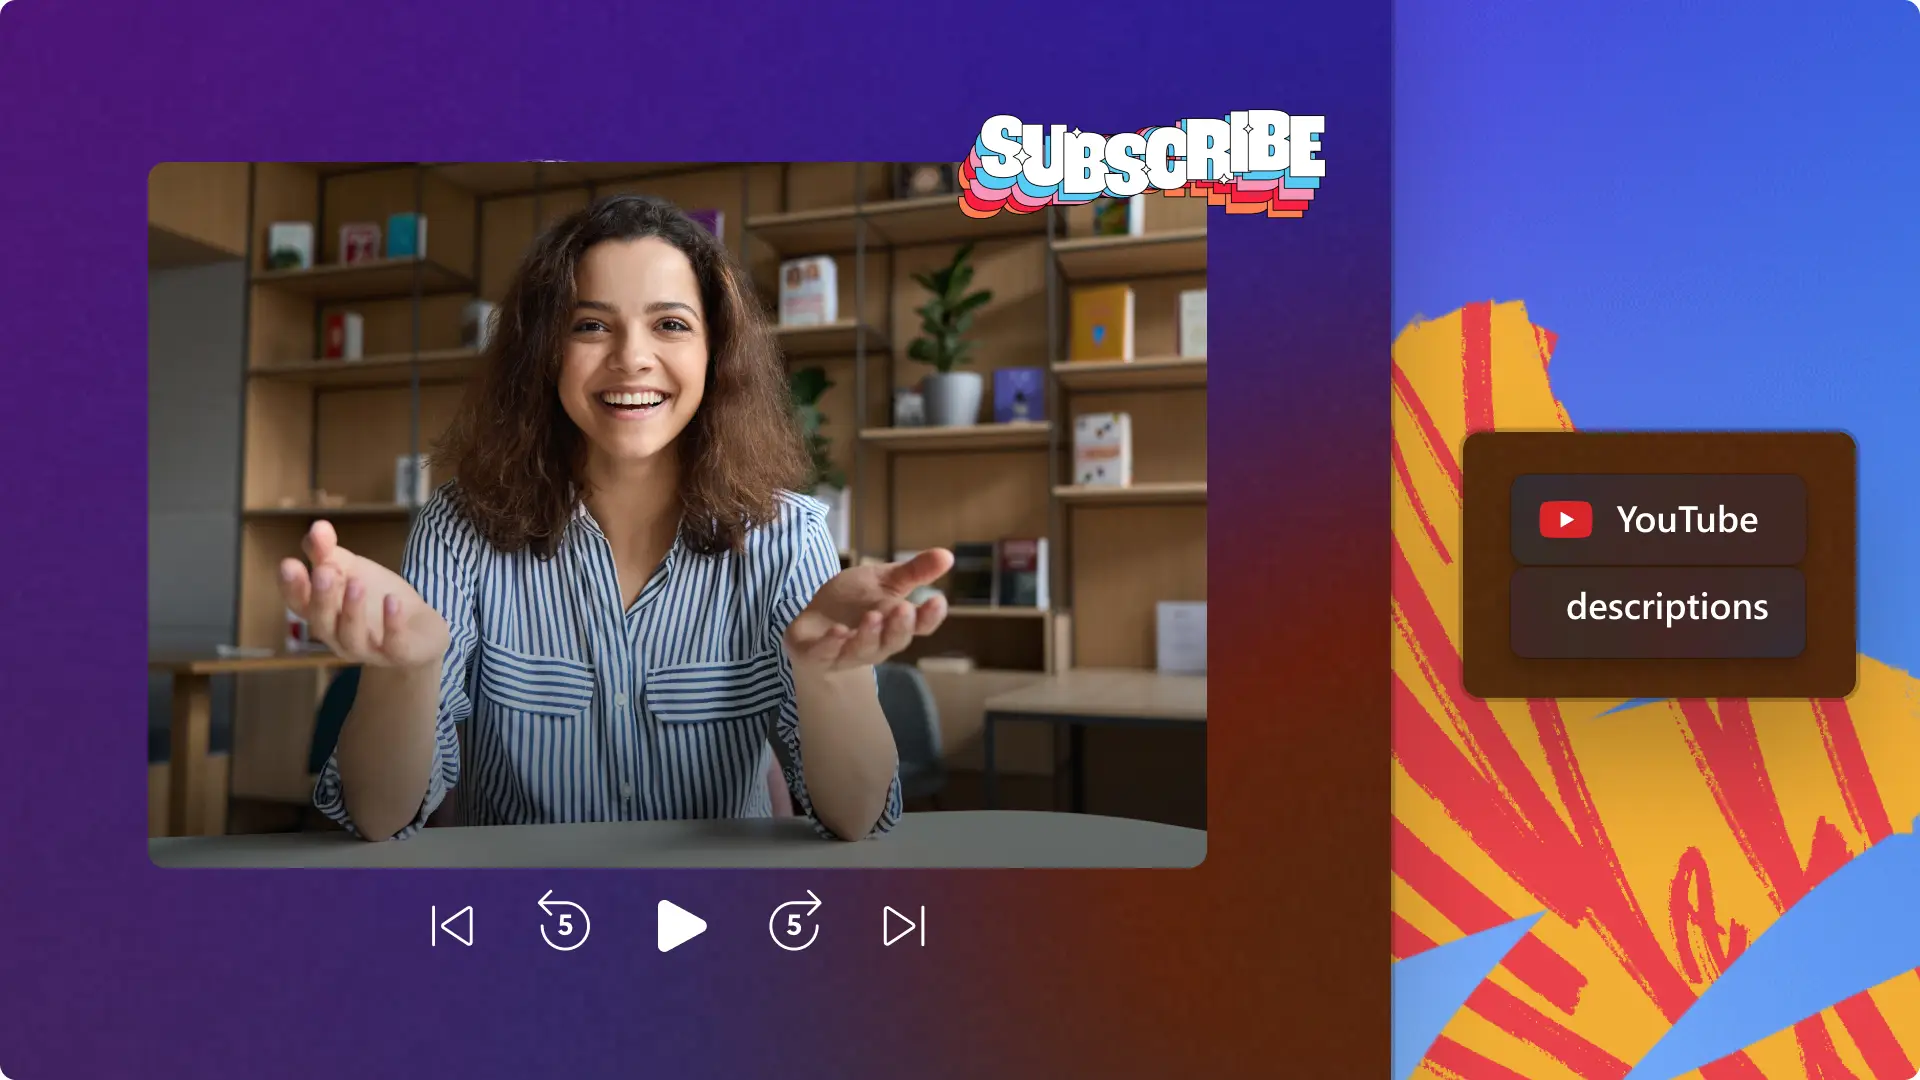
If you’re stuck for ideas, browse the library of fully customizable video templates, made by professionals, tailored for your industry. Once you have finished editing your masterpiece, simply save your video in 1080p resolution and directly upload it to YouTube. You can even turn a YouTube video into a funny GIF to add to your Google Slides presentation.
Frequently asked questions
Do I need an internet connection to play the embedded YouTube video?
Yes, an internet connection is required for video playback in Google Slides. The video streams directly from YouTube, so ensure you have a stable connection during your presentation.
Can I embed different videos multiple times in Google Slides?
Yes. You can embed many different YouTube videos on your Google Slides presentation. Just be sure that they’re all relevant to your topic.
Can I control when the video starts and stops during my presentation?
Absolutely! Google Slides allows you to set specific start and end times for your video. Just right-click on the embedded video, select Format options, and adjust the start and end times to fit your needs.
Interested in further enhancing your presentations? To add even more multimedia flair to your presentations, you might want to explore how to create video slideshows or webcam record to present a PowerPoint.
Start editing today with Clipchamp for free or download the Clipchamp Windows app.
