Heads up! The screenshots in this article are from Clipchamp for work accounts and the same principles apply to Clipchamp for school accounts. Clipchamp personal account tutorials may differ. Learn more.
On this page
- Method one: how to narrate a PowerPoint with Cameo
- Benefits of using Cameo
- Method two: how to narrate a PowerPoint with Clipchamp recording
- Benefits of using Clipchamp screen recorder
- Method three: how to narrate a PowerPoint with AI voiceovers
- Benefits of using Clipchamp AI voiceovers
- Method four: how to create video narration with Microsoft Copilot
- Benefits of using Microsoft Copilot
Take presentations to the next level by turning slides into a dynamic story using an engaging narration. Provide valuable context beyond what’s written in the slides by adding AI, voice recordings, or webcam narrations to personalize any presentation.
Enhance sales video presentations, onboarding decks, and even company culture slides by recording a narration in minutes.
Learn four ways to create a captivating PowerPoint presentation with narration using innovative Microsoft tools like PowerPoint Cameo, Microsoft Copilot, and Clipchamp for work. We recommend having slide notes ready or writing a video script to make recording your narration easier.
Method one: how to narrate a PowerPoint with Cameo
Step 1. Open Microsoft PowerPoint and navigate to the record tab
Open PowerPoint on your desktop to start your recording a narration with webcam and audio. Next, click on the record tab and select the Cameo option to enable your setup the recording.
Note: steps may vary on PowerPoint for web.
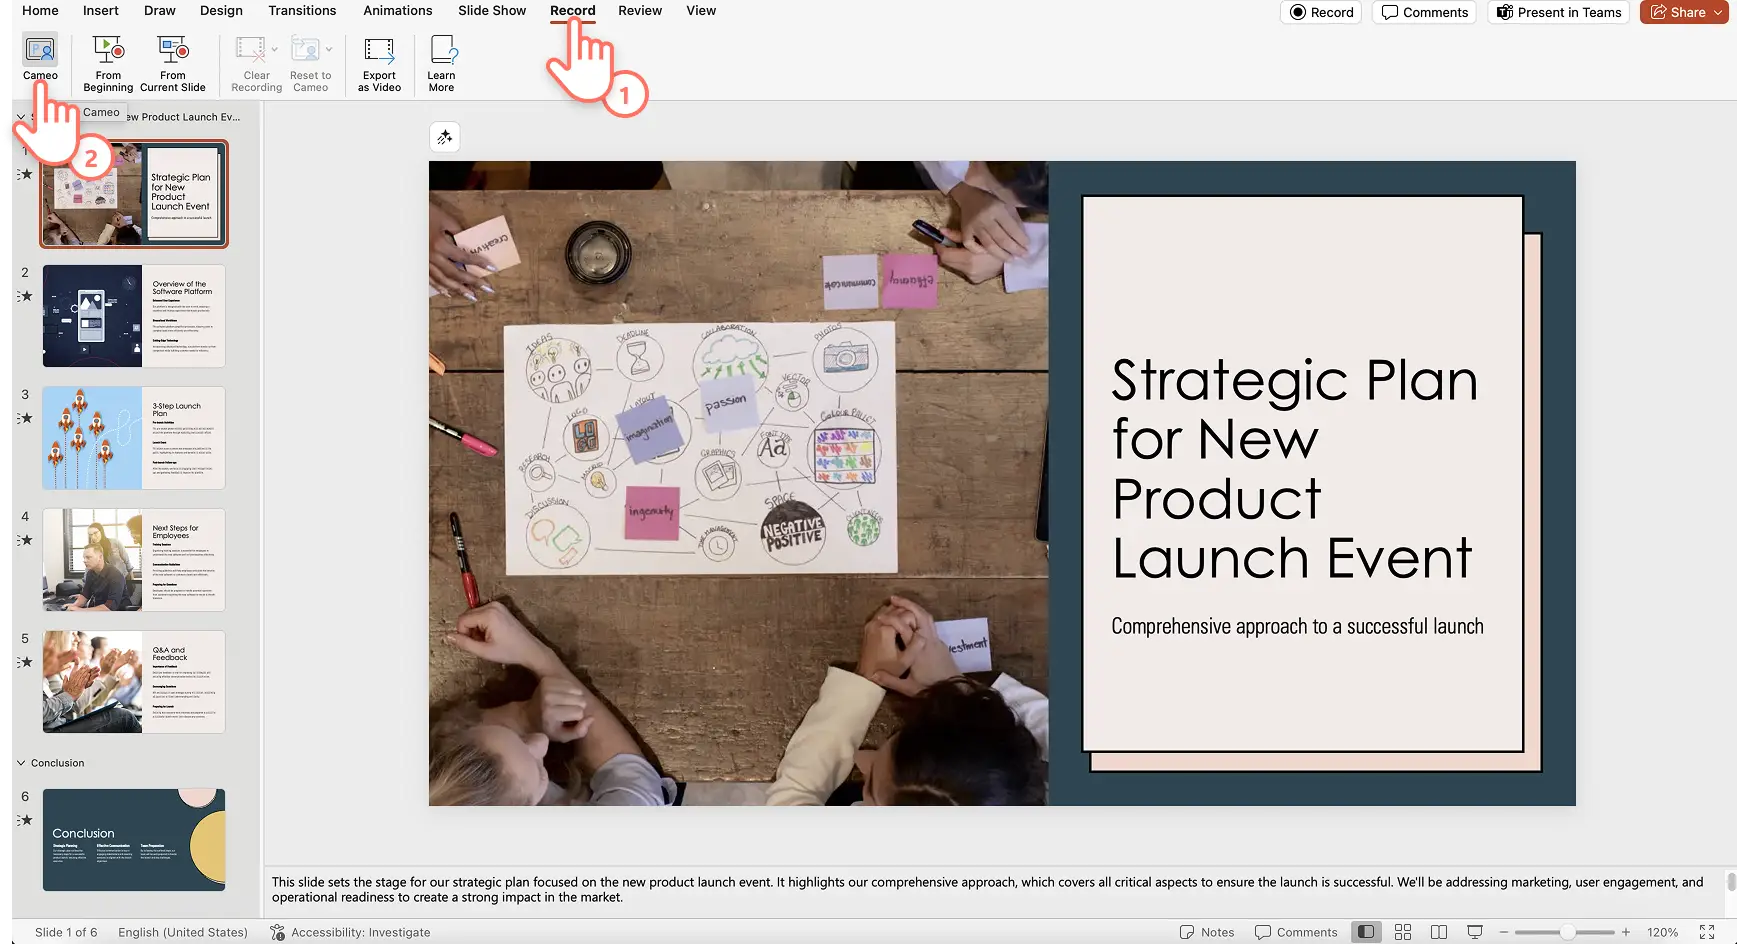
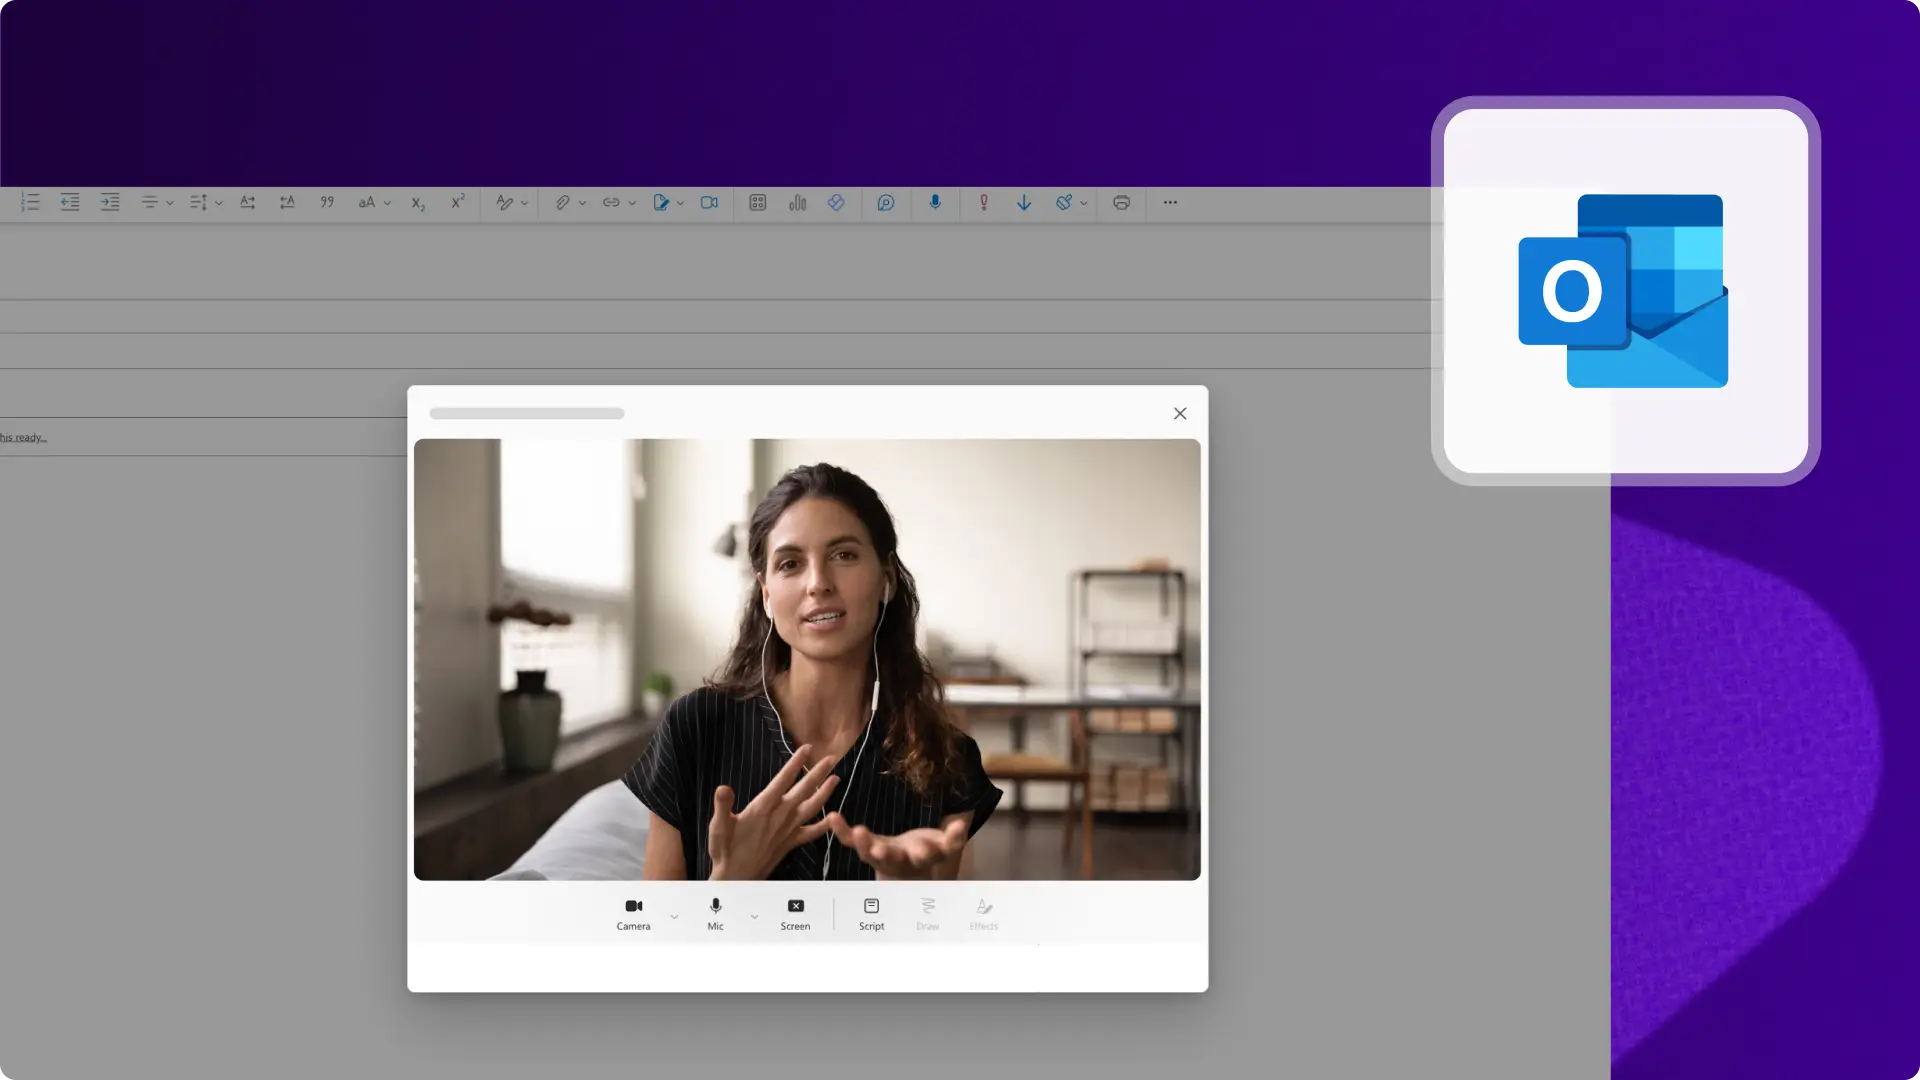
A placeholder circle will appear to preview the placement of your webcam recording overlay. Follow the prompts to enable recording permissions, then select your mic and camera source. You can also adjust the camera shape, border, and effects using the options in the camera format tab. When you’re ready, click on the record button to start recording the narration.

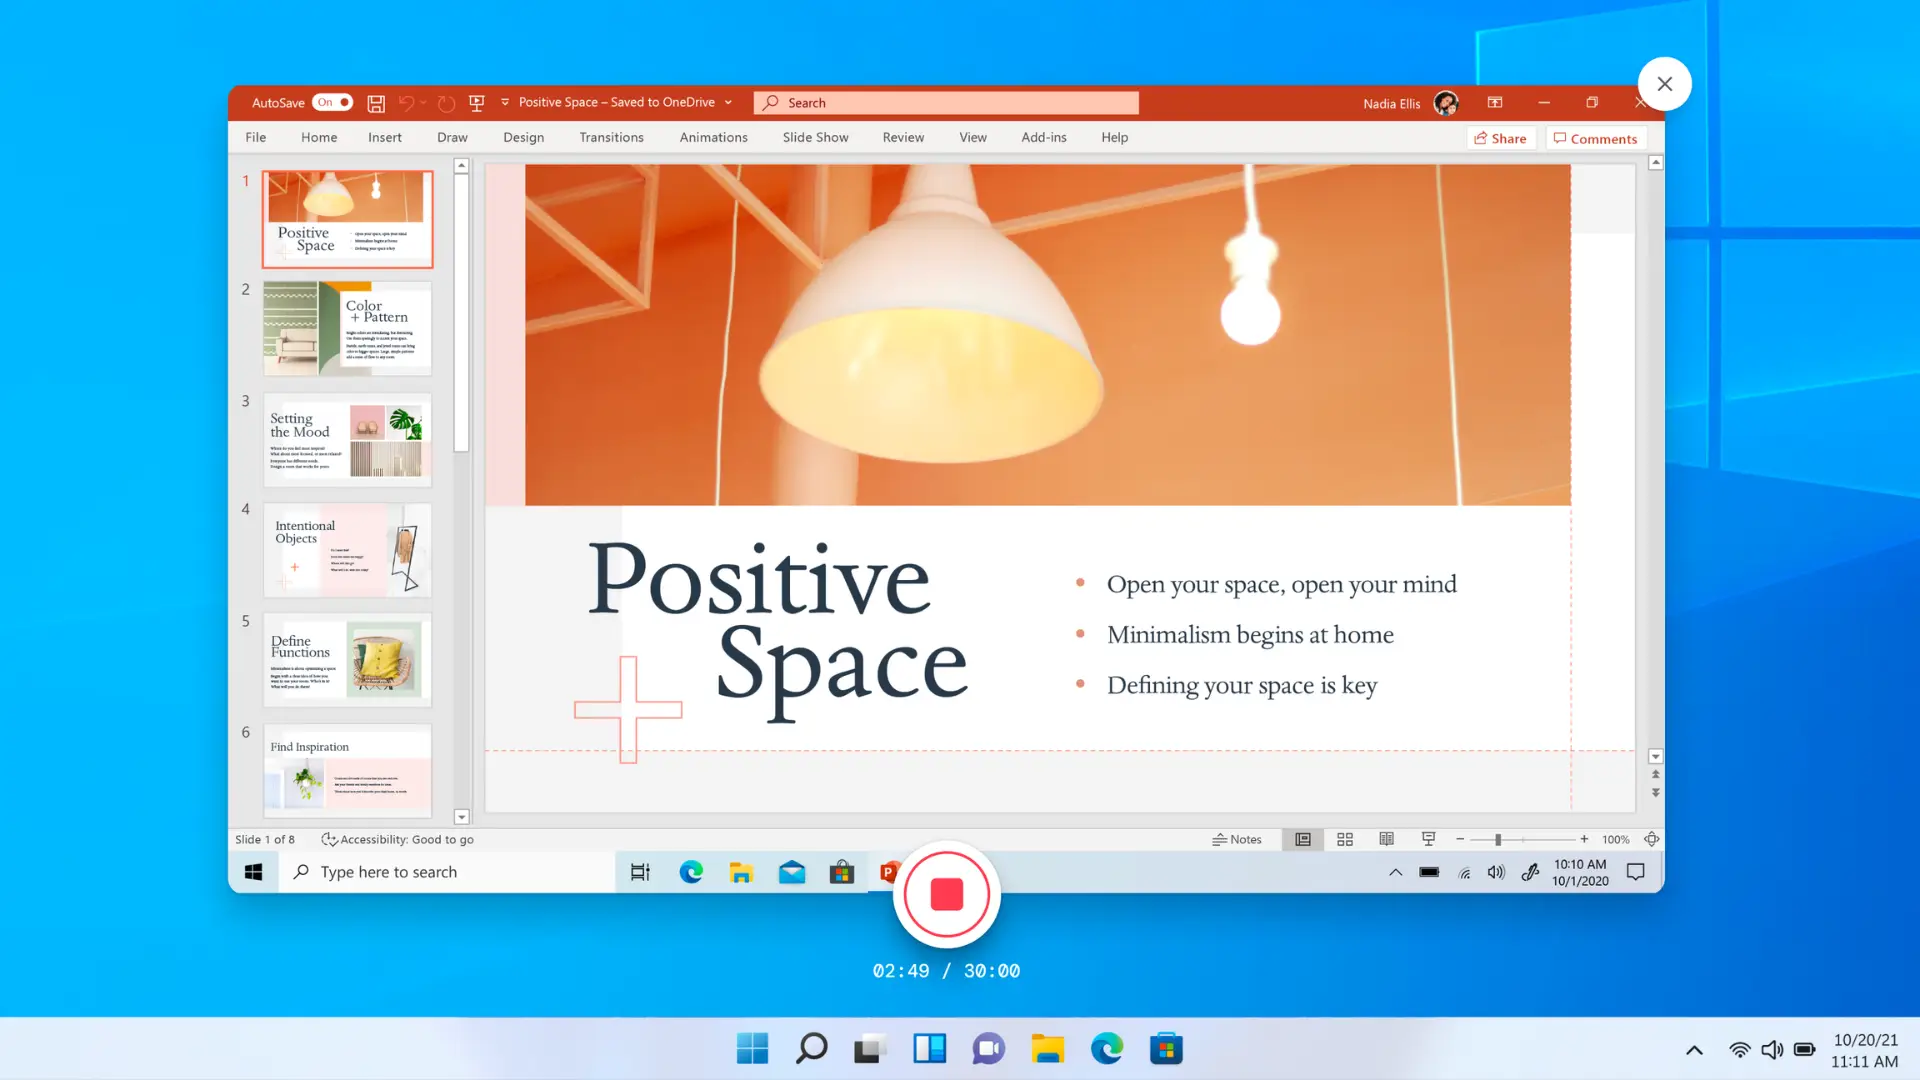
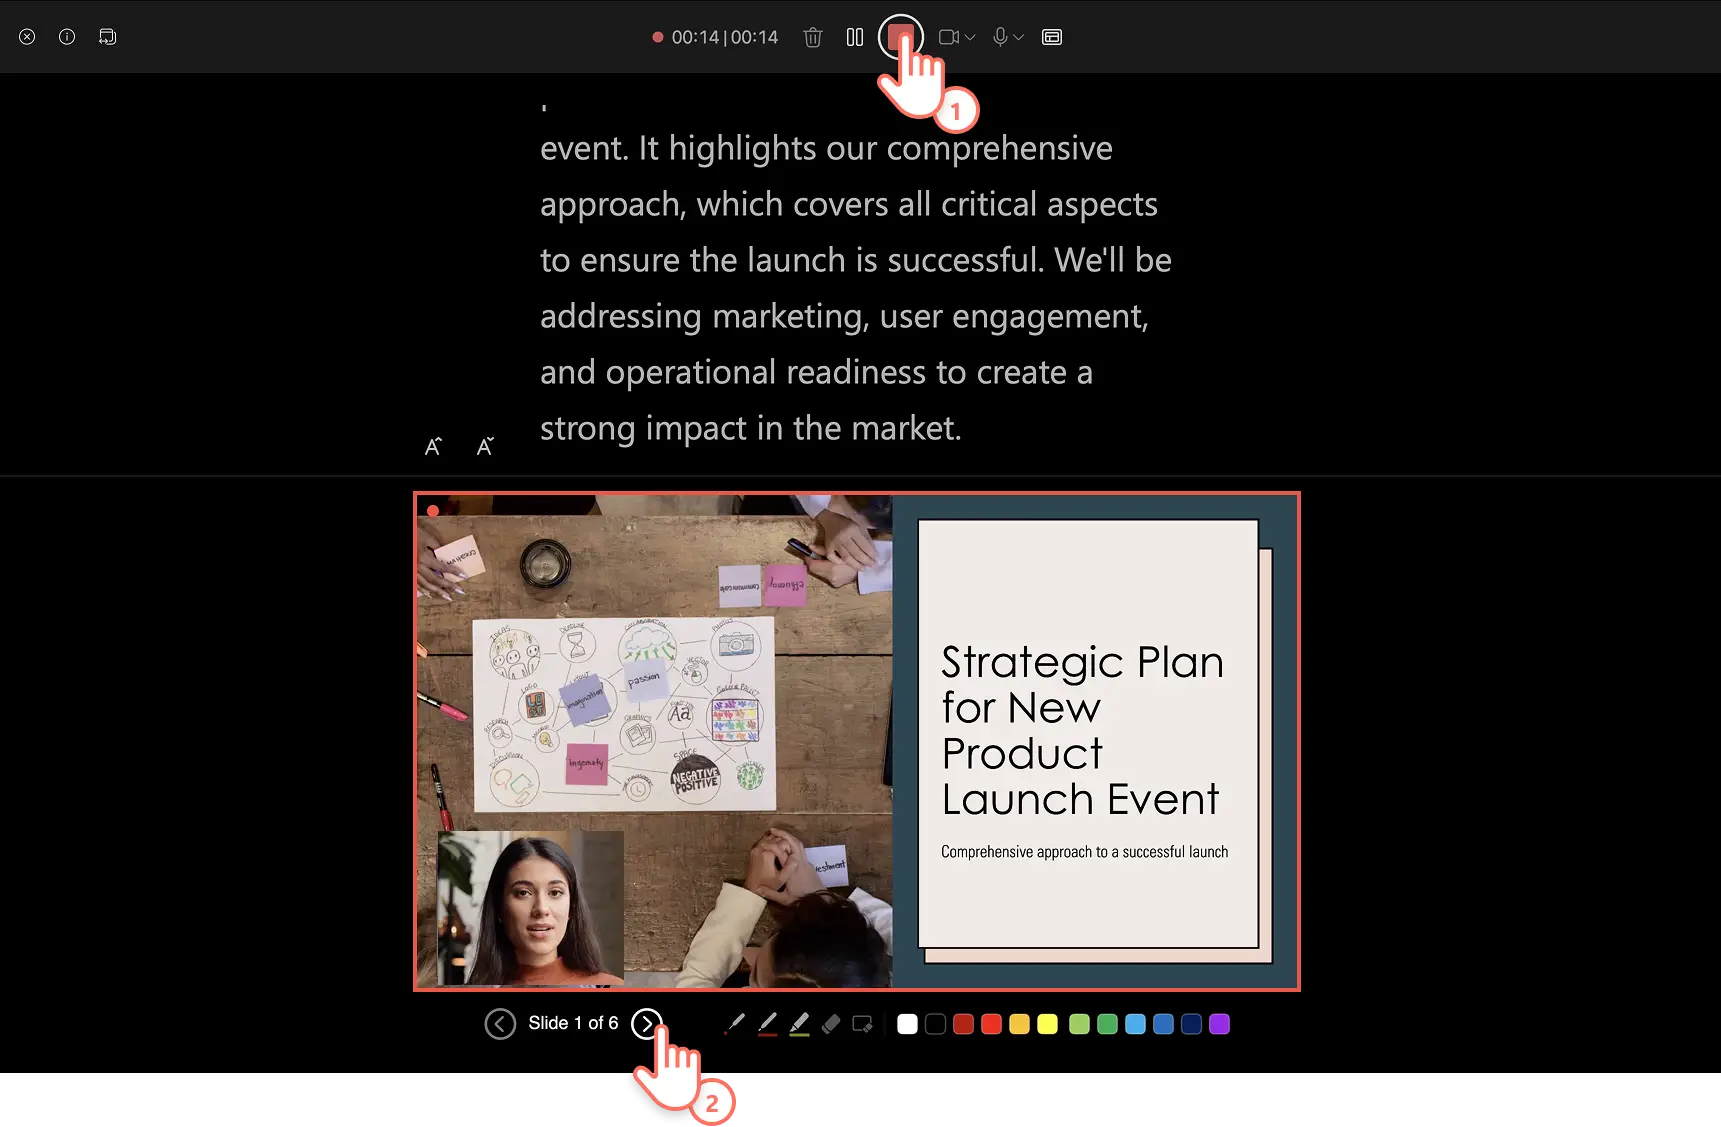
Step 2. Record your PowerPoint narration
The Cameo recorder will open where you can see your speaker notes in the form of a teleprompter, preview your slides, and view the live webcam feed. Click the red button to start and stop recording. Navigate across slides using the arrows and the speaker notes will conveniently update so you can continue narrating confidently. Preview and save your Cameo recording. It will be automatically added to the slides.
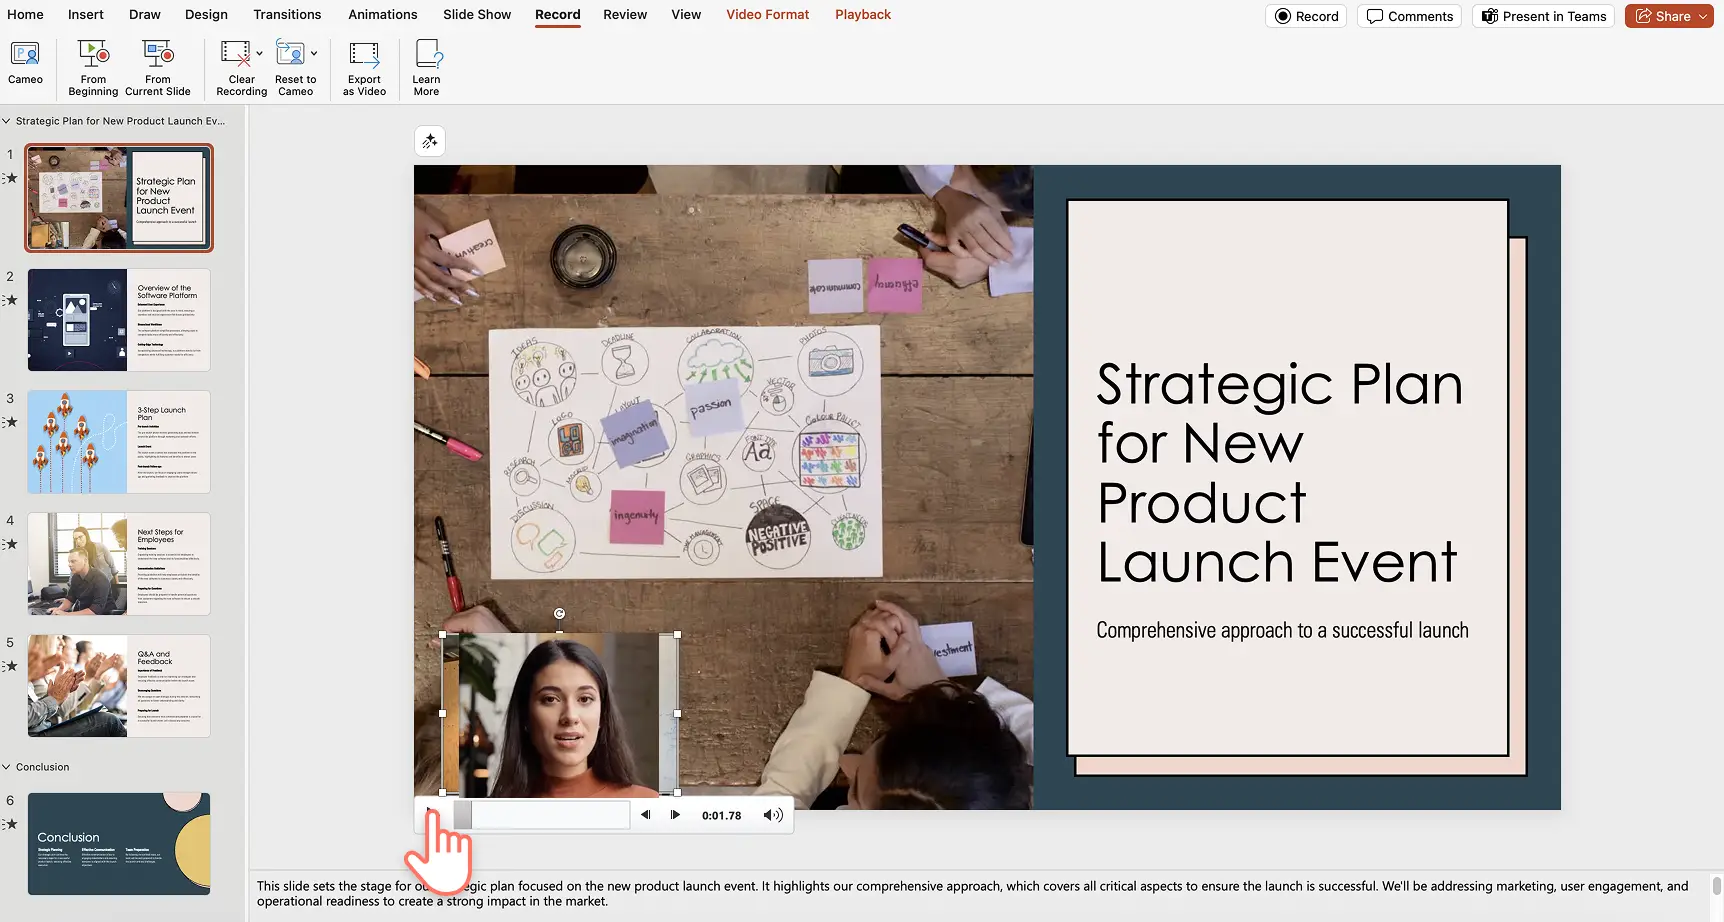
Step 3. Review your presentation narration
Preview your narration per slide using the play button. If you’d like to re-record a narration for a slide, simply record a new Cameo. Save the PowerPoint and share it when you’re happy with the narration.
Benefits of using Cameo
Camera customizations: easily adjust the size and look of the camera feed on your slides to make your narration visually engaging. This includes applying camera styles, camera shape, camera border, and camera effects.
In-built teleprompter: using the teleprompter view in PowerPoint allows you to add your script to the Notes section on each slide. You can easily refer to your script while maintaining eye contact with the camera while recording a Cameo. This helps deliver your message confidently and smoothly.
Integration with Microsoft Teams: when you present using PowerPoint Live in Teams, your camera feed can be displayed on the slides, enhancing the live presentation experience.
Method two: how to narrate a PowerPoint with Clipchamp recording
Step 1. Open Clipchamp and navigate to the screen recorder
Navigate to Clipchamp for work and click on the record and create tab on the toolbar, then select the screen option.
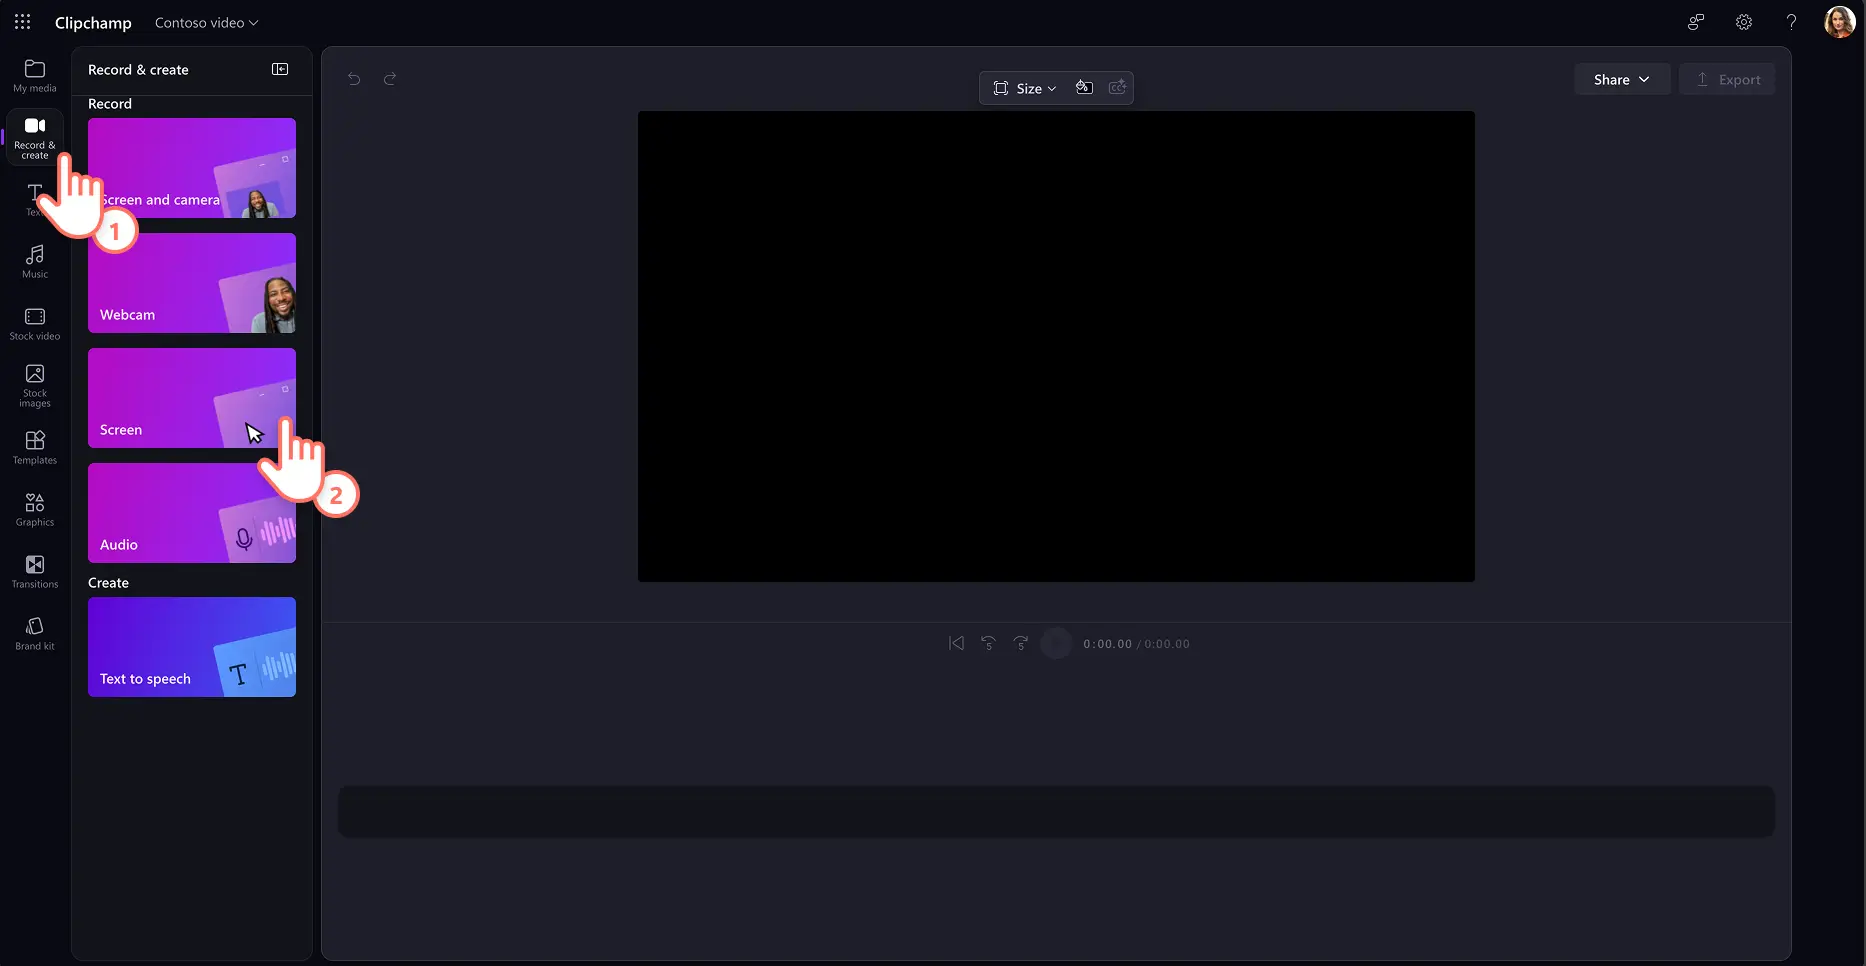
Enable recording permissions for Clipchamp when the popup windows appear. Select your microphone source then click on the red record button to start recording. Next, select which screen you’d like to record which can be either a browser tab, window, or your entire screen. You can also enable or disable tab audio here for a smooth recording experience. Select the share button to start recording.

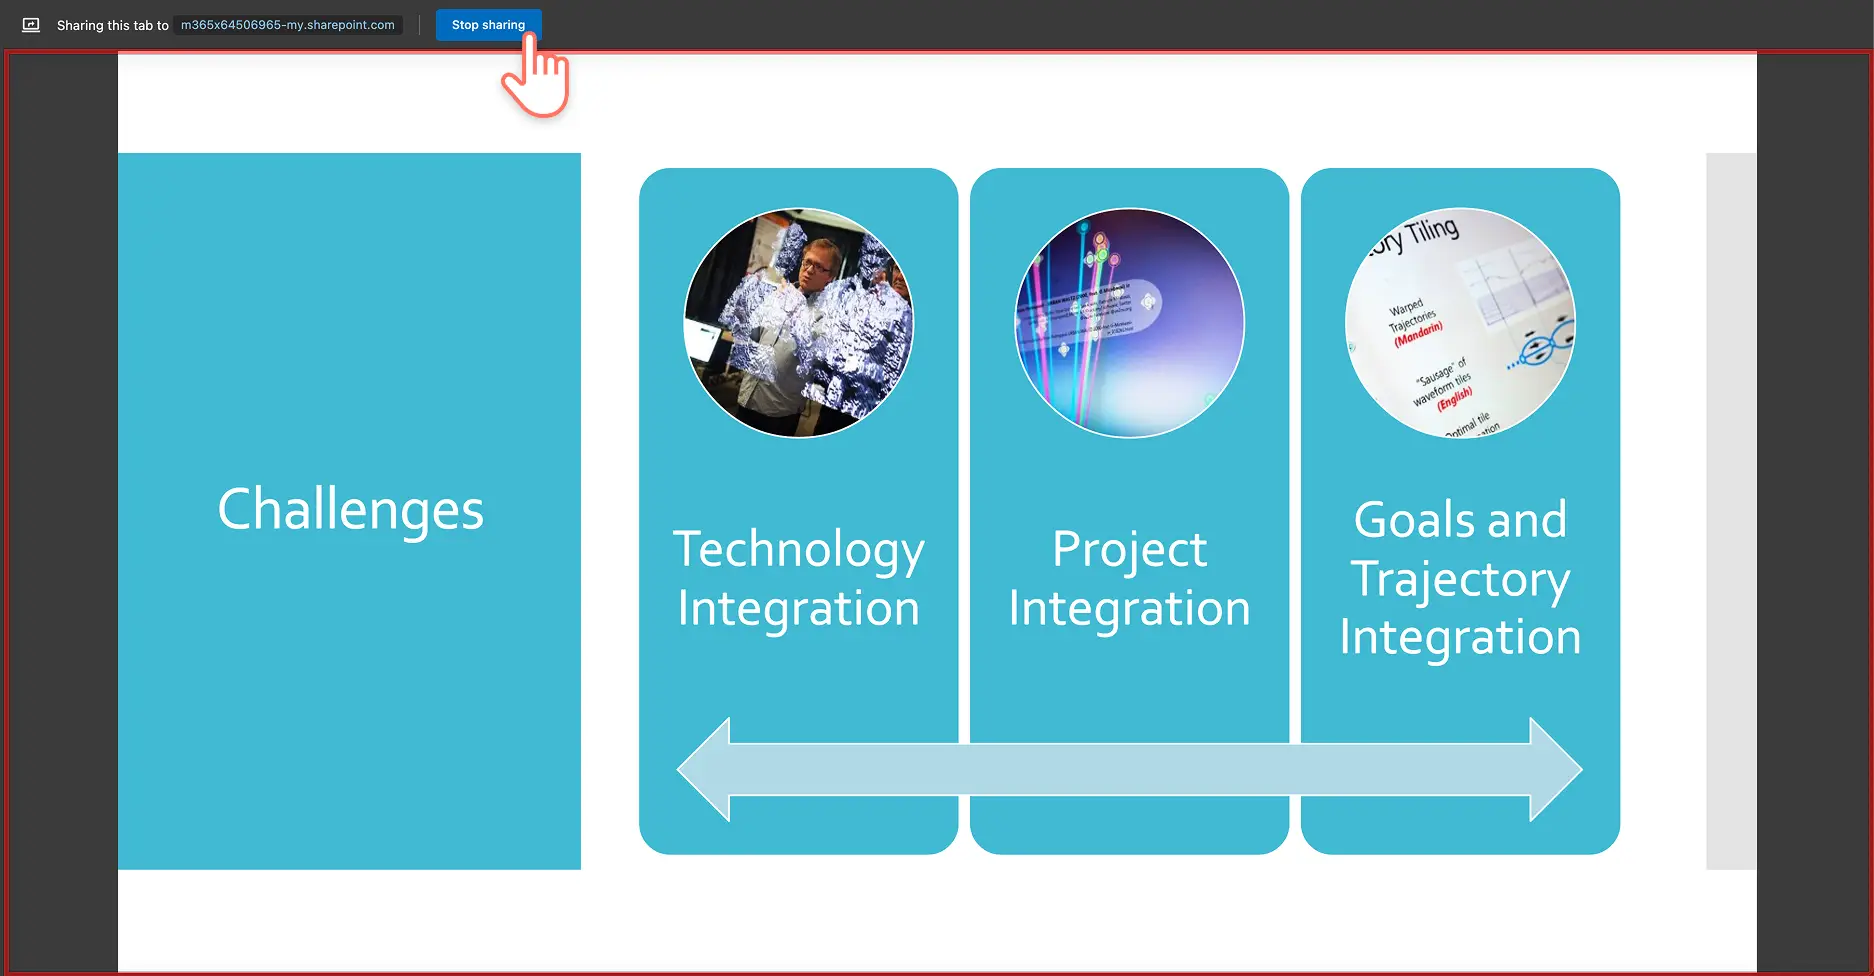
Your screen and audio recording will start. Simply click the stop sharing button to finish recording your presentation with narration. You video will be automatically added to the timeline.
Step 2. Adjust narration volume
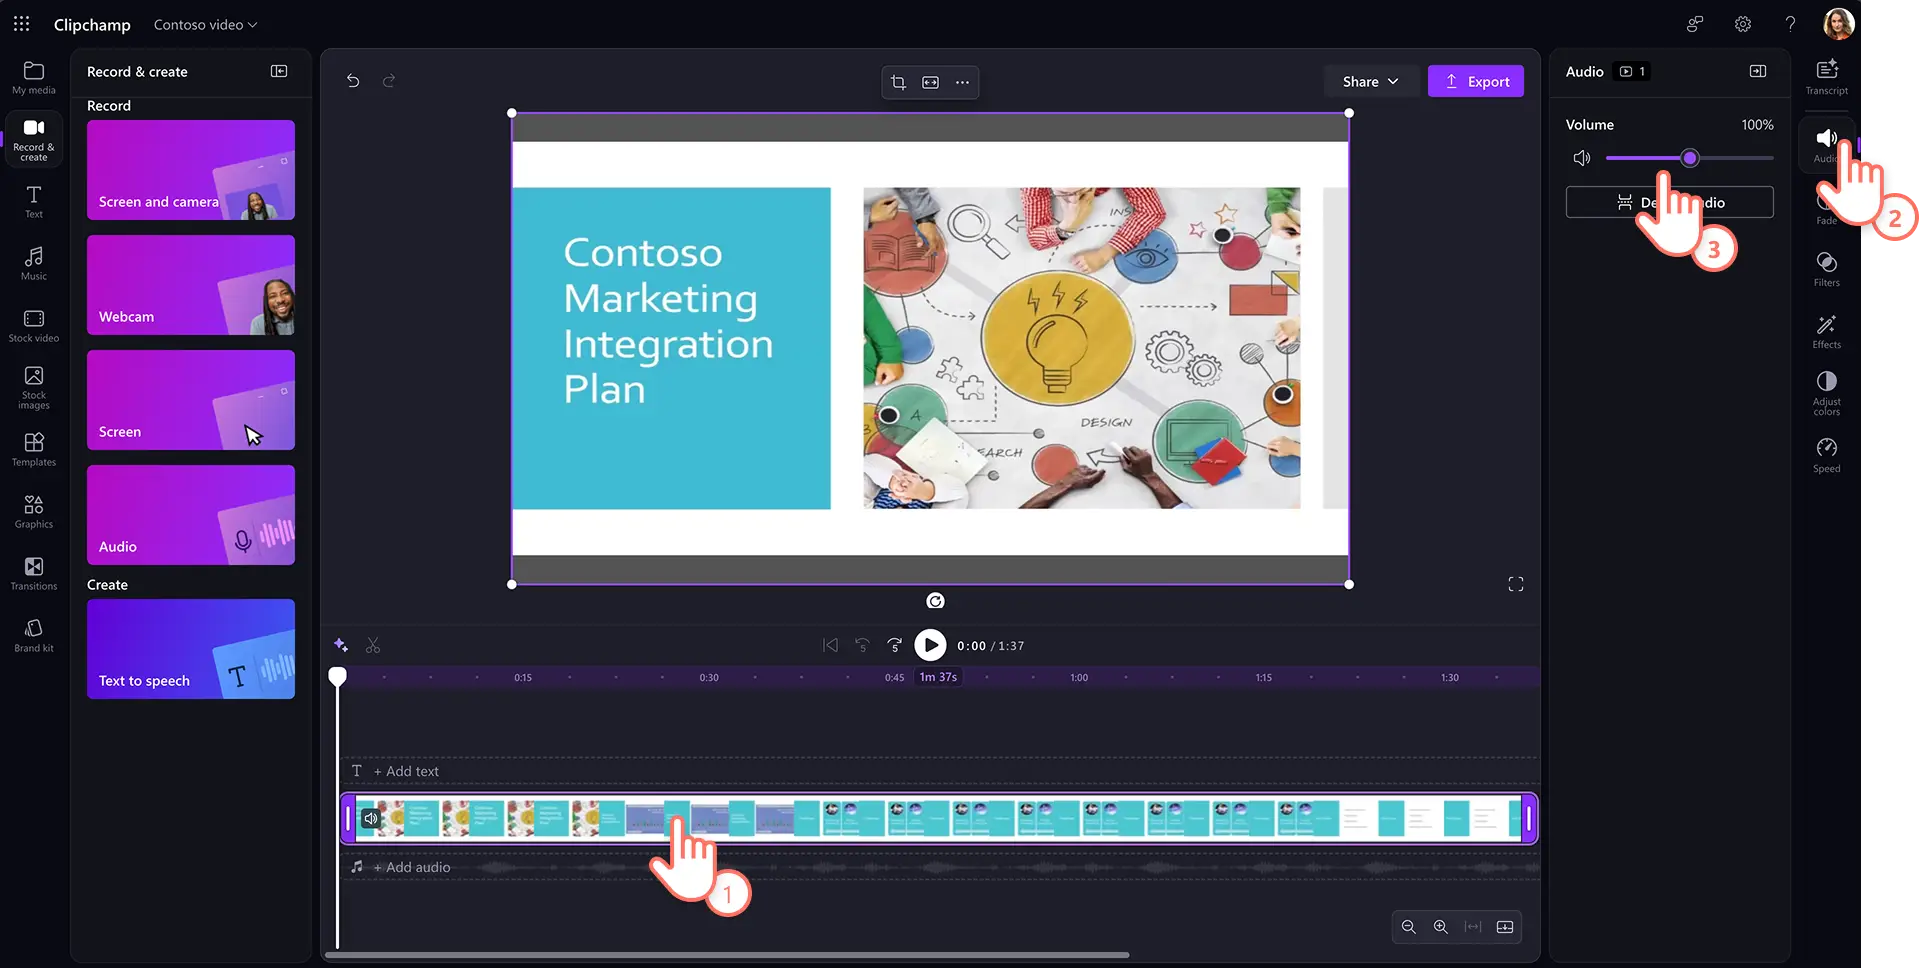
Now that you've added a voice recording to PowerPoint video, increase or decrease your narration volume by clicking on the audio tab on the property panel and using the volume sliders. You can boost your video volume up to 200% if your audio recording is too soft.
Step 3. Generate transcript and subtitles for work
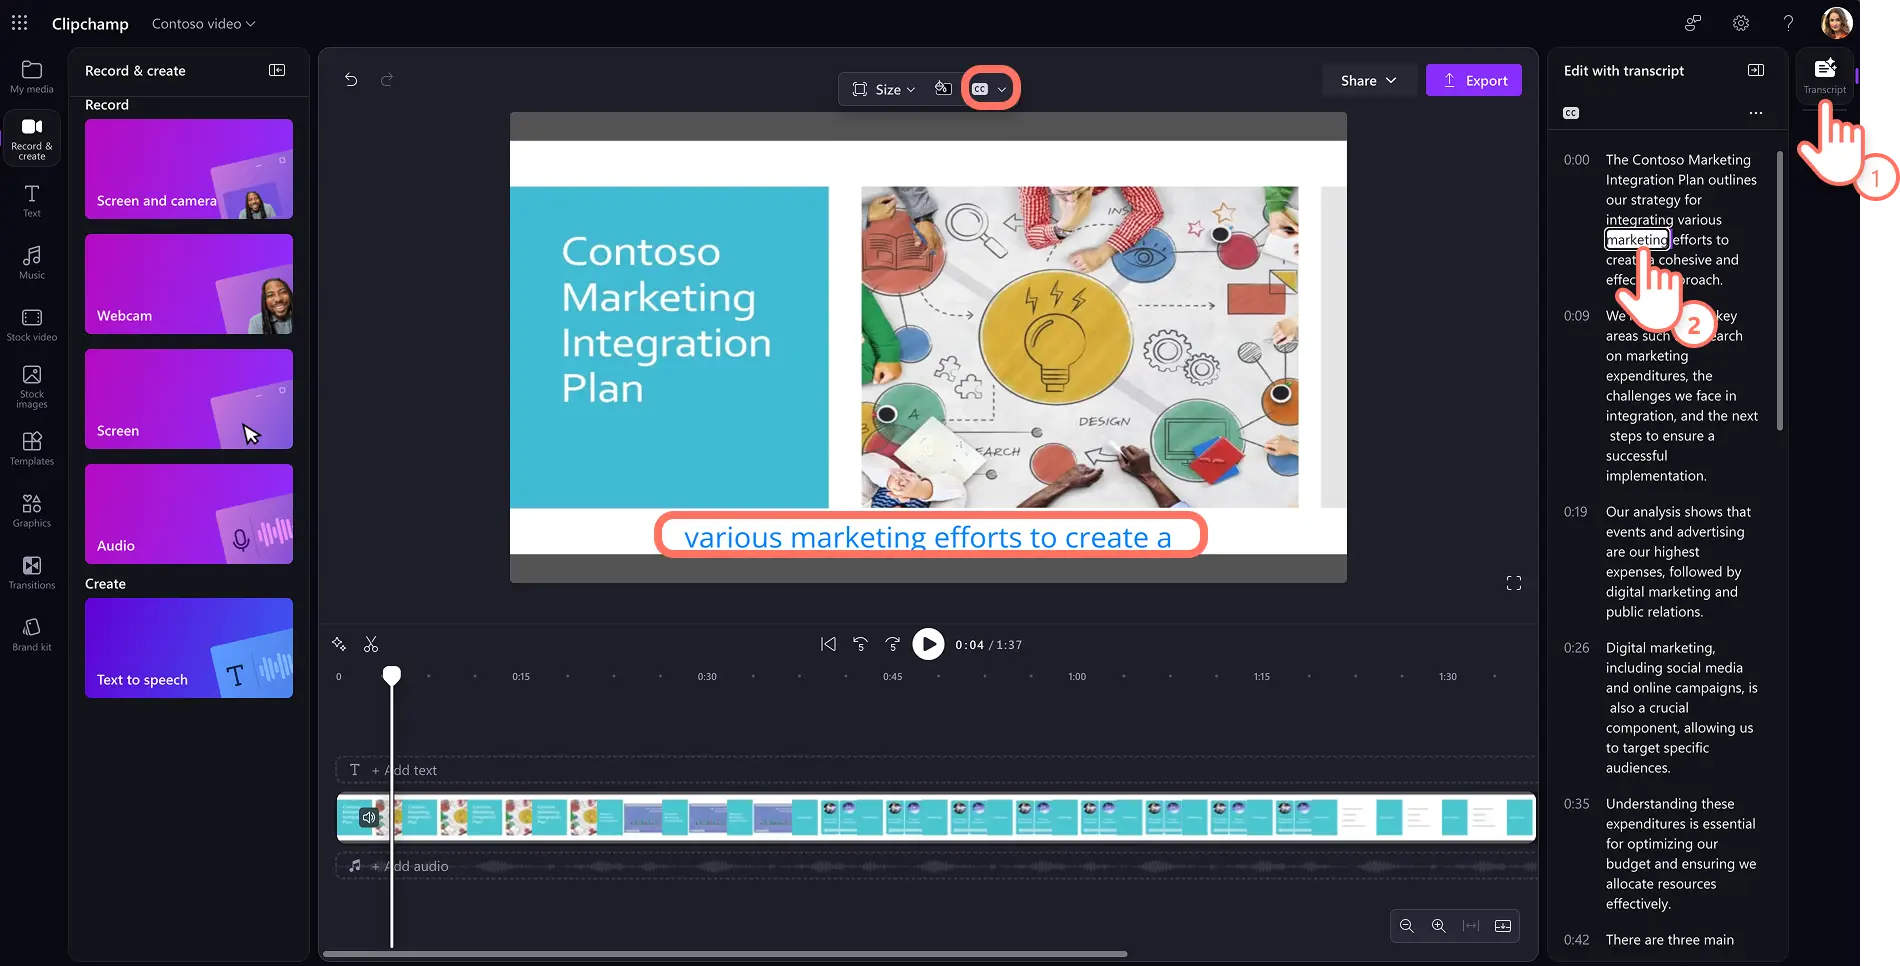
Increase the video presentation’s accessibility with AI-generated subtitles to complement your audio narration. Click on the closed caption (cc) button on the floating toolbar, or the transcript tab on the property panel to enable automatic transcription. Next, click on the generate transcript button and follow the prompts. AI will automatically generate accurate subtitles that enhances the viewer’s experience.
Step 4. Save narrated video presentation
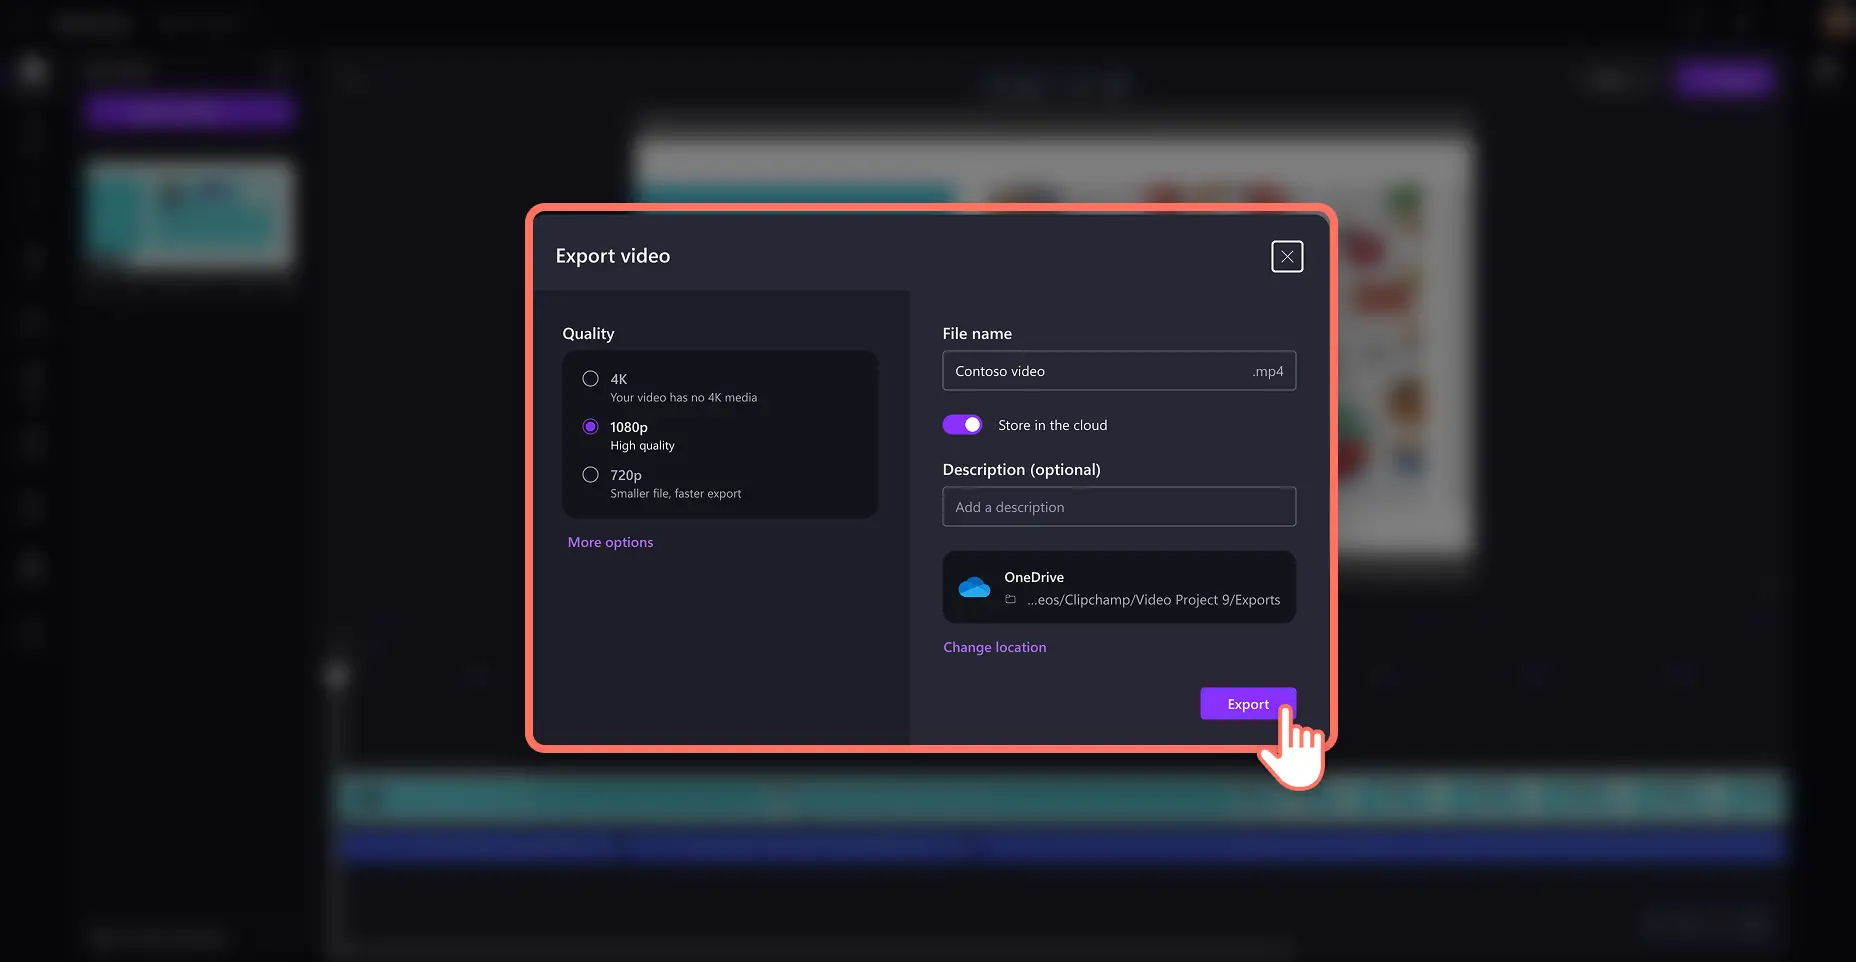
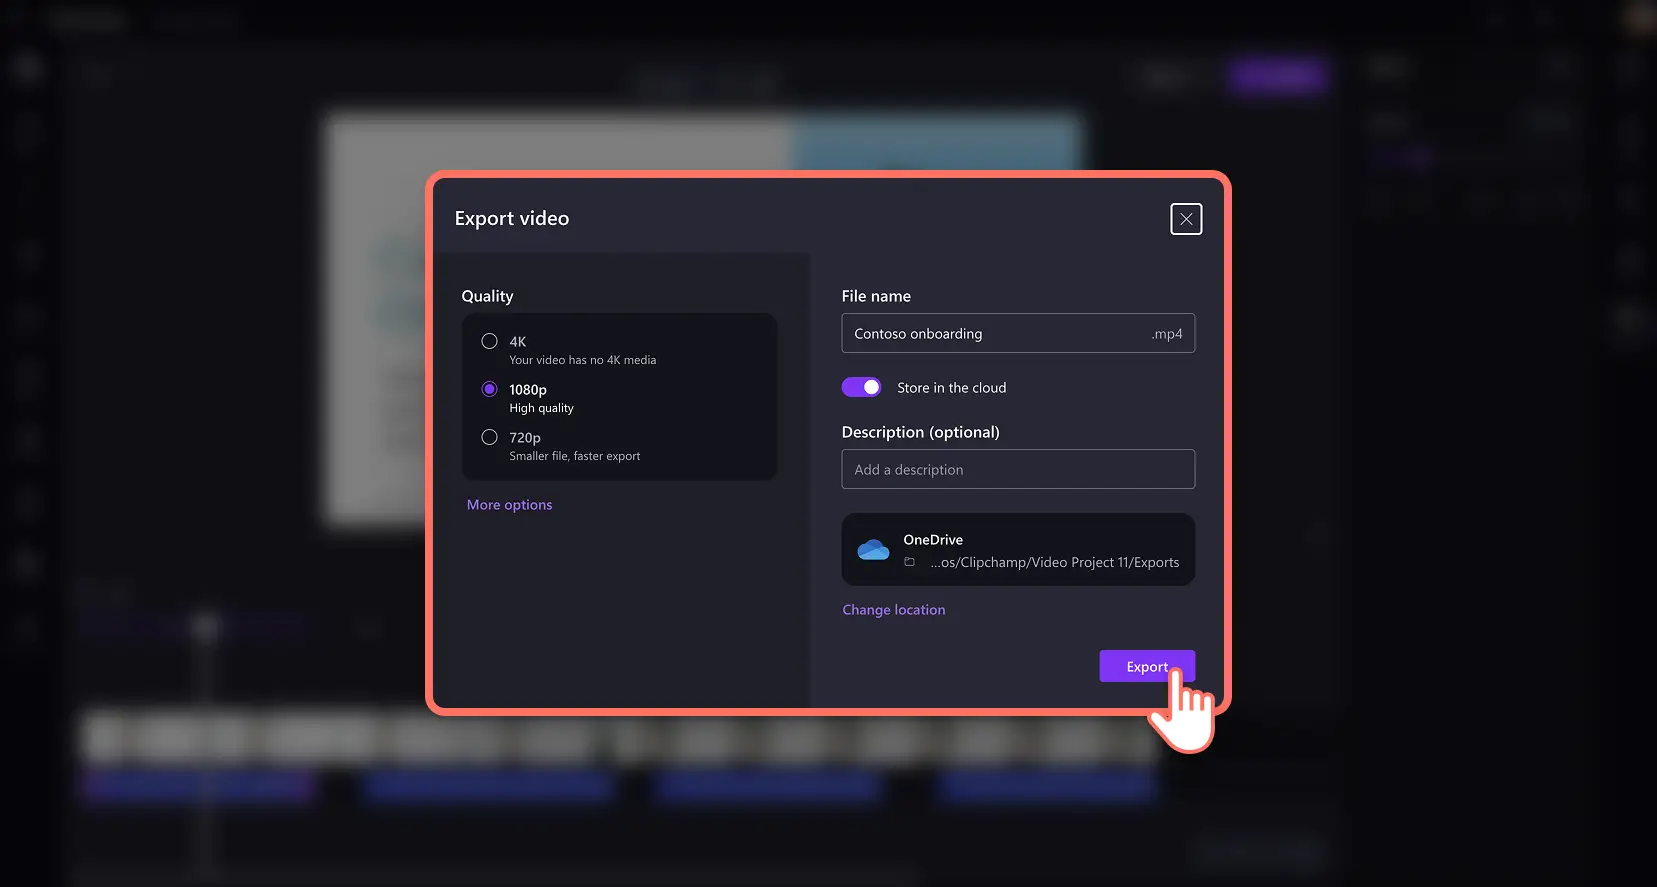
Preview the final video using the play button. Save your video presentation by clicking on the export button. Enter a file name and description, then select a video resolution and saving location in OneDrive.
Benefits of using Clipchamp screen recorder
Flexible recording options: make multiple screen recordings of your presentation up to 30-minute sessions, as many times as you like. Capture a tab, window, or entire computer screen with or without sound or add a face to your video by simultaneously recording your screen and webcam.
AI video editing: quickly trim videos using AI silence removal that deletes pauses longer than three seconds. You can also trim a video using transcript-based editing where you can delete text to remove sections from your video clip.
Combine with images and graphics: personalize screen recordings for work by adding engaging emojis, graphics, and stock media to complement your narrated PowerPoint video.
Method three: how to narrate a PowerPoint with AI voiceovers
Step 1. Open your video in Clipchamp and navigate to text to speech
Navigate to Clipchamp for work and click on the import media button on the toolbar to browse your computer files, or connect your OneDrive. Alternatively, you can use the Clipchamp screen recorder and add the presentation video recording to the timeline.
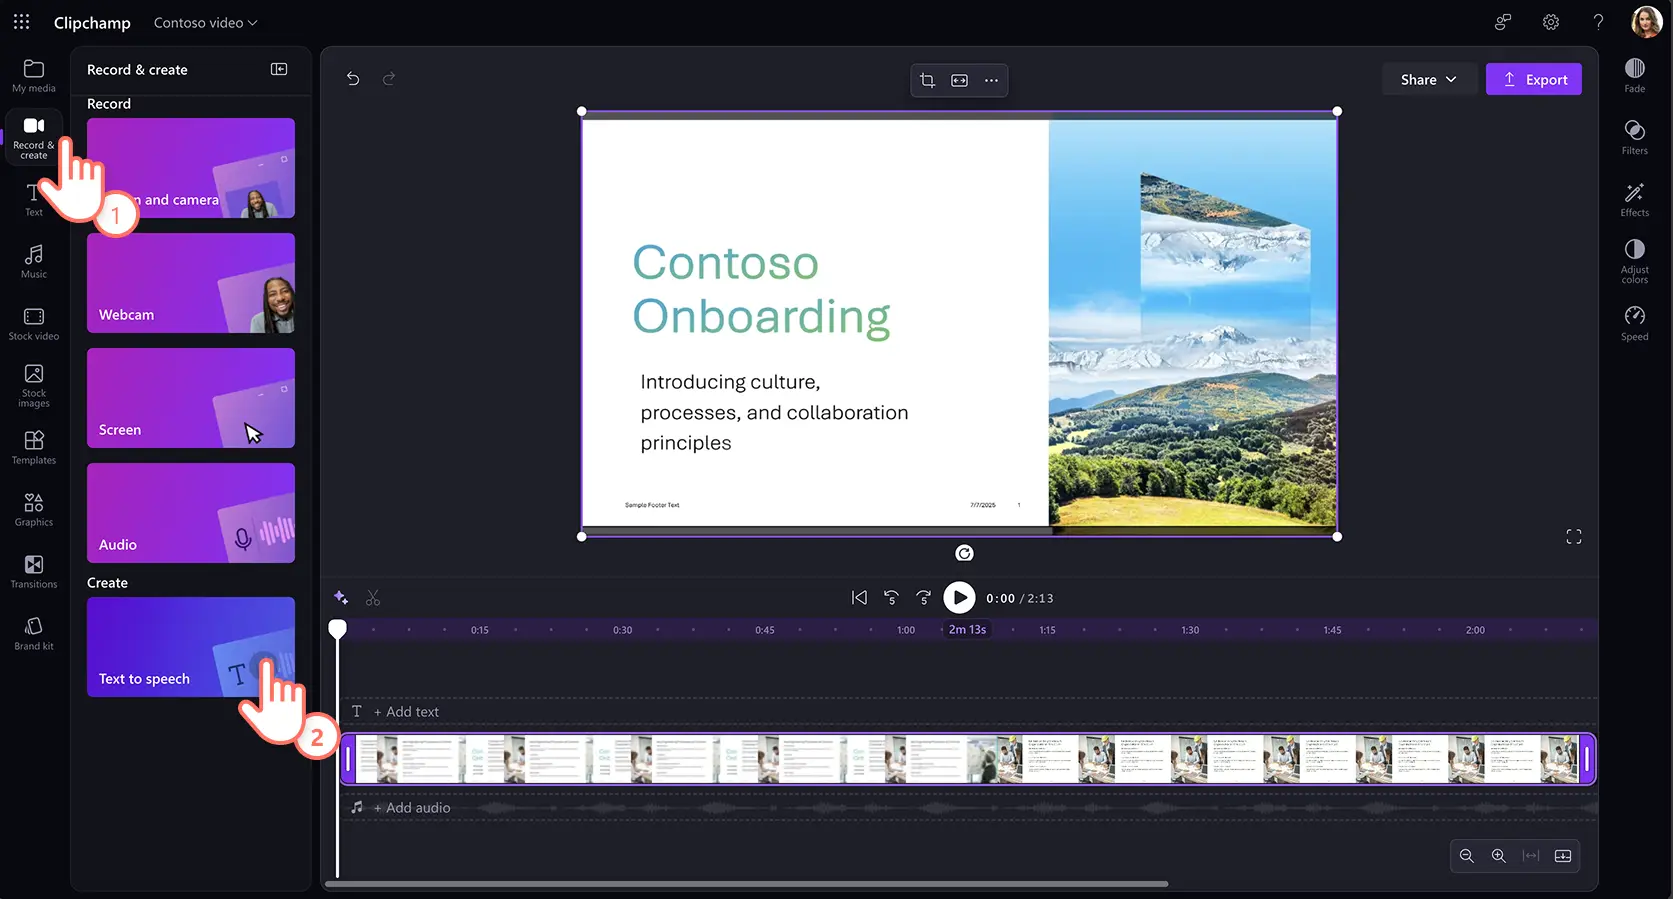
Next, navigate to the record and create tab, then select text to speech to start creating an AI narration.
Step 2. Generate audio narration for different slides
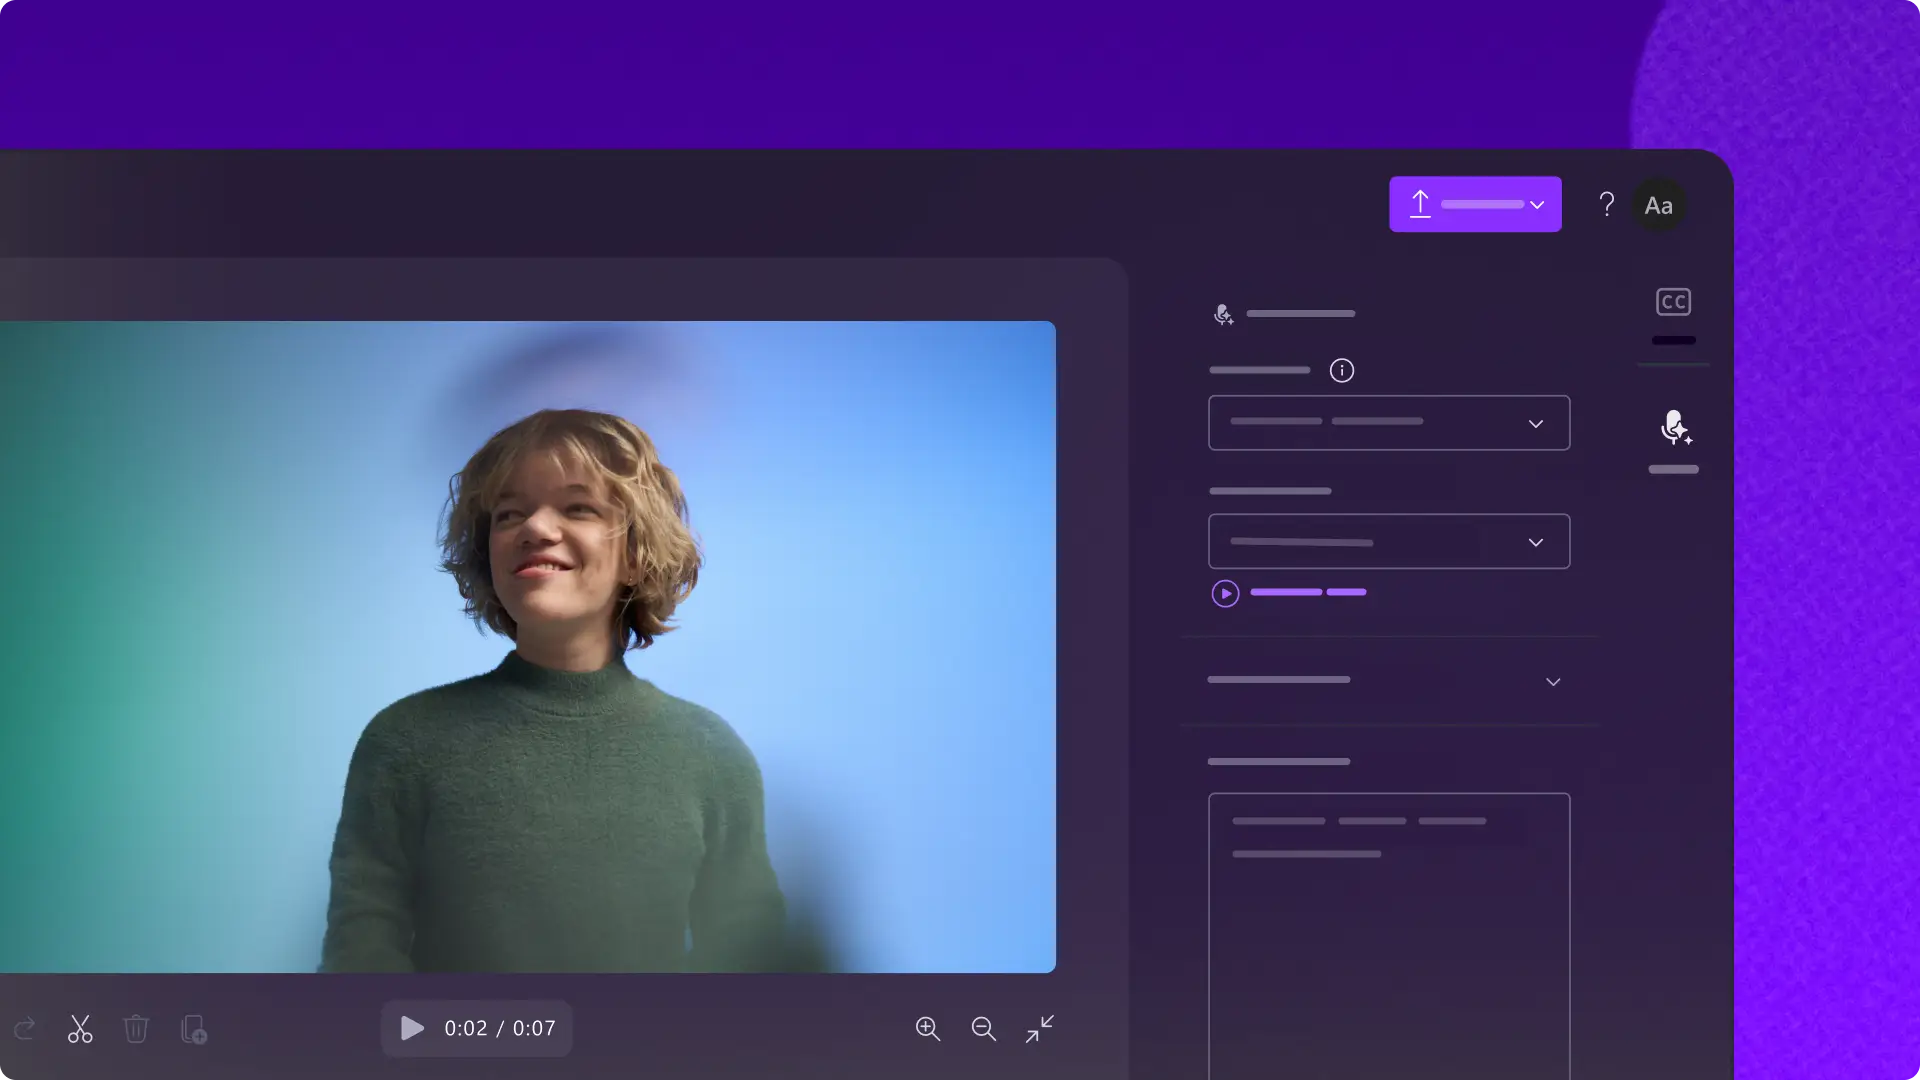
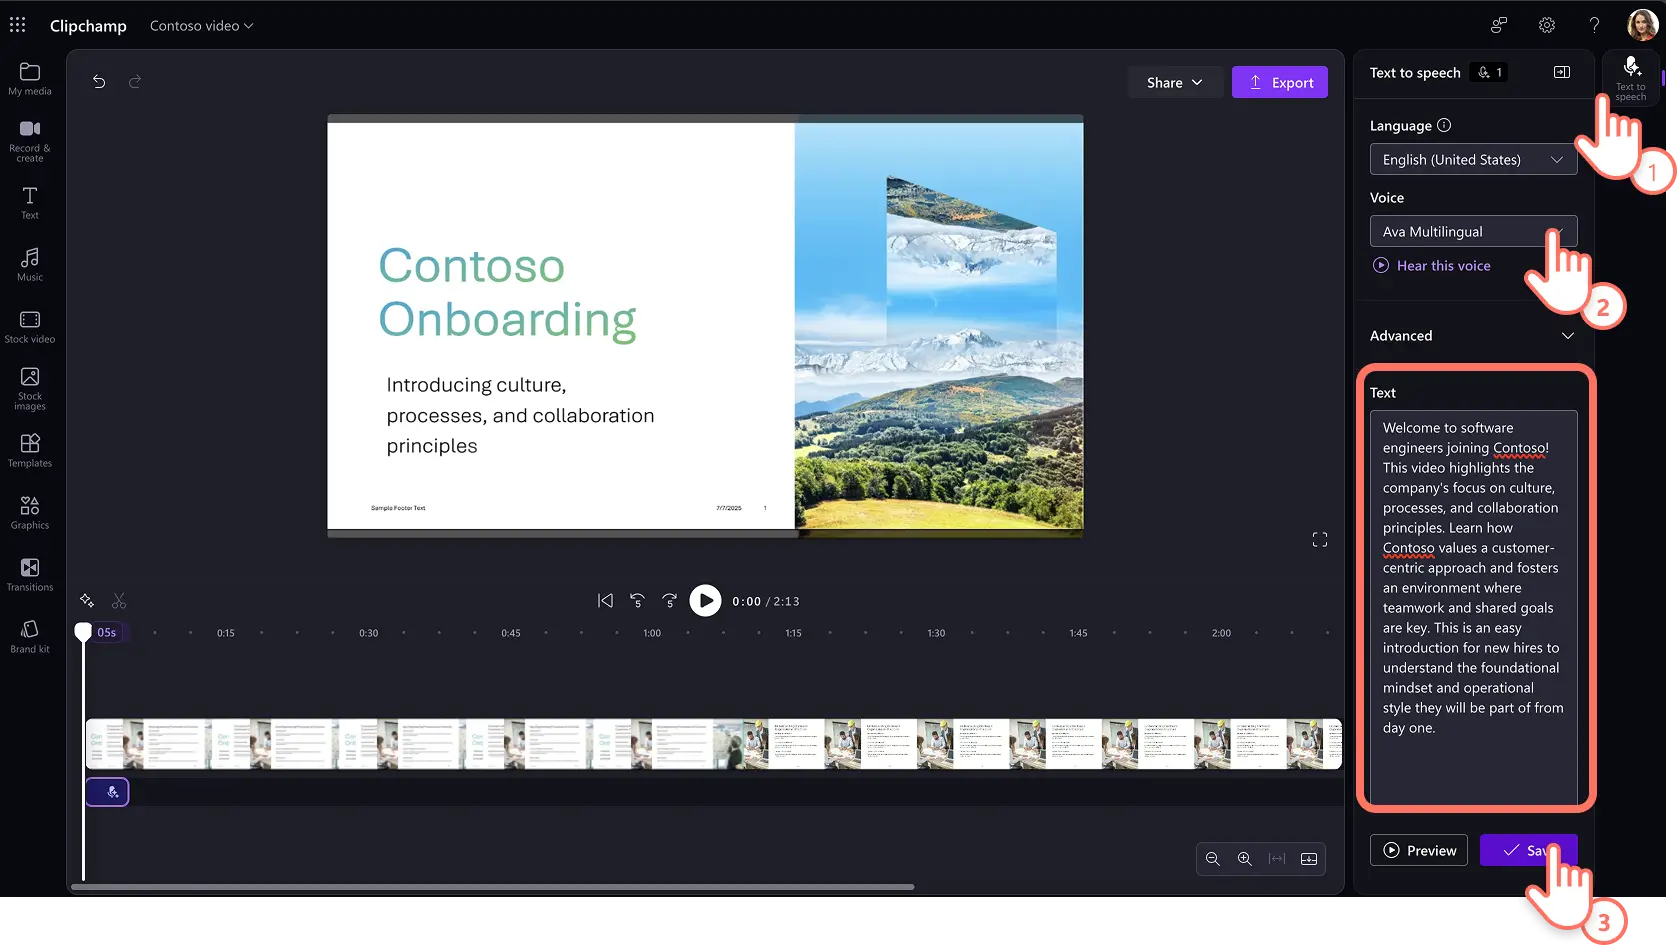
The text to speech tab will appear on the property panel where you can select an AI voice and your preferred language using the dropdown menus. Preview the realistic voices using the hear this voice button to make sure it suits your video presentation needs.
You can adjust the pitch and pace with advanced settings, selecting different pitch levels and using the pace slider to modify your narration speed.
Lastly, add your text to the text box and generate the voiceover using the save button. The text to speech narration will automatically be added to your video as an editable MP3 file.
Step 3. Sync audio narration with slides
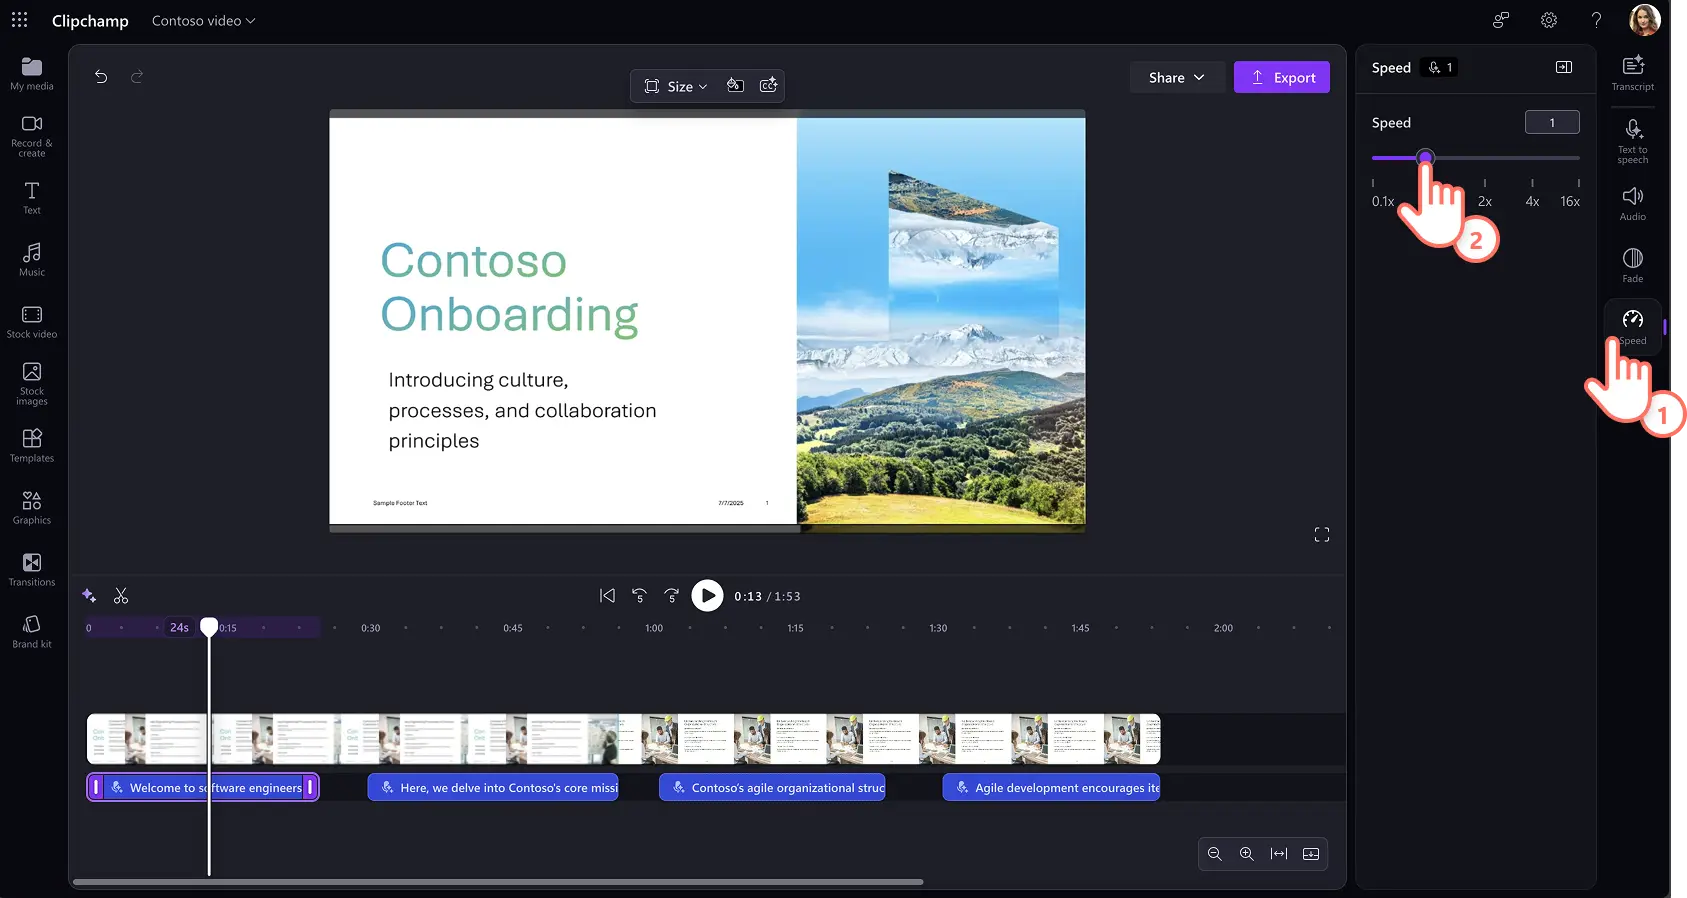
Continue generating a voiceover for each slide. Drag and adjust the placement of a text to speech voiceover on the timeline freely. You can also manually adjust the speed of a text to speech audio clip to suit the pacing of your video. Select the audio on the timeline, then click on the speed tab on the property panel and drag the slider to the left to slow down your clip, or to the right to speed up your clip. Choose from 0.1x to up to 16x speed options or input a specific value.
Step 4. Save and share your video
Preview the AI-generated narration and save the video presentation. Click on the export button, name your file then select a video resolution and saving location in OneDrive.
Benefits of using Clipchamp AI voiceovers
Generate multiple narrations: create different versions of the AI voice narration to cater to different audiences while complementing your video visuals. It’s a perfect way to batch create marketing and sales videos without making any voice recordings, saving time and effort.
Adjust voices for different video slides: enjoy the flexibility of applying individual voices to different sections of the video presentation. This increases the potential for engagement, compared to a video with a single narrator.
Multi-language narration: tap into the massive audience of foreign language speakers by creating and repurposing videos in different languages. Select languages like Spanish, French, Japanese, Hindi, German, and many more, from the AI voice and accent generator in Clipchamp for work.
Method four: how to create video narration with Microsoft Copilot
Step 1. Add speaker notes and upload the presentation
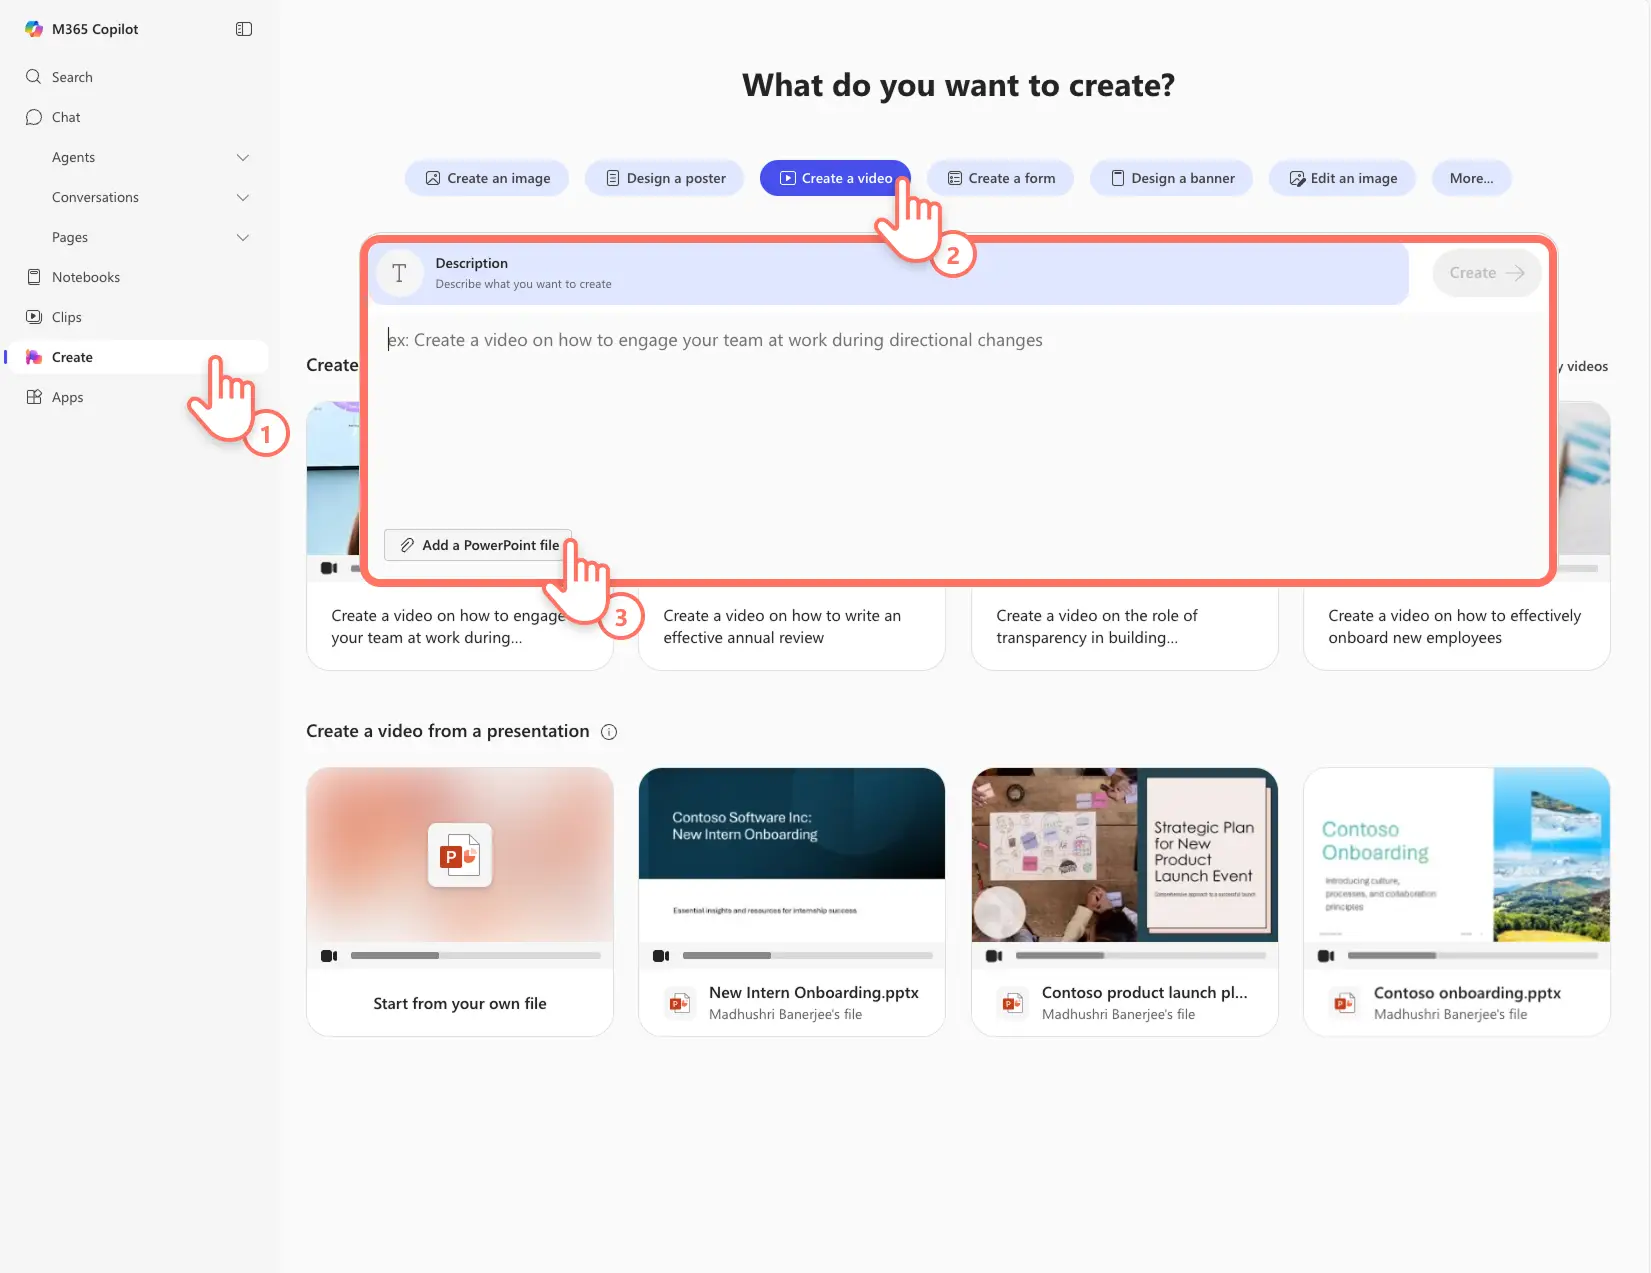
Open the PowerPoint presentation you would like to convert into a video. Add speaker notes to each slide, or chat with Microsoft Copilot in PowerPoint to generate detailed slide notes. Make sure to save the PowerPoint file with no sensitivity label. Next, navigate to Microsoft 365 Create and log in to your work account. Choose the Create option from the toolbar, then select the create a video button. Click the add a PowerPoint file button to find the presentation.
Note: the Create hub is currently only available to commercial users (Entra ID) with a Copilot license.
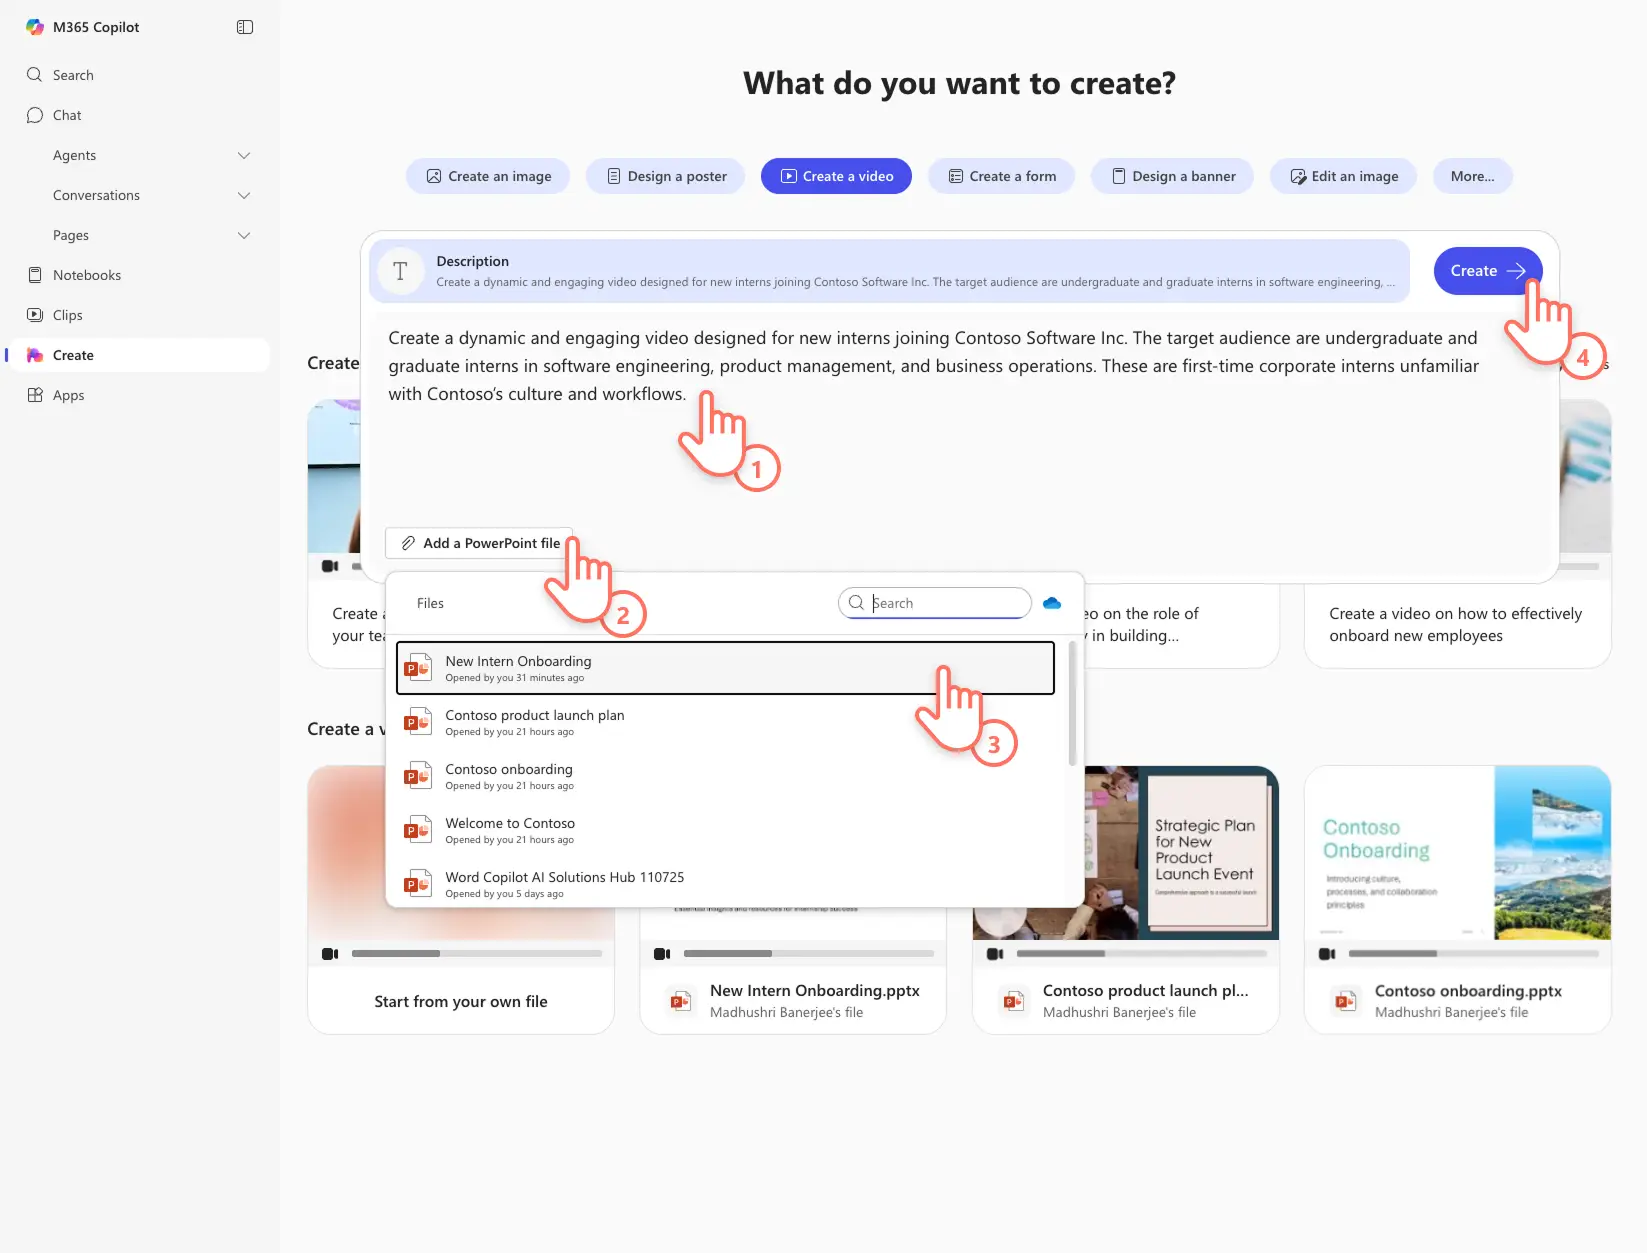
Select the presentation name from the drop-down menu and add video prompts for Copilot, such as the target audience and goal of the video. Click the create button to start converting the PowerPoint into a video with narration. The AI video will start generating.
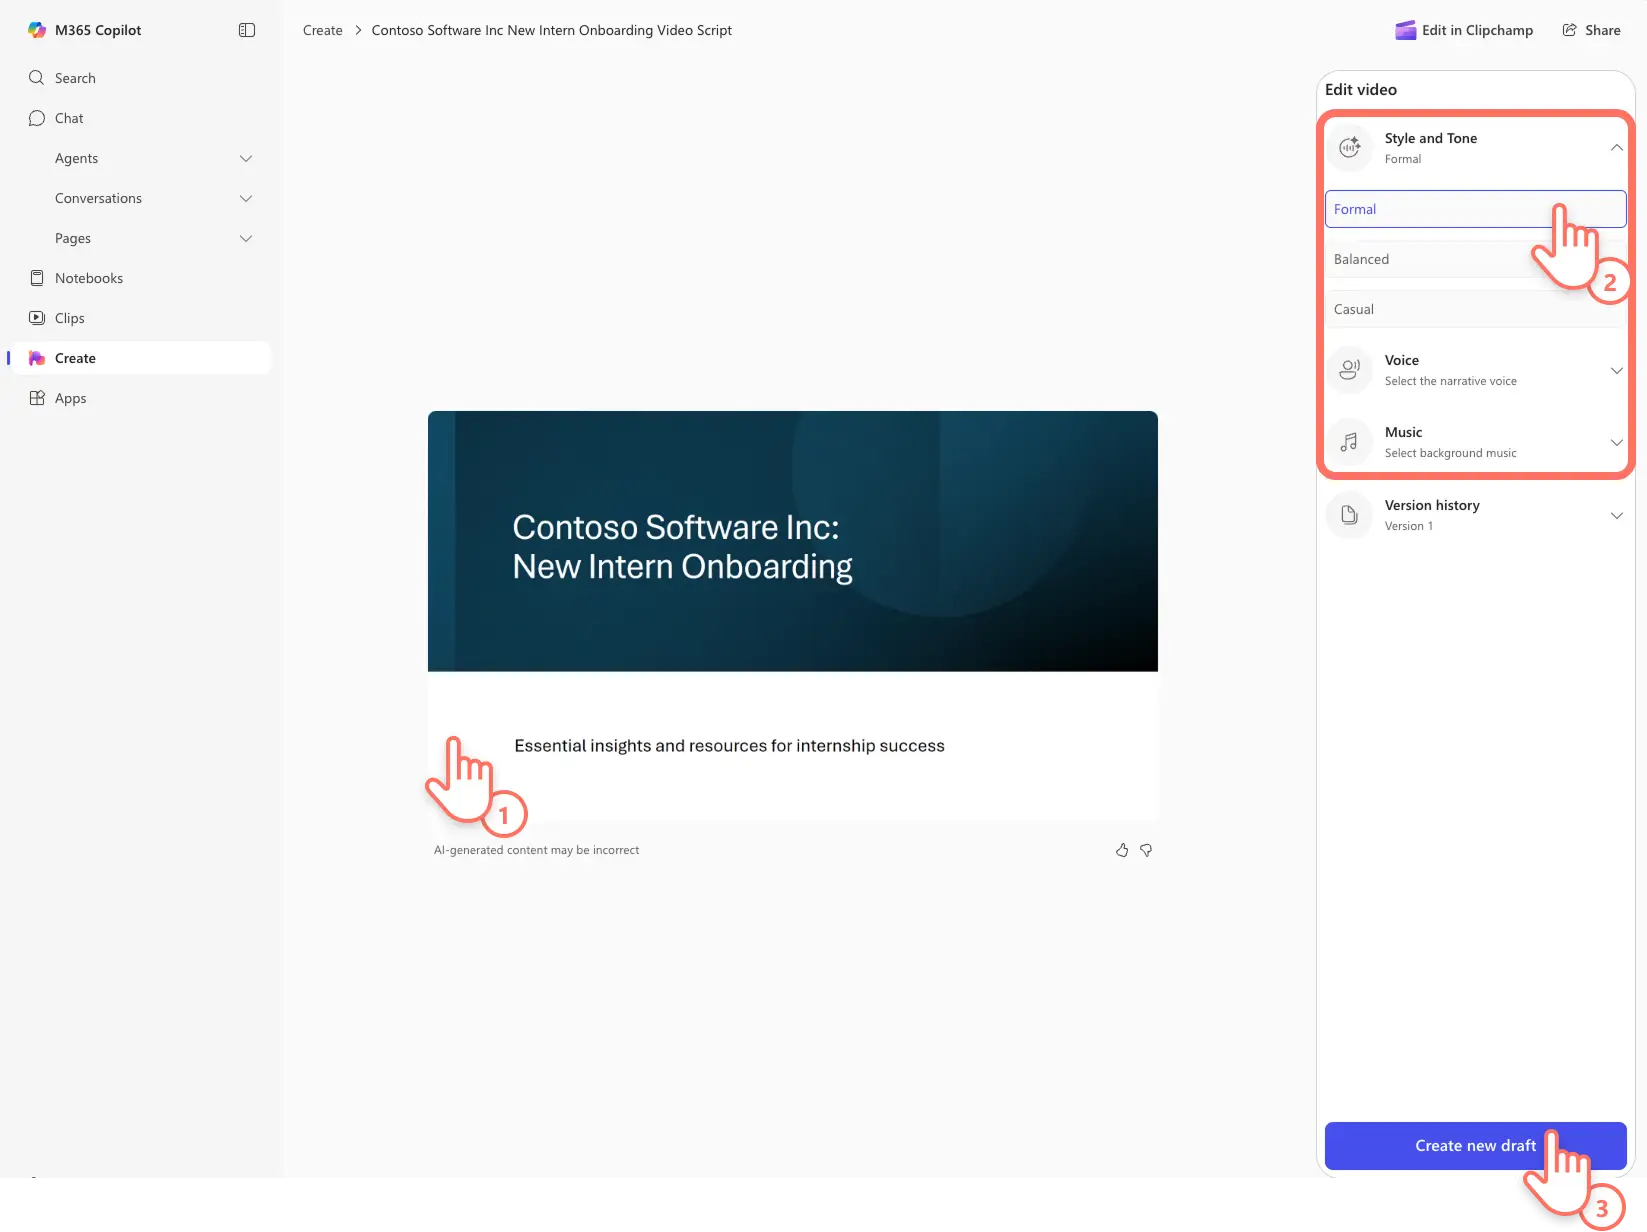
Step 2. Customize AI video narration
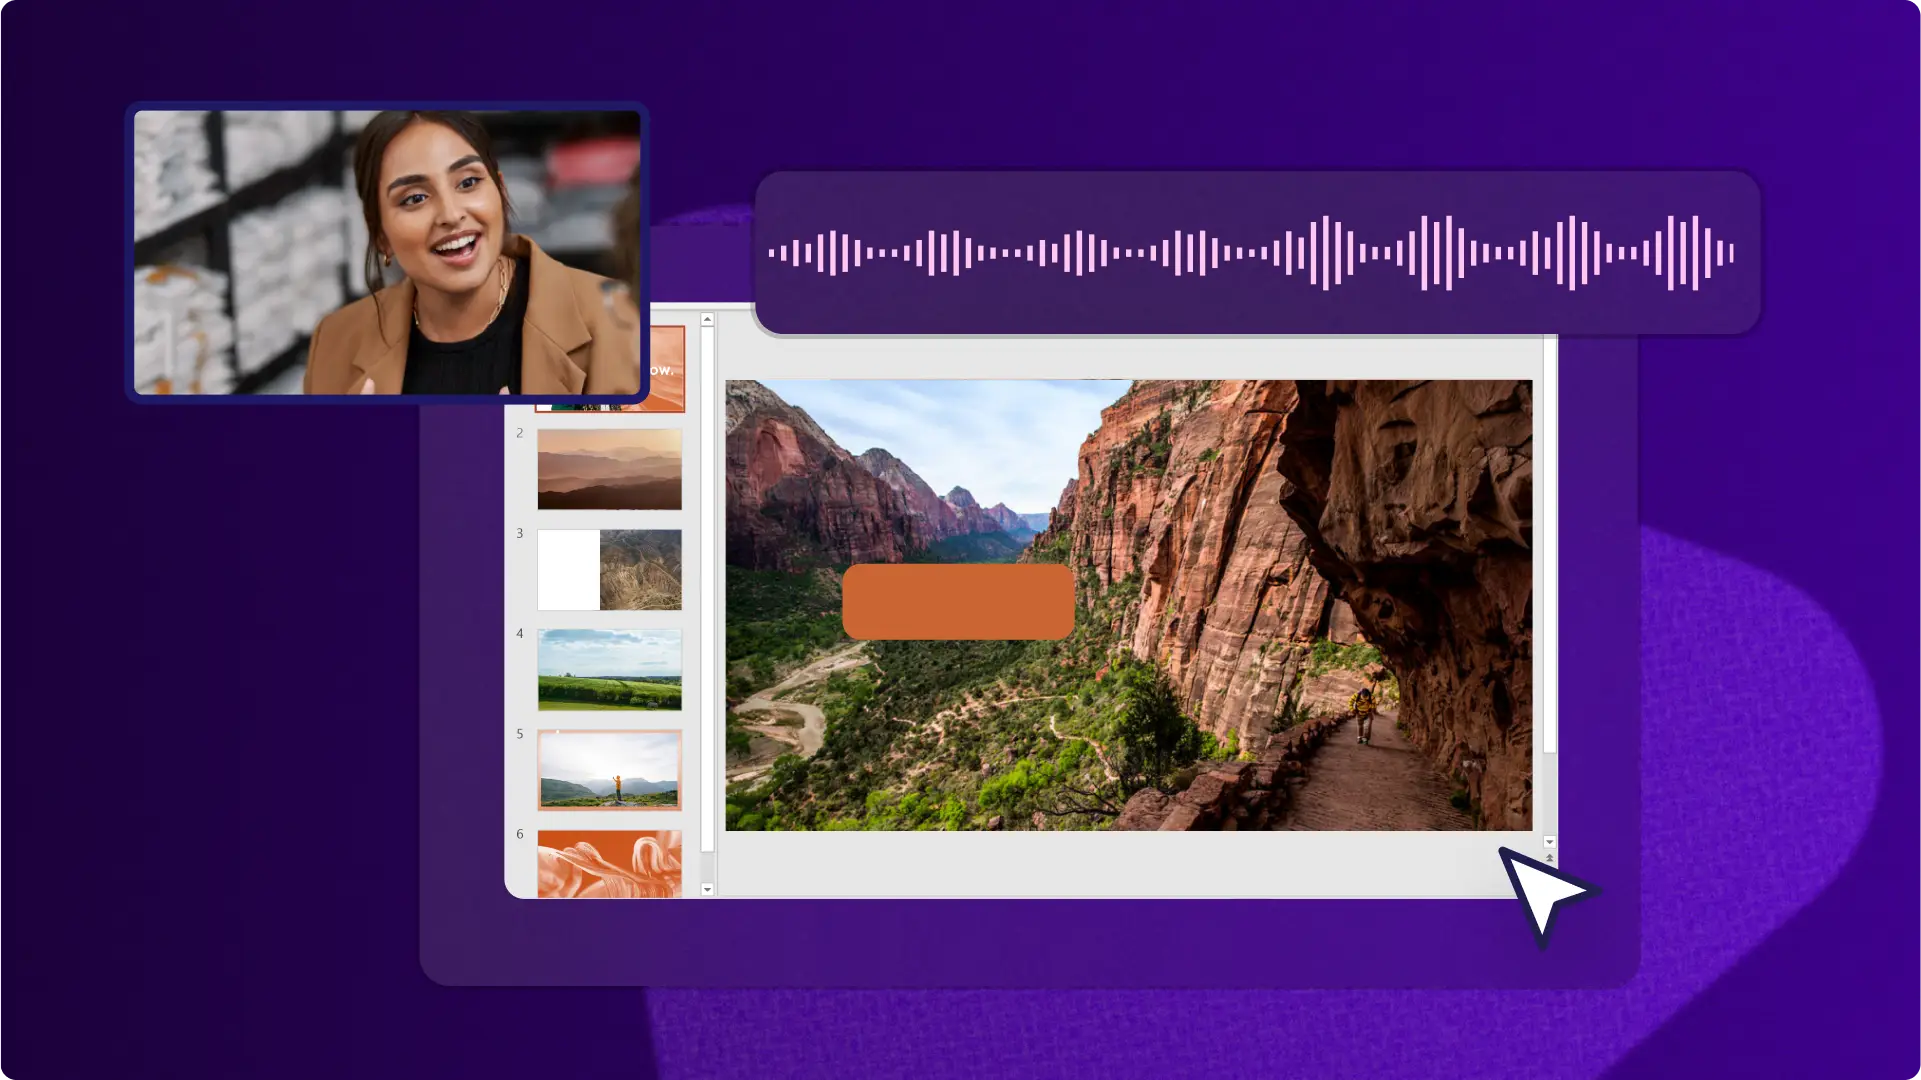
Play the video presentation to review the AI-generated narration made by Copilot and Clipchamp based on the speaker notes. Hover on the edit video property panel to view customization options, including voiceover style and tone, voice options, and a range of corporate-friendly background music tracks. Make changes as required, then click on the create new draft button to generate an updated video presentation. Repeat this process multiple times if needed.
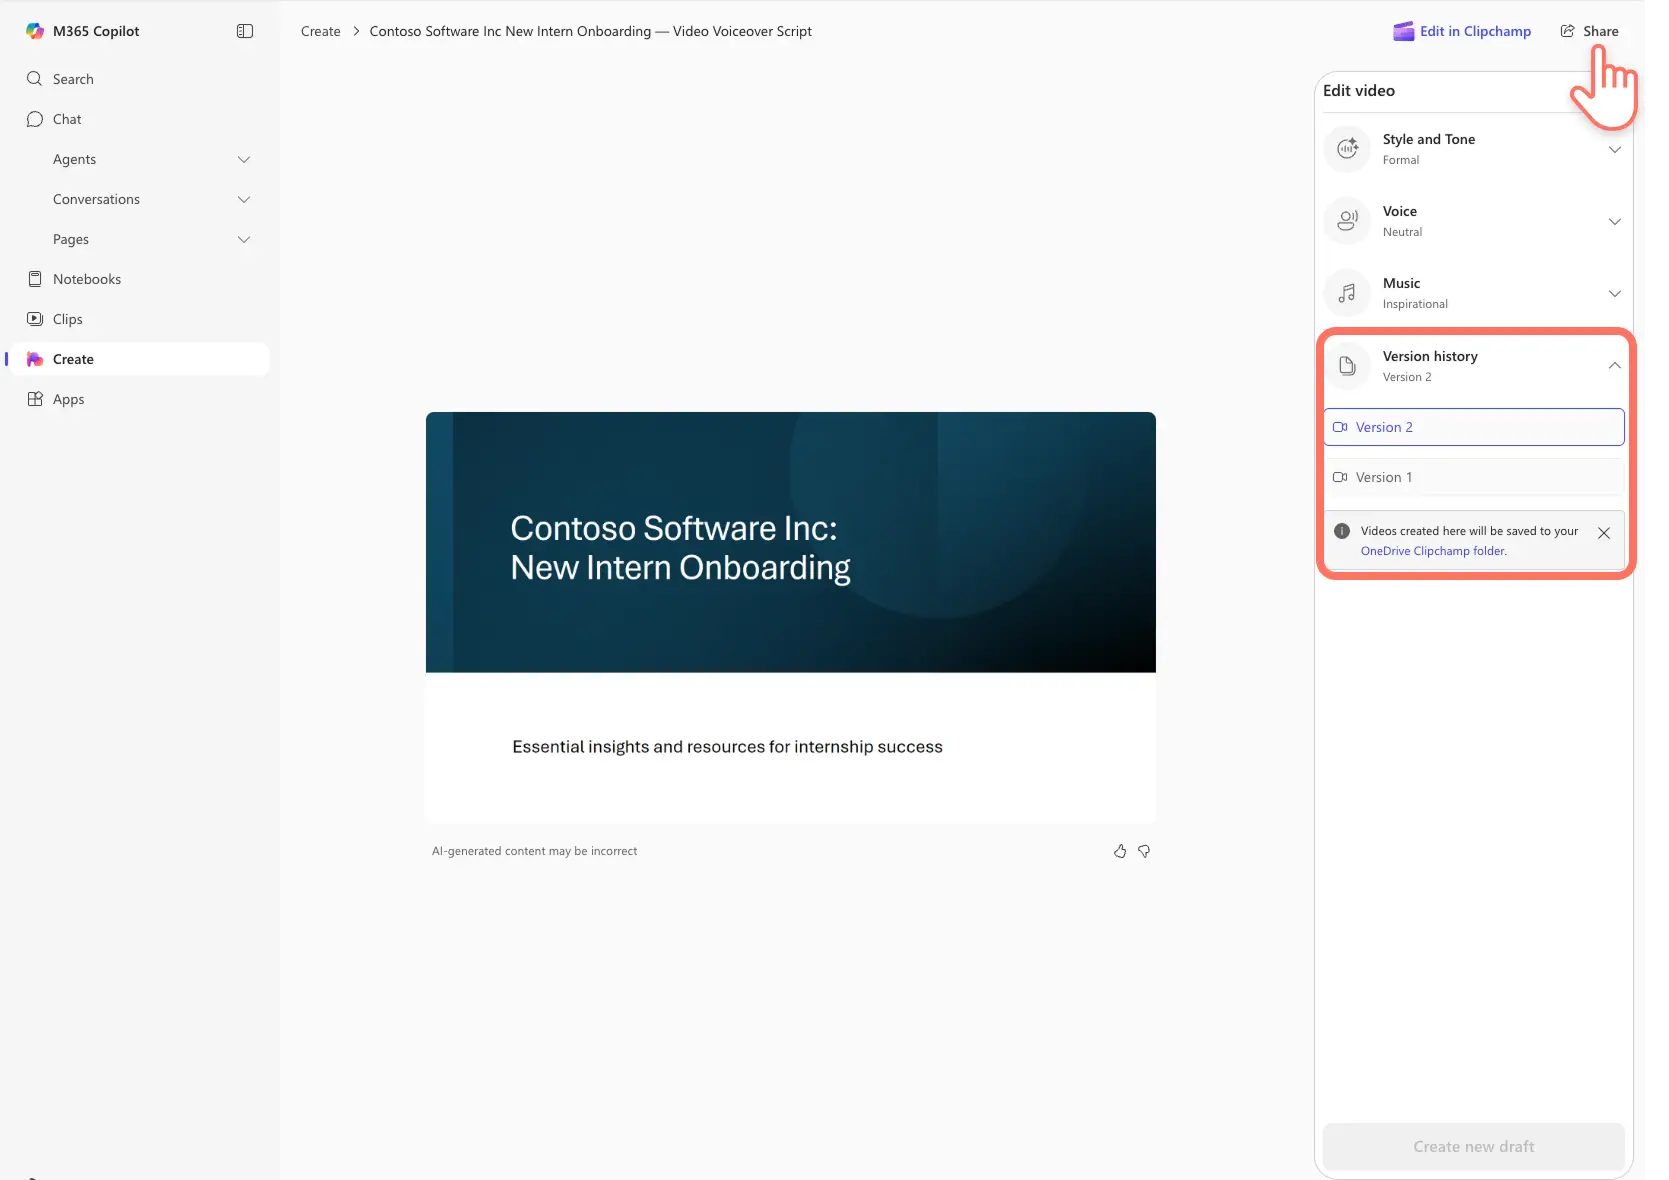
Step 3. Save and share narrated video presentation
Watch the final video presentation by clicking on the play button. Easily compare the video with previous generated videos listed in version history. Videos will automatically save to your OneDrive Clipchamp folder. Click on the share button to create a URL that can be easily viewed by colleagues and clients.
Benefits of using Microsoft Copilot
Automatic script creation: combine speaker notes and prompts to create video presentation scripts that can engage different audiences with ease. The style and tone setting instantly adapts the script to formal, balanced, and casual tones, with no scriptwriting required by users.
Quick first drafts: there’s no need to arrange recording tools to create a video narration with Copilot. Maintain efficiency and productivity in a busy work schedule with this AI-powered feature.
Consistent narration: captivate viewers with a professional voiceover across PowerPoint videos, maintaining an organization’s brand and standards. This is especially useful when creating instructional HR videos and training videos from presentations.
With these four easy audio narrations methods, anyone can create impressive work videos. Continue learning how to record your PowerPoint with webcam and further edit video presentations.
Get started making video presentations for your business with Clipchamp for work or download the Microsoft Clipchamp Windows app.