Heads up! The screenshots in this article are from Clipchamp for personal accounts. The same principles apply to Clipchamp for work and school accounts.
On this page
Instagram Reels are officially TikTok and YouTube Shorts biggest competitor, recording the highest watch rate out of the trio. With over 200 billion Meta users playing Reels daily, the short-form video format has become the most popular way to watch video online.
If you're a content creator or business, the Instagram Reels feature is the perfect way to easily engage loyal followers, generate new viewer traffic, and reach a wider audience faster. Read on to learn how to make a high-quality video with an Instagram Reel maker. Explore video editing tips, guidelines, and how to add extra effects and features using Clipchamp video editor.
Instagram Reels size, dimensions, and guidelines
Before creating an IG Reel, the Instagram terms of service states that creators need to be 13 years of age to make an account and post any form of content. Once verification is complete, you can post Instagram Reels with either a public account or a private account. Public Reels will be discoverable by all Instagram users, whereas private Reels follow your privacy settings and can only be viewed by and shared with your followers. IG Reels, like all Instagram content, must follow the community guidelines or the video will be removed.
Take a look at the video format specifications for Instagram Reels:
Video length: users can upload videos as Reels if they're between 3 seconds to 15 minutes in length. If you're recording Reels inside the Instagram app, there is a maximum video length of 90 seconds. Any feed video posts that are shorter than 15 minutes will share as Reels.
Video format: MP4 or MOV.
Video aspect ratio: recommended between 1.91:1 and 9:16 aspect ratio.
Video file size: 4GB maximum.
Video frame rate: minimum 30 FPS (frames per second).
Recommended video resolution range: minimum 720 pixels.
Video captions: highly recommended.
Cover photo: PNG or JPG at 420px by 654 x (1:1.55 ratio).
Elements of an Instagram Reel
High-quality video: the Instagram algorithm boosts videos with unique, high-quality visuals. Create your video for smartphone viewers by shooting your content vertically using a mobile phone with a high-resolution video camera.
Clear audio: when dialogue is an important feature of your Reel, ensure the audio is crisp and clear for human ears and algorithms. When using music and other audio, make your Reel go viral by using trending sounds on Instagram.
Subtitles: subtitles make videos more accessible to the hearing impaired and non-English speakers. They also increase your watch time because a large percentage of Instagram users watch Reels on mute.
Animated text: motion titles are another design element that can showcase your personal brand while highlighting key information. You can make your videos more visually striking, fun, and digestible with clear and charismatic animated text.
CTA graphics: grow your audience on Instagram and other platforms like TikTok and YouTube by using animated graphics for CTA buttons like ‘link in bio’ or ‘watch now’ stickers. They add character to your Reels while growing your brand.
Branding: craft a personality for your Instagram account and your brand as a content creator. Use unique fonts, brand logos, and add a signature touch with consistent use of filters and other effects.
Dynamic video editing: make your Reel engaging and cinematic by using video editing tools. The Instagram app includes a variety of effects and video templates, but you can also use video editing software for a bigger variety of editing techniques like animated transitions and dramatic zooms for before and after style morphs.
How to make a Reel on Instagram
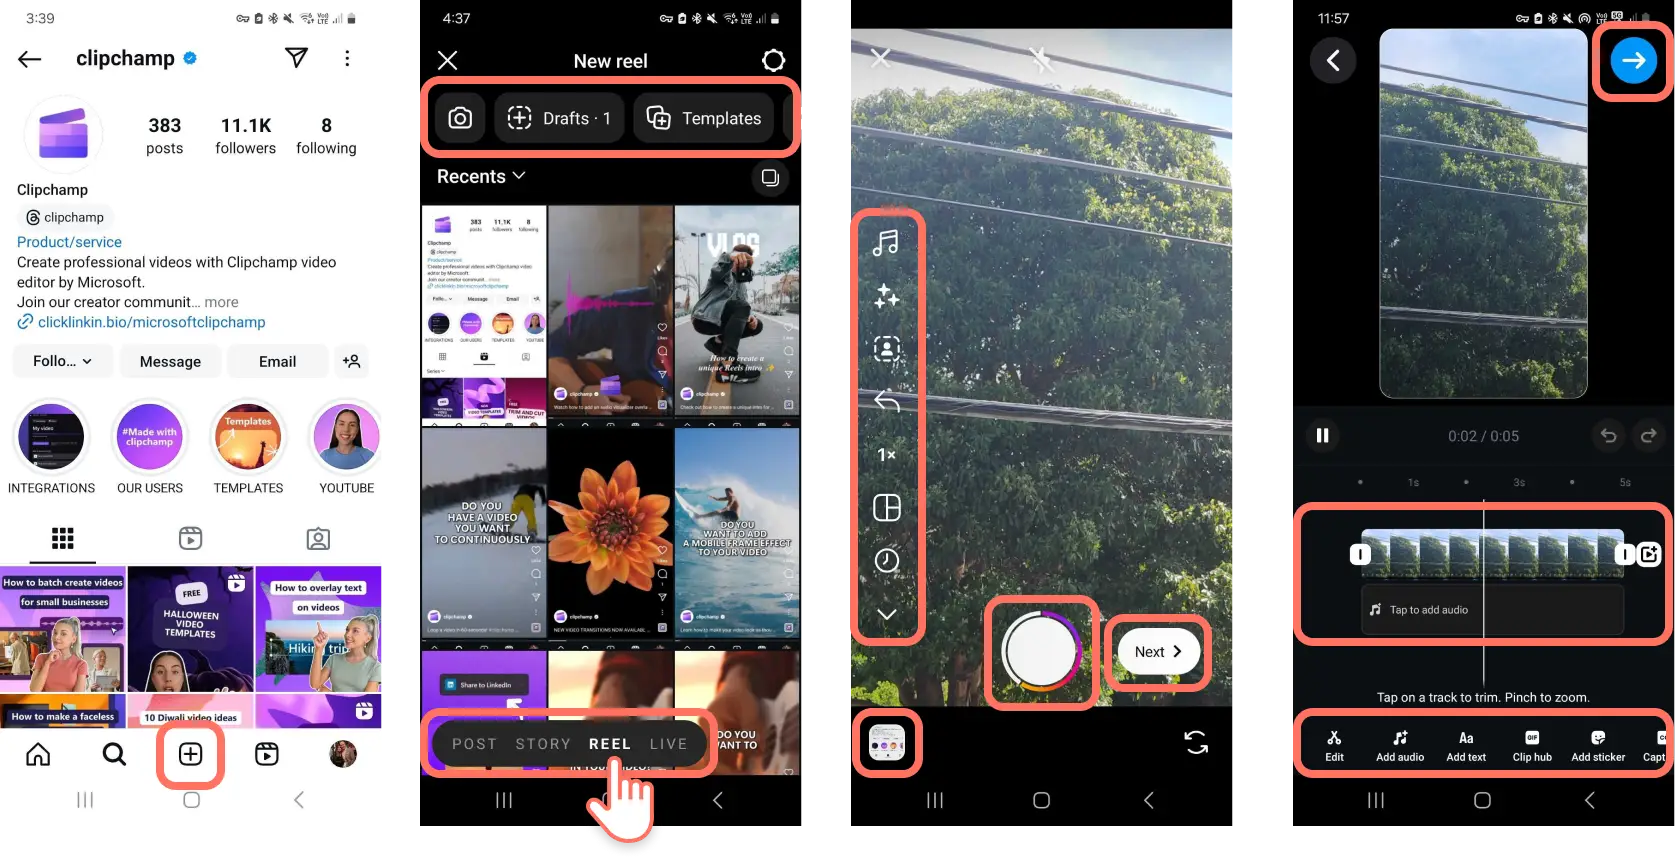
Open Instagram on your smartphone and tap the plus icon (+) at the bottom center of the screen to make a new post.
Scroll across the bottom bar to select the Reel tab.
To record straight into your phone camera, tap on the record button at the bottom center of the screen.
To upload a video file, tap on the camera library icon at the bottom left of your screen.
Customize your Reel by adding audio, effects, filters, or text by tapping on the icons running down the left of your phone screen.
Tap on the next button to continue editing your video.
Add final edits like more audio, captions, and other effects by tapping on the icons at the bottom of the screen.
Swipe up to view the timeline of your video to make more edits like adding transitions, reorder clips, and trim video and audio clips.
Tap on the next button then enter your Reel caption and other details.
Tap on the share button to publish your Reel.
The in-app Instagram Reel maker is a high-quality editing tool with AR (augmented reality) effects and filters and a massive sound library of licensed music. However, if you want to create content using unique Instagram templates or make videos faster by batch creating Reels for your business, consider the Clipchamp video editor as your Instagram Reel maker of choice.
How to make an Instagram Reel with Clipchamp
Many content creators make their Instagram Reels using video editing software for access to more editing features and to edit on a computer or laptop. Clipchamp is a free online video editor with a range of editable 9:16 video templates so you can make professional-quality Instagram Reels all from your web browser with no downloads needed.
Step 1. Start with a Reels video template
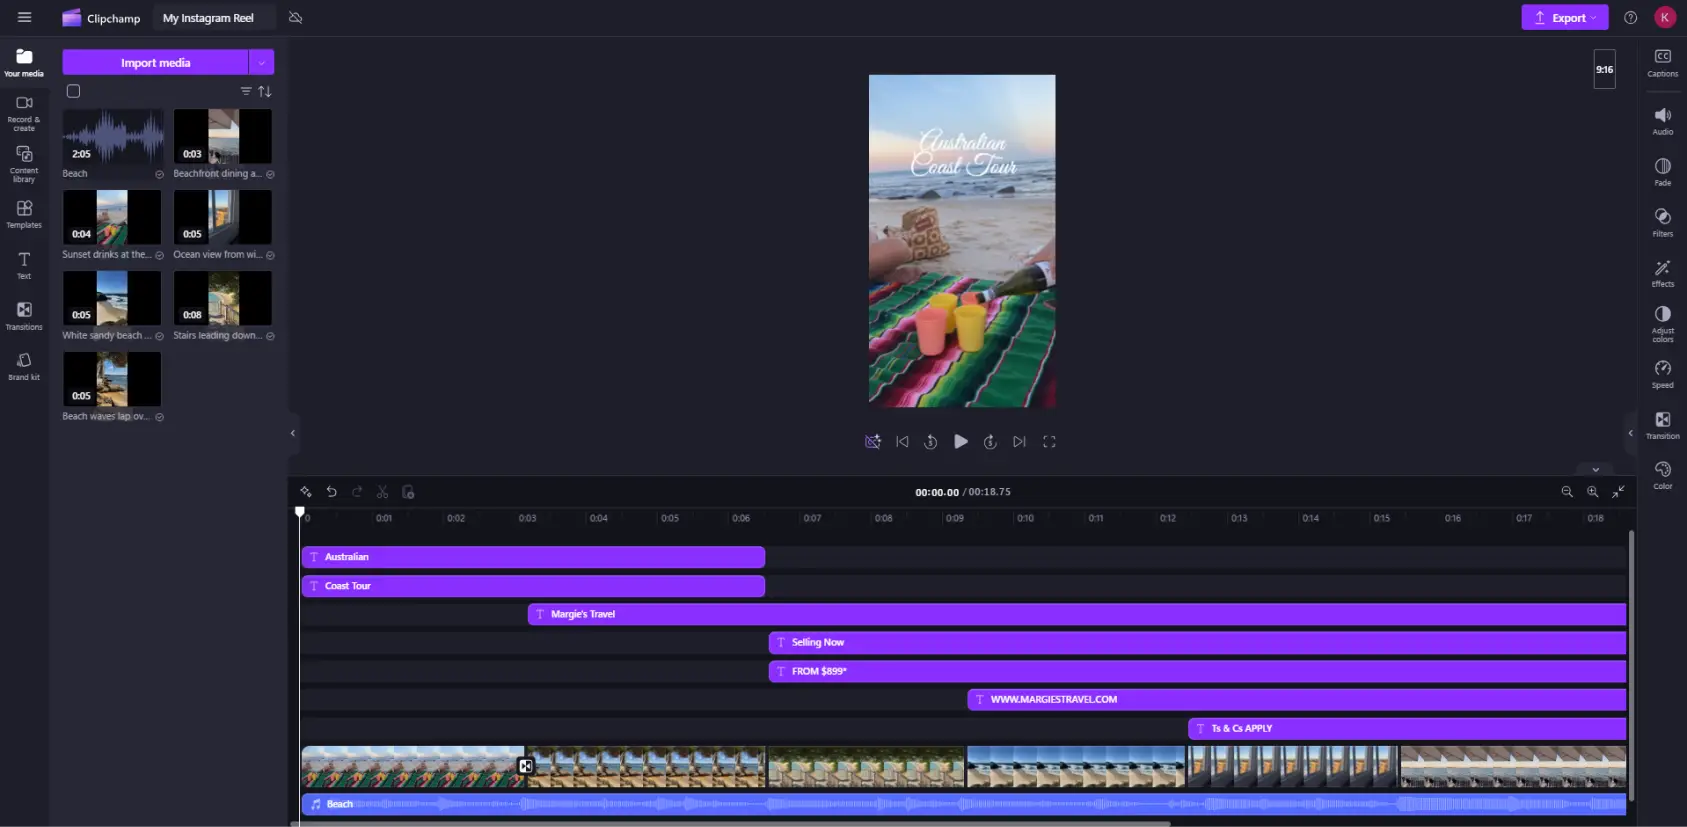
Choose one of the simple and dynamic Instagram Reels templates – they include animated text, transitions, royalty-free music, and other effects. This provides you with a framework to get started. You can customize and change any elements as you edit. If you prefer, some templates are ready to save and share as they are – all you need to do is change the text and export.
Step 2. Import your own videos and photos
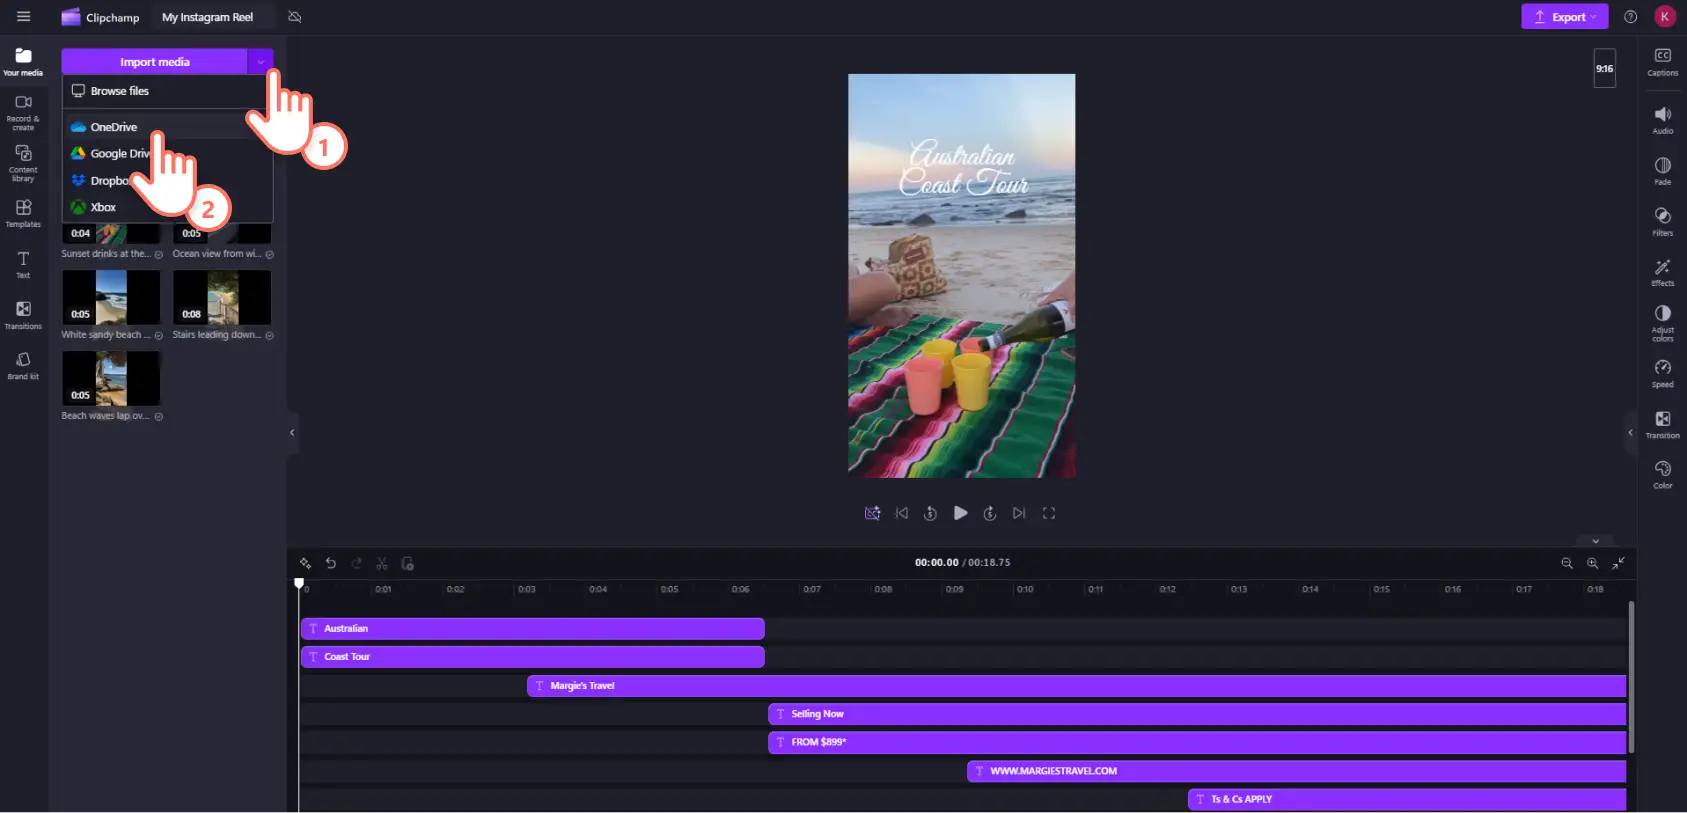
Now that your template has loaded onto the timeline, it’s time to add your own video, audio, and photos. Click on the import media button in the your media tab at the top left of the window. Here you can upload media files from your computer or connect your OneDrive.
Step 3. Customize the Reels video template
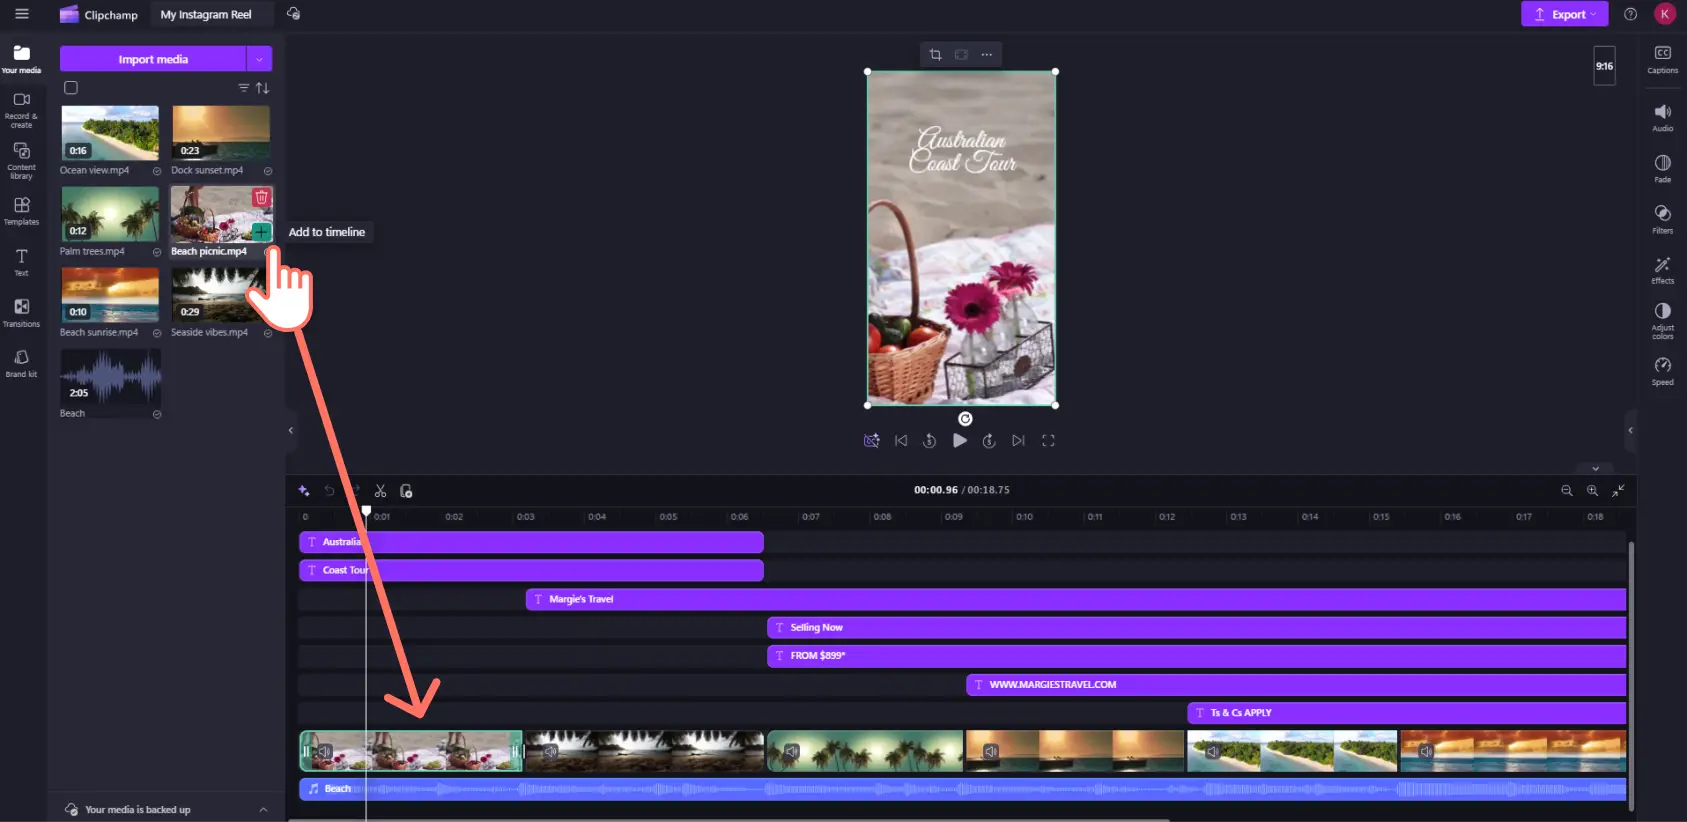
Once your personal media is uploaded, drag and drop the files from the your media tab onto the timeline. Place your new video files on top of the template video clips in the timeline to replace them. You can resize your personal videos to suit the Instagram aspect ratio using the video resizer.
Modify text and animated titles
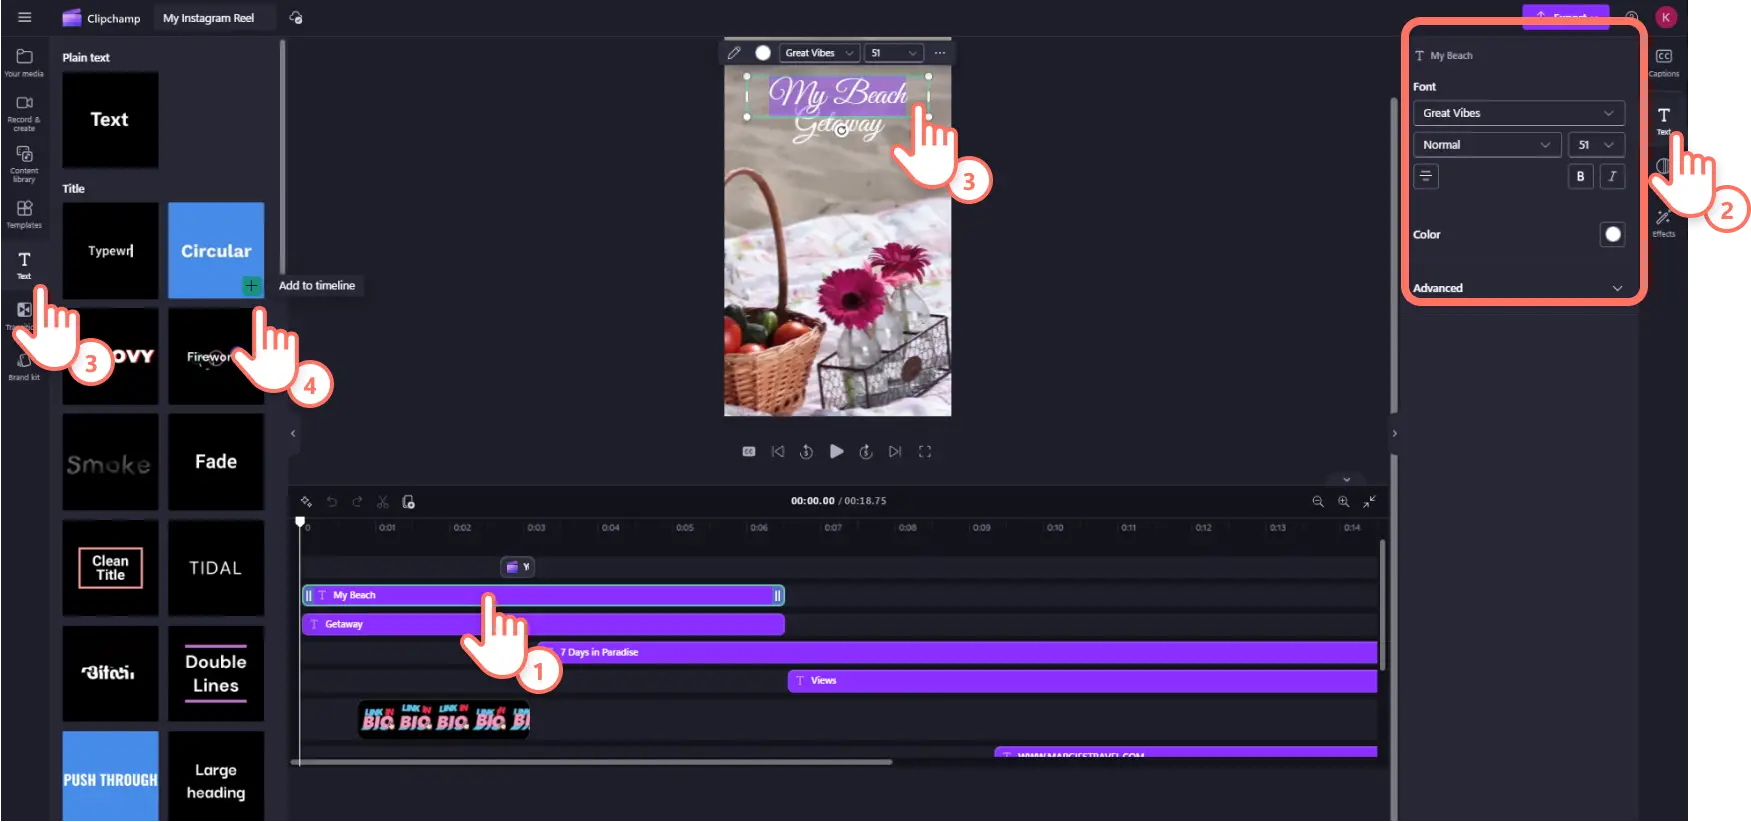
To change the template text, click on the text asset in the timeline so it’s highlighted. Next, click on the text tab in the property panel to change the font and advanced settings like shadows. Then click on the title inside the preview window to change the text. You can also add new text like animated titles by clicking on the text tab on the toolbar then dragging and dropping a new title onto the timeline.
Add graphics and effects
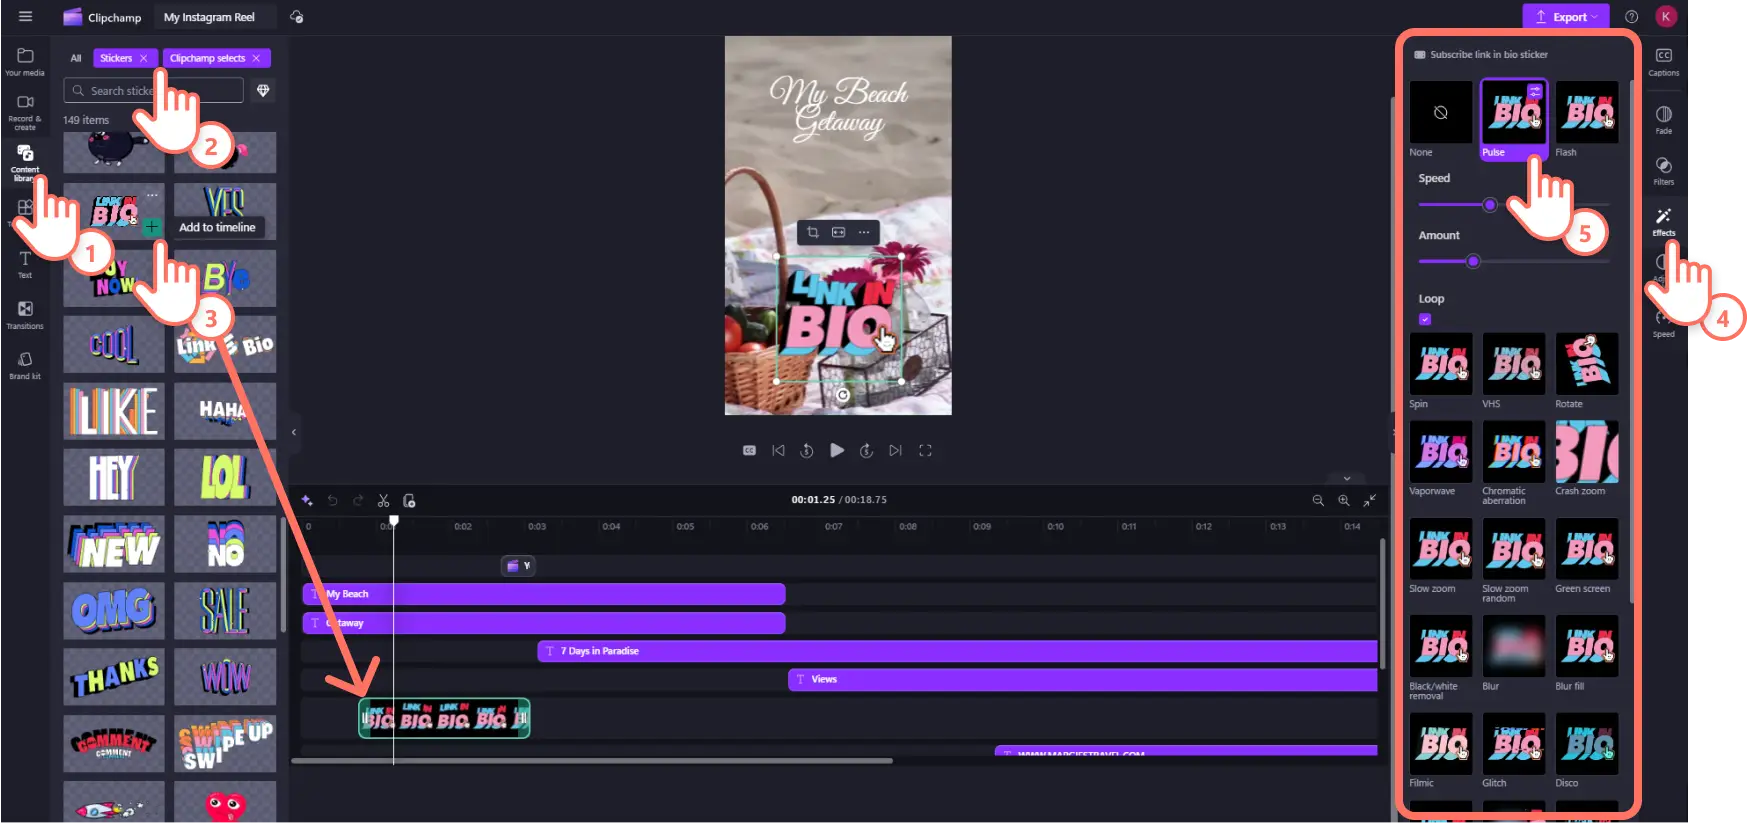
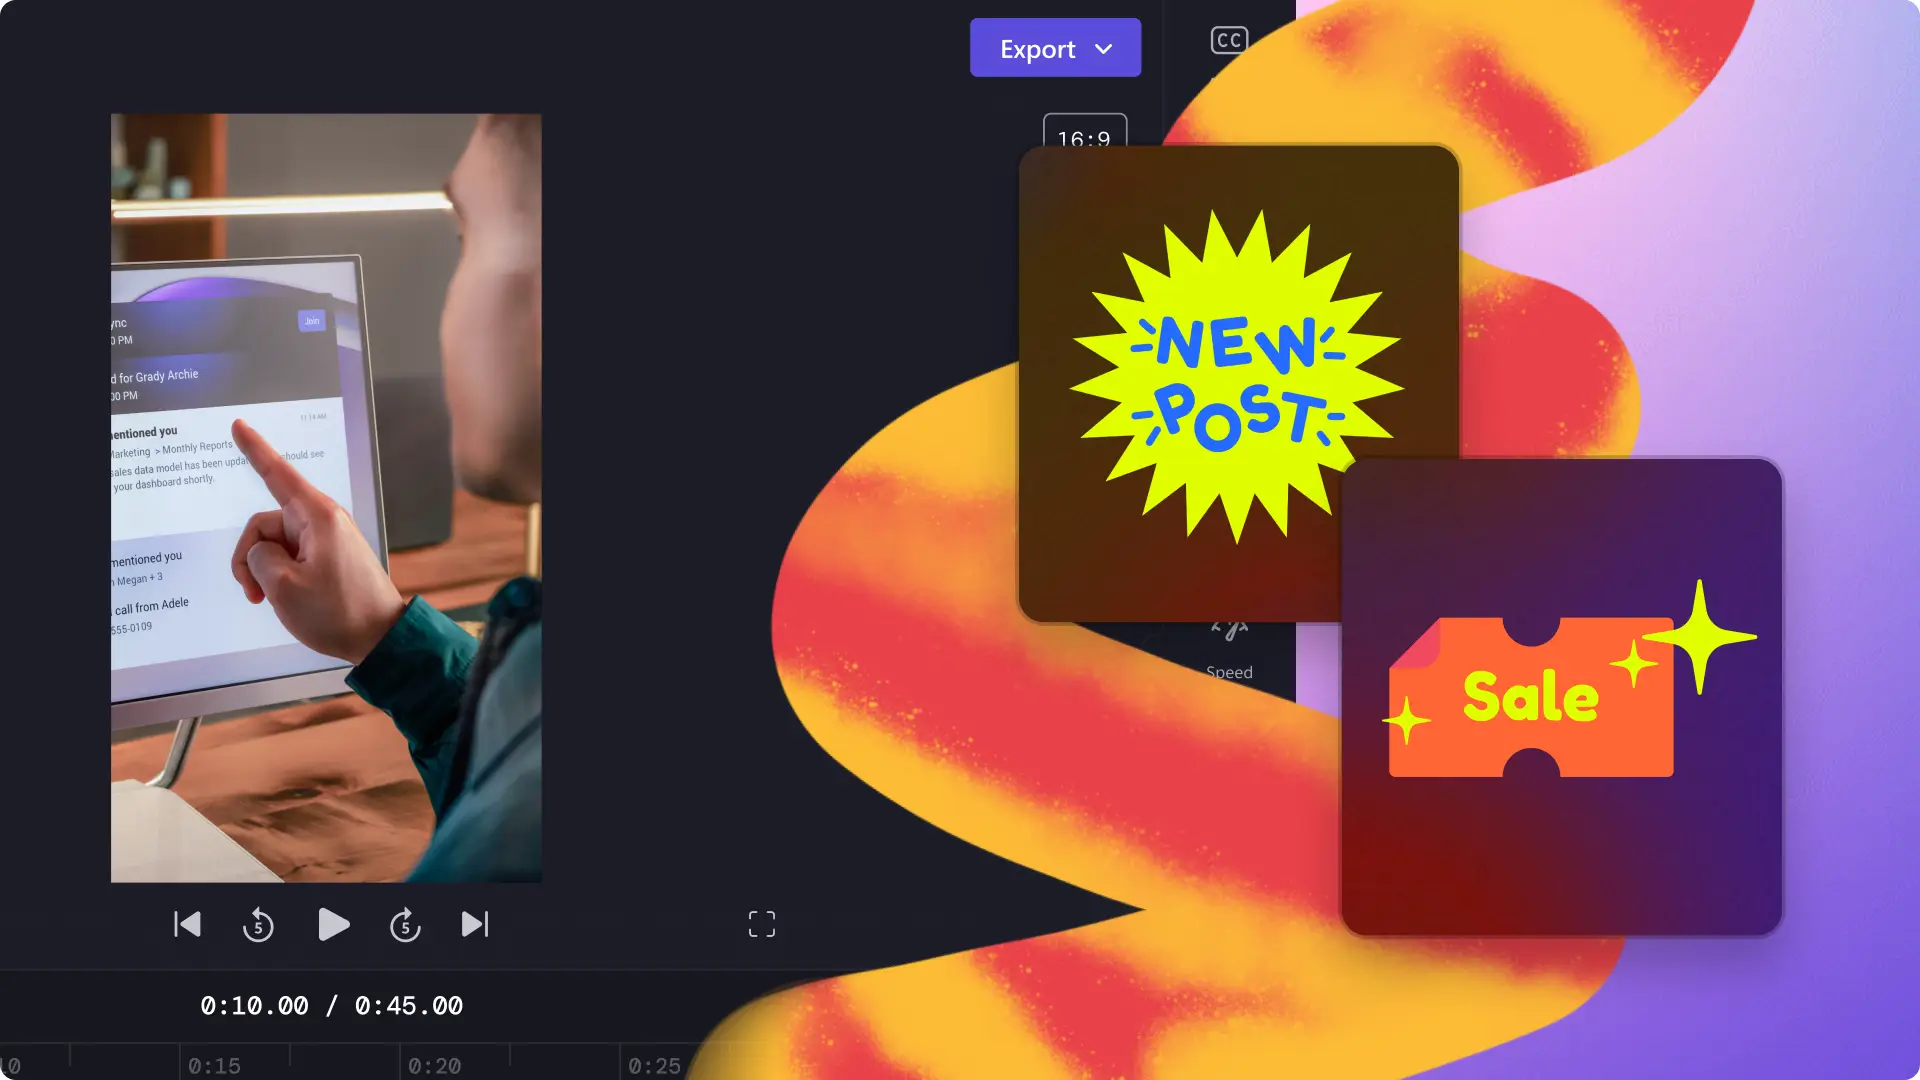
To add animated graphics like stickers and GIFs, click on the content library tab on the toolbar then click on the drop-down option and select stickers. Scroll through the sticker library then drag and drop a sticker onto the timeline on top of your video assets.
To add an effect, click on the sticker on the timeline so it’s highlighted, then click on the effects tab on the property panel. Some stickers will come with custom animation effects. Hover above the option to preview, then click on the effect to apply it to your sticker.
Update royalty-free background music
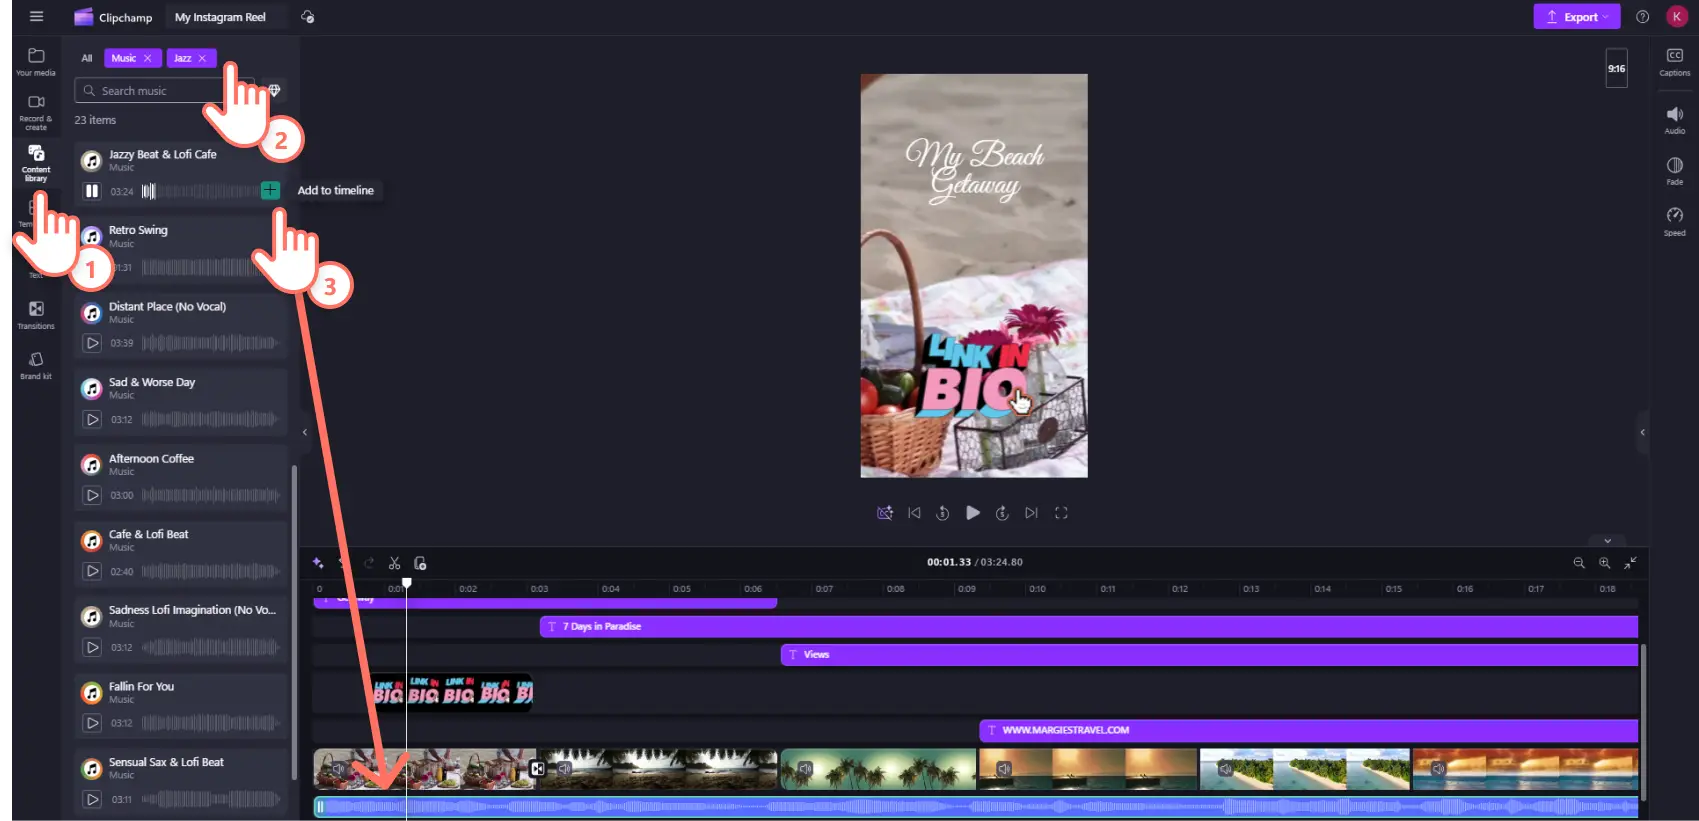
To change the background music, click on the content library tab on the toolbar and click on the audio drop down arrow, then select music. Scroll through the royalty-free music collections by genre or type music styles or other keywords into the search bar. Once you’ve found your audio clip, drag and drop it over the template music on the timeline to replace it.
Step 4. Enhance with AI voiceover and subtitles
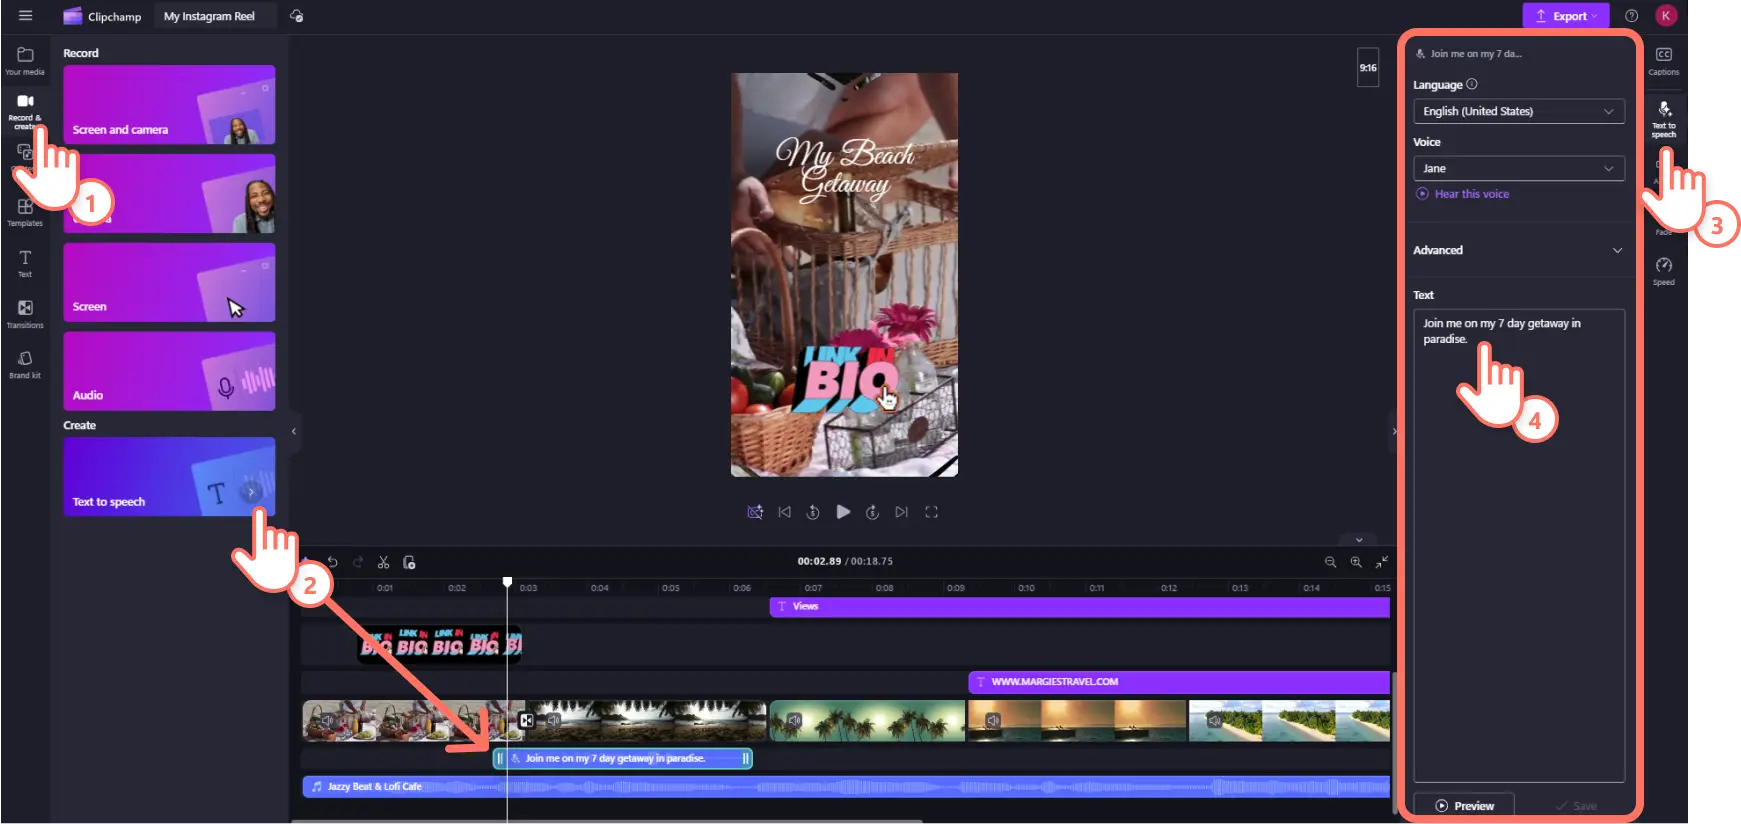
Add a human sounding narrator to your Instagram Reel using the text to speech generator for lifelike and professional quality AI voiceovers. Click on the record & create tab on the toolbar then select text to speech. This will add a new audio asset to the timeline. Click on the text to speech tab on the property panel then type in your text and adjust the AI voiceover settings including emotion, vocal pitch, and pace.
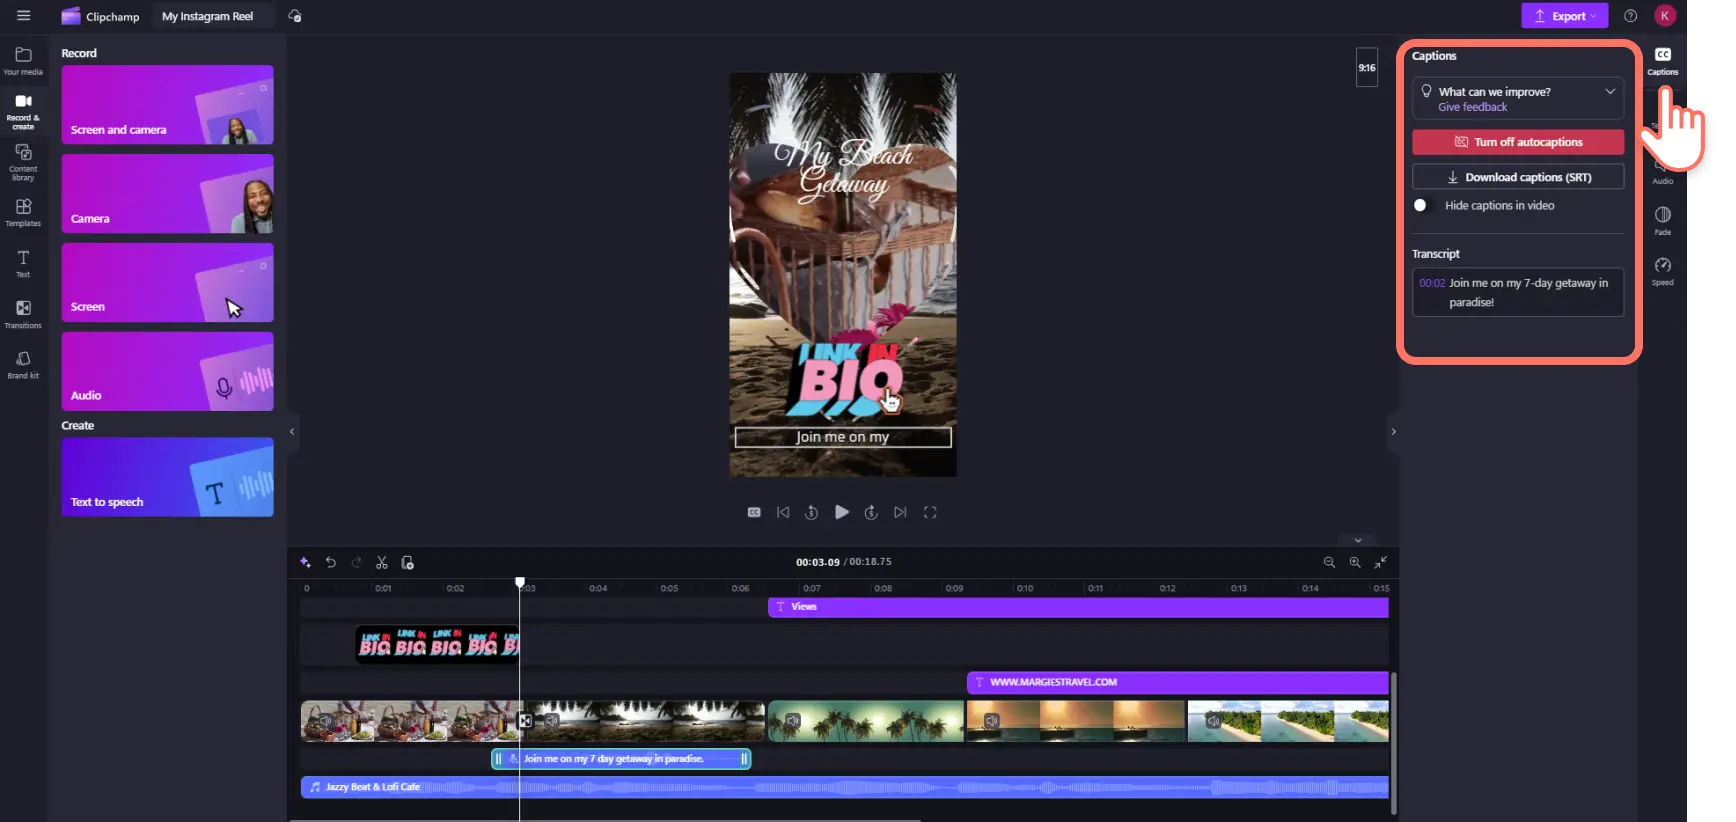
Make your Reel more accessible and easier to watch with no sound by adding subtitles. Click on the captions tab on the property panel and click on the transcribe media button. Select your preferred language in the popup window then check the box to filter any profanity and start the transcription by once again clicking the transcribe media button. Back in the closed captions tab on the property panel you will see your timestamped transcript, where you can fix any errors.
Step 5. Add your brand logo, colors, and fonts
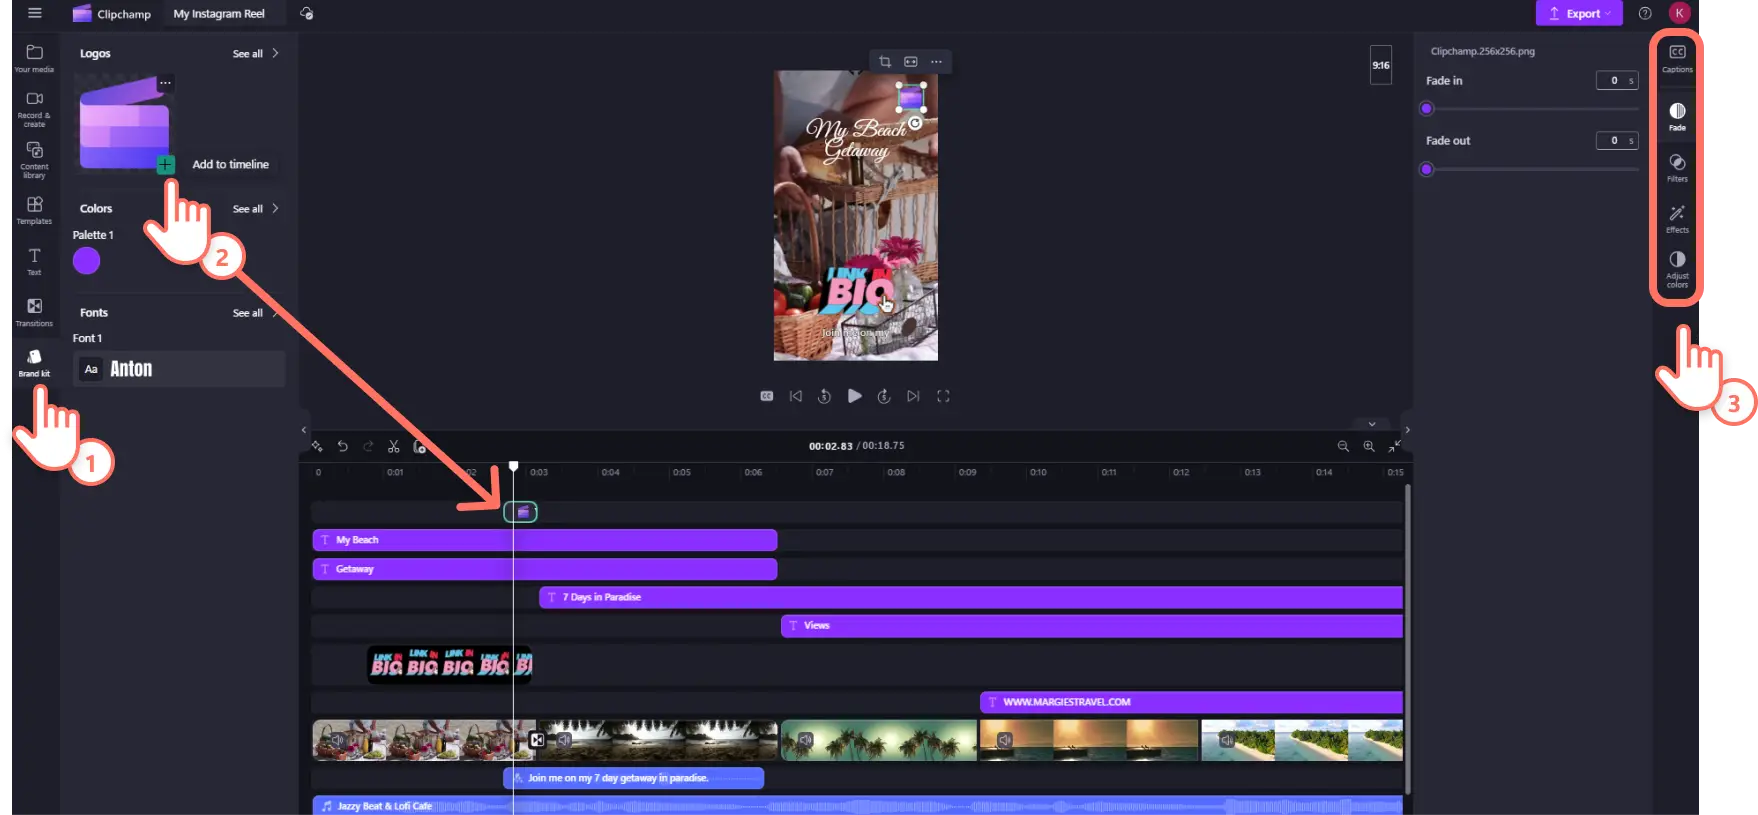
Add your company logo, font, and color using the Clipchamp brand kit tool. Click on the brand kit tab on the toolbar to access your stored logo, font, and color. Drag and drop your logo onto the timeline above all other assets.
Step 6. Preview and save your Instagram Reel
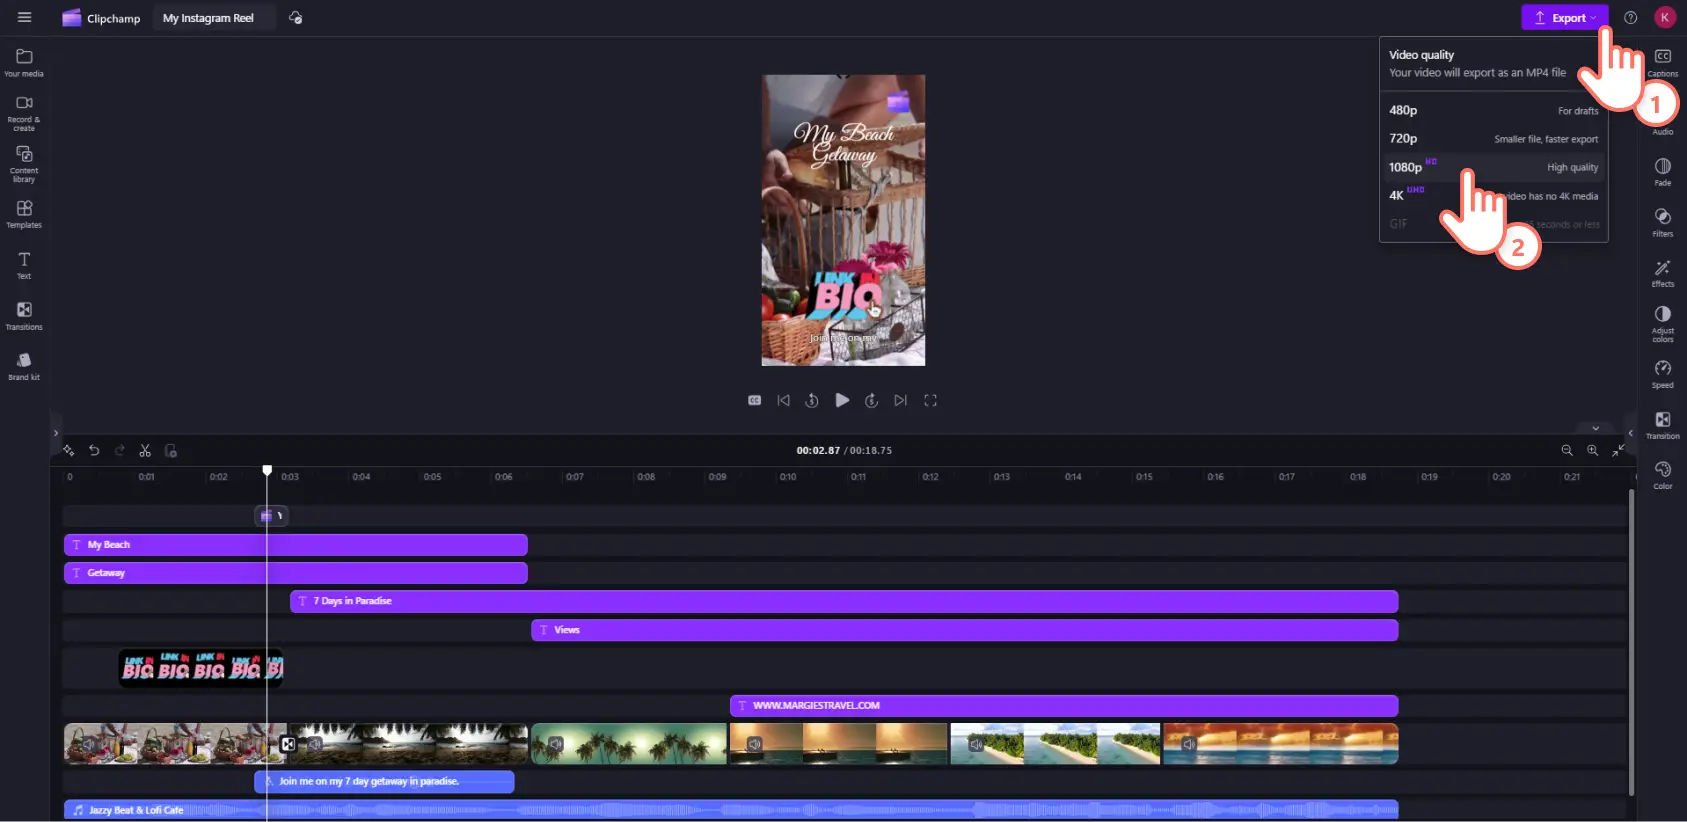
Once you’ve finished editing, press the play button under the preview window to watch your finished Reel. When you’re ready to save, click on the export button and select a video resolution. We recommend 1080p HD resolution for the best video quality for IG.
Frequently asked questions
How to make trending Reels on Instagram?
Head to the Explore page in Instagram and see what is already trending. You can then remix trending videos using templates. A clever way to make a Reel go viral is to stand out by adding a unique twist to a trending Reel.
What’s the difference between an Instagram Reel and Story?
Reels and Stories are both mobile-friendly video content, but the major difference between them is Reels last forever while Stories last 24 hours. Reels are also more publicly discoverable and are suggested to the larger Instagram community whereas Stories are primarily accessed by followers or from a user’s public profile home feed. Check out how to make Instagram Stories for more help.
Should Instagram business accounts post Reels?
Absolutely, Instagram Reels attract over 1 billion users monthly and that is a market all businesses want to promote in. Reels are easy to create and can boost your reach and engagement while promoting your brand, products, and services. Check out how businesses can use TikTok and Instagram for in-depth tips.
Look in the mirror… and you'll now see a pro who has mastered how to make an Instagram Reel! If you’re searching for more inspiration, check out these Instagram Reel idea for businesses or read our Instagram ultimate guide for in-depth tips on how to use the platform.
Start creating Instagram Reels with Clipchamp or download the Clipchamp Windows app.
