Heads up! The screenshots in this article are from Clipchamp for personal accounts. The same principles apply to Clipchamp for work and school accounts.
On this page

Looking to slow down background music or increase MP3 audio speed, without changing the quality and pitch? With the audio speed changer, quickly and easily adjust audio speed in seconds.
Finding the right audio speed can help fine-tune videos for social media, trim lengthy voice recordings, and express emotion. Just speed up or slow down any media that includes audio from 0.1x to 16x speed. You can also detach audio from video to edit audio speed without changing video speed.
Let's explore how to use the audio speed changer to increase and decrease sound speed with Clipchamp video editor.
How to increase the speed of video audio
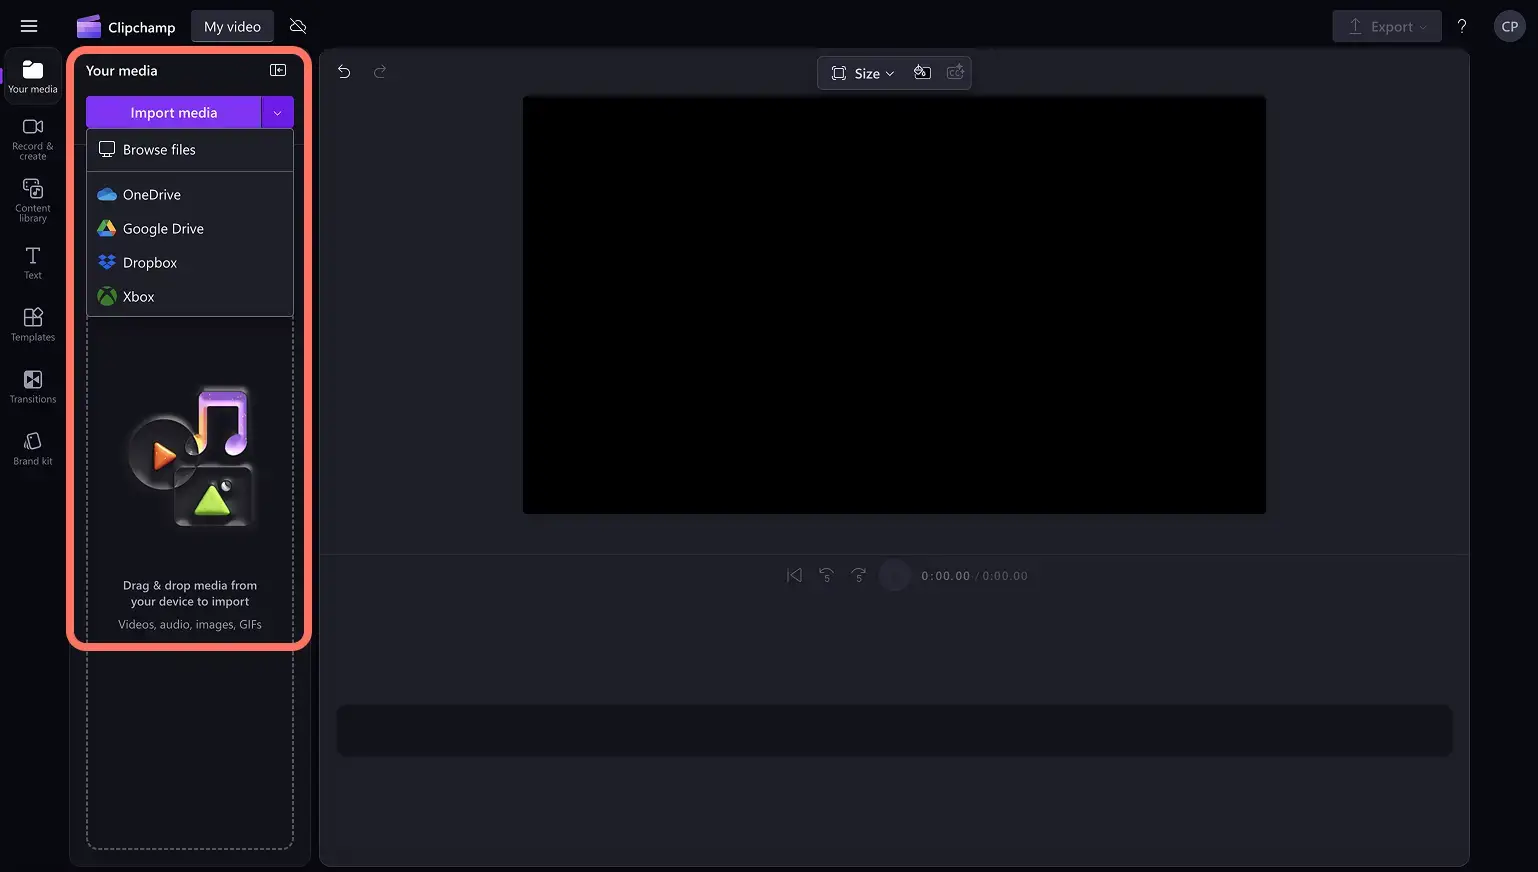
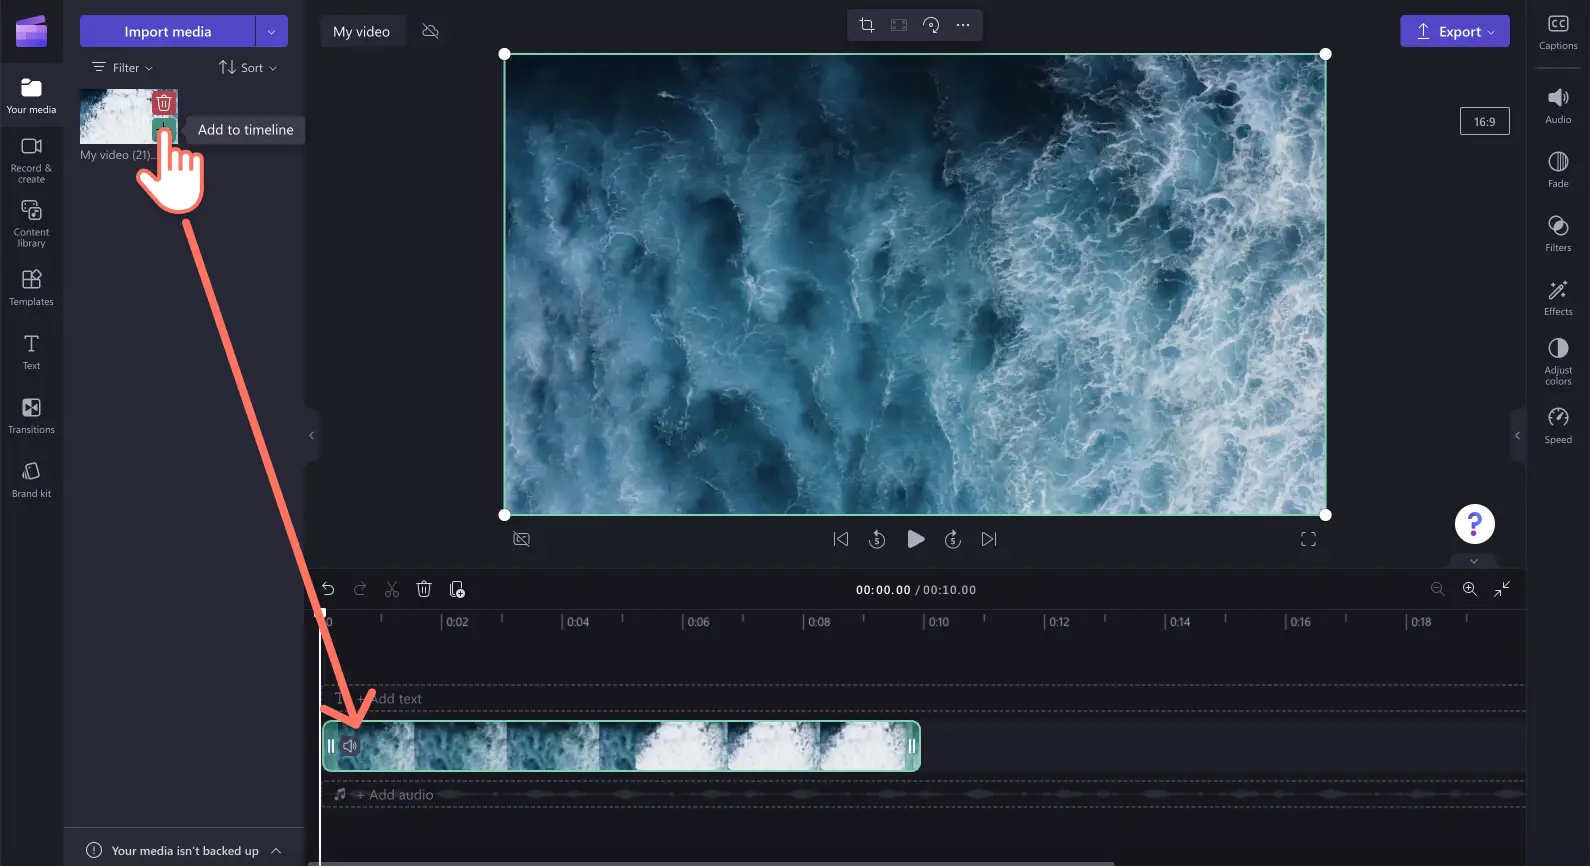
Step 1. Import a video with sound
To import videos, click on the import media button in the your media tab. Browse computer files, or connect OneDrive account.
Drag and drop a video onto the timeline to begin editing.
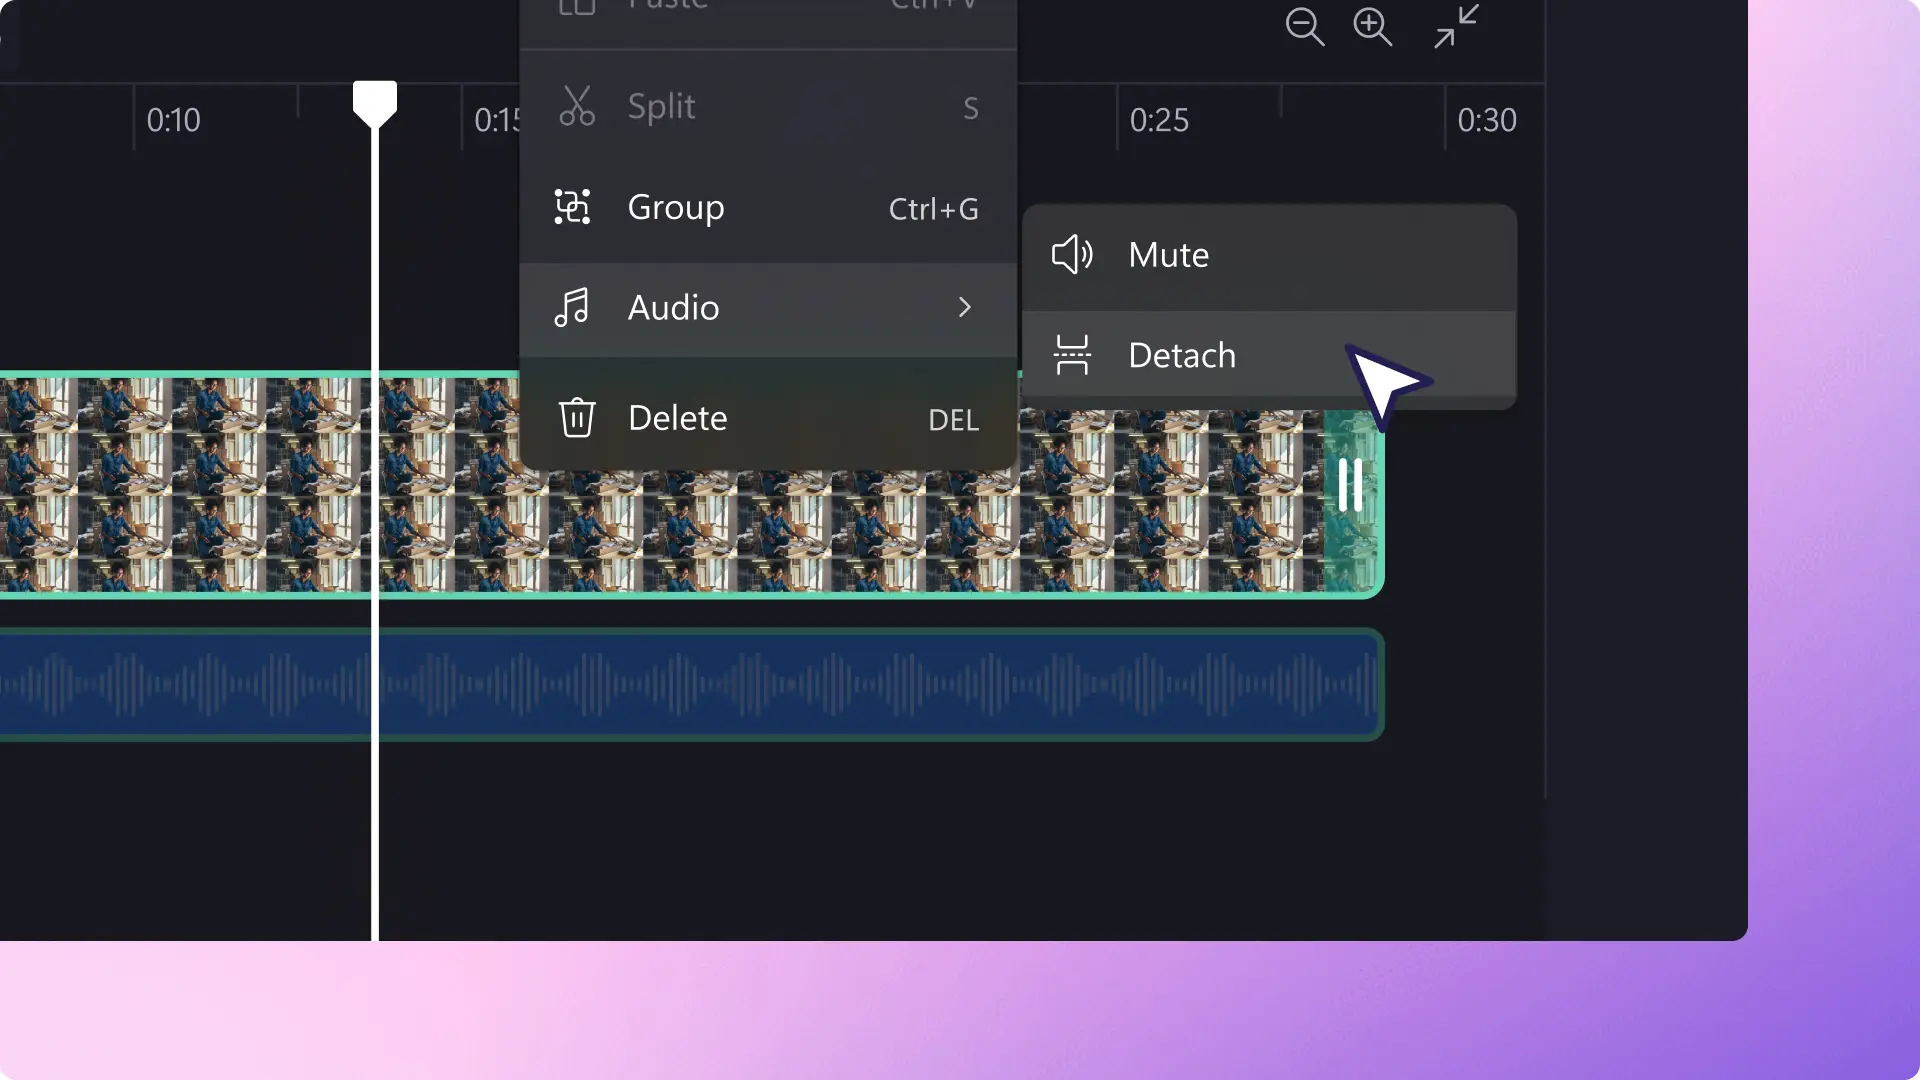
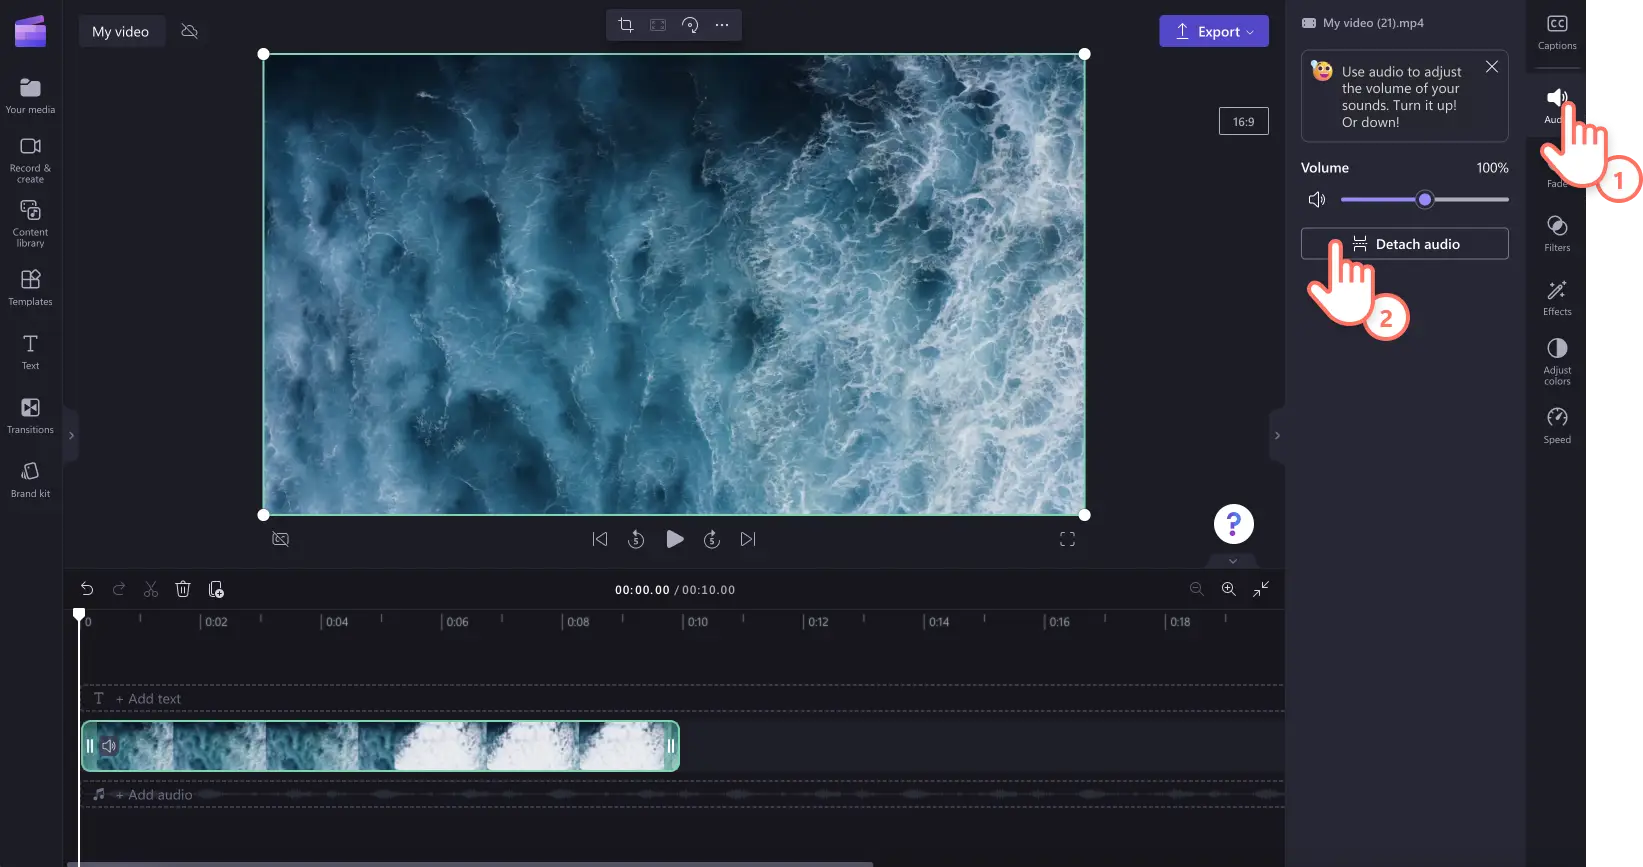
Step 2. Detach audio from video
To speed up audio without editing the speed of video, separate video from audio. Click on the audio tab on the property panel, then click on the detach audio button. An audio file will automatically download to your device as a .m4p file, as well as appear on the timeline below the video clip.
Note: if you would like to speed up a video and audio a the same time, skip to step three. Do not detach audio from video.
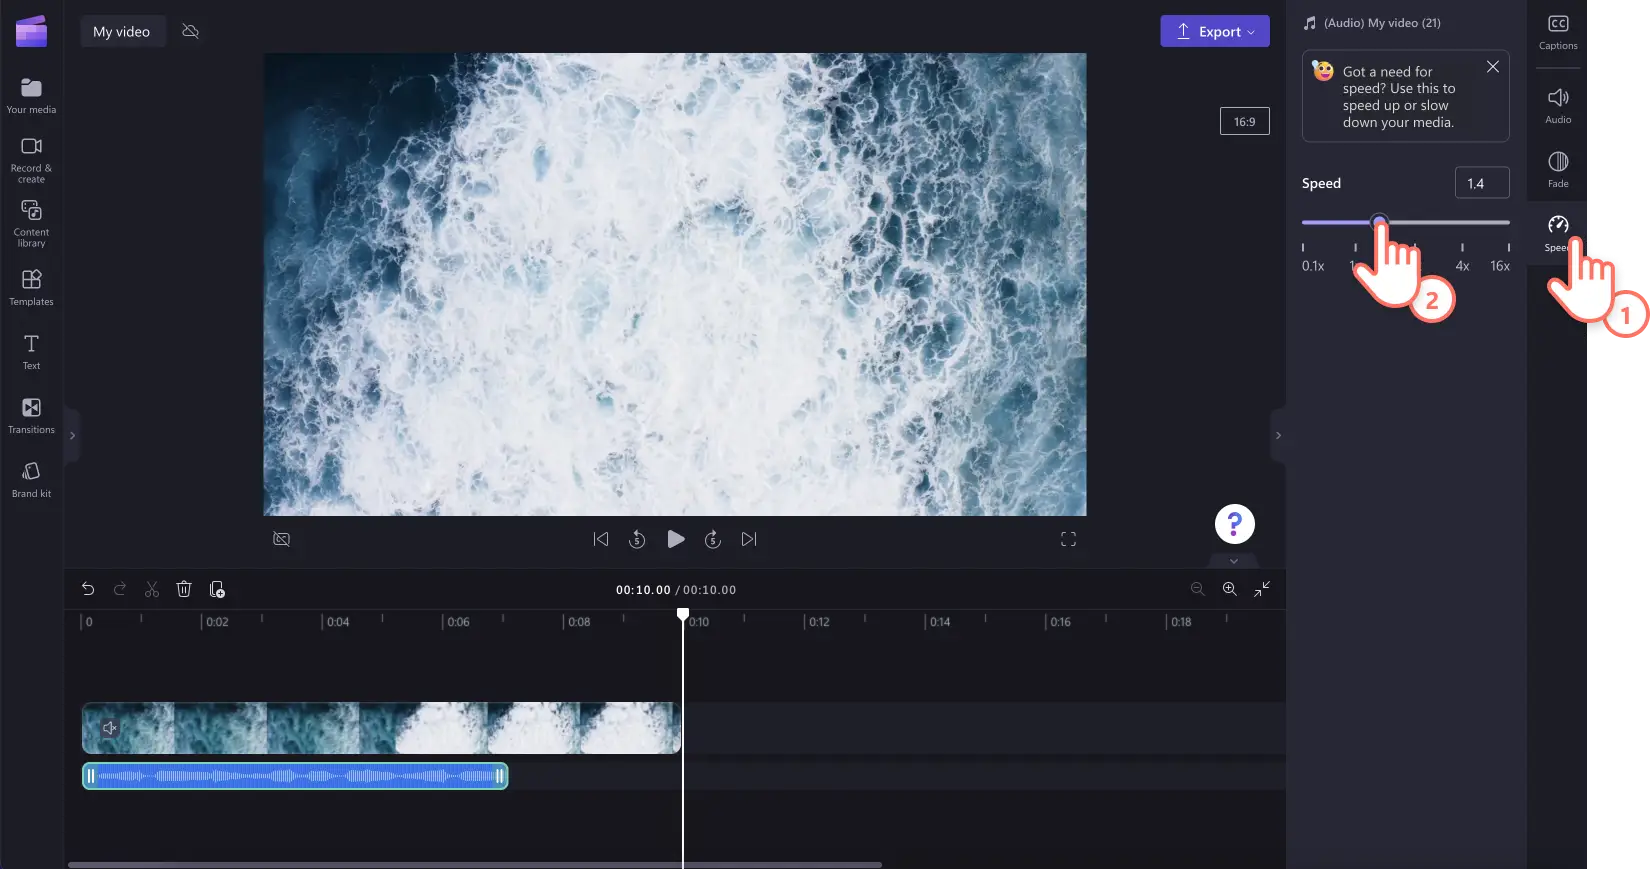
Step 3. Use the audio speed changer
Click on the speed tab on the toolbar, then adjust audio speed from 0.1x to 16x speed. Drag the speed slider to the left to slow down the speed or drag to the right to speed up the audio speed. You can also type in a specific numeric value.
Note: speeding up audio will make the media shorter on the timeline, acting as an audio trimmer. Slowing down audio file will make media longer on the timeline, acting as slow motion.
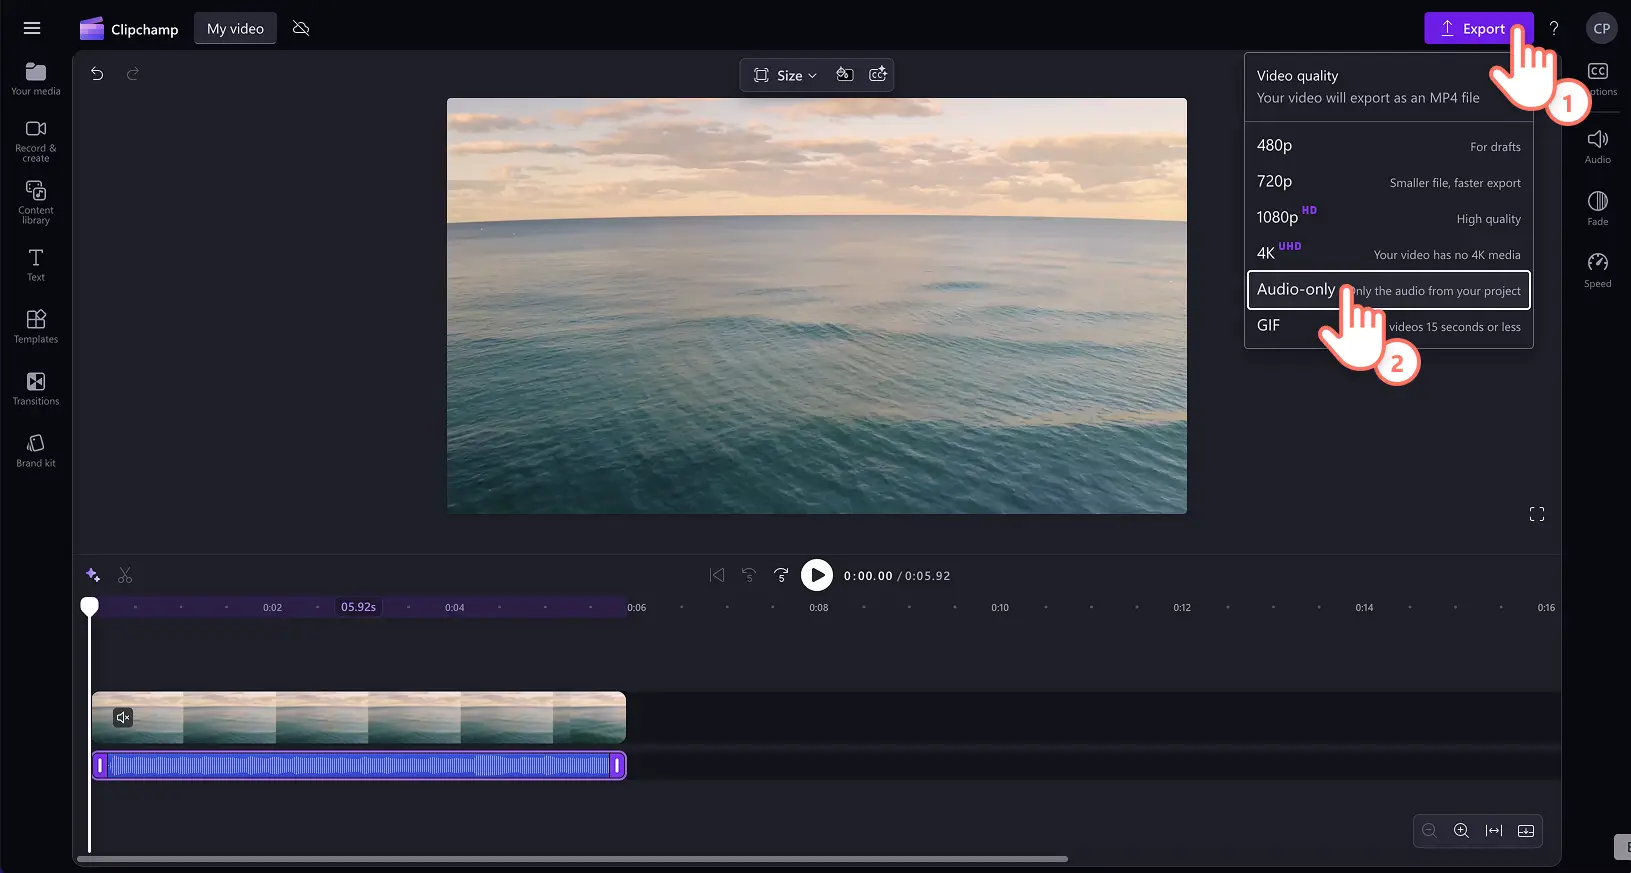
Step 4. Download adjusted audio
Finally, export the video in HD video quality, or download the altered audio file. To export audio only, click on the export button, then select audio only.
Watch how to adjust the speed of videos on YouTube
How to speed up or slow down music
Import music or select royalty-free stock music from the content library.
Drag and drop music assets onto the timeline.
Click on the audio file on the timeline, then click on the speed tab on the property panel.
Drag the speed slider to the left to slow down the speed or drag to the right to speed up the audio speed. You can also type in a specific numeric value to adjust the audio speed changer.
To export audio or music, click on the export button, then select the audio-only option.
Note: speeding up music or sound effects will appear shorter on the timeline or longer on the timeline if you’re slowing down. If music is attached to a video, all video footage will also change speed.
How to change the speed of voice recordings
To create a voice recording, click on the record and create tab, then click on the audio option. Follow the on-screen prompts to create a voiceover.
To create an AI voiceover, click on the record and create tab, then click on the text to speech generator. Follow the on-screen prompts to create an AI voiceover.
Click on the MP3 file on the timeline, then click on the speed tab on the property panel.
Drag the speed slider to the left to slow down the speed of voice audio or drag to the right to speed up voice audio. You can also type in a specific numeric value to adjust the audio speed changer.
Note: increasing or decreasing the speed of voiceover audio will make the asset appear shorter or longer on the timeline.
Watch how to use the audio speed changer video tutorial
How to speed up or slow down part of an audio file
To increase or decrease the speed a specific part of an audio asset, use the split tool and audio speed changer combined.
Click on the audio file or video on the timeline.
Move seeker to the timestamp where you would like to edit the speed.
Click on the split tool (scissors icon) on the timeline.
Move seeker to the timestamp where you would like to end the speed edit.
Click on the split tool (scissors icon) again on the timeline.
Click on the cut audio, then click on the speed tab.
Drag the audio speed changer left and right to increase or decrease speed.
Keep editing audio assets and videos with beginner-friendly features like increasing audio volume and how to trim audio.
Change the speed of audio online today with Clipchamp video editor or download the Microsoft Clipchamp Windows app.
Frequently asked questions
How to speed up sound without changing pitch?
Editing the speed of any audio using the audio speed changer in Clipchamp video editor will not alter audio pitch. The audio speed changer will only alter the speed of video and audio.
How to speed up audio without editing video?
Easily speed up audio within a video without editing footage by detaching audio and video. By separating audio from video gives you the option to adjust audio speed without adjusting video speed.
Is the audio speed changer free?
The audio speed changer and video speed selector are free video editing tools in Clipchamp video editor.
What type of audio is compatible with the audio speed changer?
Speed up or slow down any video with audio, or audio files like AI voiceovers, voice recordings, music, or sound effects using the audio speed changer.