Heads up! The screenshots in this article are from Clipchamp for personal accounts. The same principles apply to Clipchamp for work and school accounts.
On this page
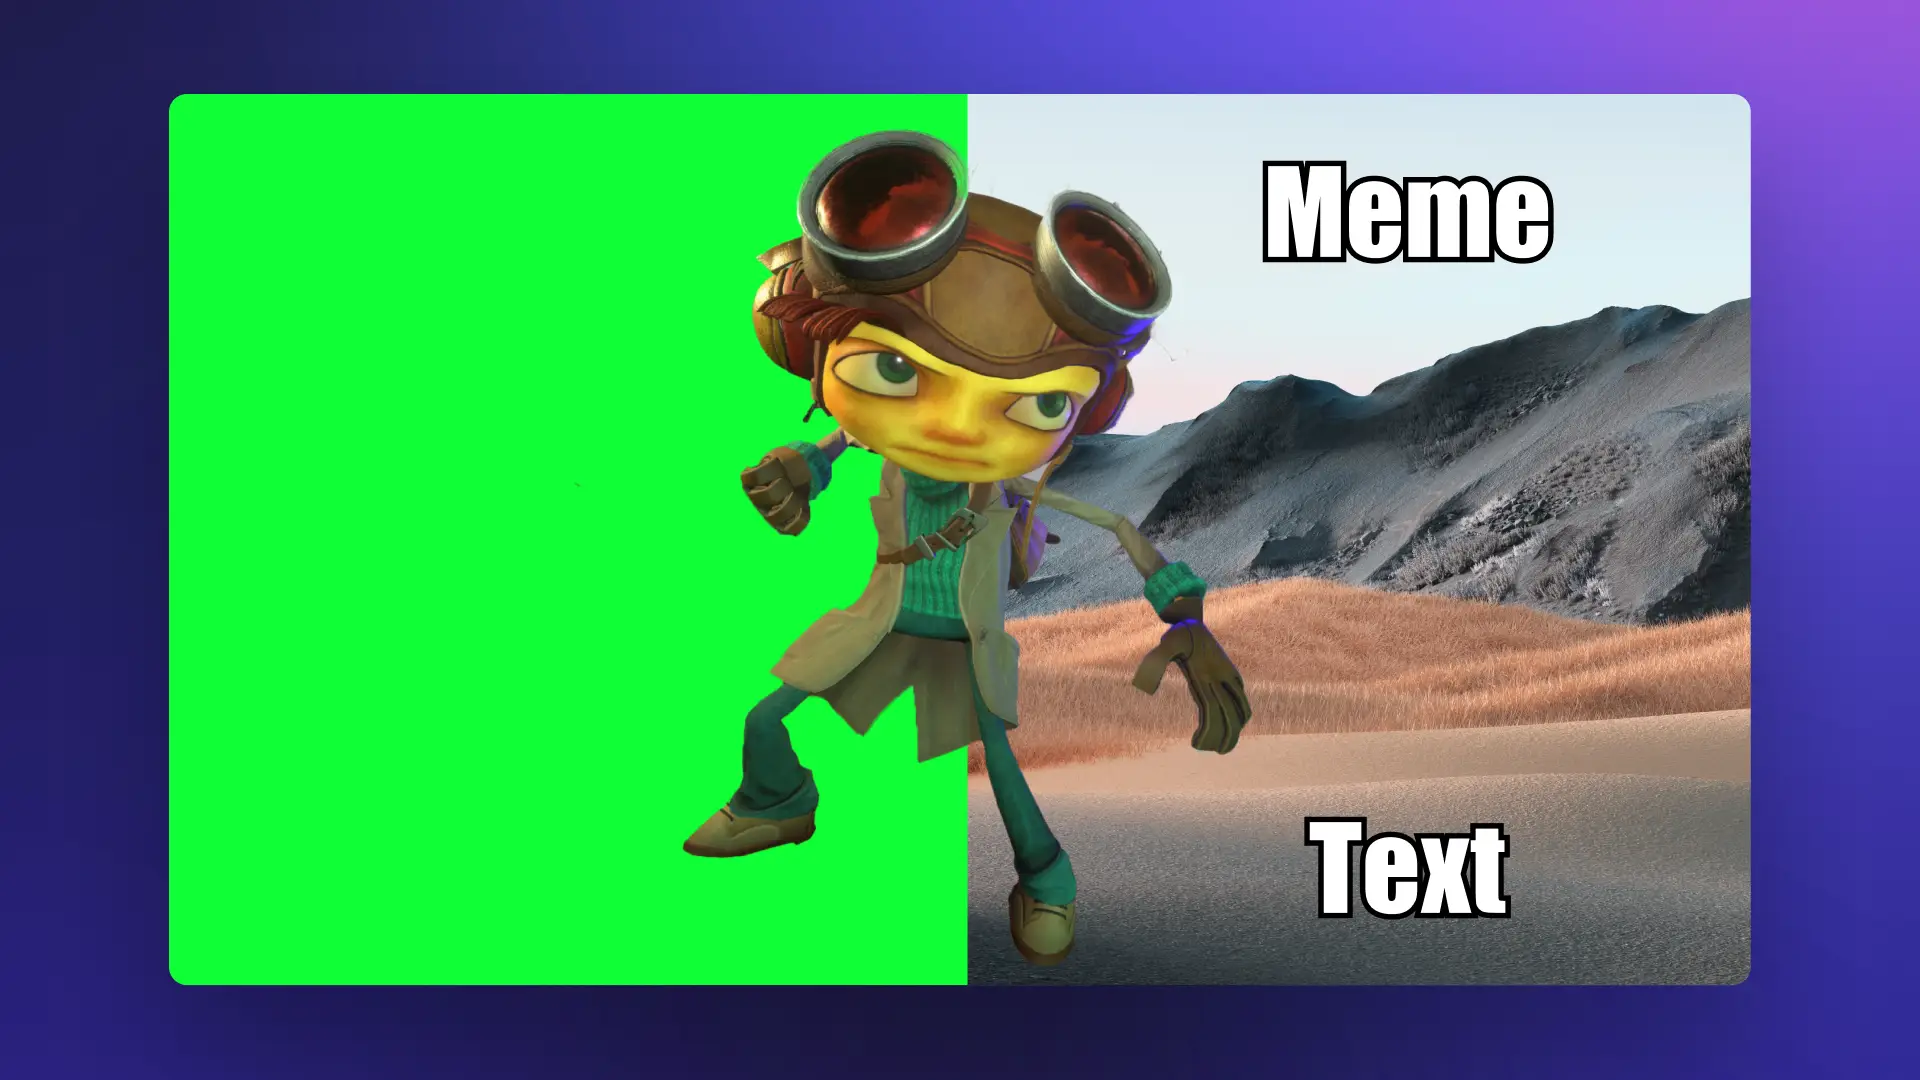
Create professional green screen effects without expensive software. Easily add impressive visuals to gaming videos, Instagram ads, or corporate videos with the free online green screen video editor. Also known as chroma key, this special effect lets you replace either a green, blue, or red colored background in a video with a different video background or image.
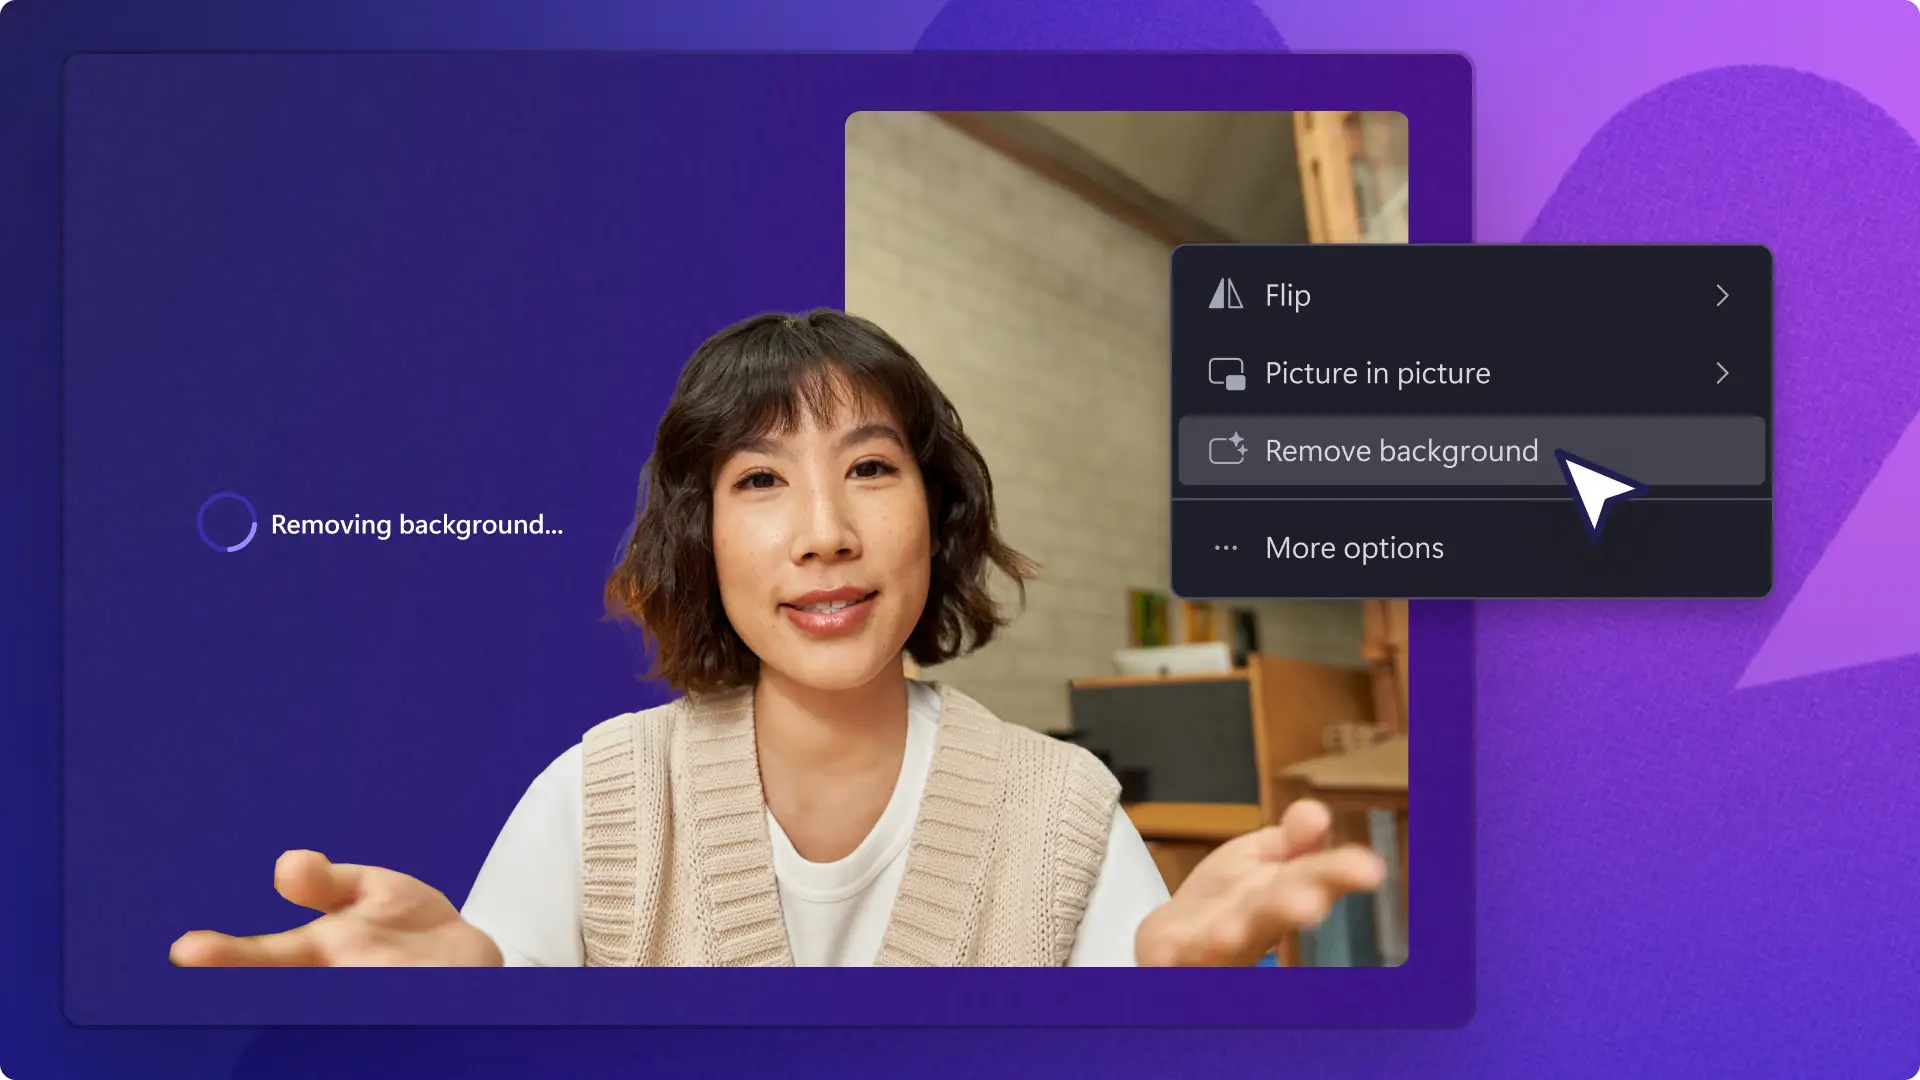
Replace video backgrounds and add special effects for free with the green screen remover in Clipchamp video editor.
How to edit green screen videos for free
Step 1. Add a green screen stock video onto the timeline
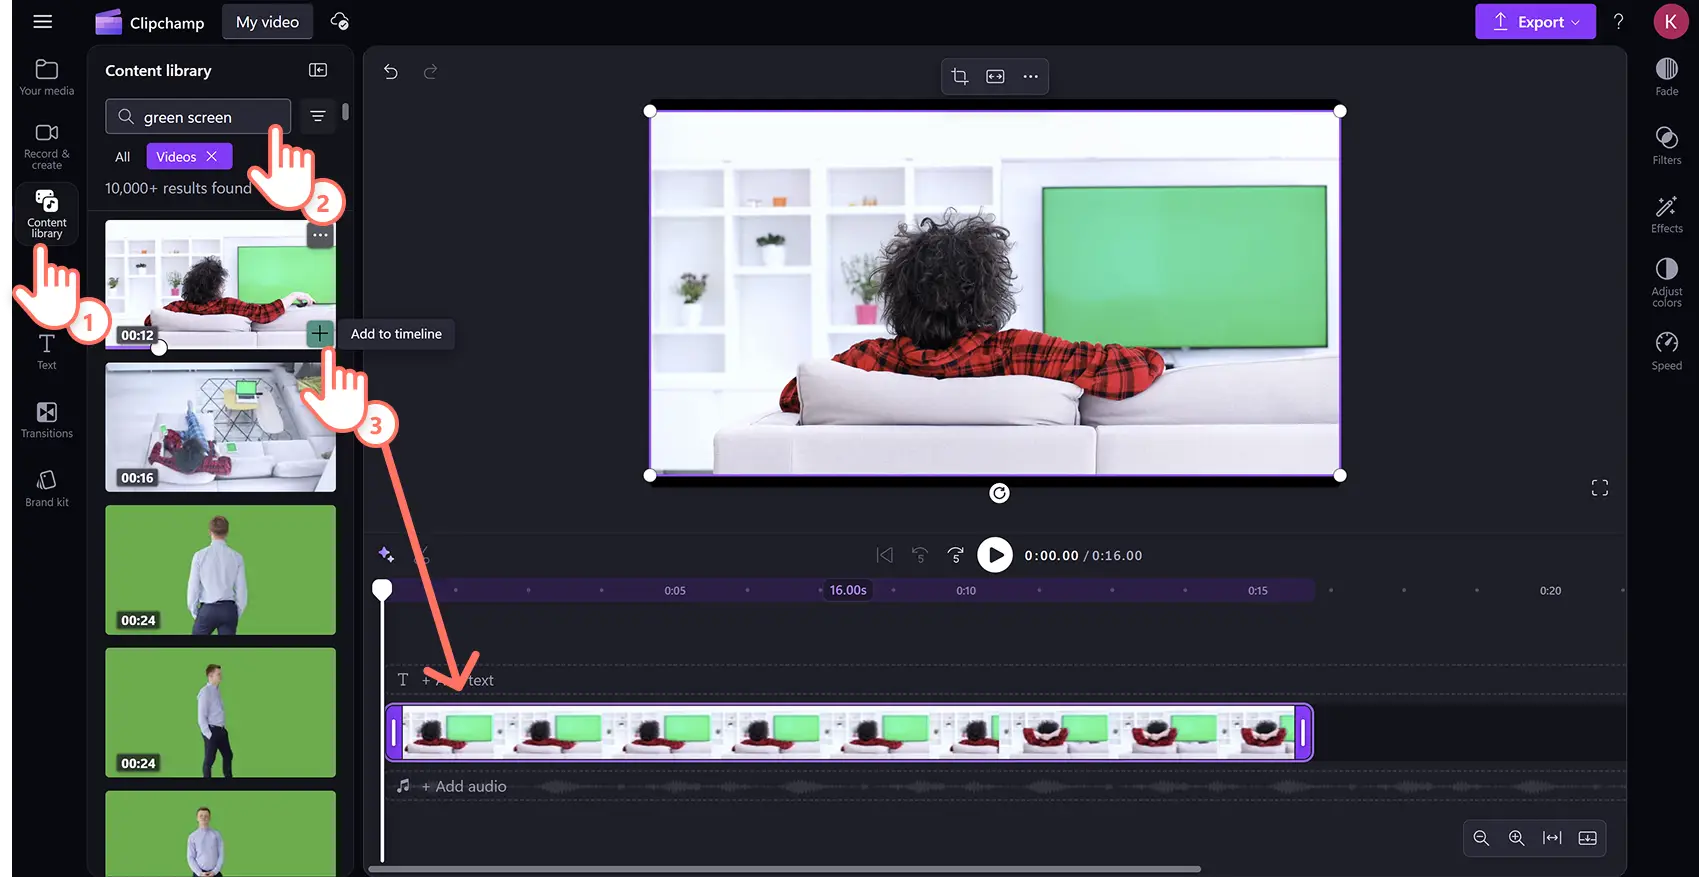
Click on the content library tab on the toolbar then select videos from the visuals drop down arrow. Type 'green screen’ into the keyword search bar to browse the wide range of royalty-free green screen footage.
The content library contains a wide variety of green screen stock including mobile and TV frames, performers, cartoons, and graphics. Once selected, drag and drop the video onto the timeline.
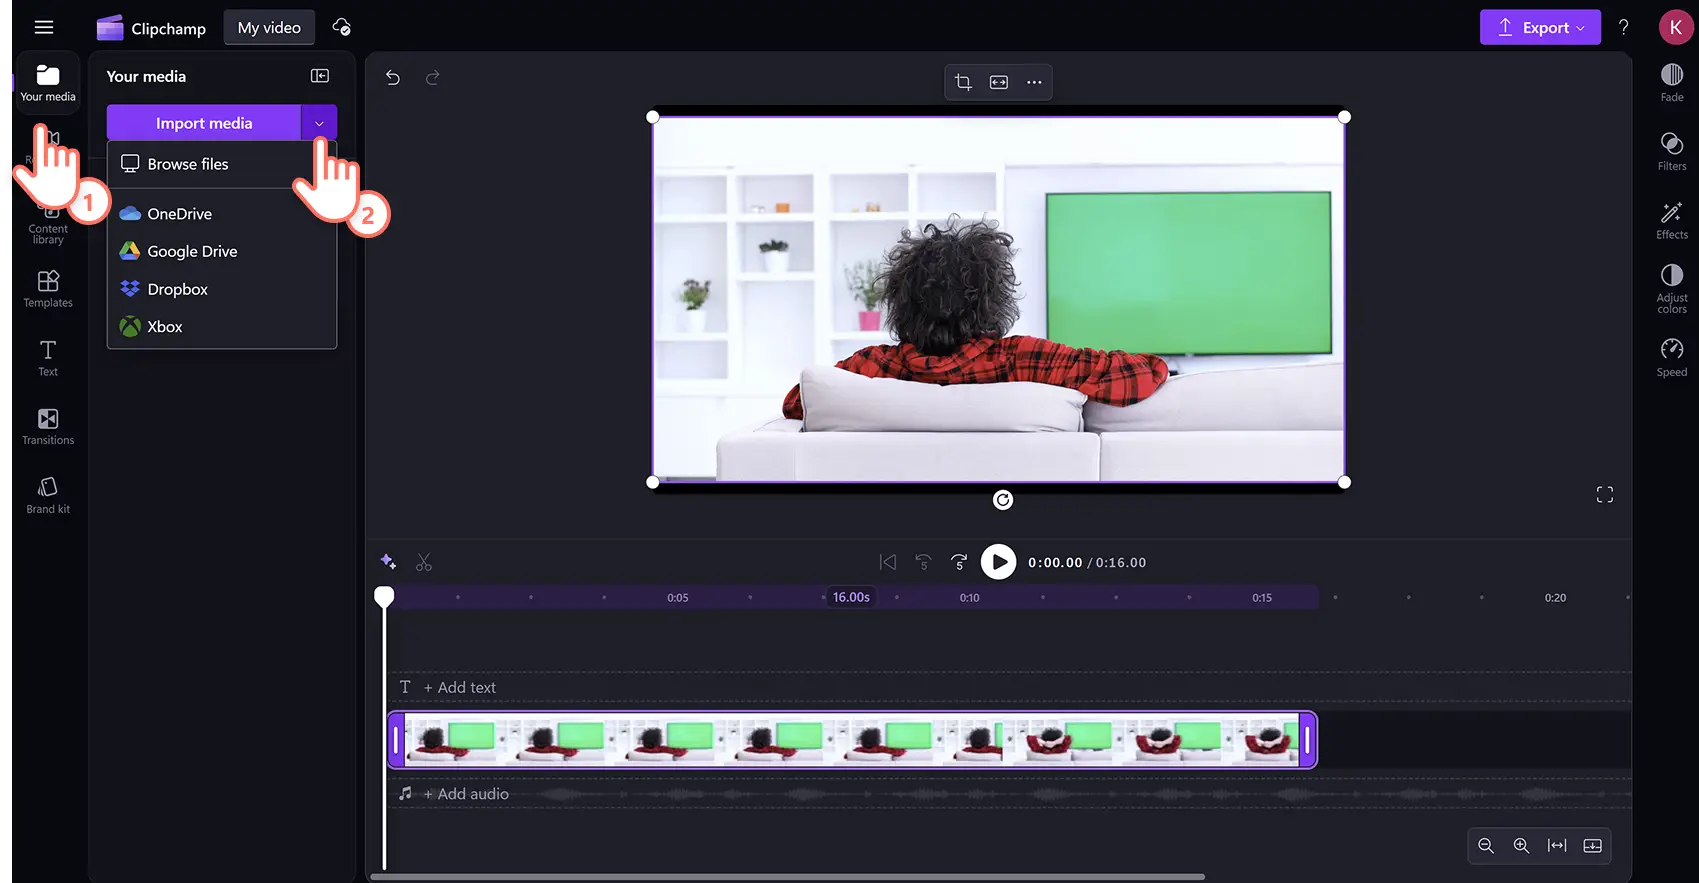
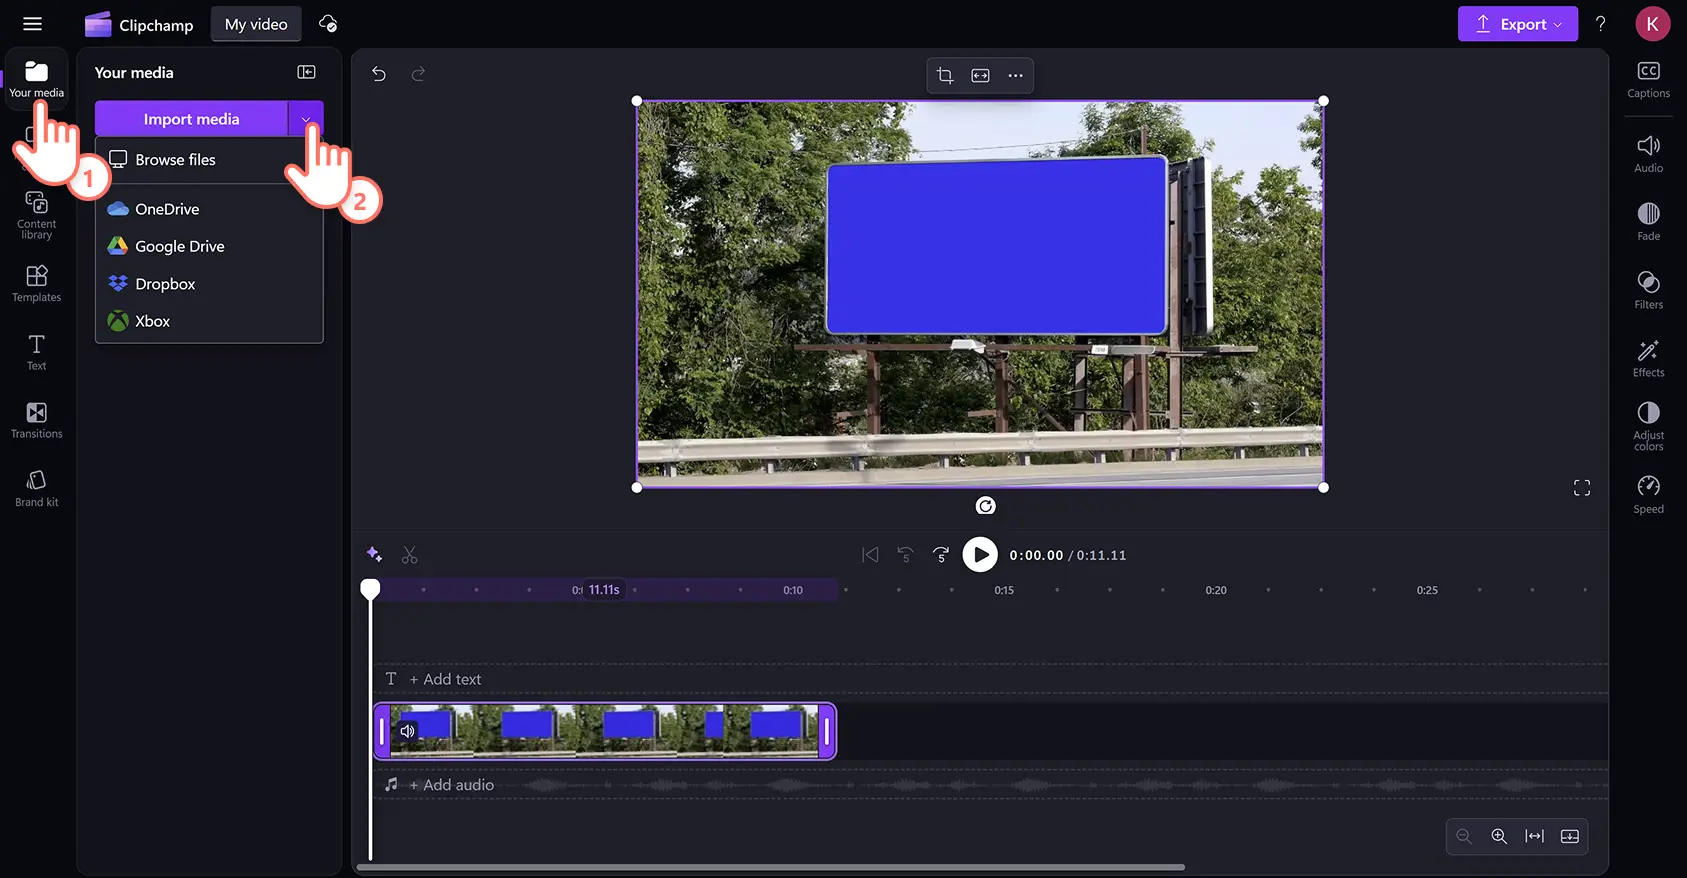
To import a video, click on the import media button in the your media tab on the toolbar. Upload media from your device or connect a OneDrive account.
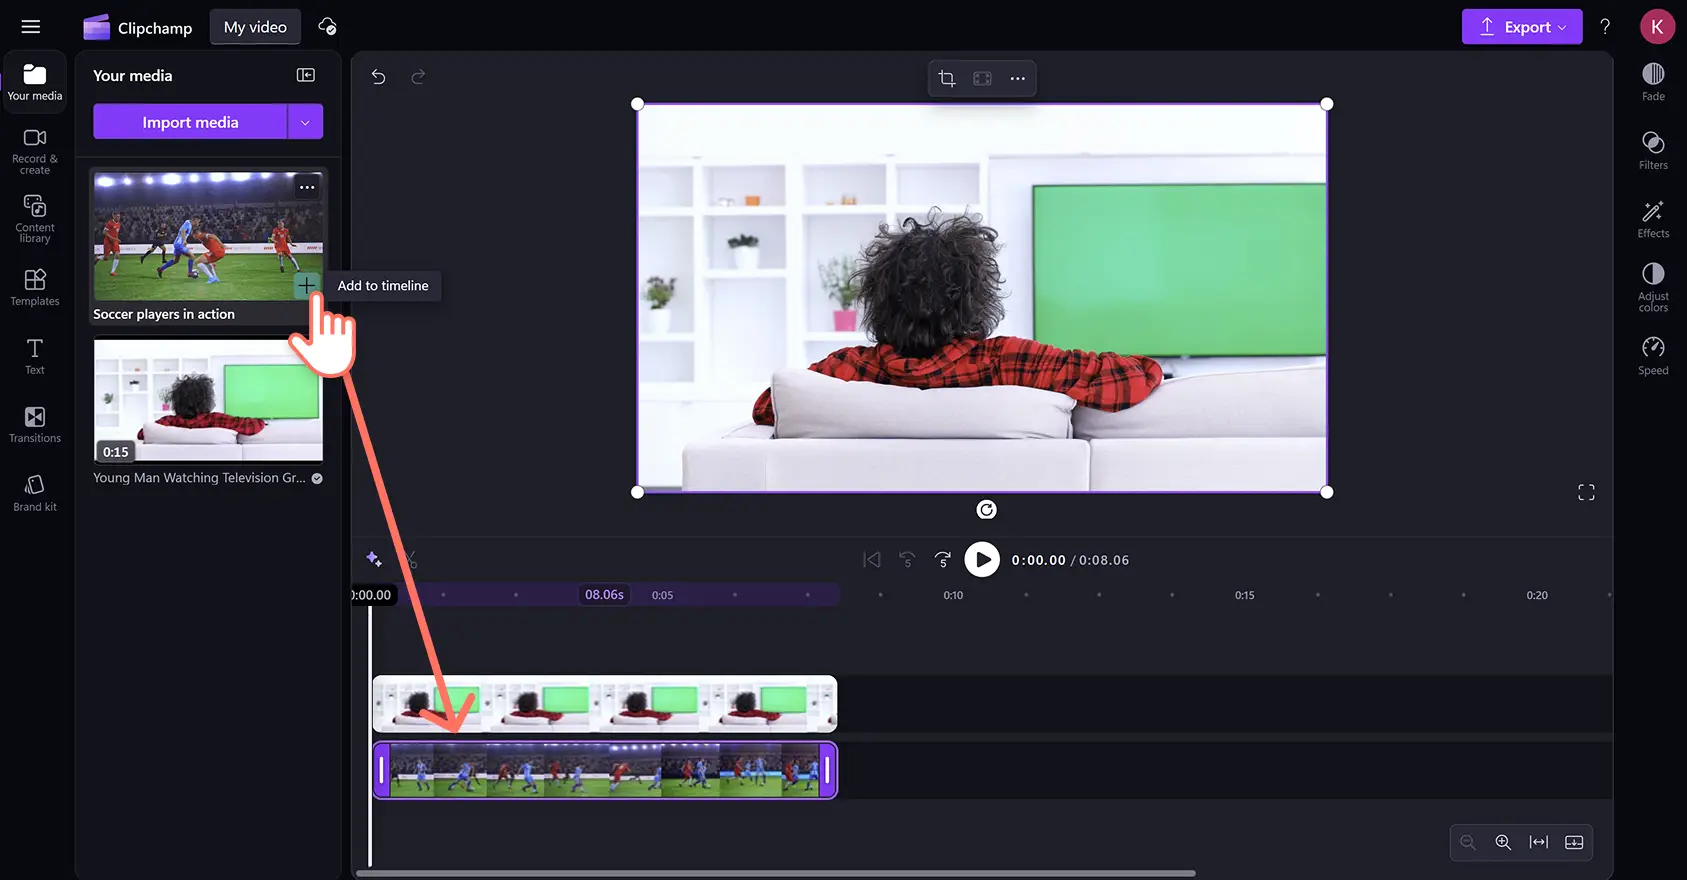
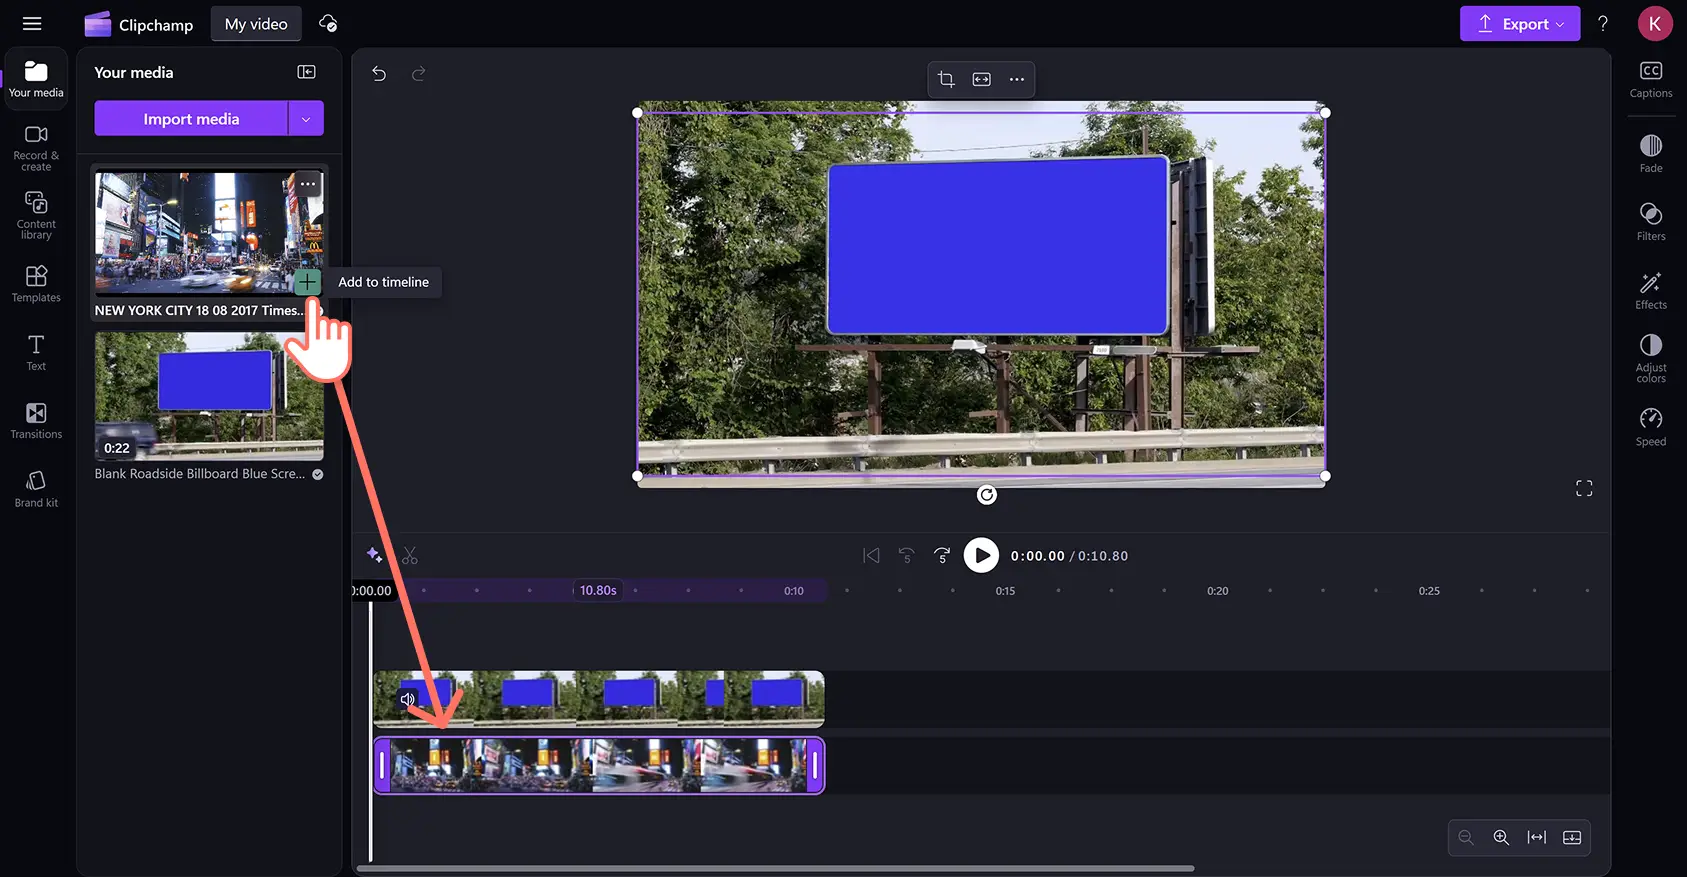
Step 2. Add a video clip below the green screen video
Drag and drop the video below the green screen video on the editing timeline. The green screen video should always be on top of all other video elements.
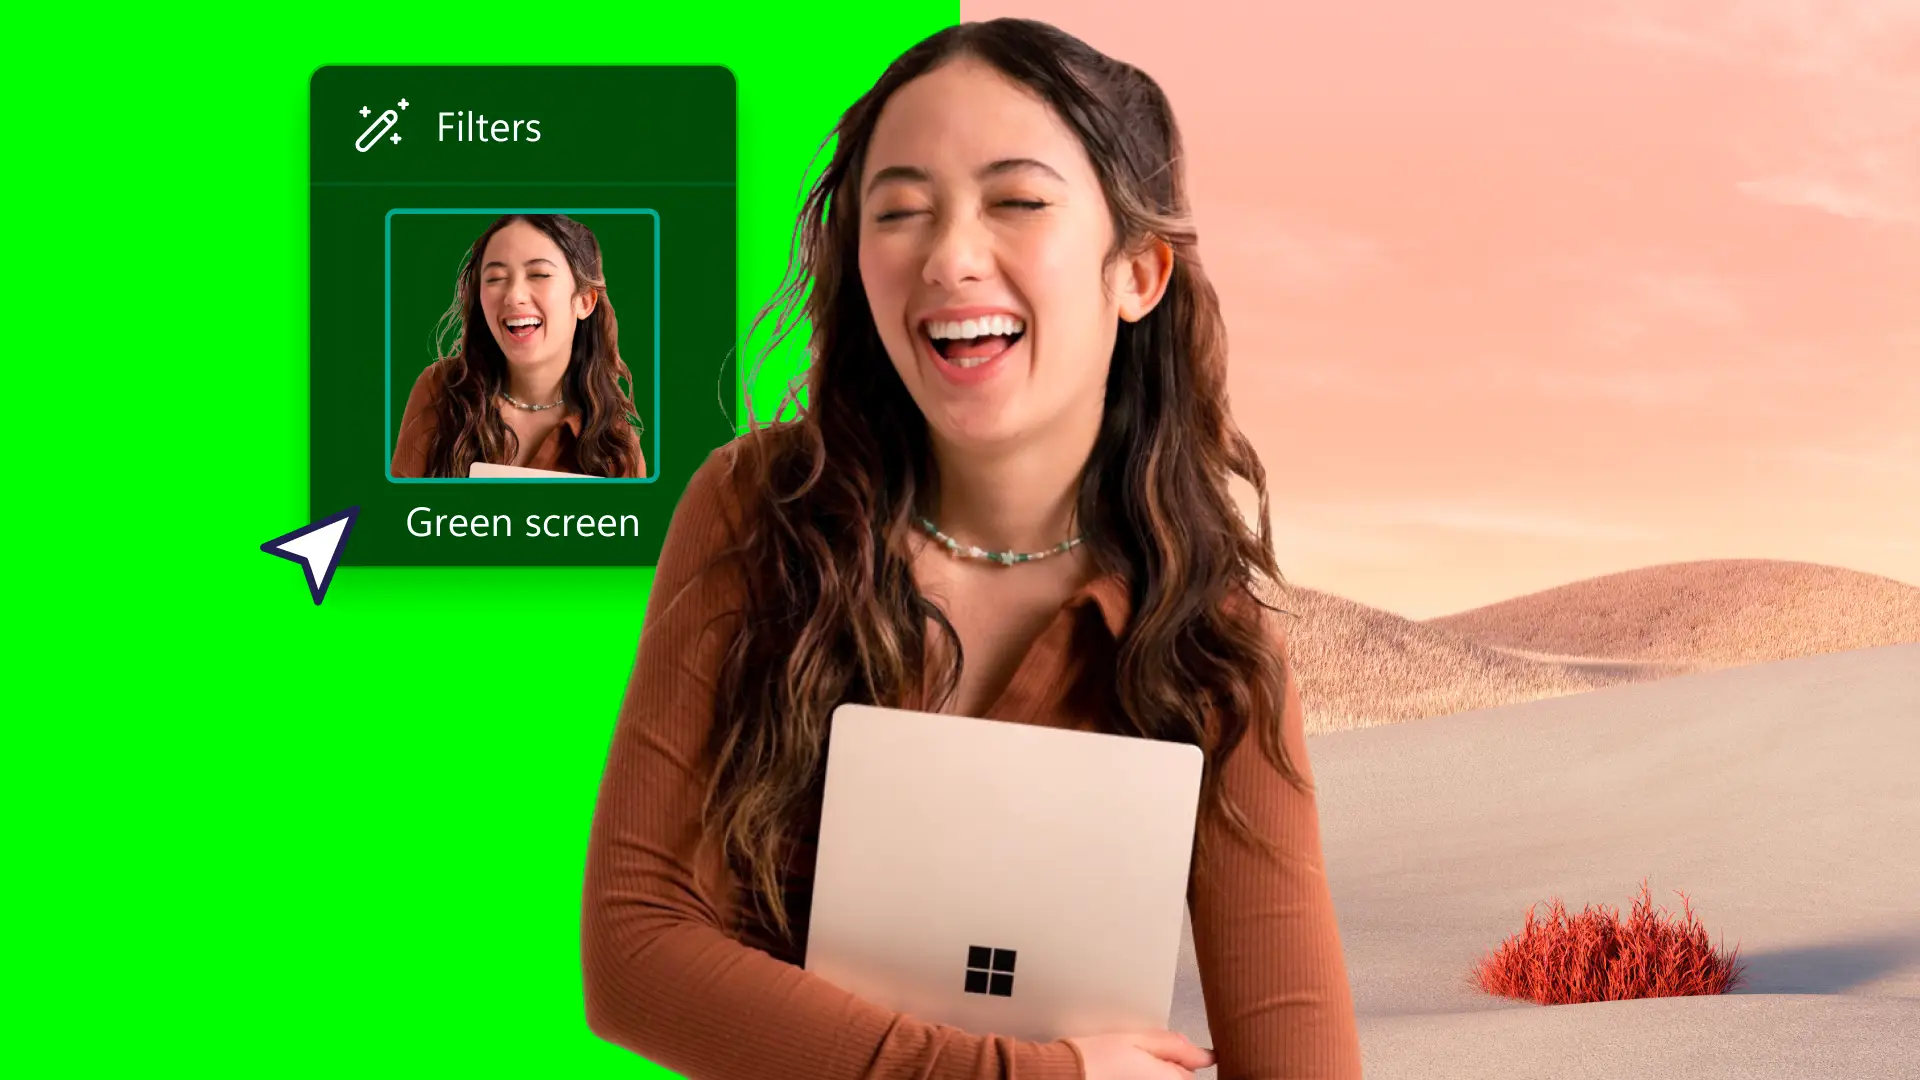
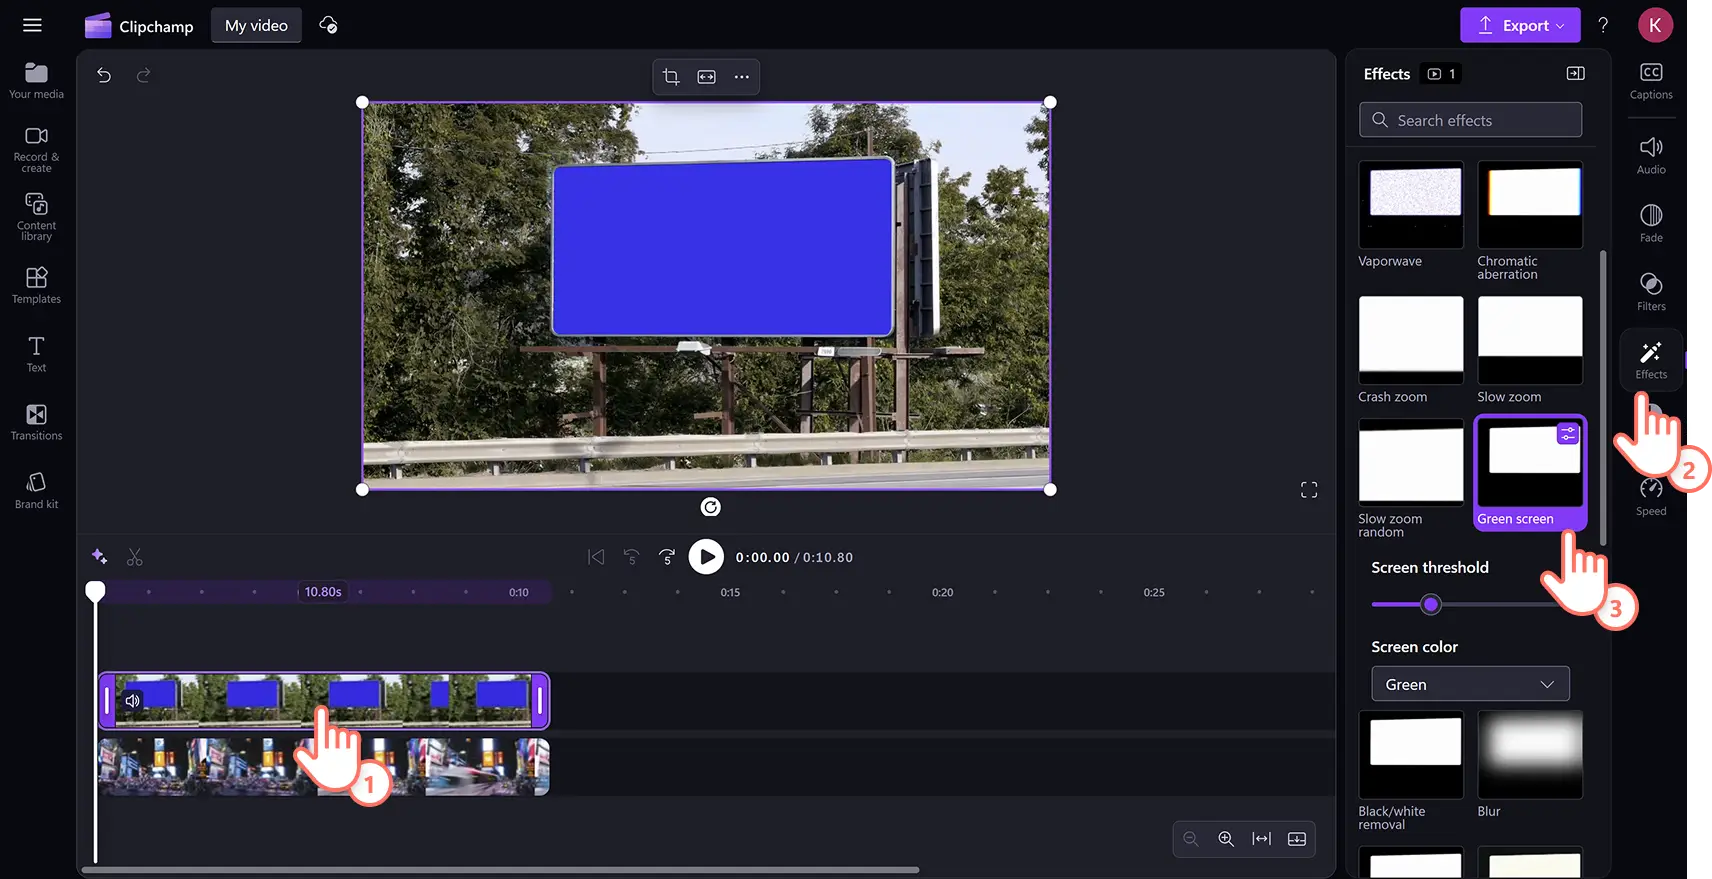
Step 3. Apply the green screen filter
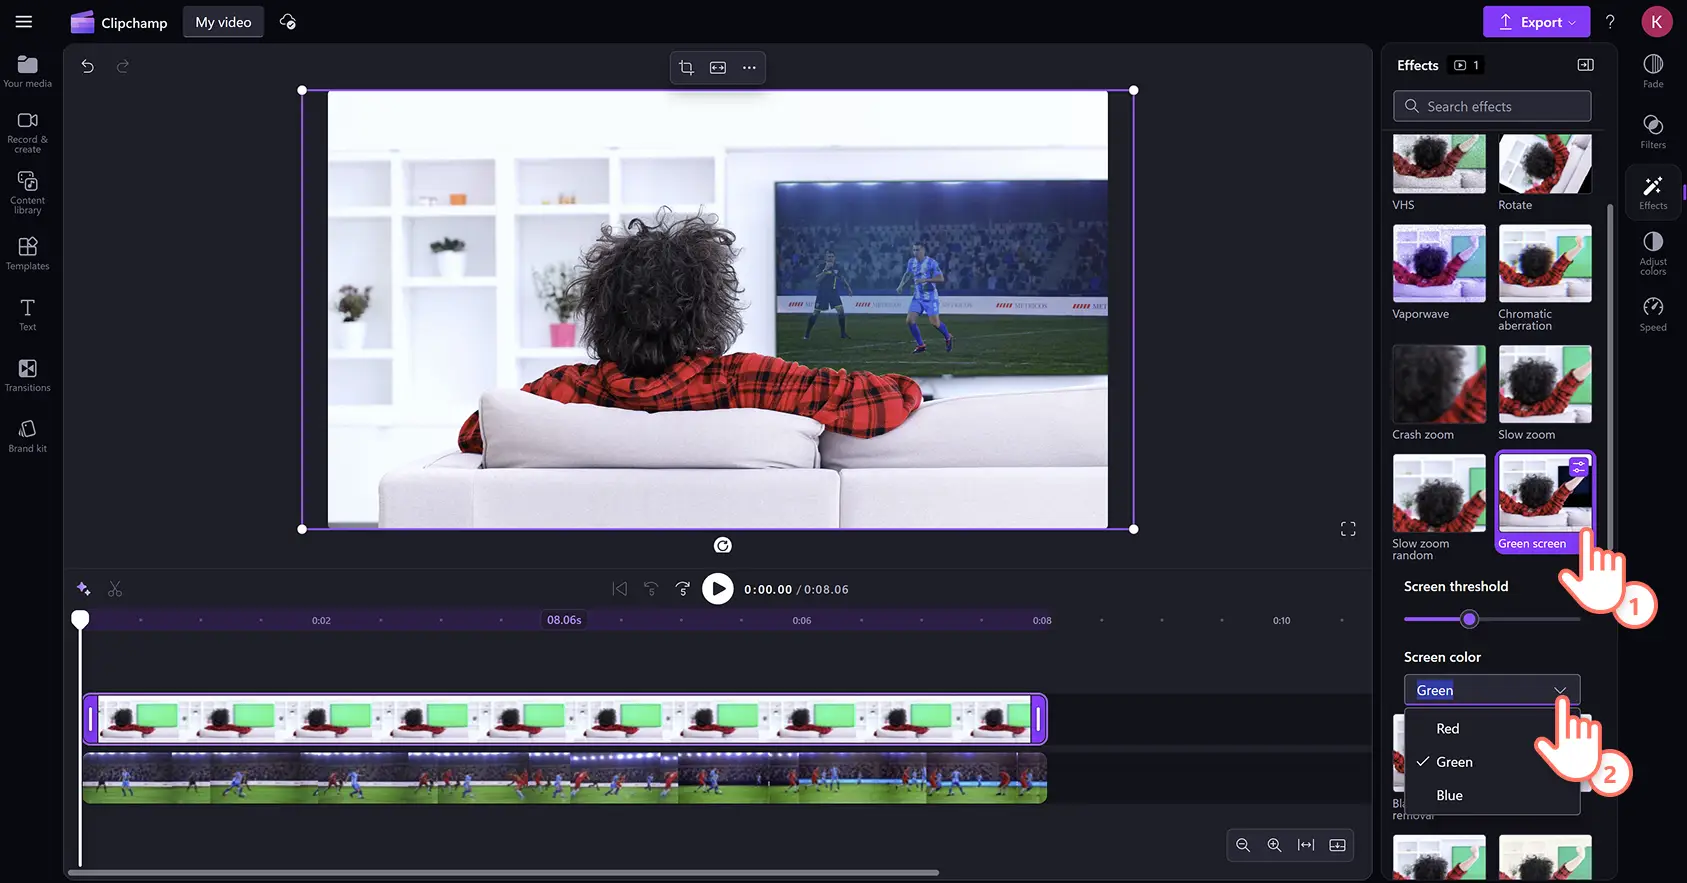
Click on the green screen video on the timeline, then click on the effects tab on the property panel and scroll down to select the green screen option.
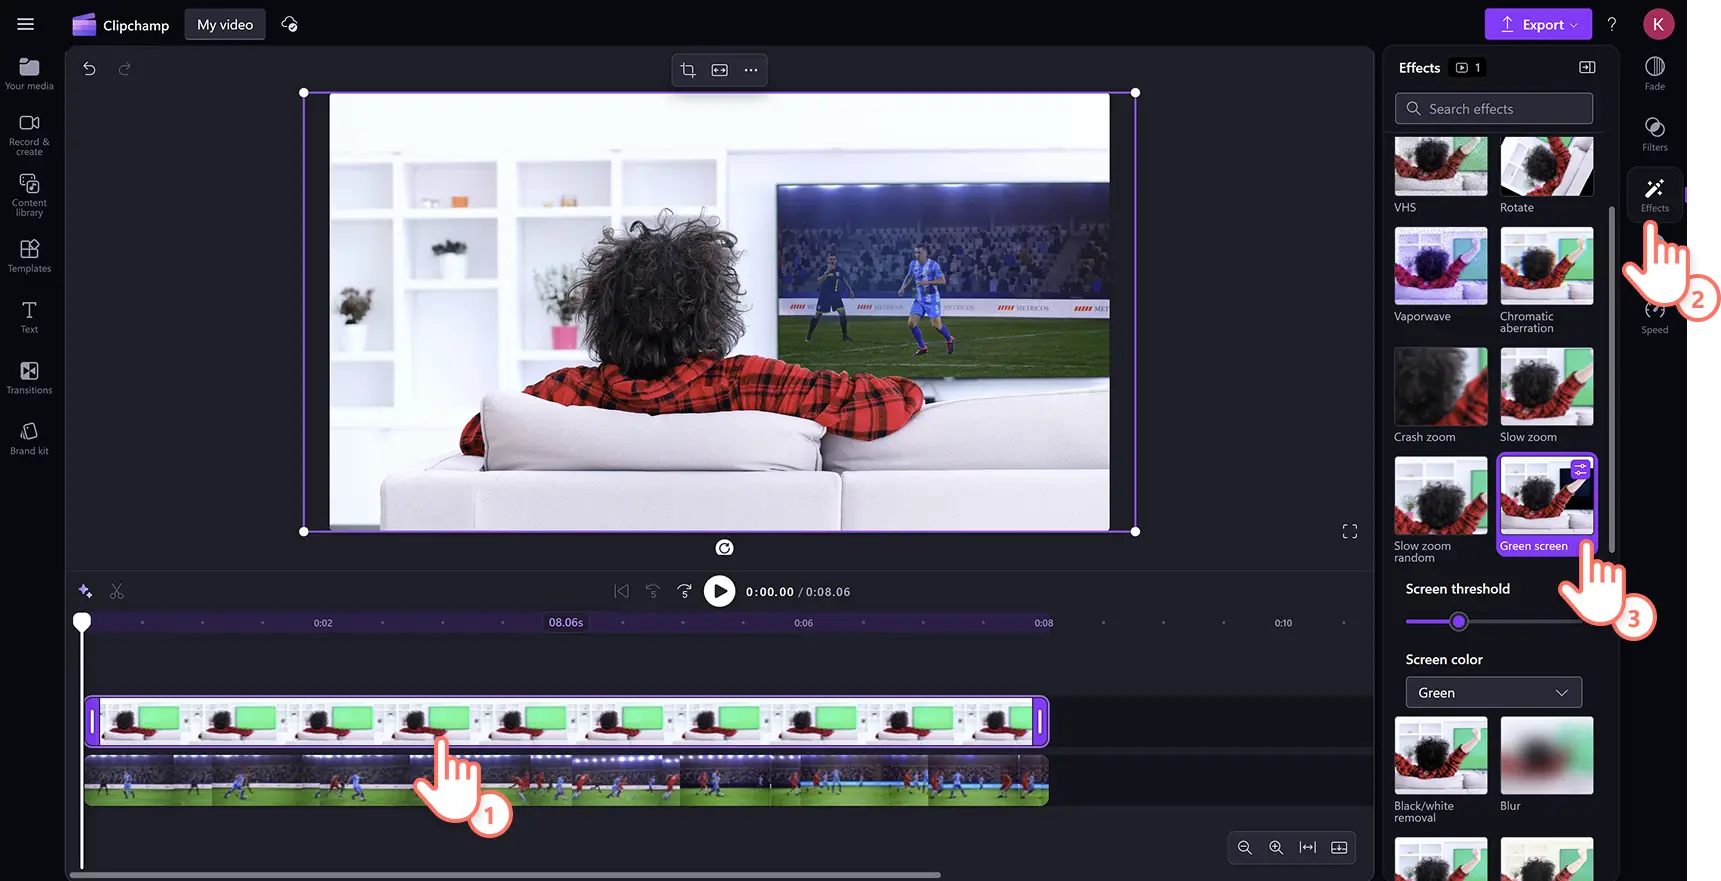
Once selected the green screen effect, the screen threshold will appear. Drag the slider left or right to increase or decrease the intensity of the filter. You can also switch to red or blue screen options here.
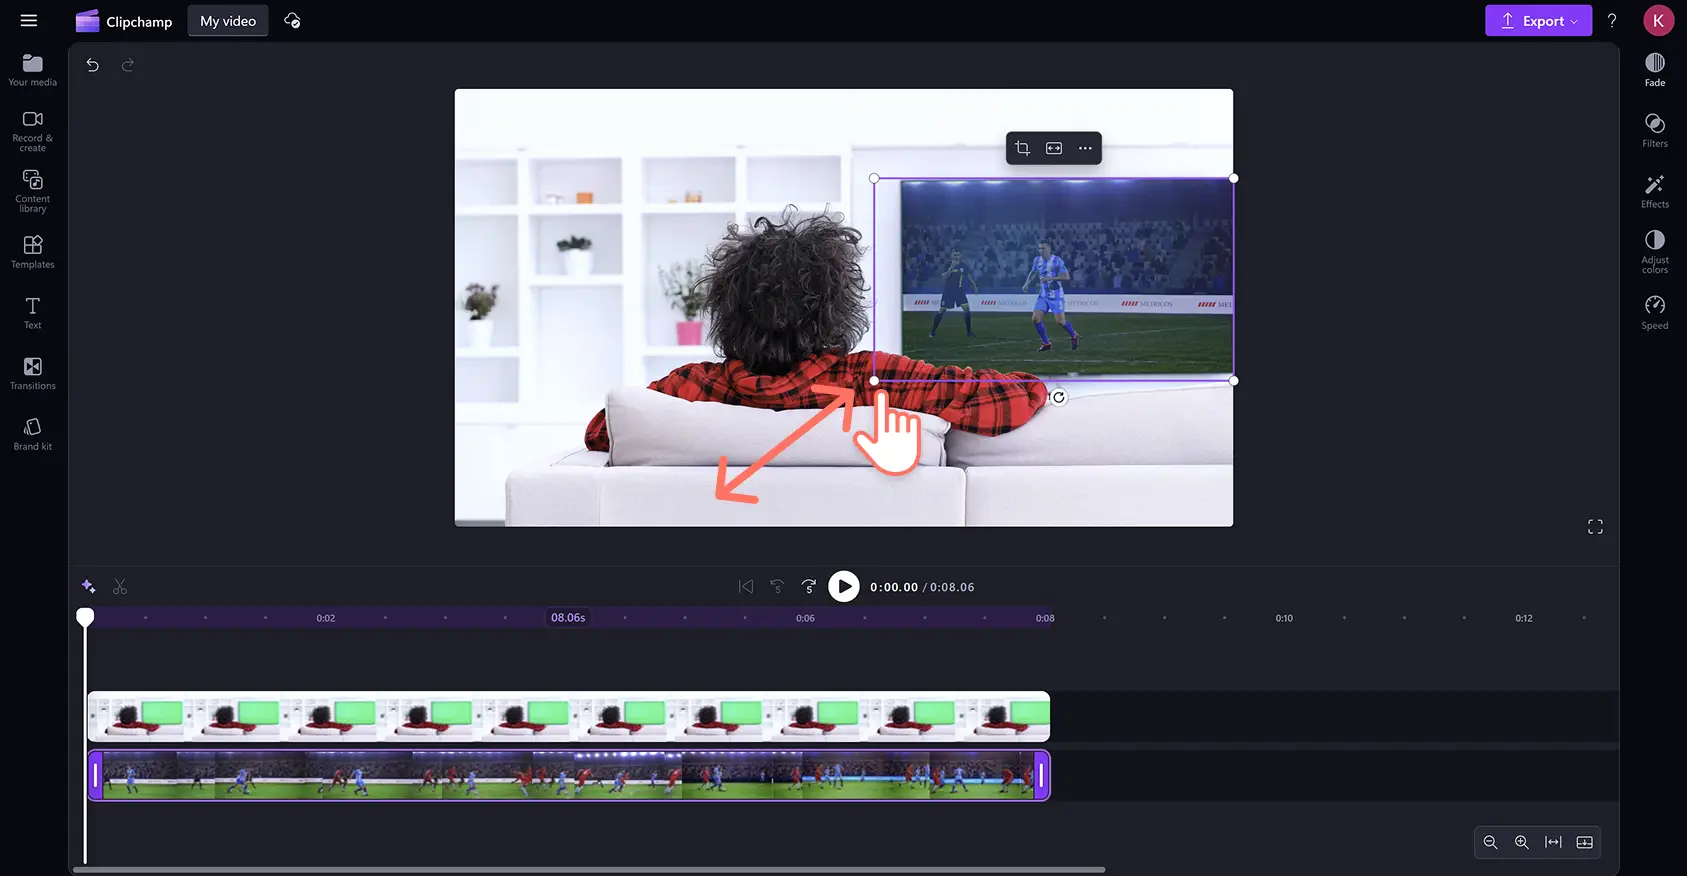
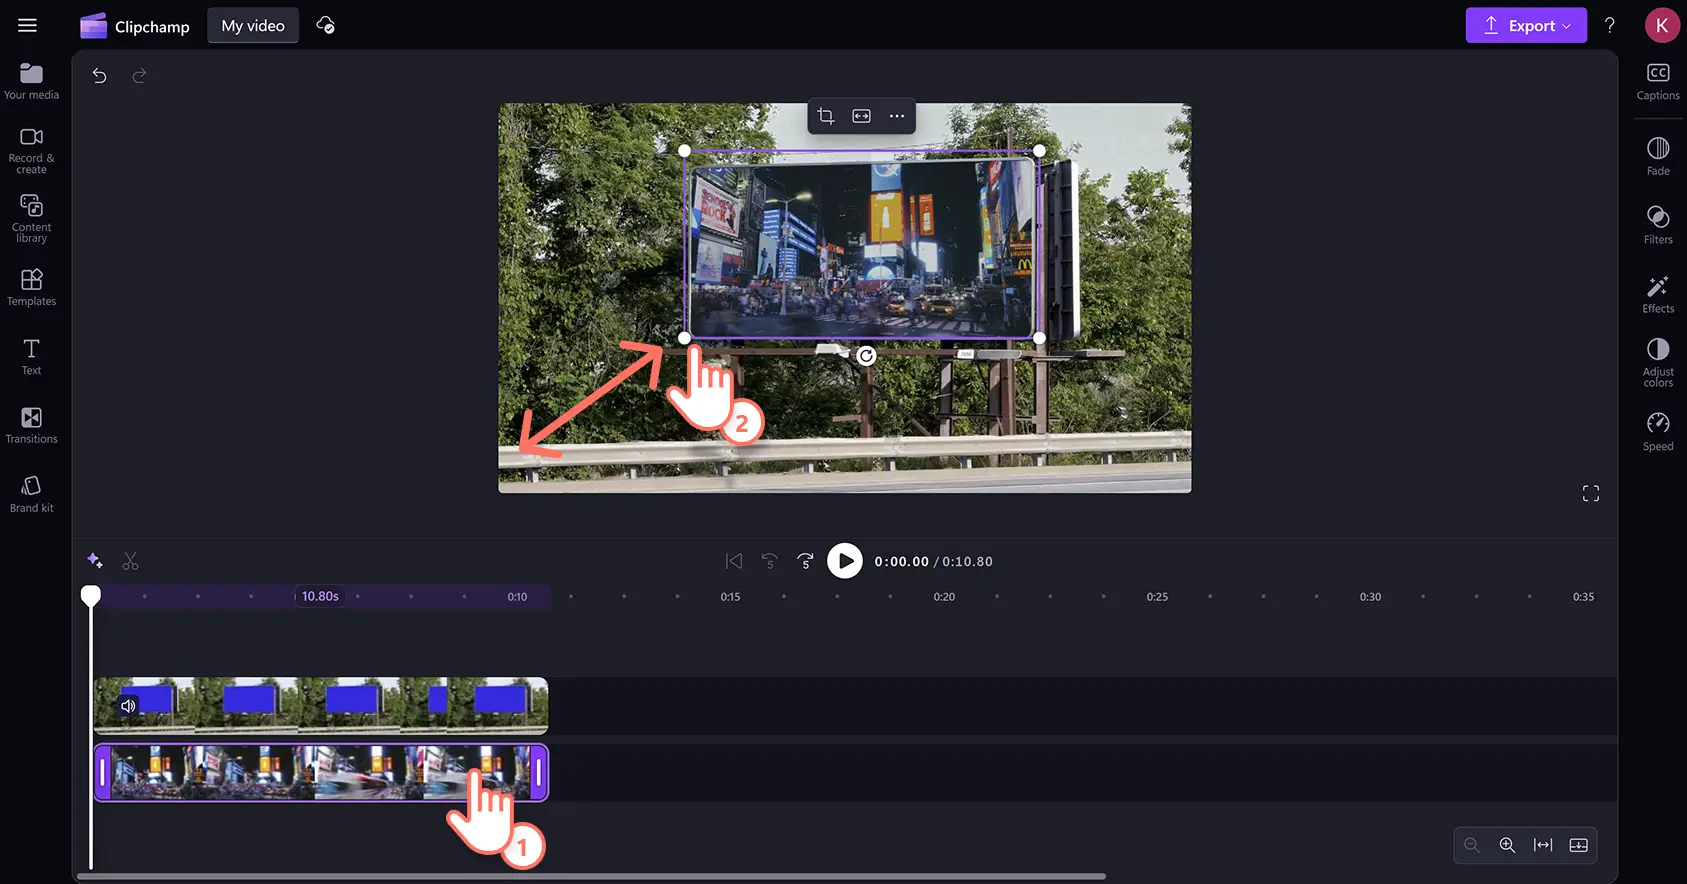
The second video may be a different size to the green screen layer. Easily change the size and placement of the video with the crop tool to create a video overlay.
Step 4. Preview and save video
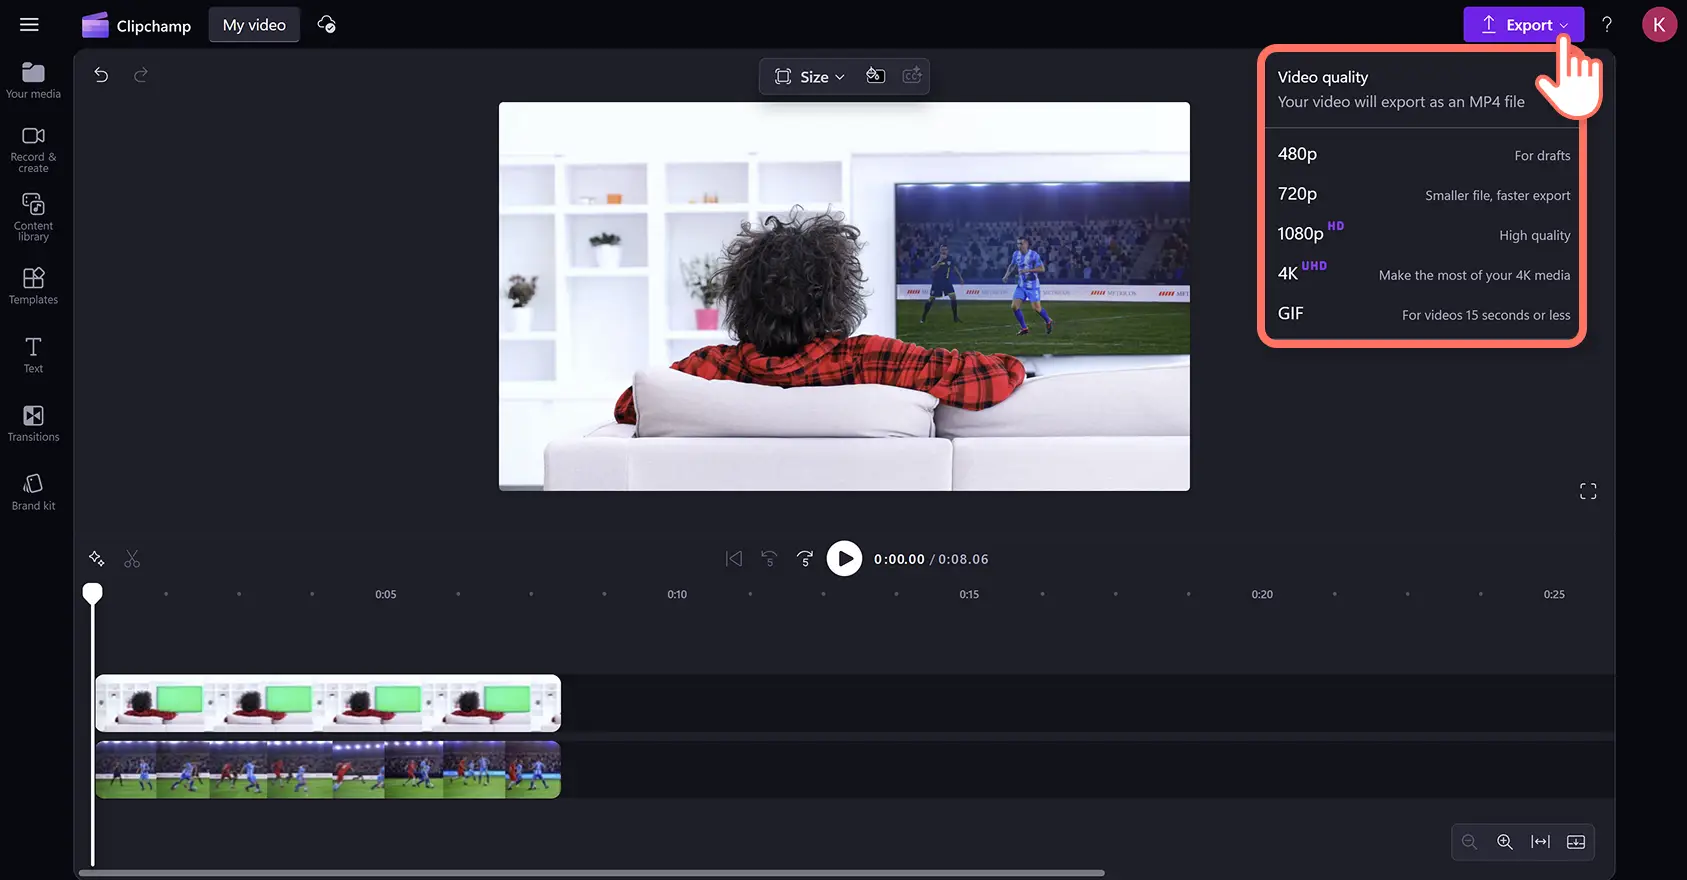
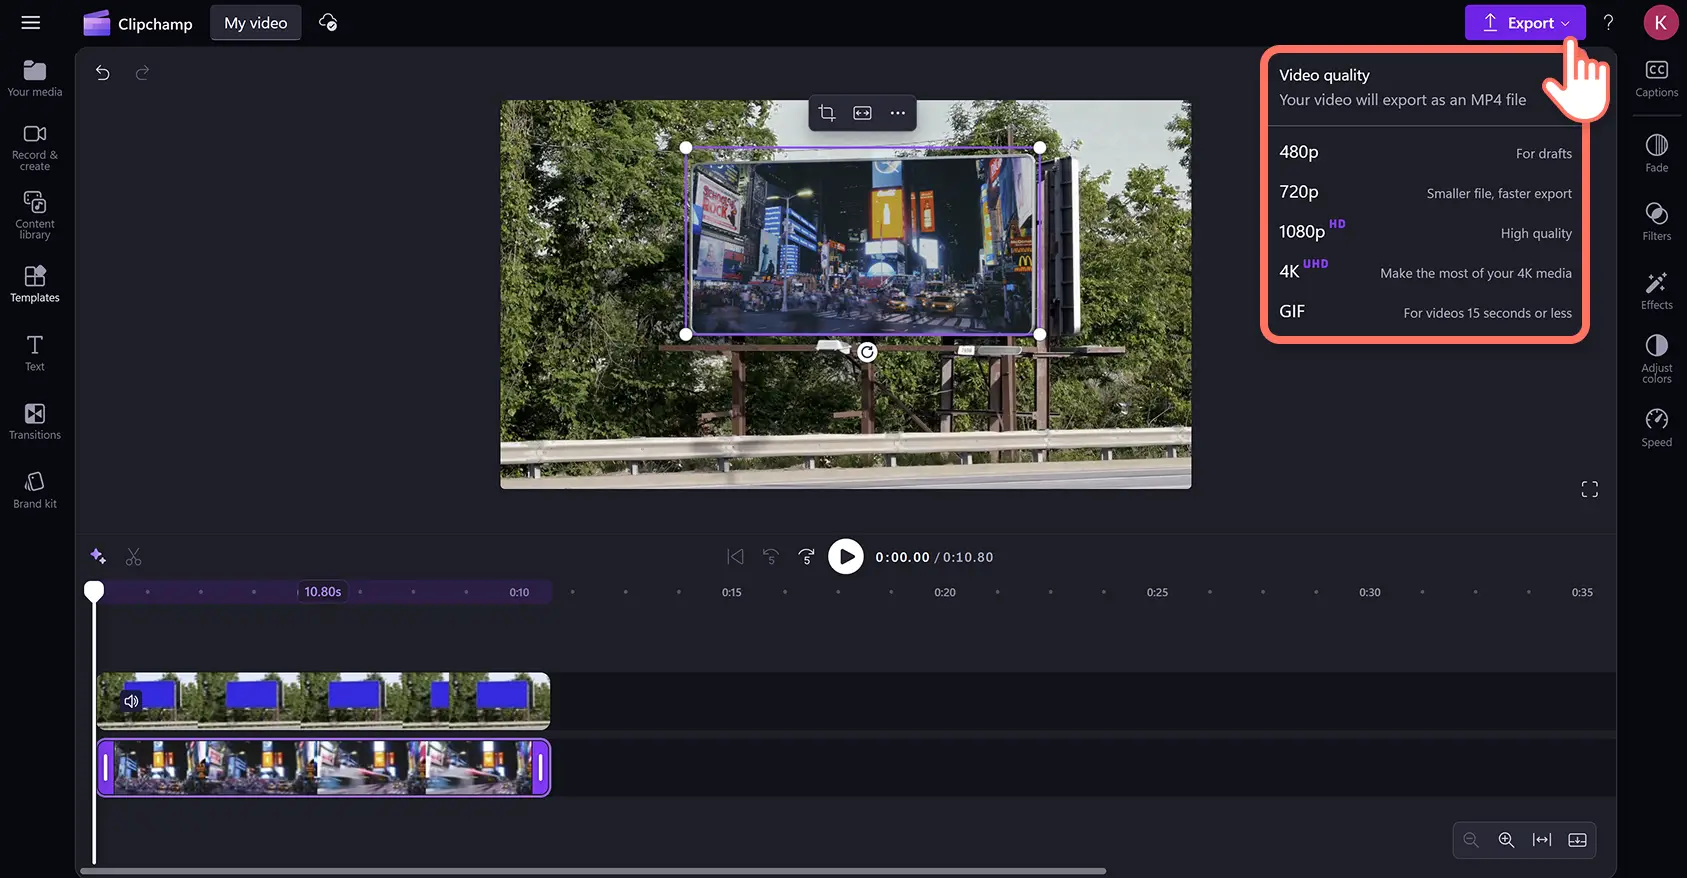
Ensure videos are ready to save by clicking on the play button to preview. Next, click on the export button and select a video resolution.
How to edit red or blue screen videos
Step 1. Drag and drop a red or blue screen stock video onto the timeline
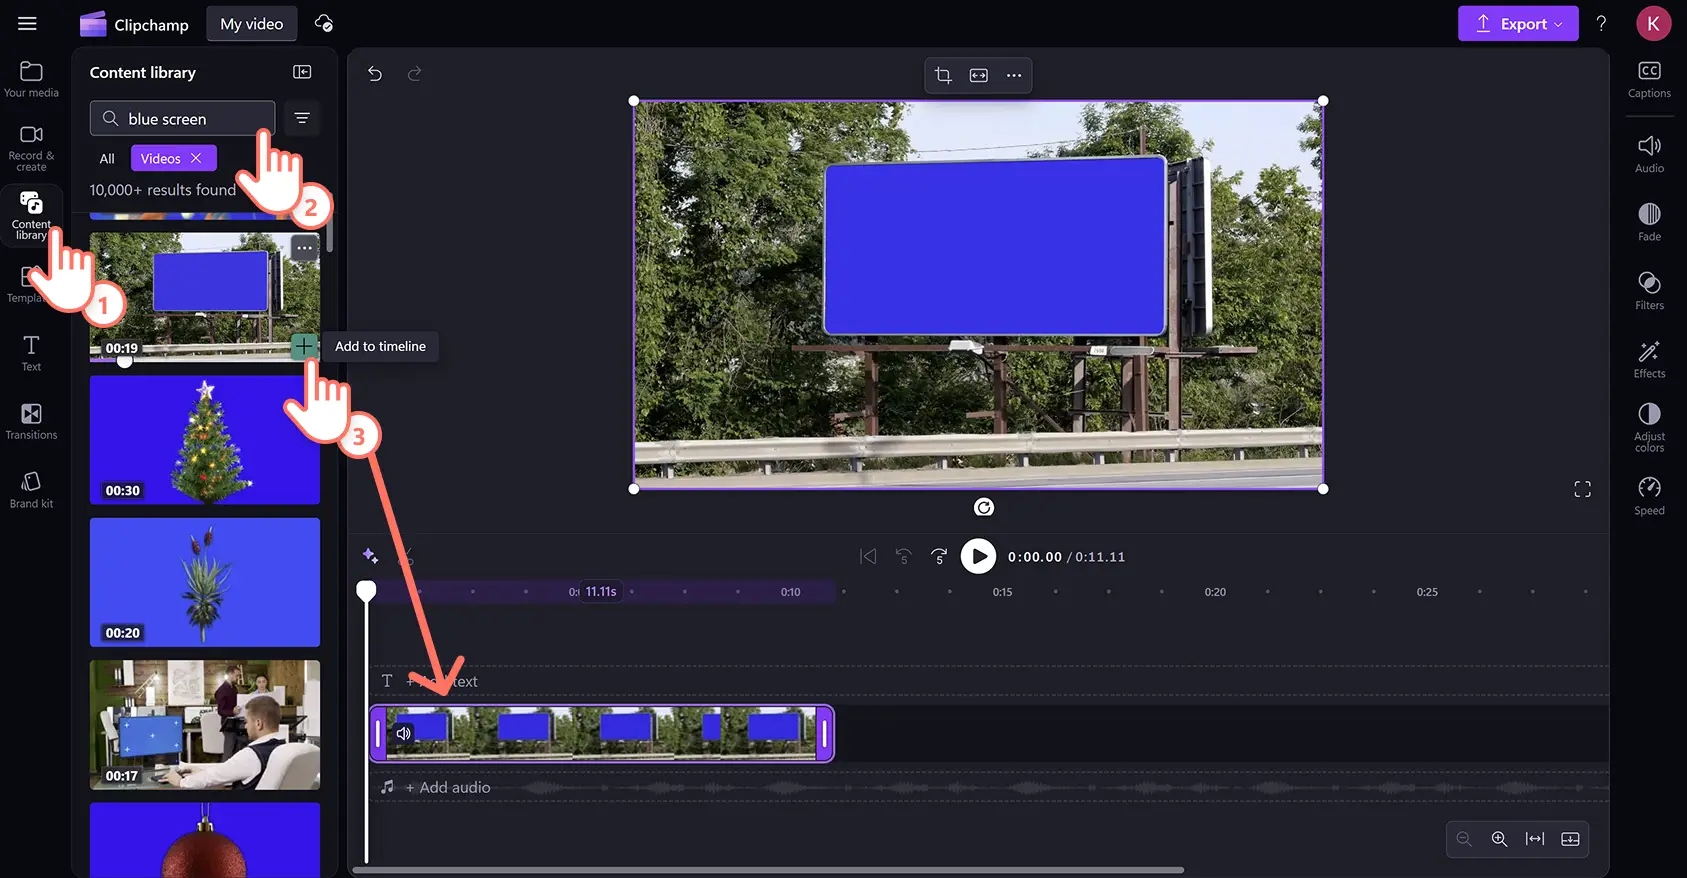
The green screen editor is also compatible with red and blue stock video footage. Click on the content library tab on the toolbar and select videos from the visuals drop down arrow and browse the red or blue screen stock videos using the keyword search bar.
Step 2. Add the video clip below the red or blue screen video
Add the second media asset to the timeline the same way as green screen videos. To import footage, click on the import media button in the your media tab on the toolbar. Upload files from a device, connect OneDrive, or use stock footage from the content library.
Drag and drop the video onto the timeline below the blue screen clip. Blue, red, or green screen stock must always be above all other video elements on the timeline for the effect to work.
Step 3. Apply the green screen filter
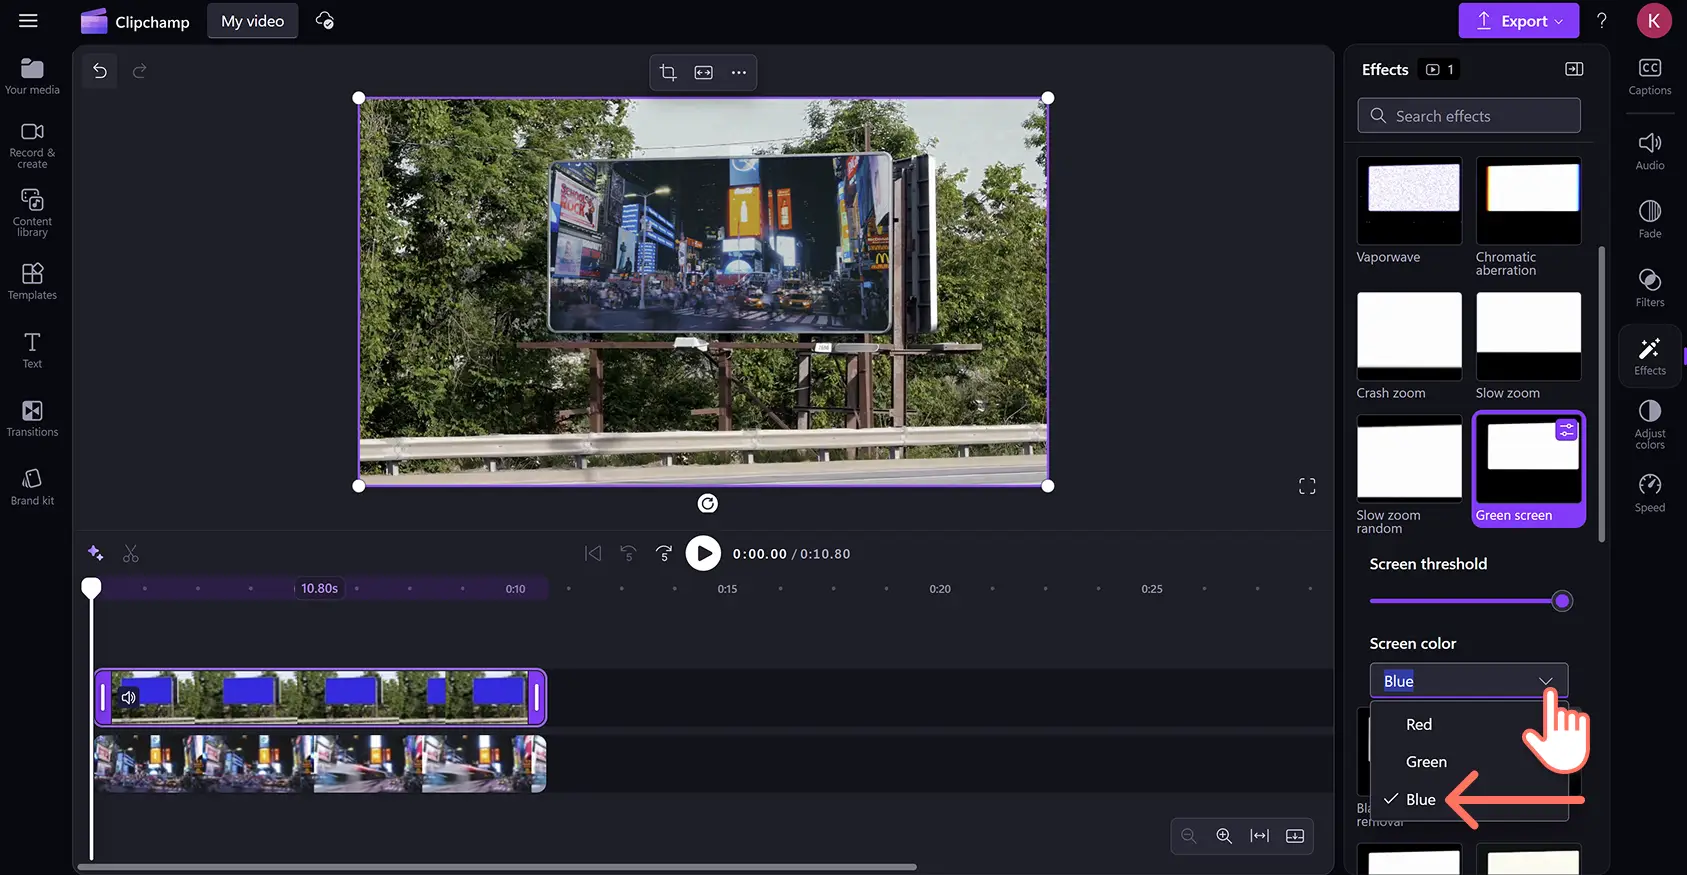
Click on the top video clip on the timeline, then click on the effects tab on the property panel. Select the green screen option.
Click on the screen color dropdown, then select blue. The chroma key effect will apply when the correct screen color is selected.
Step 4. Edit video size and position
If the second video is larger or smaller in size than the blue or red screen section, simply adjust the size and position. Click the video on the timeline, then click on the clip inside the video preview. Use the freehand tool to drag the video corners in and out to change the size. You can also reposition the asset by clicking and moving the video around the video preview with your cursor.
Step 5. Preview and save your video
Ensure videos are ready to save by clicking on the play button to preview, then click on the export button.
Watch how to create green screen video tutorial
Check out the step-by-step video tutorial to watch how to apply the green screen effect to videos.
How to make green screen videos for Instagram and TikTok
Create green screen videos to suit social media aspect ratios with the free video resizer. Follow the steps below to learn how.
Drag and drop green screen footage onto the top layer of the timeline and underlay footage on the bottom layer.
Click on the top layer, then click on the effects tab on the toolbar. Select the green screen option then click on the correct color and adjust the screen threshold.
With no assets on the timeline selected, click on the size button on the floating toolbar and select the vertical 9:16 aspect ratio for Instagram and TikTok.
The video clip will now appear in the center of the frame with black bars above and below. To remove this letterbox effect, click on the top green screen layer then click on the fill button on the floating toolbar, then do the same for the bottom layer.
Both clips will now fill the screen, removing the black borders. To reframe clips, click on each then use the freehand tool to reposition them inside the frame.
Optional: keep videos in its original proportions and black borders, ensure the bottom underlay video is positioned correctly. Add a color background by clicking on the background color option on the floating toolbar.
Enhance green screen videos with AI video editing tools and effects
Clean up video footage with trim and crop
Use the trimming tool to remove awkward pauses, filler words, or excess footage at the beginning or end of videos. Easily refine subjects with the freehand cropping tool to adjust the frame or remove any distractions at the edges.
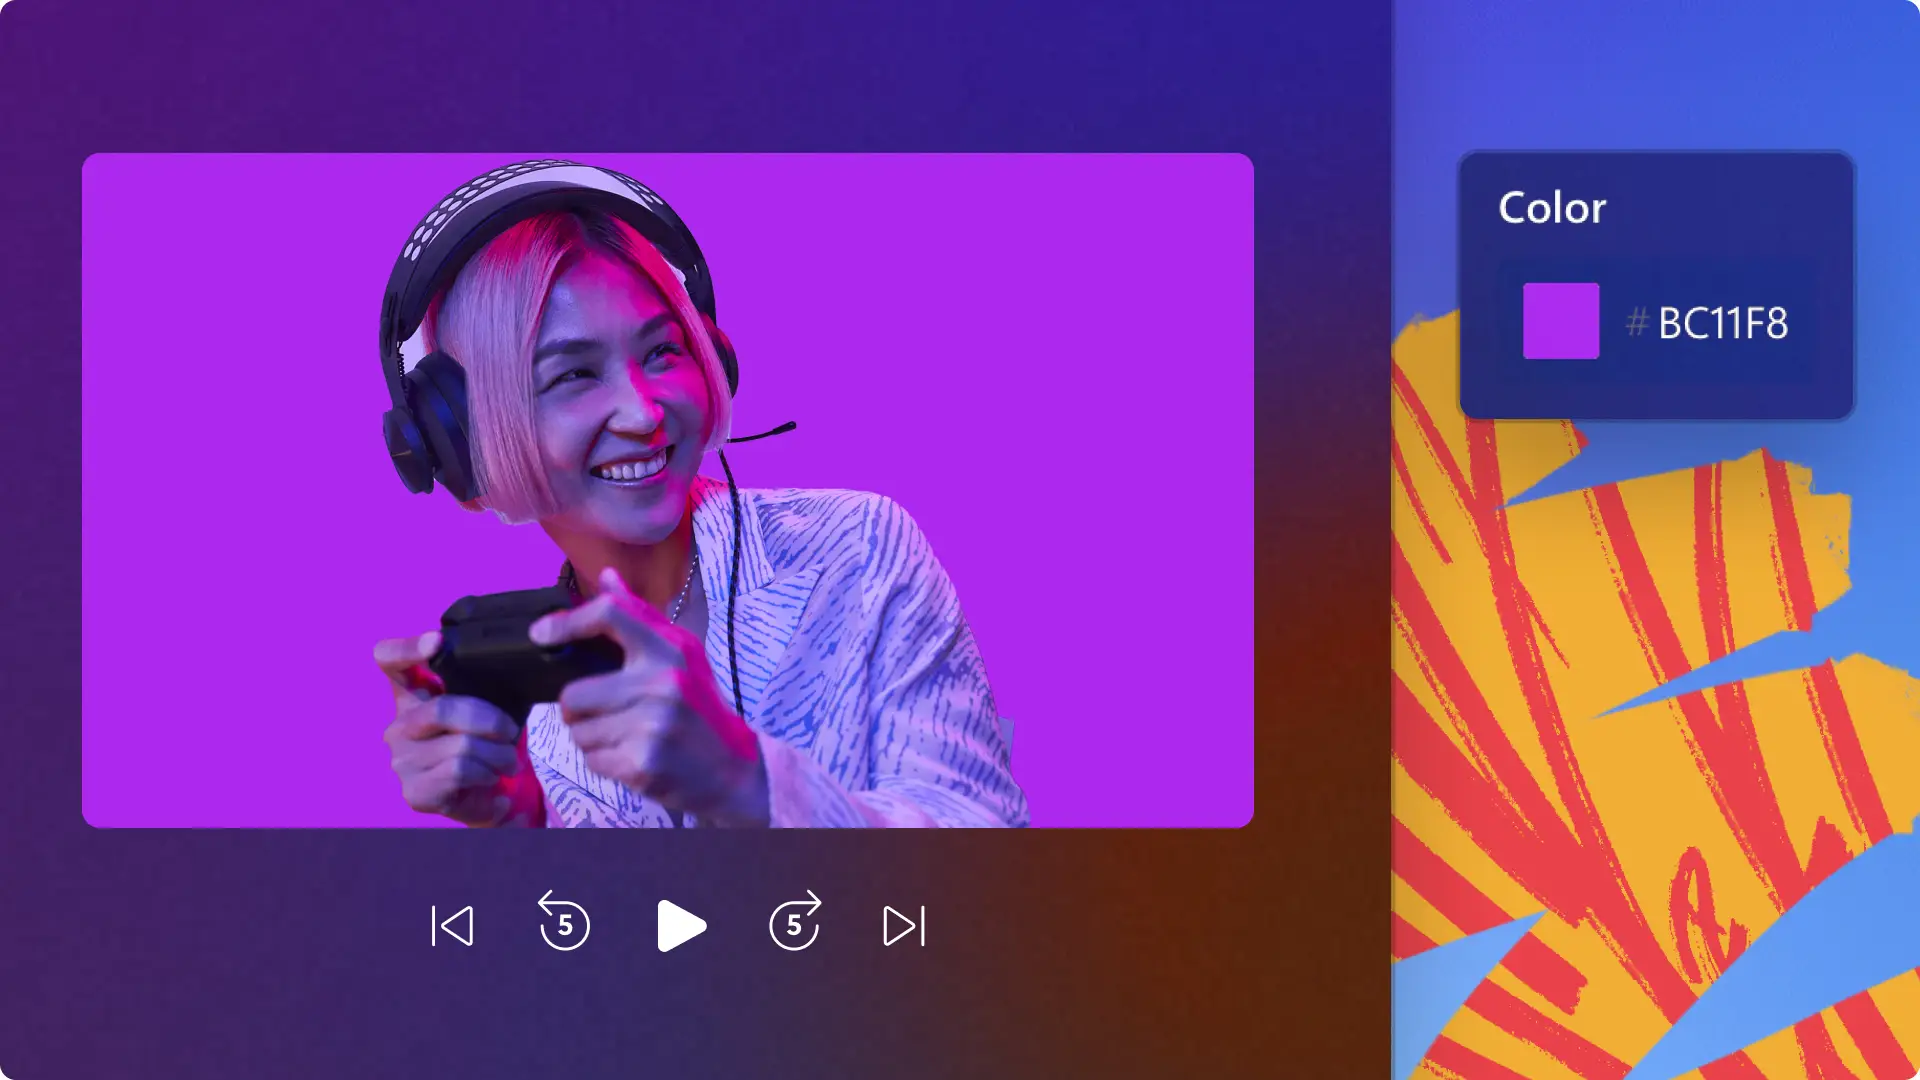
Explore different styles of video backgrounds
Whether you're replacing a green screen or starting fresh, add color backgrounds to give videos a bold or branded look. Upload personal images or video backgrounds for added personalization, or select from the royalty-free content library.
Enhance videos with AI voiceovers and subtitles
Further improve video accessibility and help boost viewer retention when watching on mute by pairing AI subtitles with AI voiceovers. Create realistic AI voiceovers with closed captions in a variety of languages.
Add animated text overlays to videos
Layer animated text and title overlays to videos to seamlessly introduce speakers or different topics and sections. Use lower thirdsto provide helpful context, like job titles, callouts, or supporting commentary.
Tip: use multiple enhancements in a single scene, like combining animated titles, a custom background, and subtitles, to give videos a more dynamic, scroll-stopping feel.
Add final touches to chroma key videos with the online video enhancer and adding scene transitions between clips.
Create green screen videos free online in Clipchamp video editor or download the Microsoft Clipchamp Windows app.
Frequently asked questions
What videos can I make with the green screen effect?
Creators can easily make any style of video clip using the green screen overlay in Clipchamp video editor, from gaming highlights, tutorials, and corporate videos to green screen memes, GIFs, and real estate videos.
Do I need a green screen to insert a background into a video?
If you are recording your own green screen footage, make sure your background is a red, blue, or green color, or else the green screen editor won’t work.
Is Clipchamp green screen video editor free?
All free users of Clipchamp video editor can access a limited selection of green screen stock footage and templates, but all users can save in 1080p video resolution.