Heads up! The screenshots in this article are from Clipchamp for work accounts and the same principles apply to Clipchamp for school accounts. Clipchamp personal account tutorials may differ. Learn more.
On this page

Unlock the power of video in the workplace by creating custom reusable video templates made with Microsoft Clipchamp. Speed up the process of creating training videos, demos and video presentations, and Reels for marketing by empowering team members to create consistent videos with an editable video template.
Accurately represent your enterprise faster and effortlessly enable better collaboration on brand projects with video templates. They’re perfect for acting as a guide for consistent video narrative structures.
Learn how to create professional work video templates using eye-catching backgrounds, branded video elements, animations, and more in Clipchamp video editor.
How to create a video template
Step 1. Import media to build your template
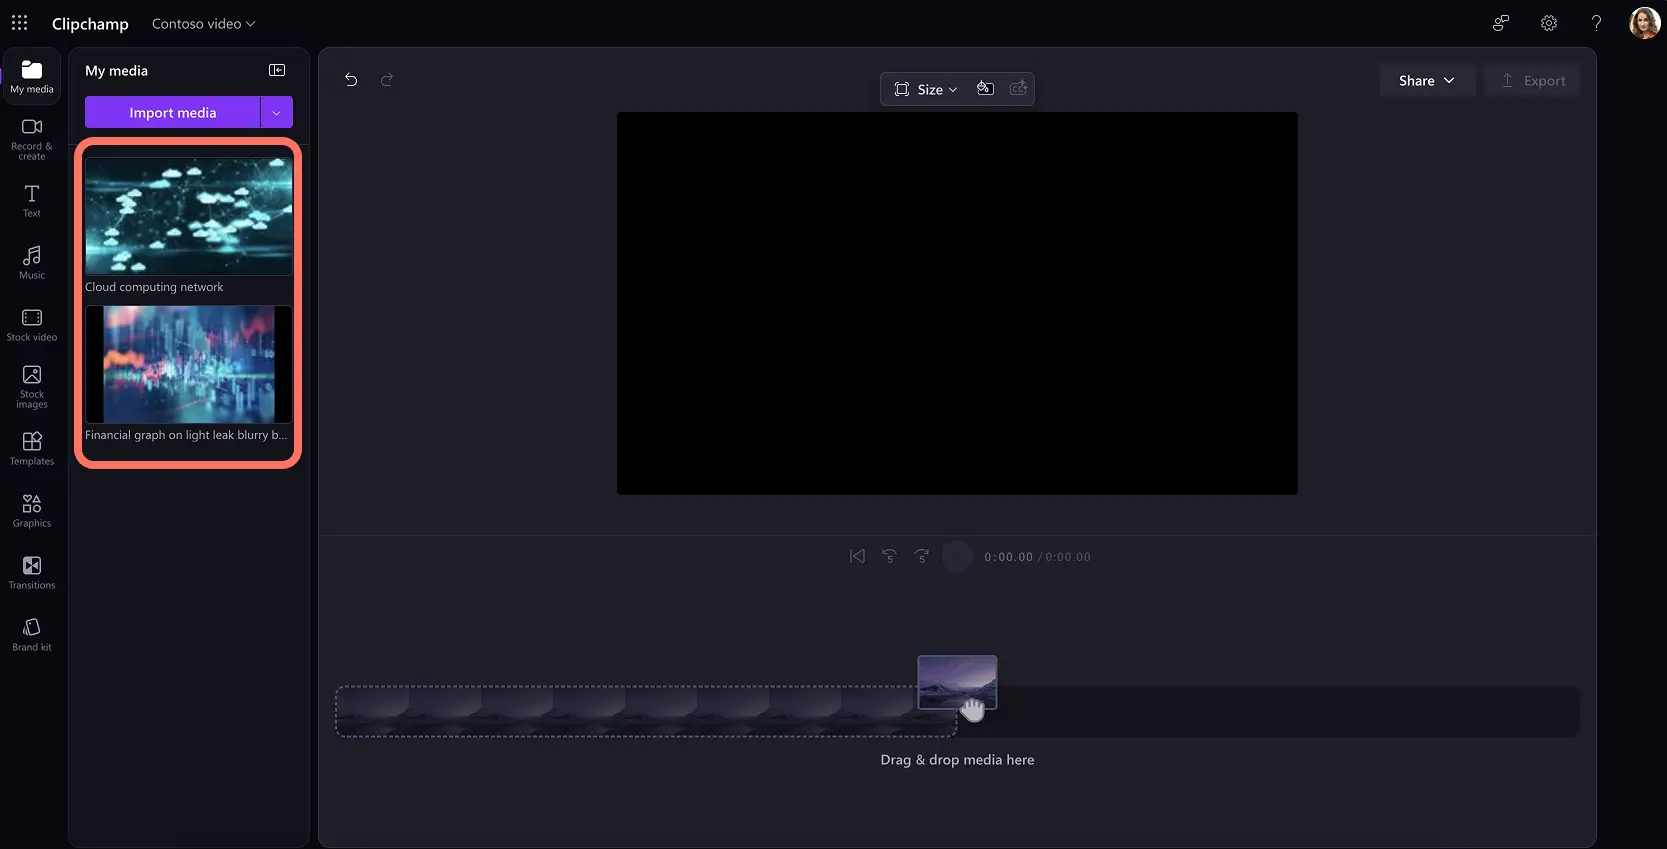
To import videos, photos, and audio, click on the import media button in the your media tab on the toolbar to browse your computer files, or connect your OneDrive to view media from your organization’s SharePoint.
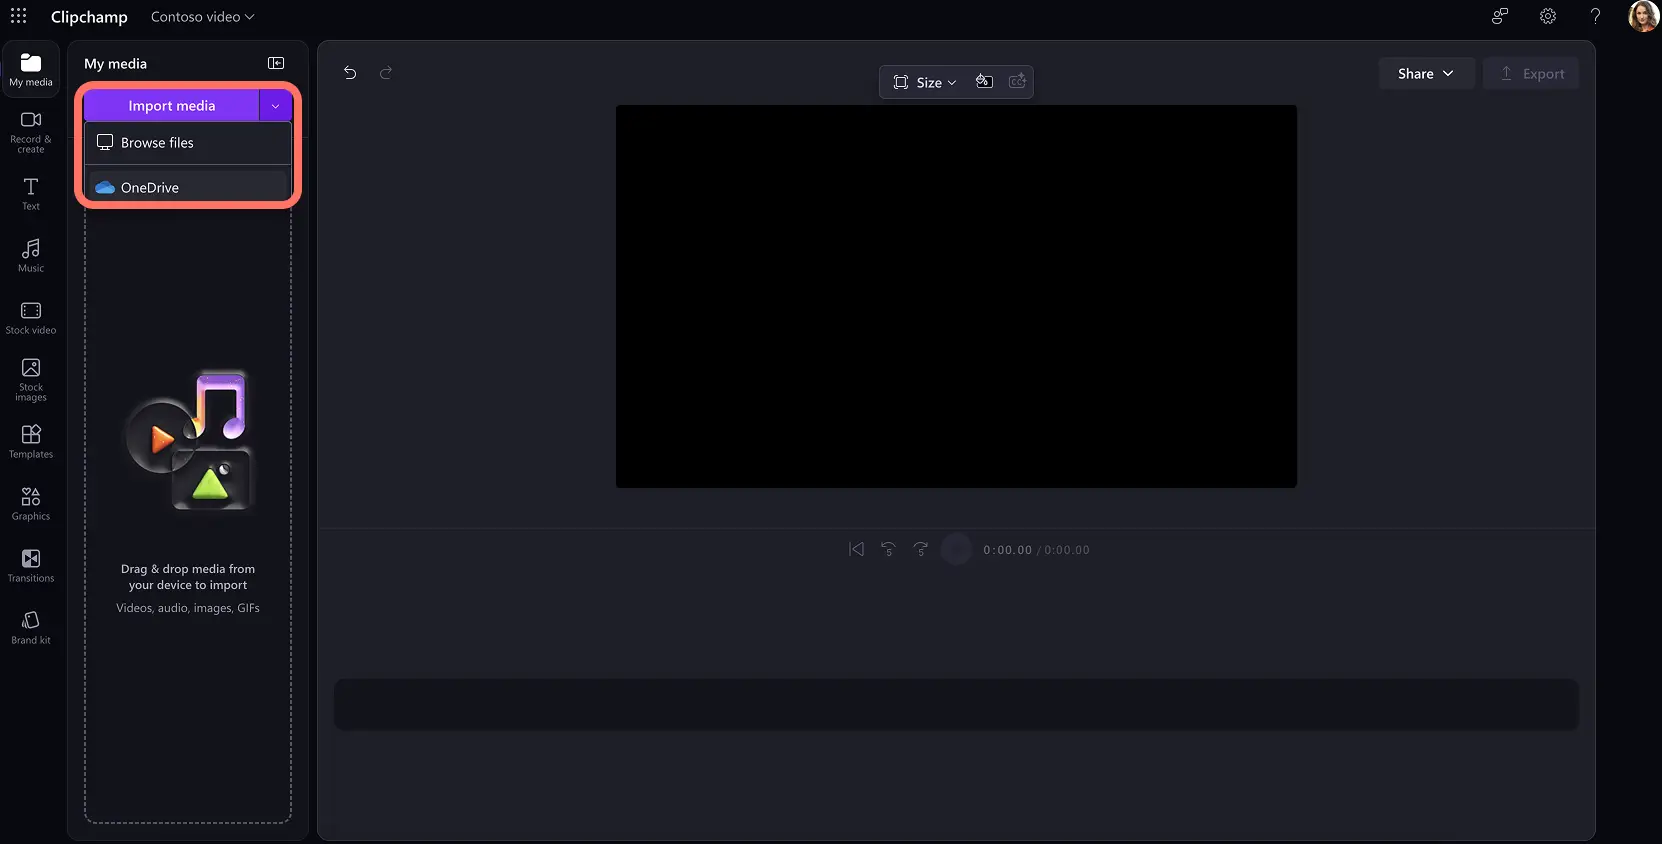
View all uploaded media in the your media tab to add to your video template when you’re ready.
Tip: if you don’t have any personal or branded footage to use in your video template, browse the stock video tab on the toolbar to search for high-quality, royalty-free videos and video backgrounds. Alternatively, explore Microsoft AI Image Creator to create and add unique logos or images to work videos.
Step 2. Create a custom background for your video template
Build videos on the perfect foundation of a custom colored video background using your brand’s colors.
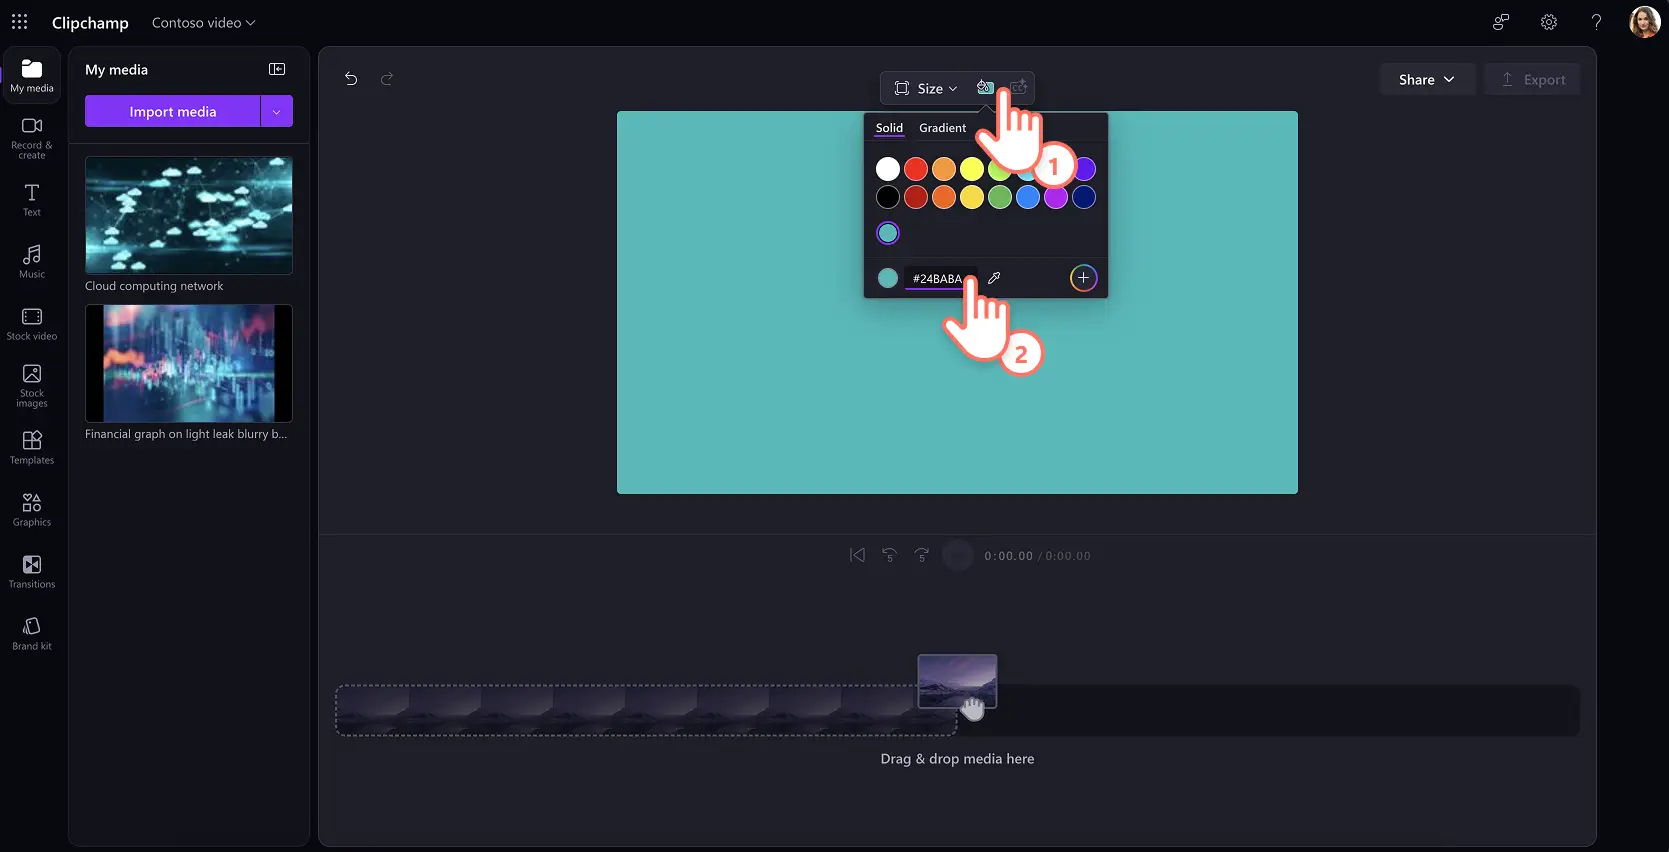
To add a background color, deselect all timeline items. Next, locate the background color button in the floating toolbar next to the video preview. Here you can add a solid or gradient color to the video's background using default color choices, the HSV color picker, or by entering the HEX code.
Step 3. Add elements to build the video template
Add videos to the timeline
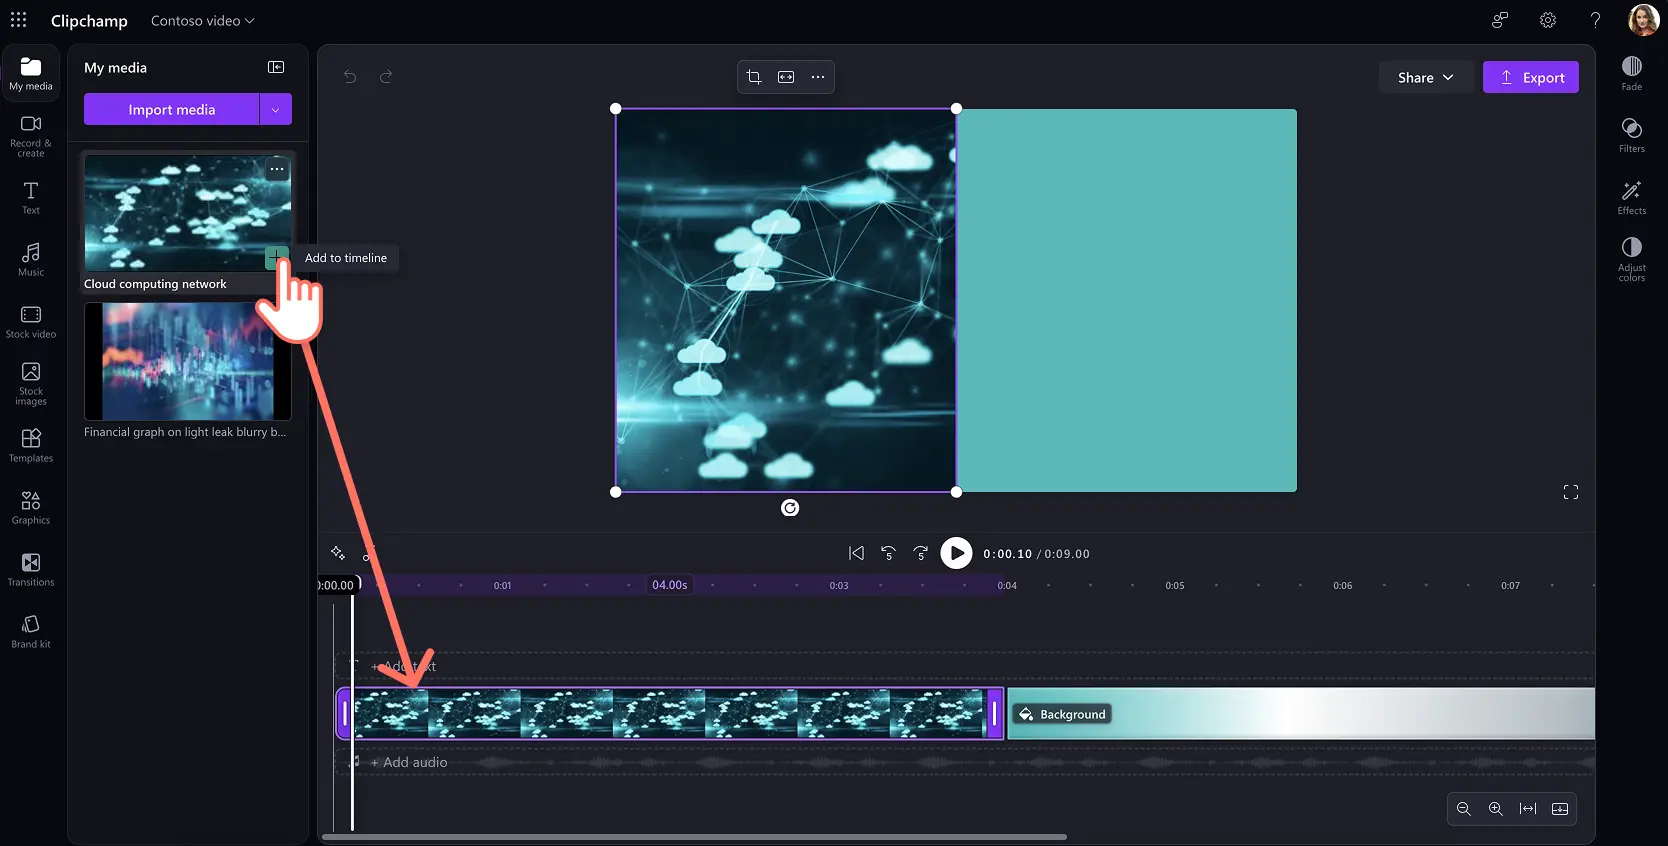
It’s a great idea to create templates for video presentations, slideshows, and even a reusable branded intro video. Drag and drop images and video clips from the your media tab directly onto the timeline.
Trim the length of your clips by dragging the handles inwards or crop the video using the freehand crop tool to perfect the positioning.
Add text to the timeline
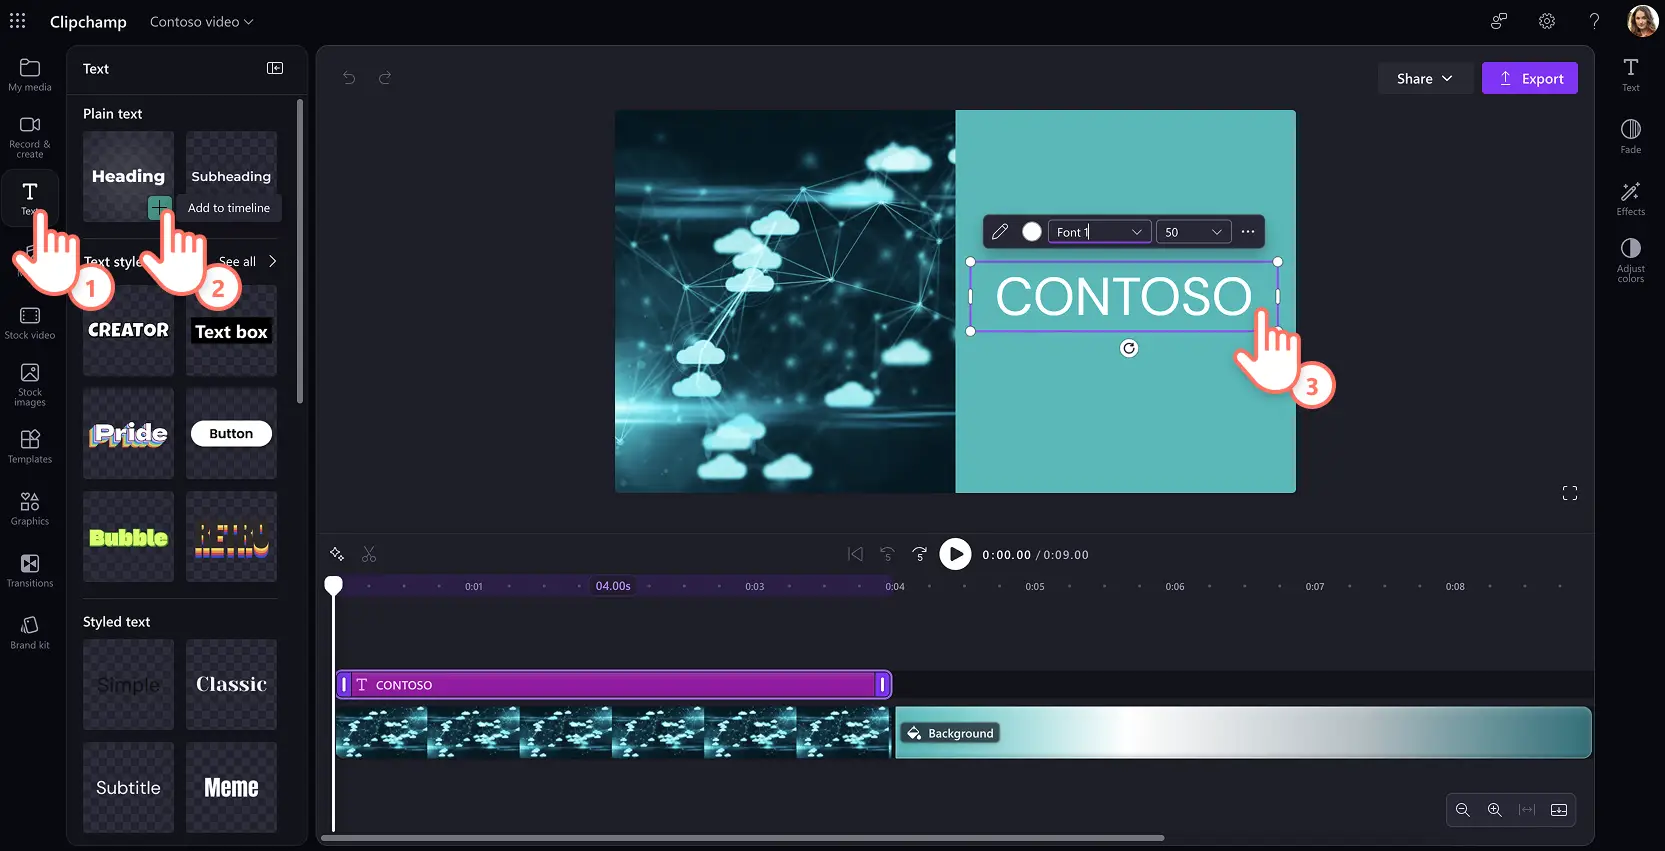
Include your brand name, or create editable text placeholders across your video template to speed up the video editing process for your team.
Navigate to the text tab on the toolbar to find a range of titles and animated text options for your video template. Click on the add to timeline button or drag and drop it into the timeline. You can further update your font, style, size and color to suit your branding needs.
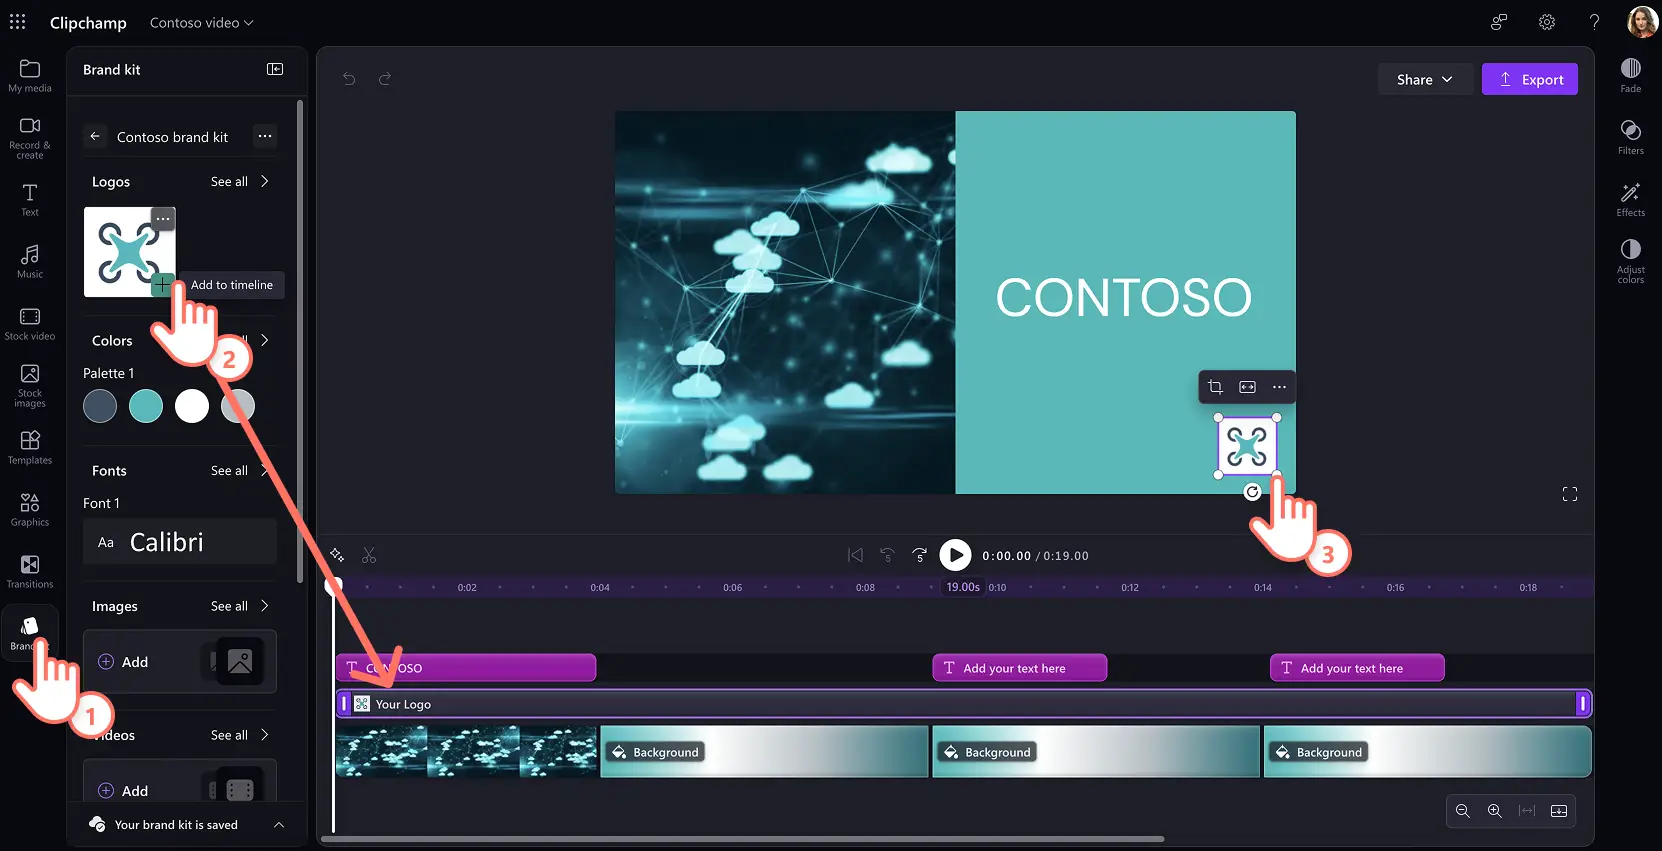
Add your brand logo
Add a professional look to your video template by adding your company logo using the brand kit feature.
Navigate to the brand kit tab on the toolbar and choose your brand kit of choice then view logos, custom fonts, and custom color palettes. Drag and drop your logo onto the timeline above your video clip. You can edit the size and location of your logo by dragging the corners. You can also turn a logo into a video watermark.
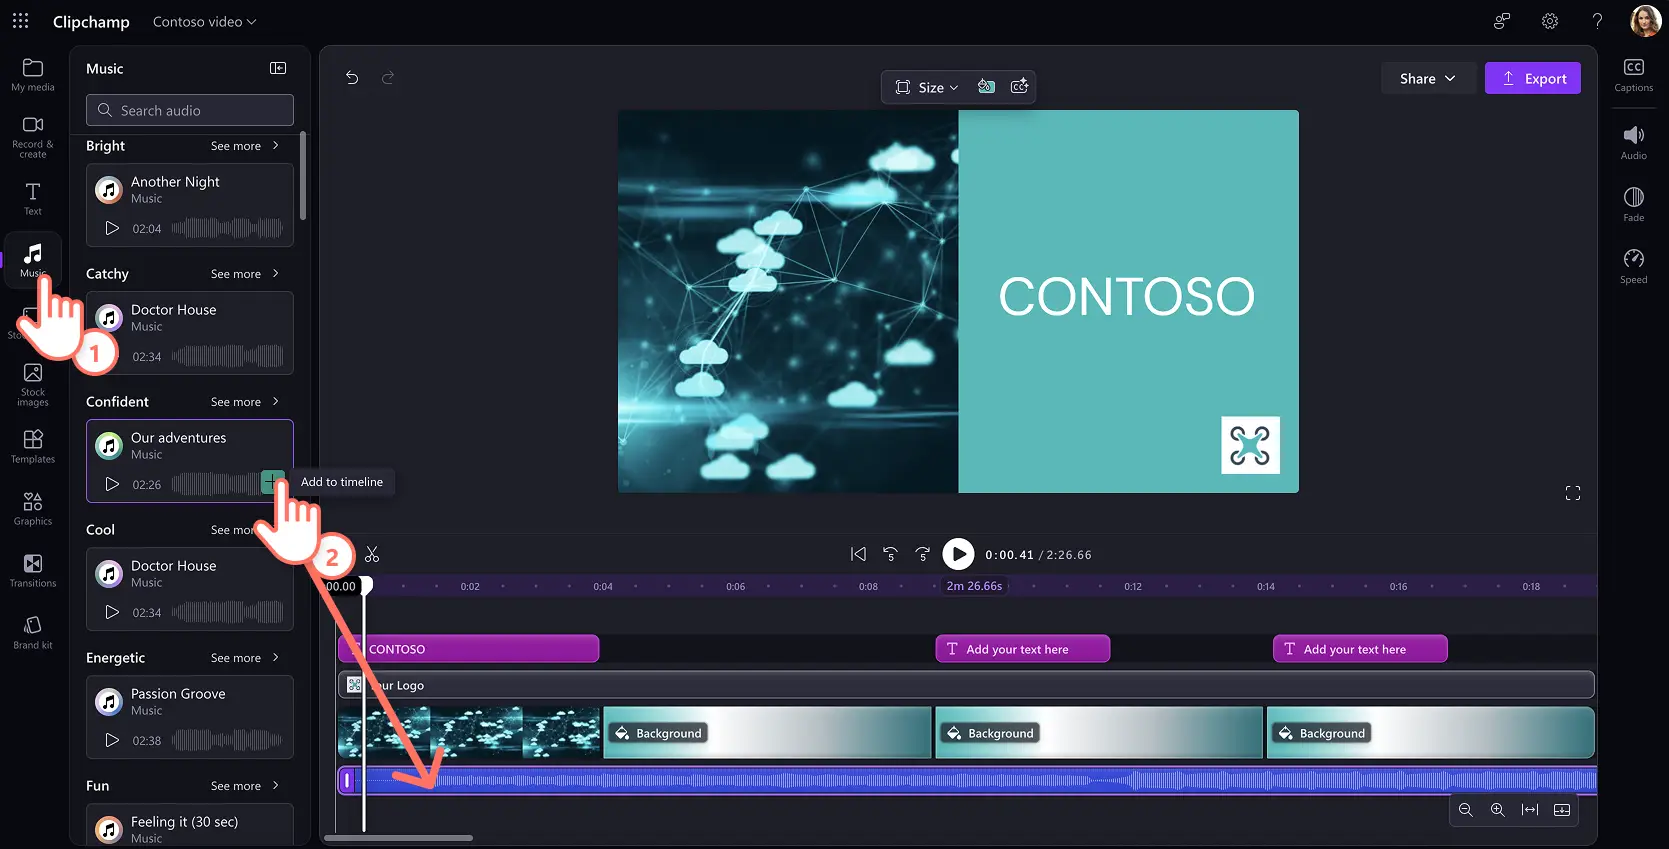
Add music to the video
Background music is an essential tool to enhance brand identity and set the tone for a corporate videos. If your organization has a corporate jingle, upload this to the your media tab and add it to your timeline. If not, choose from a range of versatile instrumentals to add to your video template.
Click on the music tab and preview a range of royalty-free audio options. Drag and drop the audio track to the template when you find a suitable tune.
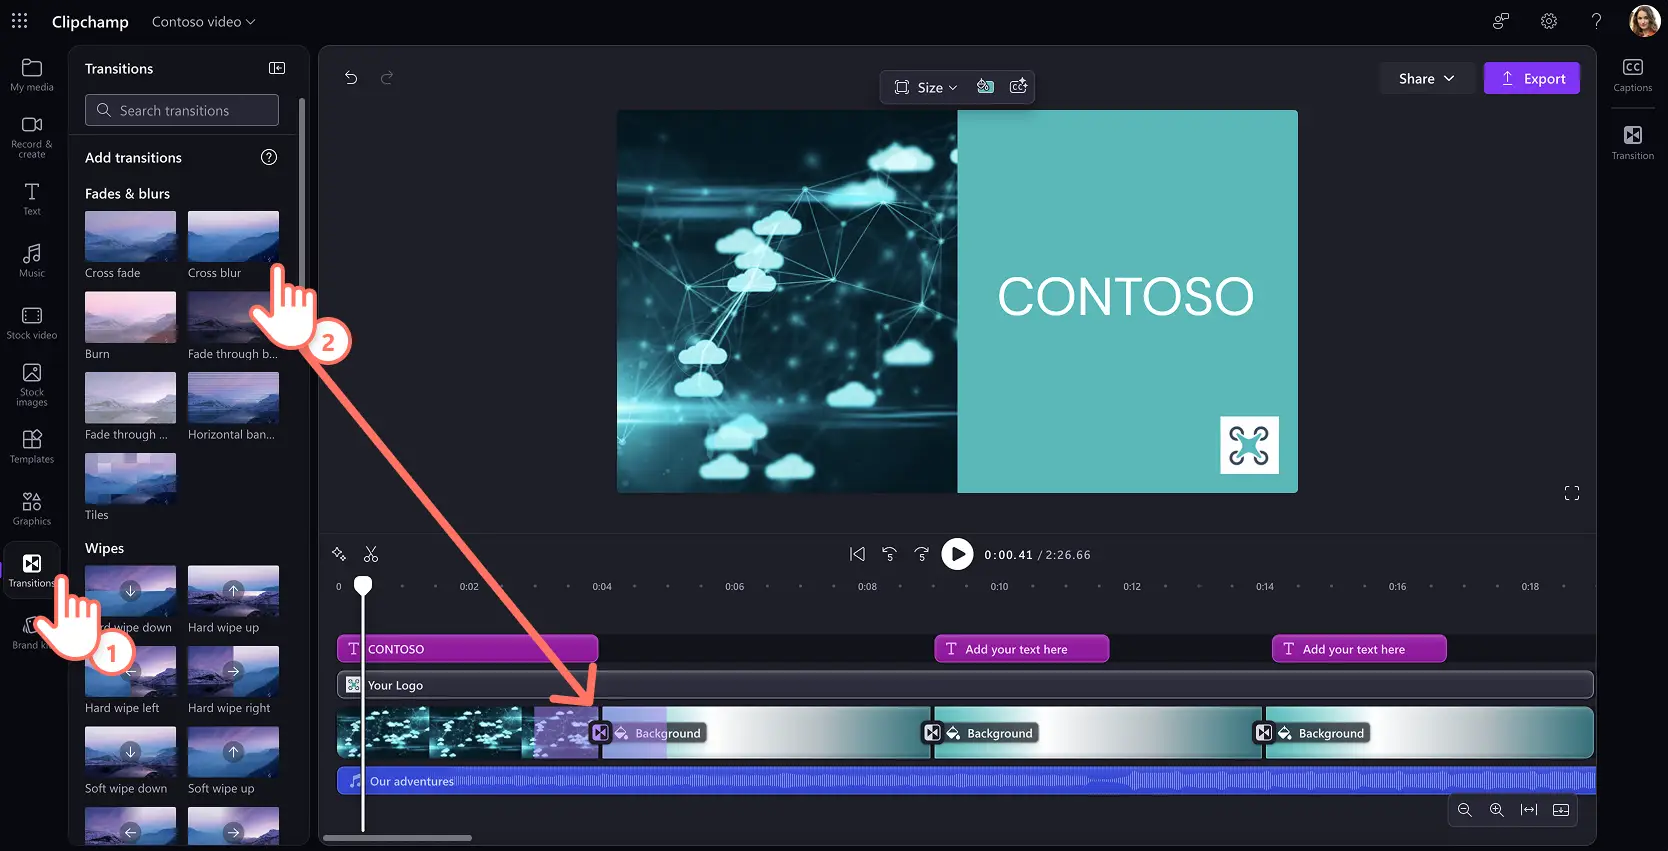
Add animated scene transitions
Turn your slideshow video template into a polished video by adding scene transitions that connect two clips. While bold and creative transitions may not be suitable to corporate videos, elegant transitions like fades and swipes can elevate your video content.
To add a transition between videos, click on the transitions tab on the toolbar. Preview and choose a transition then drag the transition between the clips on the editing timeline. It will automatically snap into place.
Step 4. Create and share the video template
Play to review your video template. When you’re ready, click on the templates tab. Select the create template from project button.
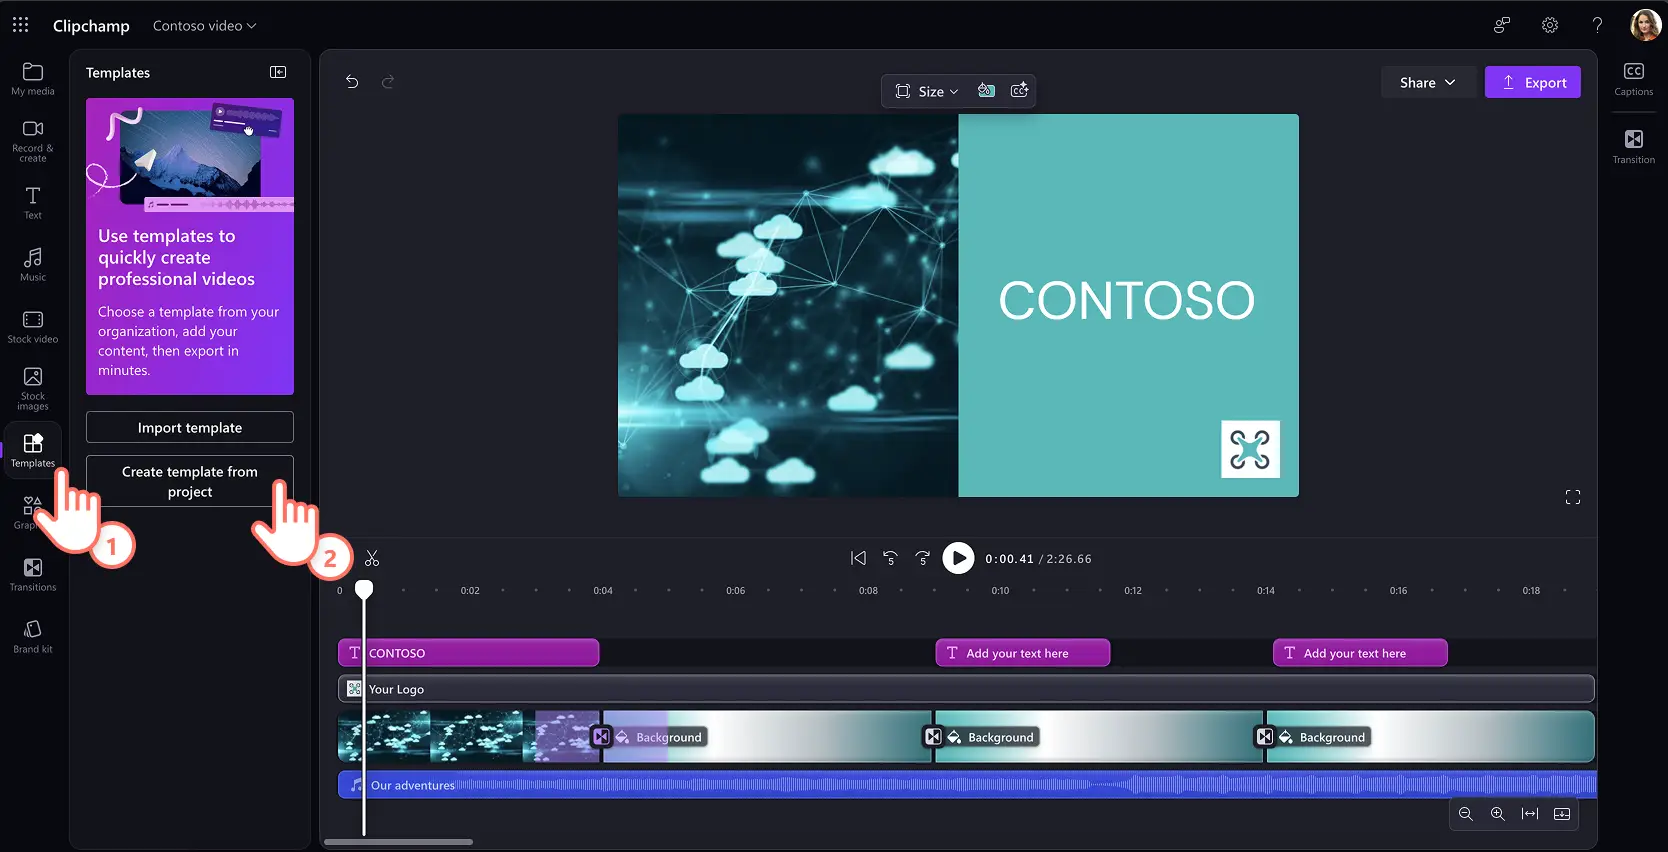
Follow the prompt and name your template using a professional title, such as your brand name. Click on the create button to turn your video project into a reusable video template. Once it’s saved, it will appear in the templates tab.

You can further edit and share this template following the steps below.
How to share a video template with your team
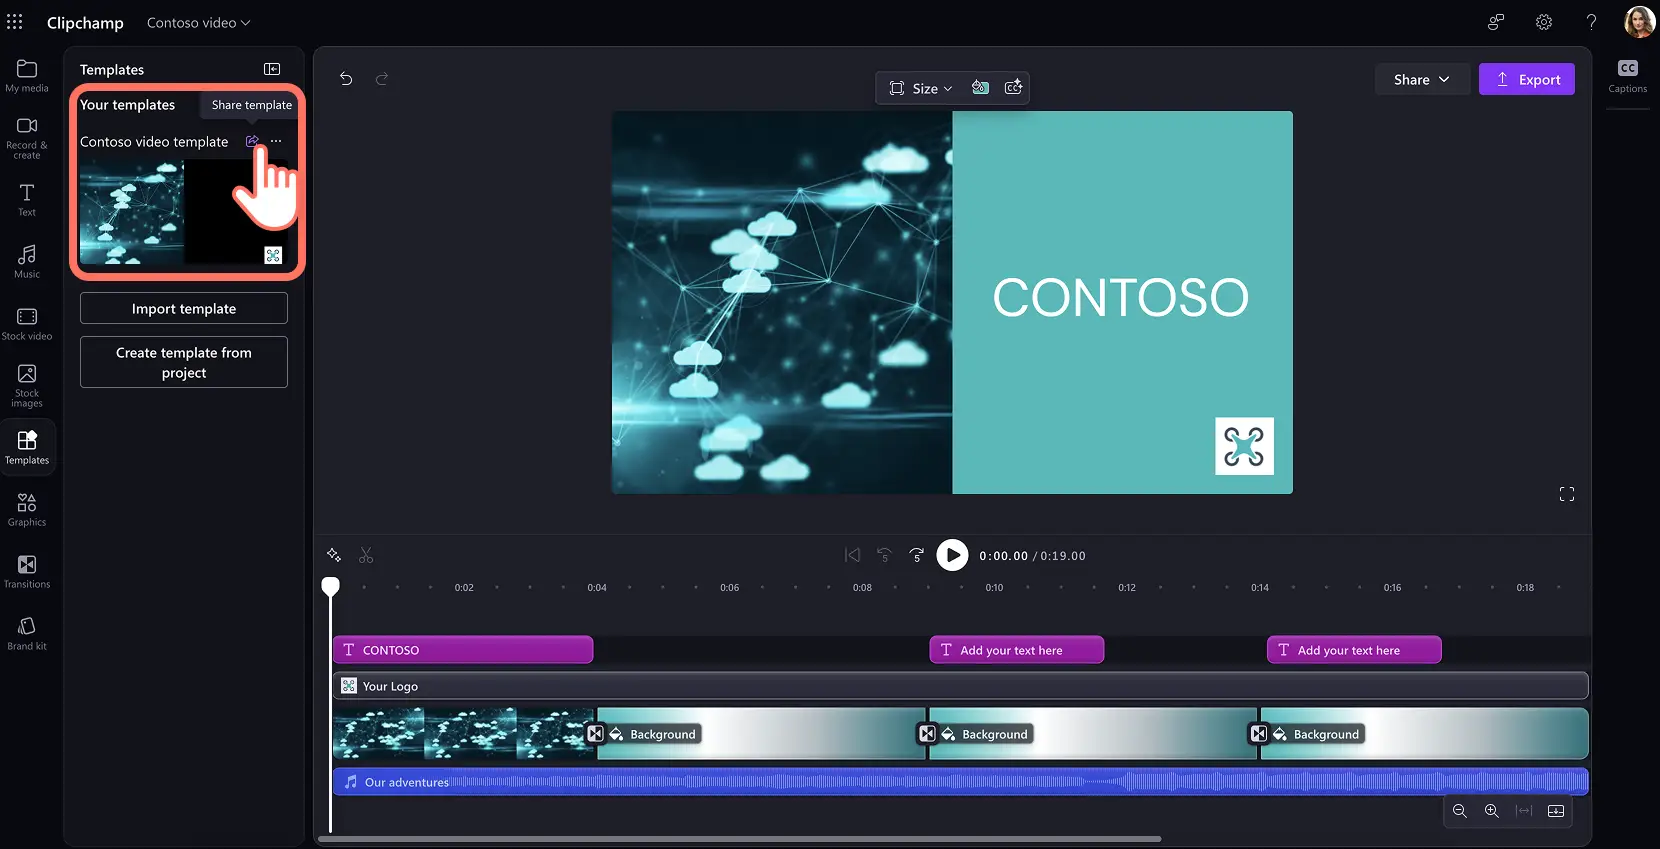
Step 1. Generate a template share link
Navigate to the templates tab and hover over the arrow icon to share your video template within your organization.
Step 2. Email the template link
A popup window will appear where you can manually add a name, email, or email group. You can also set up access to editable, view-only, or limit any downloads altogether. Click the share button to send the email invite to the Clipchamp video template easily.
Alternatively, you can use the copy link button to post in a Teams chat, Microsoft Loop document, or wherever you prefer.

Watch how to create and share video templates tutorial
Unlock the power of video in the workplace with custom video templates. Create consistent branded videos for your organization, perfect for beginners.
Continue exploring must-have corporate video ideas, AI transcript-based editing, or refine your webcam and screen recording skills in Clipchamp. You can also learn how to convert AI images into videos.
Get started making video templates for your business with Clipchamp or download the Microsoft Clipchamp Windows app.