On this page
Screen recording with audio is an essential tool for businesses and creators. You can create product tutorials, demo videos, online training sessions, social media ads, and much more in just a few minutes.
Either record your tutorial video using the screen recording audio, or create your own AI voiceover or voice recording for free.
Learn more about how to use the online screen recorder with audio on Windows and Mac, and easily creating voiceovers to assist with Clipchamp video editor.
How to screen record with audio on Mac
Step 1. Click on the screen recording feature
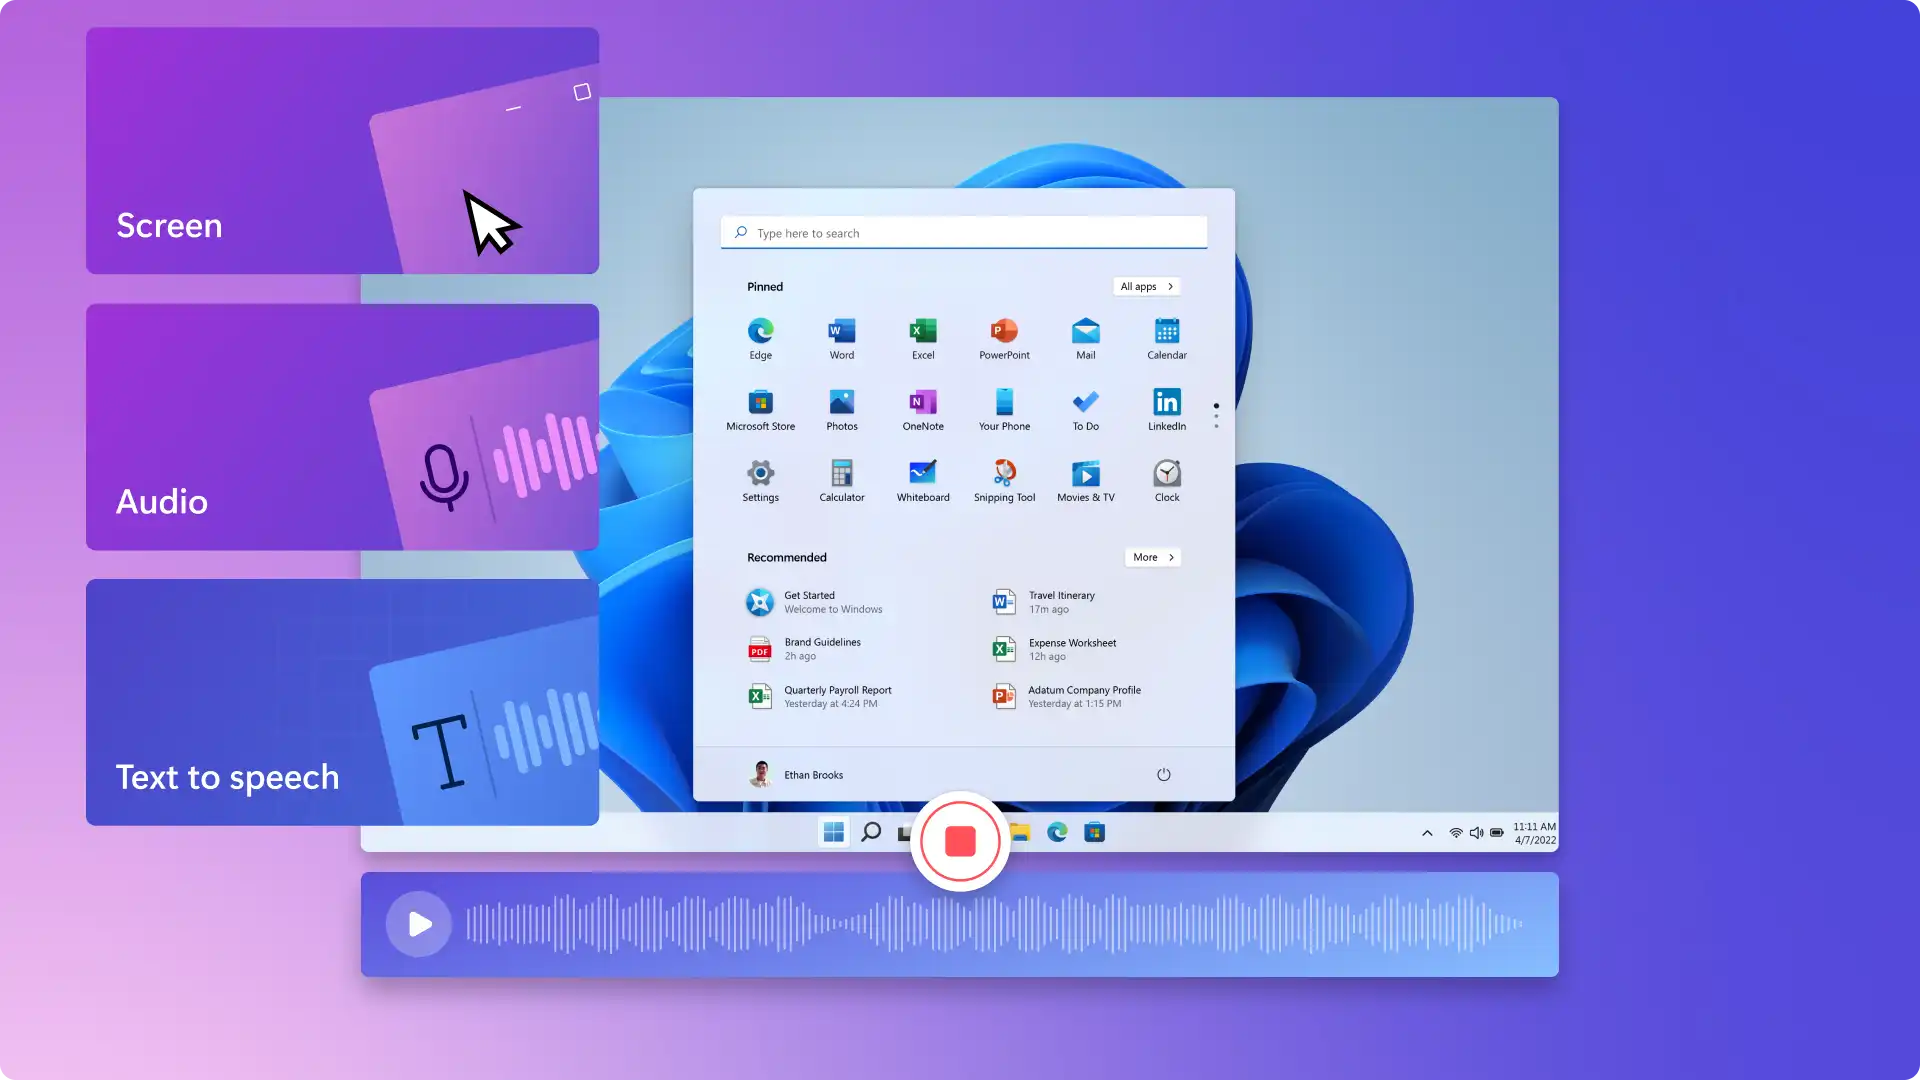
Click on the record & create tab on the toolbar, then click on the screen button.
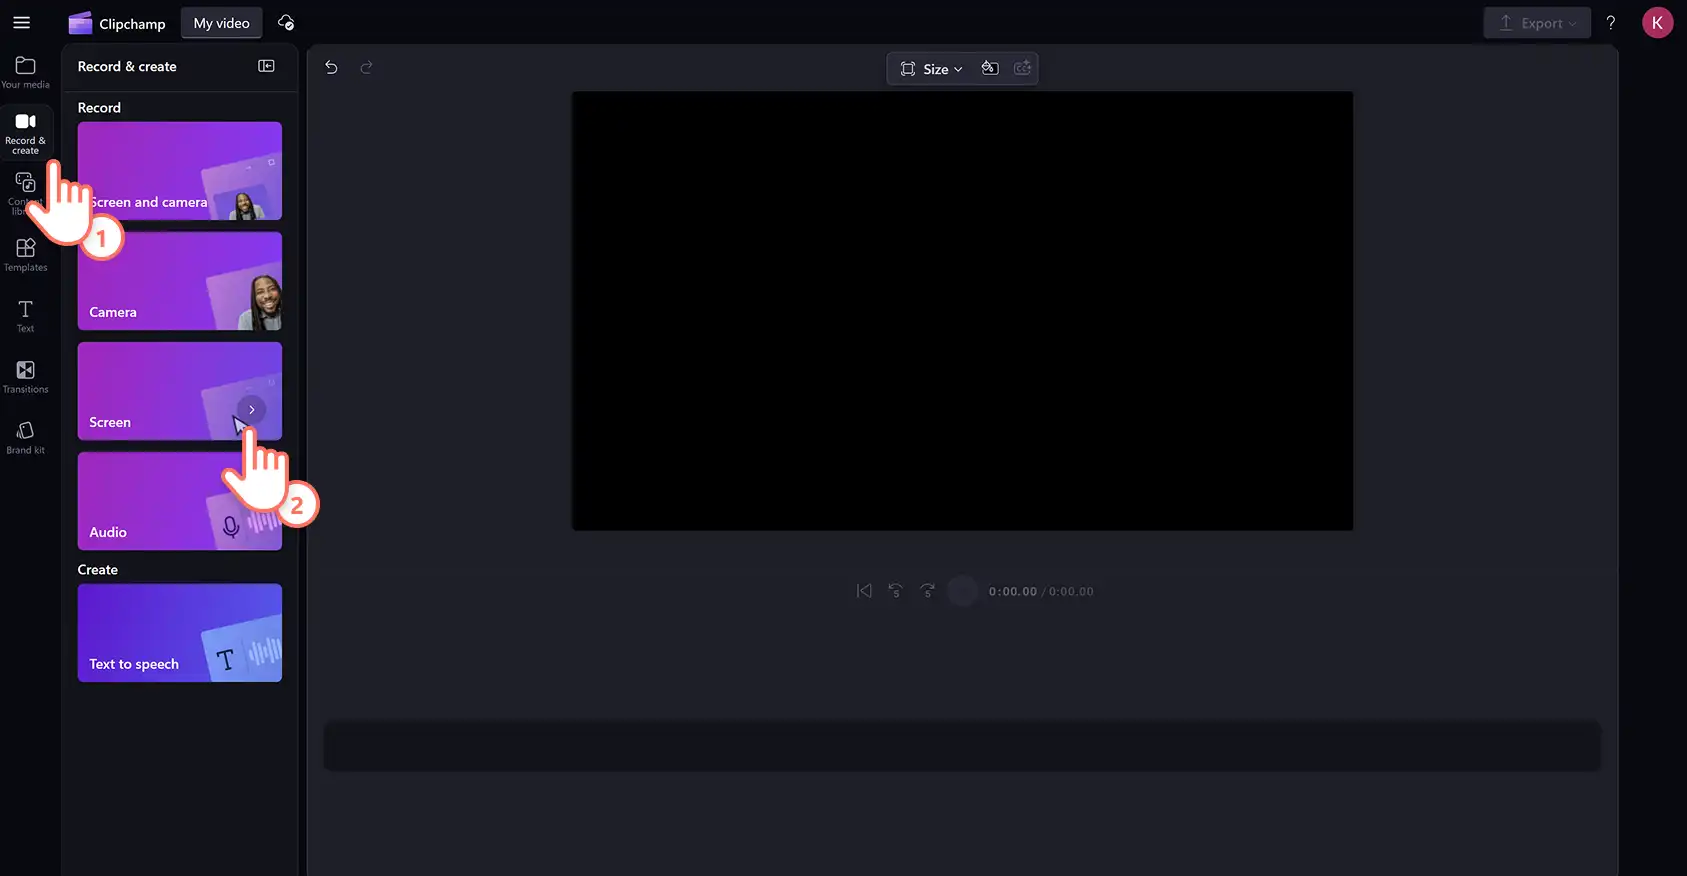
To record with audio, allow Clipchamp access to your microphone. Click allow when ready to proceed.
Step 2. Screen record instructional your video
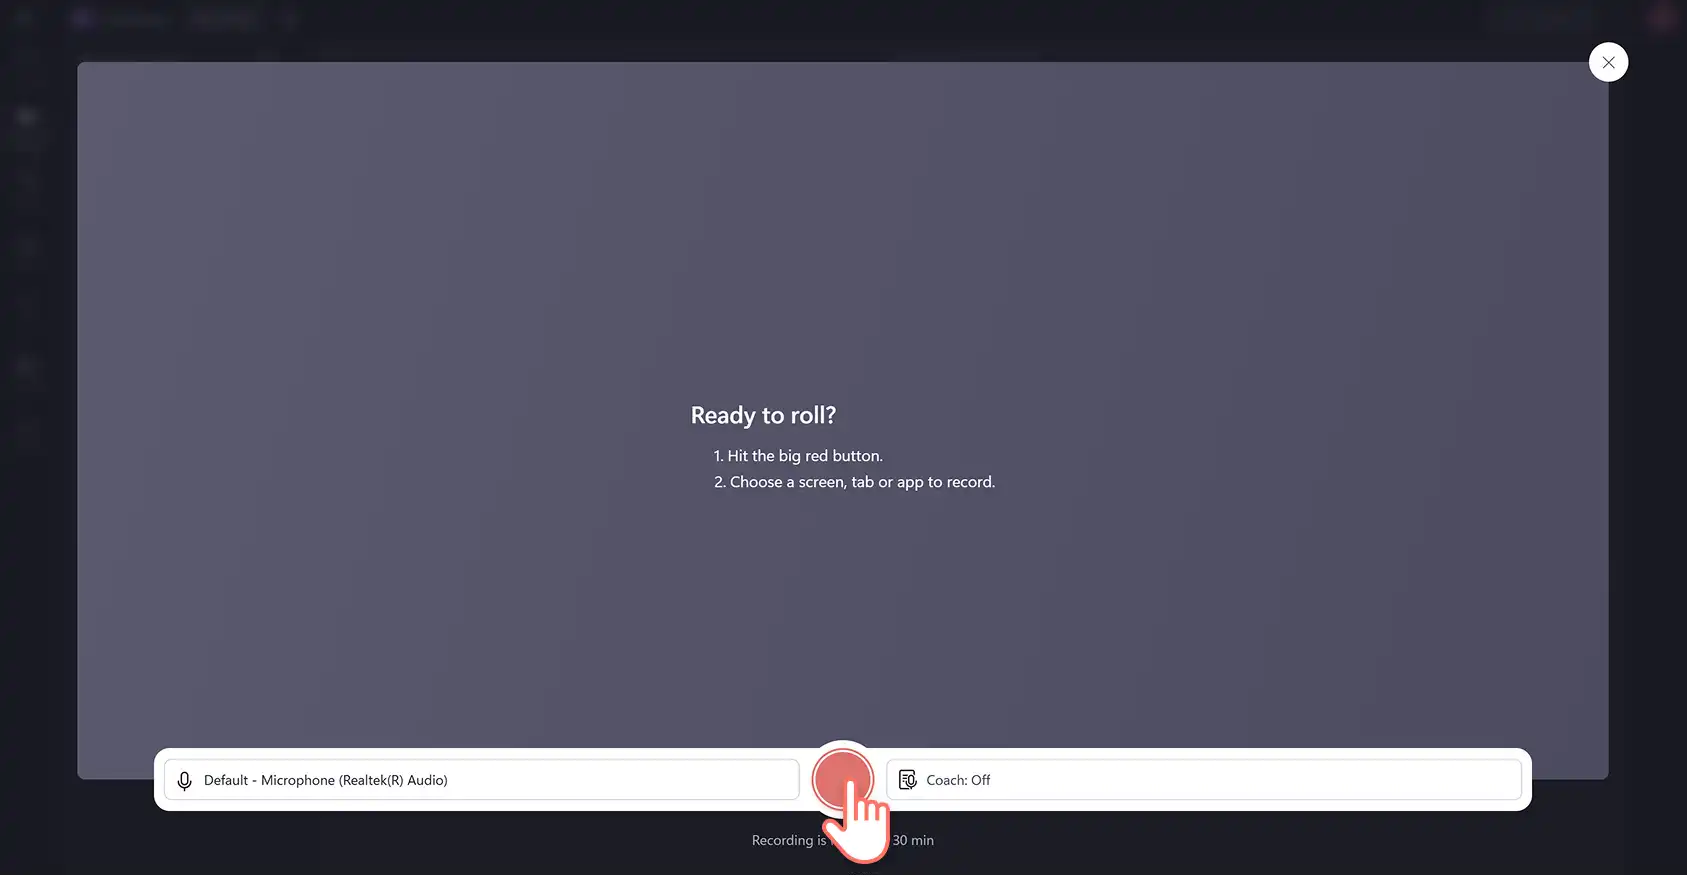
The screen recorder window will appear on your screen. Select your microphone source. Next, click on the big red record button to start recording.

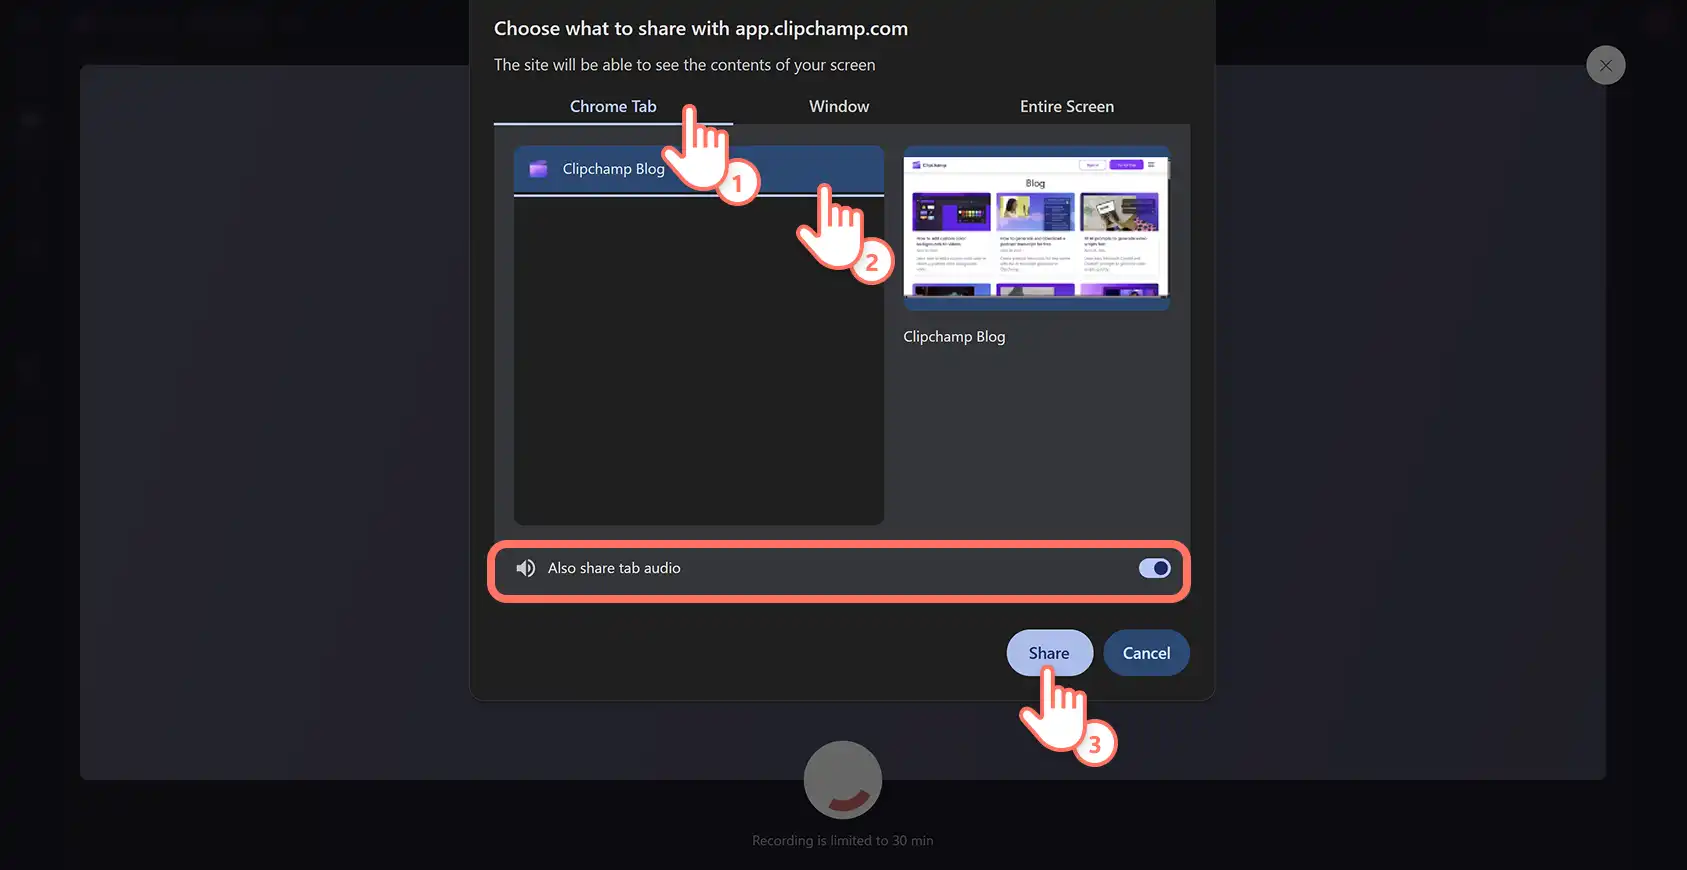
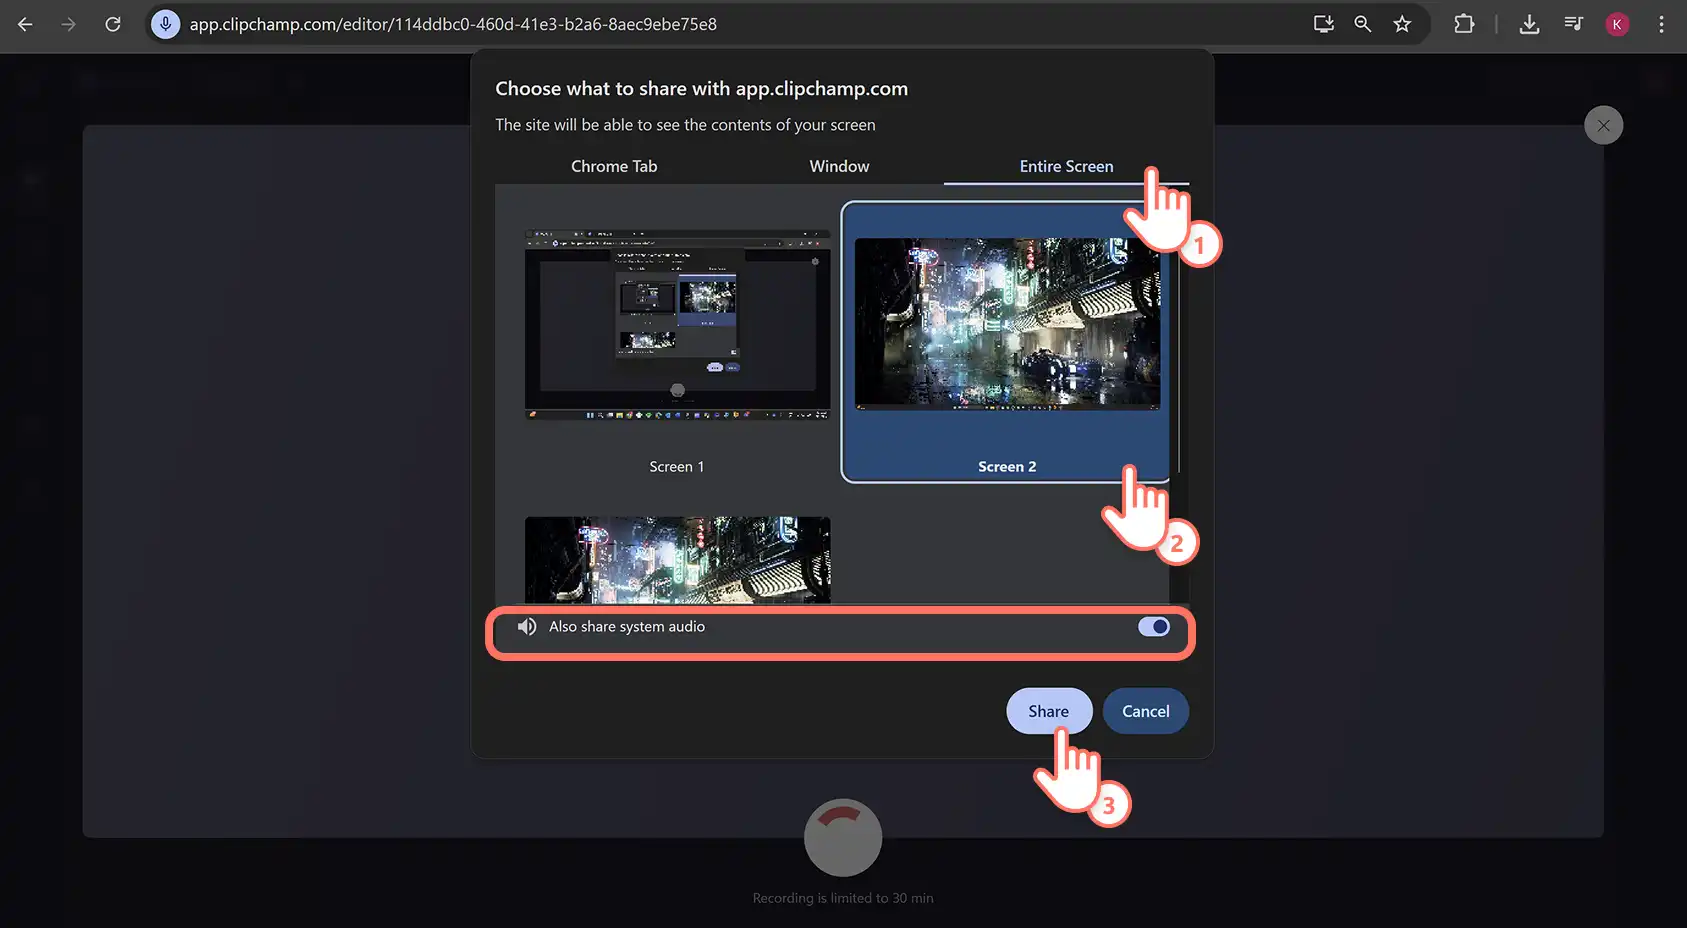
A smaller popup window will appear with screen recording options. Select to record a single browser tab, a window, or your entire screen. If you would like to use audio, select browser tab only. Make sure to turn on the audio sharing toggle to allow audio access. Once selected, click on the share button.
Note: microphone audio recordings are only compatible with the screen recording browser tab. If you would like to record your audio, use the audio and voice recorder feature separately.
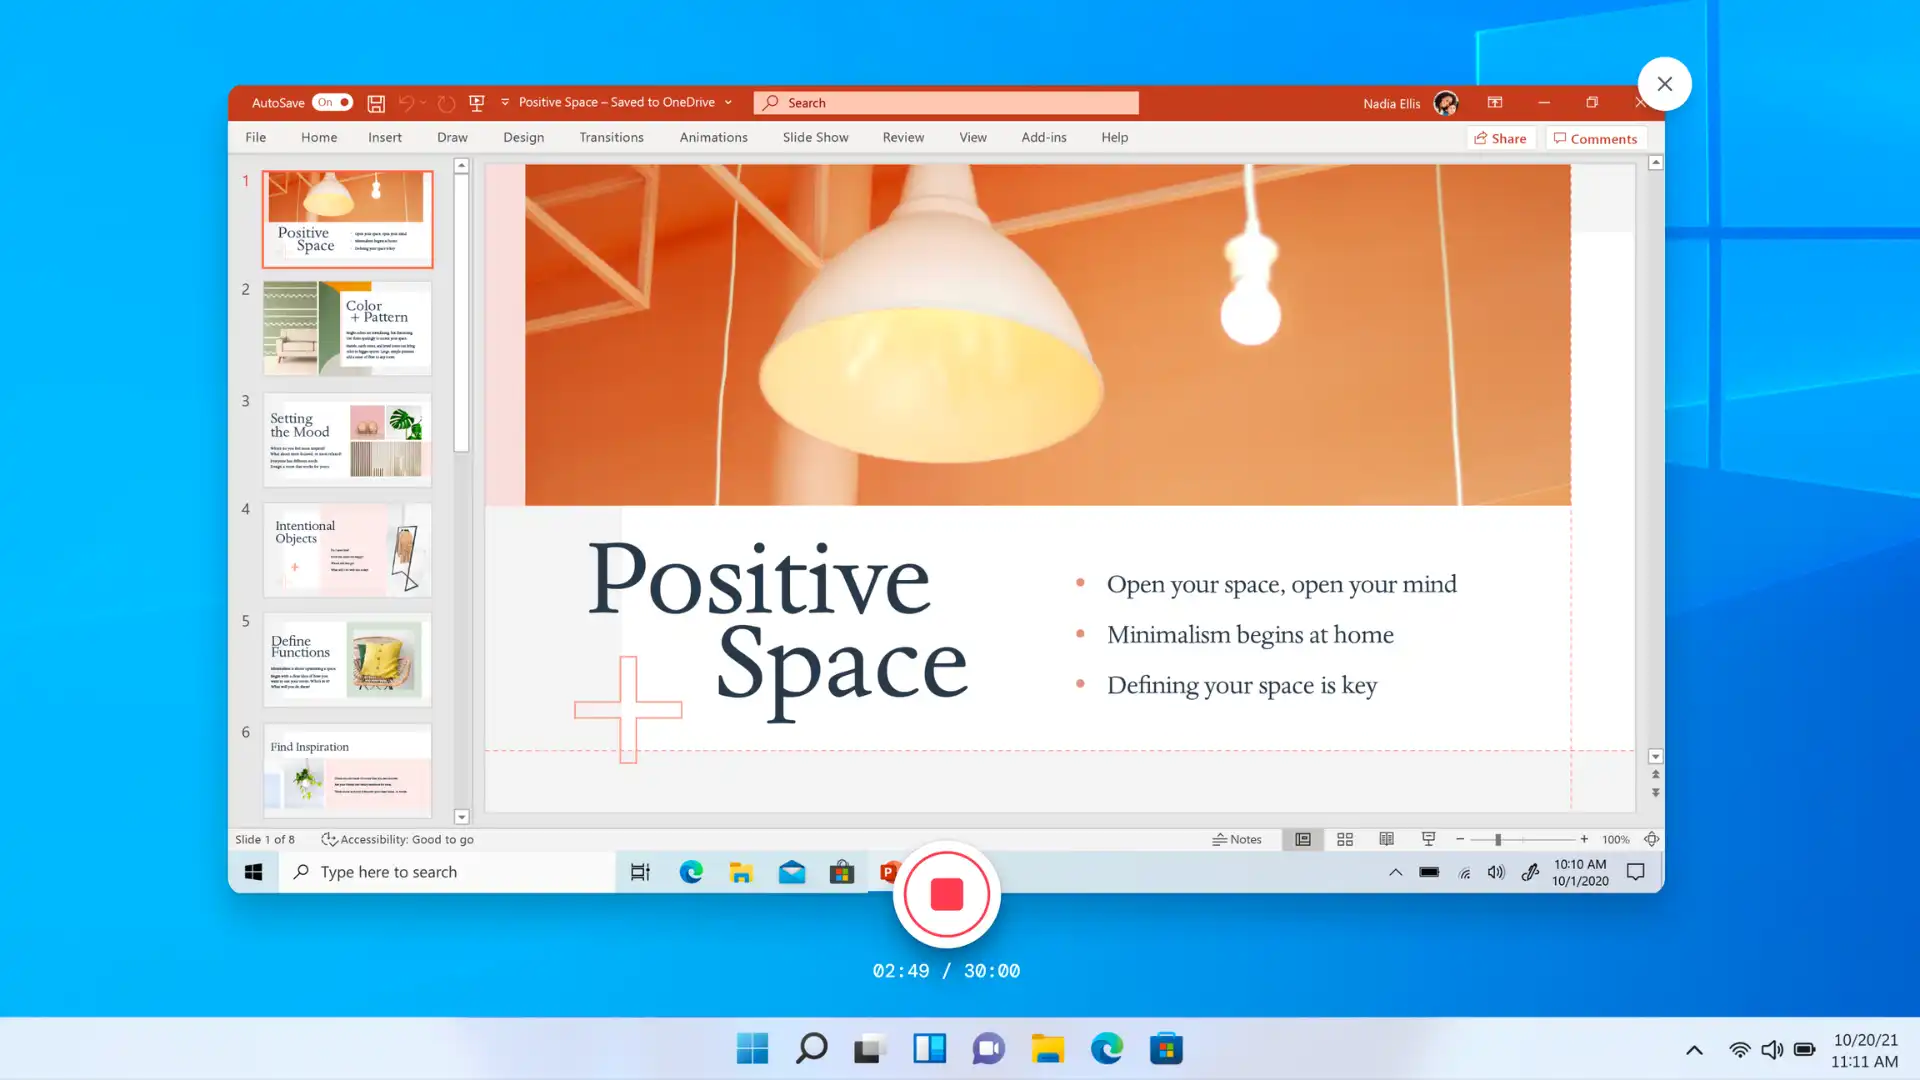
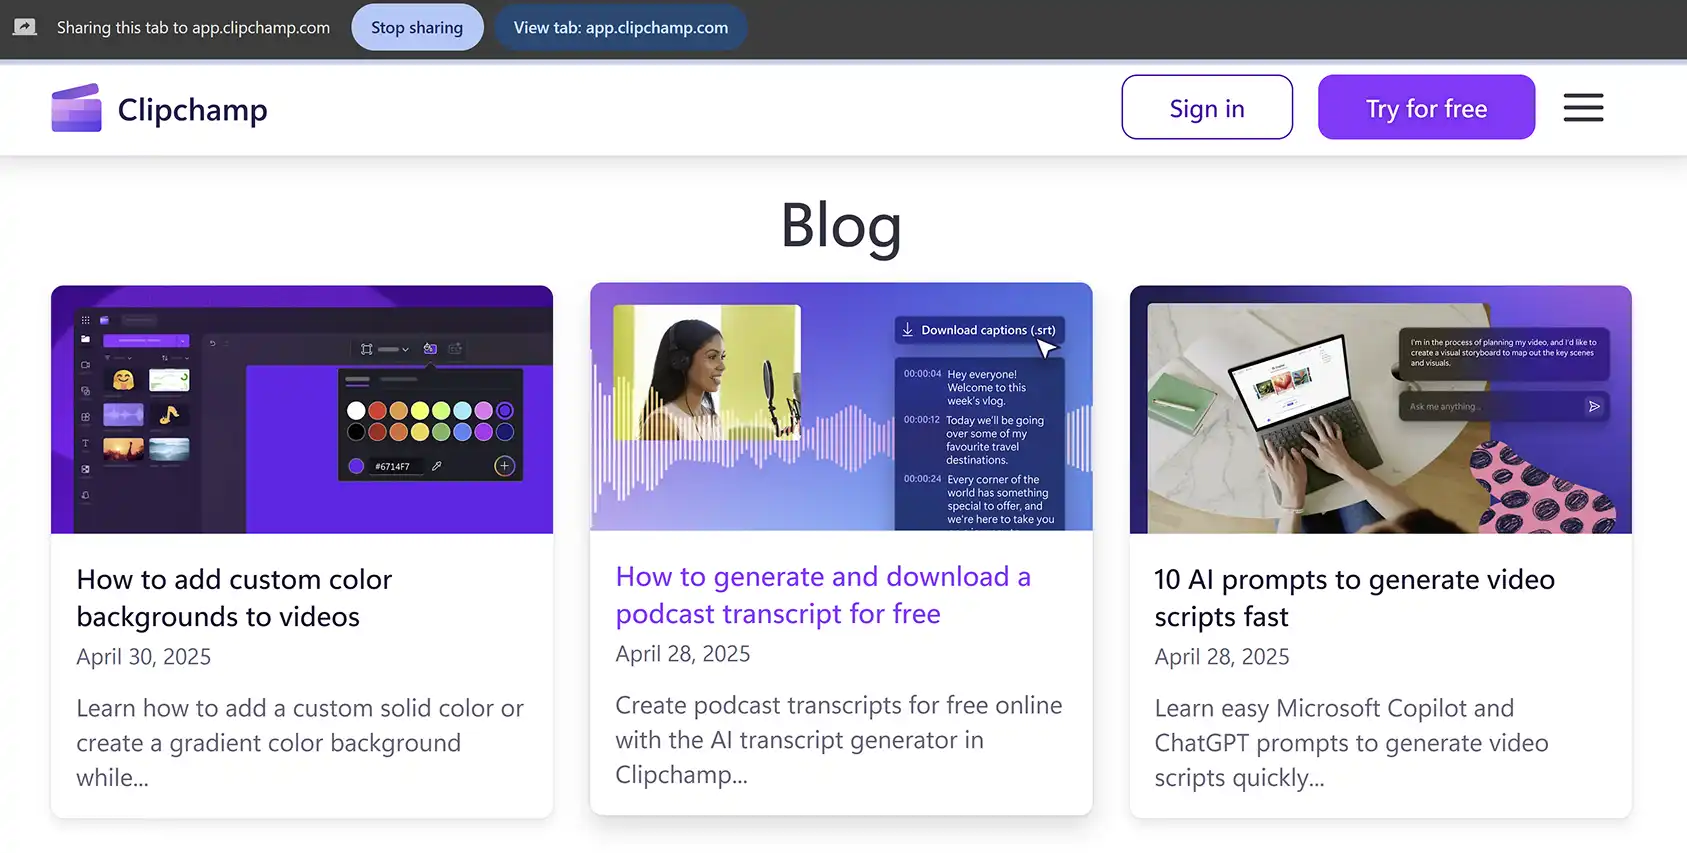
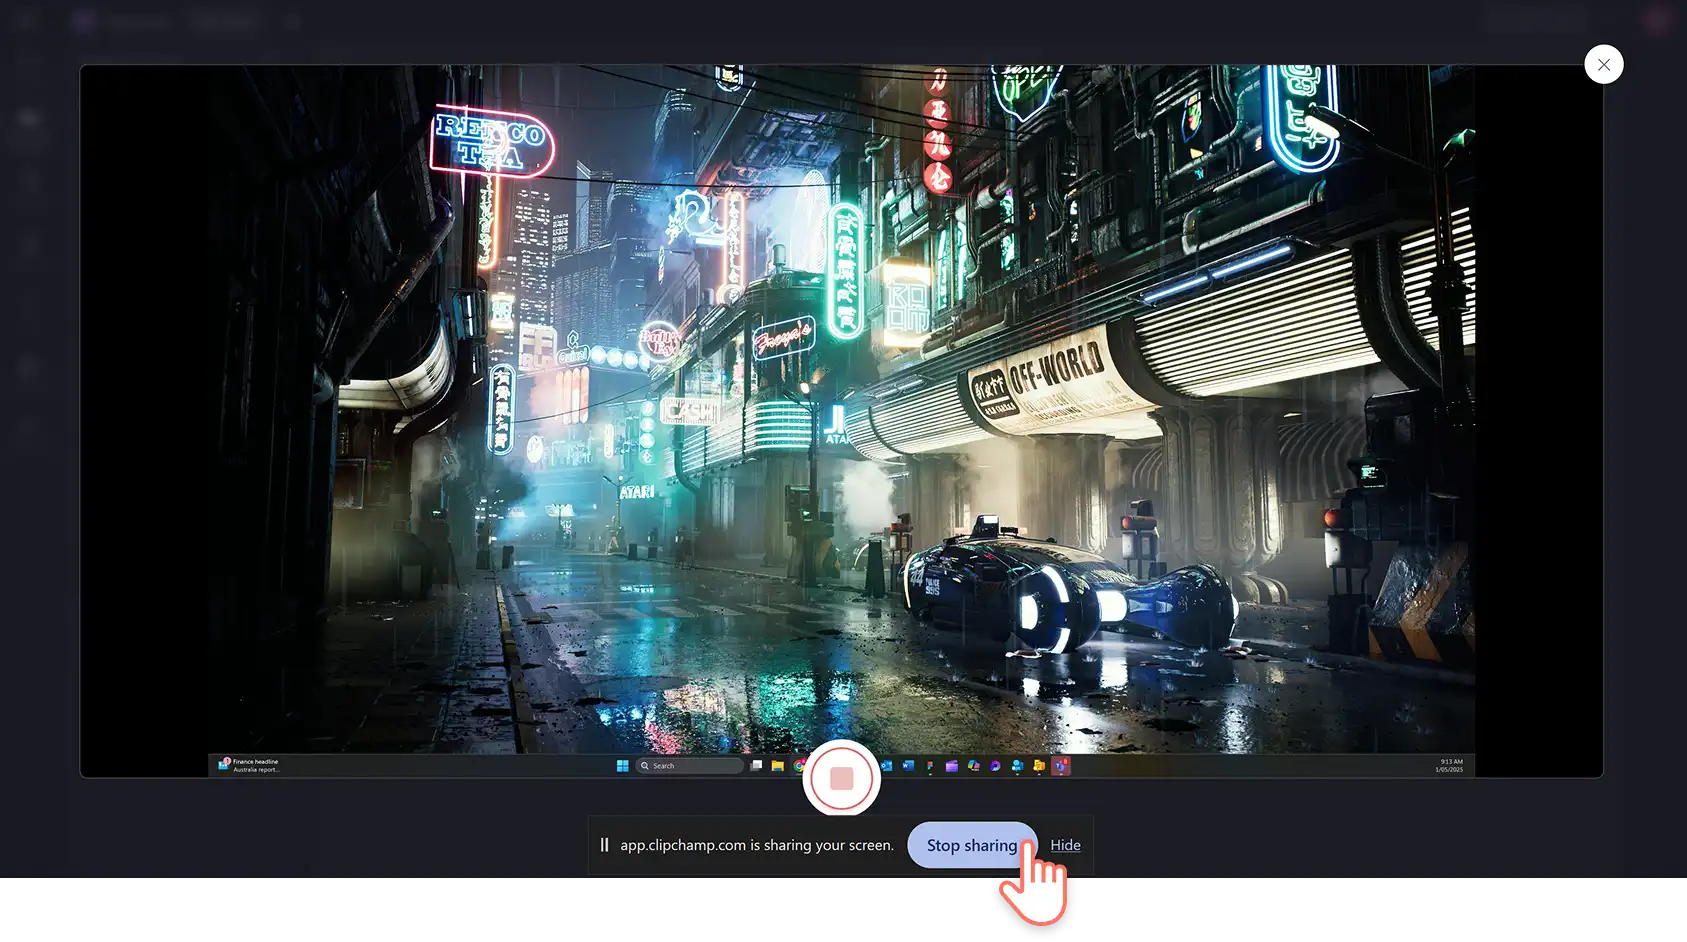
Record your computer screen and audio for up to 30 minutes. If you have selected to record a browser tab, you will automatically be taken to the tab in a full screen preview. You will be able to see the website URL your screen recording is displaying at the top of your screen.
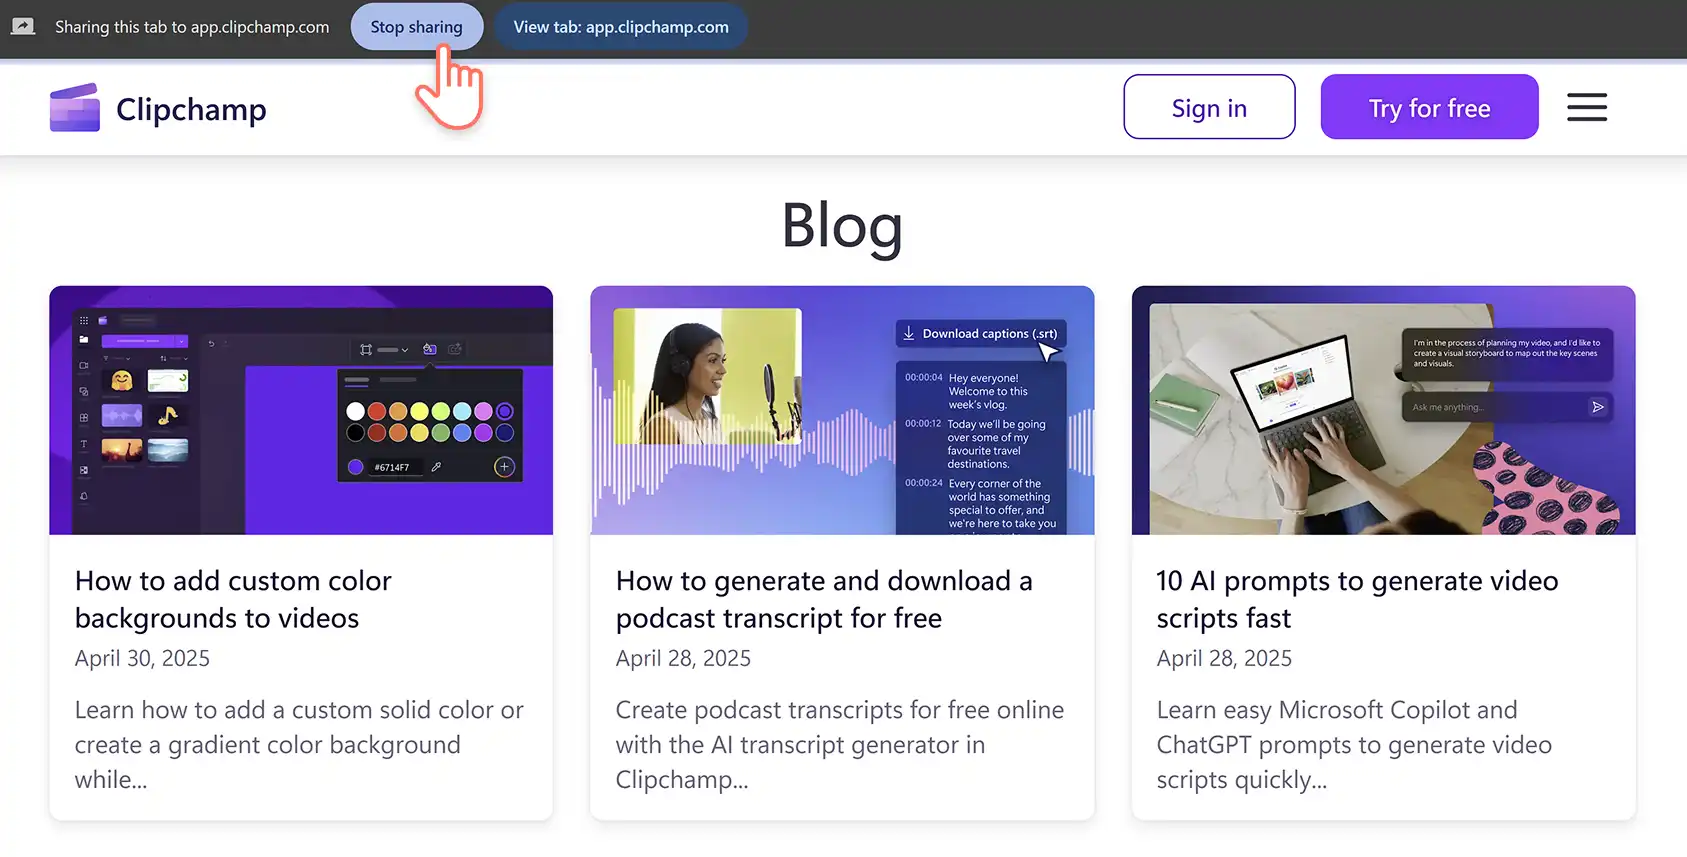
Once you are happy with your screen recording video, click on the stop sharing button.
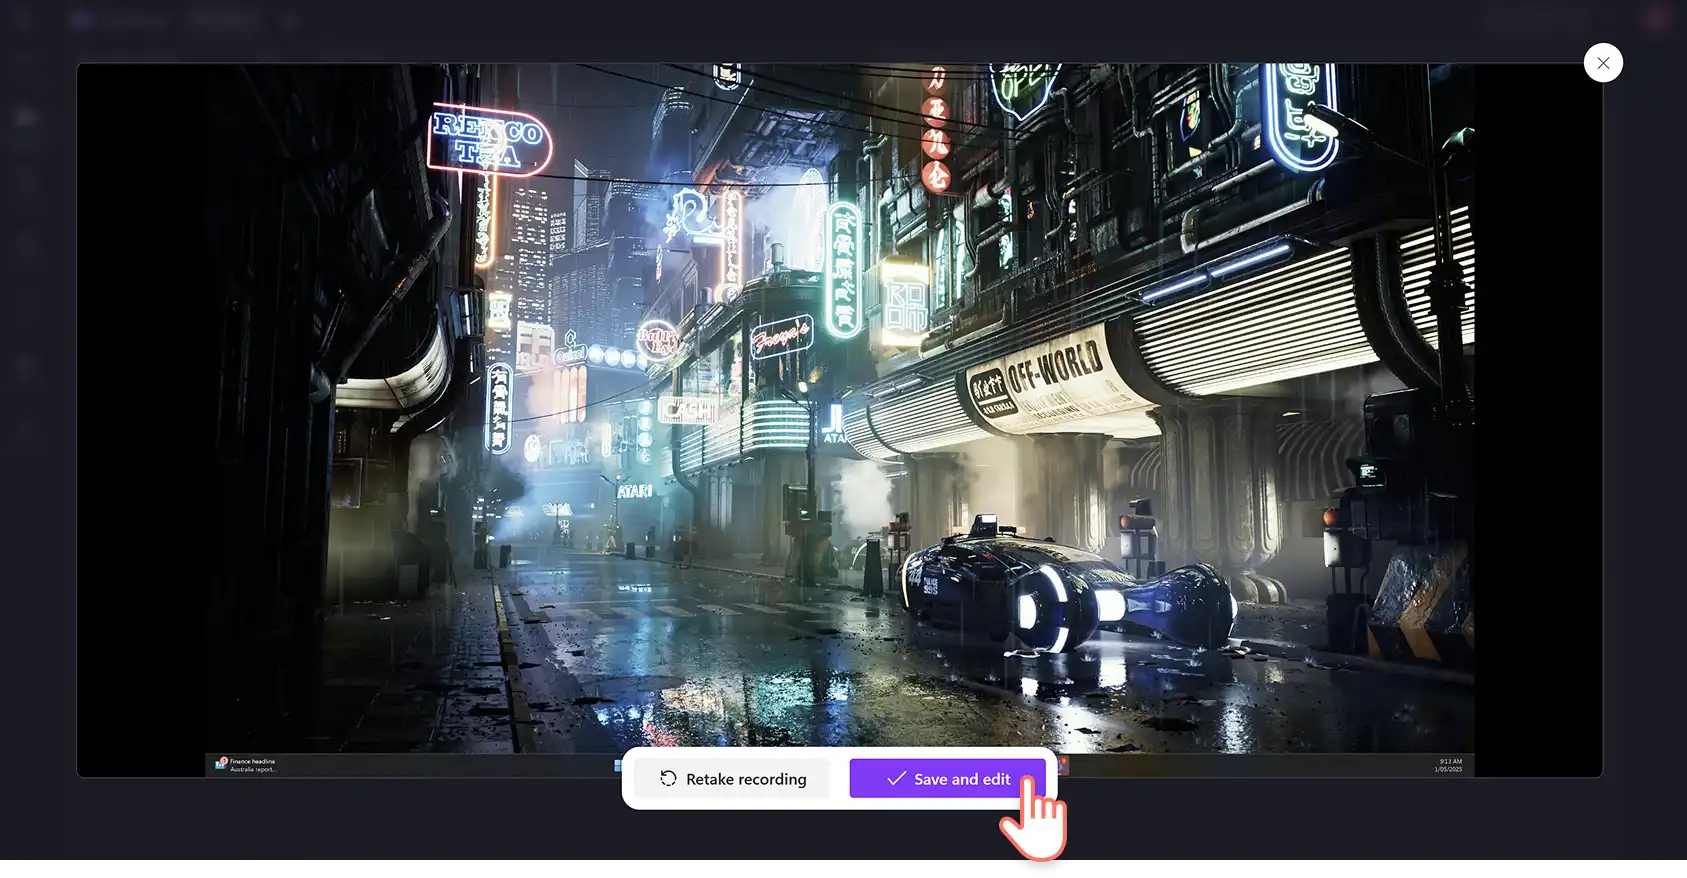
To preview your screen recording with audio, click on the play button. Make sure the audio button isn't on mute so you can hear your audio recording as well. Click on the retake recording button if you would like to redo your video, or click save and edit to return back to the editor.
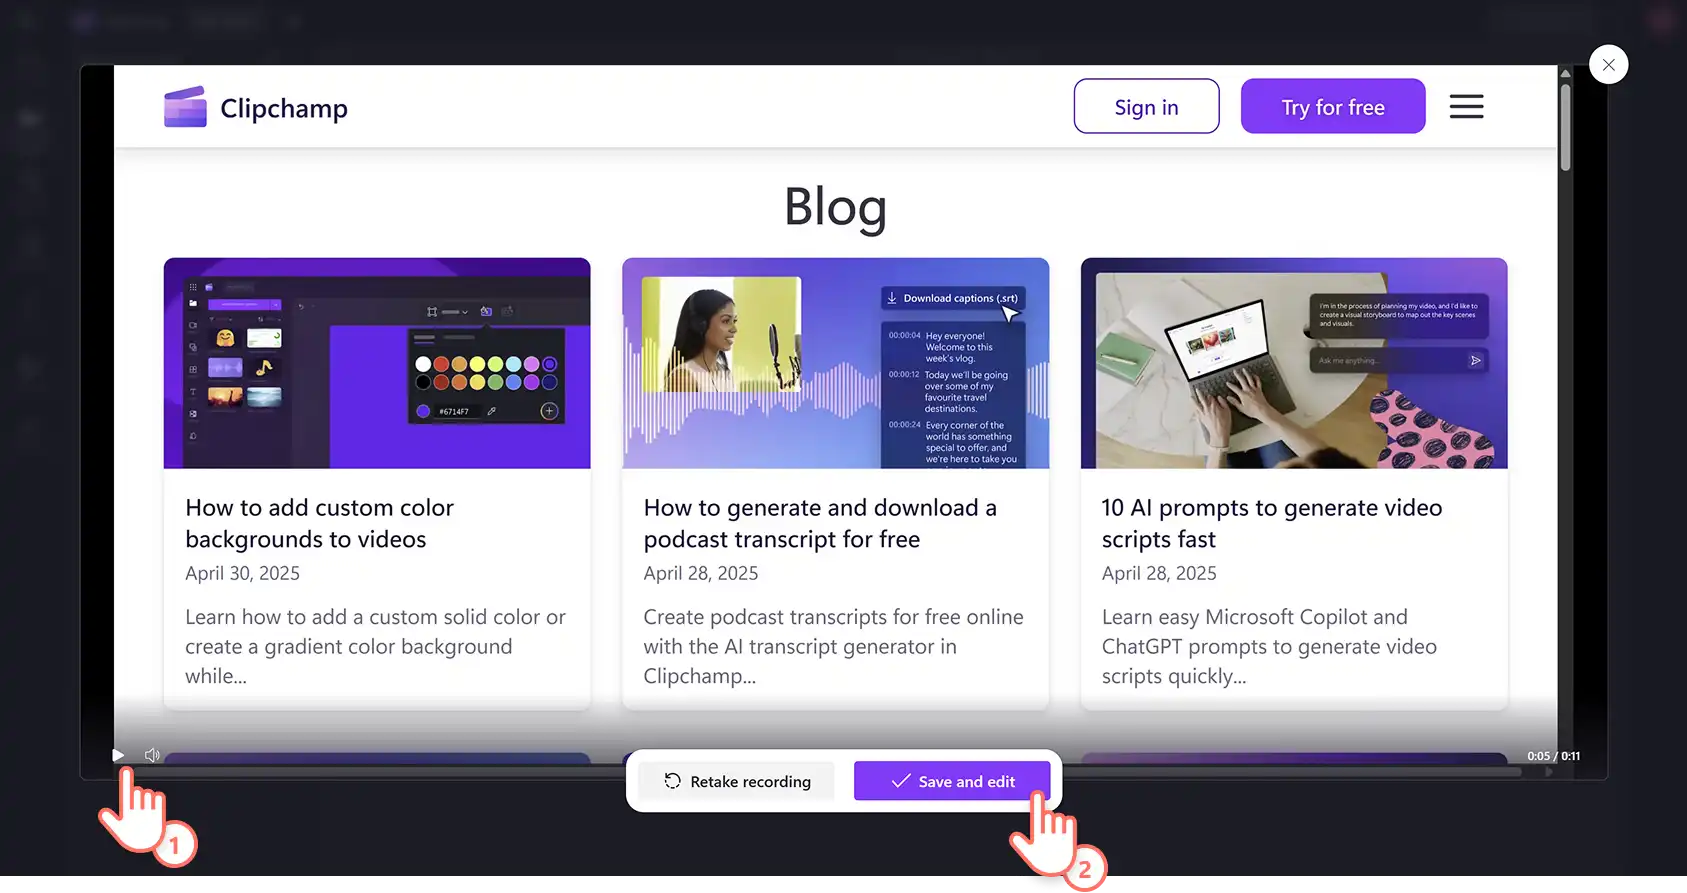
When you return to the editor, you’ll see your screen recording with audio has been added to your timeline and downloaded to your device as an MP4 file automatically. To download your audio file separately, detach the audio from video.
How to screen record on Windows with audio
Click on the record & create tab on the toolbar, then click on the screen button. The screen recorder window will appear on your screen. Next, click on the big red record button to start recording.
A smaller popup window will appear with screen recording options. Select to record a single browser tab, a window, or your entire screen. If you would like to use audio, select browser tab only. Make sure to turn on the audio sharing toggle to allow audio access. Once selected, click on the share button.
Record your computer screen and audio for up to 30 minutes. Once you are happy with your screen recording tutorial, click on the stop sharing button.
To preview your screen recording with audio, click on the play button. Make sure the audio button isn't on mute so you can hear your audio recording as well. Click on the retake recording button if you would like to redo your video, or click save and edit to return back to the editor.
When you return to the editor, you’ll see your screen recording with audio has been added to your timeline and downloaded to your device as an MP4 file automatically. To download your audio file separately, detach the audio from video.
Enhance screen recordings with AI voiceovers
AI voiceovers
If you don’t want to use your own microphone audio, create an AI voiceover instead.
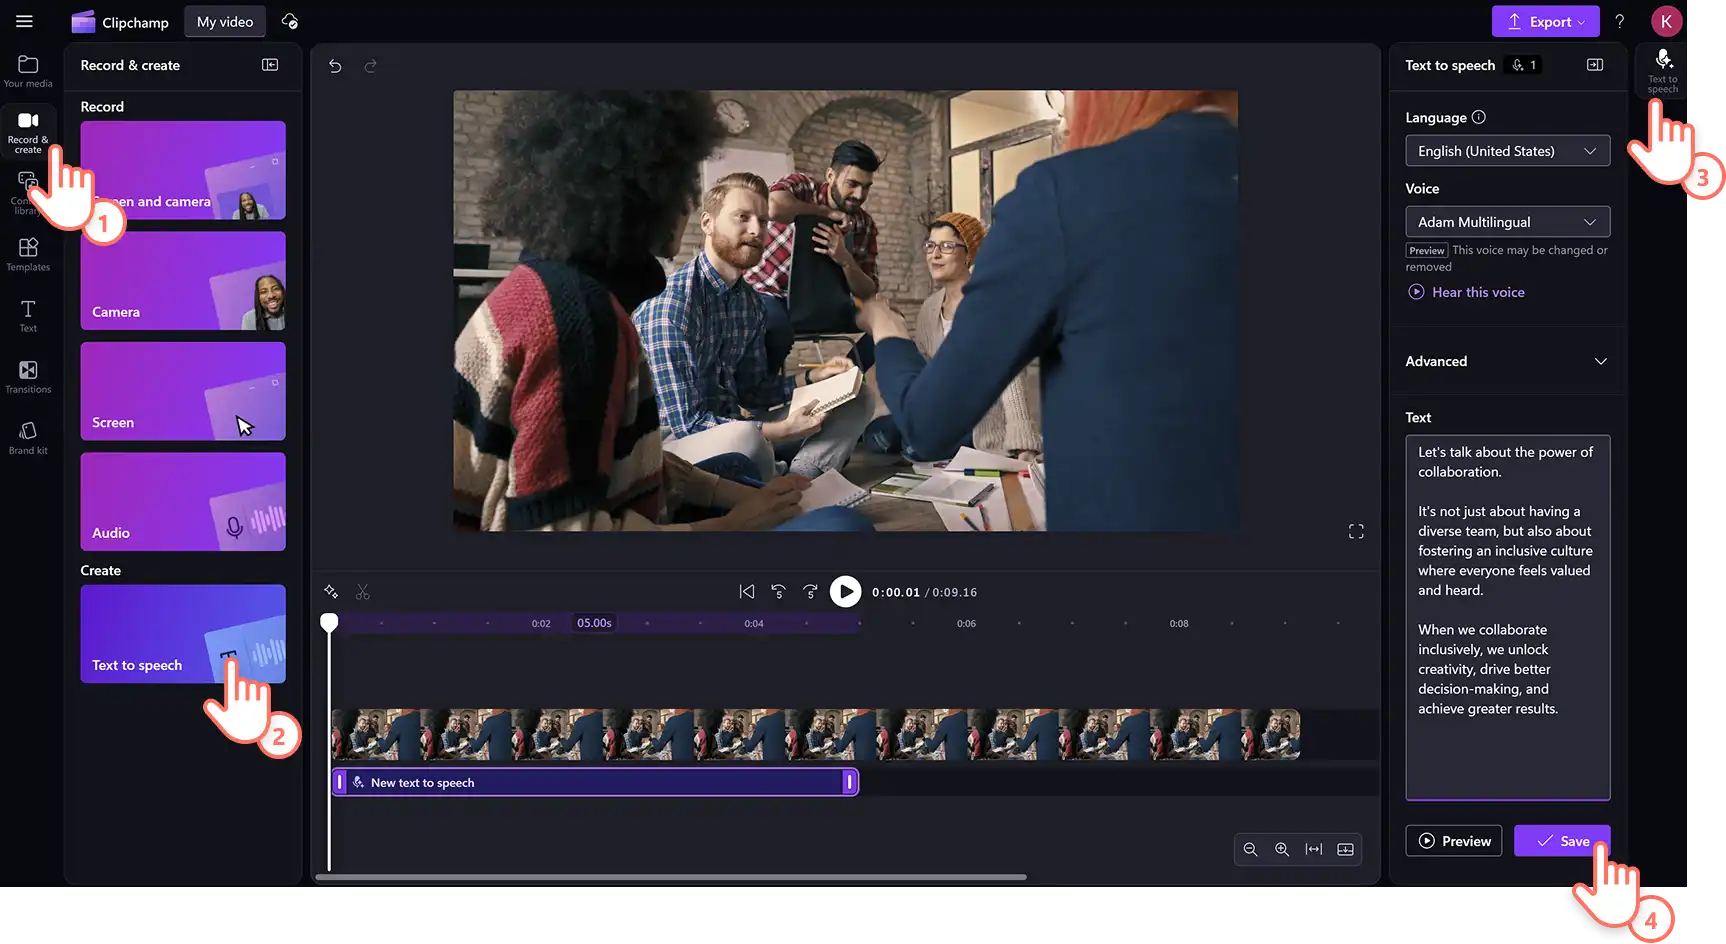
Click on the record & create tab, then click on the text to speech button.
Pick a language, voice, pitch and speed.
Enter your text to generate a voiceover.
Preview and save your AI voiceover.
Voice and audio recording voiceovers
Try the free voice recorder to create unique voiceovers using your own voice and audio.
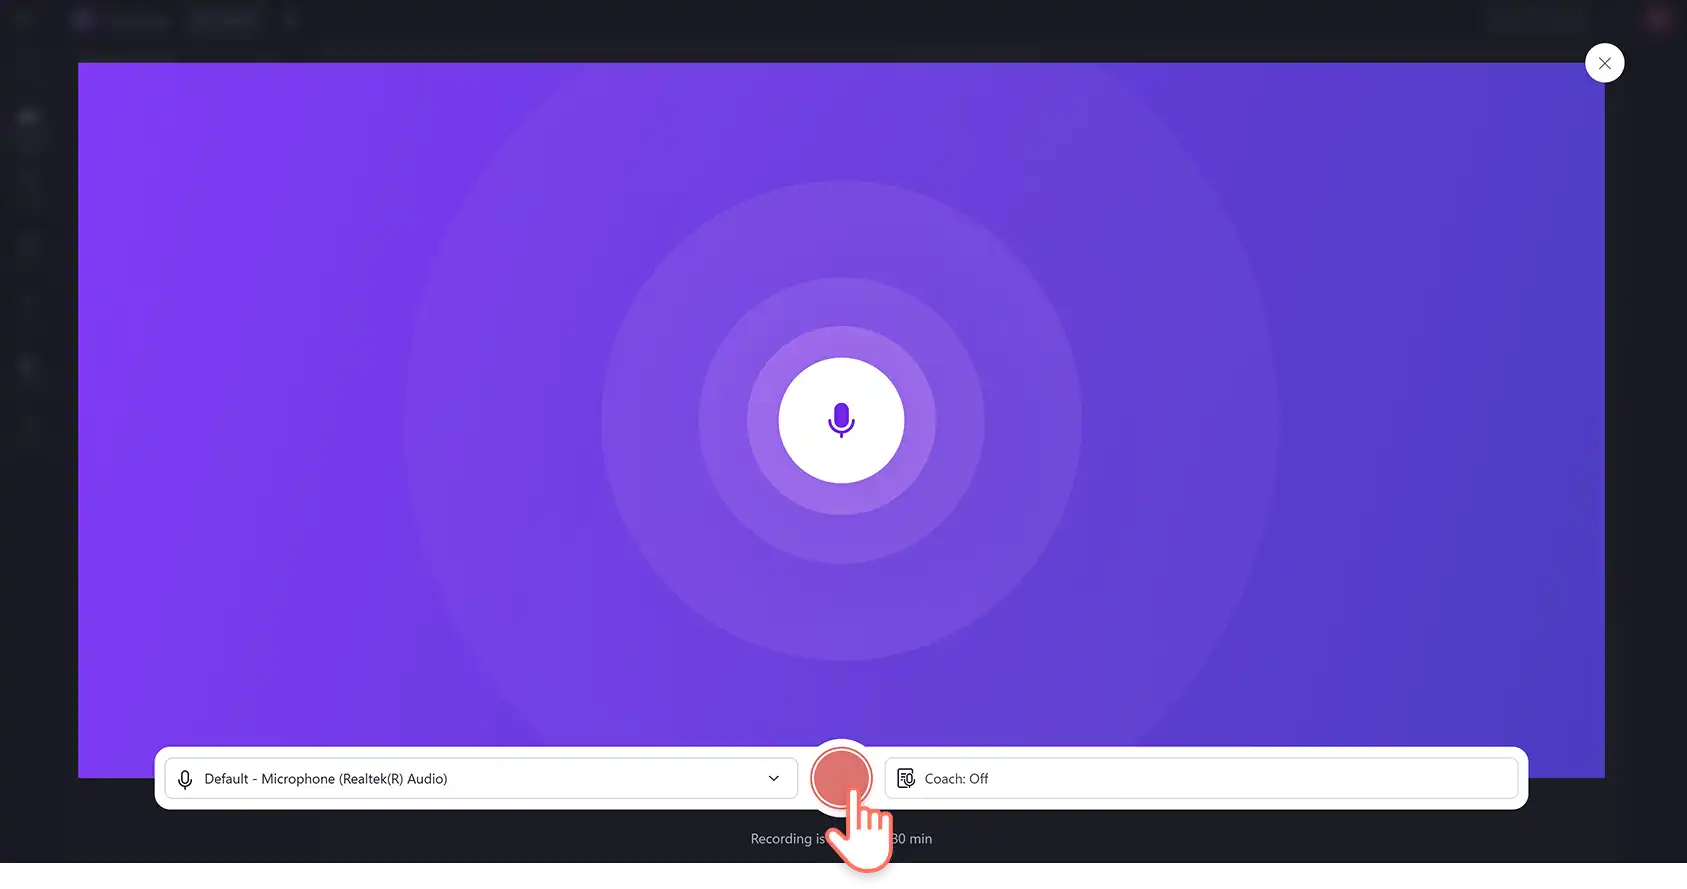
Click on the record & create tab, then click audio and enable mic access.
Click on the red button to start your recording. Record for up to 30 minutes.
Click the red button again to end your voiceover.
Preview and save your voice recording to head back to the editor.
Elevate screen recording videos with background music
Make your screen recordings more professional by adding soft background music. Follow the steps below to learn how.
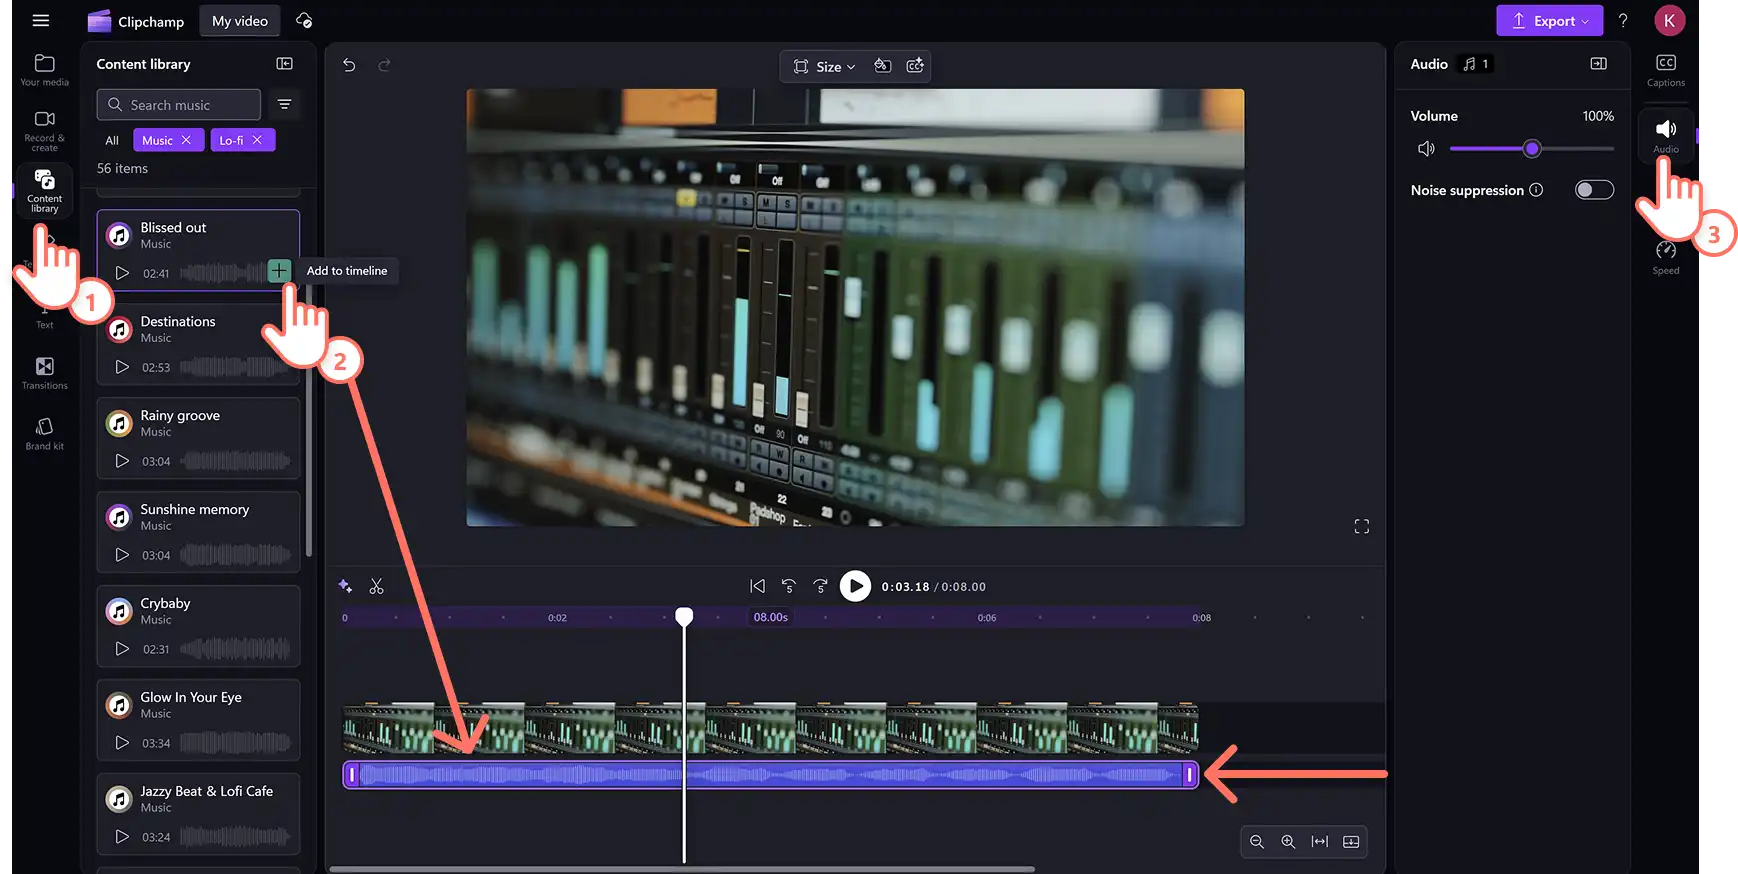
Click on the content library tab then click on the music category.
Browse the royalty-free music library to find the perfect audio.
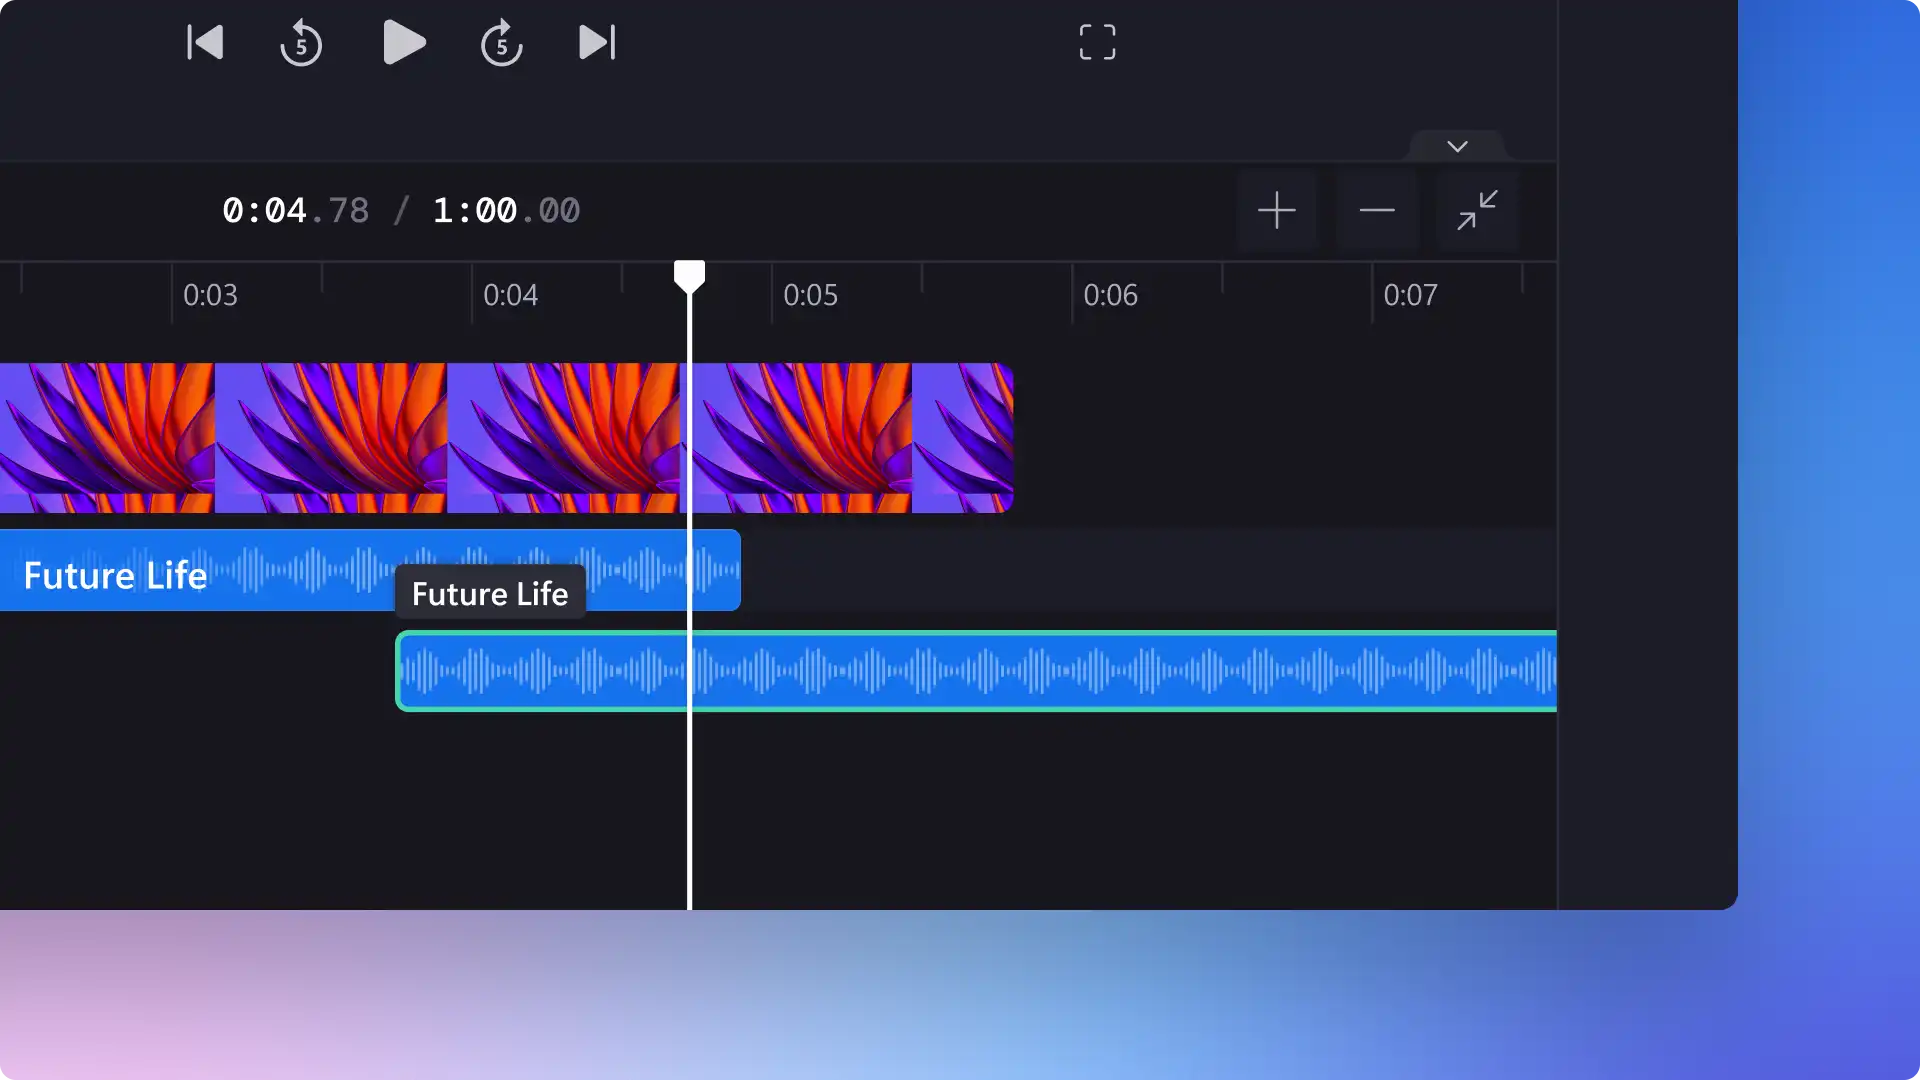
Drag and drop the soundtrack onto the timeline below your screen recording media.
Click on the audio file on the timeline, then click on the audio button on the property panel.
Turn down the volume so your original screen recording audio can be heard.
How to remove audio from screen record videos
Follow the steps below to easily remove the existing audio from your screen recording. Removing audio or muting sound is ideal for adding background music or new voiceovers.
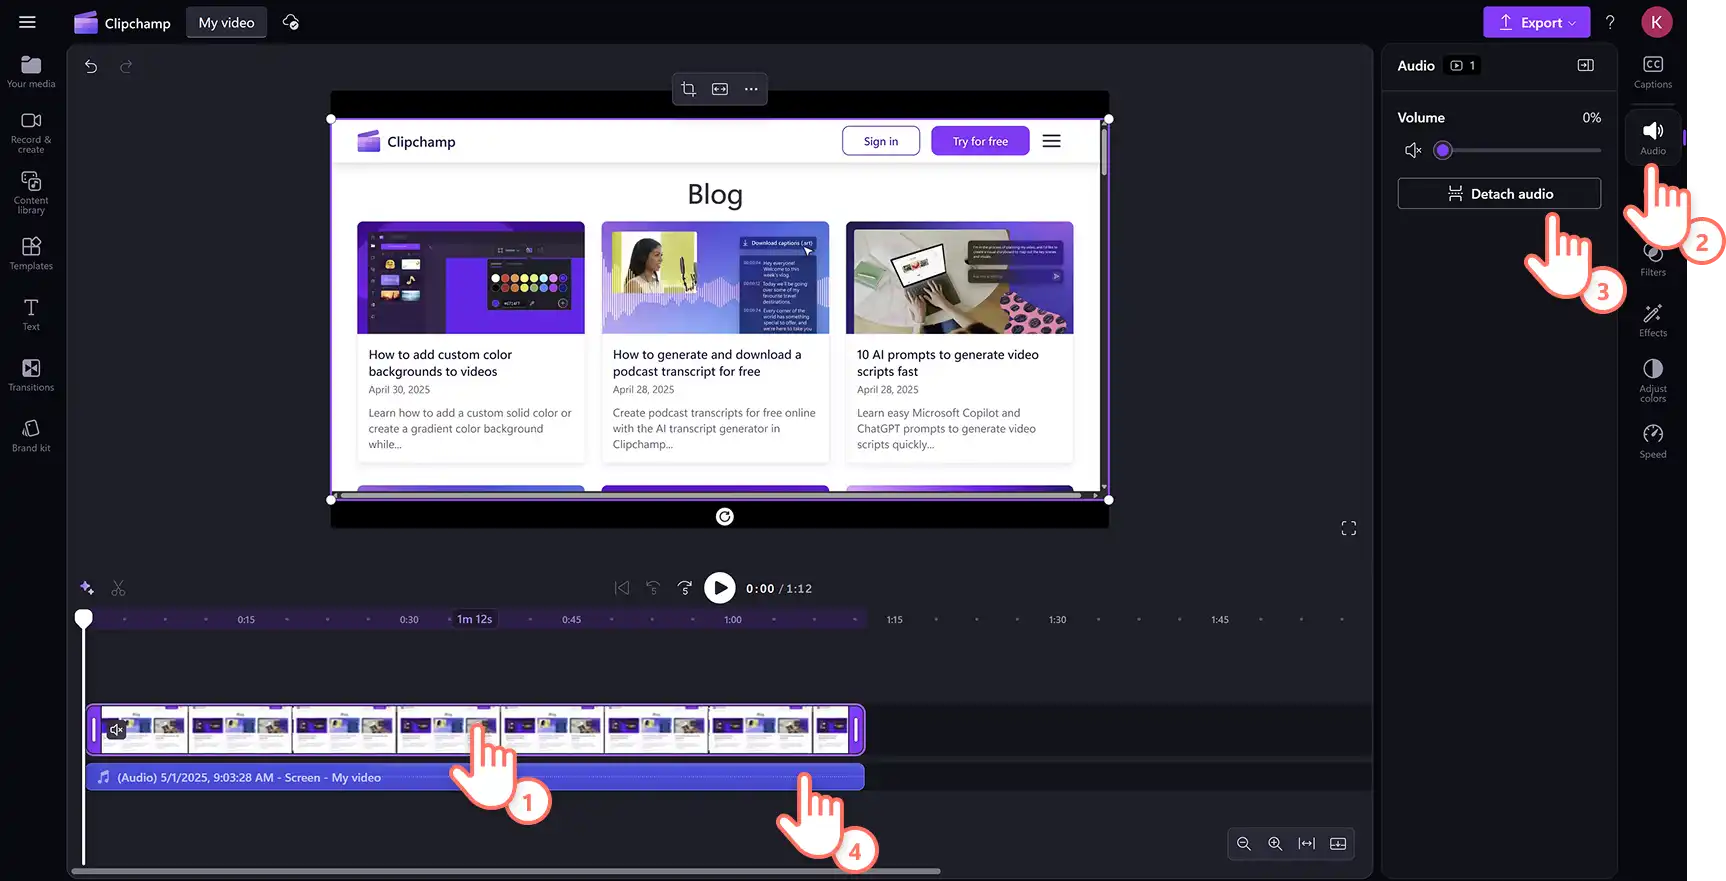
Click on your screen recording on the timeline.
Click on the audio tab on the property then click on the detach button. Your audio will now be separated from your screen recording asset and appear as a new asset on the timeline.
If you would like to delete the audio file on the timeline, right-click on the audio file and click on the delete option (trash can icon) or press the delete key on your keyboard.
For more help separating audio and video, check out the blog.
Frequently asked questions
Is there a time limit on screen recordings?
There is currently a 30-minute time limit on all screen recordings with audio. If you need to record longer, you can always create multiple recordings and edit them together.
How do I record my screen on Windows 11 with sound?
You can screen record with audio on Windows 11 using Clipchamp. The free screen and webcam recorder allows you to record your screen while recording a webcam video and audio as well. When you’ve finished, your screen and camera recording will appear in your media library as two separate media files.
Can I record my screen and use my webcam at the same time?
The screen and webcam recorder in Clipchamp video editor allows you to record your screen while recording a webcam video. When complete, your screen and camera recording will appear in your media library as two separate media files.
Why does my screen recording not have sound?
Test your device’s microphone or external microphone before you start your screen recording. Make sure you grant permission for Clipchamp to access your microphone of choice too. Remember to turn the volume up on your device for video playback.
Find more ways to record videos with the camera recorder, or take a look at how to create gaming reaction videos.
Start editing today with Clipchamp or download the Microsoft Clipchamp Windows app for free.
Heads up! The screenshots in this article are from Clipchamp for personal accounts. The same principles apply to Clipchamp for work and school accounts.