На цій сторінці
- Що таке відео з реакціями?
- Найпопулярніші жанри відео з реакціями
- Вибір формату відео з реакціями
- Характеристики відео з реакціями для YouTube
- Створення відео з реакціями
- Створення відео з реакціями для YouTube Shorts
- Додавання спецефектів до відео з реакціями
- Найкращі канали з відео з реакціями для натхнення
- Повторне використання та публікування відео з реакціями
- Правила щодо авторських прав і уникнення порушень
- Дивитися, як редагувати відео реакції підручник
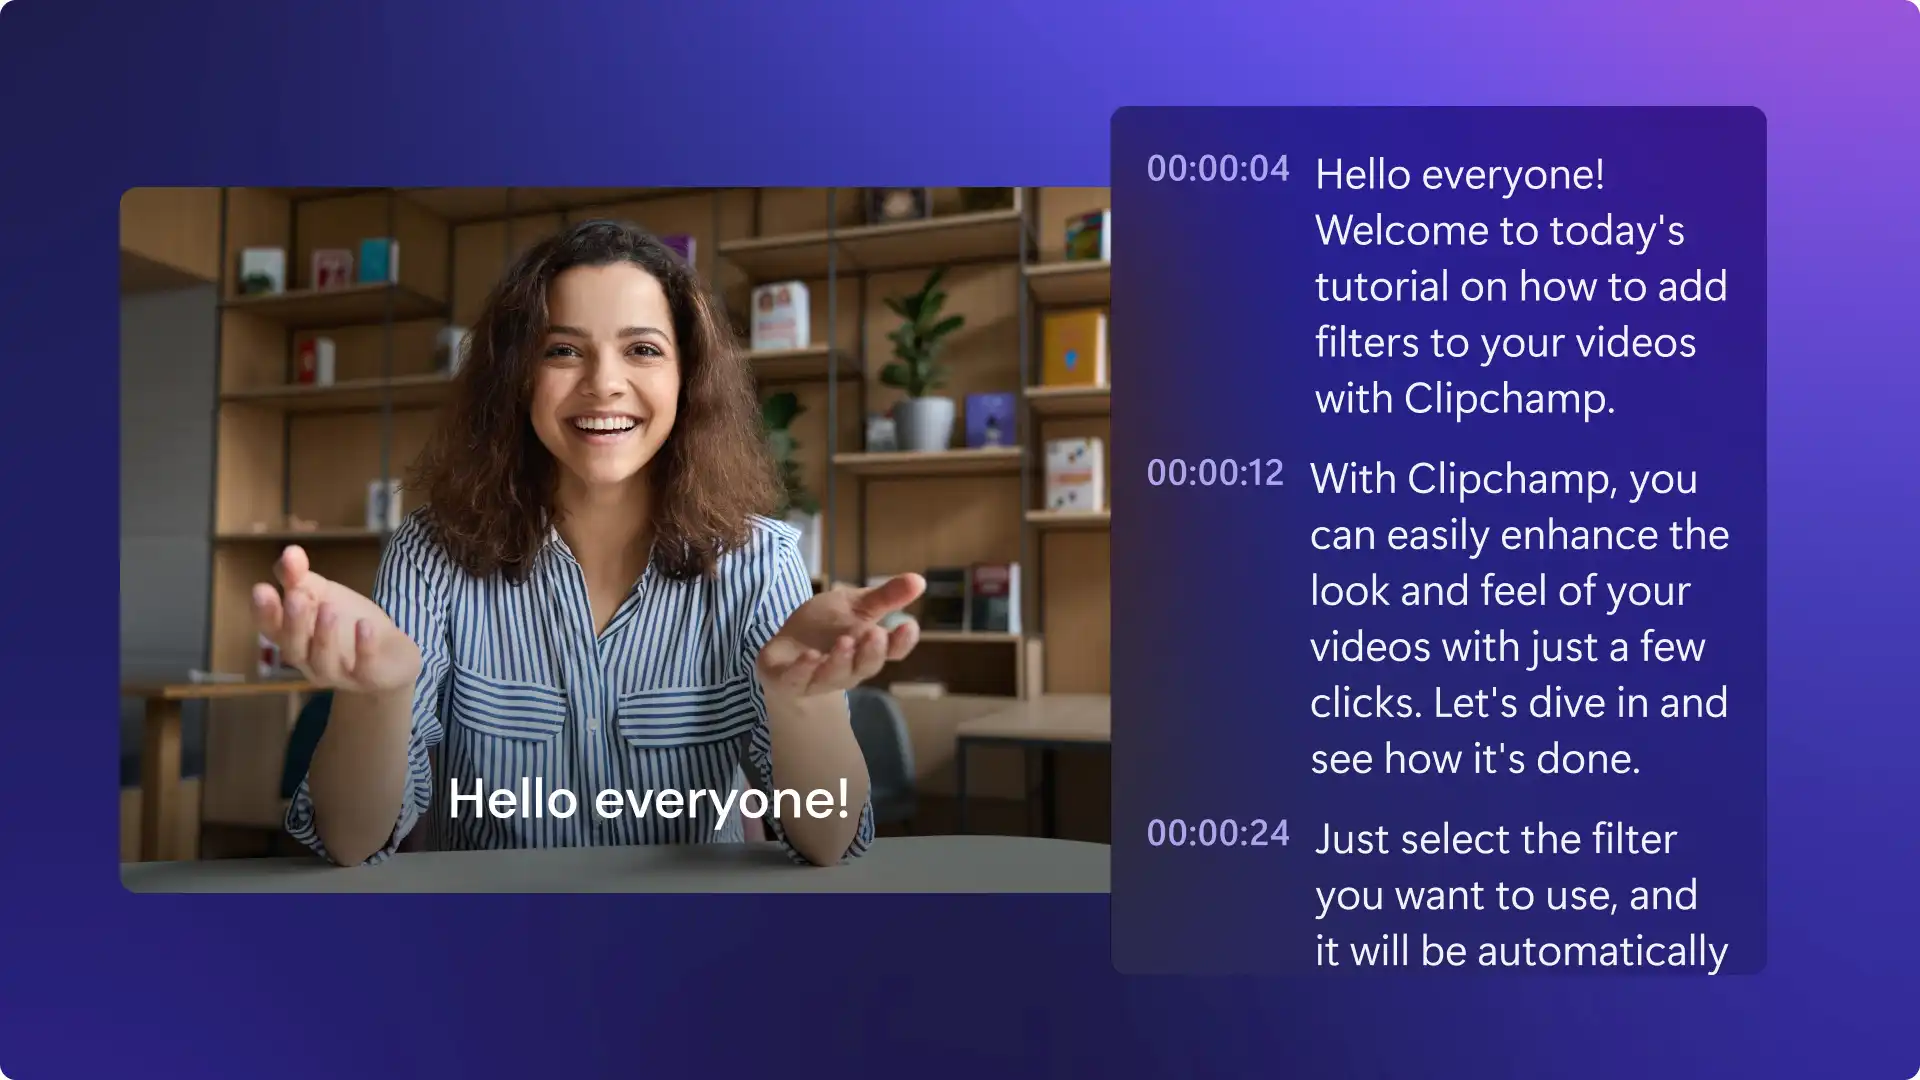
Ви колись голосно сміялися над добіркою мемів, кричали від несподіваного повороту подій у фільмі або раділи приголомшливому моменту в грі й хотіли побачити реакції інших людей? Саме тому відео з реакціями заполонили YouTube, TikTok та інші платформи.
Завдяки онлайновому відеоредактору створювати такі відео – чи то вираження надмірних емоцій, чи глибокий аналіз – дуже легко. Дізнайтеся, як записувати екран і камеру, щоб створювати цікаві відео з реакціями, за допомогою відеоредактора Clipchamp.
Що таке відео з реакціями?
Відео з реакціями – це тип вмісту, де автори записують свої реакції в реальному часі на різний медіавміст, наприклад музичні відео, сцени з фільмів, меми або дивні популярні кліпи, які змушують задуматися про те, що не так із людством. Відео з реакціями стають успішними, якщо викликають асоціативні зв’язки: люди люблять спостерігати, як інші сміються, соромляться або повністю втрачають самовладання під час перегляду вмісту, який їм подобається (або відверто не подобається). Створювати відео з реакціями легко. Просто запишіть реакцію за допомогою онлайнового засобу записування веб-камери та додайте її як накладання або поруч з оригінальним відео.
Найпопулярніші жанри відео з реакціями
Відео з реакціями бувають різних форм і розмірів, але деякі жанри постійно привертають увагу та набирають мільйони переглядів. Вибір правильної ніші допоможе залучити потрібну аудиторію та змусити її повертатися знову й знову. Нижче наведено кілька найпопулярніших типів відео з реакціями.
Реакції на популярні меми та тренди в Інтернеті
Події в Інтернеті розвиваються стрімко, і відео з реакціями допомагають авторам швидко приєднуватися до трендів. Реагуючи на популярні виклики в TikTok, смішні меми або інтернет-драми, ви можете підтримувати свіжість і актуальність вмісту.
Реакції на музичні відео
Дивитися, як хтось уперше реагує на хітову пісню або музичне відео, завжди цікаво. Відео з реакціями на музику мають величезну популярність. Це може бути аналіз текстів пісень, оцінка вокальних технік або просто рухи в ритм із музикою. Такий тип відео зокрема актуальний серед пристрасних груп шанувальників, наприклад K-pop, репу та класичного року.
Реакції на сцени з фільмів і серіалів
Від шокуючих поворотів сюжету до емоційних кінцівок – реакції на фільми та серіали дають змогу підтримувати зацікавленість глядачів. Людям подобається спостерігати, як інші вперше переживають зради в кіно, сцени після титрів або страшні моменти у фільмах жахів.
Реакції на ігри
Реакції на ігри можуть бути різні: від живих реакцій на анонси нових ігор до перших відео з ігровим процесом культових ігор. Багато авторів також демонструють реакції на гнівні виходи з гри, швидкі проходження або шокуючі моменти в іграх.
Реакції на комедійні відео та скетчі
Деякі канали, як публікують відео з реакціями, спеціалізуються на стендап-комедіях, пародіях або кумедних невдачах. Такі відео набирають популярності завдяки перебільшеним емоціям і дотепним коментарям.
Вибір формату відео з реакціями
Перш ніж створювати власні відео з реакціями, важливо вибрати правильний формат. Відео з реакціями бувають різних стилів, і ваш вибір залежатиме від платформи, типу вмісту та часу, доступного на редагування.
Реакції у форматі довгих відео для YouTube або коротких роликів для Shorts і TikTok
Не всі відео з реакціями однакові – деякі краще підходять для довгого формату на YouTube, тоді як інші набирають популярності в коротких форматах, таких як YouTube Shorts, TikTok або Instagram Reels.
Довгі відео з реакціями на YouTube (від 8 хвилин) дають змогу проводити глибокий аналіз, коментувати вміст і розповідати історії. Цей формат ідеально підходить для реакцій на серіали, музичні відео та ігри, або якщо вам просто подобається чути свій голос.
Реакцій короткої форми (TikTok, YouTube Shorts, X video) швидкі, швидкі та покладаються на високоенергетичні вирази та швидкі скорочення. Він чудово підходить для реакцій на меми, популярні тренди або незграбні невдачі, які не потребують детального аналізу.
Реакції в прямих трансляціях (на Twitch або YouTube Live) дають авторам змогу реагувати в реальному часі на анонси ігор, церемонії нагородження або екстрені новини. Вони дуже інтерактивні, адже ніщо не зрівняється зі щирим вигуком "О Боже!".
Індивідуальні або групові реакції
Відео з індивідуальними реакціями є найпоширенішими та найпростішими у створенні. Просто натисніть кнопку записування й нехай ваше обличчя говорить само за себе.
Відео з груповими реакціями (за участю друзів, сім’ї або інших авторів) привносять різні погляди, більше гумору та енергії. Вони також допомагають зменшити зніяковілість, якщо ви закричите від несподіванки.
Стилі редагування відео з реакціями
Редагування може перетворити простий запис на захопливе й динамічне відео. Нижче наведено кілька методів редагування відео з реакціями.
Зображення в зображенні. Класичний формат, у якому реакція відображається в невеликому вікні, поки відтворюється основний вміст.
Розділений екран. Реакція та оригінальний вміст відображаються поруч, щоб глядачам не доводилося нічого вибирати.
Перехідні кадри та масштабування. Ідеально підходить для підкреслення драматичних зітхань, епічних невдач або моменту, коли ви усвідомлюєте, що забули натиснути кнопку записування.
Накладання тексту та емодзі. Додавання підписів, ефектів або мемів підвищує залученість, адже іноді слова не можуть передати вашу реакцію.
Характеристики відео з реакціями для YouTube
Під час створення відео з реакціями для YouTube радимо дотримуватися зазначених нижче характеристик.
Тривалість відео: 3–5 хвилин (для перевірених авторів – до 15 хвилин)
Розмір відеофайлу: 128 ГБ
Формат відео: MP4 (рекомендовано)
Розміри відео: 1080 x 1920
Пропорції відео: 16:9 (широкоекранний формат)
Якщо ви створюєте відео з реакціями для YouTube Shorts, радимо дотримуватися зазначених нижче характеристик.
Тривалість відео: 60 секунд
Формат відео: MP4 (рекомендовано)
Розміри відео: 1920 x 1080
Пропорції відео: 9:16 (книжкова орієнтація)
Створення відео з реакціями
Крок 1. Передайте відео
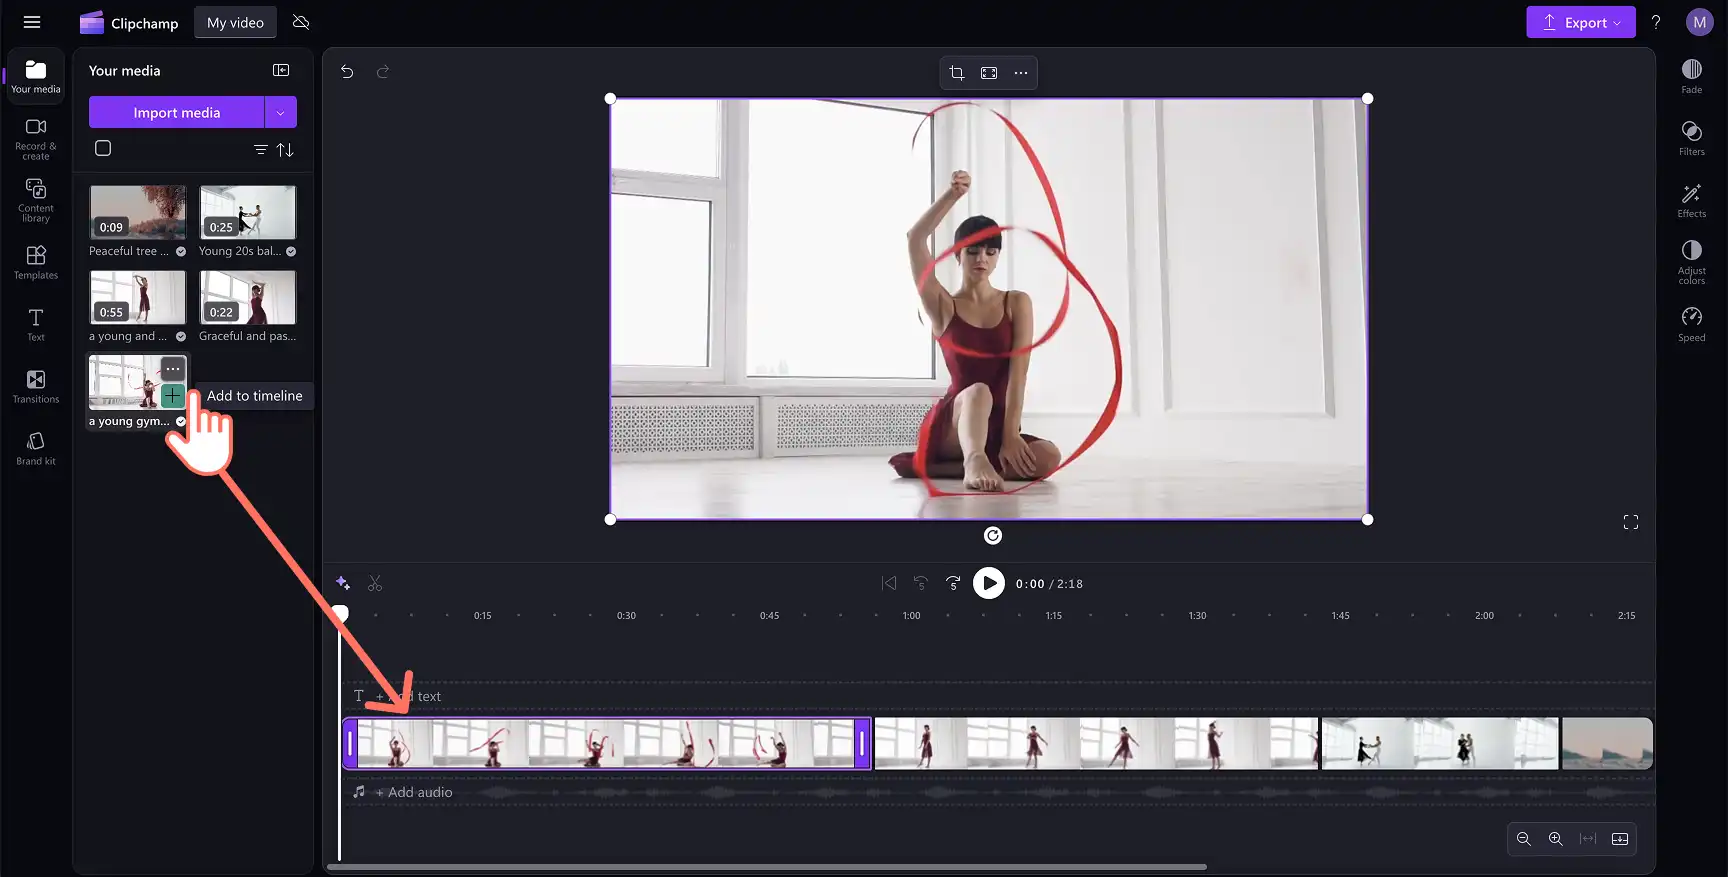
Щоб імпортувати власні відео, фотографії та звукові доріжки, на панелі інструментів на вкладці "Ваші медіа" натисніть кнопку імпорту медіафайлів, а потім перегляньте файли на комп’ютері або підключіться до OneDrive.
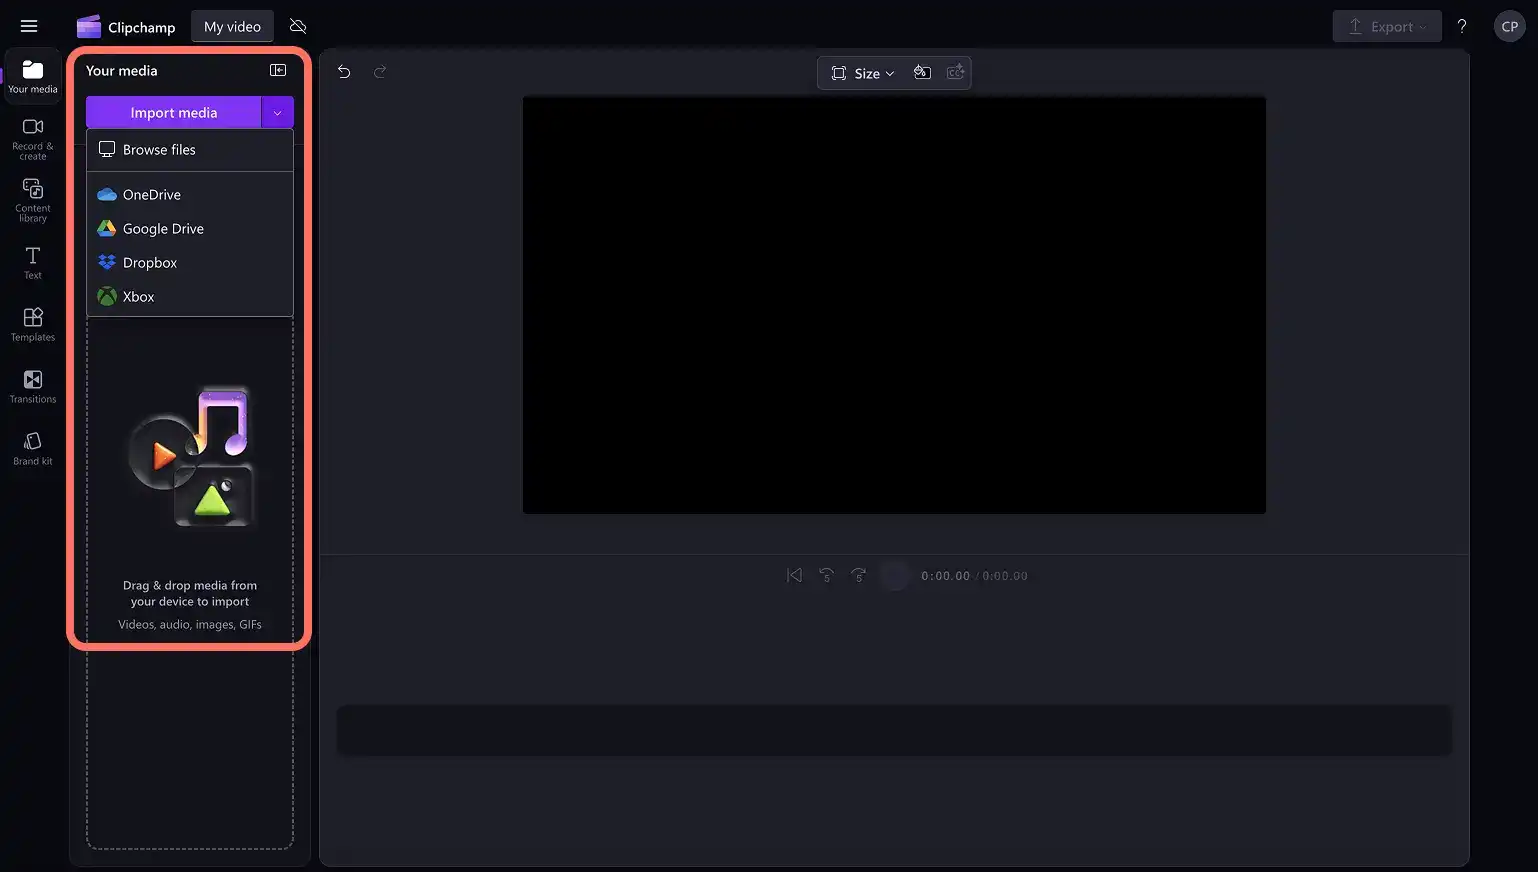
Якщо ви реагуєте на відео YouTube, переконайтеся, що ви завантажили вміст, дотримуючись усіх правил YouTube щодо авторських прав. Перетягніть відео на часову шкалу або натисніть кнопку "Додати до часової шкали".
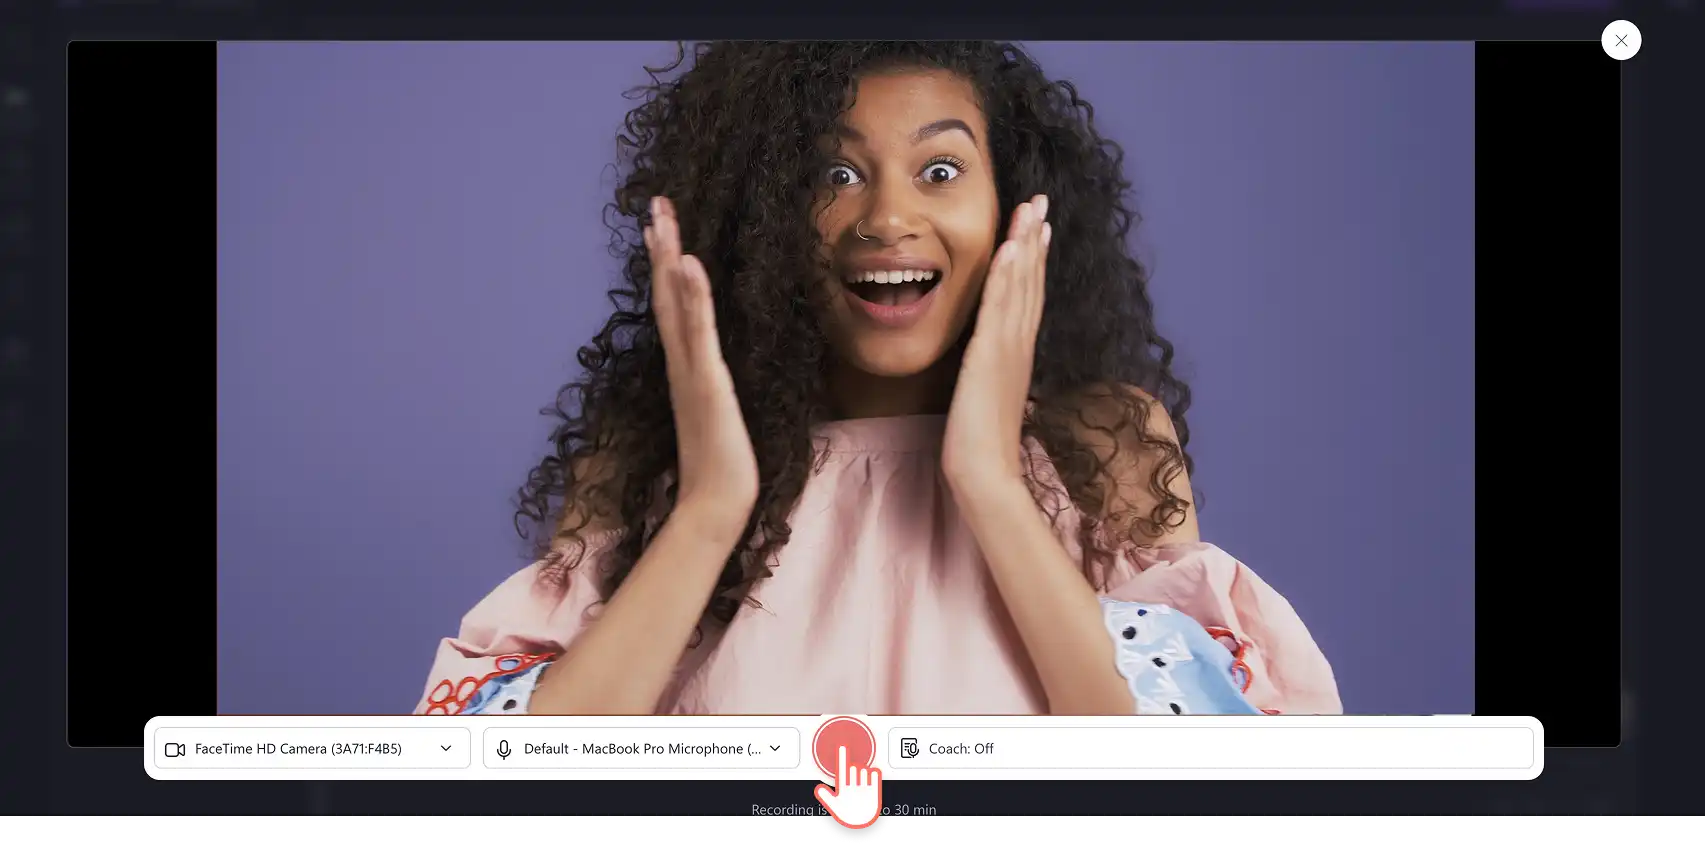
Крок 2. Створіть відео з веб-камери
Перейдіть на вкладку "Запис і створення" на панелі інструментів і натисніть кнопку камери. З’явиться спливаюче вікно для початку записування. Натисніть кнопку "Дозволити", щоб надати доступ до камери й мікрофона. Щоб почати або зупинити записування, натисніть червону кнопку записування. Ви можете записувати до 30 хвилин відео з веб-камери за раз.
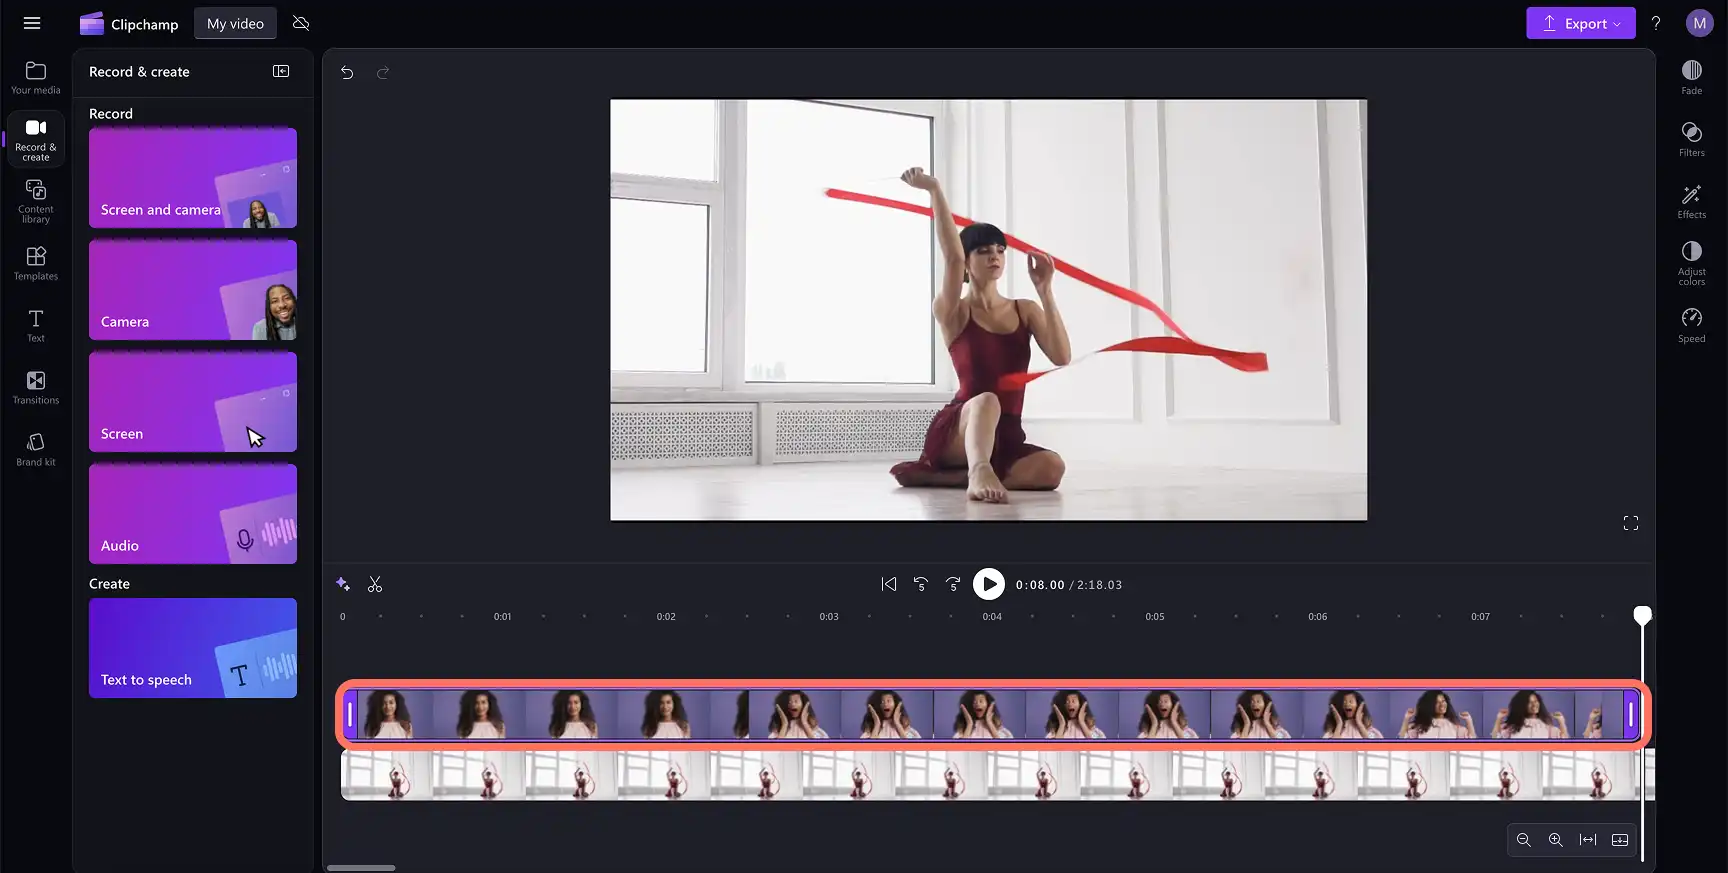
Перегляньте запис і натисніть кнопку "Зберегти та редагувати", щоб автоматично додати відео з реакціями на часову шкалу редагування. Запис також збережеться на вкладці "Ваші медіа".
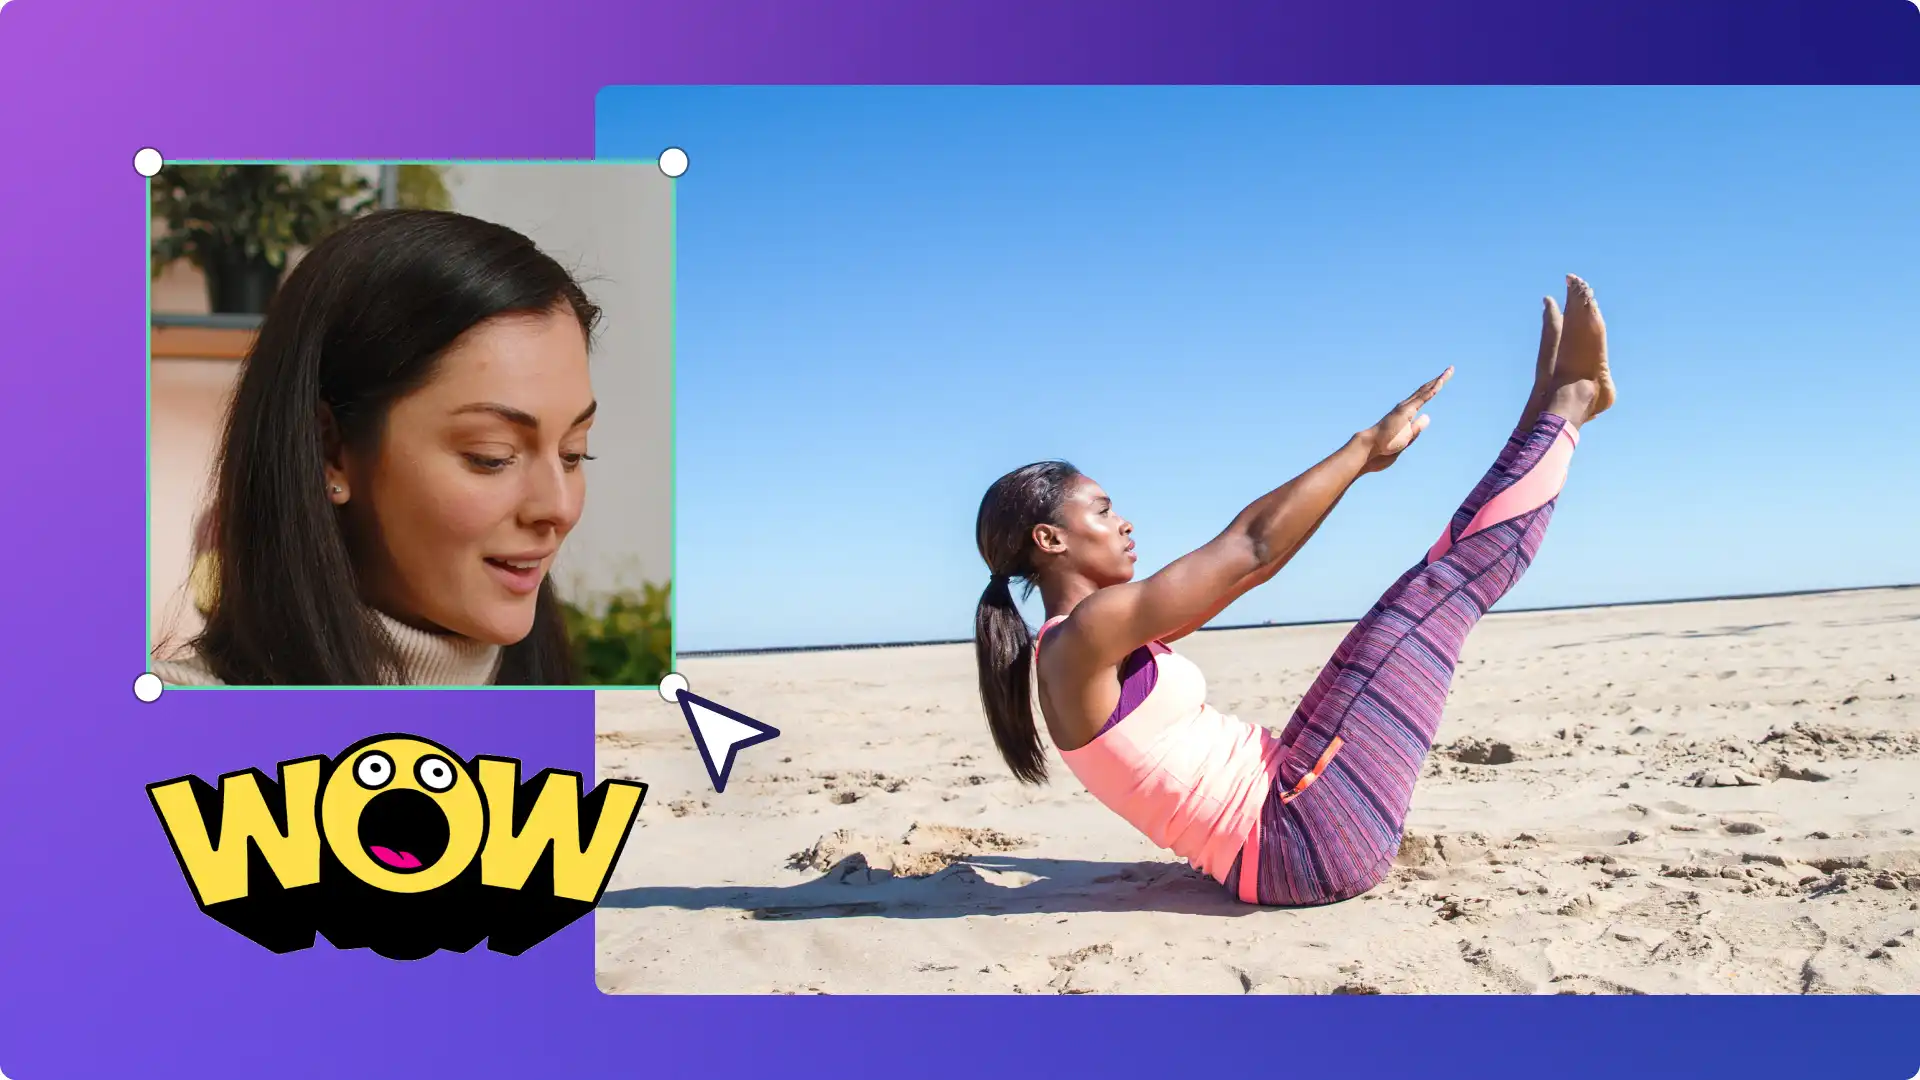
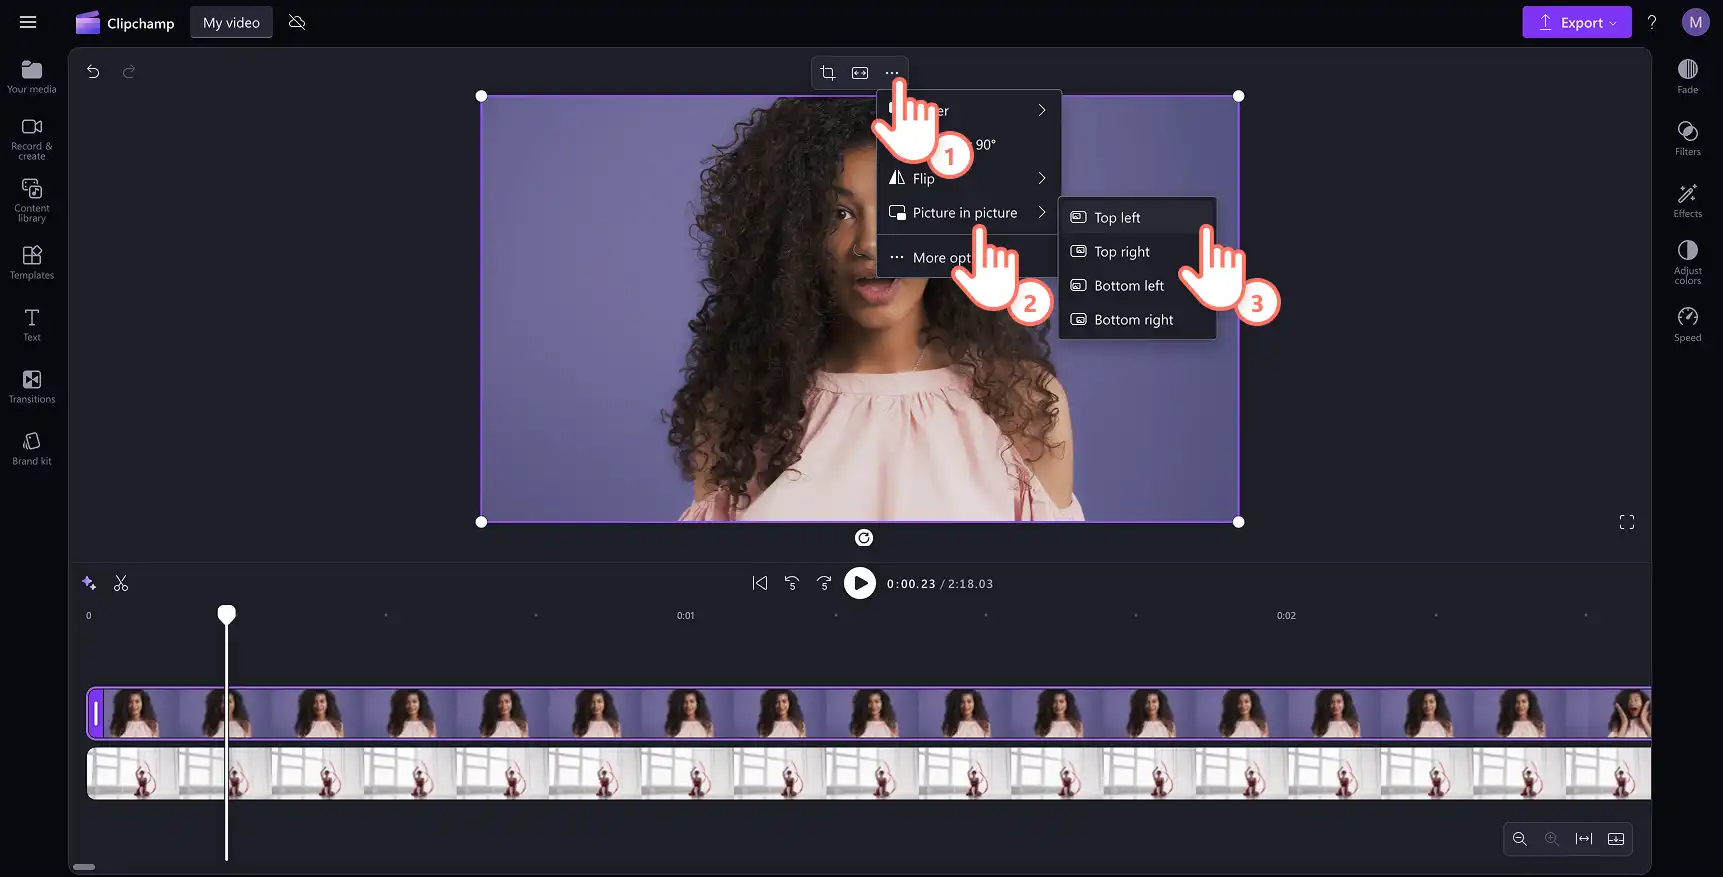
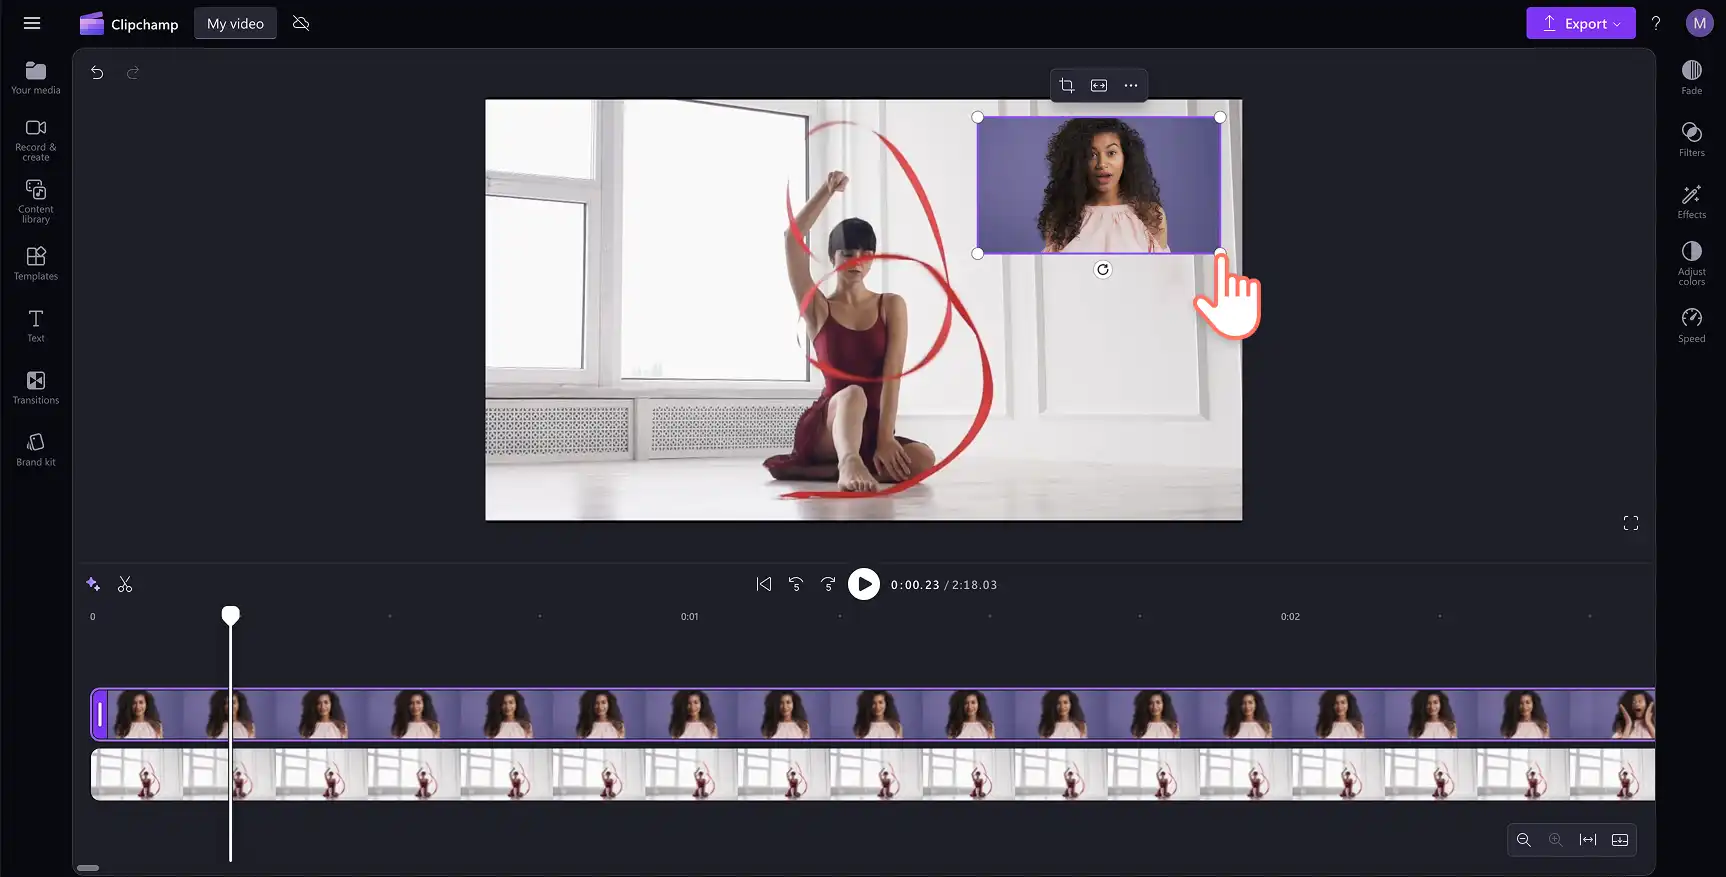
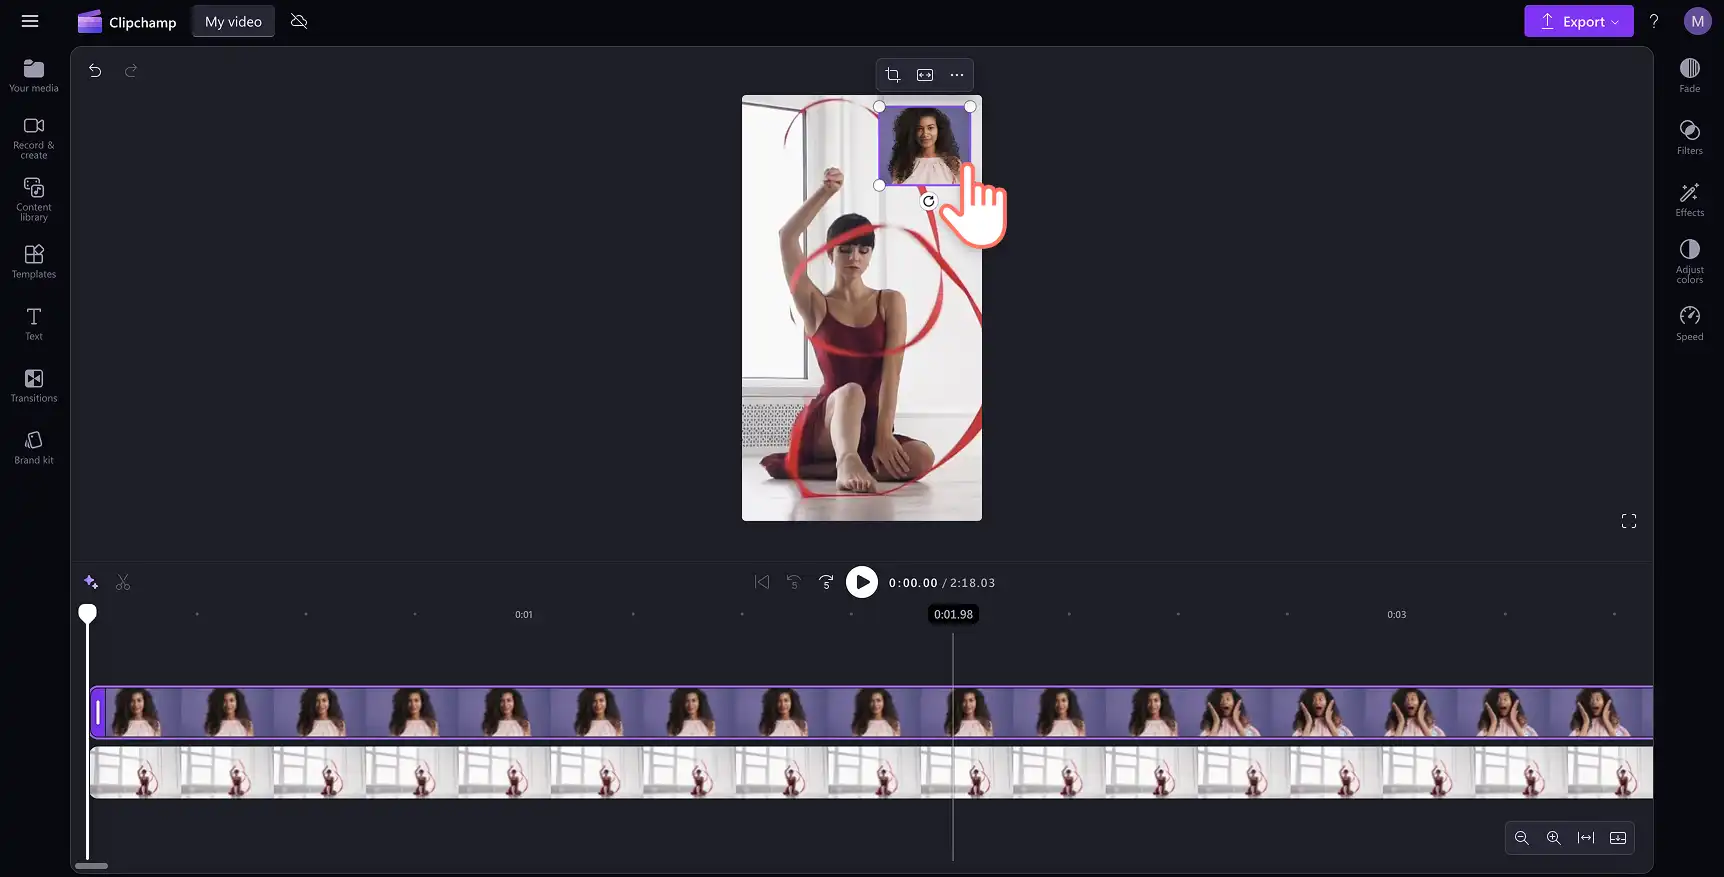
Крок 3. Створіть ефект "Зображення в зображенні"
На часовій шкалі розмістіть запис із веб-камери над кліпом, на який ви реагуєте. Виберіть відео та використовуйте рухому панель інструментів, щоб змінити розміщення відео з веб-камери. Натисніть кнопку з трьома крапками, а потім – "Зображення в зображенні". Ви можете вибрати один із кількох попередньо налаштованих розміщень: угорі праворуч, угорі ліворуч, унизу праворуч або внизу ліворуч. Також можна виділити кліп і довільно перетягувати його у вікні попереднього перегляду відео, якщо не хочете використовувати попередньо налаштоване розміщення.
Щоб змінити розмір відео, виділіть його та перетягніть кути всередину (зменшення) або назовні (збільшення).
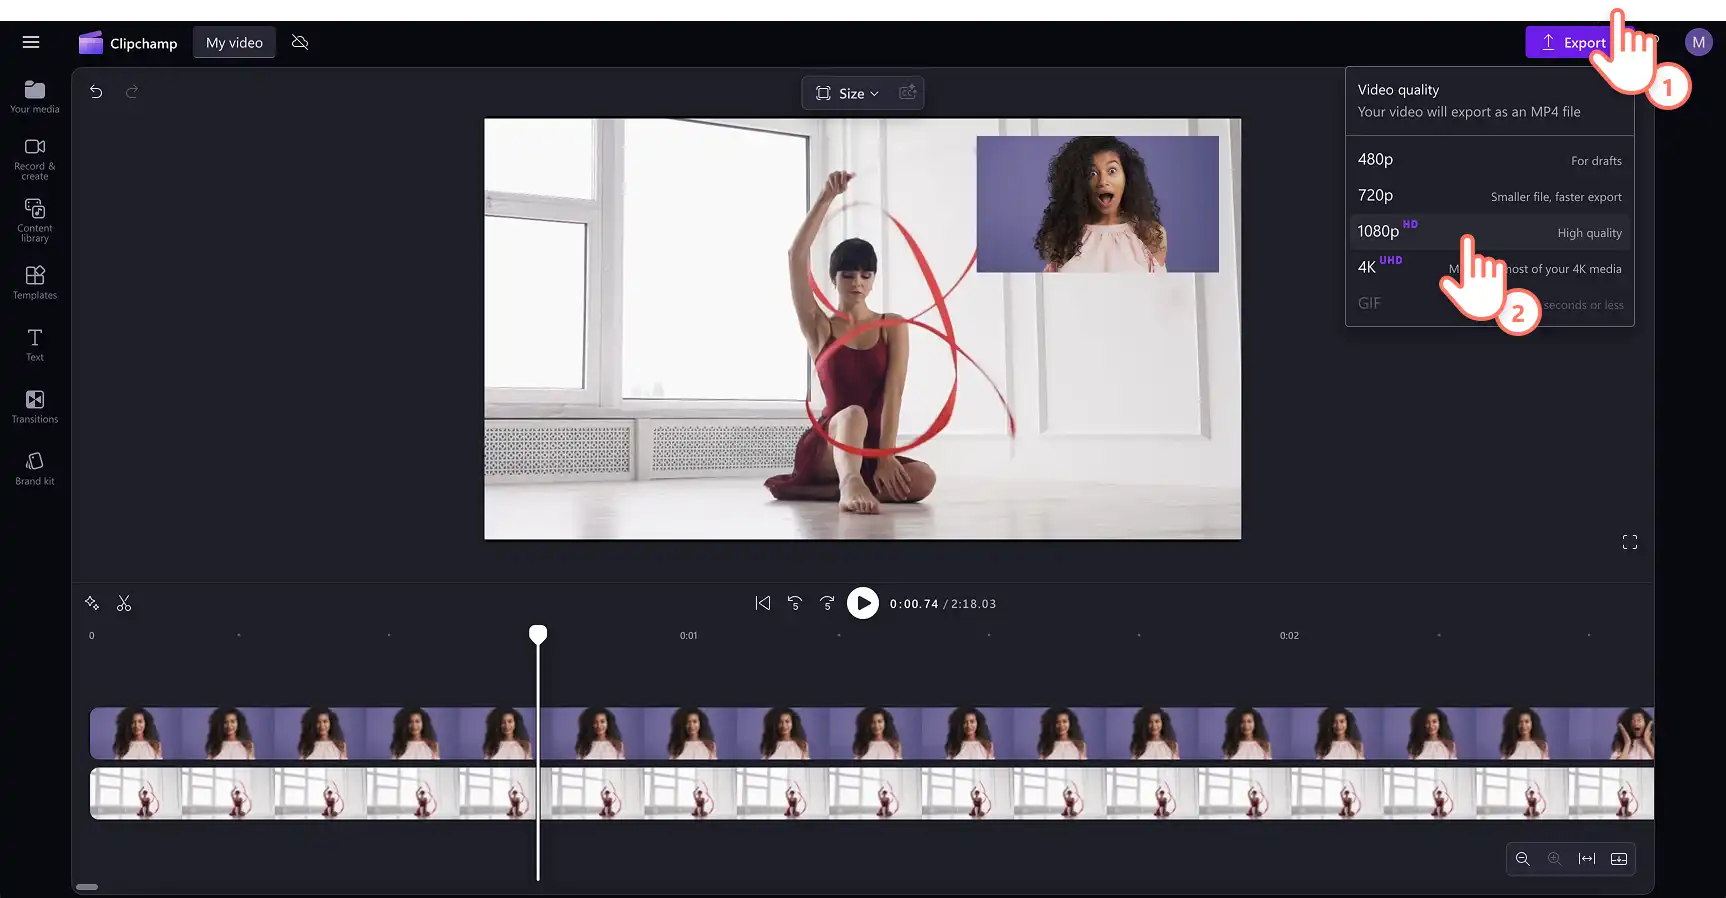
Крок 4. Попередньо перегляньте та збережіть відео
Перш ніж зберігати нове відео у форматі "зображення в зображенні", попередньо перегляньте його, натиснувши кнопку відтворення. Якщо все гаразд, натисніть кнопку експорту й виберіть роздільну здатність.
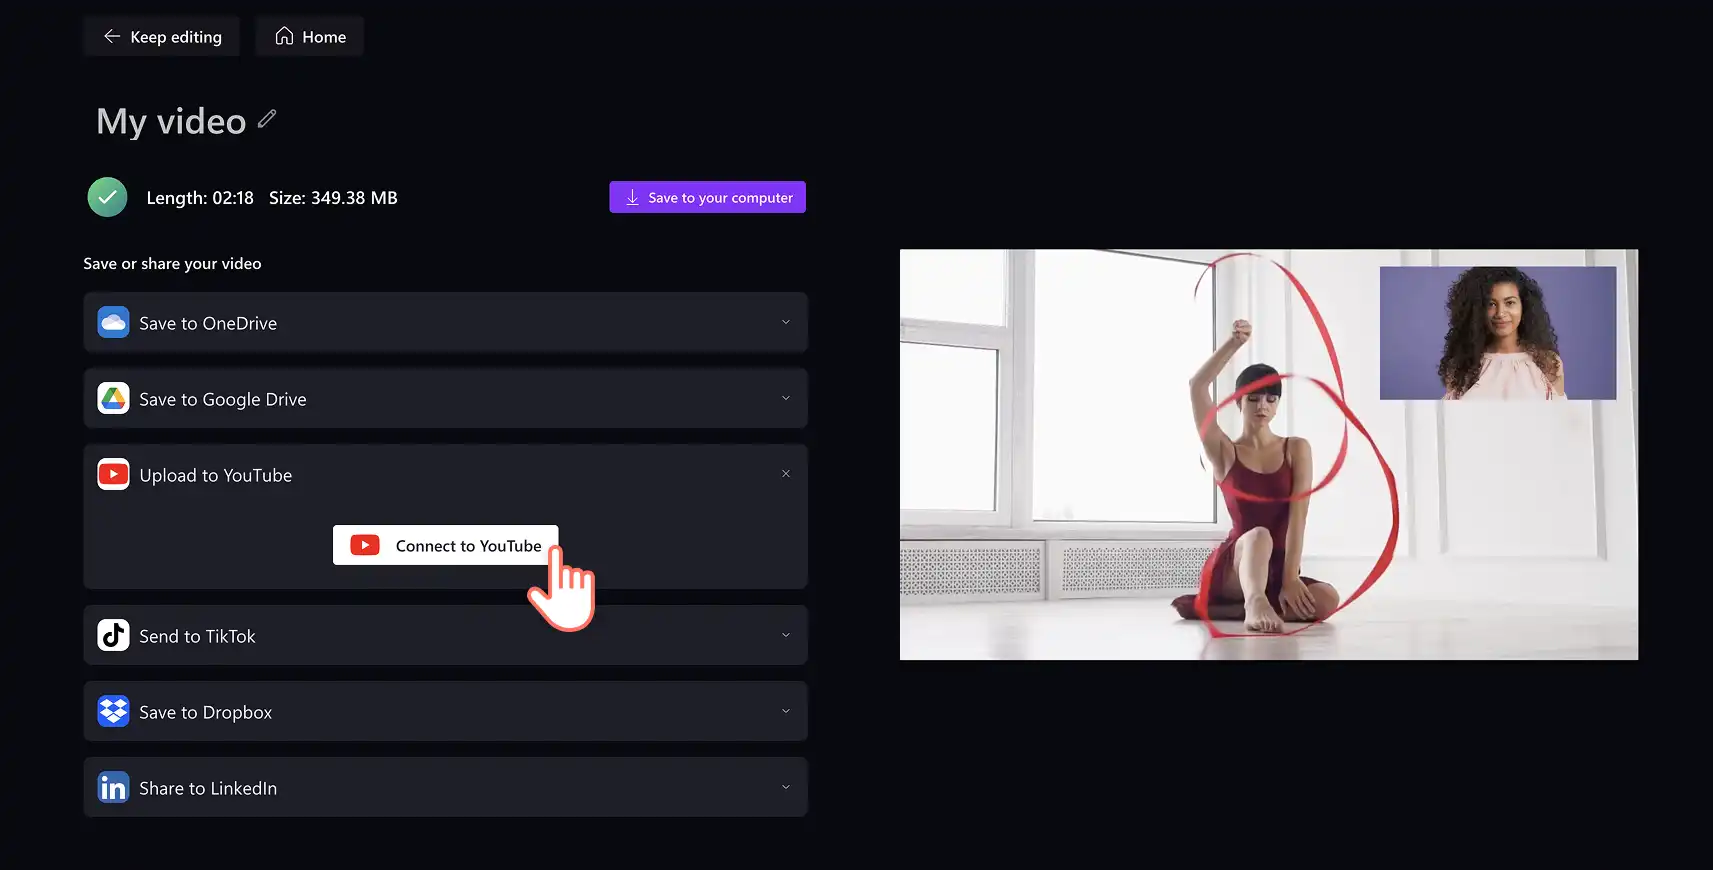
Скористайтеся корисною інтеграцією з YouTube, щоб опублікувати відео з реакціями на YouTube просто з Clipchamp.
Створення відео з реакціями для YouTube Shorts
Легко повторно публікуйте відео в YouTube Shorts за допомогою онлайнового інструмента змінення розміру відео. Щоб відео підходило для різних платформ, використовуйте готові пропорції: 16:9 для YouTube та 9:16 для TikTok, YouTube Shorts і розповідей.
За замовчуванням усі нові відео в Clipchamp мають пропорції 16:9, але ви можете легко змінити їх до або під час редагування. Натисніть кнопку "Розмір" на рухомій панелі інструментів над вікном попереднього перегляду відео. Щоб відобразився список готових пропорцій, на часовій шкалі не має бути вибрано жодного елемента. Далі виберіть "Вертикальний 9:16", щоб змінити пропорції відео.
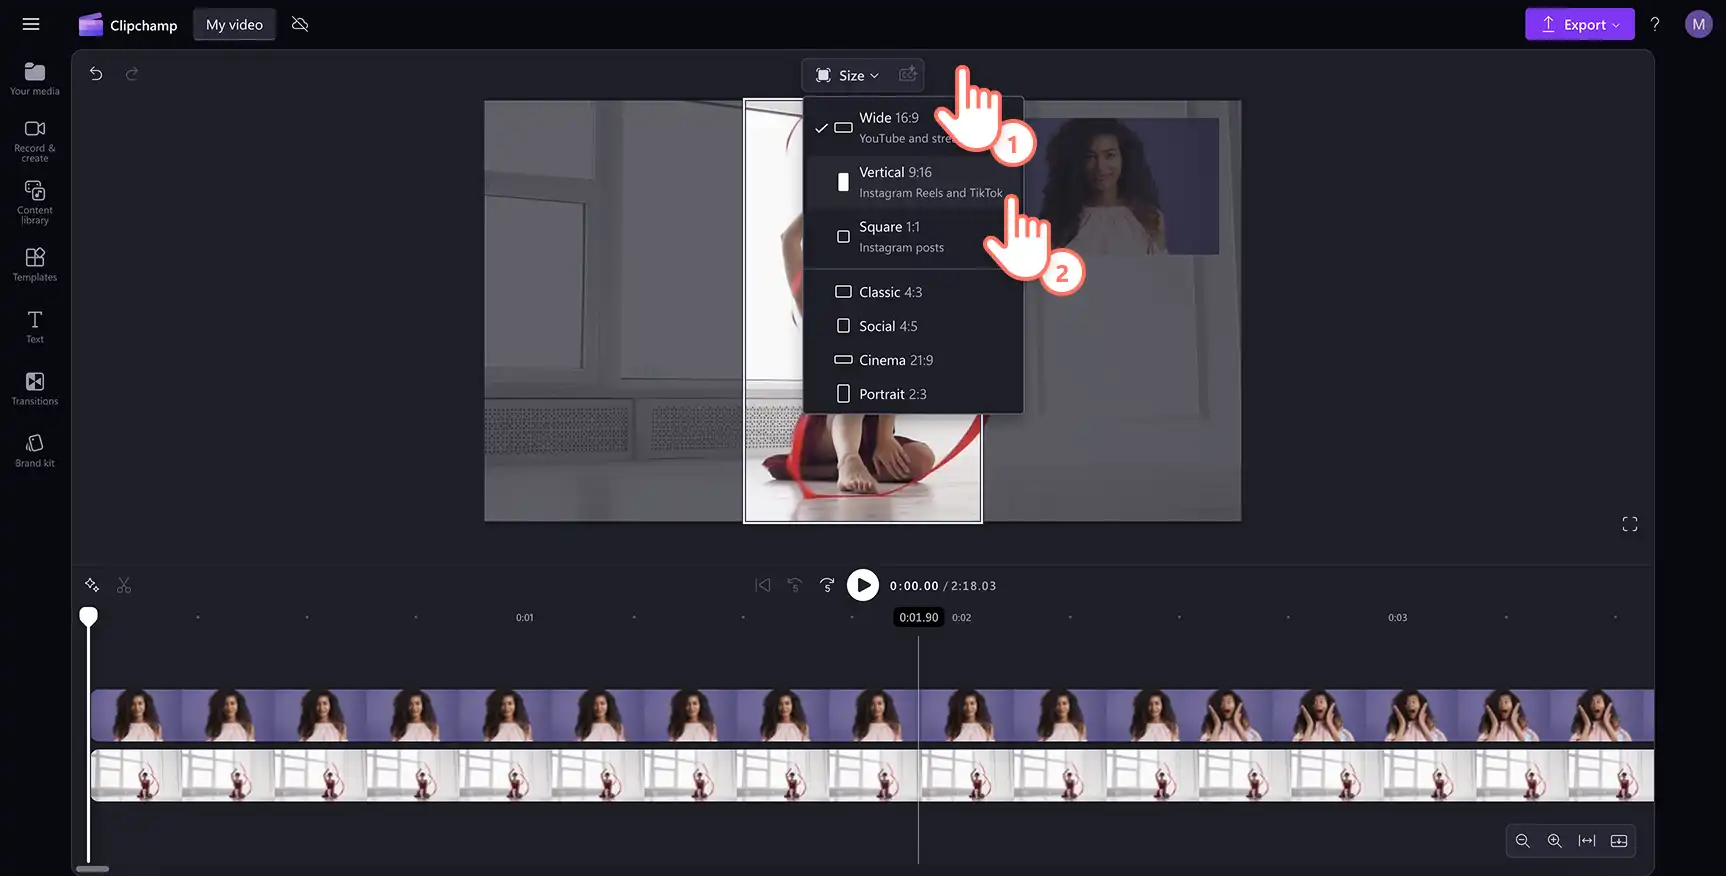
Розмір відео буде змінено відповідно до нових пропорцій. Якщо після змінення розміру відео обітнуте або містить чорні смуги, натисніть кнопку "Заливка" на рухомій панелі інструментів у демонстраційному вікні. За потреби налаштуйте розміщення відео з веб-камери у вікні попереднього перегляду, а потім збережіть відео та опублікуйте його в соцмережах.
Додавання спецефектів до відео з реакціями
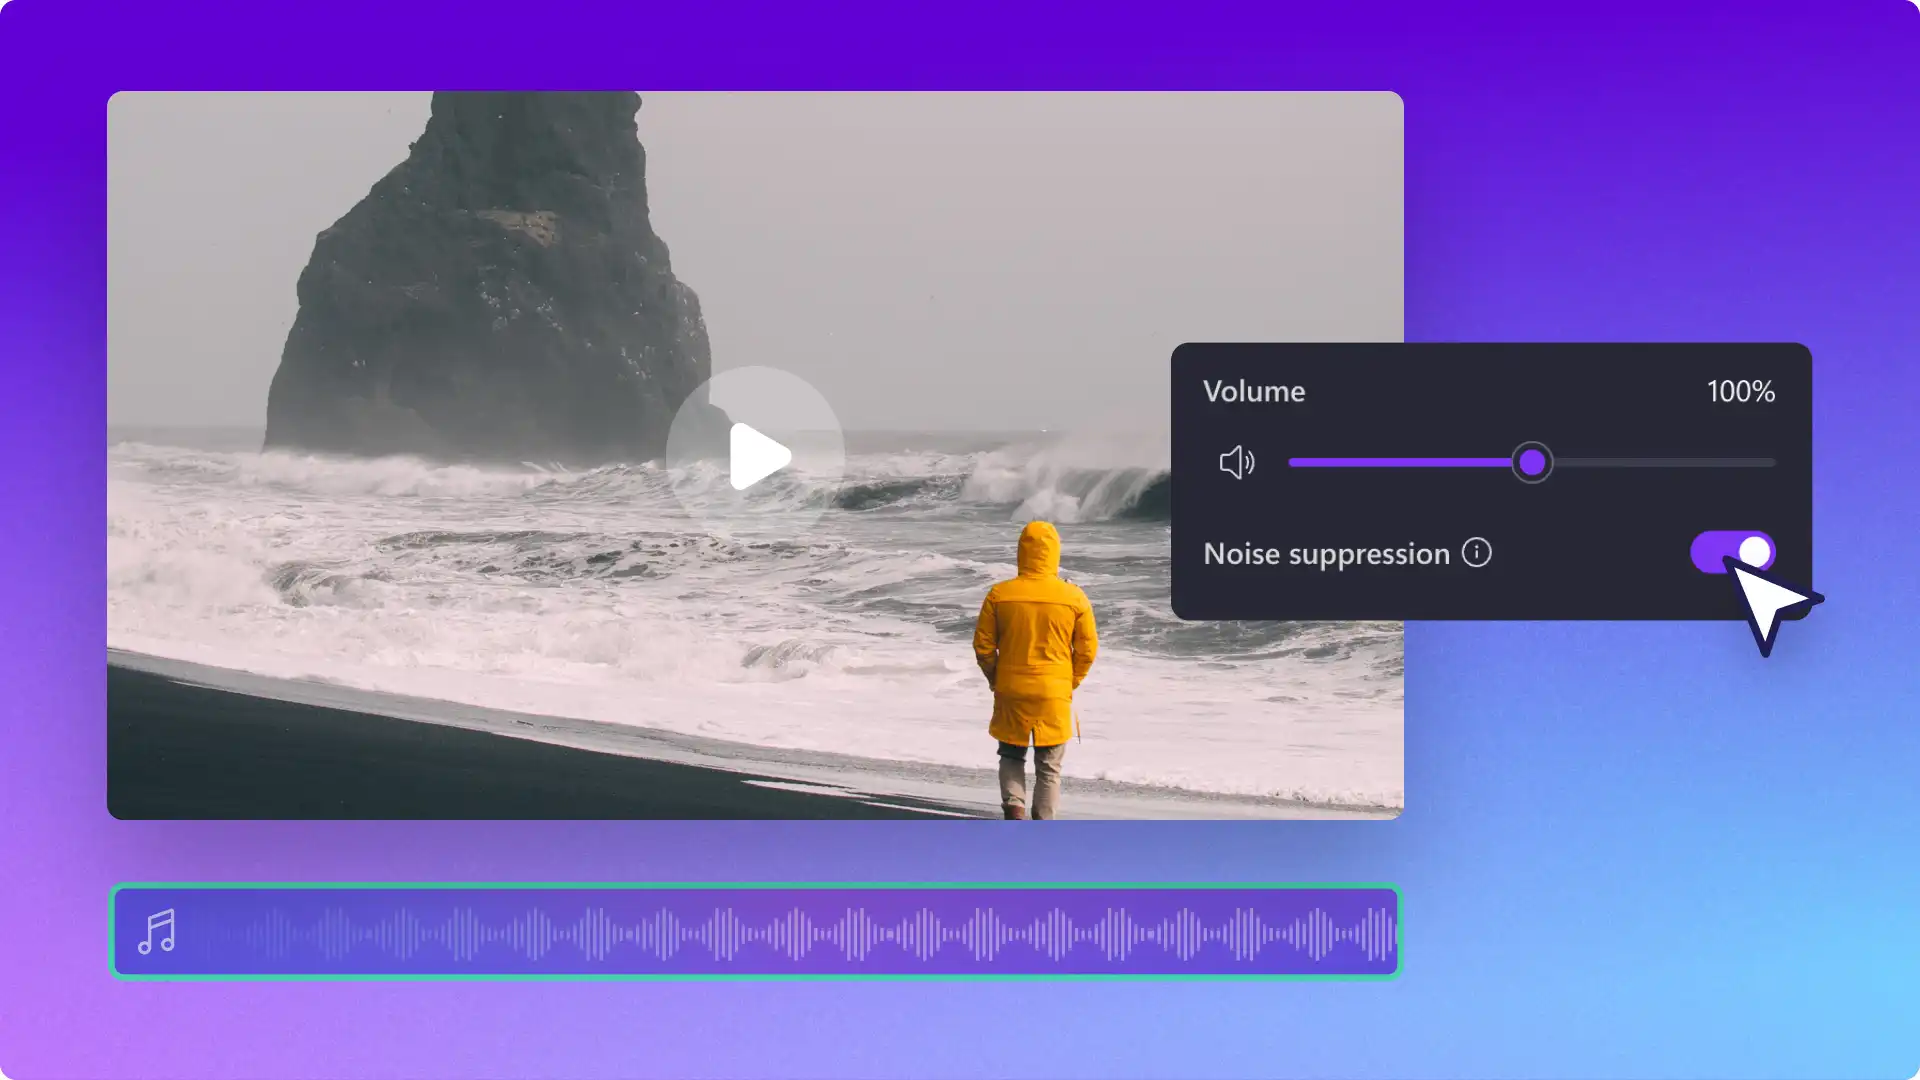
Чистий звук завдяки придушенню шуму
Щоб отримувати чіткий і чистий звук, не потрібен професійний мікрофон. Усуньте небажані фонові звуки та відлуння в приіщенні за допомогою функції придушення шуму. Просто відокремте відео від аудіодоріжки, а потім увімкніть придушення шуму, яке не вплине на чіткість вашого голосу.
Створення субтитрів
Щоб ваші відео з реакціями для YouTube можна було дивитися без звуку, додайте автоматичні субтитри. За допомогою функції автоматичних субтитрів ви можете за кілька секунд згенерувати субтитри, вибрати для них стиль і навіть завантажити транскрипт відео.
Накладання анімованого тексту та заголовків
Перетягніть шаблон анімації на відео з реакціями, щоб показати глядачам назву відео, ім’я користувача, наклейки із соцмереж, емоції тощо. Для накладеного тексту можна вибирати колір, шрифт, розмір і розміщення, які ідеально підійдуть для вашого відео з реакціями.
Об’єднання відео за допомогою переходів
Якщо додати переходи між кліпами, відео з реакціями виглядатиме ефектніше й професійніше. Для переходів доступні такі ефекти, як згасання, обертання, стрибок, обрізка, гортання, завади тощо. Просто перетягніть бажаний перехід на часову шкалу між двома кліпами.
Підготуйте початкову й кінцеву заставки для YouTube
Щоб узгодити дизайн ваших відео з реакціями та привернути увагу аудиторії, додайте початкову й кінцеву заставки. Виберіть готовий шаблон, налаштуйте його відповідно до стилю свого каналу на YouTube, додайте текст, а потім збережіть у форматі HD 1080p. До початкової й кінцевої заставки навіть можна додати безкоштовні фонові мелодії, щоб вони виділялися з-поміж інших.
Перегляд шаблонів YouTube, підписних наклейок, музики та всього іншого, щоб зробити виразне відео тут.
Найкращі канали з відео з реакціями для натхнення
Реакції на ігри: Jacksepticeye
У відео з реакціями на ігри важливо показувати справжні та щирі емоції, чи то вихід із гри в пориві гніву, епічна перемога чи моторошний момент у грі в жанрі жахів. Jacksepticeye – одна з найпопулярніших особистостей у світі ігор на YouTube. У своїх ігрових процесах автор поєднує енергійні коментарі з унікальним ірландським шармом, завдяки чому під час перегляду його відео виникає враження, ніби ви граєте з другом (дуже гучним другом).
Реакції на фільми та серіали: The Normies
Якщо вам подобається дивитися серіали в компанії, вміст The Normies буде вам до душі. Їхні групові реакції на популярні серіали, як-от "Пуститися берега", "Дивні дива" та "Останні з нас", створюють атмосферу вечора кіно з друзями – тільки вам не потрібно ділитися попкорном.
Реакції на комедійні відео та меми: Charlotte Dobre
Якщо ви любите сарказм, дотепність і спостерігати, як людей весело висміюють за їхні дурниці, вам обов’язково потрібно переглянути відео автора Charlotte Dobre. Її відео з реакціями охоплюють усе: від незручних провалів у соцмережах до негідної поведінки людей. І все це супроводжується притаманним їй незворушним виразом обличчя та експресивними реакціями.
Повторне використання та публікування відео з реакціями
Якщо ви хочете отримати якомога більше переглядів і більшу залученість, можна повторно використати вміст на різних платформах.
Перетворення довгих відео з реакціями на короткі відео Shorts, TikTok і Reels
Ви можете взяти найсмішніші, найприголомшливіші або найактуальніші моменти з повного відео й перетворити їх на короткі відео для YouTube Shorts, TikTok та Instagram Reels, щоб охопити ширшу аудиторію.
Створення GIF-анімацій і мемів із реакцій
Якщо ваша реакція ідеально підходить для мему, чому б не перетворити її на GIF-анімацію або мем із зображенням? Приголомшене обличчя, вираз відрази чи перебільшений сміх – такі моменти можуть отримати окреме життя й стати шалено популярними навіть за межами вашого відео.
Публікація кліпів із реакціями на різних платформах
Різні платформи охоплюють різну аудиторію. Повторне використання вмісту для кожної платформи підвищує шанси на те, що його побачать нові глядачі, які не користуються YouTube. Нижче наведено практичні поради для кожної платформи.
YouTube Shorts. Створюйте відео тривалістю до 60 секунд, накладайте текст, який привертає увагу. Дізнайтеся більше про створення коротких відео YouTube Shorts.
TikTok. Використовуйте швидкі нарізки, масштабування та популярні звуки, щоб відповідати стилю платформи. Якщо у вас мало досвіду редагування, дізнайтеся, як створити відео для TikTok у Clipchamp.
Instagram Reels. Повторно використайте кліп із TikTok, оптимізувавши його за допомогою гештегів, популярних в Instagram. Перегляньте поради зі створення відео для Instagram Reels.
Щебетати/X: публікуйте короткі кліпи X або GIF-анімації з дотепними підписами для залучення.
Правила щодо авторських прав і уникнення порушень
Створення цікавого вмісту – це чудово, але відео з реакціями часто містять матеріали, захищені авторським правом, тому потрібно бути обережними з тим, що та як ви використовуєте. Дізнайтеся, що вважається порушенням авторських прав, щоб уникнути видалення або демонетизації відео, які ви довго редагували.
Що можна й що не можна використовувати у відео з реакціями
Не весь вміст можна використовувати. Використання повноформатних кліпів із фільмів, музичних відео або серіалів без дозволу може призвести до блокування відео. Такі платформи, як YouTube, використовують автоматизовану систему Content ID, яка виявляє захищений авторським правом матеріал і або демонетизує відео, або повністю блокує його (що фактично означає, що YouTube відмовляється розміщувати його).
Добросовісне використання вмісту для відео з реакціями
Доктрина добросовісного використання дозволяє авторам застосовувати захищений авторським правом вміст за певних умов, наприклад у разі додавання значущого коментаря або критики. Нижче описано, як вберегтися від порушення.
Використання невеликих фрагментів замість повних сцен зменшує ризик скарг про порушення авторських прав.
Що більше ви додаєте власні думки, то менша ймовірність, що відео отримає скаргу. Крім того, це зробить відео цікавішим.
Змінення прозорості відео, масштабування або додавання накладань можуть допомогти обійти виявлення.
Іноді допомагає згадування початкового автора, хоча це не гарантовано.
Дивитися, як редагувати відео реакції підручник
За допомогою Clipchamp можна безкоштовно створювати захопливі та якісні відео з будь-якими реакціями.
Дізнайтеся більше про те, як покращити свій канал YouTube за допомогою брендованих трейлерів. Ви навіть можете переглянути аналітику конкурентів, щоб виділитися на YouTube.
Запитання й відповіді
Чи можна поділитися YouTube-відео з реакціями в інших соціальних мережах?
Так. У редакторі можна змінити пропорції відео, щоб воно відповідало вимогам інших медіаплатформ, як-от TikTok, Instagram або Facebook. Доступні пропорції: 16:9, 9:16, 1:1, 4:5, 2:3 і 21:9.
Чи можна додати фонову музику до відео з реакціями, яке публікуватиметься на YouTube?
Ви можете легко додати аудіофайл до будь-якого відео з реакціями, яке плануєте розмістити на YouTube, вибравши потрібний варіант у безкоштовній бібліотеці стокового аудіо. Не забудьте зменшити гучність фонової музики, щоб вона не заважала чути оригінальну звукову доріжку у відео.
Чи можна використовувати YouTube-відео з реакціями?
Якщо ви опублікуєте відео з реакціями на кліп іншого автора на YouTube, то можете отримати попередження про порушення авторських прав. Перш ніж завантажувати відео з YouTube, обов’язково запитайте дозвіл у його автора або власника. Публікувати на YouTube кліпи з реакціями не заборонено, але якщо не отримати дозвіл, відео можуть видалити або вимкнути в ньому монетизацію. Завжди вказуйте авторів використаних матеріалів в описі до свого відео. Автори можуть оскаржити публікацію відео з реакціями або вказати на порушення авторських прав у розділі подання скарг інструменту YouTube для керування авторськими правами.
Увага! Знімки екрана в цій статті зроблені в особистих облікових записах Clipchamp. В робочих і навчальних облікових записах Clipchamp описані функції працюють аналогічно.