Heads up! The screenshots in this article are from Clipchamp for personal accounts. The same principles apply to Clipchamp for work and school accounts.
On this page
Since launching in 2021, YouTube Shorts has steadily become one of TikTok’s primary competitors as a short-form video platform. Today YouTube Shorts averages over 70B daily views with more than 25% of YouTube channels earning revenue from the sub-platform.
Part of the reason for the video trend of YouTube Shorts is its functionality and flexibility. Creating YouTube Shorts inside the YouTube mobile app is easy and intuitive for regular TikTok and Instagram users and beginner content creators. But creators working on a desktop or laptop seeking more editing features can create YouTube Shorts using professional editing software too.
In this in-depth guide we’ll walk you through everything you need to know about how to make YouTube Shorts easily with the YouTube app and the free Clipchamp mobile and desktop apps. We’ve also got all the tips about YouTube Shorts specifications and editing features to enhance your video. Now let’s dive in!
YouTube Shorts size, dimensions, and guidelines
YouTube Shorts is an accessible video platform, but there are some basic YouTube Shorts requirements and recommendations.
Age restriction: YouTube Shorts creators must be at least 13 years old.
Subscribers: there is no subscriber requirement for posting YouTube Shorts.
Video length: 180 seconds maximum.
Video format: MP4 or MOV.
Video aspect ratio: portrait 9:16.
Video file size: 10MB maximum.
Video resolution: 1920 x 1080 pixels recommended.
Video captions: highly recommended.
Video sound: highly recommended.
How to make a Short using the YouTube app
Open the YouTube app on your smartphone then tap on the plus (+) button.
If you haven't created a Short before, tap the allow button to give camera and microphone access.
Next, tap on the Short button.
Here, you can either tap on the camera roll button to upload media assets, or tap the red record button to record inside the app.
Next, tap on the tick button to review your video, then tap on the next button to add your video details, description and settings.
When you're ready to upload, tap on the upload Short button.
How to make a YouTube Short with Clipchamp
Clipchamp is a free YouTube video editor. It includes a wide range of video templates to create professional-quality YouTube Shorts. If you’d rather create videos from your laptop or desktop, follow this guide for how to make YouTube Shorts on PC and Mac using the Clipchamp video editor.
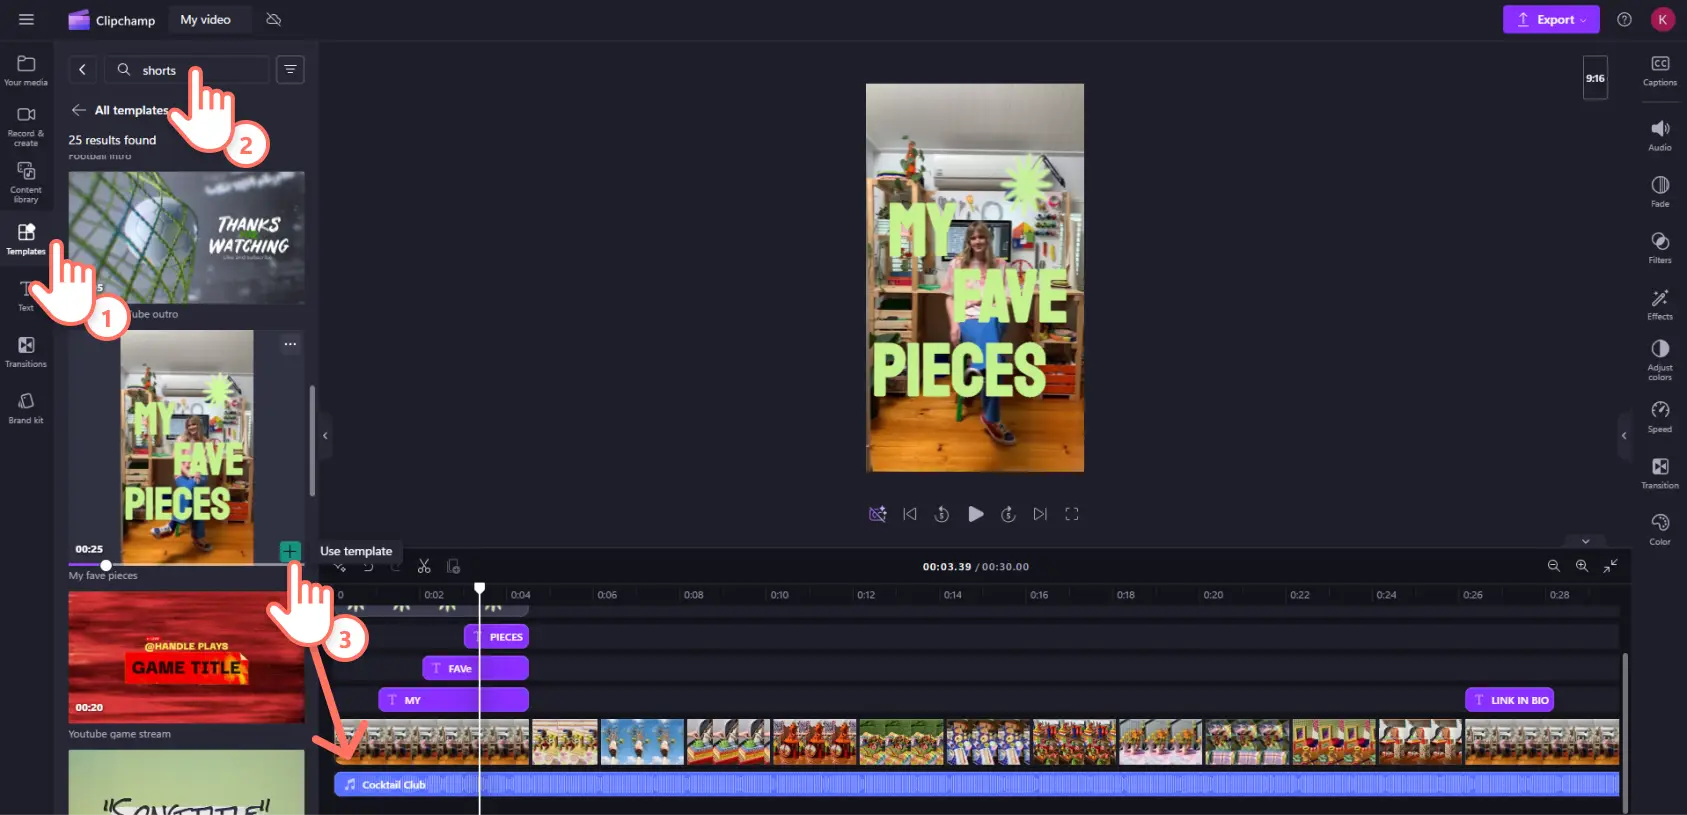
Step 1. Start with a YouTube Shorts video template
Search for a vertical video template in the 9:16 portrait aspect ratio. Click the templates tab on the toolbar and search for ‘mobile’ or ‘shorts’ in the search bar.
Select a template that suits your YouTube Short idea then drag and drop it onto the timeline or click the use template button.
Step 2. Import personal video clips and photos
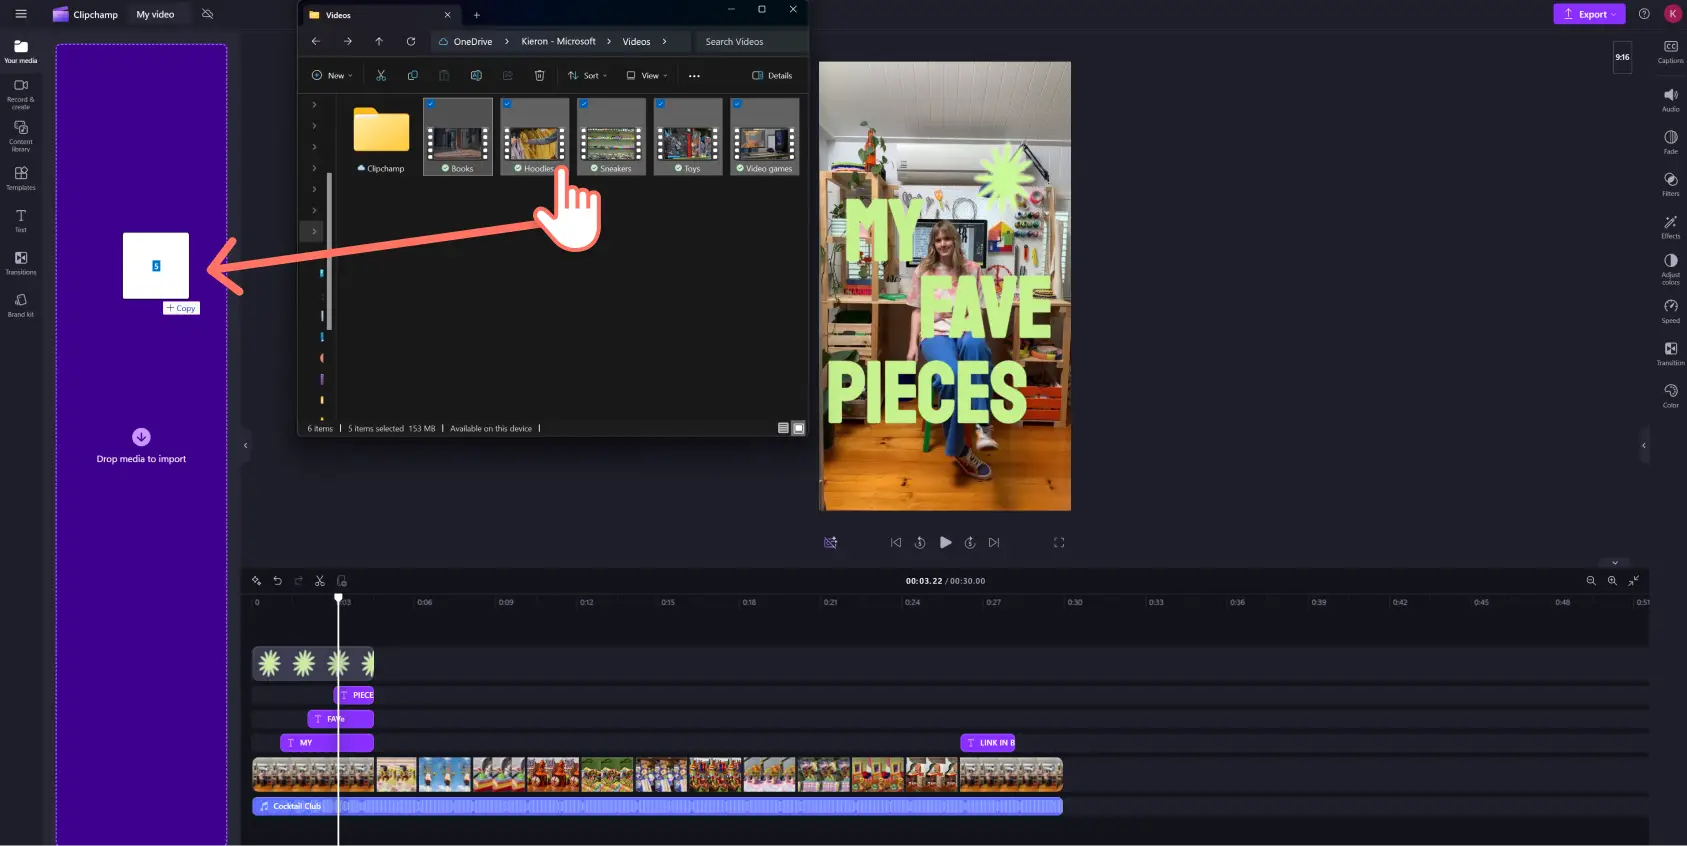
Now you’ve got your template with text and graphics, you’ll want to swap to add your own media or build on it with your own video content. Add your footage and photos to the project by clicking the import media button in the your media tab on the toolbar.
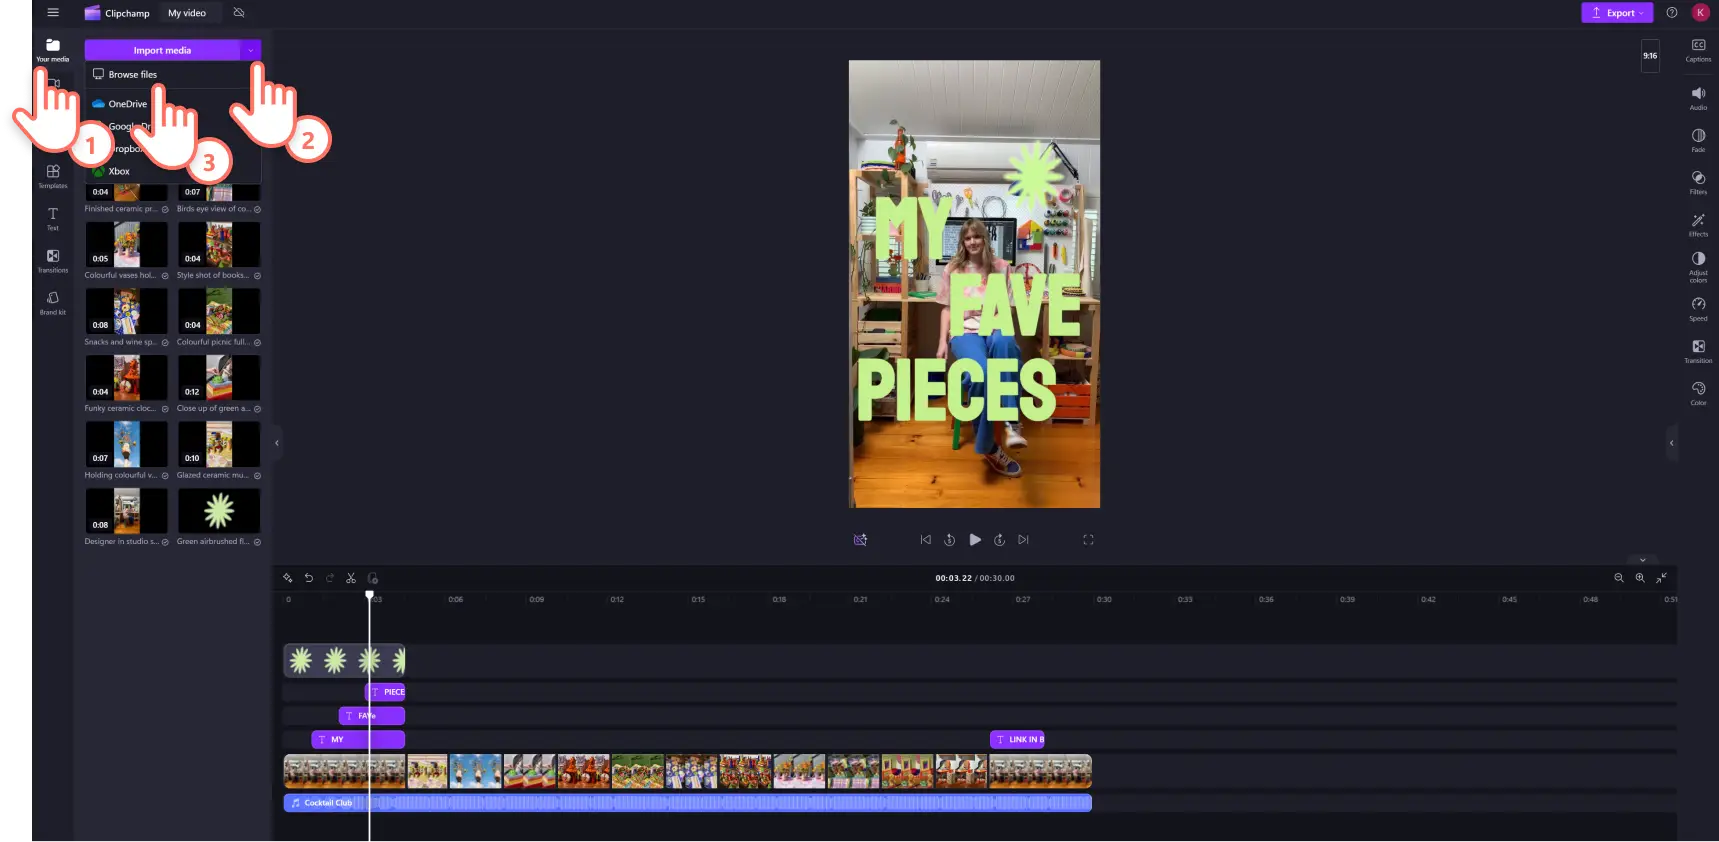
Drag and drop your personal video clips and photos from your computer or OneDrive into the your media tab.
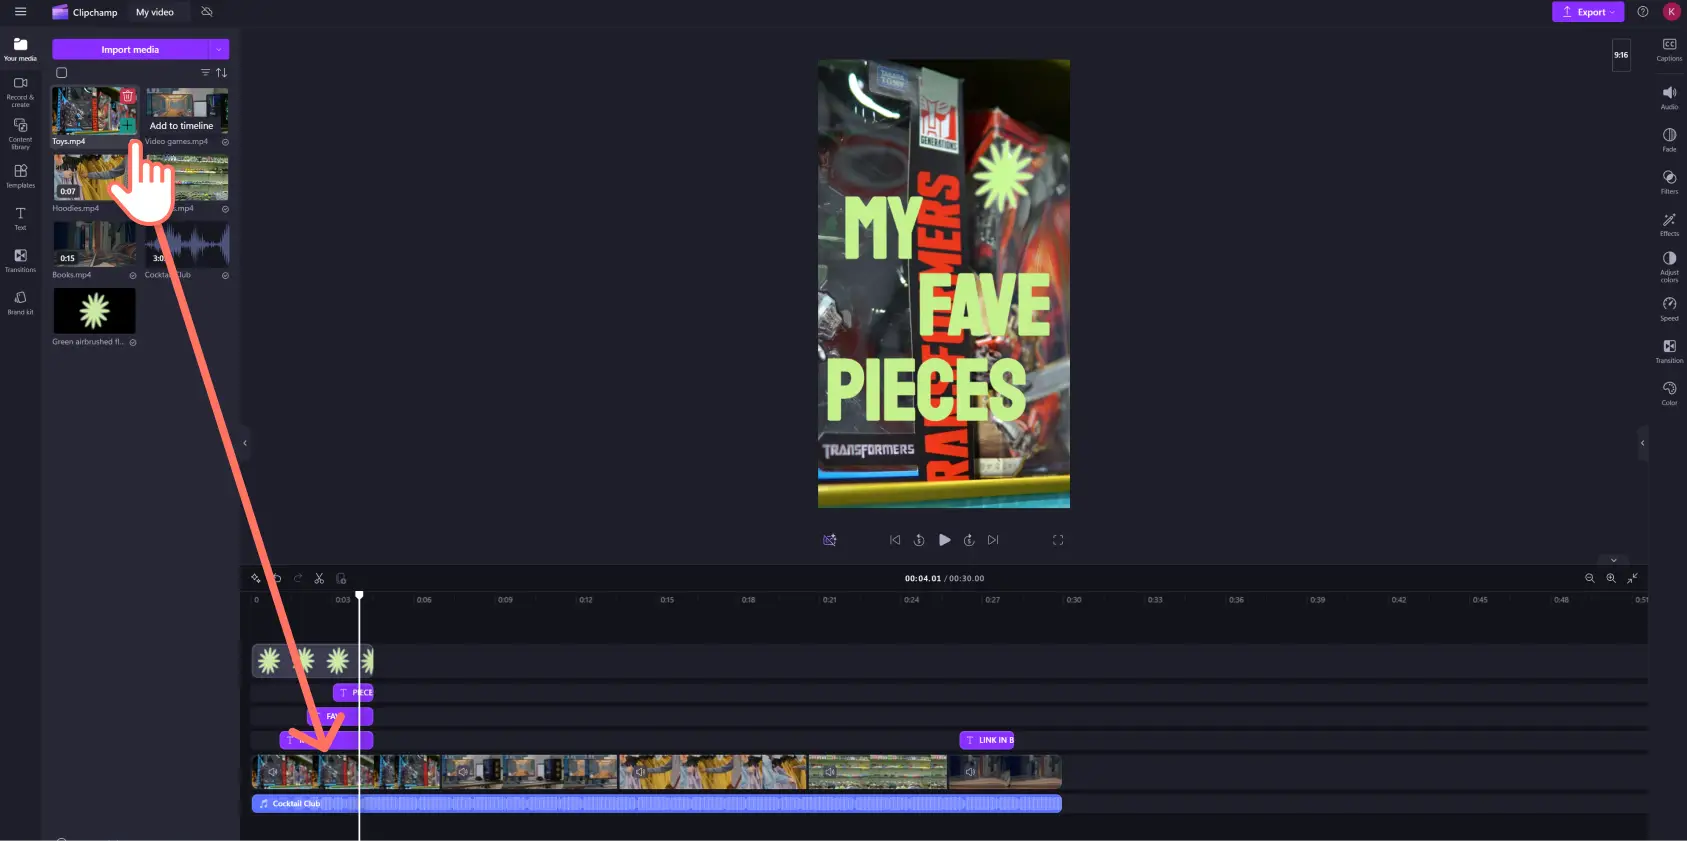
Delete the template video clips then drag and drop your original video clips onto the timeline.
Step 3. Customize the video template
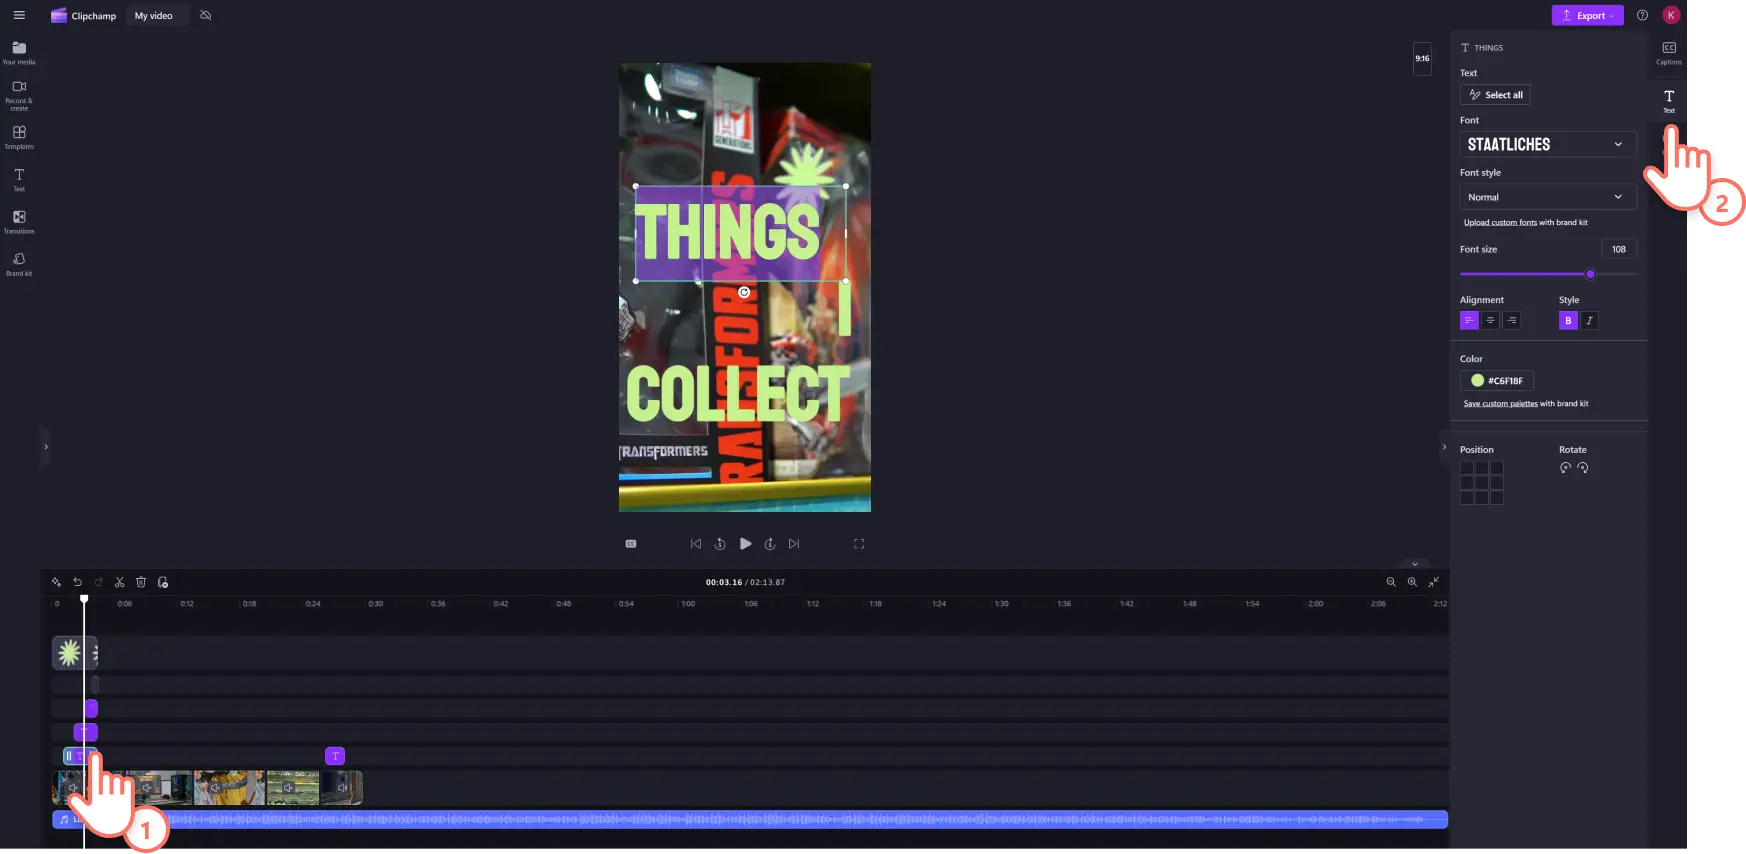
Modify text and animated titles
To change the text of the template’s animated titles, click the asset in the timeline then click the text tab in the property panel. Here you can edit and change the font, style, size, position, and more.
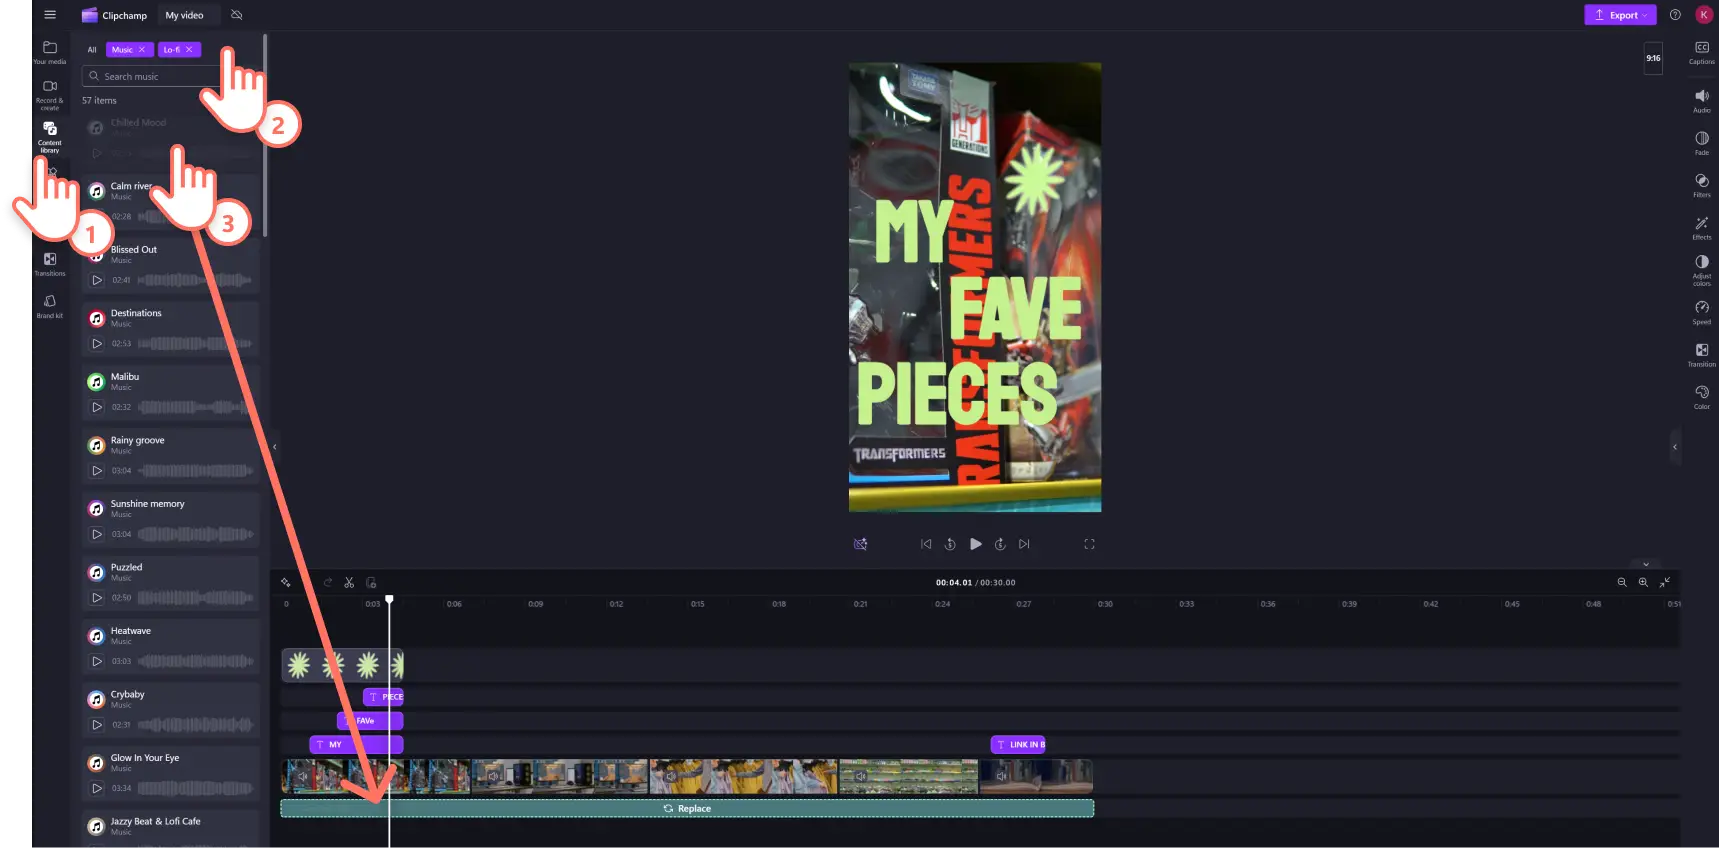
Edit audio and background music
If you want to use different music, replace the audio included in the template with your preferred soundtrack. Click the content library tab on the toolbar and select music from the audio dropdown menu.
Pick a music genre or type moods or music styles in the search bar and preview each track from inside the toolbar. Once you’ve found the right song, click the add to timeline button or drag and drop onto the timeline.
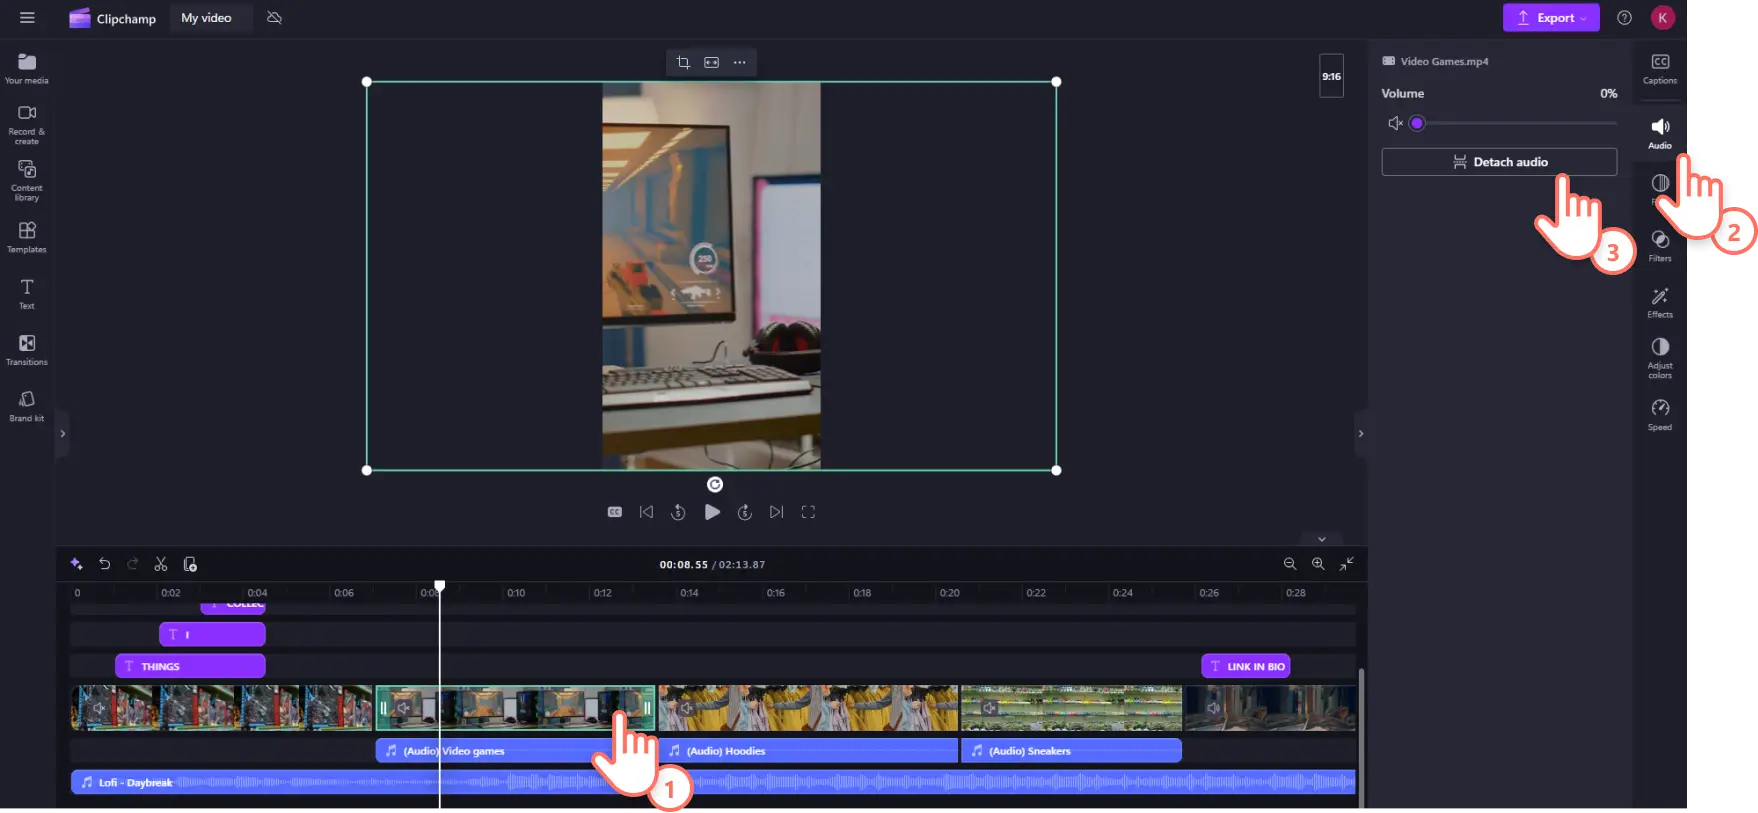
If your personal footage (like your b-roll reel) includes sound you want to edit, you can separate the audio from video then make your changes.
Click the video asset in the timeline then click the audio tab on the property panel. Click the detach audio button and then a new audio file will appear in the timeline underneath your video clip. Repeat this for all clips that have audio you want to edit.
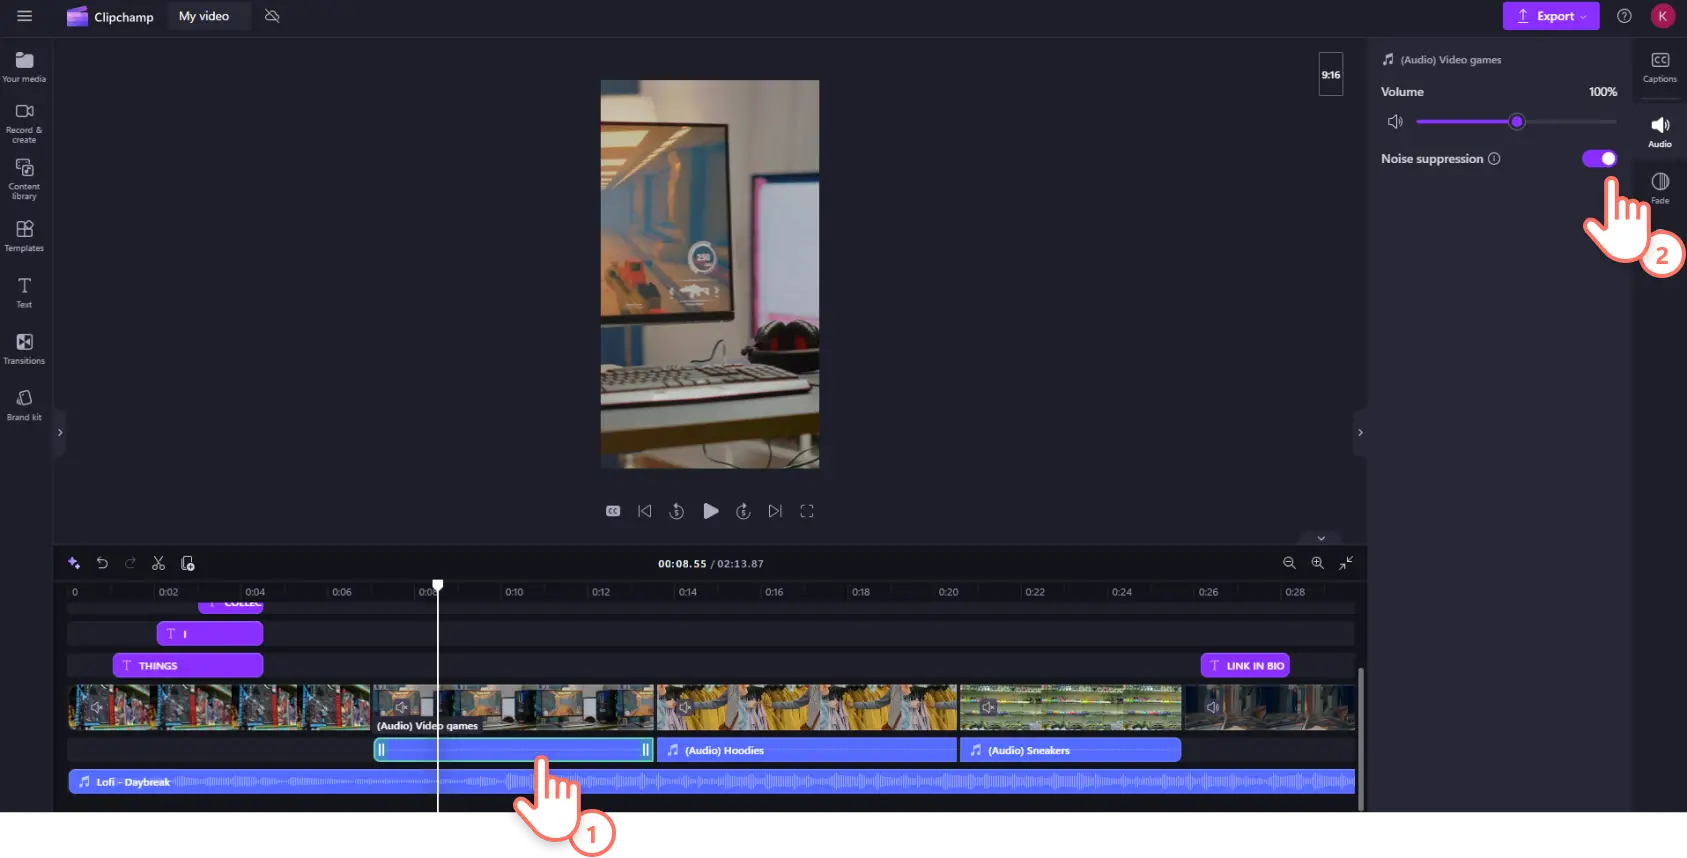
You can use the AI noise suppression tool to refine your audio quality and remove any unwanted noise. Click the audio asset in the editing timeline then toggle noise suppression on in the property panel.
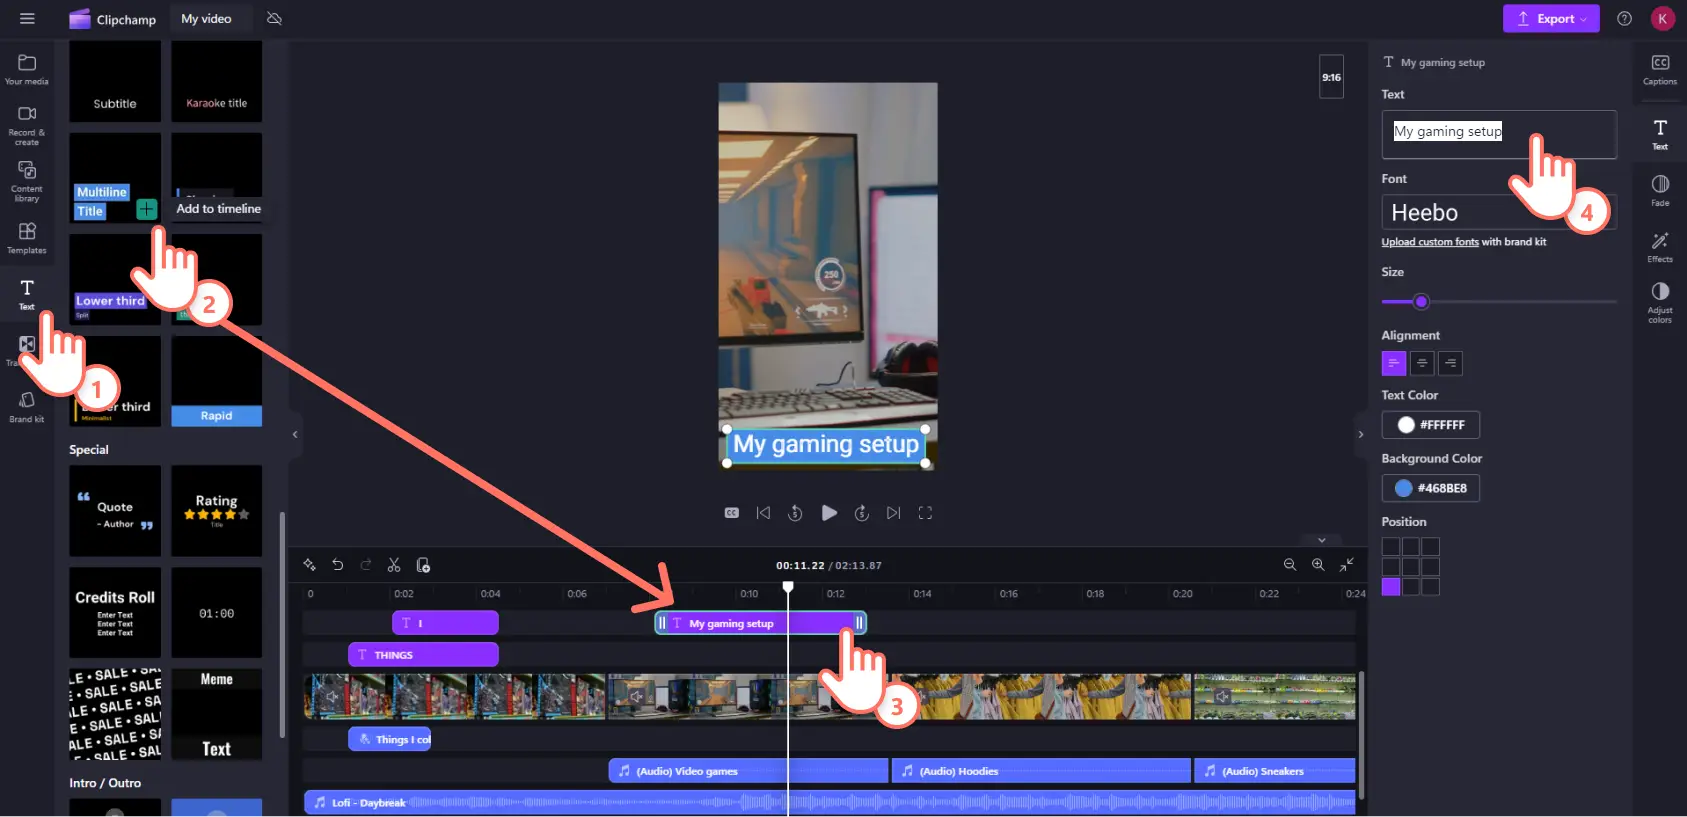
Add graphics
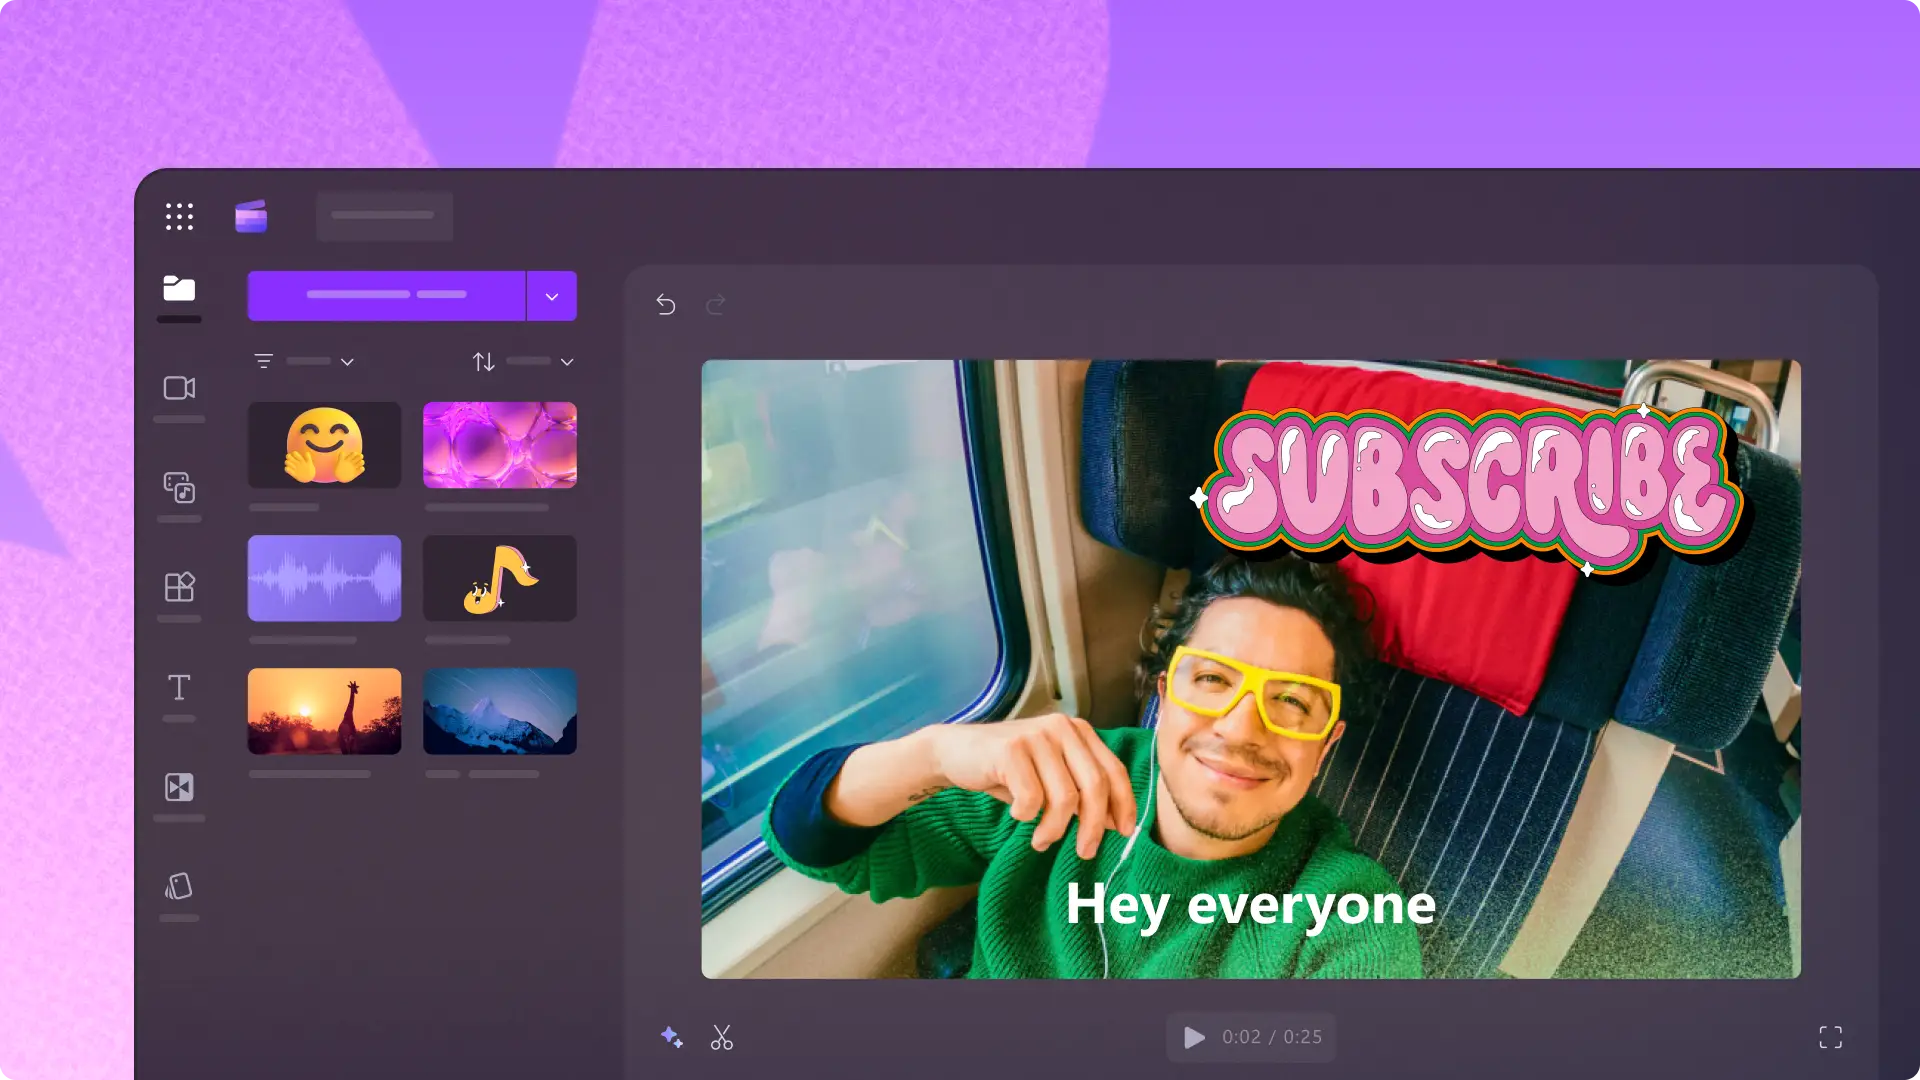
You can add graphic overlays and more text assets to customize the template. Click the text tab on the toolbar and scroll through the animated text options. Once you’ve found a style you want to use, click the add to timeline button or drag it onto the timeline. To edit your new text asset, click it in the timeline to automatically open the text tab in the property panel. Here you can change the text content and style, like size and color.
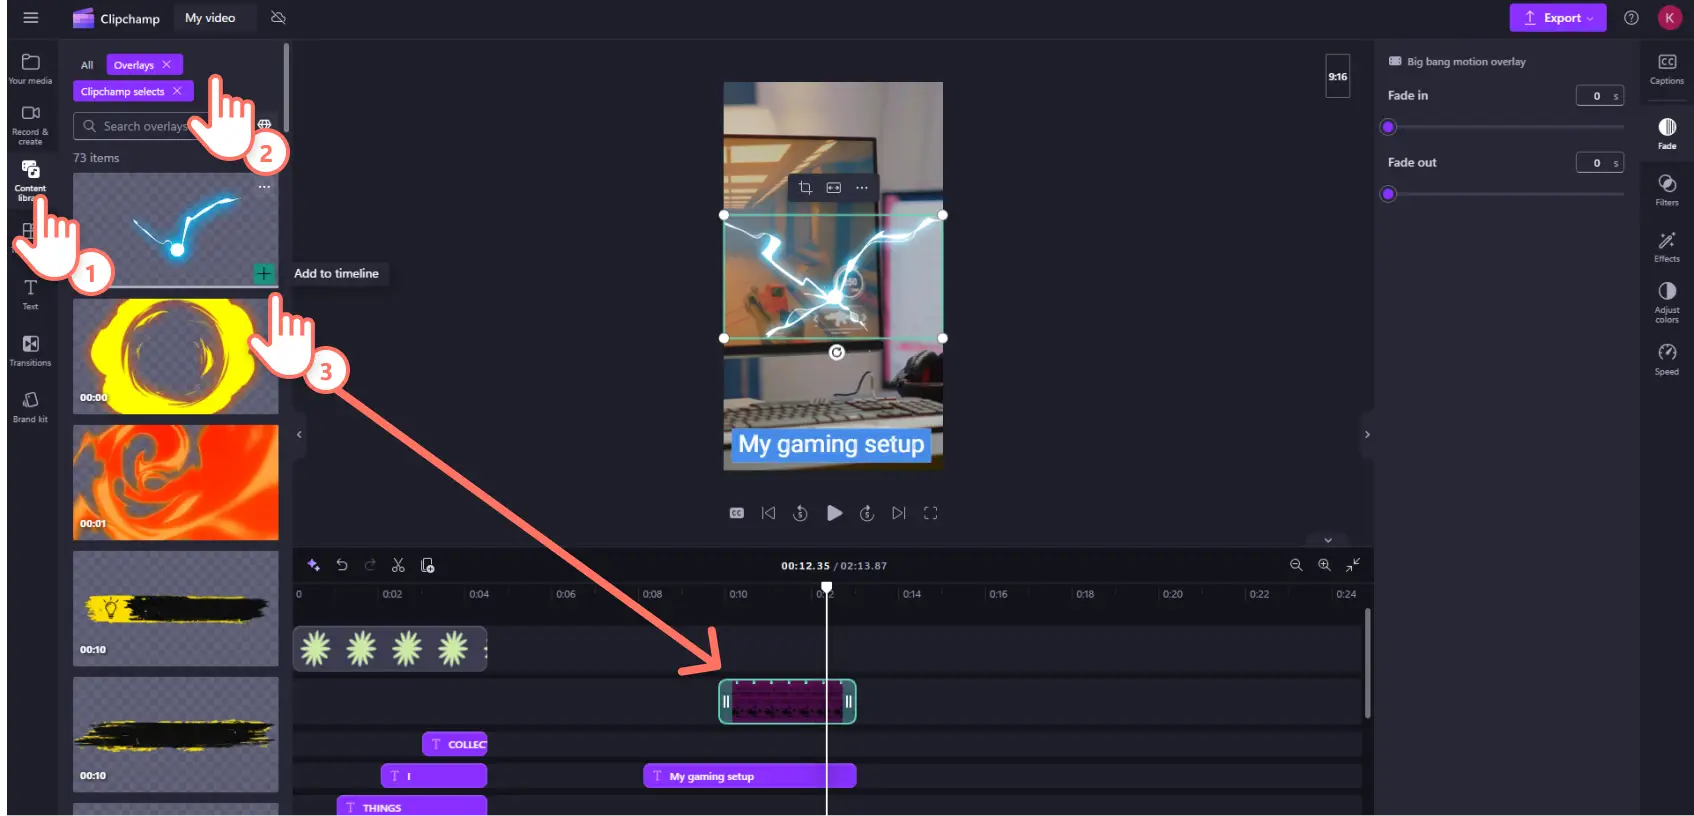
You can also add other engaging graphics like GIFs and stickers. Click the content library tab on the toolbar. Open the visuals drop down menu and select your style of graphics. For this example, we’ll add an animated overlay. Once you’ve found a graphic you want to use, click the add to timeline button or drag and drop the asset onto the timeline.
Step 4. Add AI voiceover and subtitles
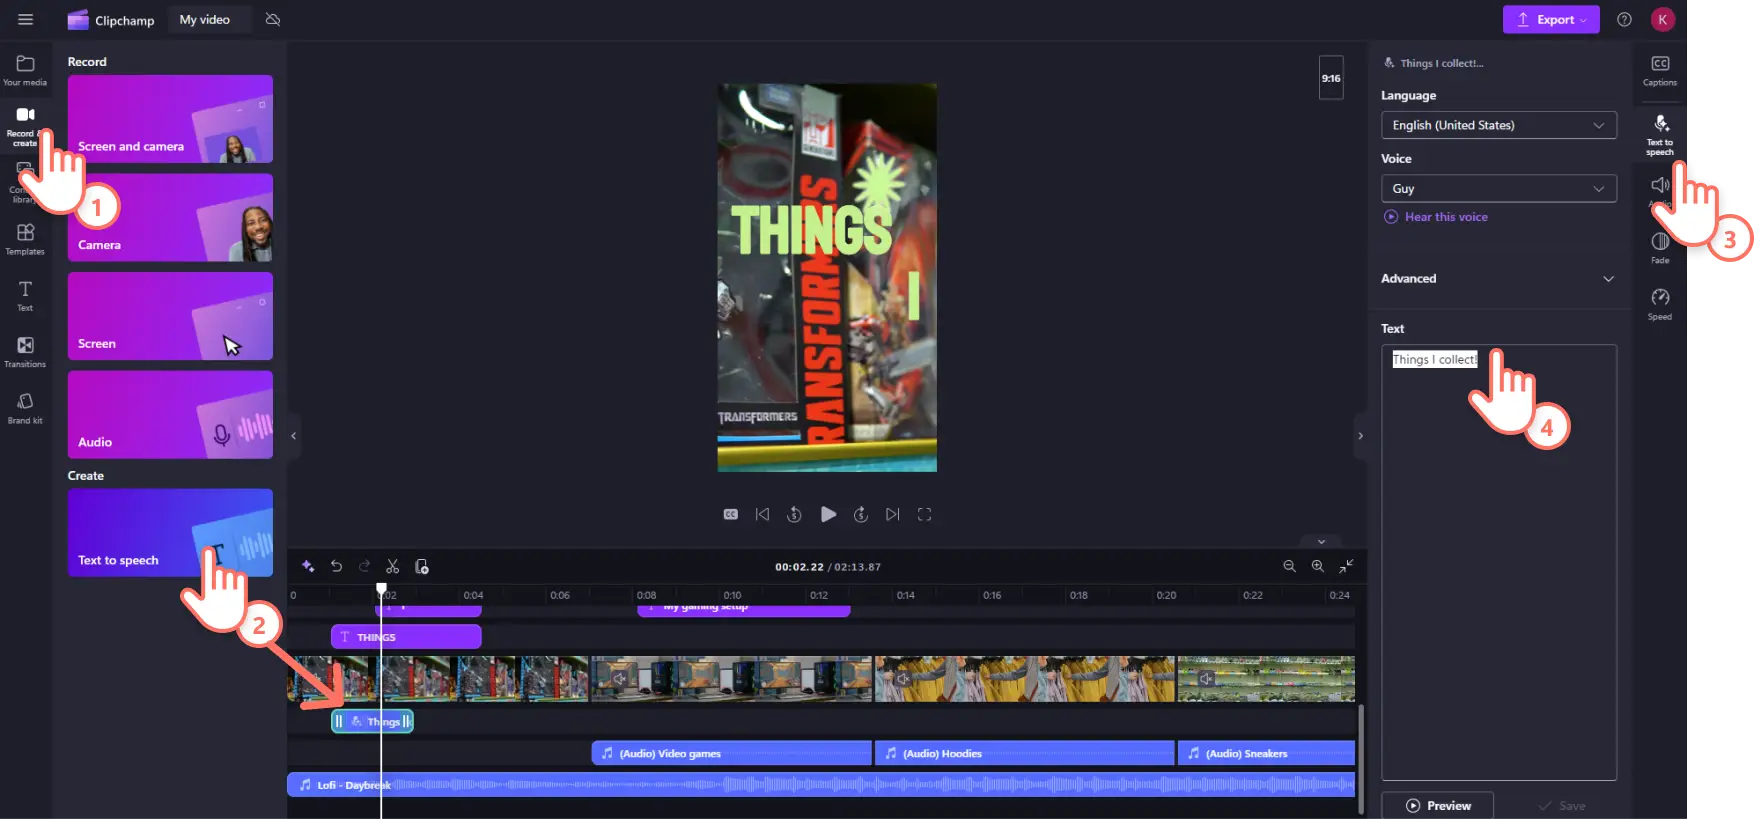
Text to speech
If your video requires a narration track but you don’t have access to a microphone (or you’re a little shy) you can use our AI voiceover generator to do the talking for you. Click the record & create tab on the toolbar then click the text to speech tool. This will make an audio clip appear on the timeline and the text to speech tab in the property panel will automatically open. Here you can enter your text and choose from natural sounding AI generated voices in more than 80 languages.
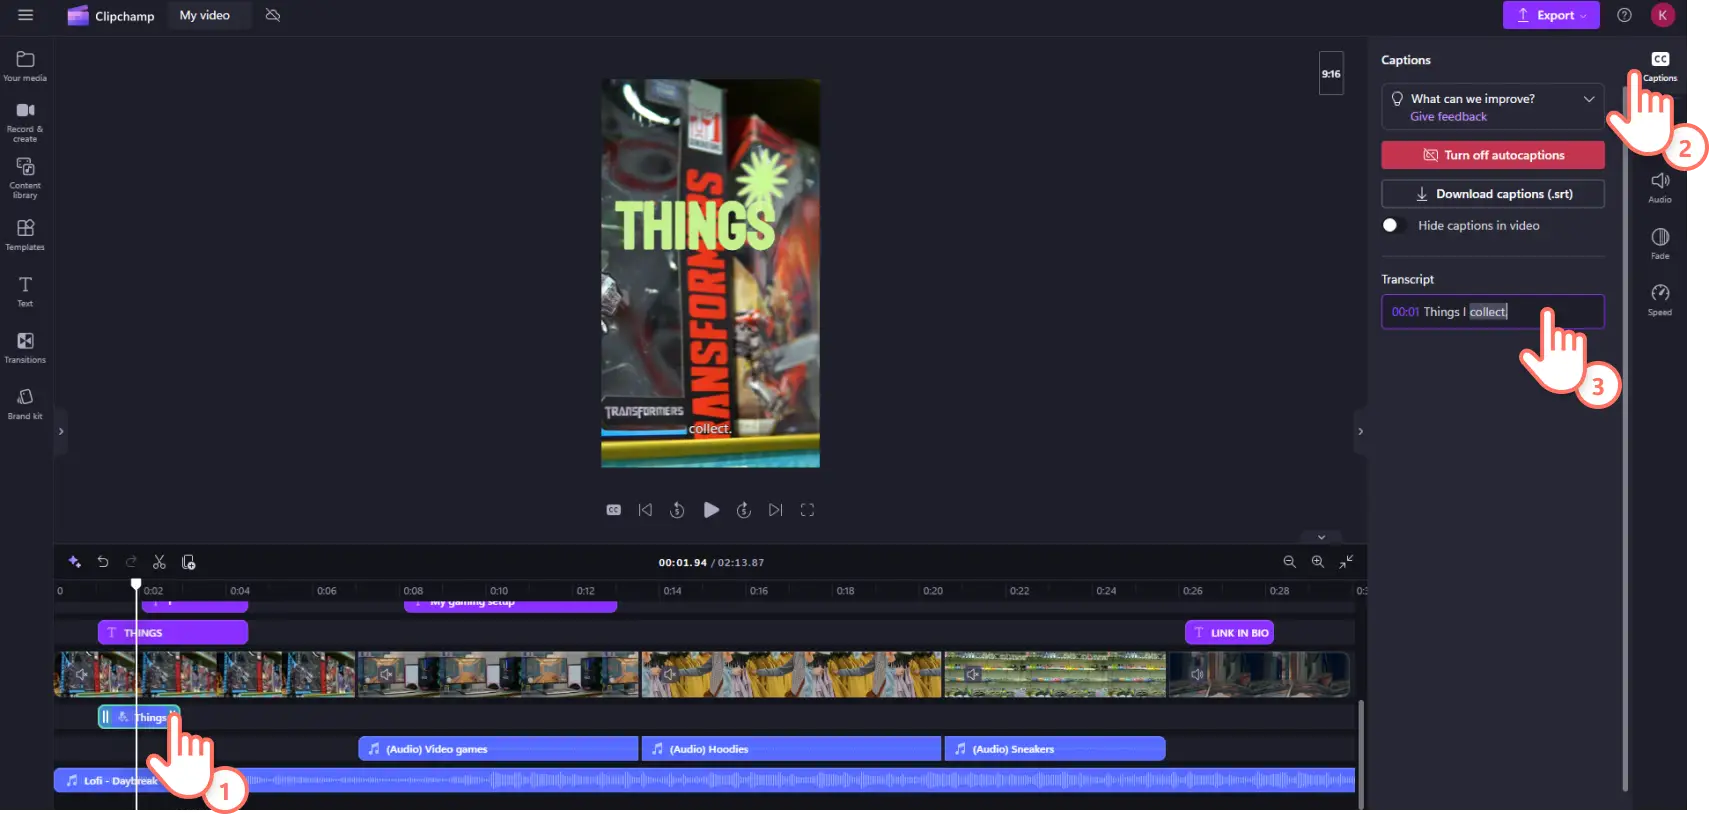
Autocaptions
Make your videos more inclusive and accessible by turning on autocaptions. Select the audio clip in the timeline you want captions for, so it’s highlighted. Next click the captions tab in the property panel then click the transcribe media button. Select your language and click the checkbox if you want to filter any explicit language. This will automatically generate captions for your audio. If you want to check or change the transcript, you can edit spelling and grammar inside the text field.
Step 5. Add your branding
Build your channel’s presence on YouTube and give your videos that professional look and feel by adding brand assets like your logo and font style with the brand kit.
Select the brand kit tab on the toolbar. Upload your logo, font, and color which will now be stored for future videos. Then drag and drop your brand assets onto the timeline.
![A screenshot of a Clipchamp user adding their brand kit assets to their video.]](https://media.clipchamp.com/clipchamp/2048/6NjBX6Q3QhO29dfaaDiQu)
Step 6. Preview and save your YouTube Short
Once you’ve finished editing your video, preview it by clicking the play button above the timeline. When you’re ready to save, click the export button at the top right of the window then choose your resolution. We recommend 1080p for the highest quality.
Note: The Clipchamp YouTube integration allows you to upload a YouTube video but doesn’t currently work for YouTube Shorts, so you’ll need to save your video to your OneDrive or hard drive then upload from inside YouTube Studio.

YouTube Shorts are as simple to create as they are to watch and just one of the ways you can make YouTube videos with Clipchamp.
Learn more in our YouTube Shorts ultimate guide. Then explore other ways to build your YouTube channel like how to write descriptions and how to post YouTube videos to Instagram.
So, what are you waiting for? Start creating YouTube Shorts with Clipchamp or download the Clipchamp Windows app.
Frequently asked questions
How to convert a YouTube video into Shorts?
YouTube has a built-in remix button so you can repurpose existing YouTube videos and Shorts for your own channel. Just tap the remix button underneath a video in YouTube to launch YouTube’s in-app editor. Alternatively, you can export and customize a YouTube video using the Clipchamp video resizer – just ensure you attribute the original content to the original creator.
Do you need 1000 subscribers to make YouTube Shorts?
No, there are no subscriber requirements for making YouTube Shorts. You can start creating YouTube Shorts right now with zero subscribers.
Can you make money with YouTube Shorts?
Yes, you can monetize YouTube Shorts to make revenue. But to enroll in the YouTube Partner Program with your Shorts content, you will need to have 1,000 subscribers and either 10 million public Shorts views in the last 90 days or 4,000 watch hours in the past twelve months.