Heads up! The screenshots in this article are from Clipchamp for personal accounts. The same principles apply to Clipchamp for work and school accounts.
On this page
Animated soundwaves turn ordinary audio into scroll-stopping video content—and adding one takes just a few clicks.
With the free online audio and music visualizer, AI scans audio and instantly generates a reactive soundwave. Make engaging visualizer videos like turning podcast audio into dynamic clips, showcasing radio broadcasts, or producing professional music videos for YouTube and beyond.
Read on to learn how to add audio visualizer to video using Clipchamp video editor online.
How to overlay music visualizers to videos
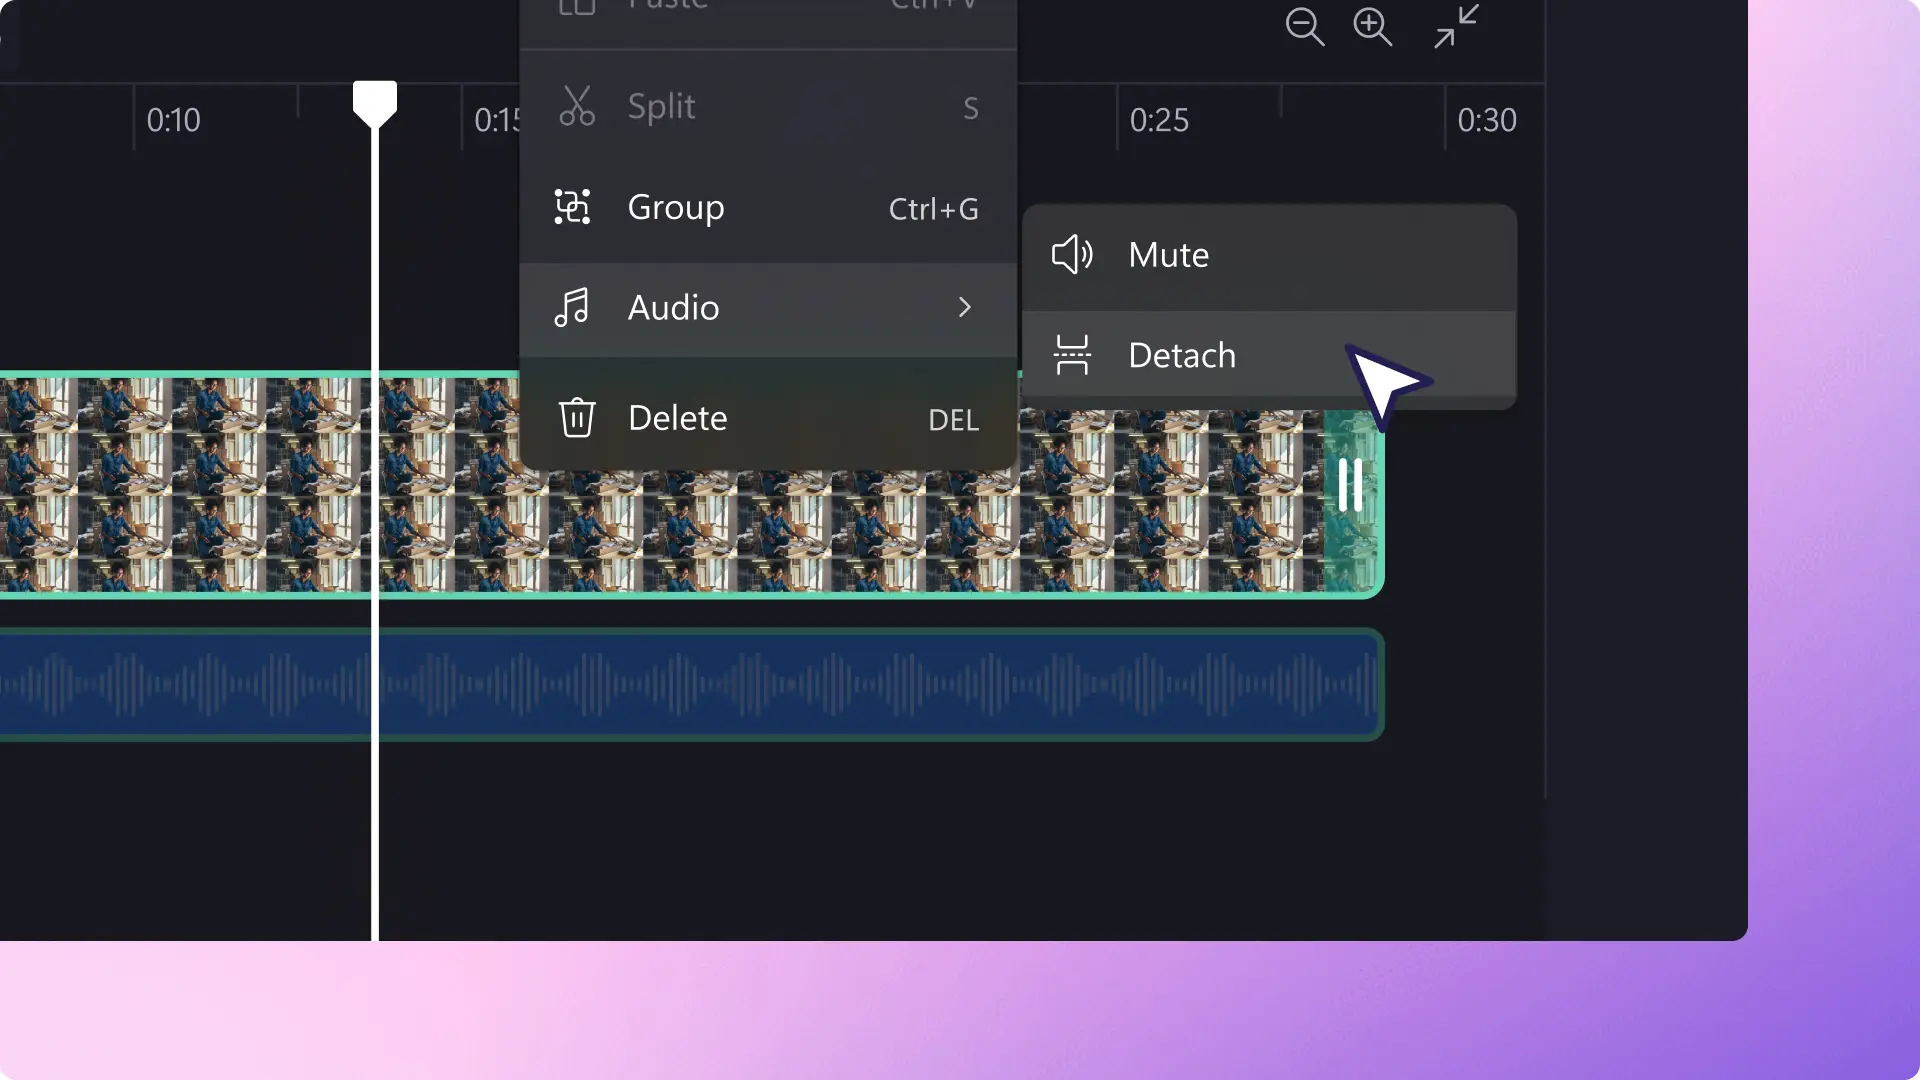
Step 1. Import videos with audio or select stock assets
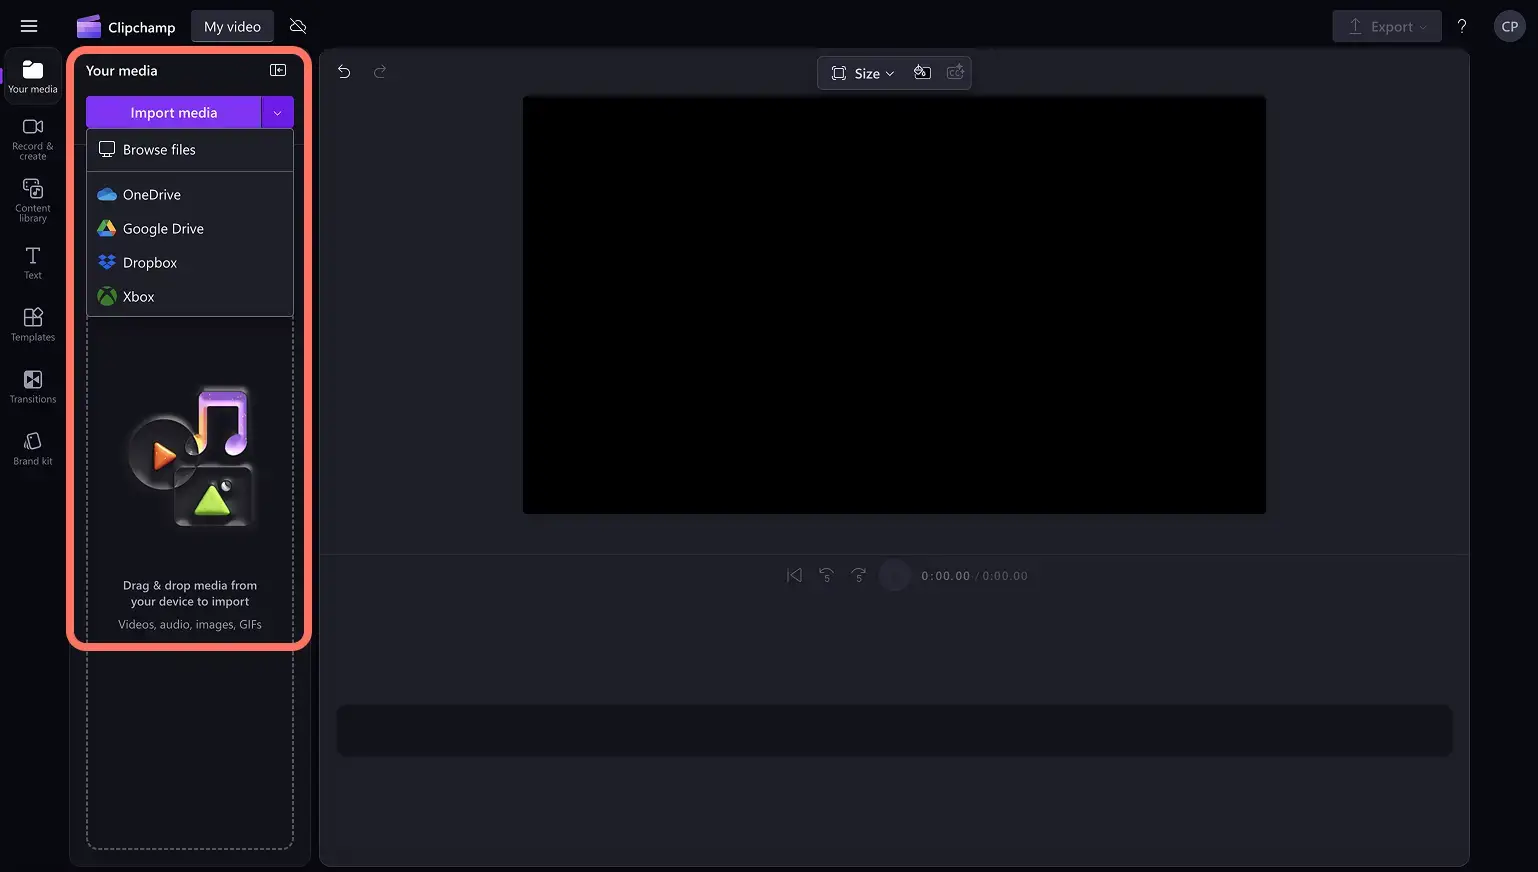
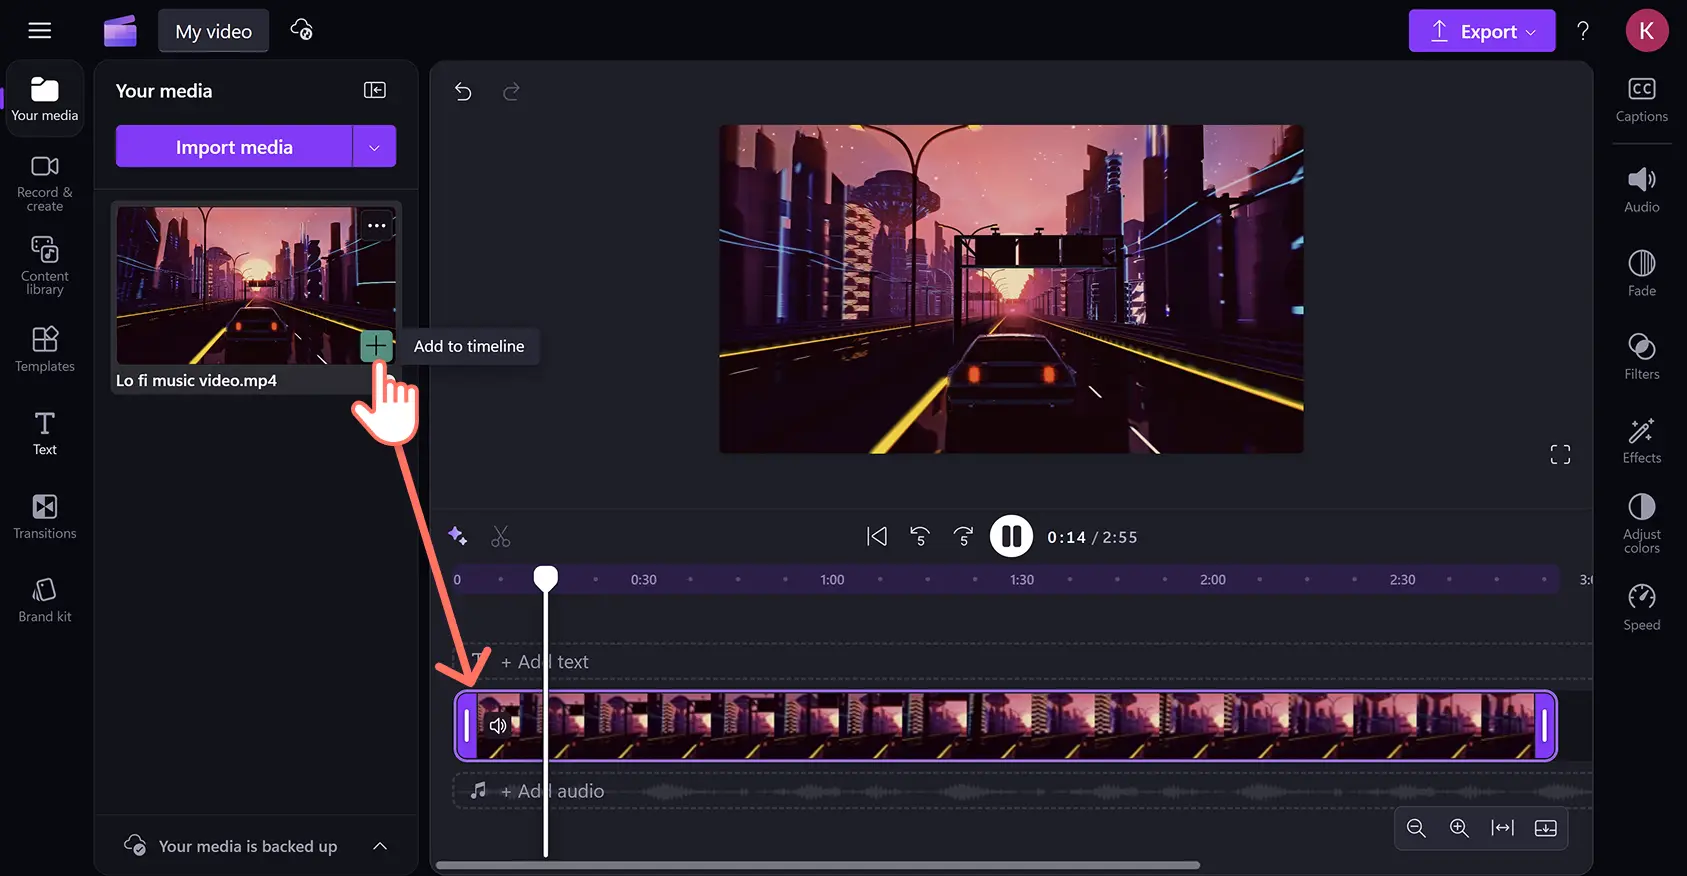
To import media, click on the import media button in the your media tab on the toolbar, then upload from a computer. Files can also be uploaded from OneDrive for easy cloud access.
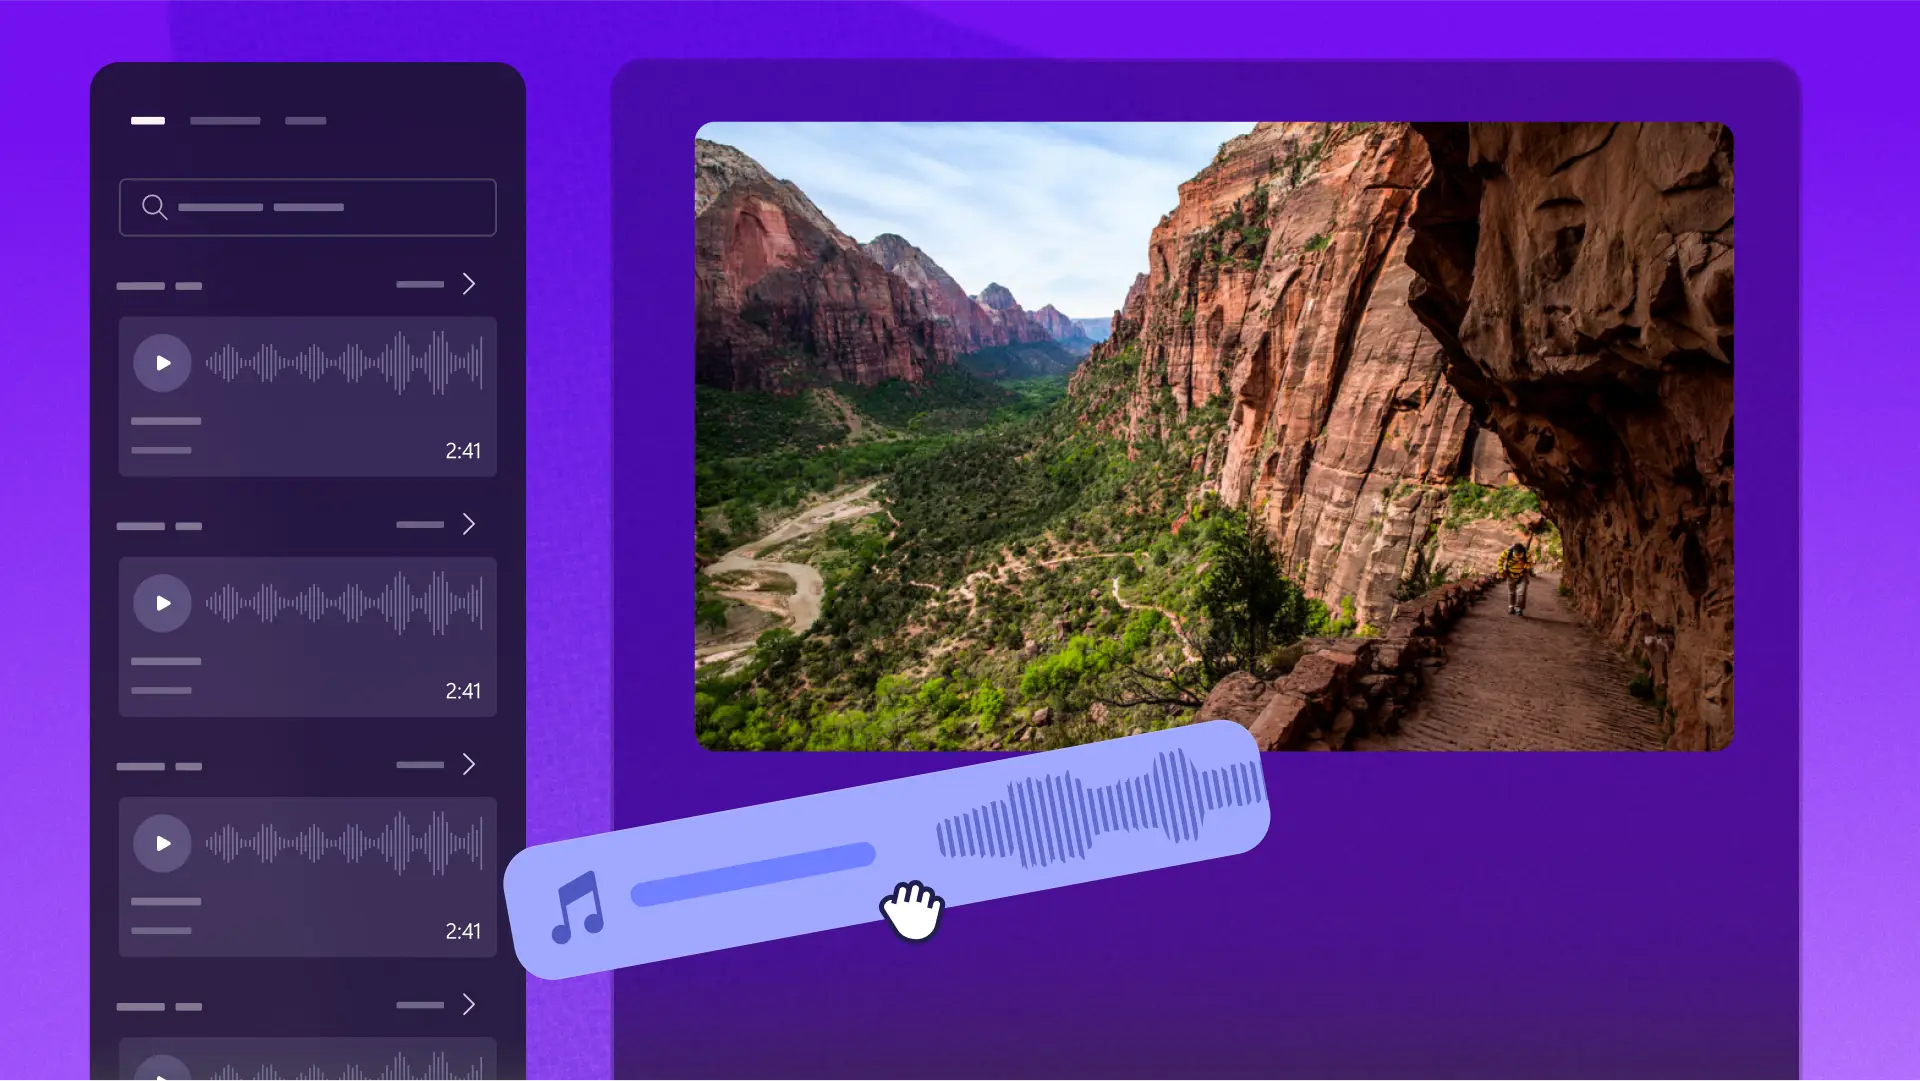
To create a video using stock media, select free stock media from the content library. Click on the content library tab on the toolbar, click on the visuals drop-down arrow, then click videos.
To select stock music, click on the audio drop-down arrow, then music. Browse different audio collections by category or type keywords into the search bar.
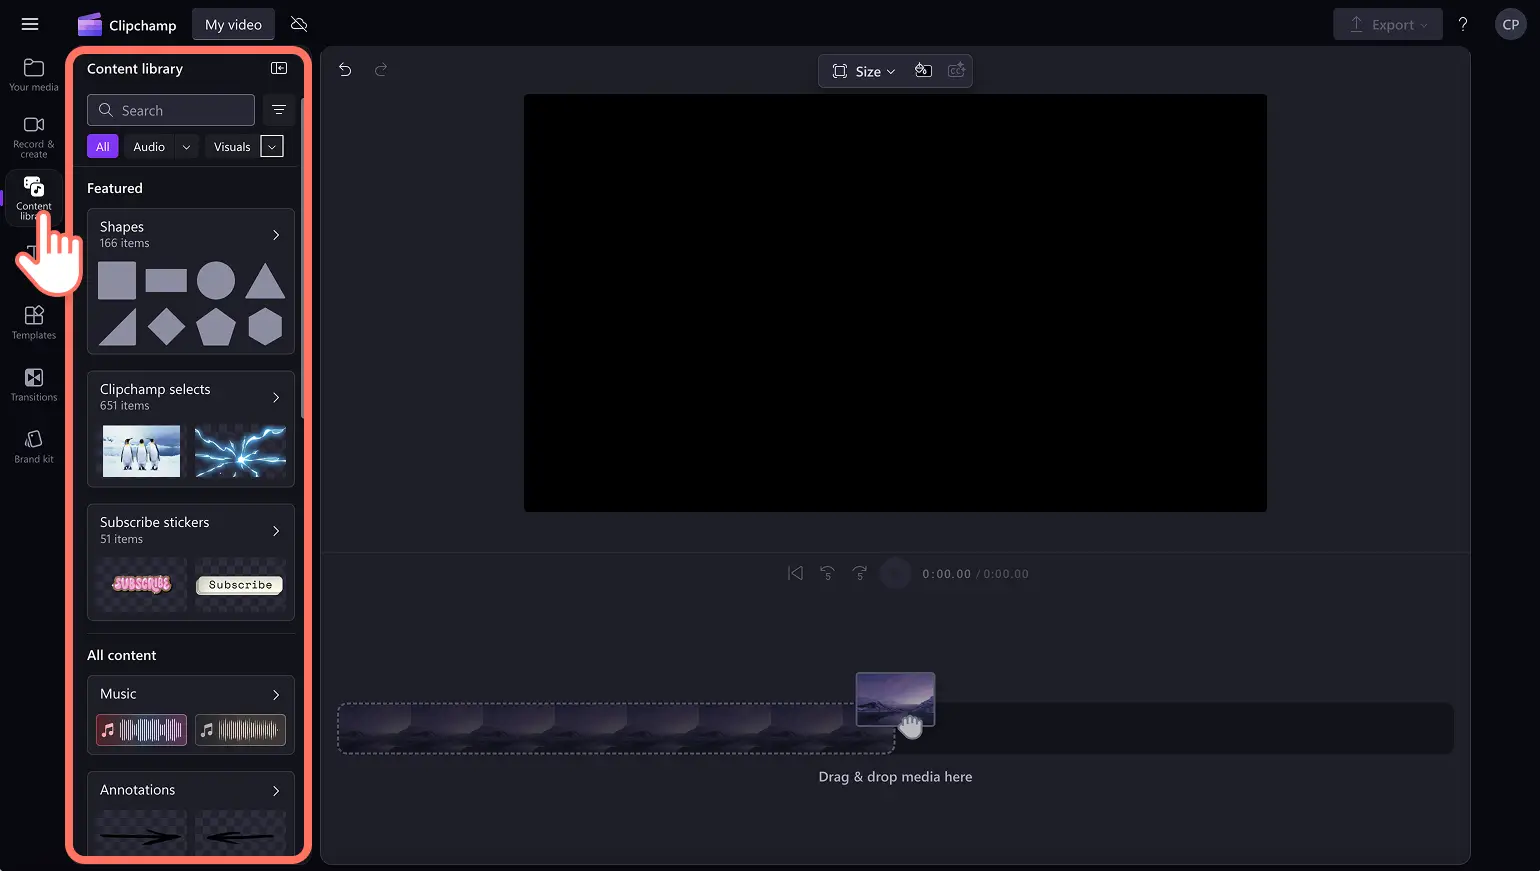
Drag and drop assets onto the timeline to begin editing.
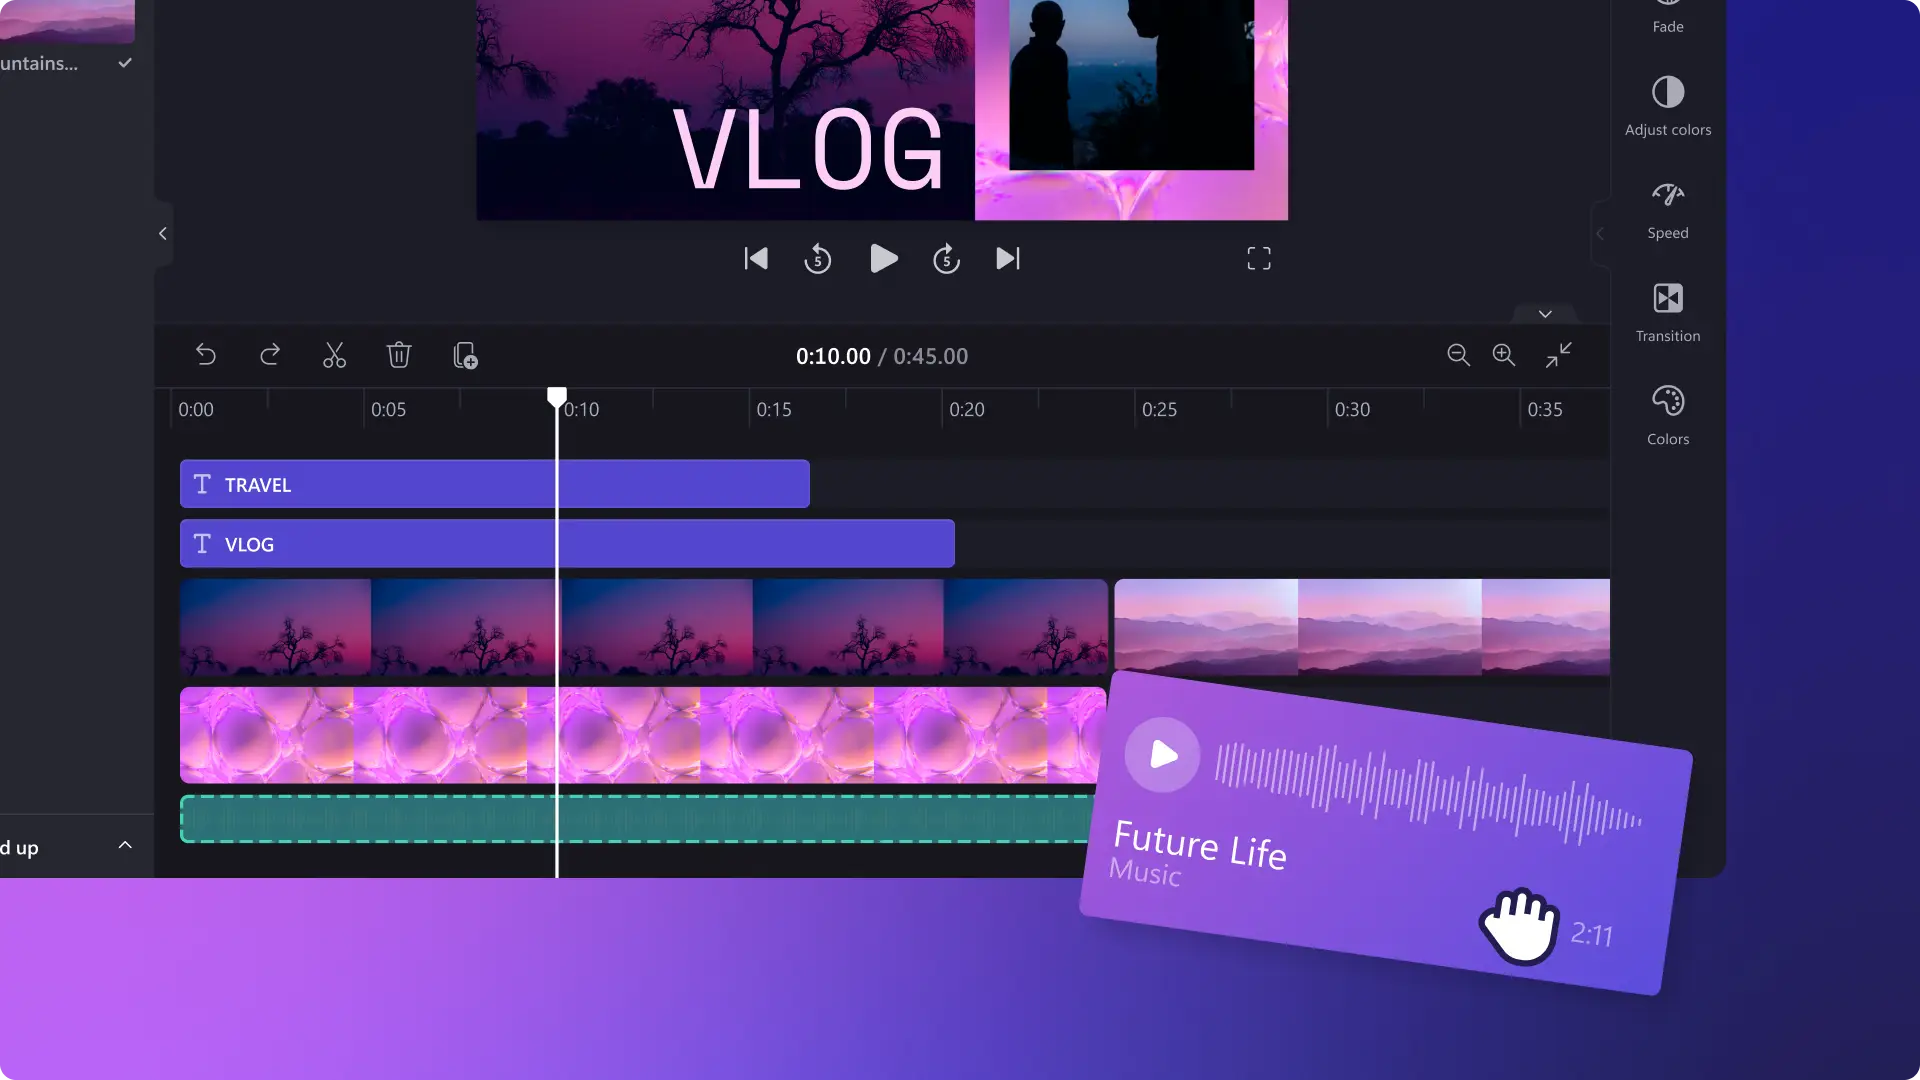
Step 2. Add an audio visualizer overlay
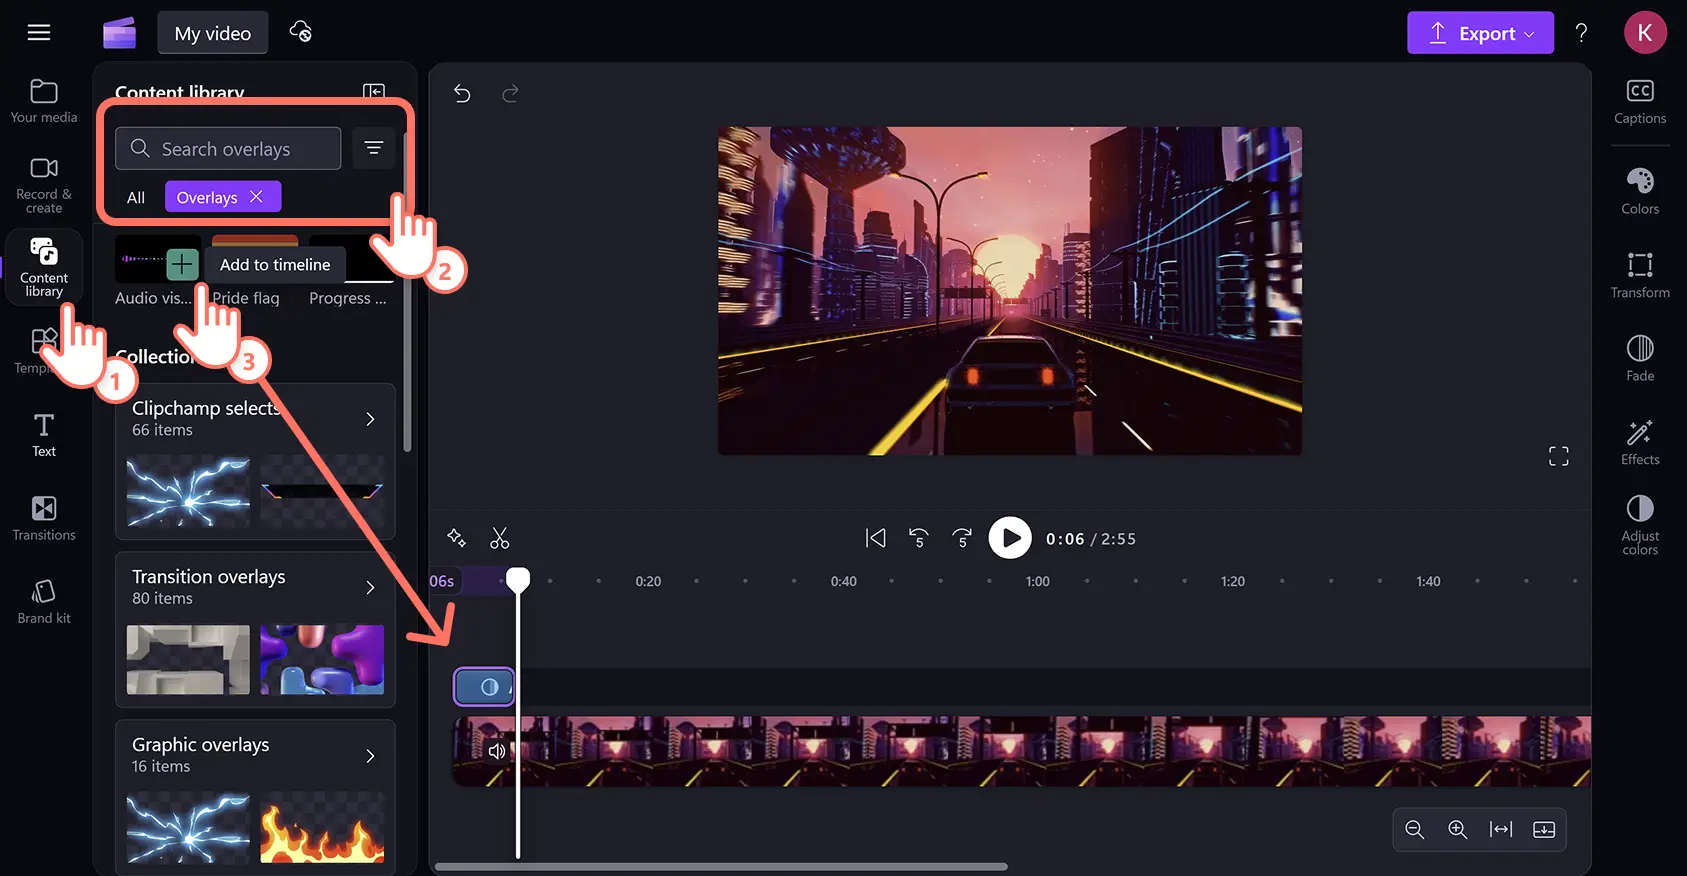
Click on the content library tab on the toolbar, then the visuals drop-down arrow, and click on overlays. The audio visualizer shortcut appears directly below the search bar.
Next, drag and drop the overlay onto the editing timeline and it will automatically scan and beat match audio. Make sure to place the music visualizer as the top layer above all other assets.
Step 3. Customize the audio visualizer
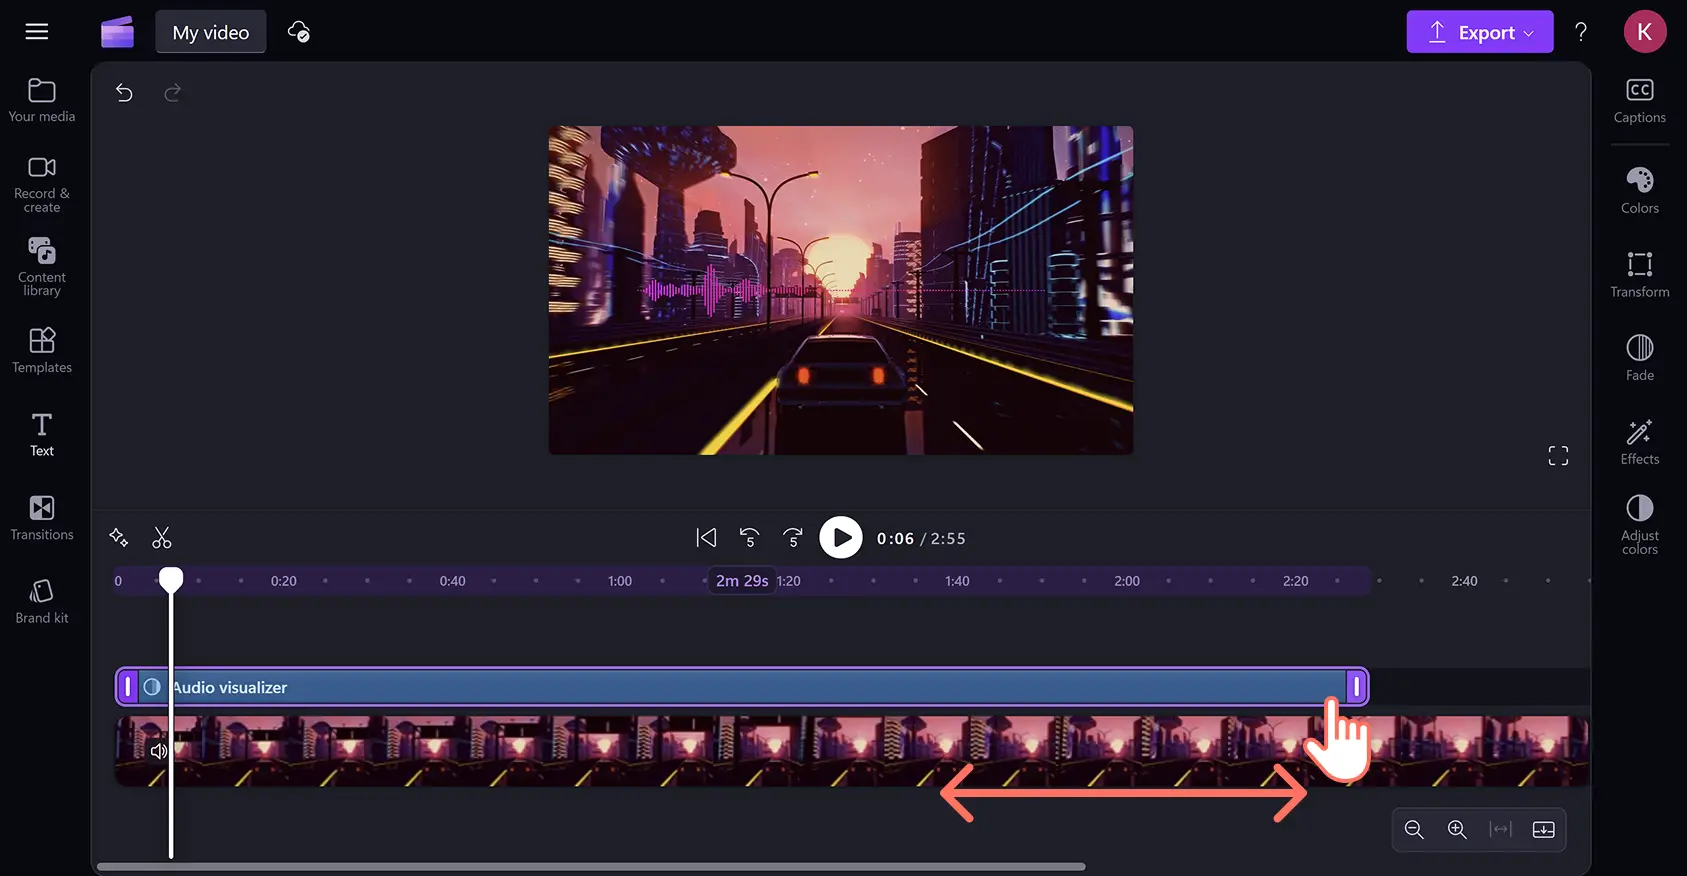
Trim music visualizer length
Change the visualizer duration to match the length of audio and video using the video trimmer tool. Click the overlay on the timeline, then drag the trimming handles inward or outward to make the visualizer longer or shorter.
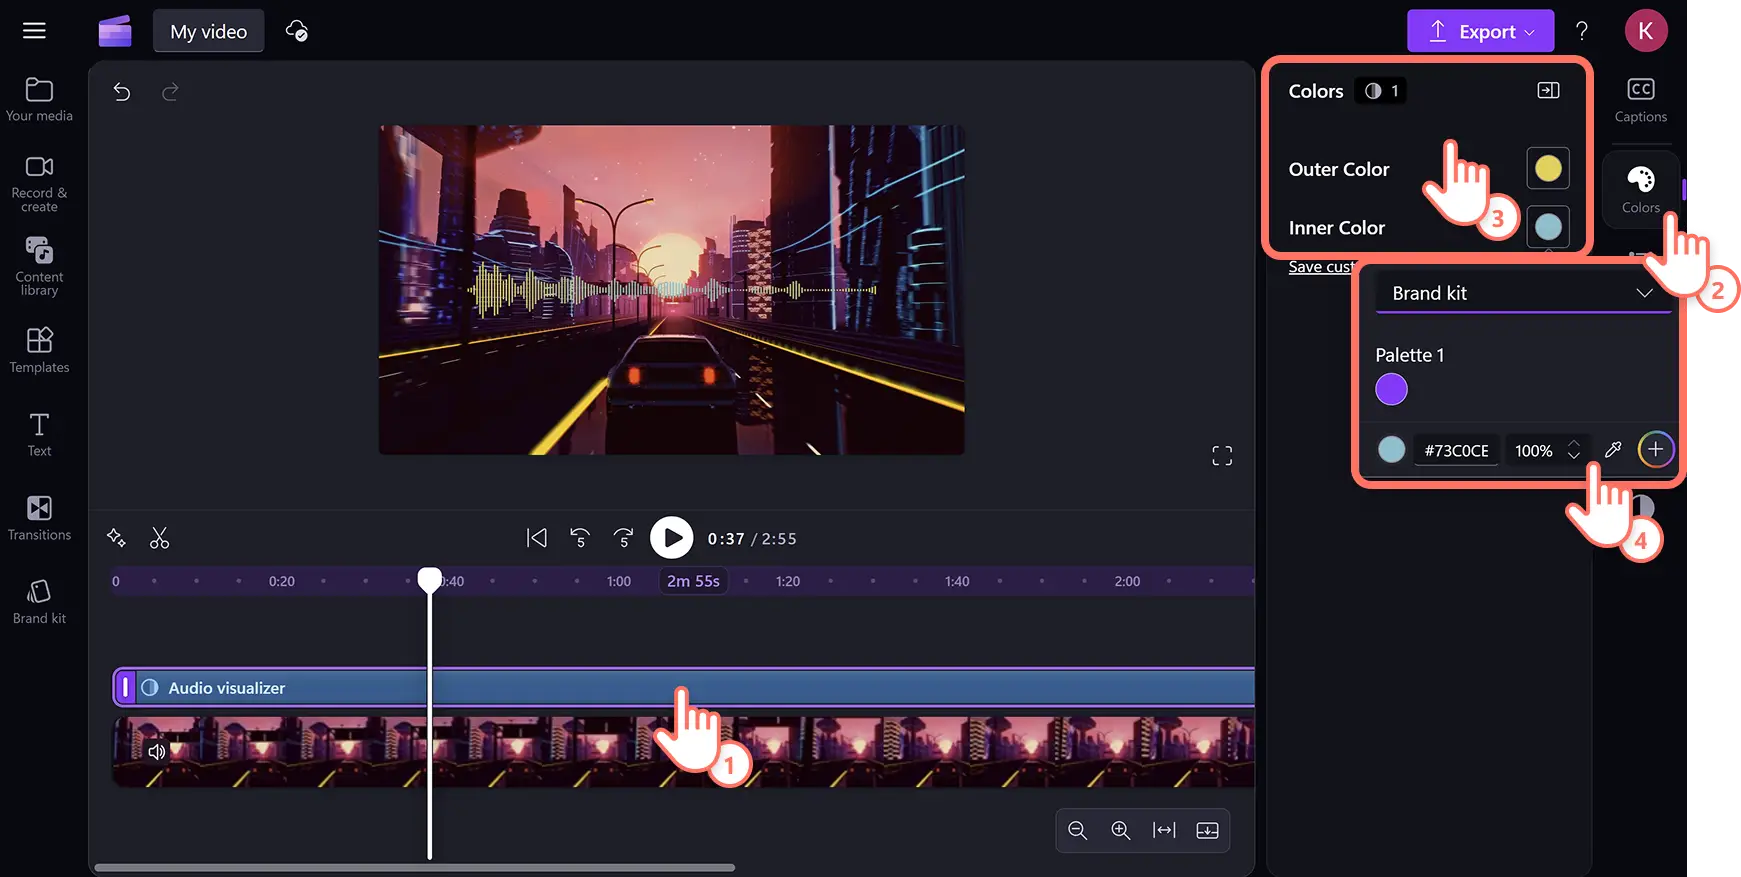
Adjust the outer and inner colors
The music visualizer contains two color layers that can be changed to suit a video aesthetic. Click on the music visualizer on the timeline to reveal the property panel, then click on the colors tab.
Edit the color scheme of music visualizers by choosing an inner color and an outer color. Select from the default color list, open the HSV picker, or type in the color HEX code. Further settings such as exposure, contrast, and saturation, can be adjusted by clicking the adjust colors tab in the property panel.
Edit the position, size, and display bar style
Customize the location, size, and design of music visualizers by clicking on the transform tab on the property panel. Next, click on one of the position boxes to change the overlay's location within the video frame. Drag the size slider to make the visualizer smaller or bigger.
Choose the music visualizer display as sound bars or sound waves. Click on the display-as-bars box to change the music visualizer from multiple vertical bars to two horizontal soundwave lines.

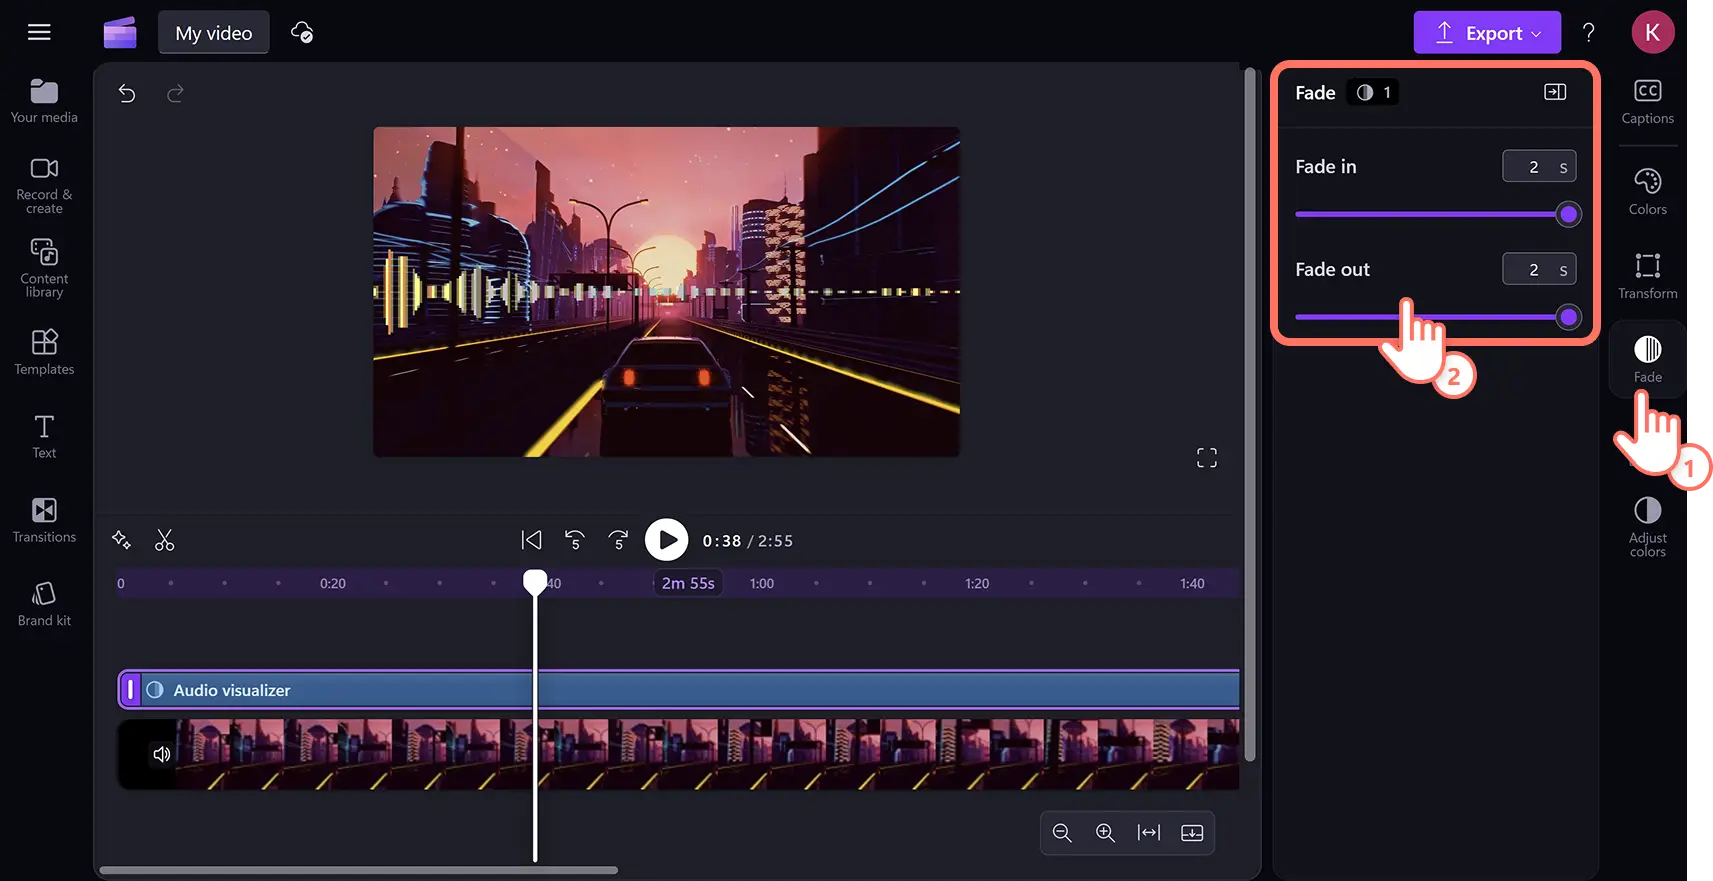
Add fades and effects
To add video effects like VHS or retro graphics, click on the visualizer on the timeline, then click the effects tab in the property panel. Browse through the effects or enter keywords into the search bar. Click an effect to add it to the music visualizer, then customize its settings. To undo an effect, click on the none option at the top.

Fades can also be added to customize the beginning and end of music videos. Click on the fade tab in the property panel, then drag the fade sliders or type in a number between zero and two seconds.
Change audio visualizer appearance with a fun video effect available in property panel. Click on the effects tab, then select a video effect that suits the video.
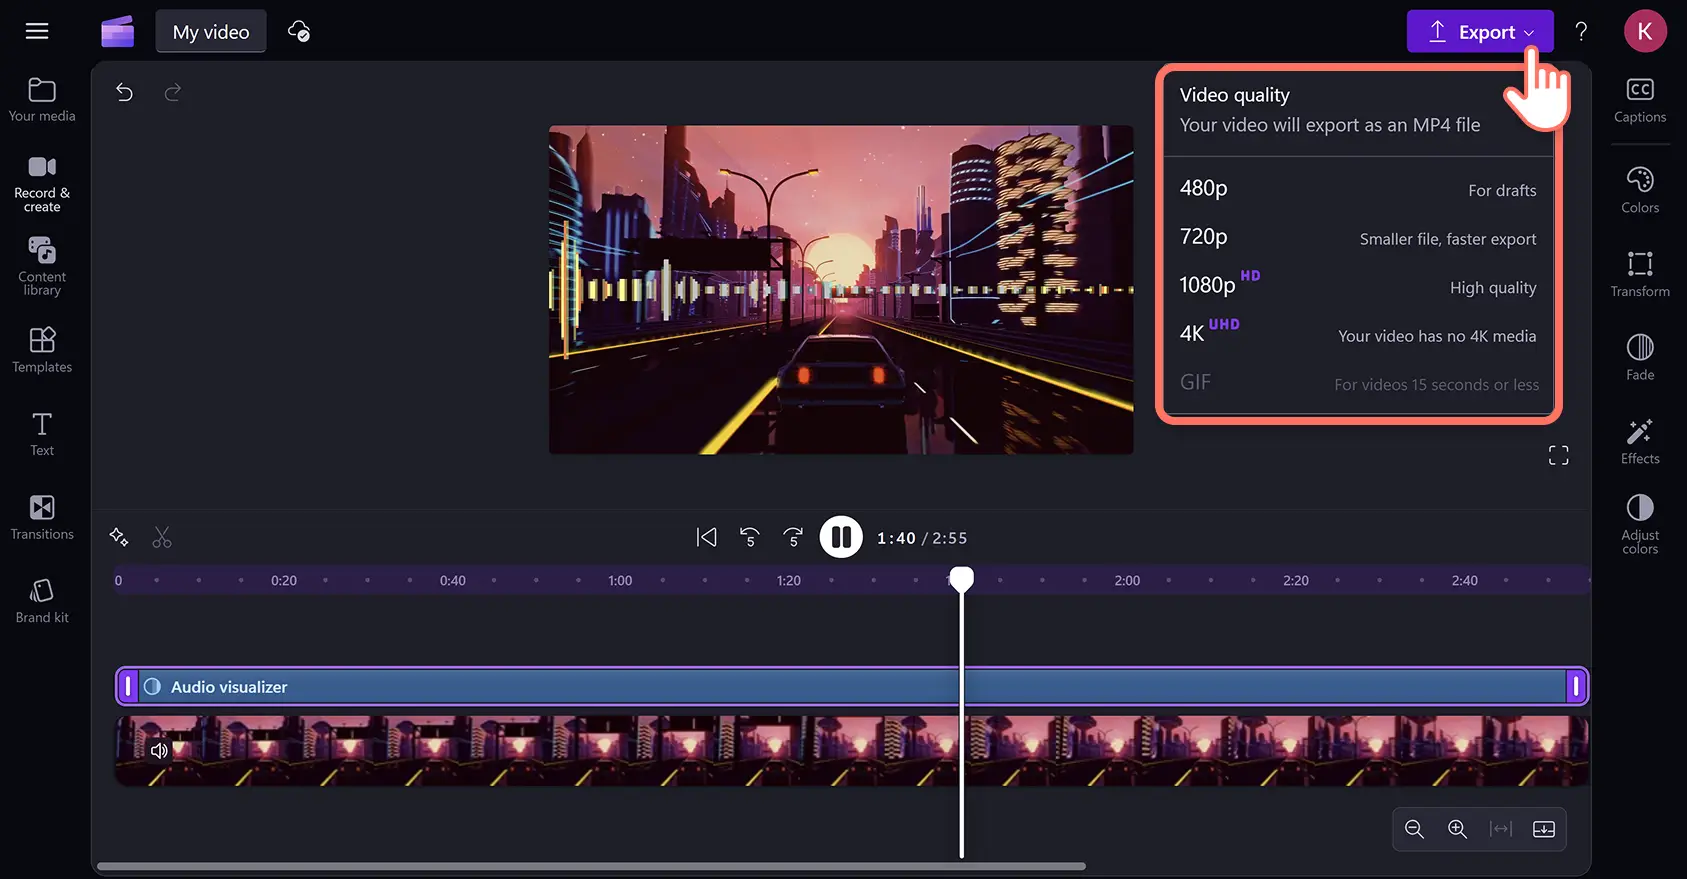
Step 4. Preview and save video in HD
Preview the podcast or music video by clicking on the play button. When ready to save, click on the export button and choose a video resolution.
Enhance music visualizer videos with AI
Remove background noise from audio: improve sound quality and filter out unwanted ambient sounds with AI noise suppression tools. The AI audio cleaner will enhance audio fidelity while removing background noise, such as hums and static.
Add AI subtitles to videos: generate automatic subtitles for lyrics in global languages with autocaptions for wider reach. AI scans your video and creates an editable .SRT video transcript to make videos more accessible and understandable.
Clean up audio with silence removal: remove unnecessary pauses without reuploading. AI auto cut will automatically identify unwanted silences so they can be deleted without stopping the workflow.
Create audio using AI voiceovers: turn text into speech with the AI voiceover generator inside Clipchamp video editor. Write a script, then customize style, language, tone, and pace to make lifelike voiceovers.
Watch the audio visualizer video tutorial
Learn how to use the music visualizer overlay in this step-by-step video.
Create original podcast and music videos by exploring the best royalty-free background music available in the content library, and learn how to add sound effects to videos for extra impact.
Five ideas to use audio visualizers in videos
Audio visualizers do more than display soundwaves. They transform any video into a dynamic, professional-looking production. Here are five creative ways to bring audio visualizers to life across different video formats.
1. Turn podcast episodes into shareable social clips
Podcast creators can repurpose audio recordings into eye-catching video clips for platforms like Instagram Reels and TikTok videos by pairing the audio with a branded background. Adding a reactive audio visualizer makes the soundwaves pulse in real time, giving static audio a visual identity worth watching. Layer text overlays, speaker names, and key quotes on top using video overlay tools to create polished, shareable clips without any extra recording.
2. Produce music release videos for YouTube
Musicians can use audio visualizers as a visually compelling backdrop for lyric videos or full-track releases on YouTube and other streaming platforms. Matching the visualizer colors to album artwork or a music video's aesthetic creates a cohesive brand identity across all platforms. Use the video enhancer to boost the visual quality of background footage and make the visualizer pop even more.
3. Create ambient soundscape videos for relaxation content
Creators in the wellness and relaxation space can pair calming audio with nature footage and a subtle audio visualizer to create an immersive viewing experience. The gentle movement of soundwaves complements content like meditation sessions, sleep music, or rain ambience videos that benefit from a visual anchor. Add fades to the beginning and end of each clip to keep the atmosphere soft and seamless throughout.
4. Elevate DJ sets and livestream highlights
DJs and music producers can transform recorded sets into professional highlight reels by placing an audio visualizer over a video background that matches the vibe of the music. Customizing the bar style, colors, and position of the visualizer ensures every set has a distinct and memorable look. Pair the visualizer with the video overlay tool to add a logo watermark or track listing for a polished, branded finish.
5. Add energy to promotional videos and brand intros
Businesses and content creators can use audio visualizers to add motion and energy to branded content like product launches, event promos, and intro sequences. A pulsing visualizer paired with a bold music track signals professionalism and attention to detail that static visuals simply cannot match. Run footage through the video enhancer first to sharpen colors and contrast, then layer the visualizer on top for a high-impact result.
Make audio and music visualizers for free online in Clipchamp video editor or download the Microsoft Clipchamp Windows app today.
Frequently asked questions
Are audio visualizer and music visualizer the same tool?
The audio visualizer and music visualizer are the same overlay effect. It works for all audio and music files in Clipchamp video editor.
How do I share my music video with audio visualizer?
A music video can be shared directly to YouTube, TikTok, and OneDrive from Clipchamp using third-party integrations. All Clipchamp audio is copyright and royalty-free, so videos containing stock music can be posted anywhere online without facing legal issues.
Can I add multiple music visualizers to my video?
As many music visualizers as needed can be added to a video in Clipchamp video editor. Just keep in mind that the visualizer only works for one audio source at a time. However, multiple audio tracks with individual visualizers can be arranged sequentially on the timeline in the same video.
Is the audio visualizer overlay compatible with voice recordings and music?
The audio visualizer works with all audio sources inside Clipchamp video editor. The overlay can be applied to videos containing audio, uploaded MP3 files, stock music, AI voiceovers, and voice recordings.