Heads up! The screenshots in this article are from Clipchamp for personal accounts. The same principles apply to Clipchamp for work and school accounts.
On this page
Easily combine photos and videos to create an engaging slideshow video that captivates your viewers. Curate your favorite family memories, enhance study materials, or showcase new products using video slideshows.
Read on to learn how to create video slideshows perfect for social media and corporate presentations in a few minutes for free using the Clipchamp video editor.
How to make video slideshows
Step 1. Import videos or select stock footage
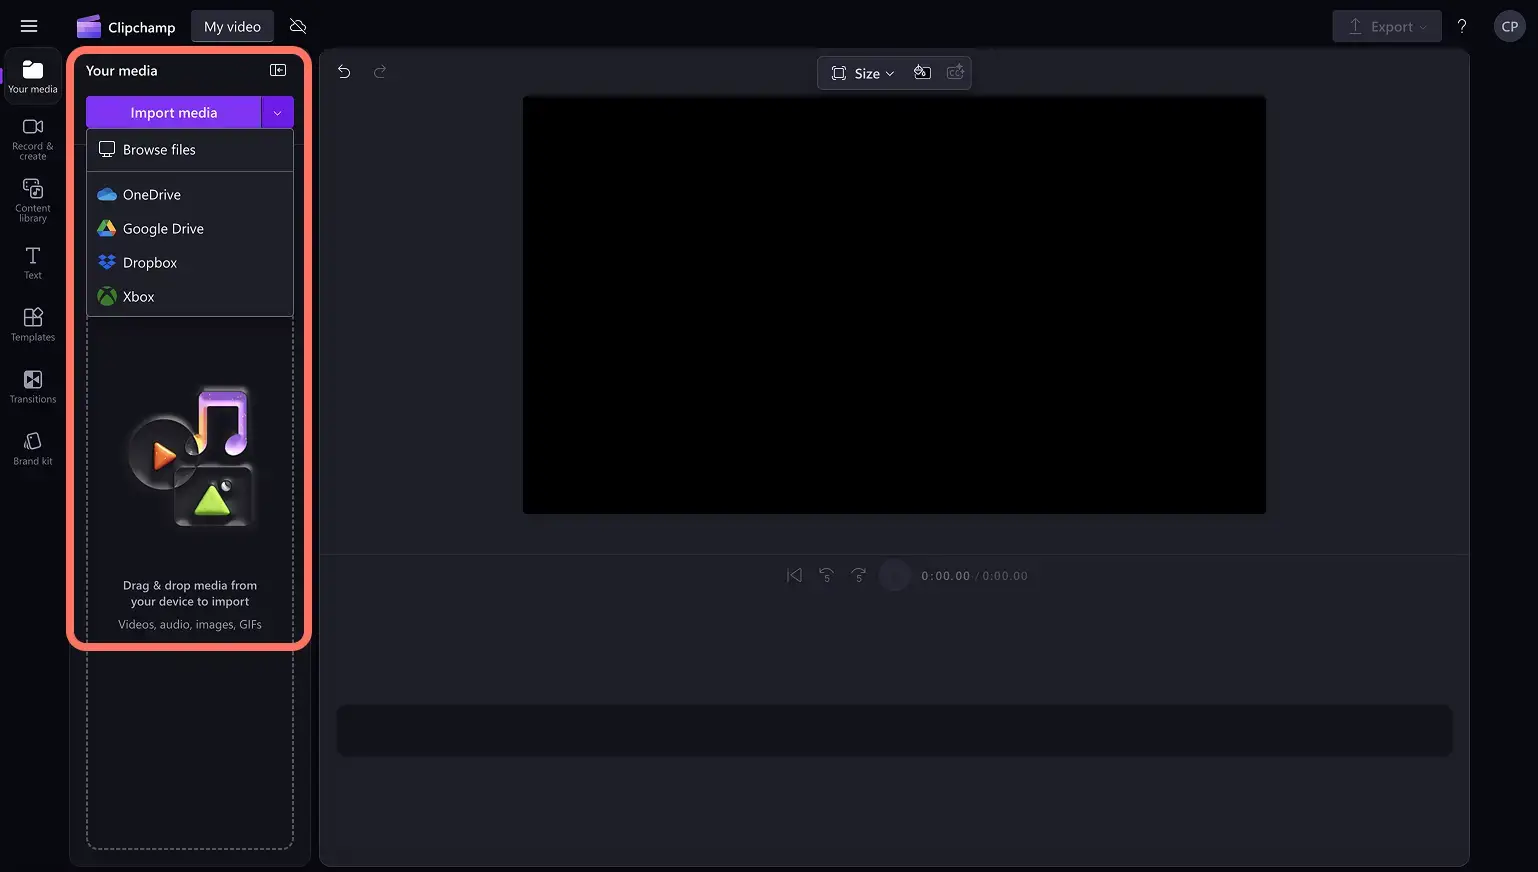
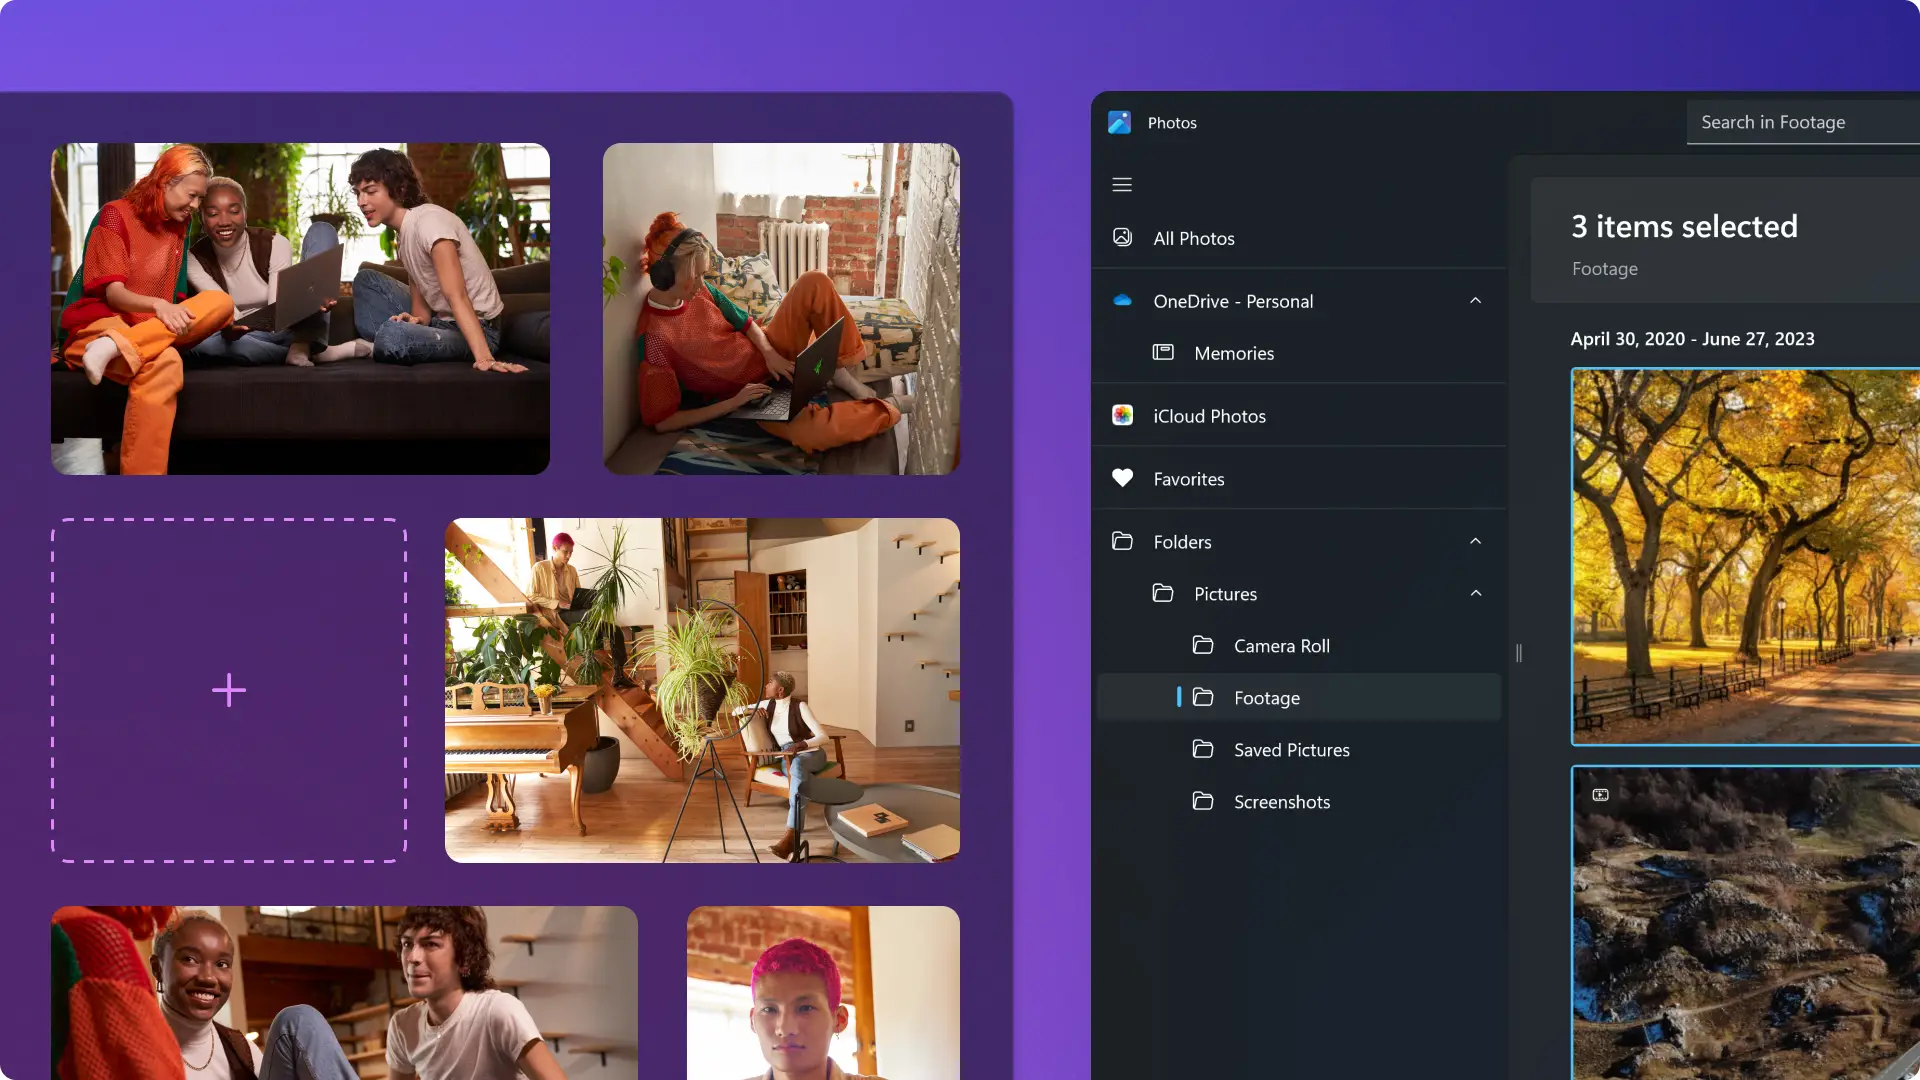
To import your own videos, photos, and audio, click on the import media button in the your media tab on the toolbar to browse your computer files, or connect your OneDrive.
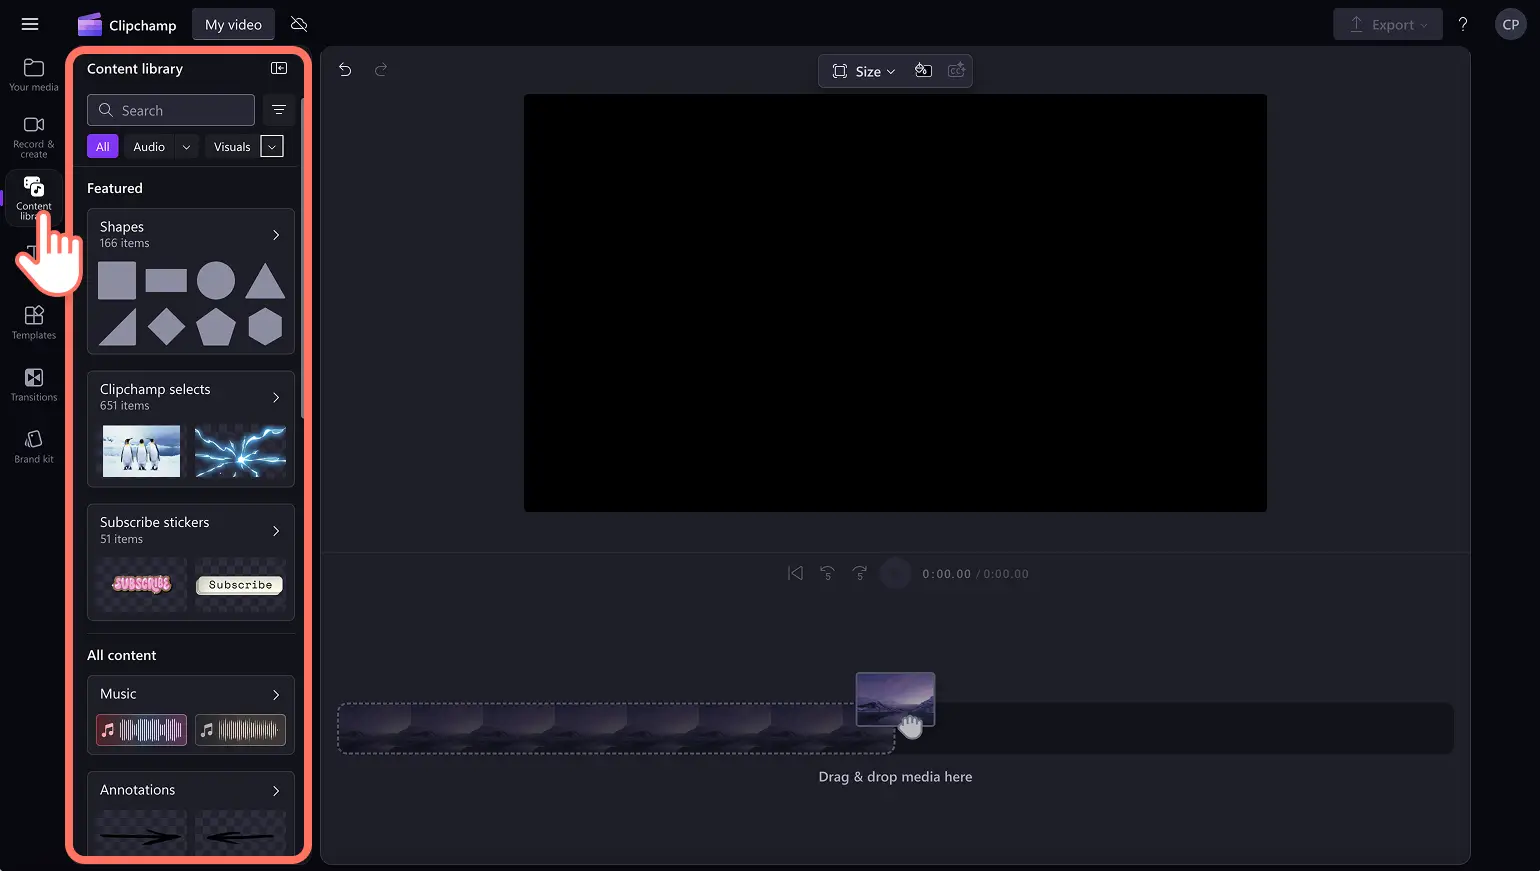
You can also use free stock media like video clips, video backgrounds, and stock music. Click on the content library tab on the toolbar and click on the visuals drop down arrow, then videos, photos, or backgrounds. Search through the different stock categories using the search bar as well.
Tip: If you can't find footage or images that suit your video vision, create AI generated photos to add to your video slideshow.
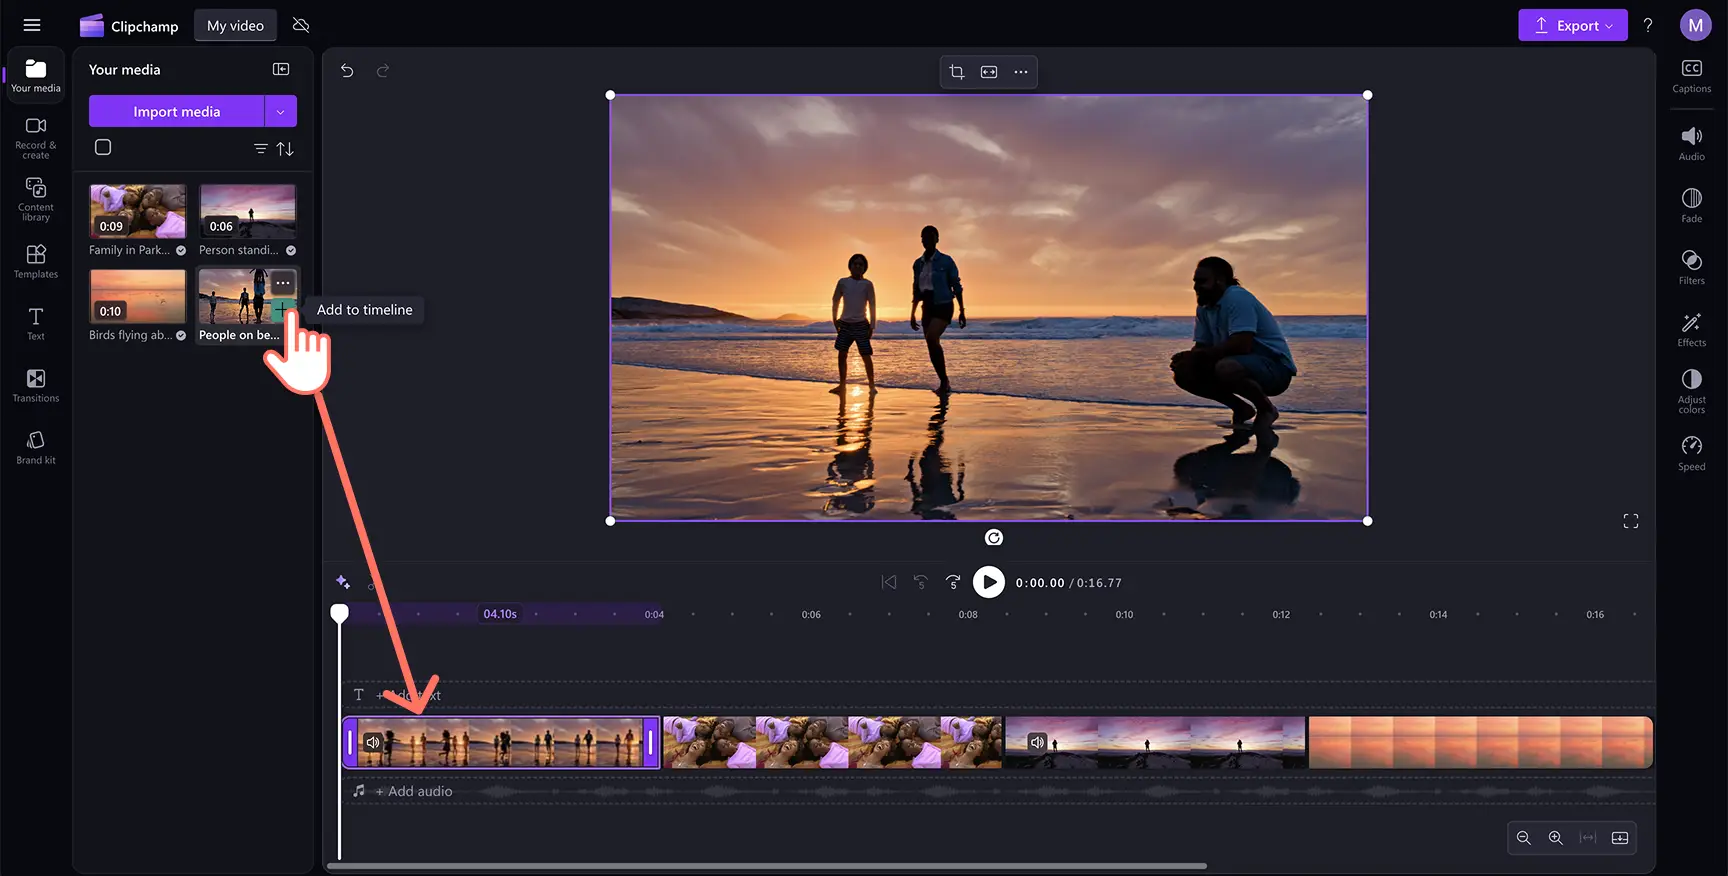
Drag and drop your media files from the your media tab onto the timeline. You can easily rearrange the timeline if you place media in the incorrect order. If there are gaps between your video clips, use the intelligent gap removal tool to remove blank spaces in your slideshow video.
Step 2. Personalize with text and lower thirds
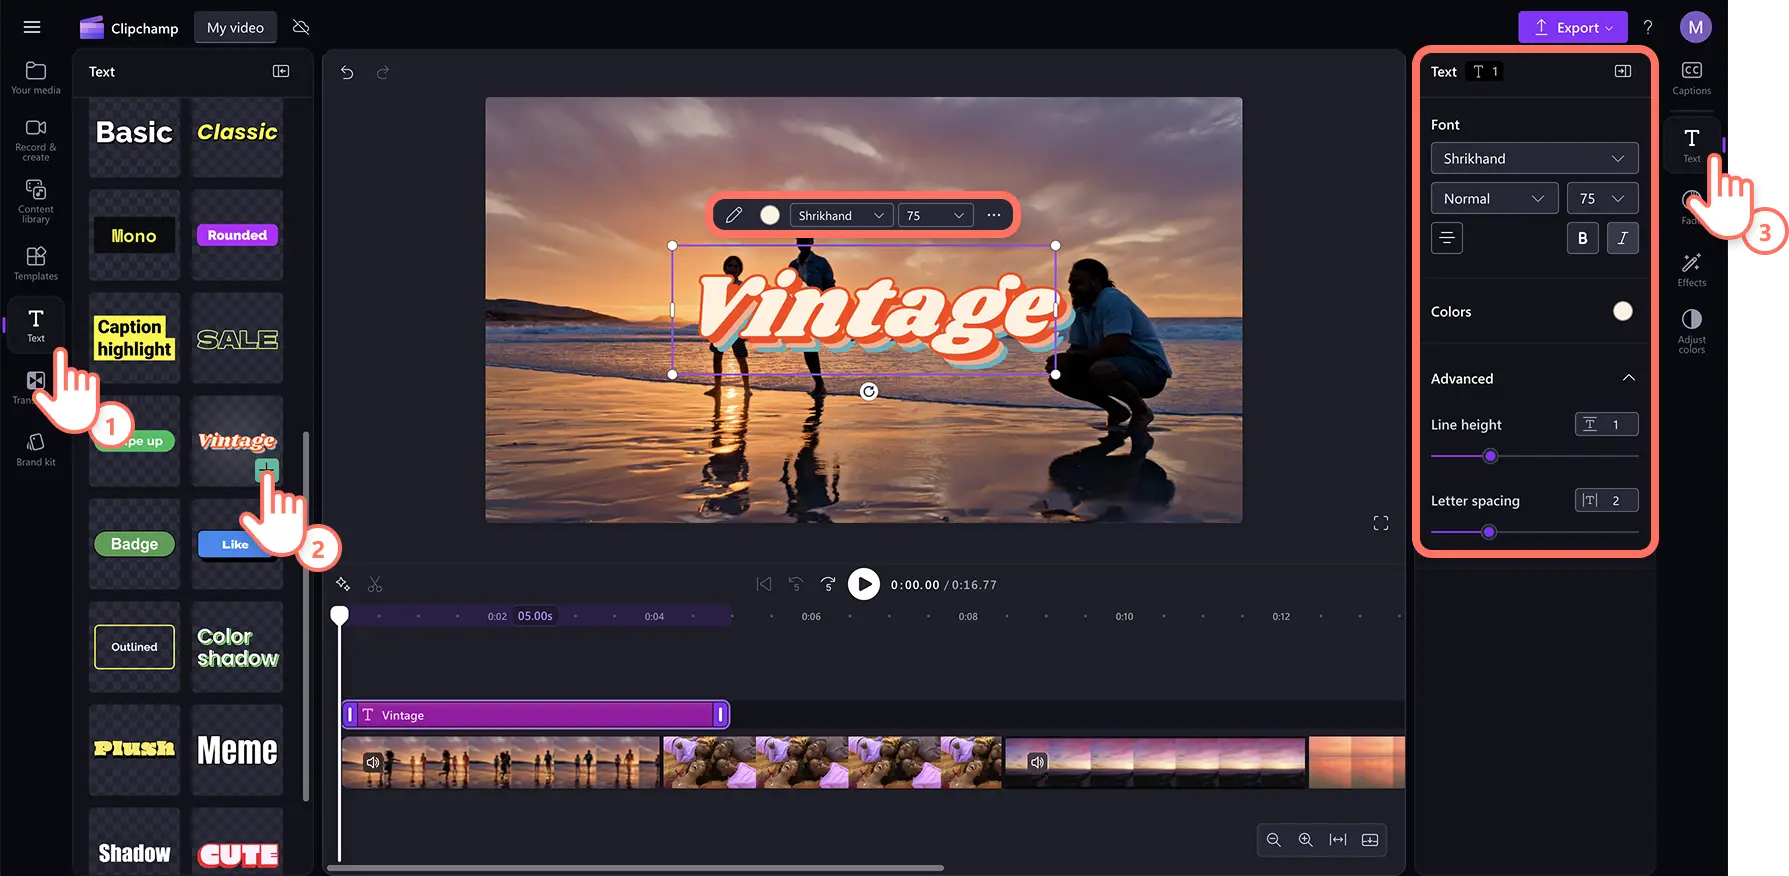
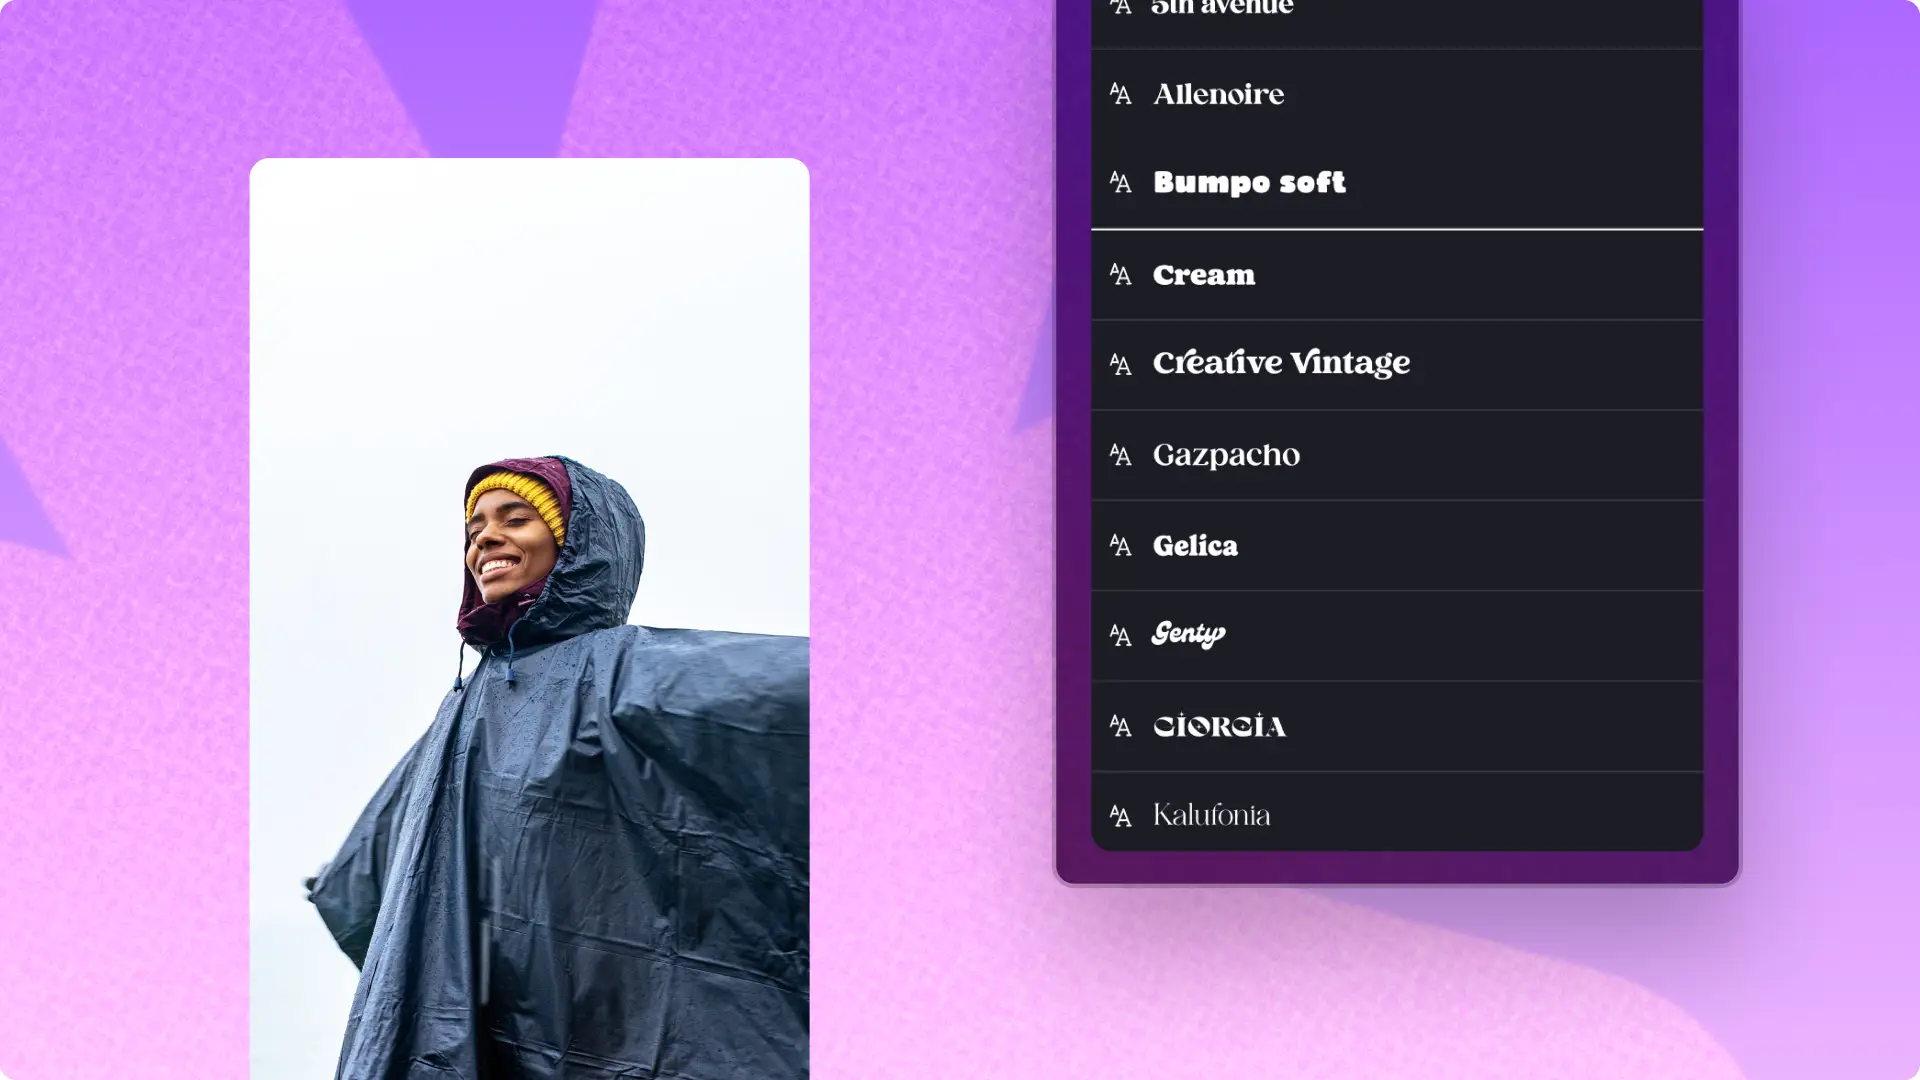
To add text, click on the text tab on the toolbar and scroll through the title options to find the perfect font style. Drag and drop your chosen title onto the timeline above the video assets.
To type and customize your text animation, select your title in the timeline to reveal the pencil icon in the text menu inside the video preview, or by clicking on the text tab on the property panel. Edit the font, size, alignment, colors, and position to tell your story.
If you're making a corporate slideshow video, opt for professional text overlays like lower thirds.
Step 3. Add music to video slideshow
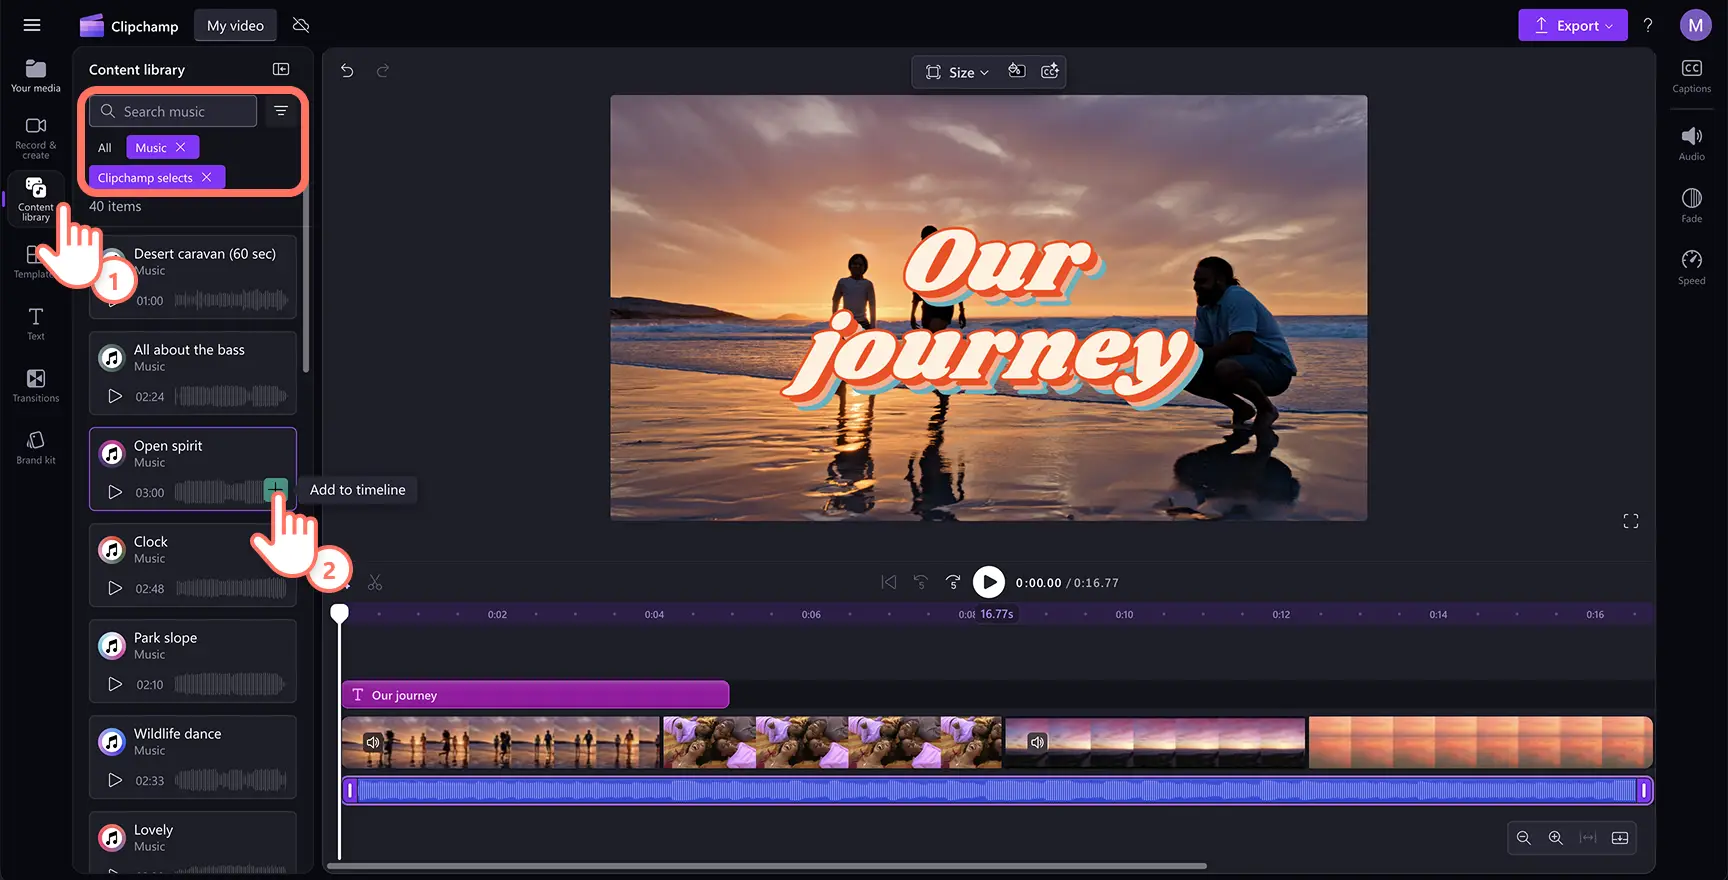
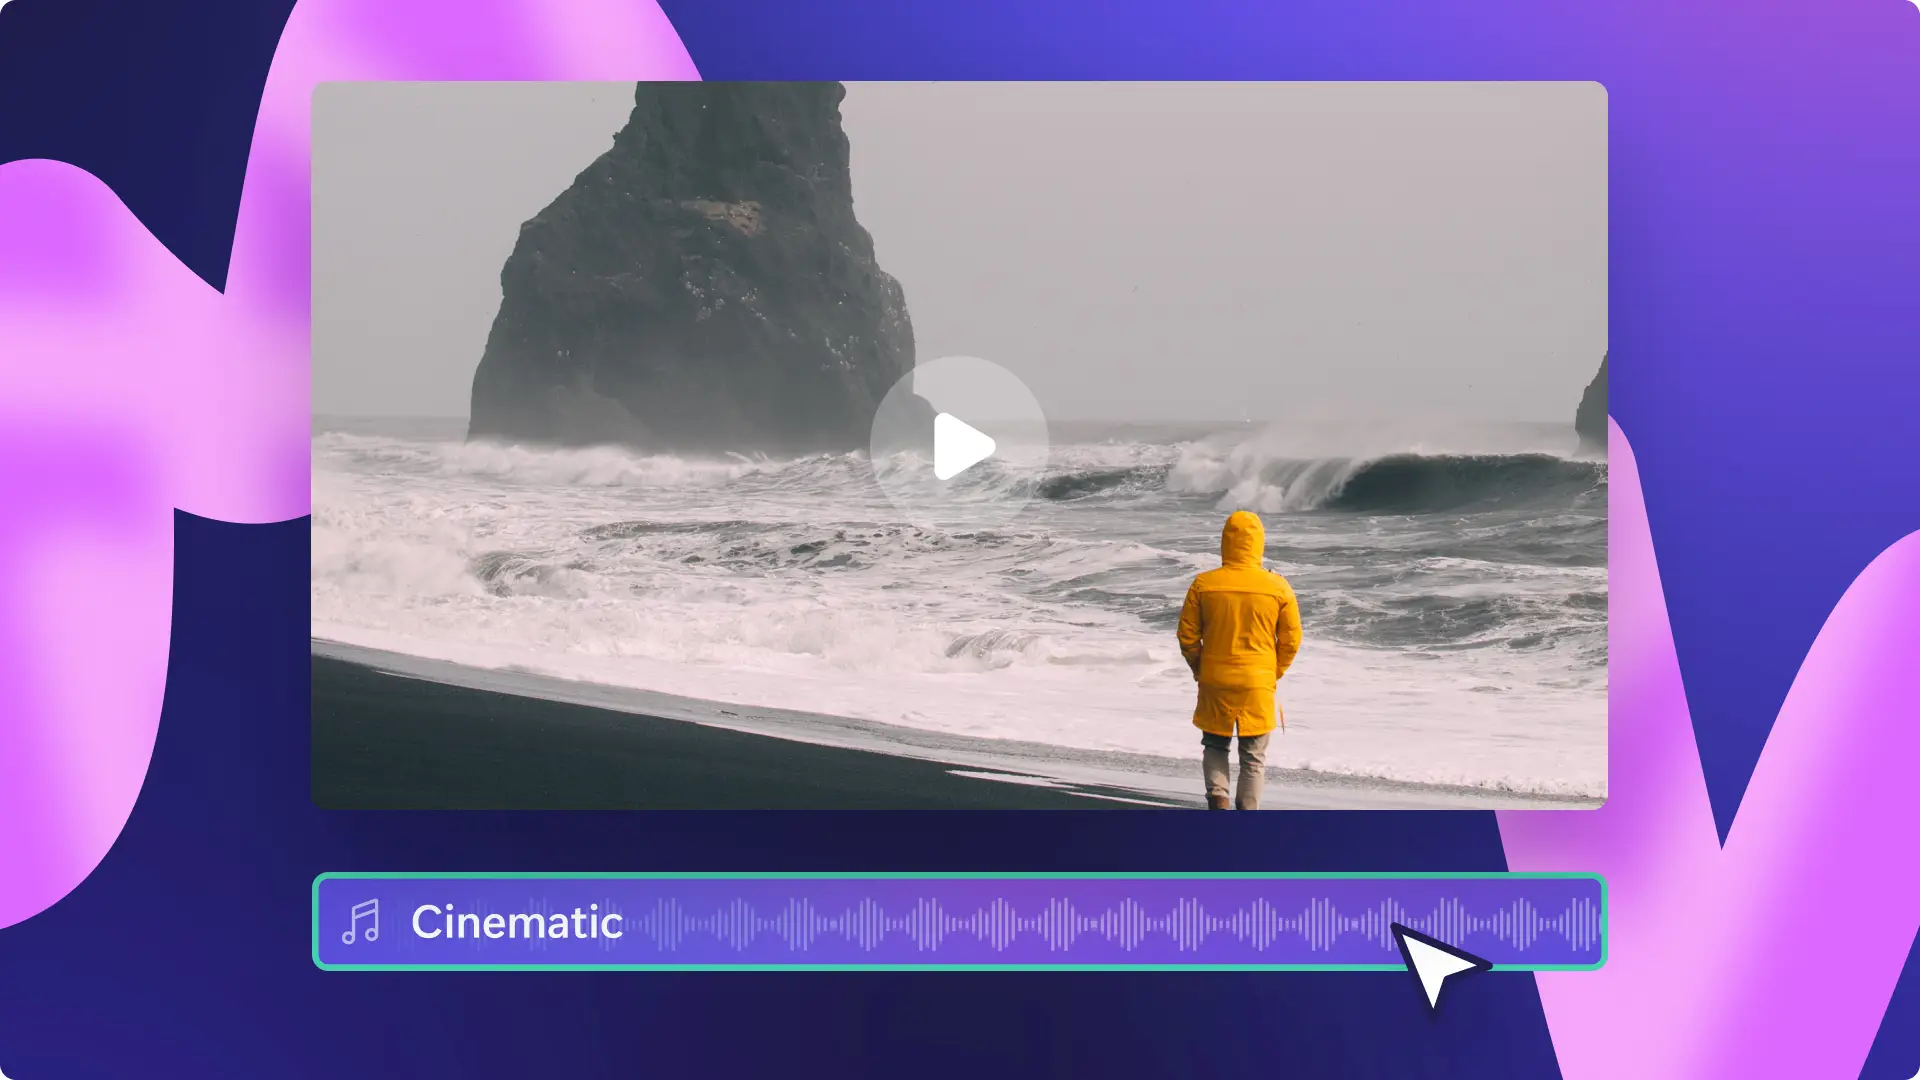
To add background music, click on the content library tab on the toolbar, then click on the music category to browse through the royalty-free music options. Drag and drop your chosen track onto the timeline below your media.
Step 4. Add transitions and graphics
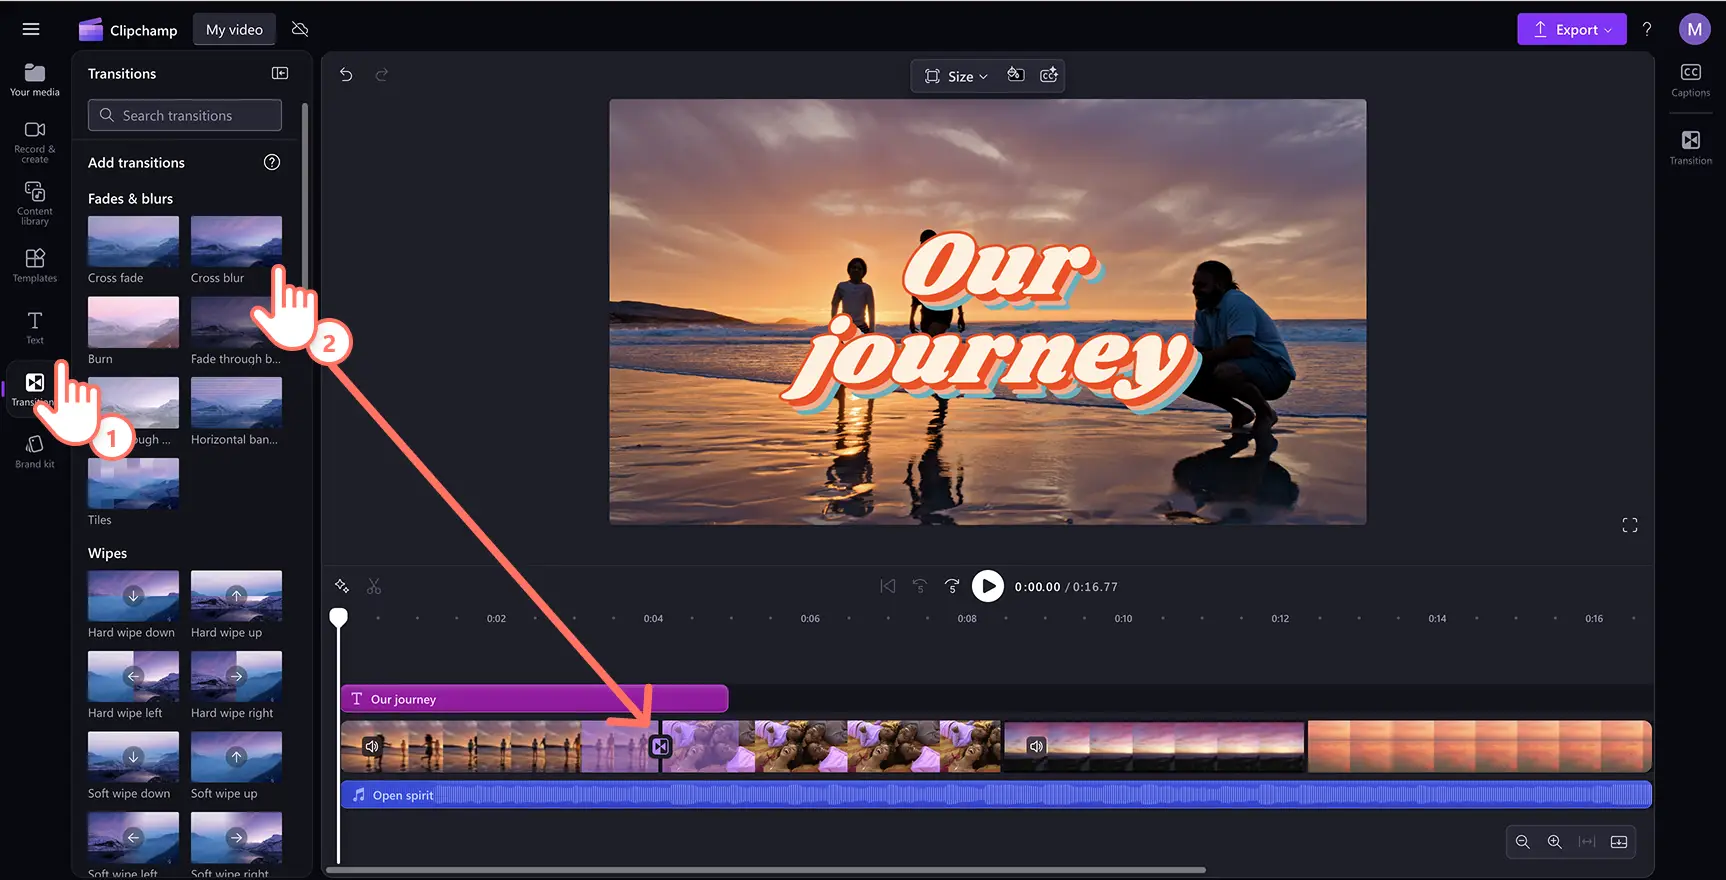
Place a scene transition between two clips on the timeline to improve the flow of your video. Click on the transitions tab on the toolbar. Drag and drop a transition onto the timeline between two media assets.
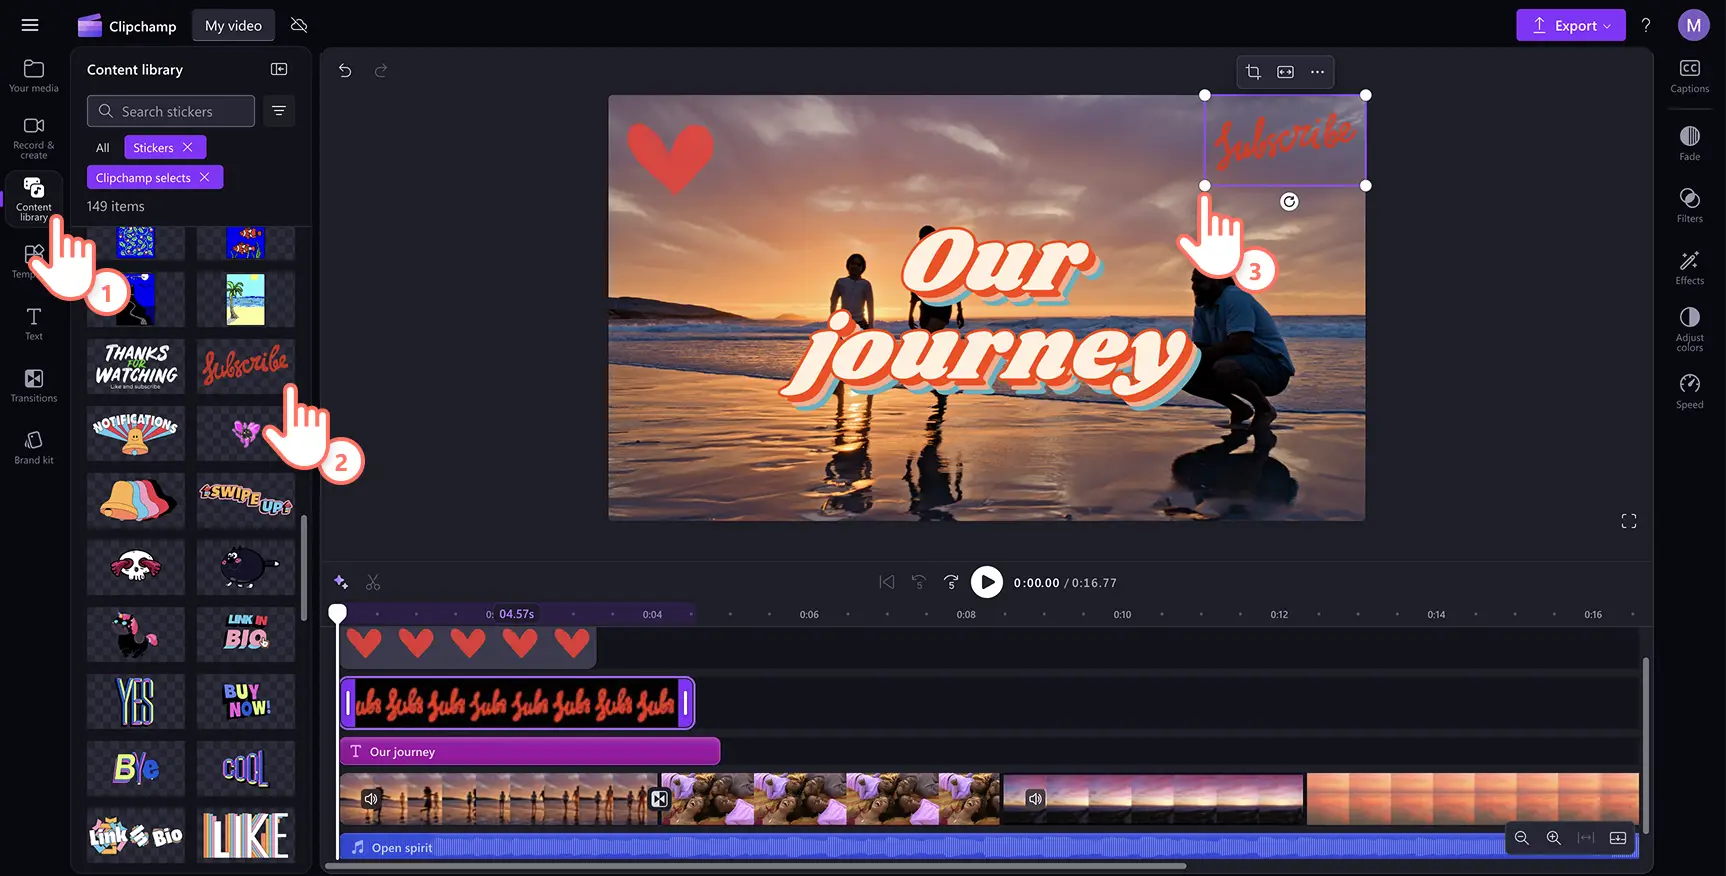
To add video graphics like stickers and shapes, click on the content library tab on the toolbar, then click on drop-down option to select stickers. Browse the sticker library, then drag and drop a sticker onto the timeline above your videos. Select the video asset and freely resize and crop it using the cropping handles that appear in the video preview. Find a range of animated graphics to improve your complement your video's message in Clipchamp.
Step 5. Preview and save your video
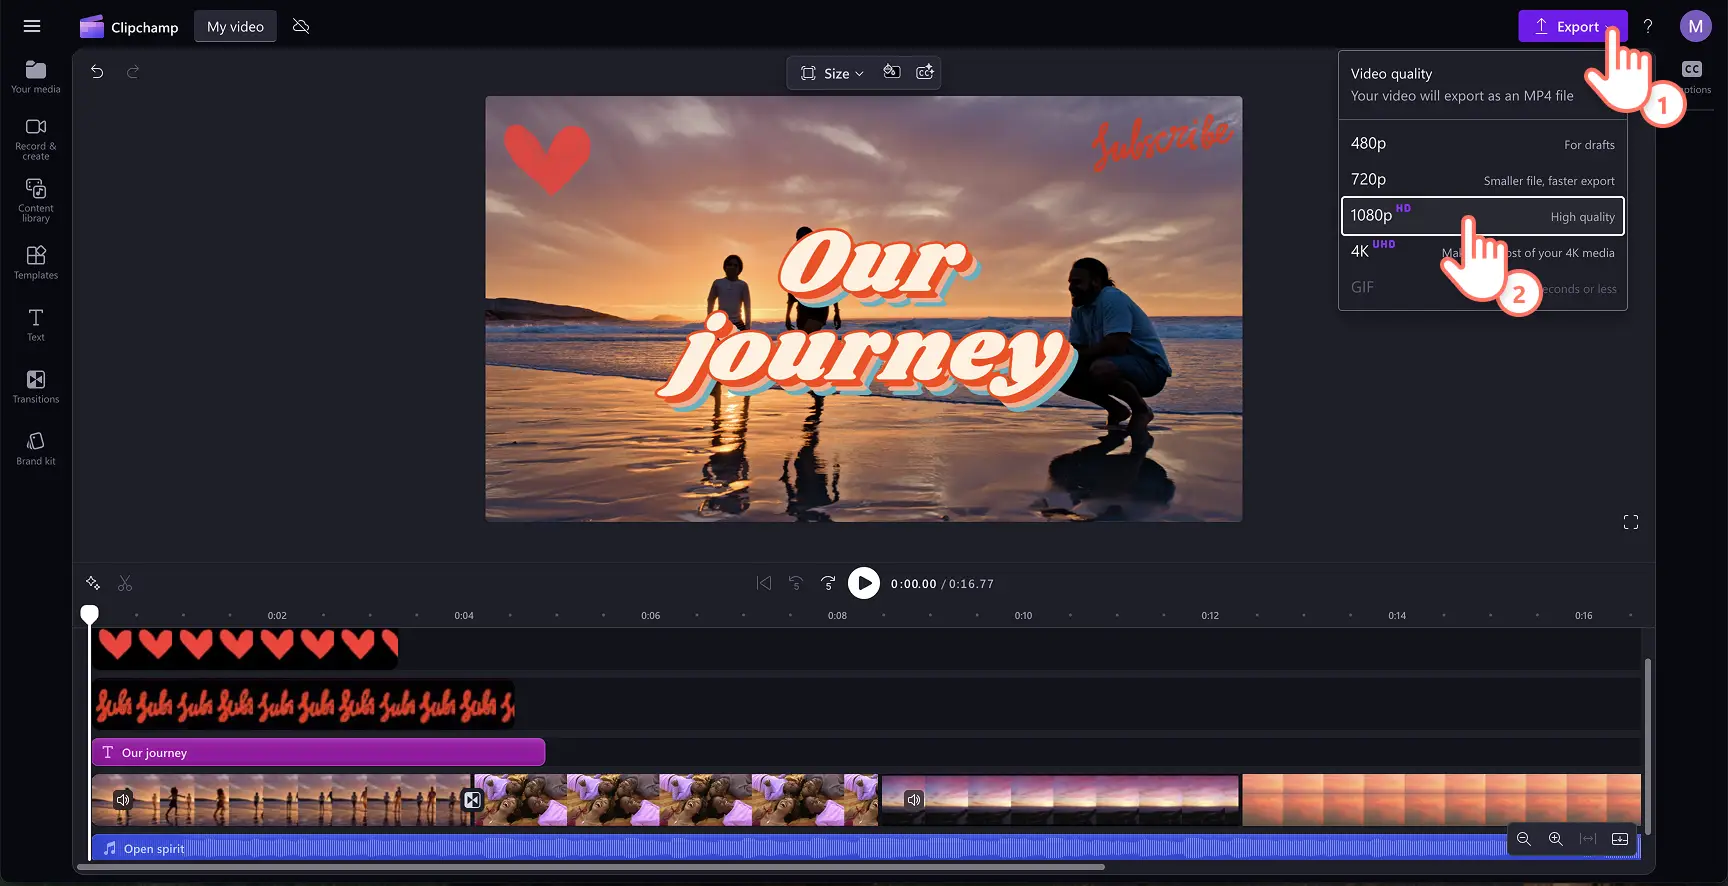
Before saving your new video, make sure to preview by clicking on the play button. When you’re ready to save, click on the export button and select a video resolution that suits your needs. You can also save your video directly in OneDrive.
How to enhance a slideshow video
Import HD videos, images, and clear audio so your photo slideshow is easy to understand and looks professional.
Use stock videos, images, and audio if your personal media is blurry, unclear, or you're lacking relevant footage.
Place overlays like frames and borders and annotations to add value to your slideshow.
Use filters like VHS or special effects like blur to level up your slideshow video and engage your viewers faster.
Choose a text style which matches the mood of your content, or upload your custom font to make a branded slideshow video.
How to choose music for a slideshow video
Selecting the right background music can enhance your slideshow video. Find copyright-free original audio tracks in a wide range of genres like pop, jazz, country, lo-fi, and so much more in Clipchamp. Here are some tips to help you choose ambient music for your video:
Use soft background music to enhance the mood, tone, and vibe of your photo slideshow.
Create authentic and clear voiceovers to capture attention on social media, and lower the ambient music volume to ensure the narration can be heard.
Add sound effects to transitions, intro, or outros like pops, clicks, or claps to immerse viewers.
How to create slideshows with AI video editor
Need to create a slideshow video quickly like a travel Reel video or a birthday video to share with the group chat? With the AI video editor in Clipchamp, you can create a professional-looking video in just a few clicks.
Learn how to create a slideshow video using the autocompose feature in Microsoft Clipchamp.
Frequently asked questions
Is the slideshow maker in Clipchamp free?
Clipchamp video editor is free for all users to create a slideshow and export it in 1080p video resolution.
Can I use a template for my slideshow?
If you’re low on time or inspiration, start with a ready-to-use template. All you have to do is replace the media inside the template with your own in a few clicks. You can even add your personal brand colors and logo to make your slideshow professional.
Is there a time limit on slideshow videos?
There is no limit on how long you can make your Clipchamp video slideshow, but we recommend limiting slideshows to 10 minutes or less.
Get inspired with how to make a video with pictures using the montage maker, or learn how to make corporate slideshow videos like tutorials and demo videos. You can also learn how to add a video to a presentation you've already made.
Edit your first slideshow video today with Clipchamp for free or download the Clipchamp Windows app.

