On this page
Express your authenticity and create a better connection with your viewers with vlogs. People subscribe to people, so share your daily life, travel diaries, unique experiences, and behind-the-scenes footage through entertaining vlogs to find your community. Create vertical vlogs on TikTok and Instagram or the original widescreen videos on YouTube to keep viewers coming back.
Explore how to plan vlogs that get views, and edit vlogs like a pro using Clipchamp video editor.
What is a vlog?
A vlog (short for "video blog") is a video diary, often showcasing real life on screen. It can be an hour-long YouTube episode or a micro vlog on TikTok, Instagram Reels, or YouTube Shorts. The video blogging format is flexible with notable genres like "get ready with me", "a day in the life", and "travel". Creators like Alix Earle and Emma Chamberlain show how personal and polished can coexist. To get started, creators need to pick a style that fits your story and audience, and mind platform rules, privacy, and basic etiquette when filming in public.
How to plan and create vlogs
1. Choose a platform: Reels, Shorts, or TikTok
Different video platforms suit different styles and forms of video content. Knowing where you’ll upload your videos means you can be confident about the format, size, video trends, and popular video editing styles. YouTube is the largest video hosting service and the go-to for long-form and widescreen video content. It’s also a clear choice if you want to make money from your vlog, with the YouTube Partner Program providing a clear pathway for monetization. However, YouTube isn’t the only path for vlogging. Many successful influencers and creators choose other platforms. Instagram Reels and Stories attract viewers seeking digestible short form vlogs. TikTok is also well-suited for short form vlogs.
2. Choose a vlog niche and audience
Before starting your vlog, determine what content you want to make and who you’re creating videos for. It’s vital to establish a clear channel niche which is a unique topic that interests a lot of people. Select a topic that will attract multiple viewers if your goal is to monetize your channel. Popular revenue-generating niches include travel, a day in the life, fitness, finance, fashion, gaming videos, and more. Your niche will go hand-in-hand with your audience, especially if you’re a new vlogger. Next, narrow down which segment of that audience you want to target. This can help you choose aspects of your content, like what language you will use, as well as the overall tone and video editing elements like subscribe animations and background music.
3. Create a vlog upload schedule
Once you start creating regular video content, you’ll need to organize when to edit it and upload it. This is when you’ll need to organize your content calendar, a schedule of when and where you will upload your video content. You can track all your videos across all stages from planning, to shooting, editing, and uploading. You can also factor in days and times with the highest watch-time. It’s also wise to factor in the holiday season, major public holidays and other events for content ideas and to schedule around. The type of vlog you’re making will influence your schedule. Vlogs come in all shapes and sizes. They can be daily, weekly, monthly, or special one-off occasions like buying a car or a wedding dress. Whichever frequency you choose, you want to be organized. A consistent cadence will attract a loyal audience who will learn your schedule and anticipate your new videos.
4. Plan video recording and vlog editing
Once you know what you would like to record in your vlog, plan what style of camera angles and editing techniques will enhance the viewing experience. For beginners, it can be helpful to create a rough outline or video storyboard of the visuals you need so your vlog so the video feels intentional with a clear narrative direction. These can include videos of you talking to the camera, time-lapse videos, b-roll clips, point-of-view videos, green screen footage, and even drone shots. Creative editing like L-cuts (carrying over the audio from one scene while showing the next) and J-cuts (starting the audio before showing the new scene is revealed) can make your video dynamic and engaging. Also, try to record your video clips in chronological order so video editing is fast and organized.
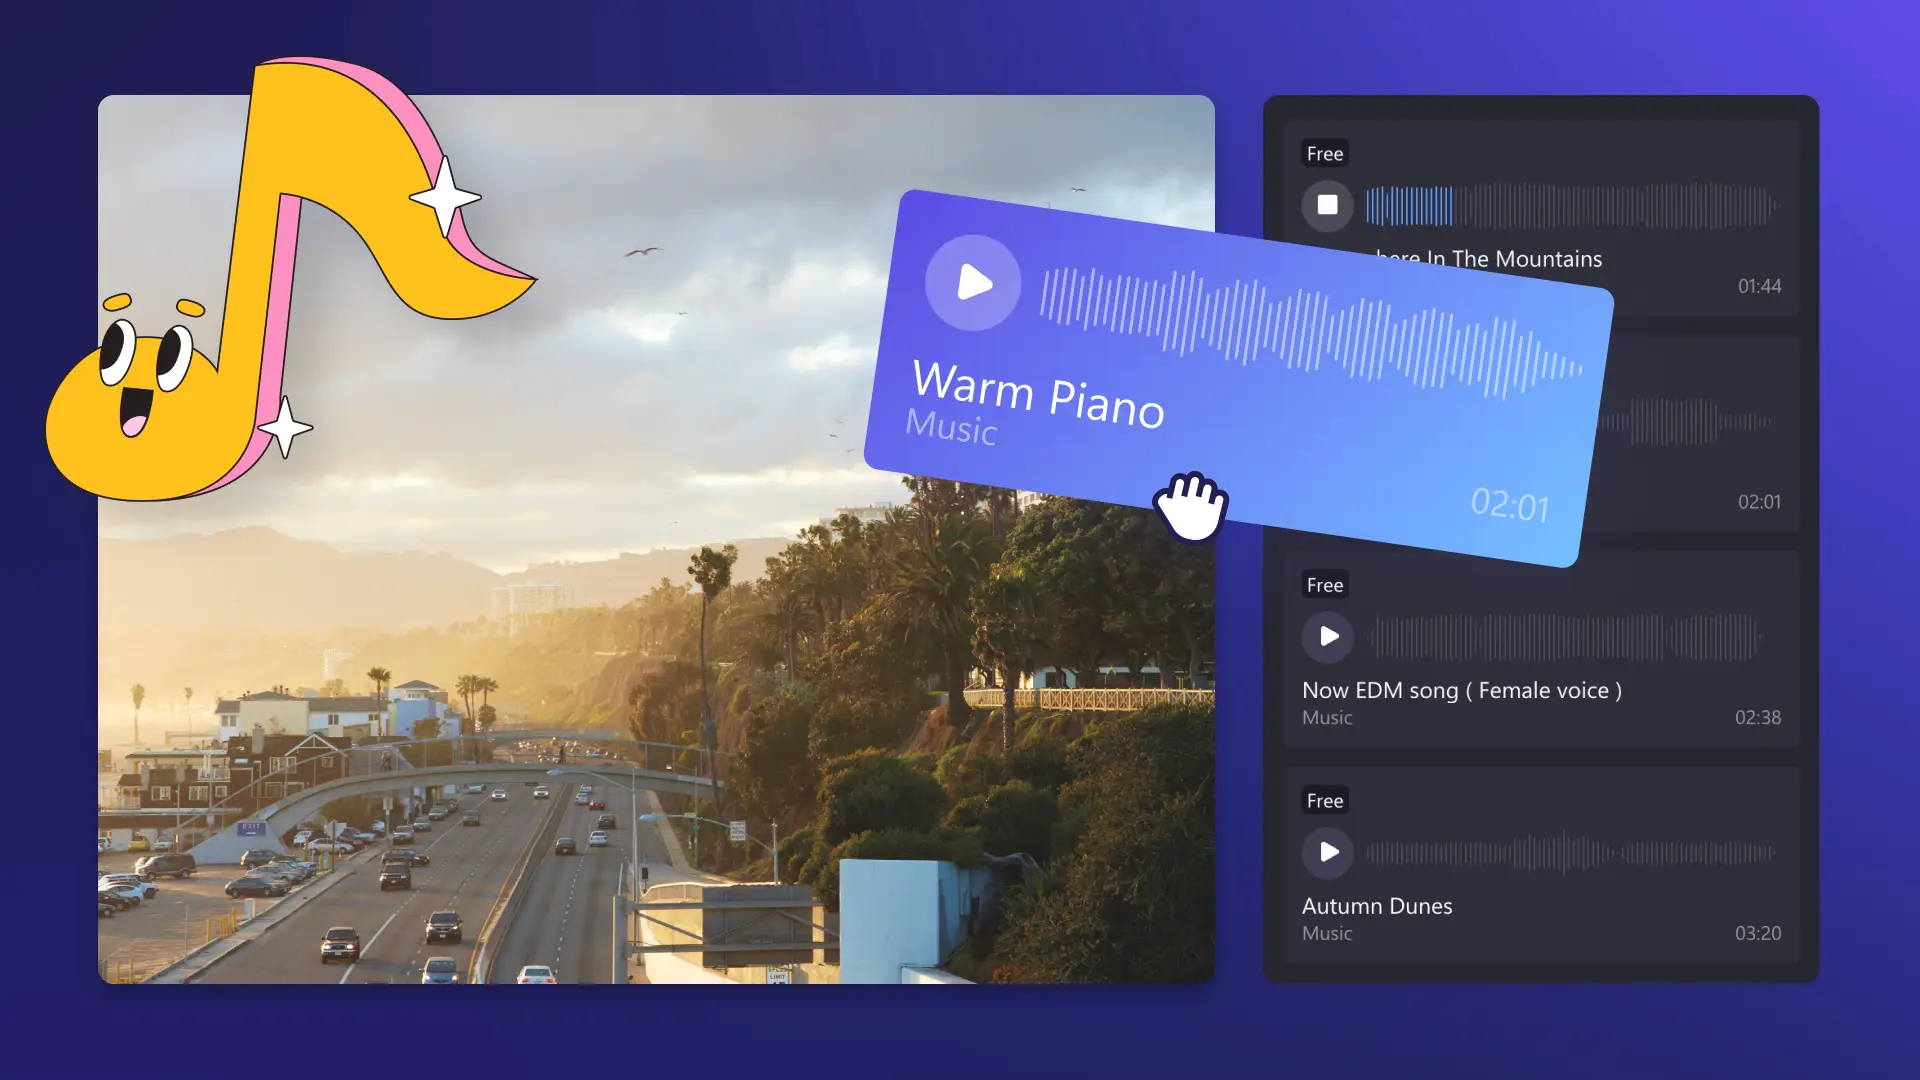
5. Get rights for stock media and music
Find royalty-free stock videos, images, graphics, and background music that you can mix in with your own footage in your vlogs. Use your own footage, properly licensed stock media like the Clipchamp stock library, or Creative Commons assets that allow commercial use, and give credit where required.
A bonus tip for reaction video creators is to keep reused clips short, add your own voice and context, and avoid making compilations without any unique editing.
6. Plan for monetization
If you want to make money from your content, consider how you can create revenue. Think about ads, Shorts revenue, creator rewards, affiliate links, and brand sponsorships. If you react to other people’s clips, make the video content clearly yours with commentary, teaching moments, or creative edits. Reused footage should support your story, not replace it. Learn about how to monetize a YouTube channel, and how to get sponsored on Instagram.
Additionally, you can also reach out to fellow creators to collaborate and appear in their content so you can cross-promote vlogs and grow your audience together.
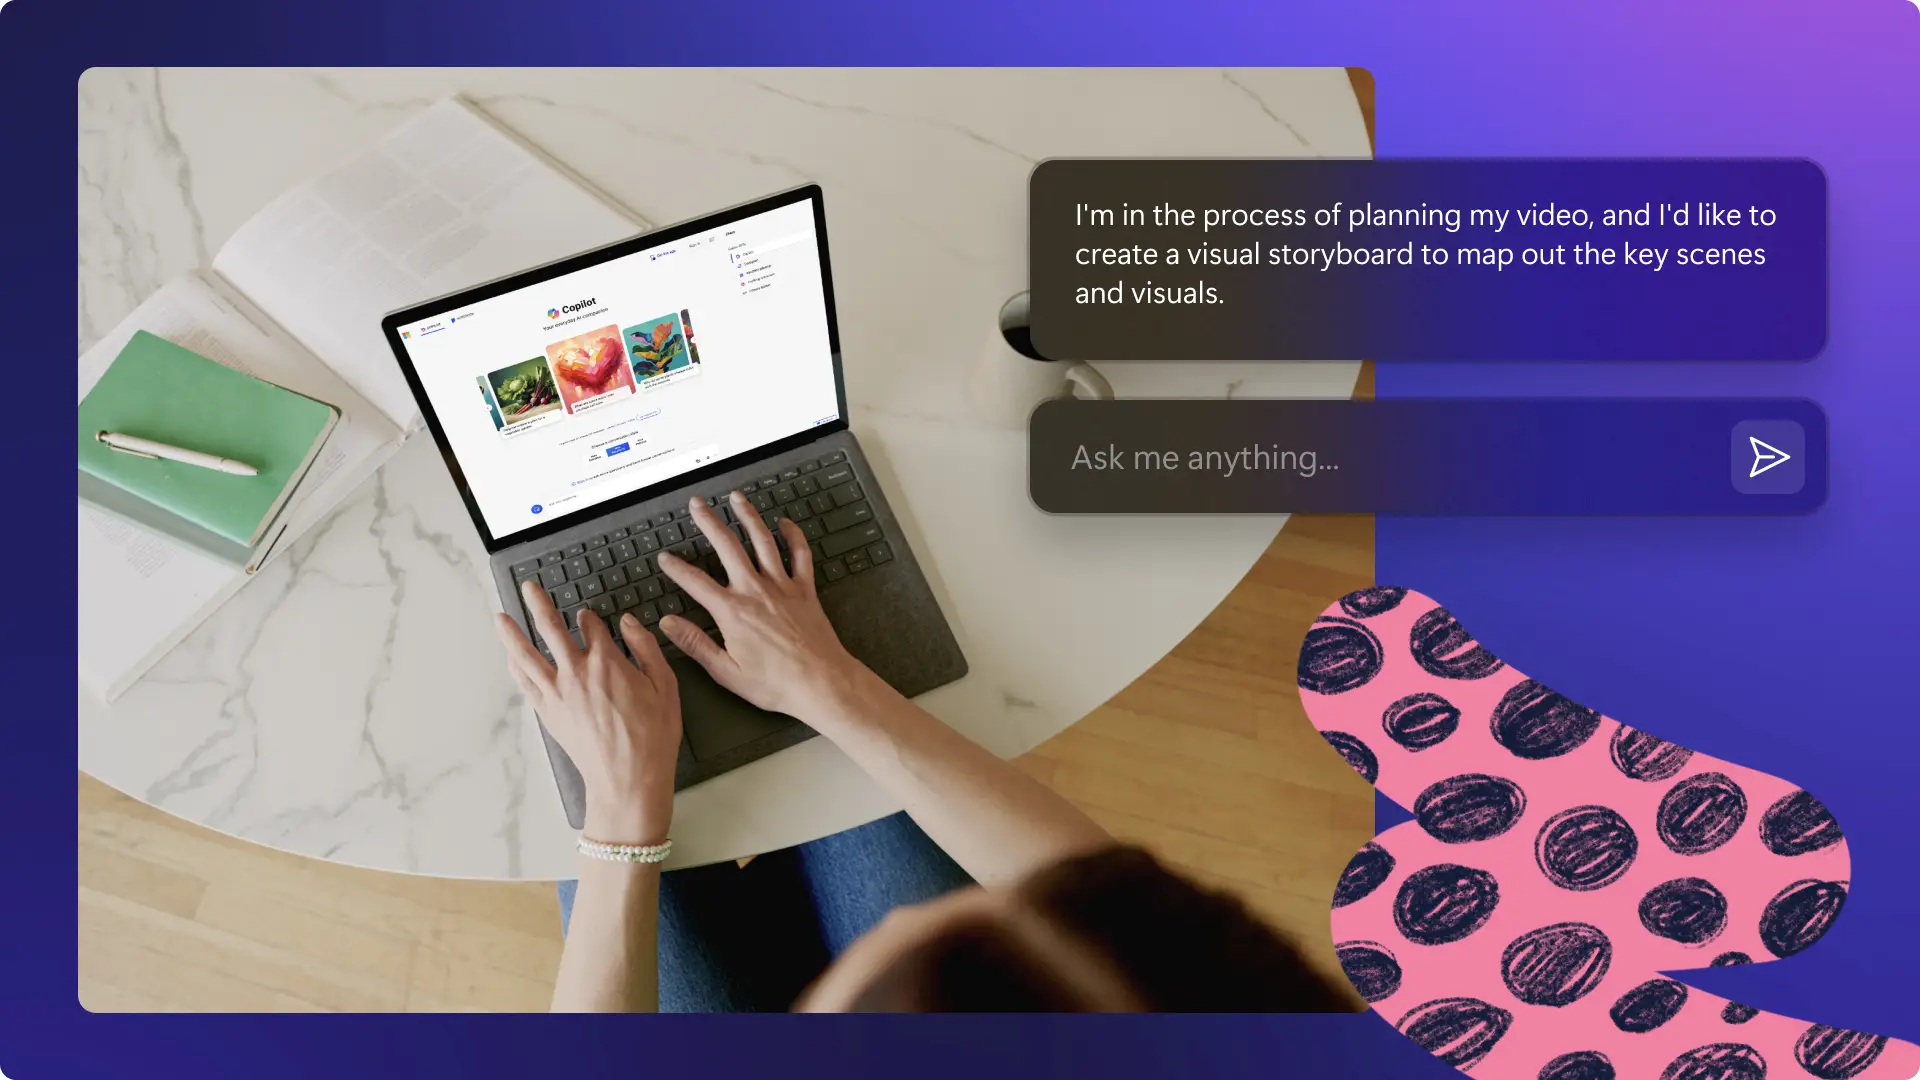
7. Use AI to create outlines and scripts
You need a plan before you start filming your vlog, even if it’s a vlog about a day in your life. Work smarter by treating AI like a smart assistant. Use and prompt AI to draft scripts, improve hooks, titles, video SEO, then rewrite in your tone. It doesn’t need to be a word-for-word cinematic script. Even if it’s a simple guideline, it will help you as you record your clips as loose vlogs benefit from a scripted opener, a mid-video re-hook, and a clear call to action.
Essential vlogging tools in 2025
1. Versatile vlog camera
Don’t have a professional video camera? If you have a recent smartphone, you already have a capable vlogging camera, especially in good light. Add a small tripod or grip, and use a gimbal when you need extra-smooth movement. Dedicated cameras still win for low light and lens flexibility, but recent phones shoot excellent 4K and are fast to publish from.
2. High-quality vlog microphone
In some situations, your smartphone's built-in microphone is enough. However, if you're recording vlogs in noisy places or outdoors, you should use an external vlog microphone. Consider investing in a wireless lavalier mic that can attach to your smartphone or camera. This will minimize background noise like traffic, wind, and talking, so viewers can easily focus on your narration and not be distracted. It also means you can set up your camera on a tripod and film yourself at a distance with crystal clear audio. If you don’t have a big budget for a mic, consider using AI noise suppression tool while editing.
3. Ring lighting or natural lighting
Lighting is the fastest quality upgrade. If you have the space, a small LED panel with a softbox gives a softer, more natural look than a ring light. Ring lights are fine for beauty/talking-head shots at arm’s length. Match color temperature to your room (e.g., 5600K near daylight). Poorly lit environments never look good on camera. The good news is just like with stabilizers and tripods, there are small external ring light attachments for smartphones. As a bonus it will also reduce the amount of color correction you’ll need while editing your video.
4. Easy vlog video editor
Professional video editing software is costly and takes a long time to master. Beginners and social media creators can make professional-looking content quickly using free online video editors. A great vlog maker is Clipchamp video editor as it’s packed with professional video editing features, is free and intuitive. Vloggers can drag and drop to create video montages, then trim, crop, and resize video footage. Access royalty-free stock music and videos for atmosphere and b-roll footage. Add on-theme subscribe sticker and choose intro and outro video templates to get your vlog ready.
5. AI subtitle generator
Subtitles and captions have become an essential element to all good videos as they make content more accessible, inclusive, and easier to follow on mute. Add value to your vlogs with the accurate subtitle generator in Clipchamp. You can even download your YouTube transcript in SRT file format.
6. Vlog thumbnail editor
Once you’ve filmed and edited an amazing video, you want to ensure potential viewers click on the thumbnail. Create a custom thumbnail including graphics and text so that your video stands out in search results and timelines. New to designing? Use a simple image editing software like Microsoft Designer. You can also use AI tools like Copilot to brainstorm what designs to use to make click-magnet thumbnails.
7. YouTube description generator
Nail video SEO by using a YouTube description template or AI generator. The text box in the about tab of your YouTube video and channel is a crucial element of attracting views and subscribers to your channel. A well-crafted YouTube video and channel description can also promote your other content and social media platforms. Speaking of Copilot above, you can also use the AI assistant to generate your YouTube descriptions.
8. Cloud storage
You can save your storage in a cloud service like OneDrive so all your video clips are backed up and you never need to worry about smartphone storage space or losing your footage. Clipchamp also has a neat OneDrive integration so you can export and save completed videos and clips directly from the editor.
How to edit vlogs with Clipchamp
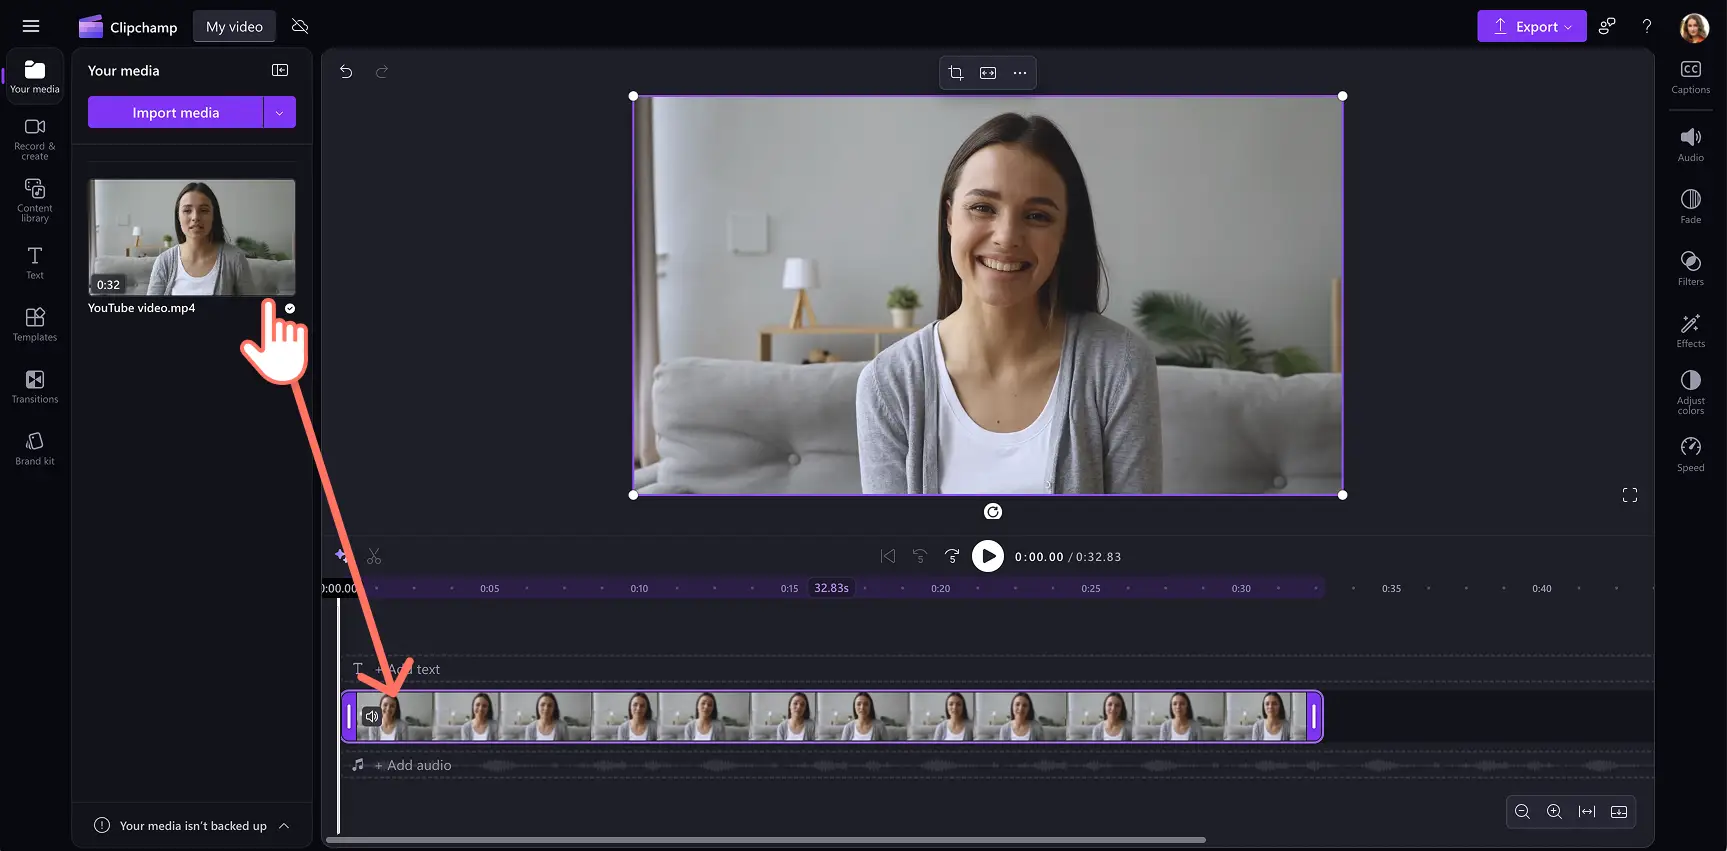
Step 1. Upload video clips
To import your vlog media files, click on the import media button inside the your media tab on the toolbar. Browse your media files and select files from your device or cloud storage.
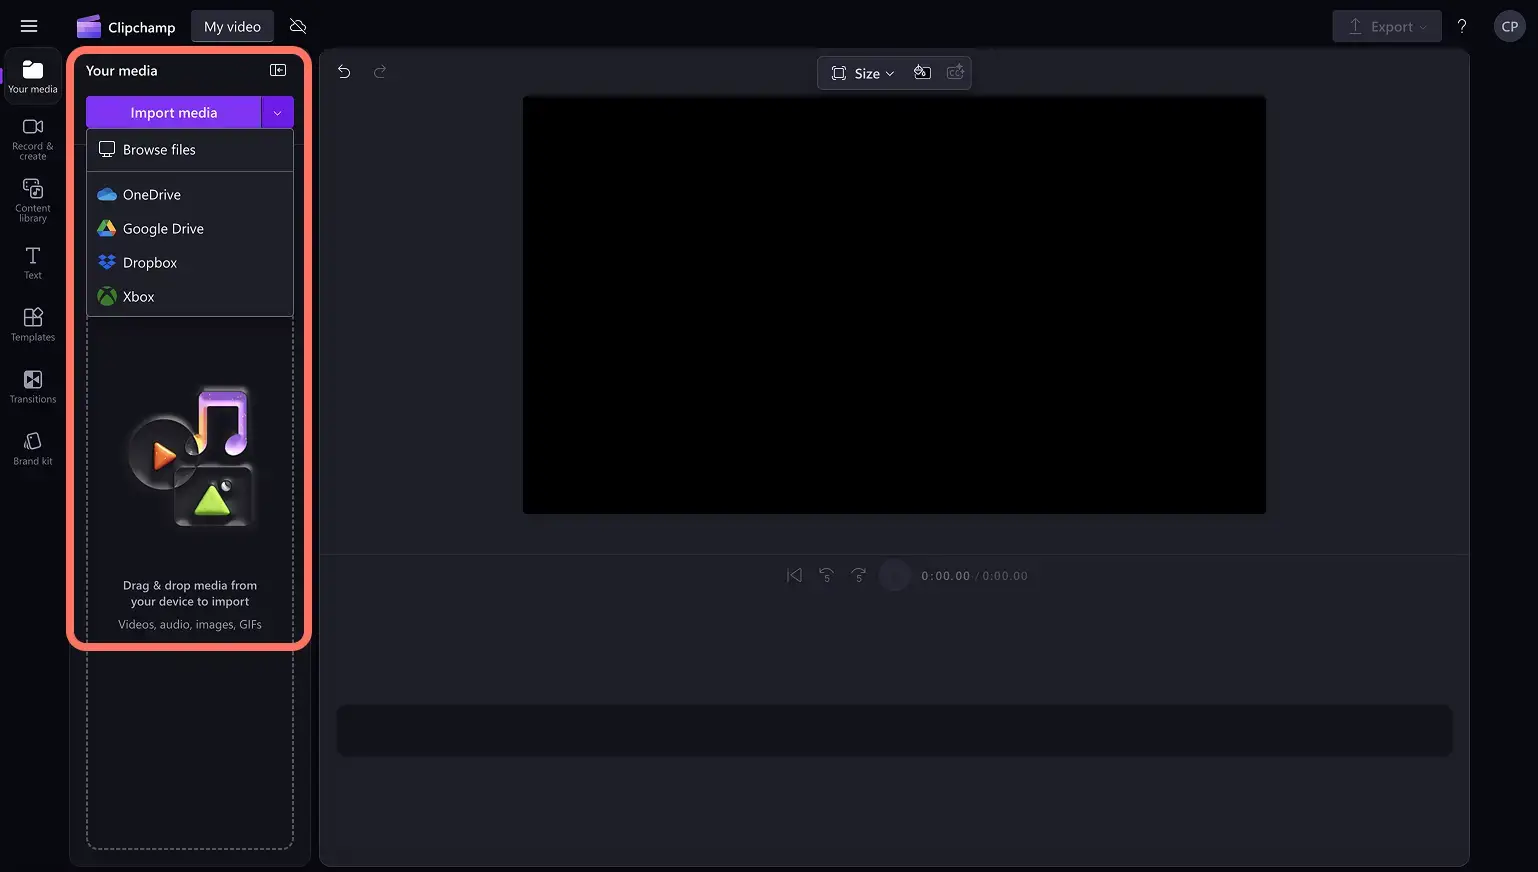
Drag and drop your video clips onto the timeline to get started.
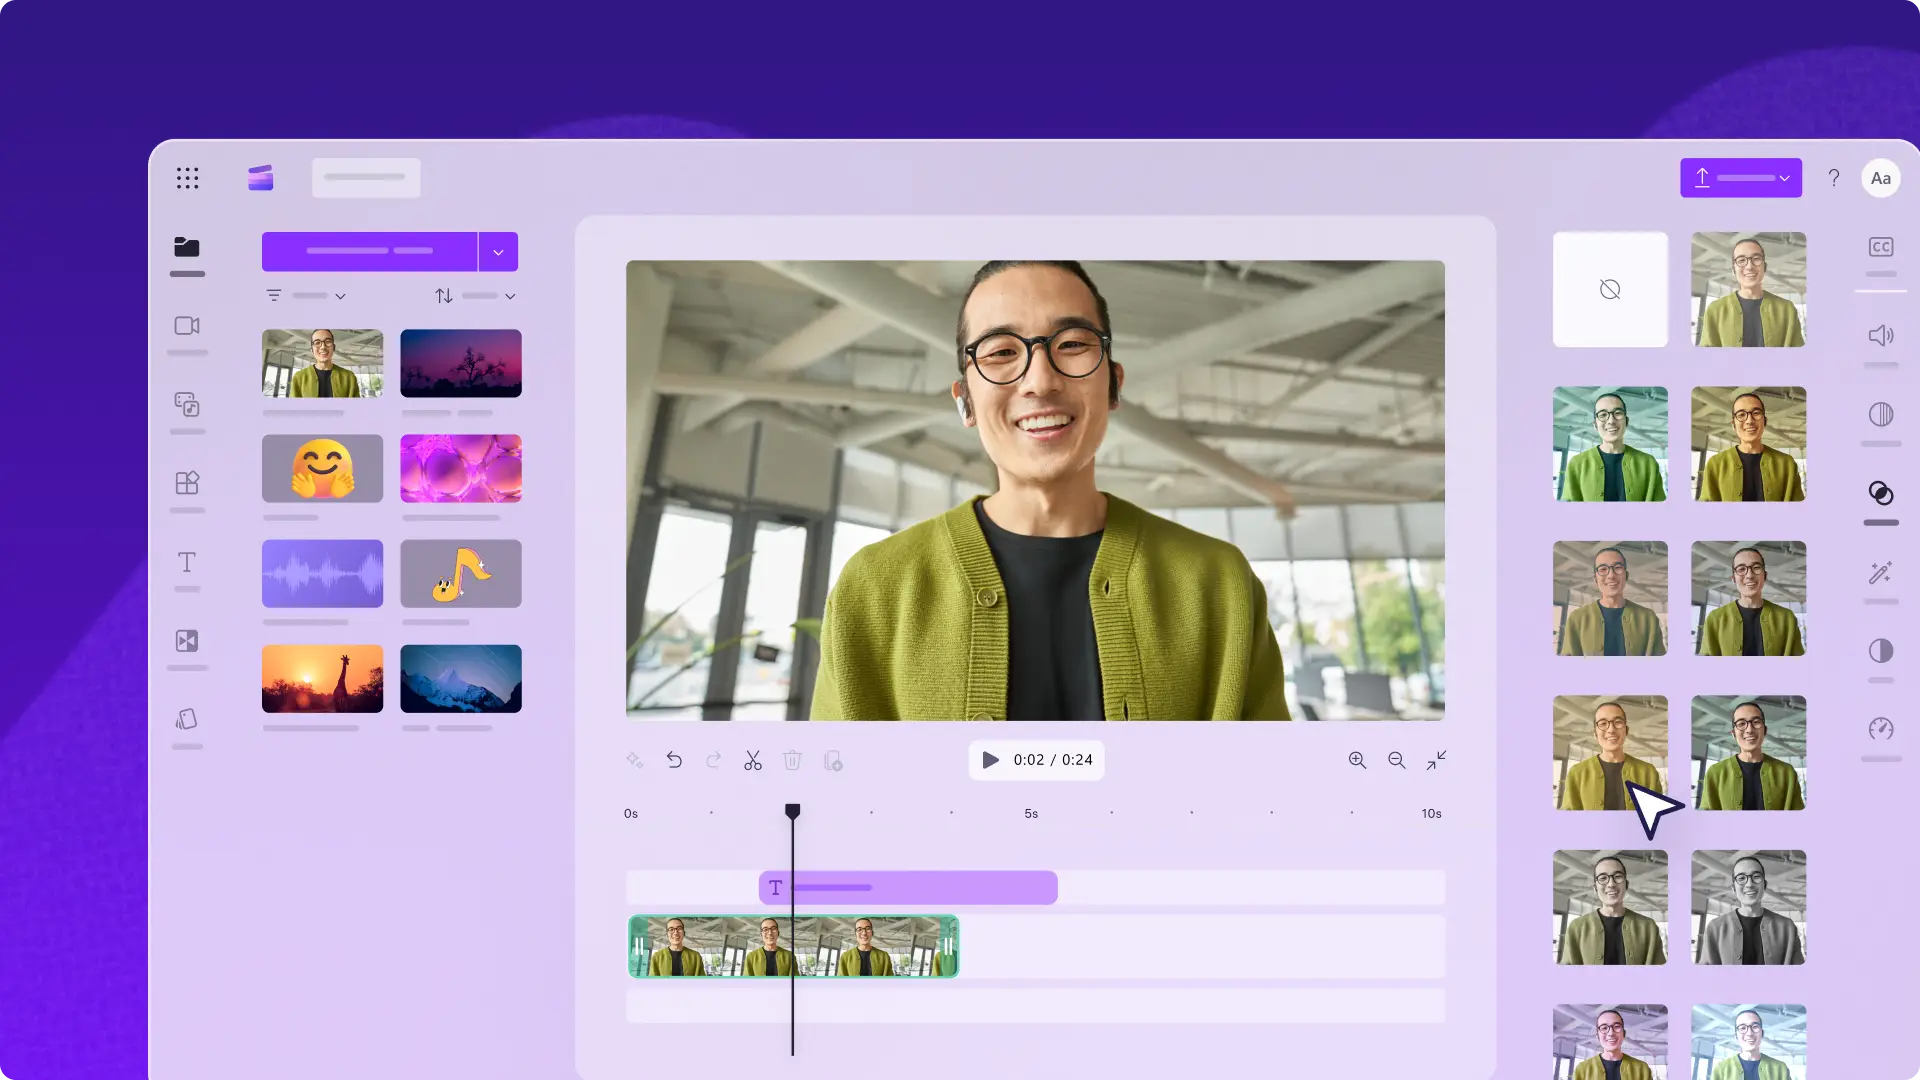
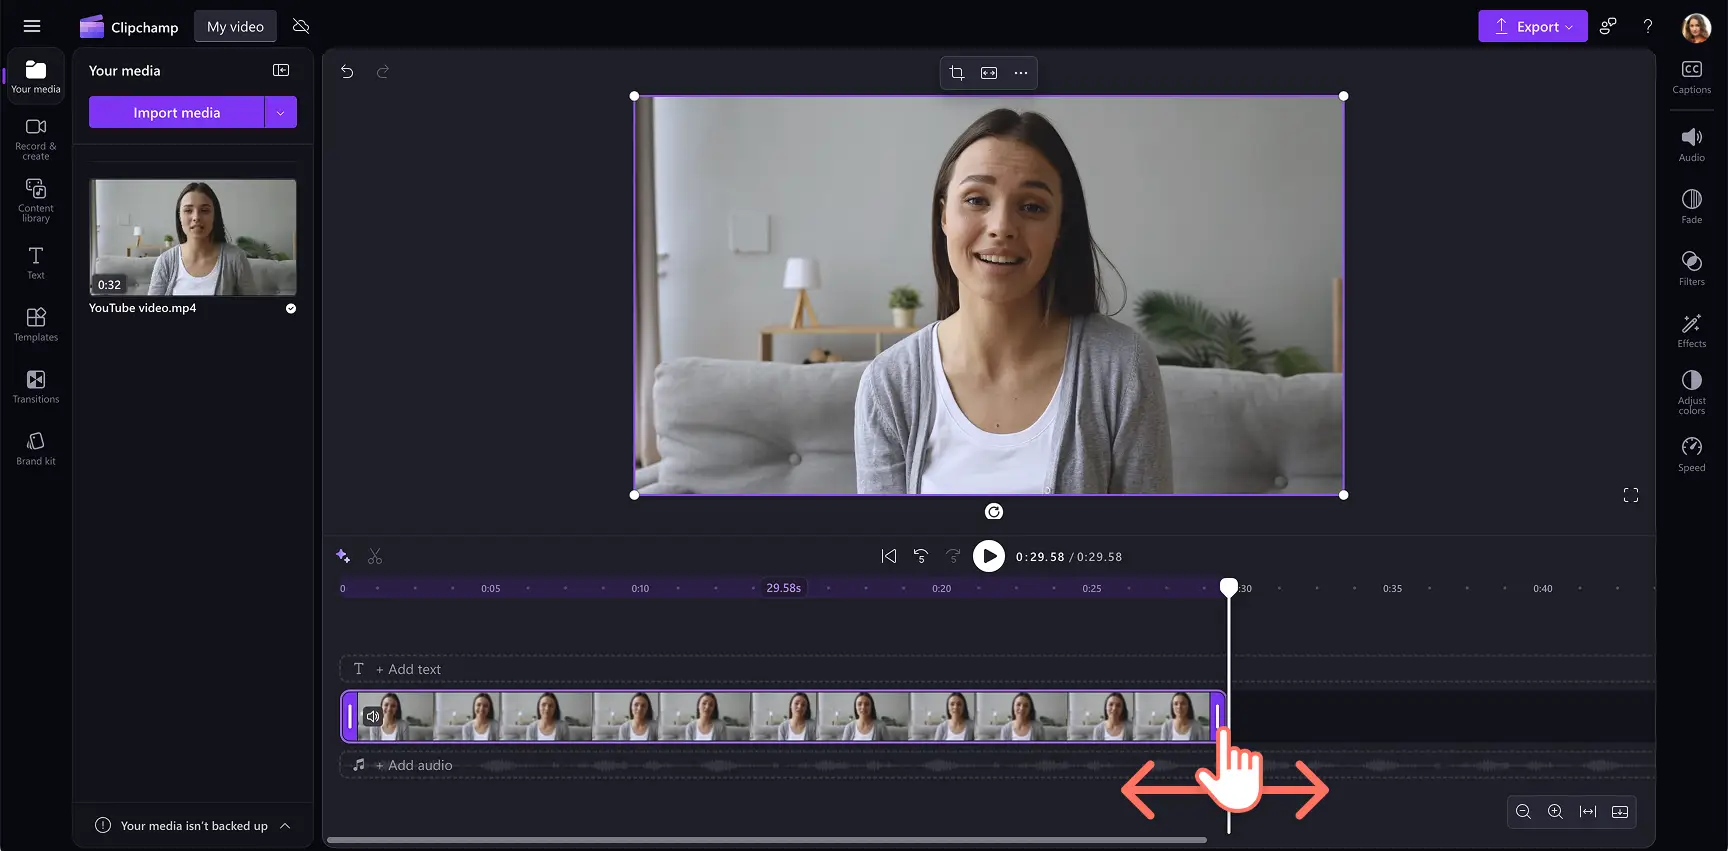
Step 2. Trim and enhance video clips
If your footage is too long, simply trim your videos to suit the timeframe you’re looking for. Click on the video on the timeline, then drag the handles to the left of the timeline. This will reduce the length of the video. If you make your video too short, drag the sidebar to the right of the timeline to make it longer.
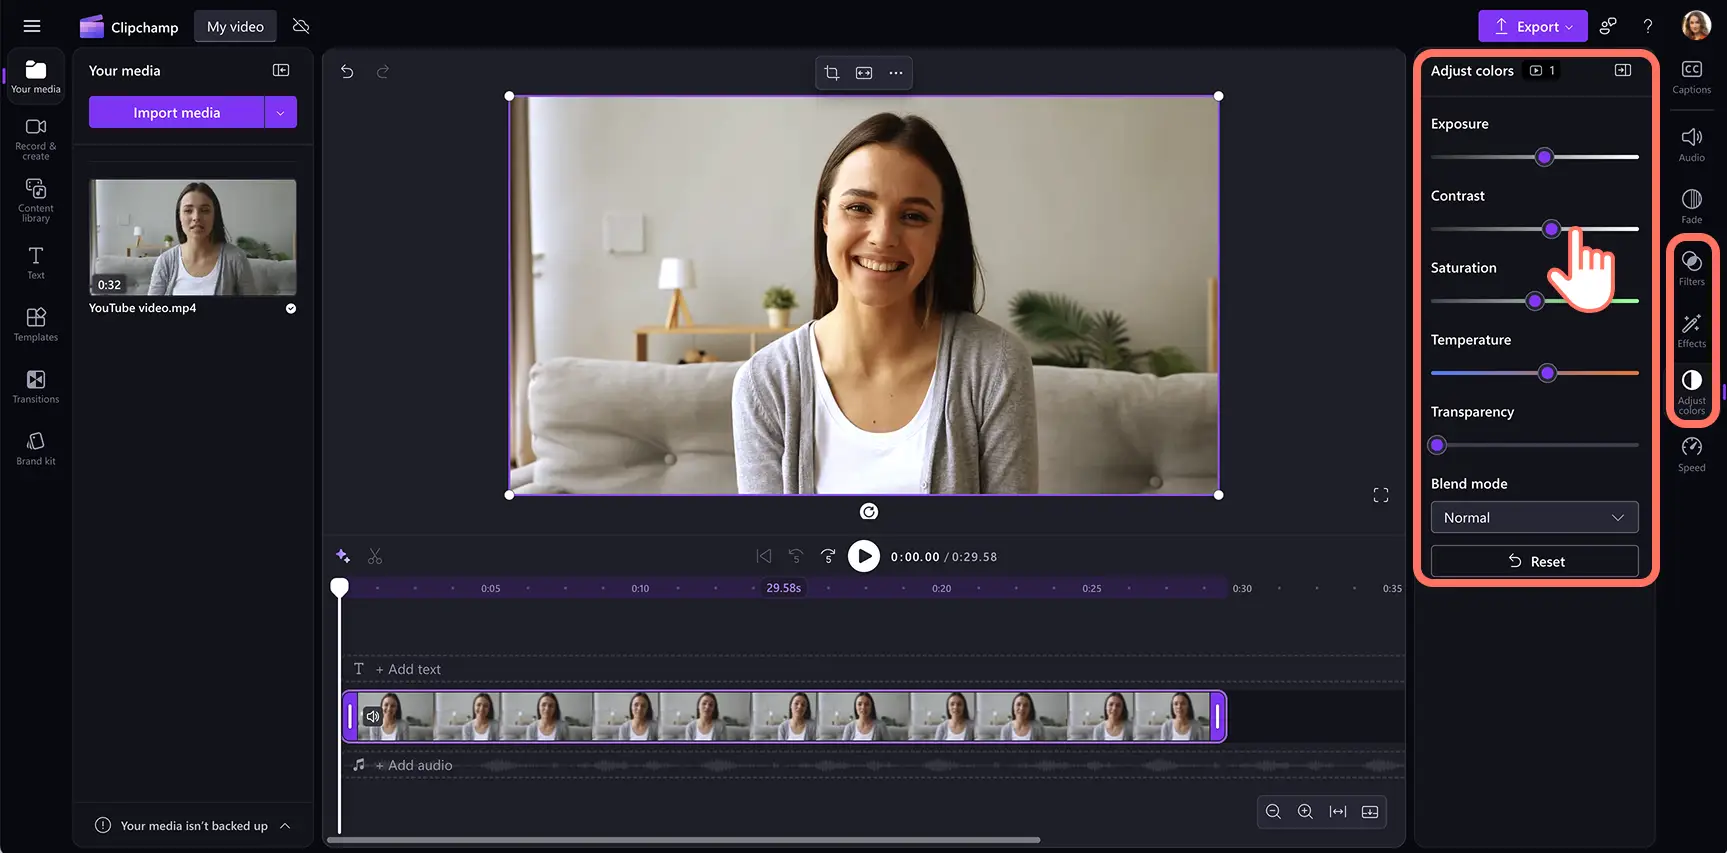
Next, adjust the colors of the video by applying a video filter, effect or manually adjusting correcting your video colors from the property panel.
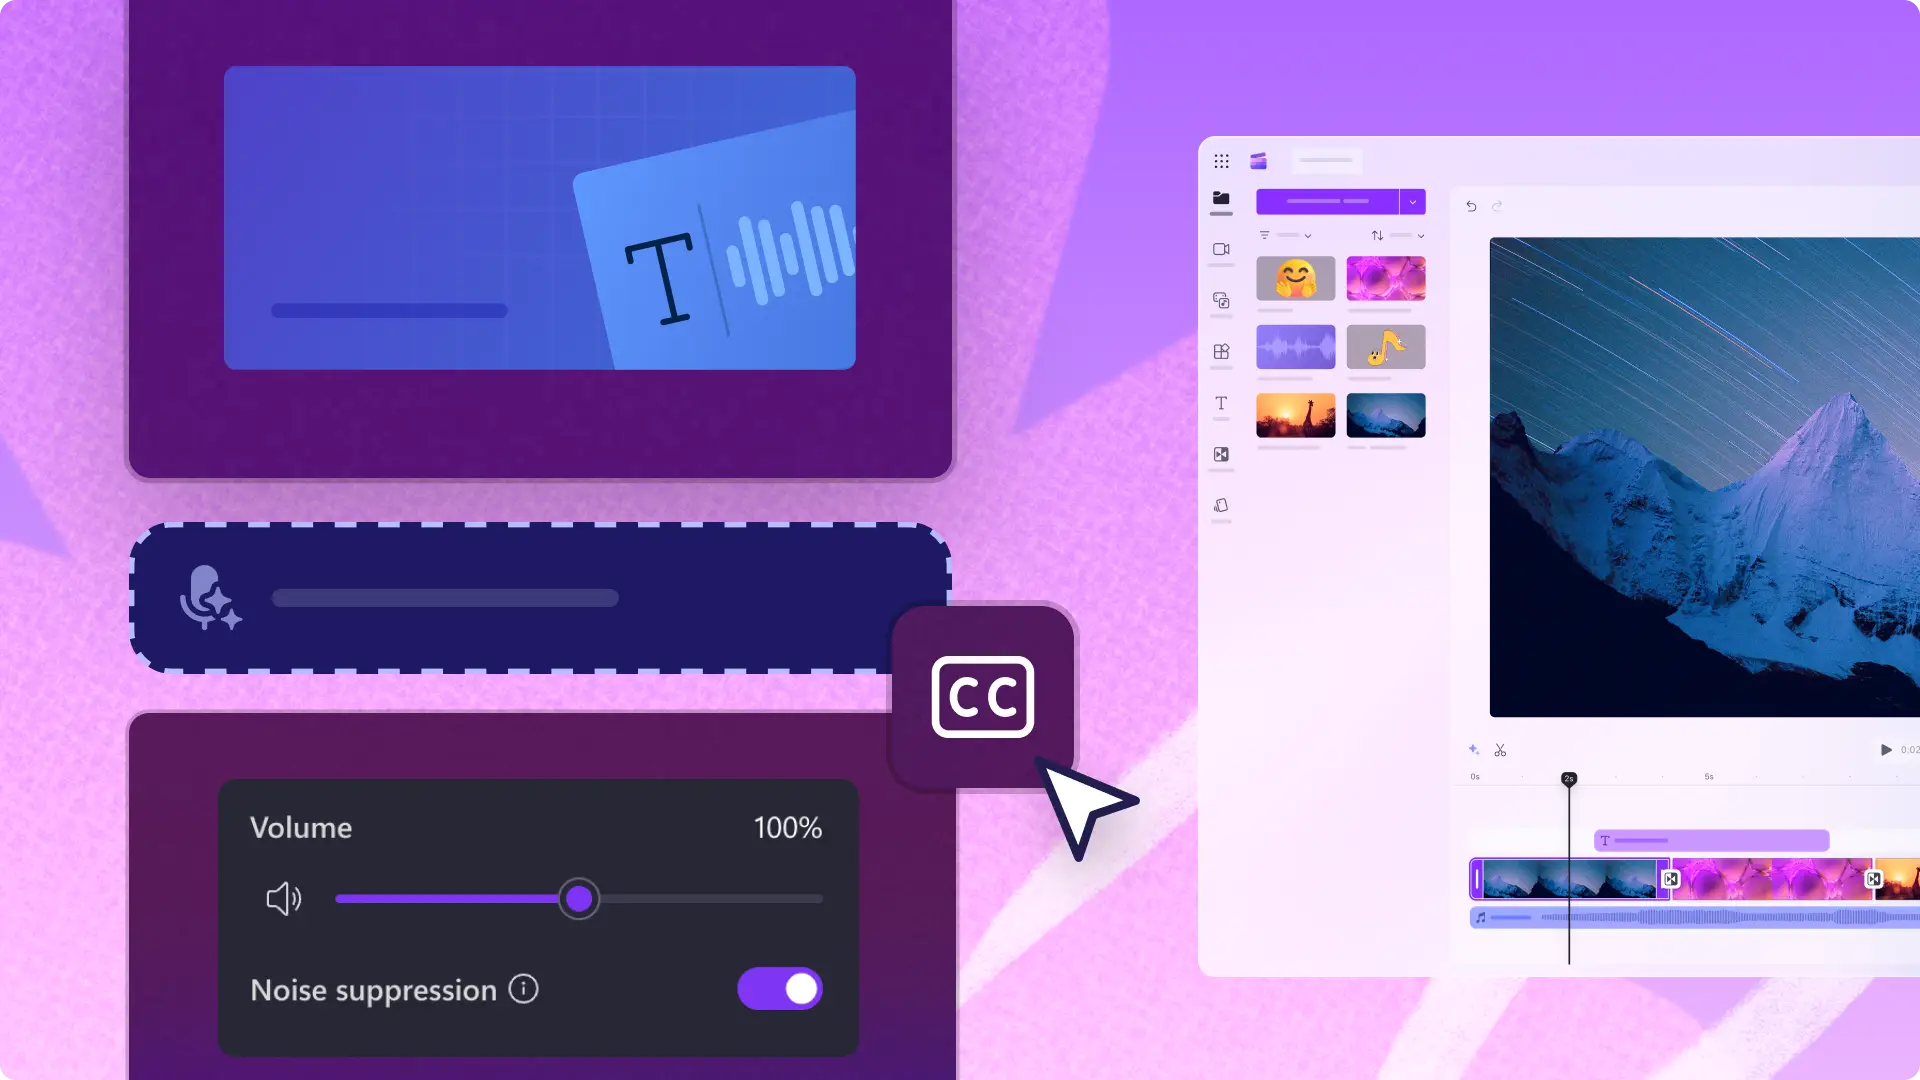
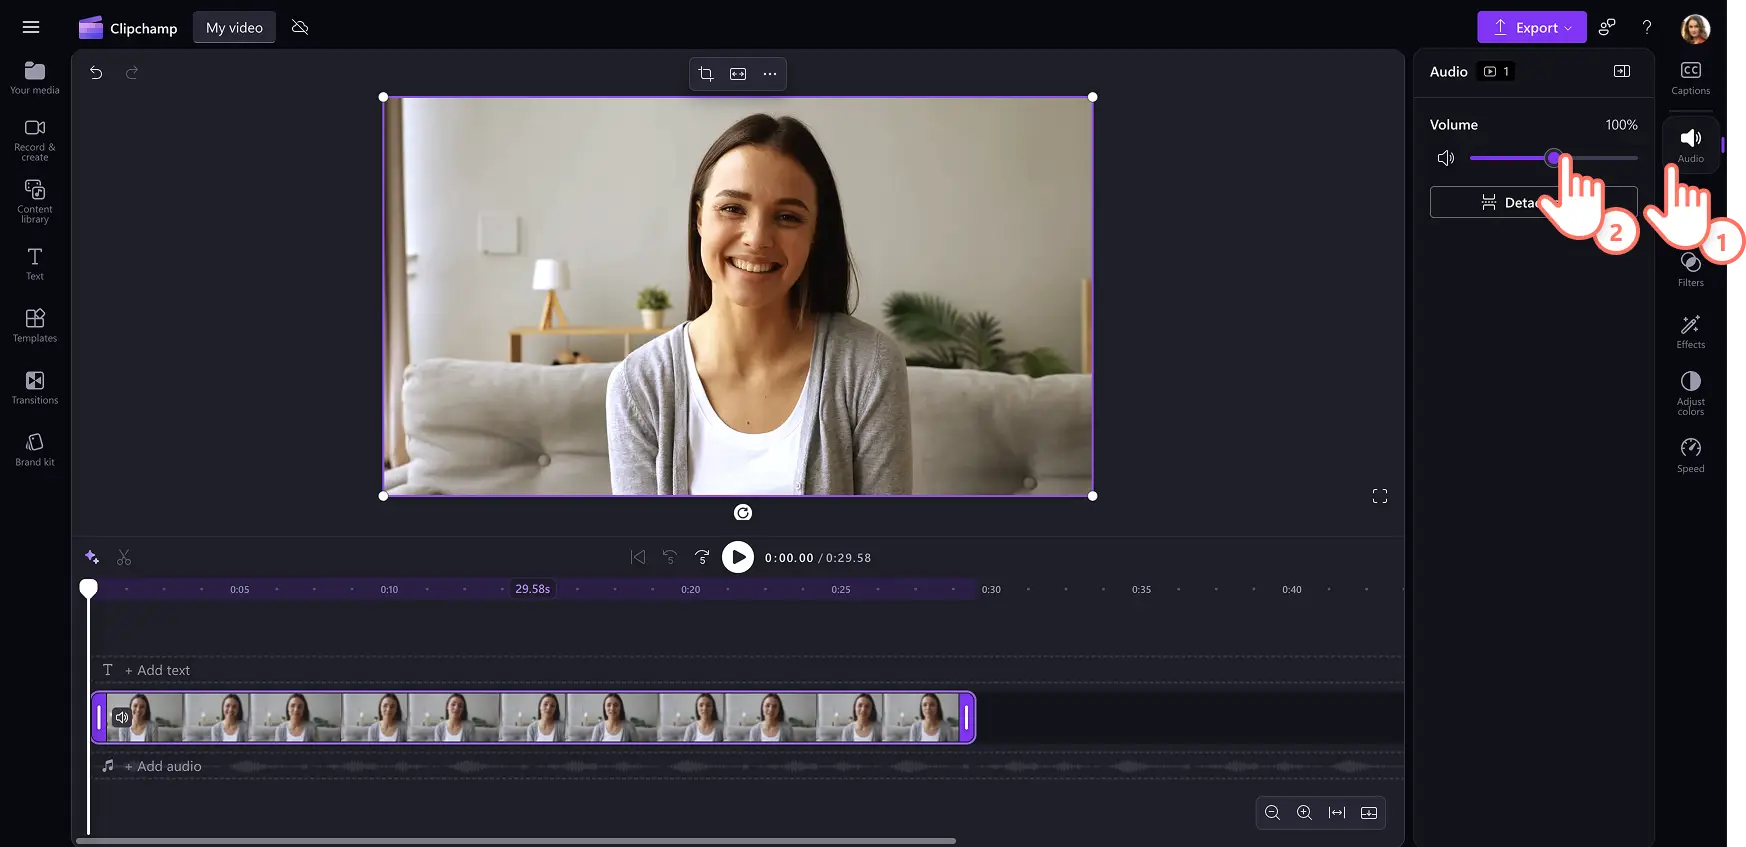
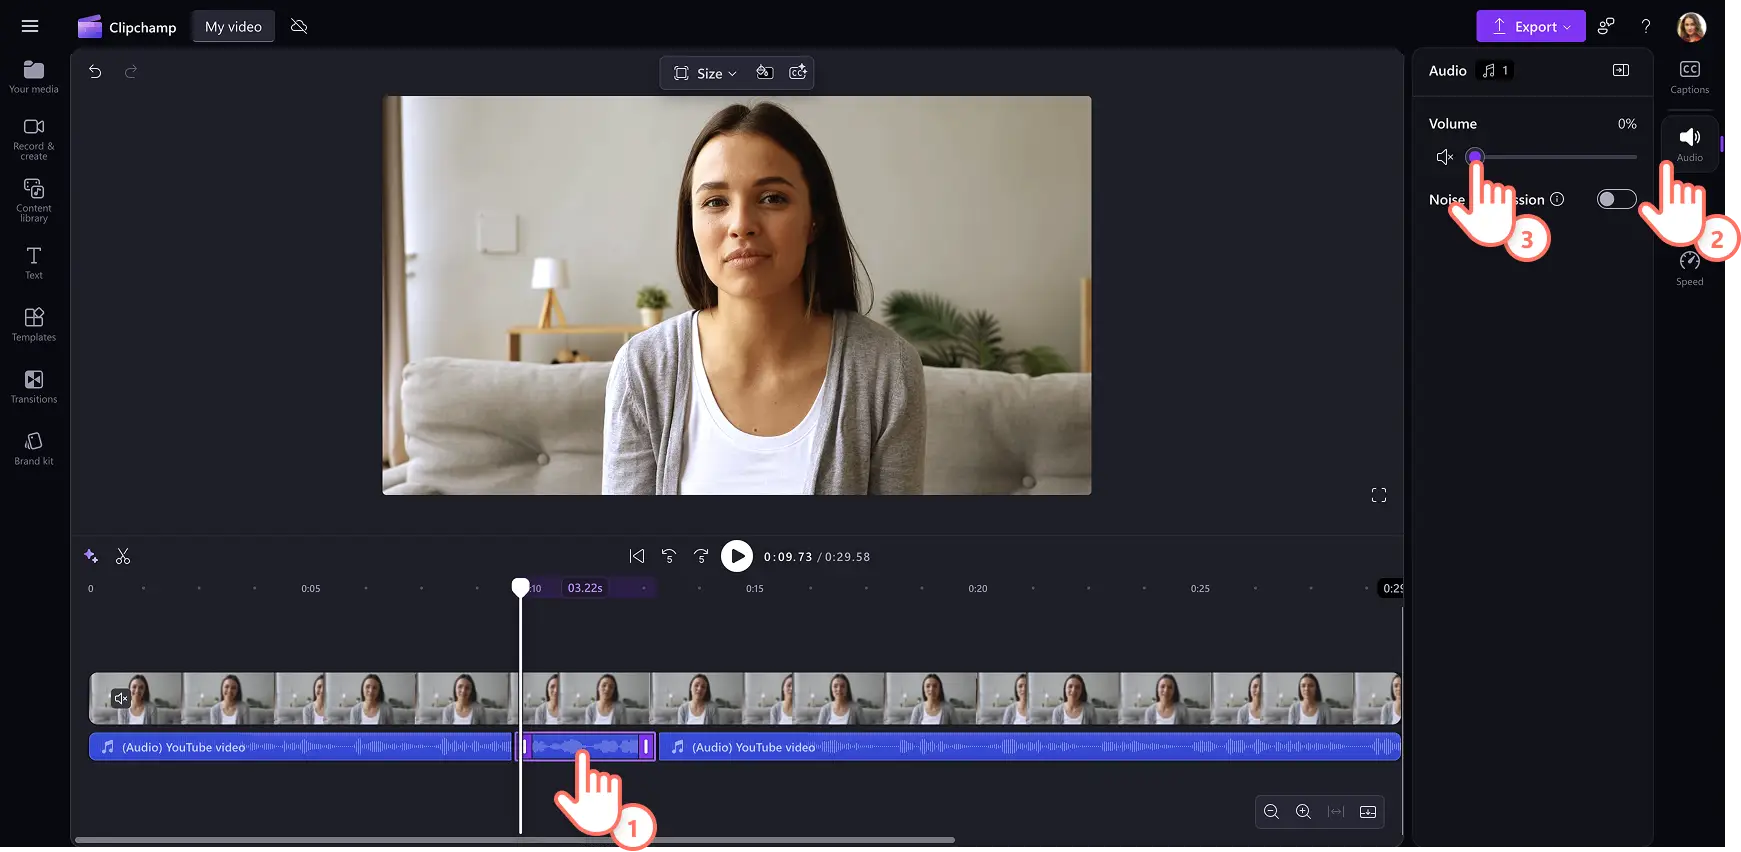
Step 3. Edit the video audio
If your vlog has audio, click on the audio tab on the property panel. Here, you can adjust the volume of your audio using the slider. Drag the slider to the right to make your video’s audio louder or drag to the left to make the audio softer.
If your audio and video are in separate tracks, split your audio where you would like to mute using the split tool, then click mute the snipped of audio using the audio tab on the property panel. This feature is perfect for removing mistakes and removing profanities.
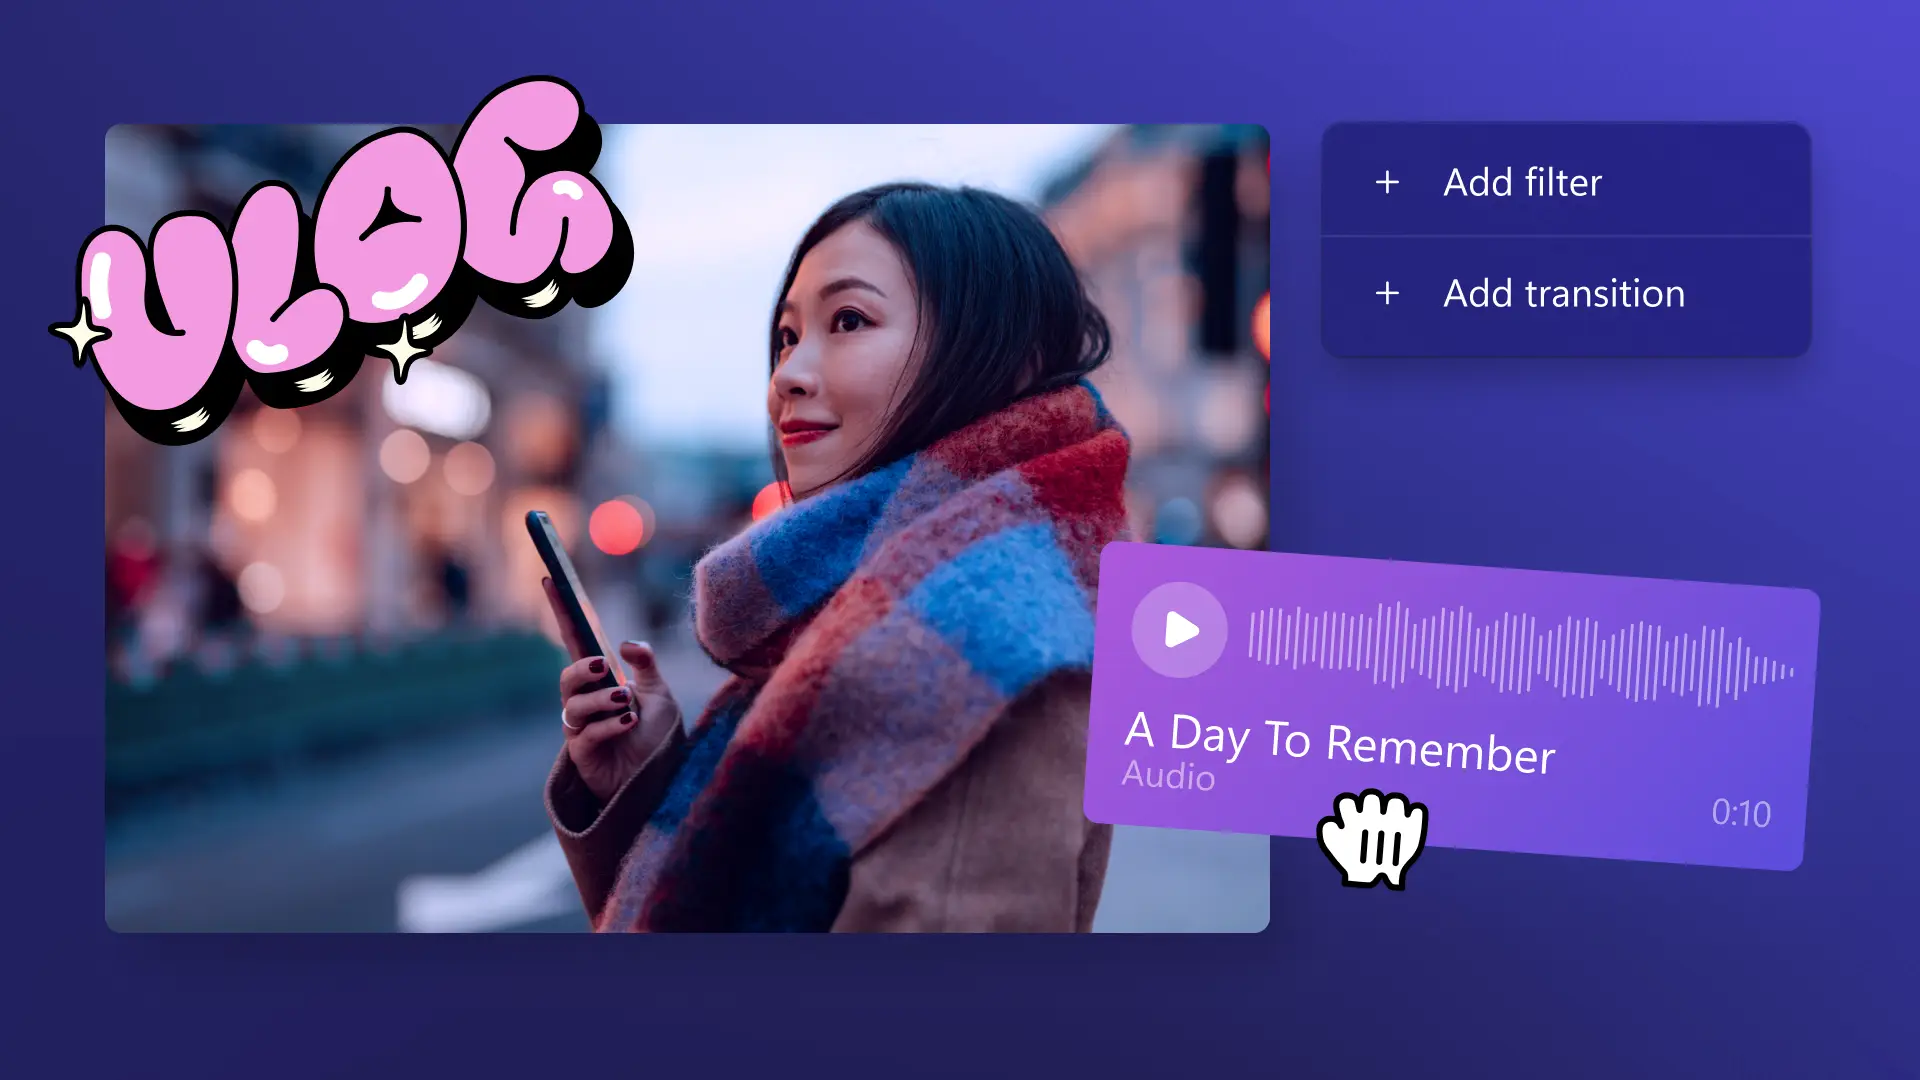
Step 4. Add vlog music, stickers, and text
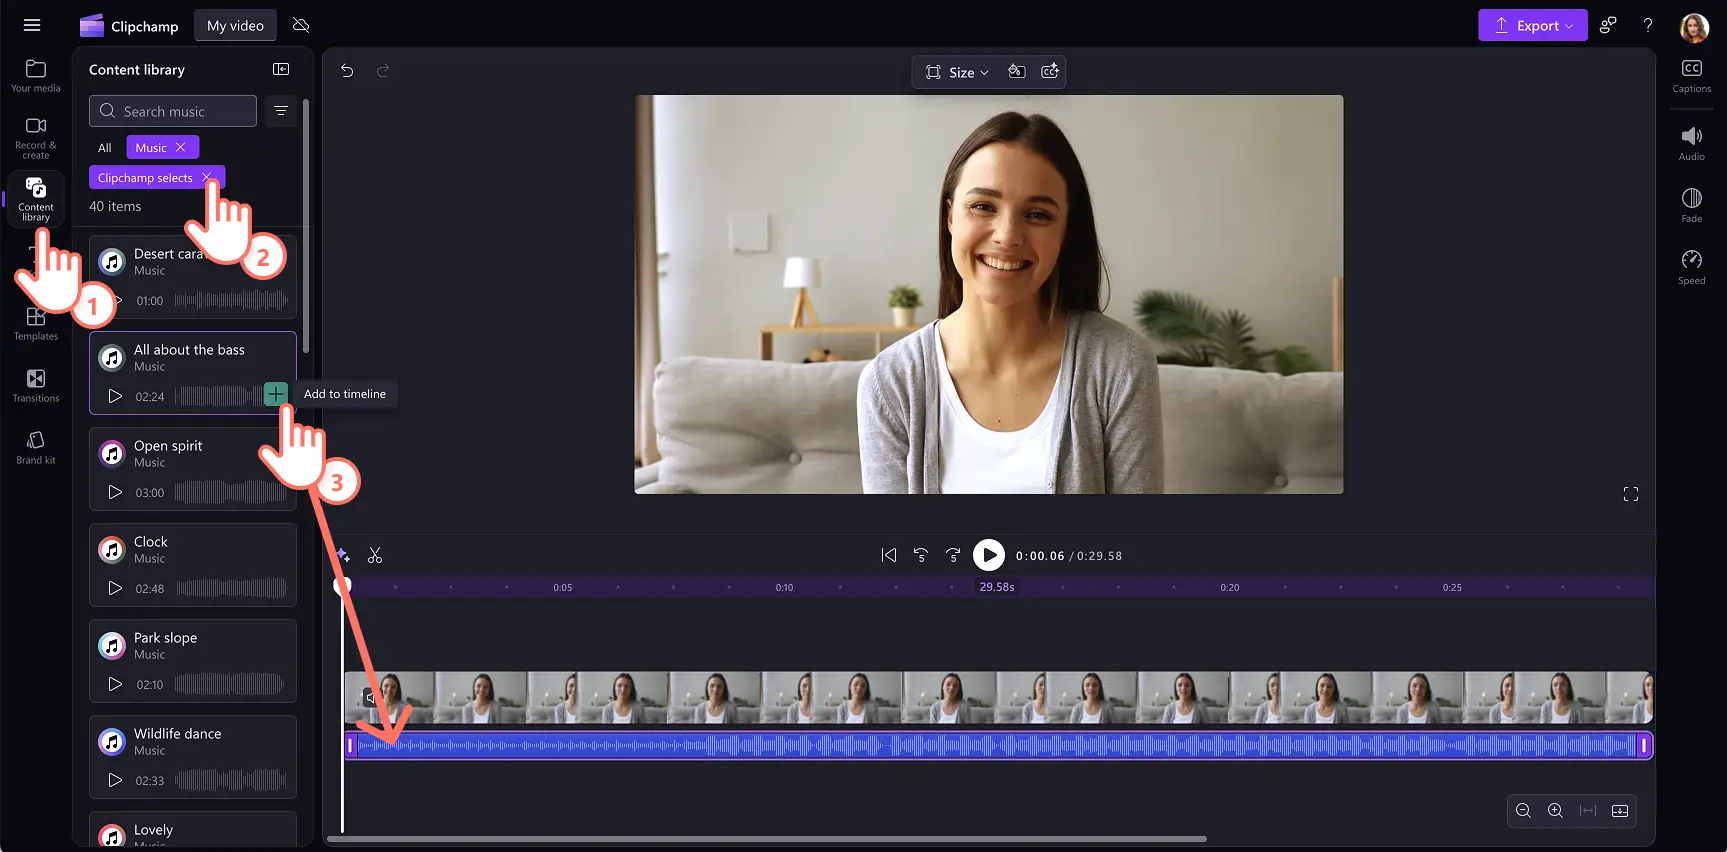
To add background music onto your vlog, select the content library tab on the toolbar, and select music from the audio drop down arrow, to browse the stock audio library.
You can type in keywords in the search bar to look for specific genres, themes, or moods, or click on the see more button within a music category. Don’t forget to turn down the volume of your background music so viewers can still hear your vlog audio.
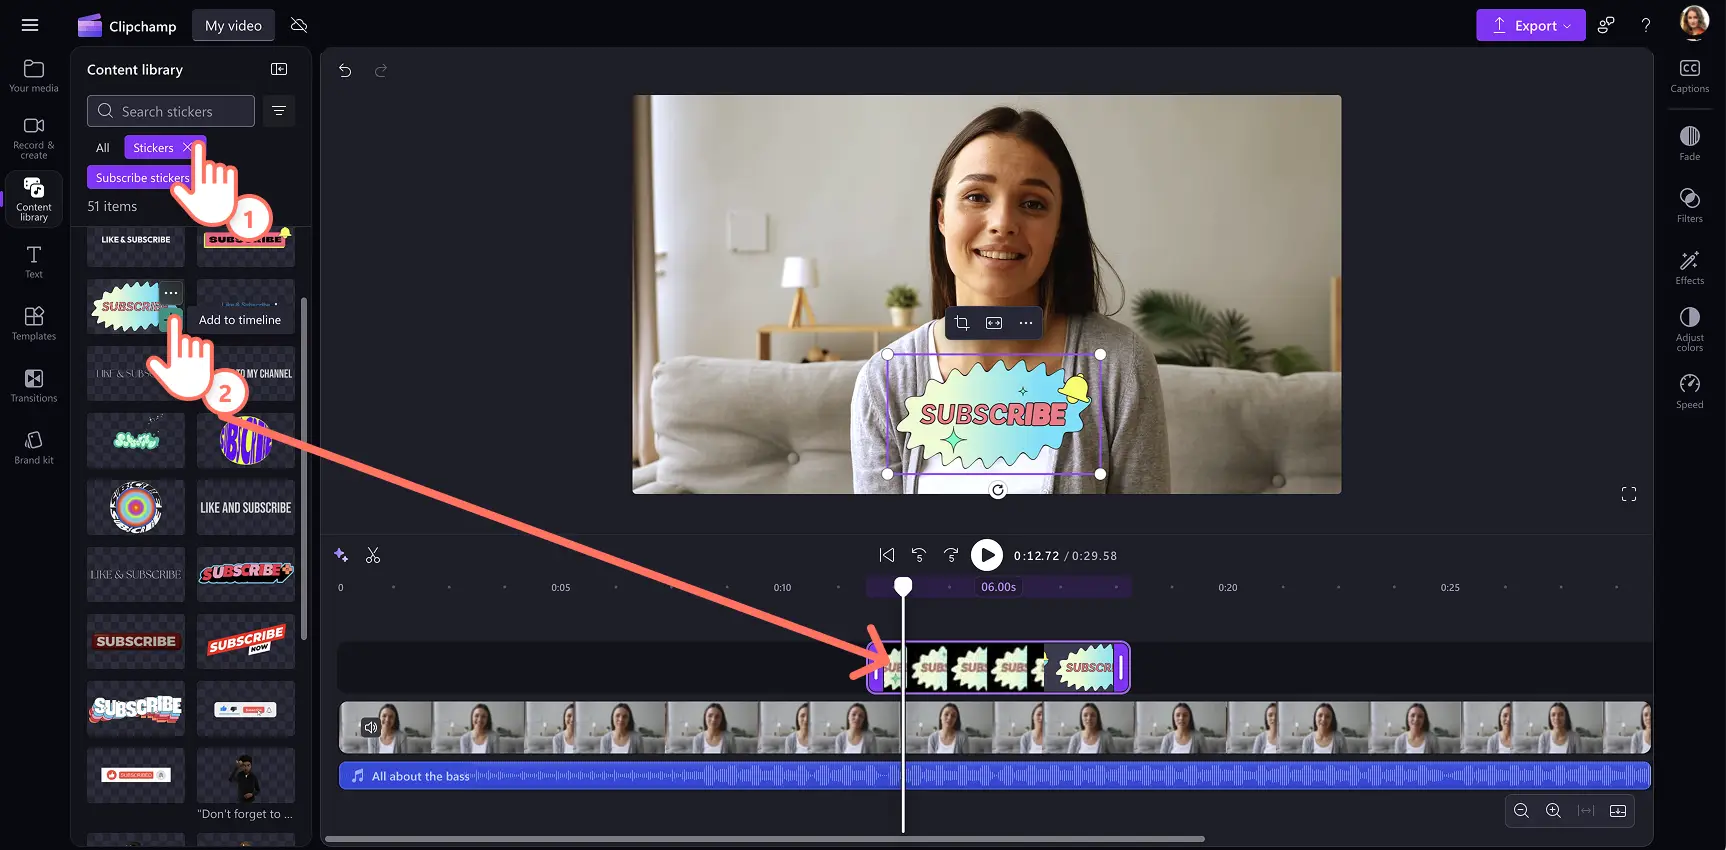
Next, add sticker overlays. To add overlays like subscribe buttons, emojis, and even ASL sign language stickers, click on the content library tab on the toolbar and click on the visuals drop down arrow, then choose stickers. You can also browse frames, overlays, shapes, backgrounds, annotations and GIFs.
Drag and drop your sticker onto the timeline above your video. Edit your stickers size using the floating toolbar on the video preview.
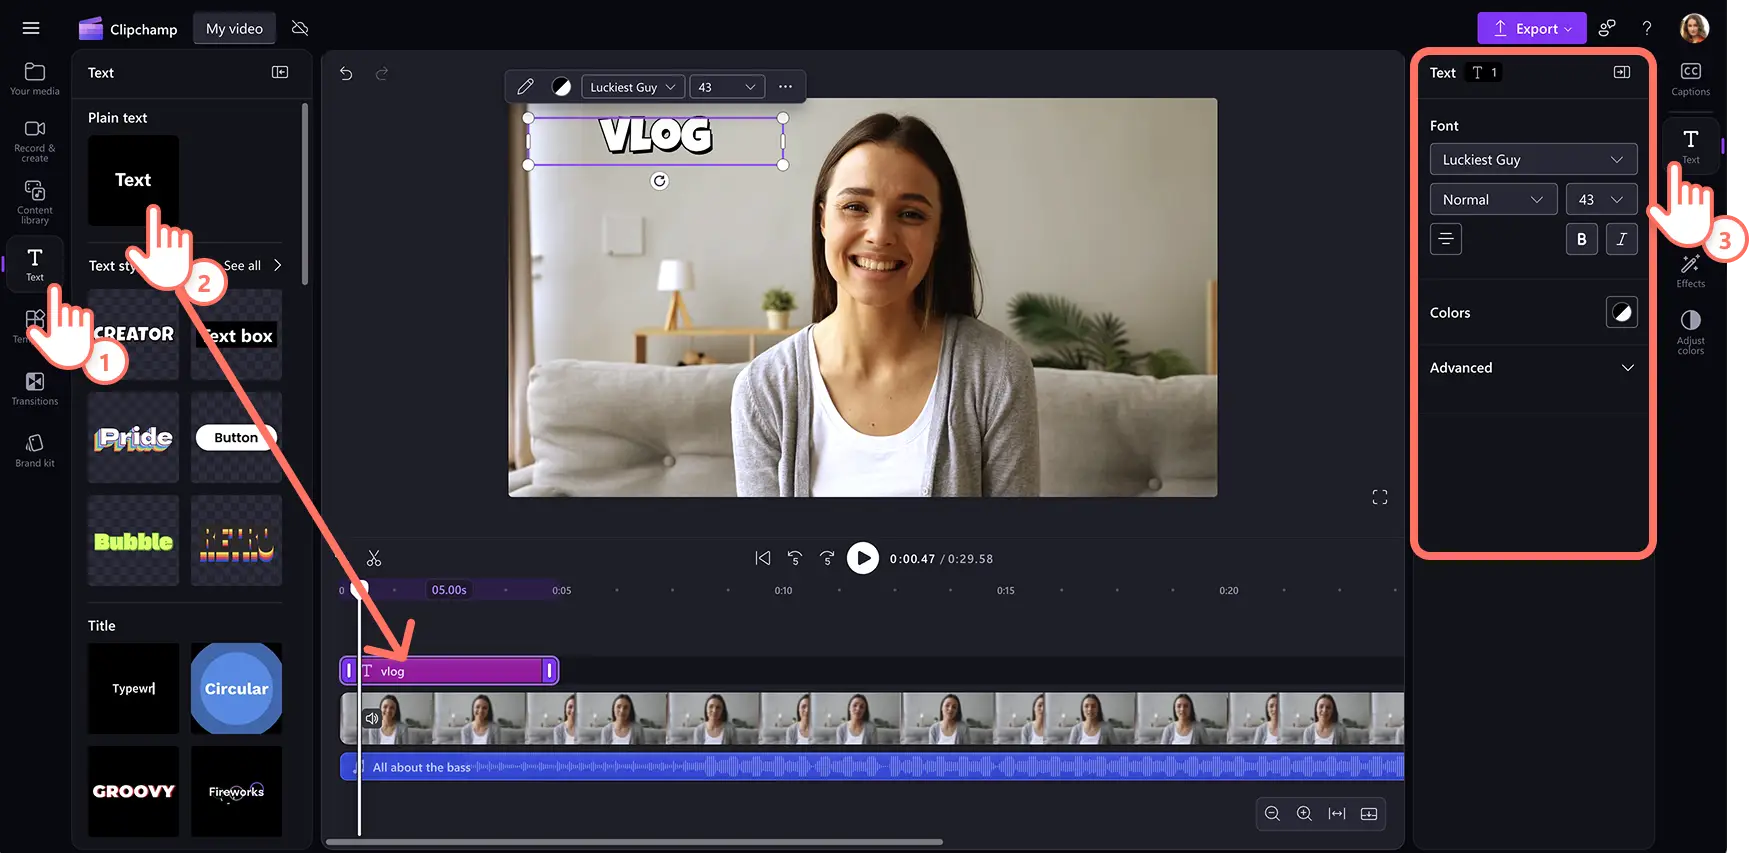
You can also add motion titles and text to your vlog using the text tab on the toolbar. Click on the text tab then select a title. Drag and drop the title onto the timeline above your video. Edit your text, font, size, alignment, color, and placement in the property panel.
Step 5. Add subtitles to video
To make your vlog more accessible to all viewers, add subtitles using the autocaptions feature. Click on the captions tab on the property panel, then click turn on autocaptions. Follow the on-screen prompts to transcribe your video with AI. Customize the size, colors and placement of your captions easily.
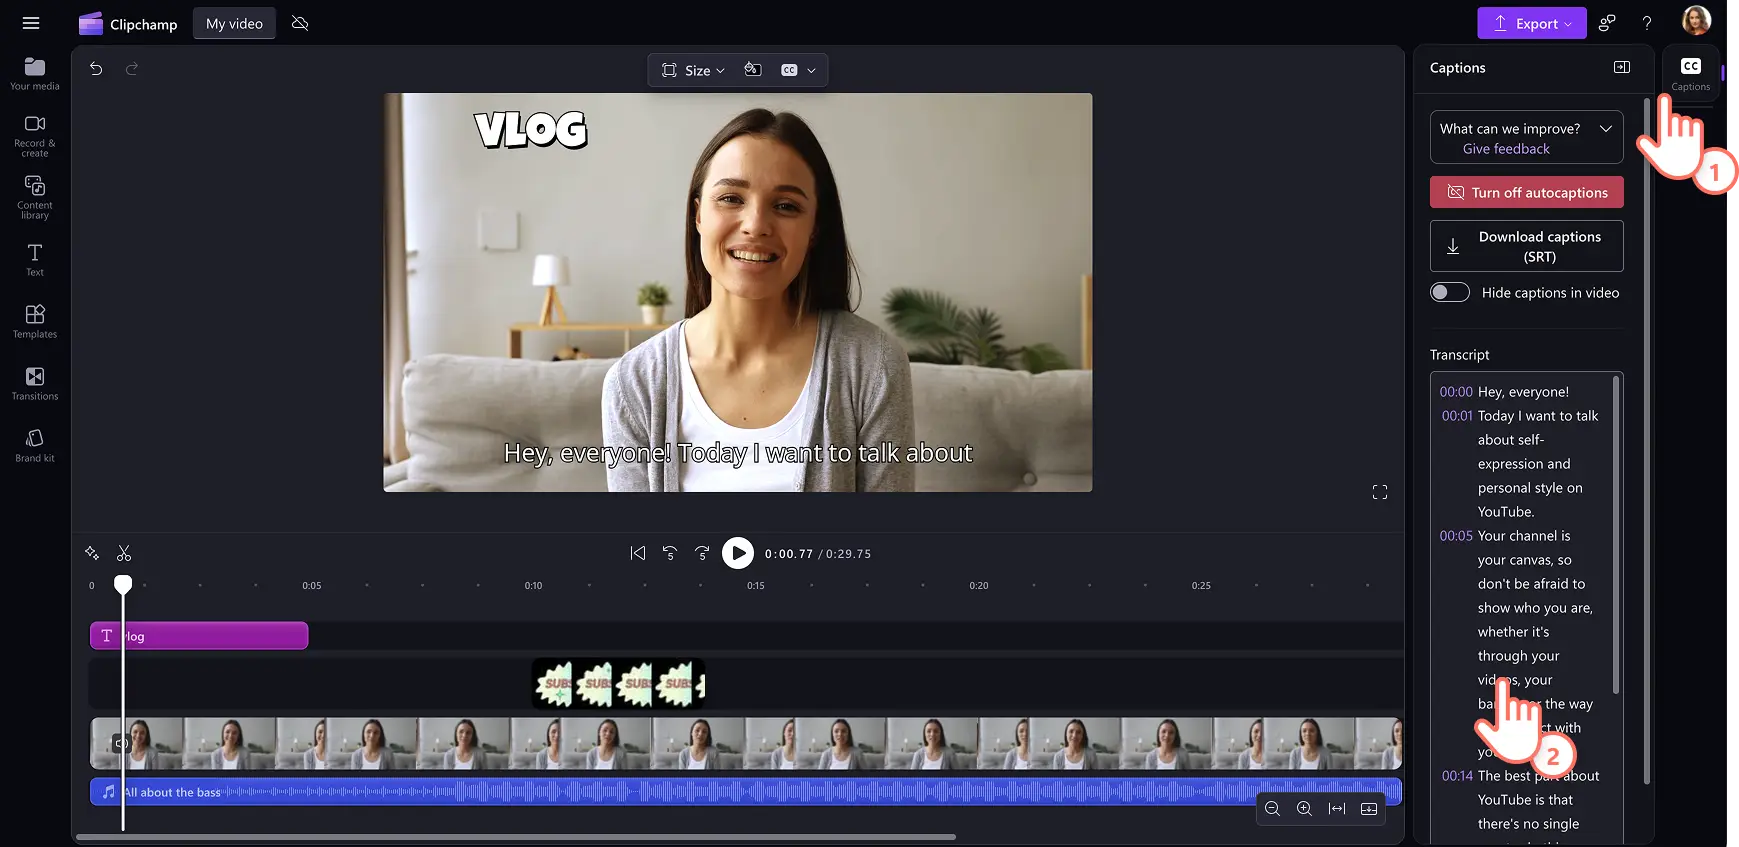
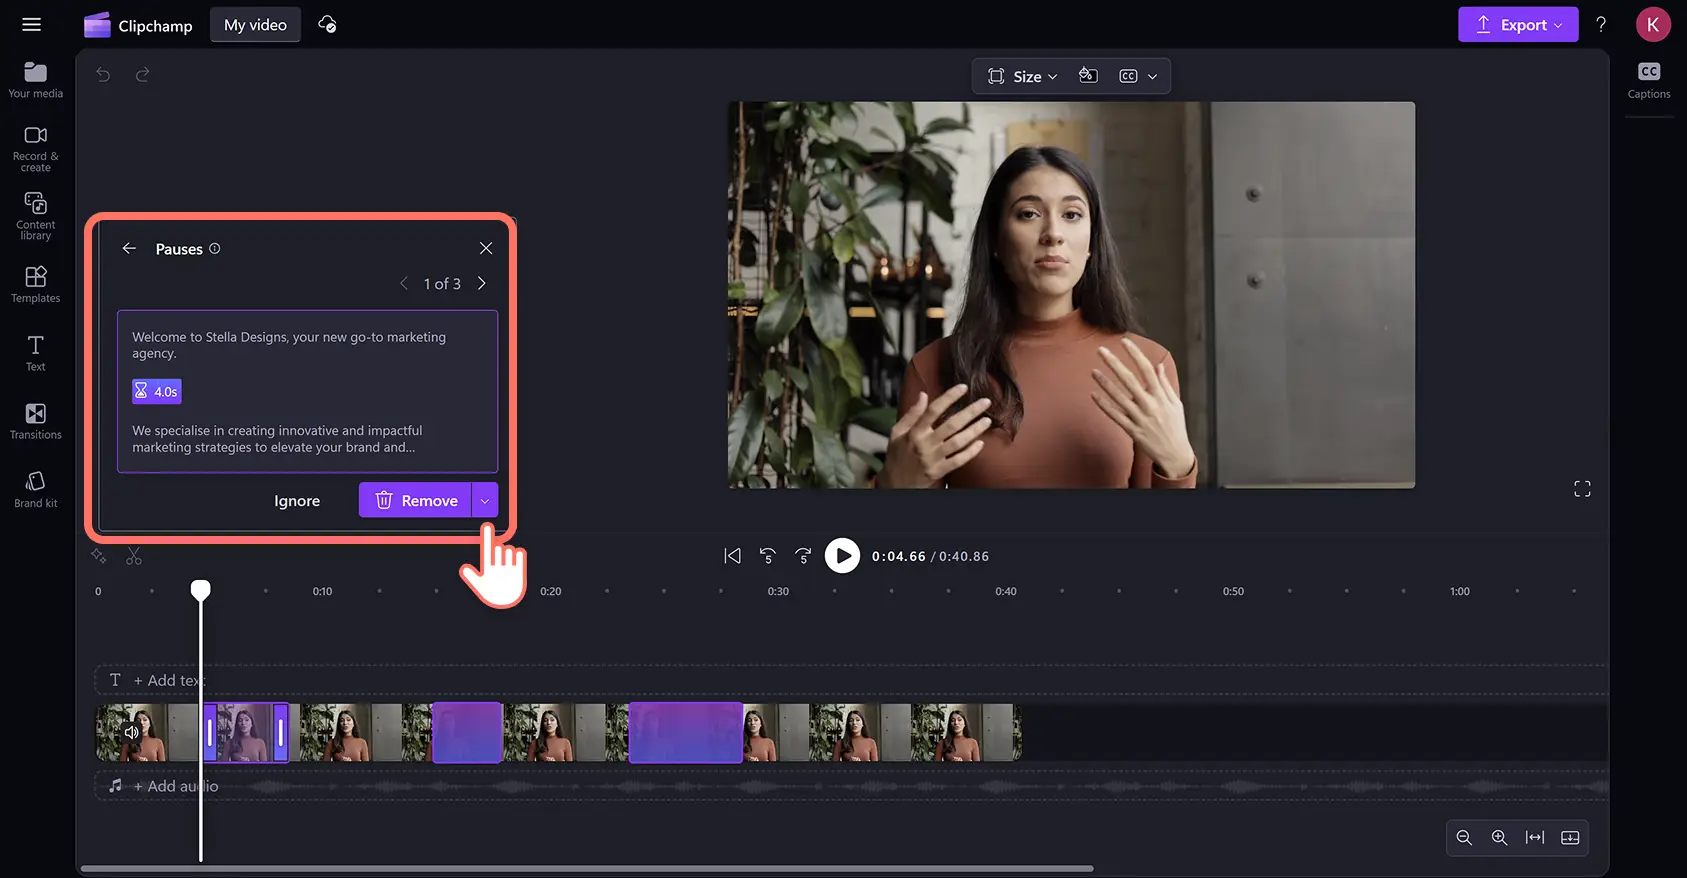
When you create captions, you can also enjoy our intelligent silence removal feature. This feature will find any pause or silence that’s longer than 3 seconds in your video and highlight it in purple so you can trim or delete them with ease.
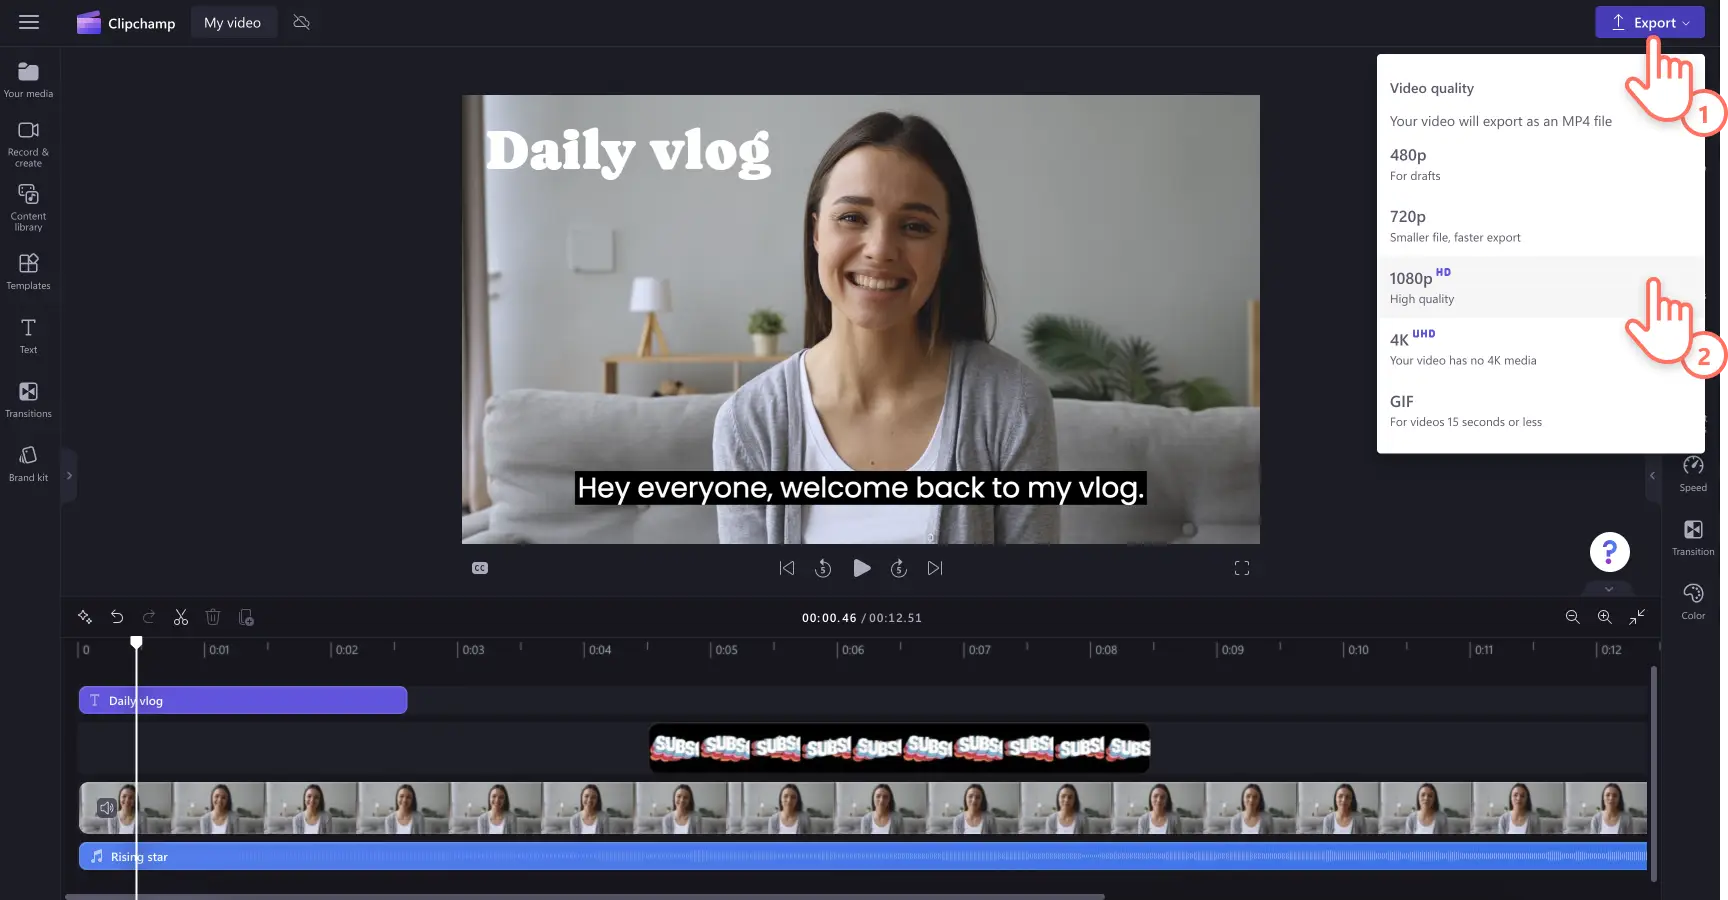
Step 6. Save vlog and share to YouTube
To save your vlog, click on the export button then select a video resolution.
You can also upload your vlog to YouTube using the YouTube integration directly in Clipchamp.
AI video editing features to edit vlogs faster
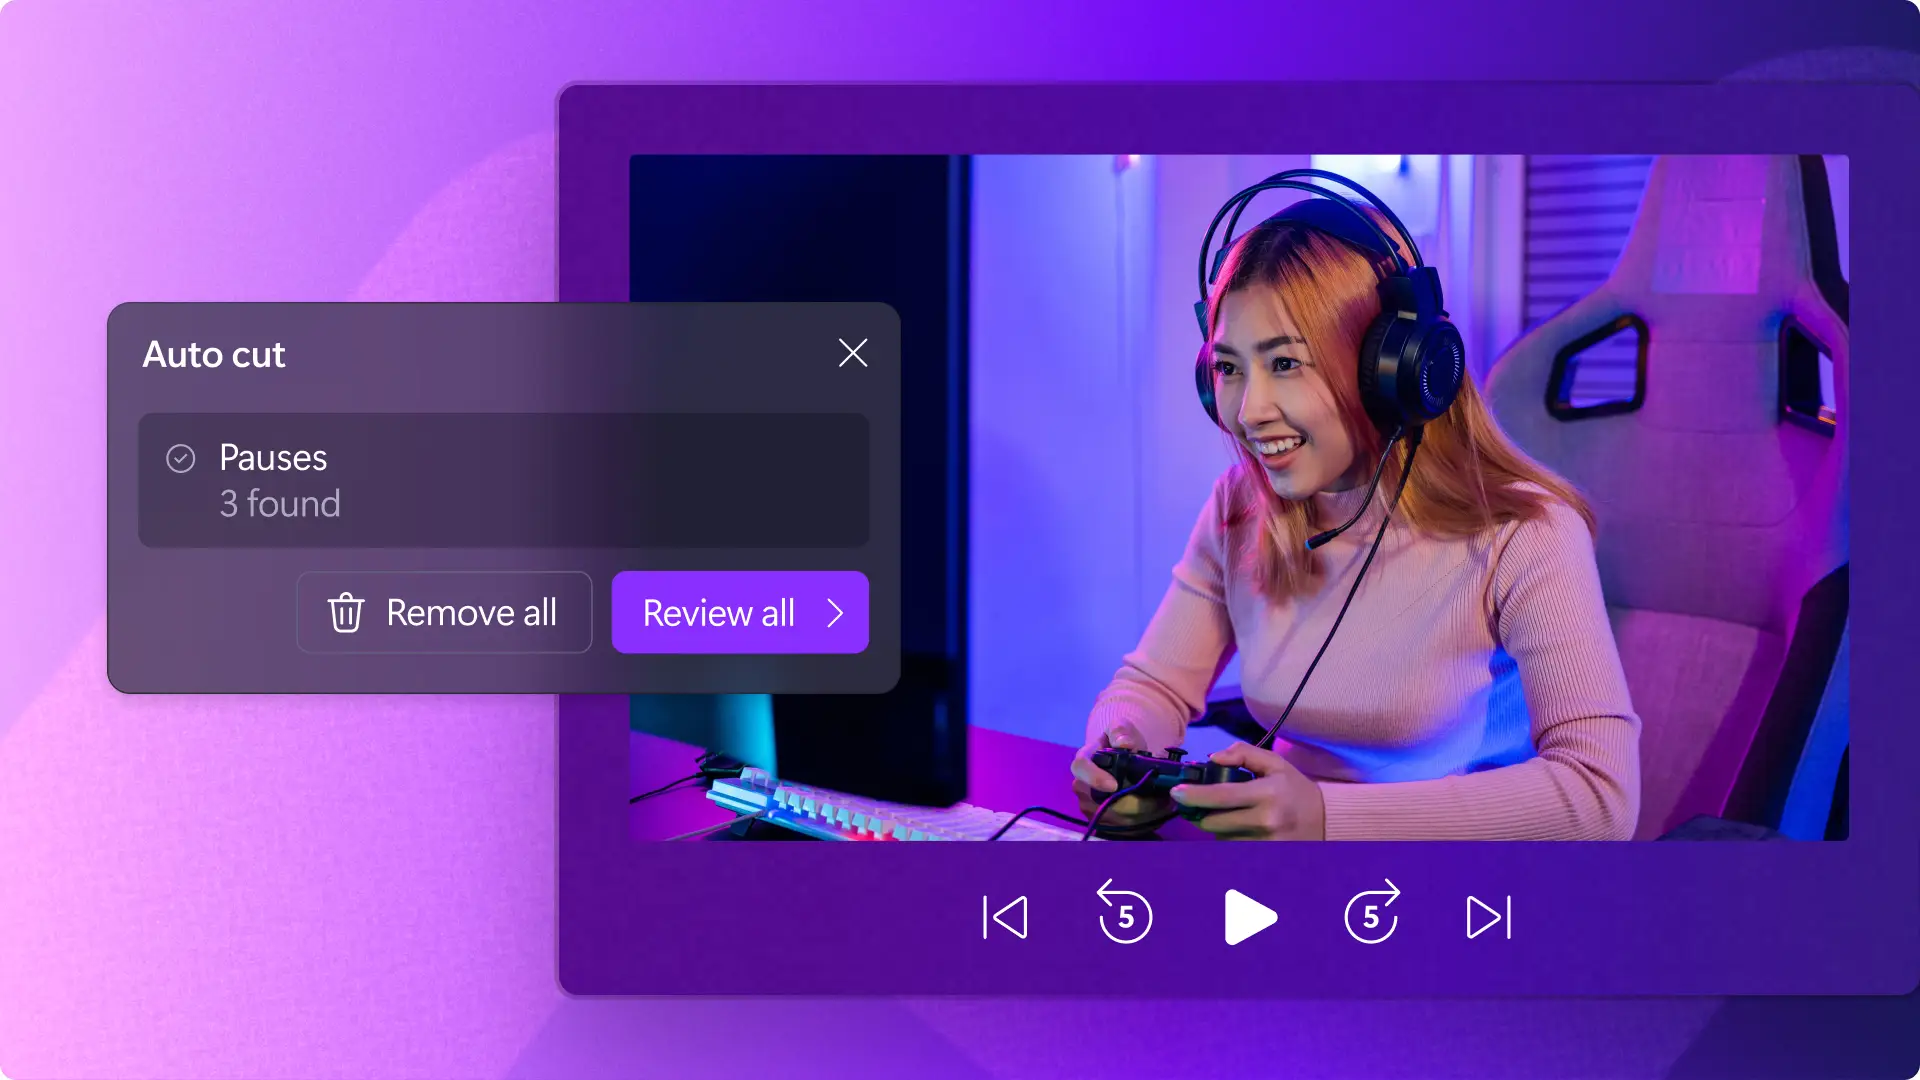
Auto cut
Automatically remove long pauses and silences with the AI silence remover. Any unwanted gaps longer than three seconds are identified and highlighted for you to trim out in a single mouse-click. It also identifies the length of silences and gives you the option to leave them in if you prefer. This is a time-saving tool, where you don’t need to manually check for pauses and gaps.
Noise suppression
Reduce background noise and any unwanted sounds like echoes with the noise suppression feature. You can automatically remove distracting hums or sounds without compromising the audio quality of your video, no matter what microphone you record with. You can also polish up poor audio from busy environments like traffic and wind. Here's a demo video to help you get started.
Learn about more AI video editing tools in Clipchamp.
Now you know how to start a vlog with the right equipment and editing tools. Continue learning how about how to write video scripts for ideas on how to structure your content, or explore audio editing hacks. Start creating vlogs with Clipchamp video editor or download the Clipchamp Windows app.
Frequently asked questions
How long should my vlog be?
There’s no specific time limit for vlogs as it depends on the requirements of the platform you choose. For vertical vlogs on TikTok and Instagram, aim for around 60 seconds. On YouTube, you can go up to 30 minutes, depending on your content and audience.
How many vlogs a week should I upload to YouTube?
Creators can upload however many vlogs they want throughout the week. Daily vloggers usually aim to upload 7 videos over 7 days, but other vloggers only upload once a week. This will depend on your planned uploading schedule and how much video footage you have captured.
Can I resize my vlog in Clipchamp?
Yes, a video resizer helps you make your video fit, every time. Select a preset aspect ratio to change your video size for YouTube, Instagram, TikTok, Facebook, WhatsApp and even create a custom size effortlessly. Select 16:9 for YouTube, 9:16 for TikTok or Stories, 2:3 for Facebook and Square 1:1 for Instagram.
Heads up! The screenshots in this article are from Clipchamp for personal accounts. The same principles apply to Clipchamp for work and school accounts.