On this page
Whether you’re a pro video editor or UGC content creator, unboxing videos are a unique way to share the excitement of new purchases and sponsorships while connecting with your viewers.
With over 50% of people watching a product video on YouTube before buying, give your followers a detailed look into new tech products, subscription boxes, beauty items, and more. Easily edit unboxing videos with high-quality video clips, authentic reactions, and unbiased reviews.
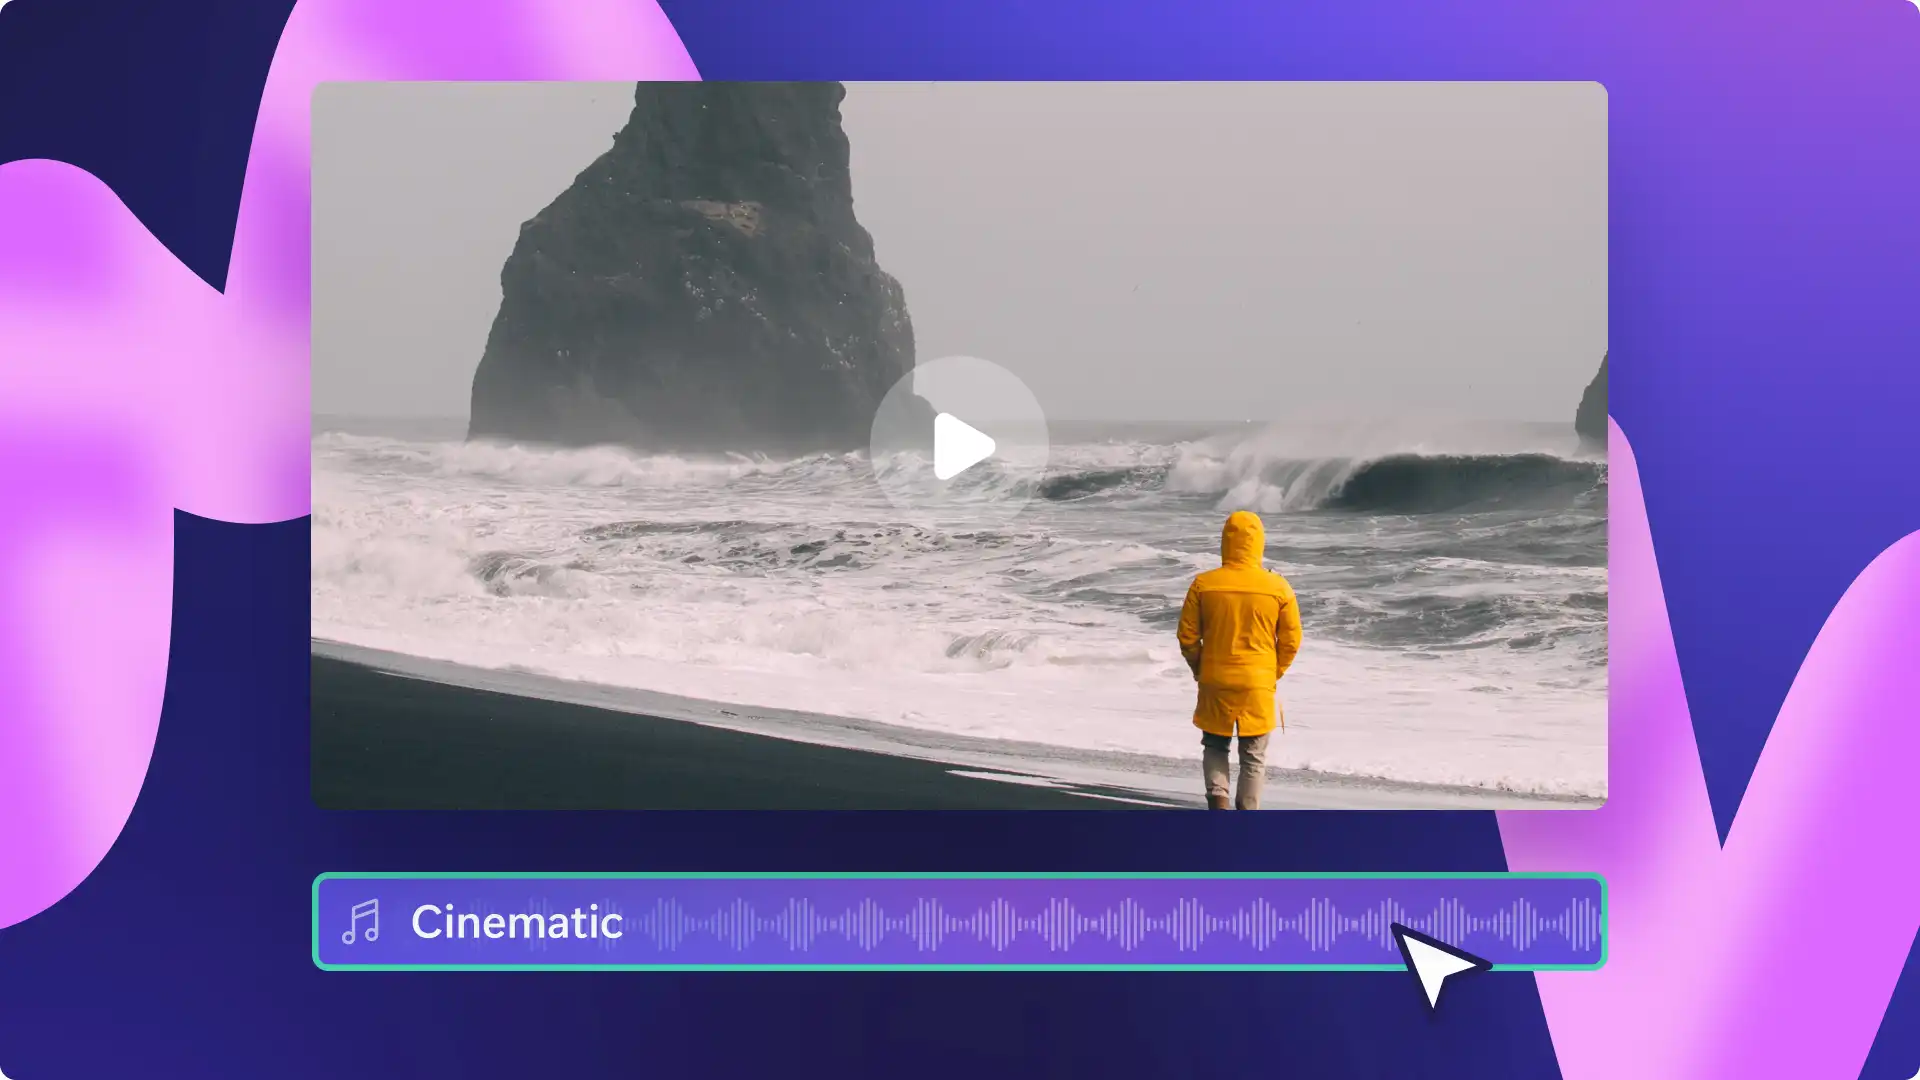
Spark your creativity with our 5 authentic unboxing video ideas and explore how to edit unboxing videos using professional editing features like AI voiceovers, transitions, and captions with Clipchamp.
5 popular unboxing video ideas with examples
1. Tech and gaming PR unboxing series
Give your followers an exclusive insight into the latest tech and gaming products. Share new features, functions, monthly game releases, upgrades, and what comes in the package.
Engage your viewers with close-up and wide-angle shots, fast spin transitions between video clips, and add motion titles showing where to buy the product and if they’re worth the hype. You can also create personalized intro and outro videos, along with overlay subscribe panels for YouTube videos.
2. Lifestyle review videos
From new home and decor products to beauty, skincare, and wellness, explore new products with your followers and how you’re going to use or style them. Lifestyle product reviews are a popular niche on YouTube and TikTok. This style of unboxing video can save your followers valuable research time and money by giving them an honest review.
Pair your video clips with low volume background music, filters and effects, and use text and titles to share brand names, prices, and where to buy the products that you are unboxing and reviewing.
3. Unboxing vlog style
Want to share your unboxing video with a more relatable and friendly editing style? Create an unboxing vlog video for any social media platform. Introduce vlog style unboxing video with a B-roll montage of the product you’re reviewing, then smoothly transition into your unboxing video.
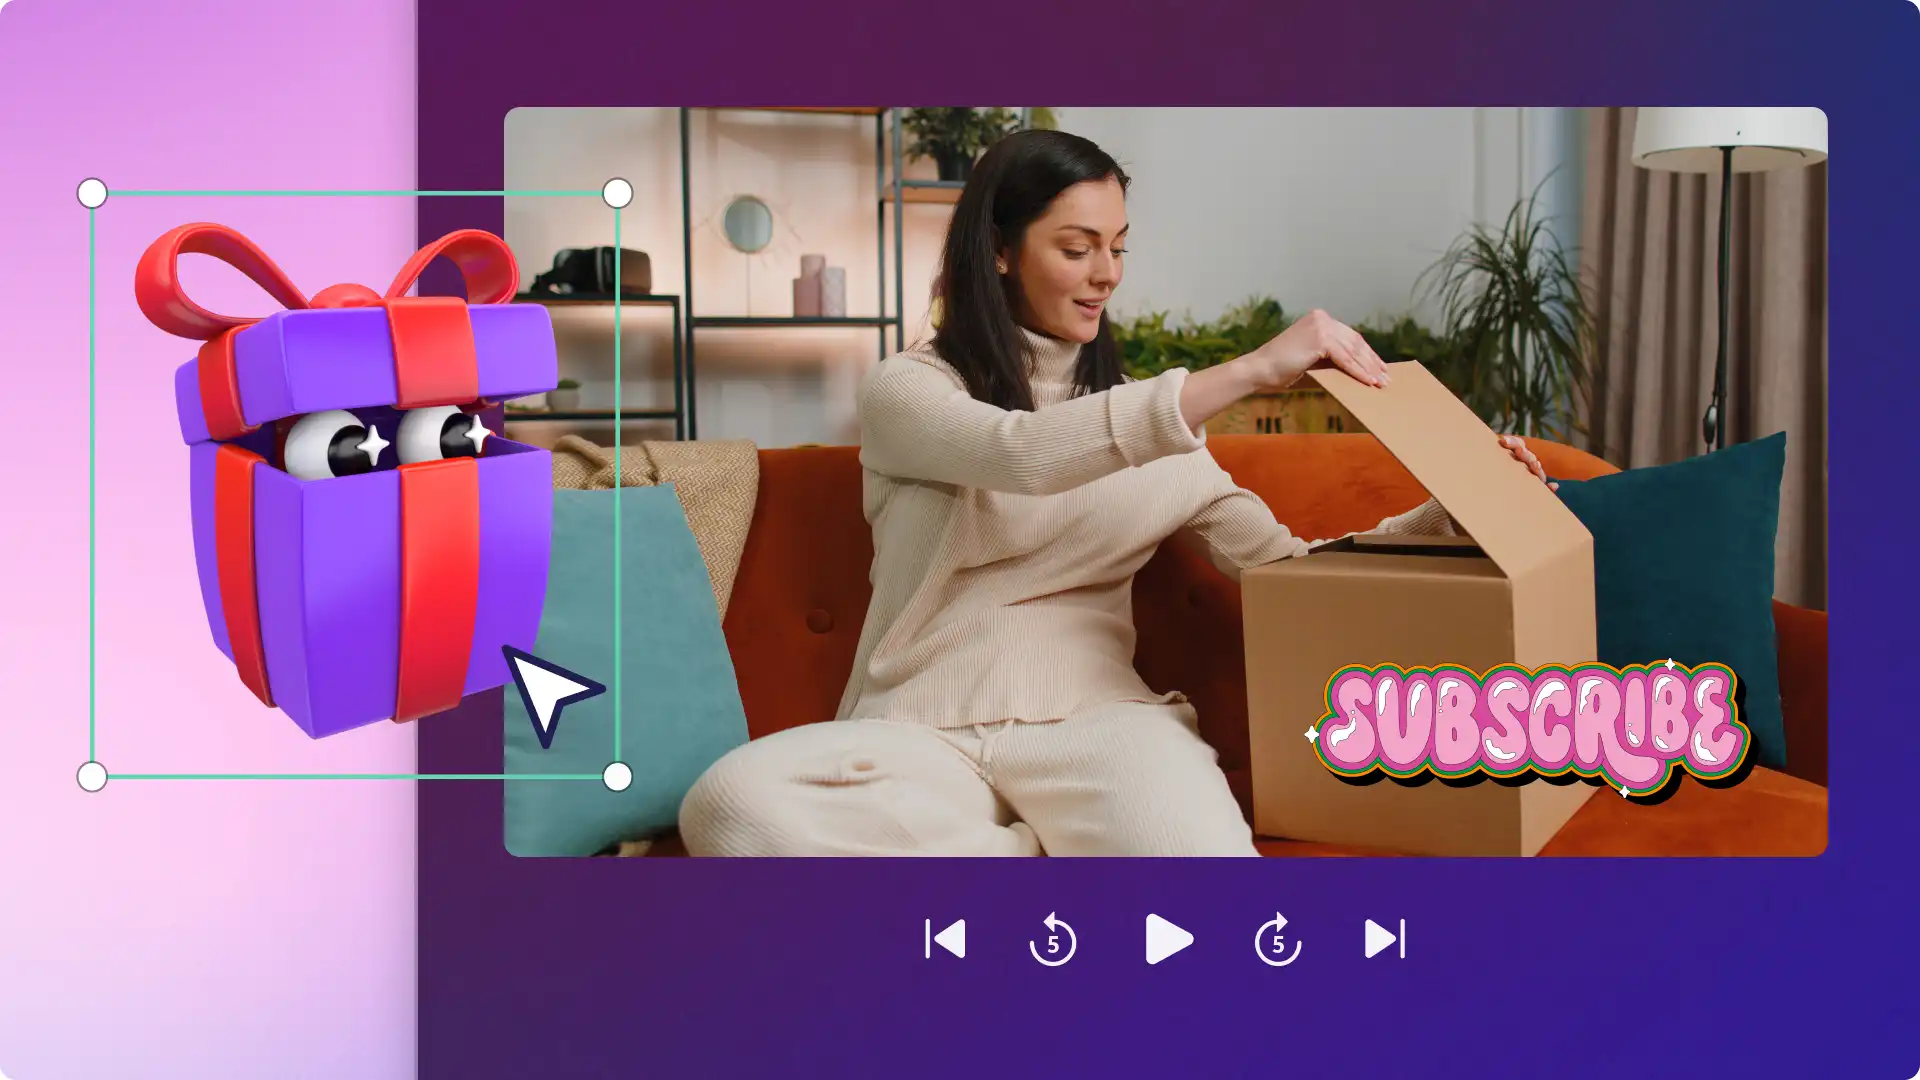
Combine your vlog style video with auto-captions, branded intro videos for YouTube, and overlay fun effects like subscribe stickers, star reviews, and arrows and annotations. You can also accompany any meme moments within your vlog with GIFs.
4. YouTube Shorts ASMR tech videos
Excite ASMR fans on YouTube by combining the relaxing tone of ASMR with explanations about new tech products. Tune into unpackaging sounds like tape ripping, package crackles, and peeling off protective films on brand new tech products. You can also highlight the materials the product is made out by tapping your nails or a pen on the product.
Switch between close-up video clips and regular portrait video, specifically zooming in and trimming clips when creating an ASMR sound effect. Pair the YouTube Shorts with soft background music and video effects like VHS and blur video. Check out a ASMR tech video on YouTube Shorts here.
5. Timelapse unboxing videos
If you're reviewing multiple PR packages at once, or creating an unboxing haul video, showcase all your packages in the once place with a timelapse unboxing video. Just set up your camera with a widescreen angle and capture yourself unboxing each package one by one.
Make your video more engaging with ambient background music and on-screen text popups. If your timelapse video is too fast or too slow, easily edit the speed of your video clip using the speed selector. Add transitions between your last video clip and outro video, pair with transition sound effects and subscribe stickers to show your viewers the video is coming to an end.
Elements of a great unboxing video
Consistency and clear video layout
Every successful unboxing video has one thing in common, a clear and professional video layout. Make sure your videos are easy to watch, through high-quality video clips, smooth transitions, and perfect audio. If you want to level up your unboxing video layout even further, explore the picture-in-picture effect to overlay a close-up angle of your unboxing on top of your widescreen reaction video.
Engaging overlays like GIPHY reactions and stickers
Infuse your unboxing videos with your personality and style, while making them informative and entertaining with relatable GIPHY reactions and stickers. With the right combination of funny meme videos and stickers, you can elevate your reactions and make them stand out within your unboxing video.
Customizing with video effects and borders
Instantly change the aesthetic of your unboxing video with video overlays like the bokeh video effect, unique VHS filters, and colorful borders and frames. Add different effects to your video to sprinkle in your personality and branding.
Encouraging accessibility with captions and ASL stickers
Make your unboxing videos easier to follow while muted and more accessible for all viewers with real-time captions and sign language stickers. Using smart detection technology, the auto-captions feature generates captions and a video transcript for you in a few minutes. You can also add ASL stickers like “don’t forget to like and subscribe” to add an inclusive and meaningful tough to your video.
How to edit unboxing review videos
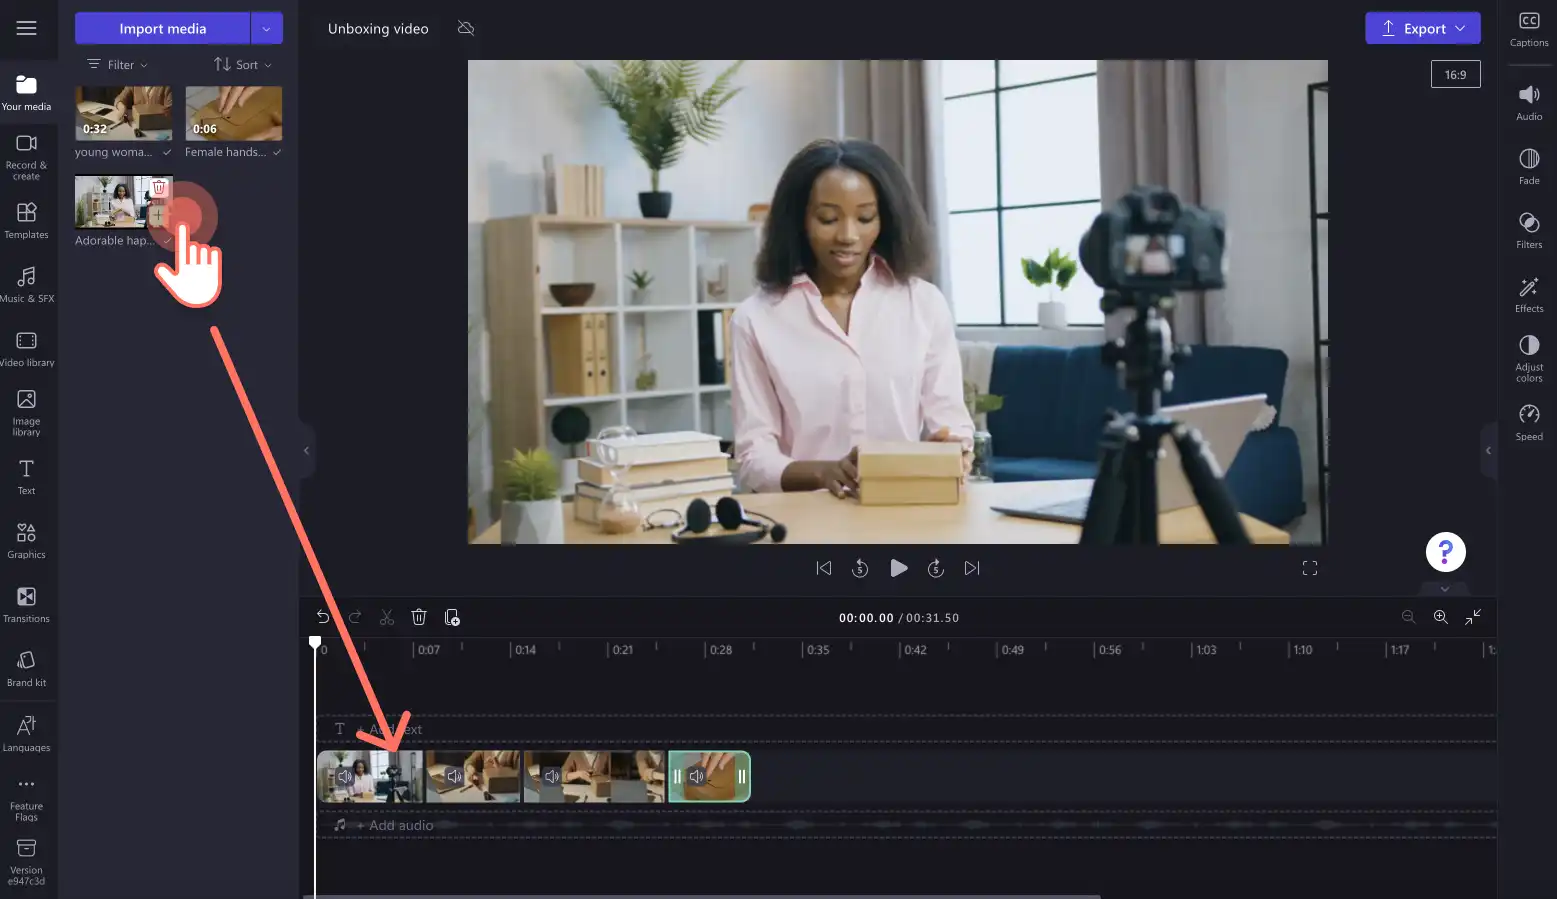
Step 1. Import your own media or add stock videos
To start creating an unboxing video, you’ll need to import your own media or add stock videos. Click on the import media button in the your media tab on the toolbar to browse your computer files, or connect your OneDrive.
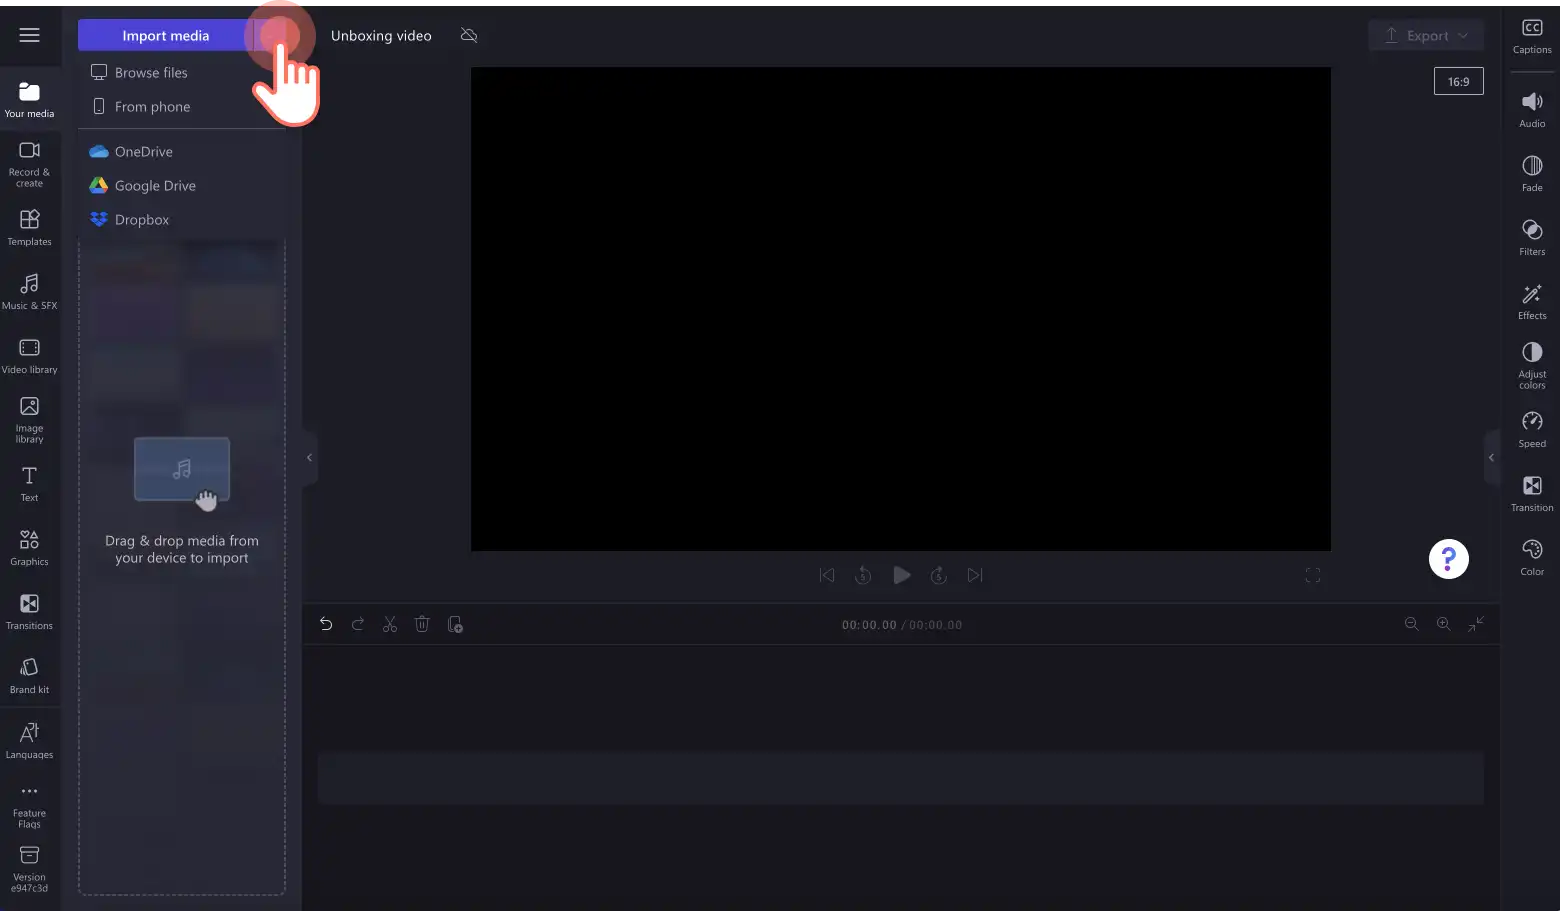
If you would like to include any stock footage, click on the video library tab on the toolbar. Browse the royalty-free video library to select the right stock for your video. Use the search bar to look for stock based on keywords or click on the see more button within a video category.
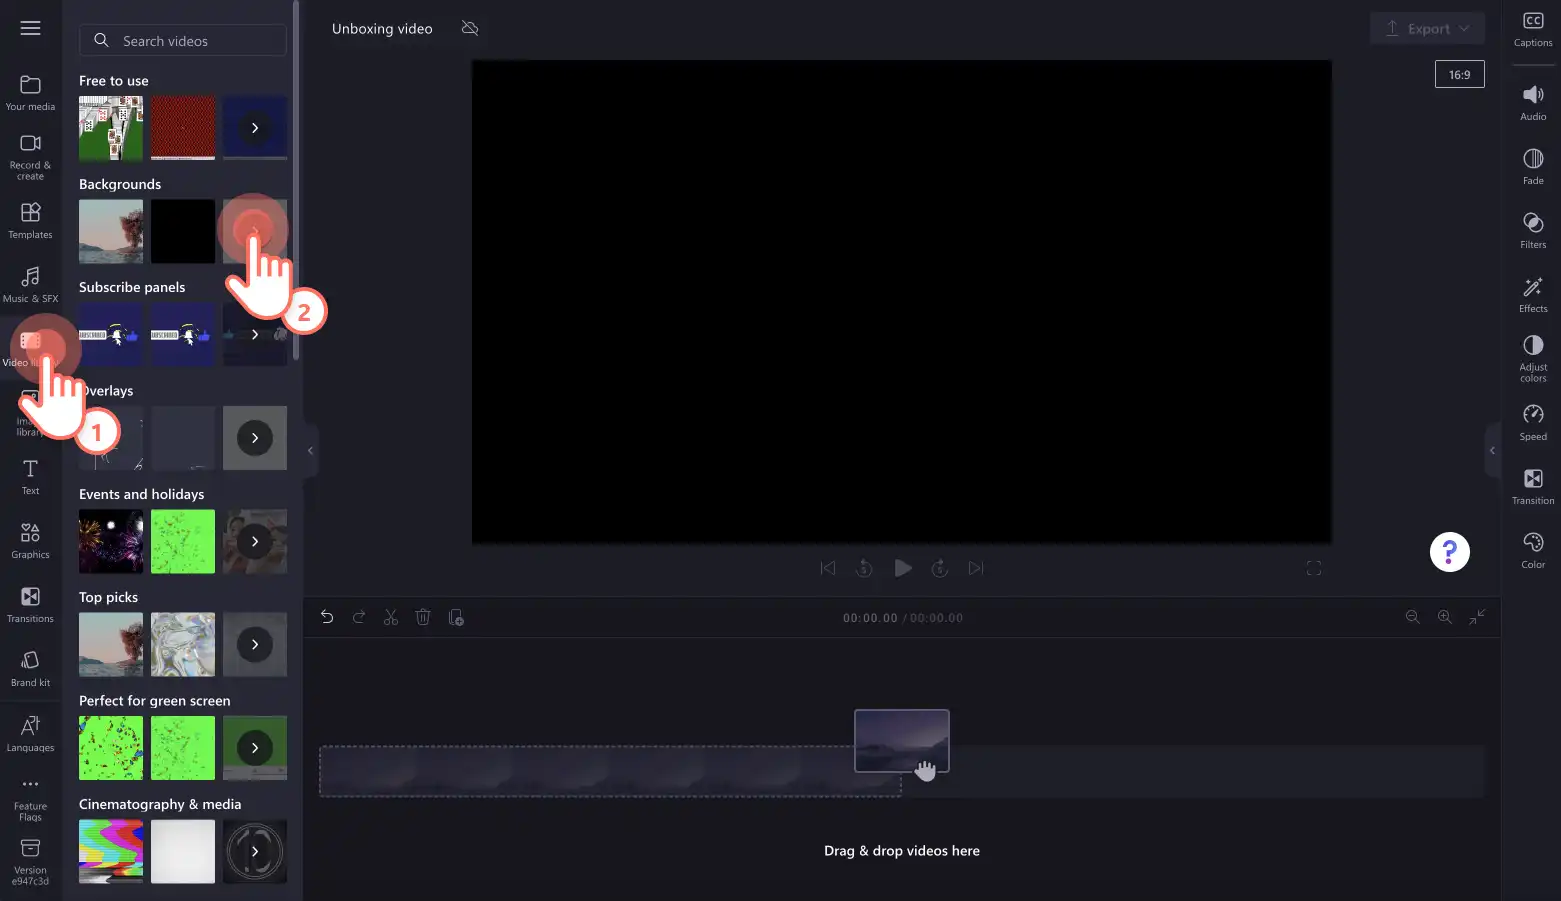
Next, add your videos to the timeline from the your media tab. Drag and drop each video clip onto the timeline side by side.
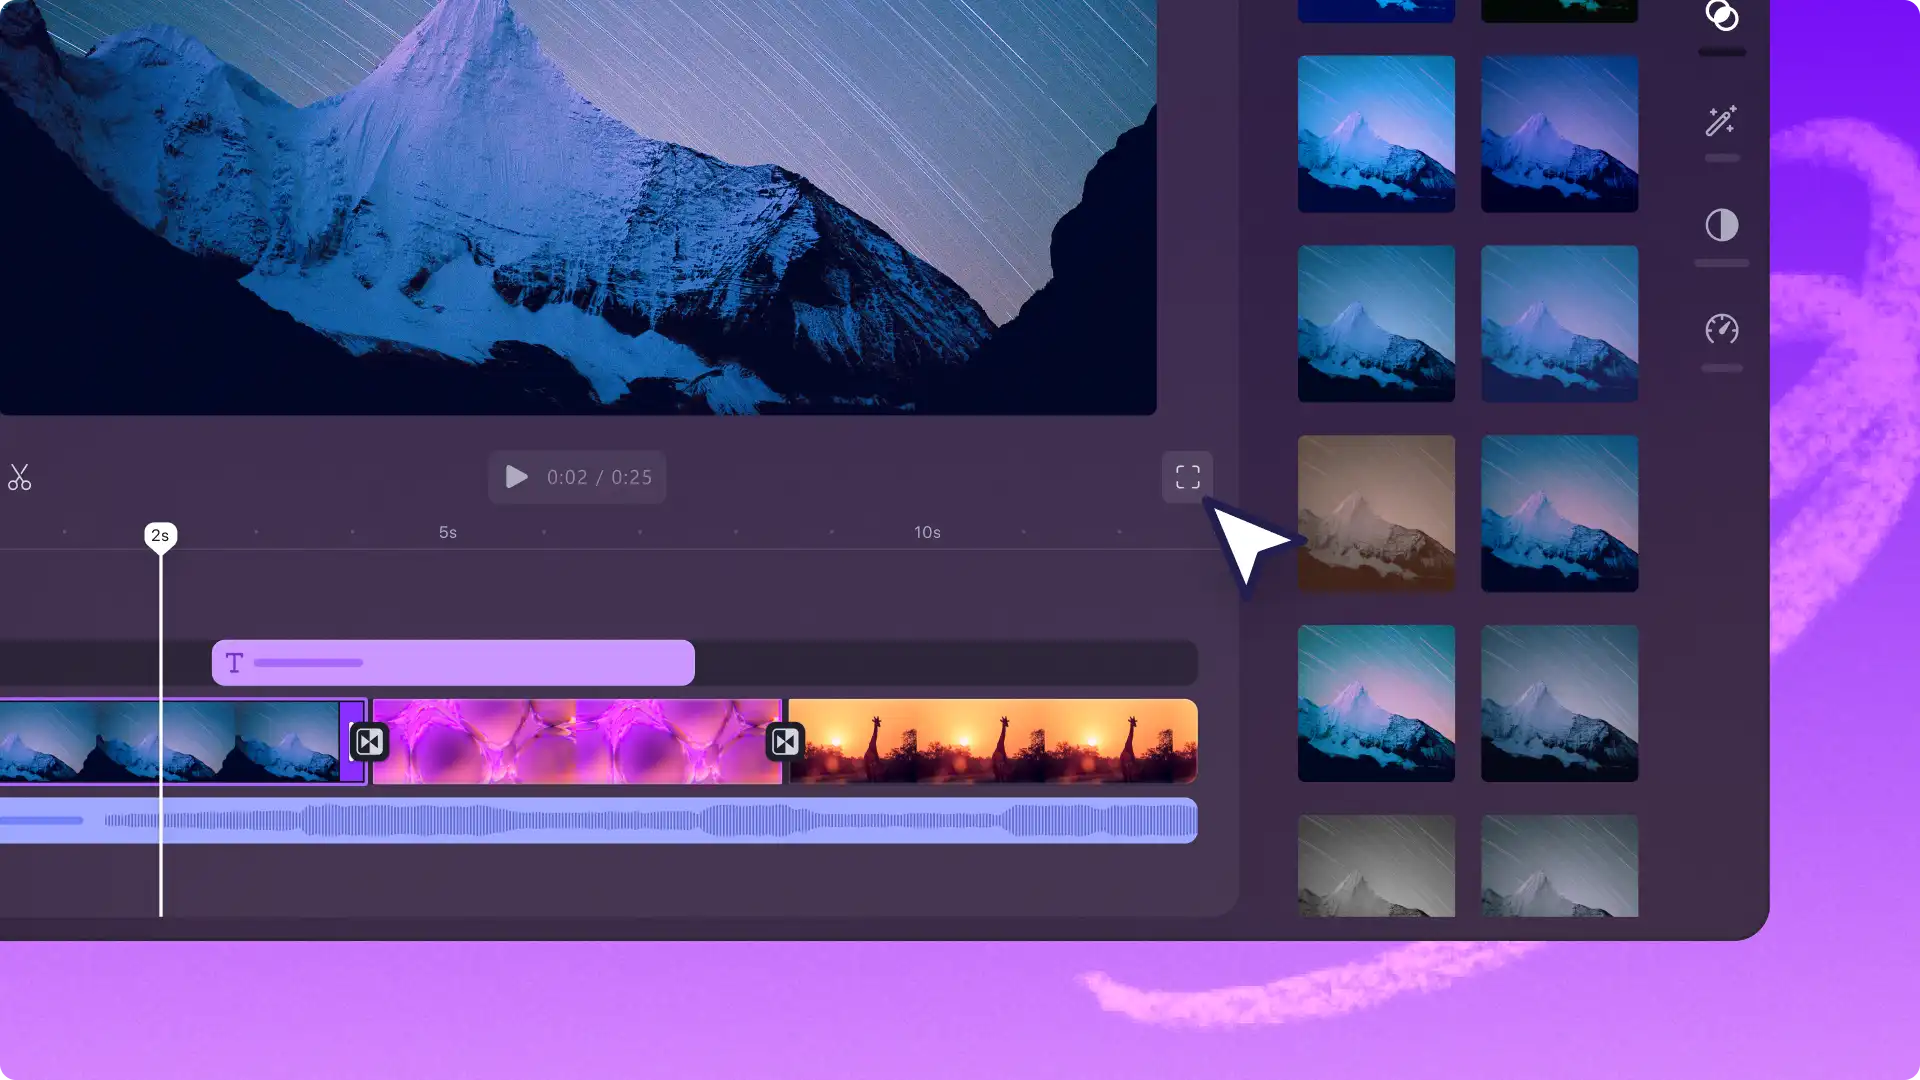
Step 2. Trim video clips to cut unwanted footage
Once you have placed your videos onto the timeline, trim the length of the clips so they showcase the right moments and cut out any mistakes. Click on the video on the timeline so it’s highlighted. Move the handles to the left of the timeline to trim the video length.
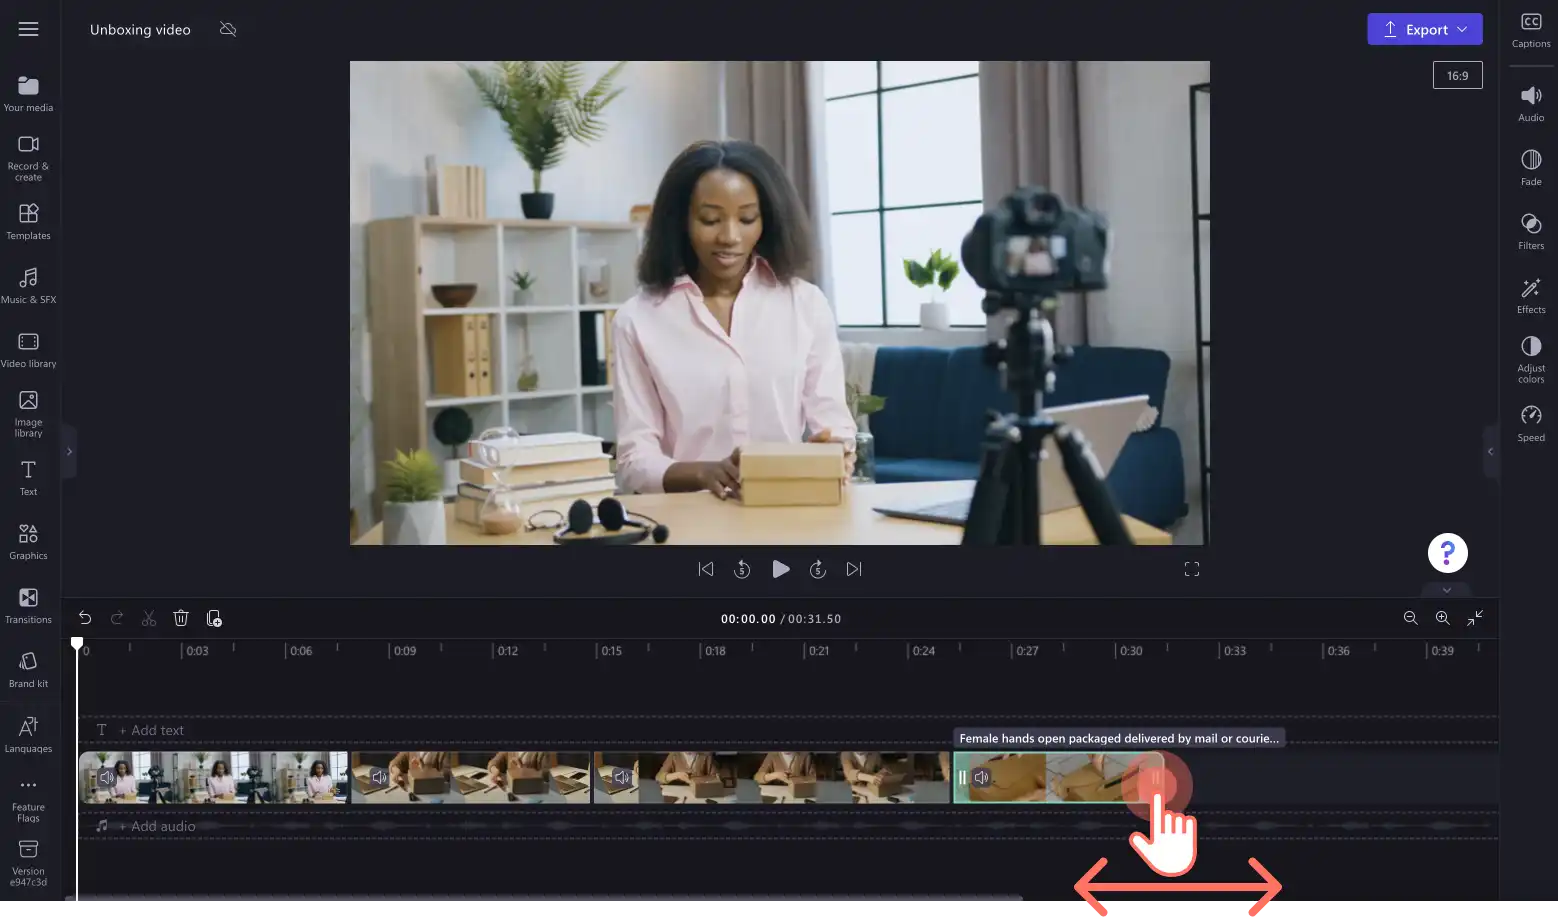
Trimming a video clip will also trim any audio that is attached to the clip. For more help, check out the trim help article.
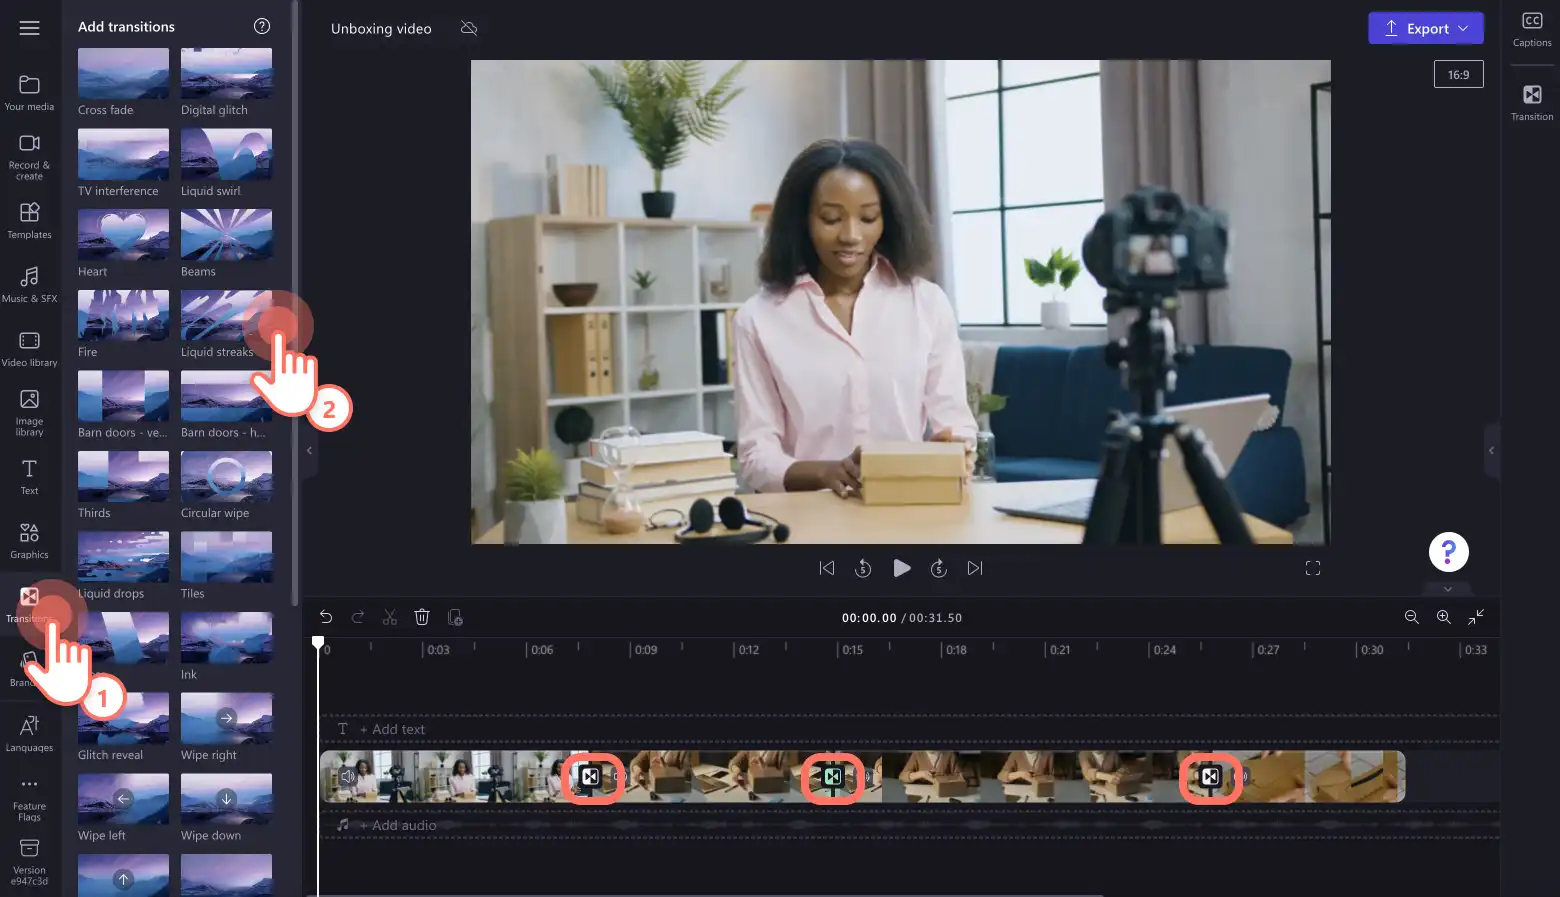
Step 3. Add special effects to your unboxing video
Scene transitions
Make scene transitions more obvious and set the tone of your video’s pace and style with video transitions. Just drag and drop a transition onto the timeline between two clips from the transitions tab on the toolbar to creatively connect your scenes. Select from popular transitions like fade to black, zoom, jump cuts, glitch, swipe, and cross-dissolve to make your videos more professional.
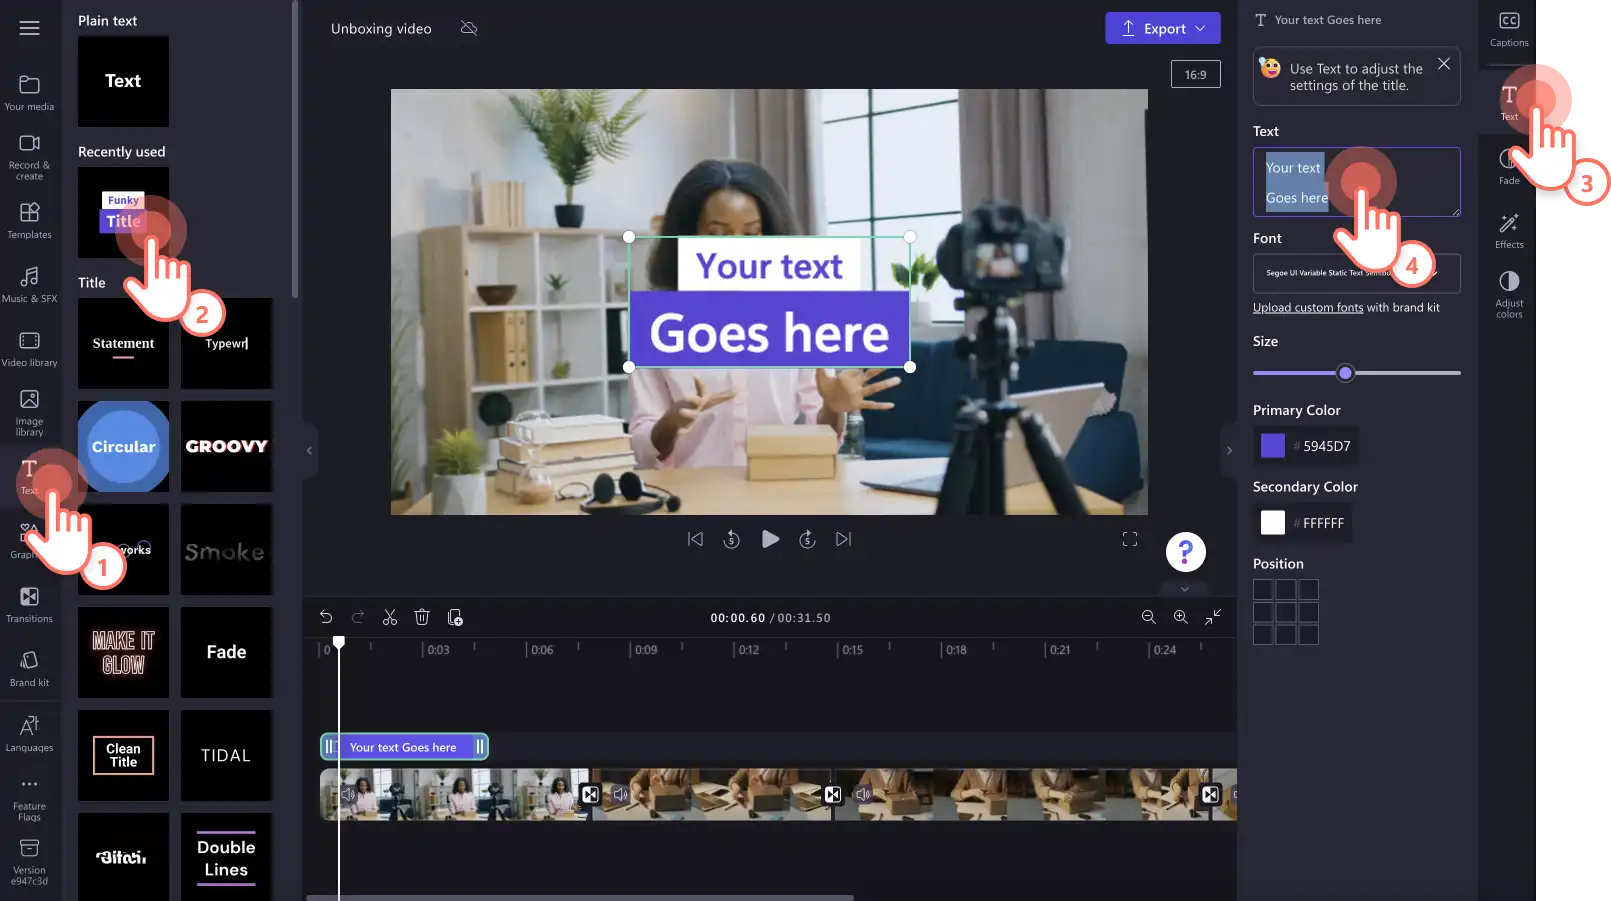
Animated text
Include valuable information for your viewers like company names, product names, your username, prices, and more with unique motion titles. Choose from a selection of animated titles in an assorted fonts, colors, sizes, and positions to suit any video. Drag and drop a title onto the timeline from the text tab on the toolbar. Edit your text using the text tab on the property panel.
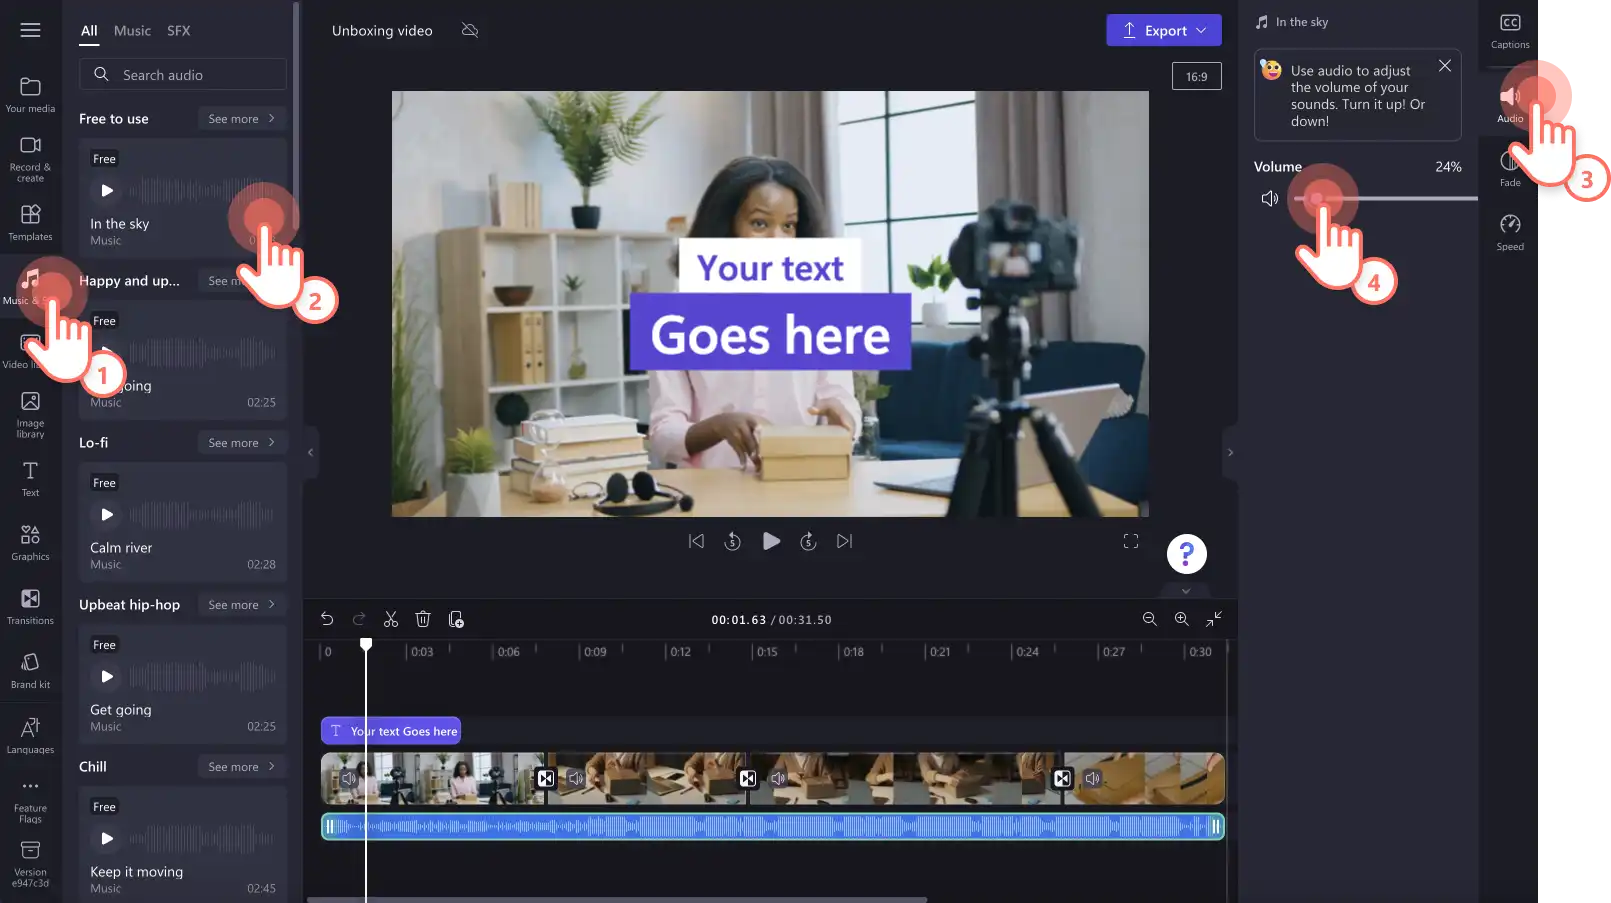
Royalty-free background music
Make your PR unboxing videos more polished and professional with high-quality sound effects and copyright-free background music. Select a tune from a wide range of different themes, vibes, and tones. Level up your video clips and transitions with SFX sound effects like pings, bangs, boom explosions, and more. Drag and drop an audio track onto the timeline from the toolbar. You can fade in and out audio and edit your audio volume using the audio tab on the property panel.
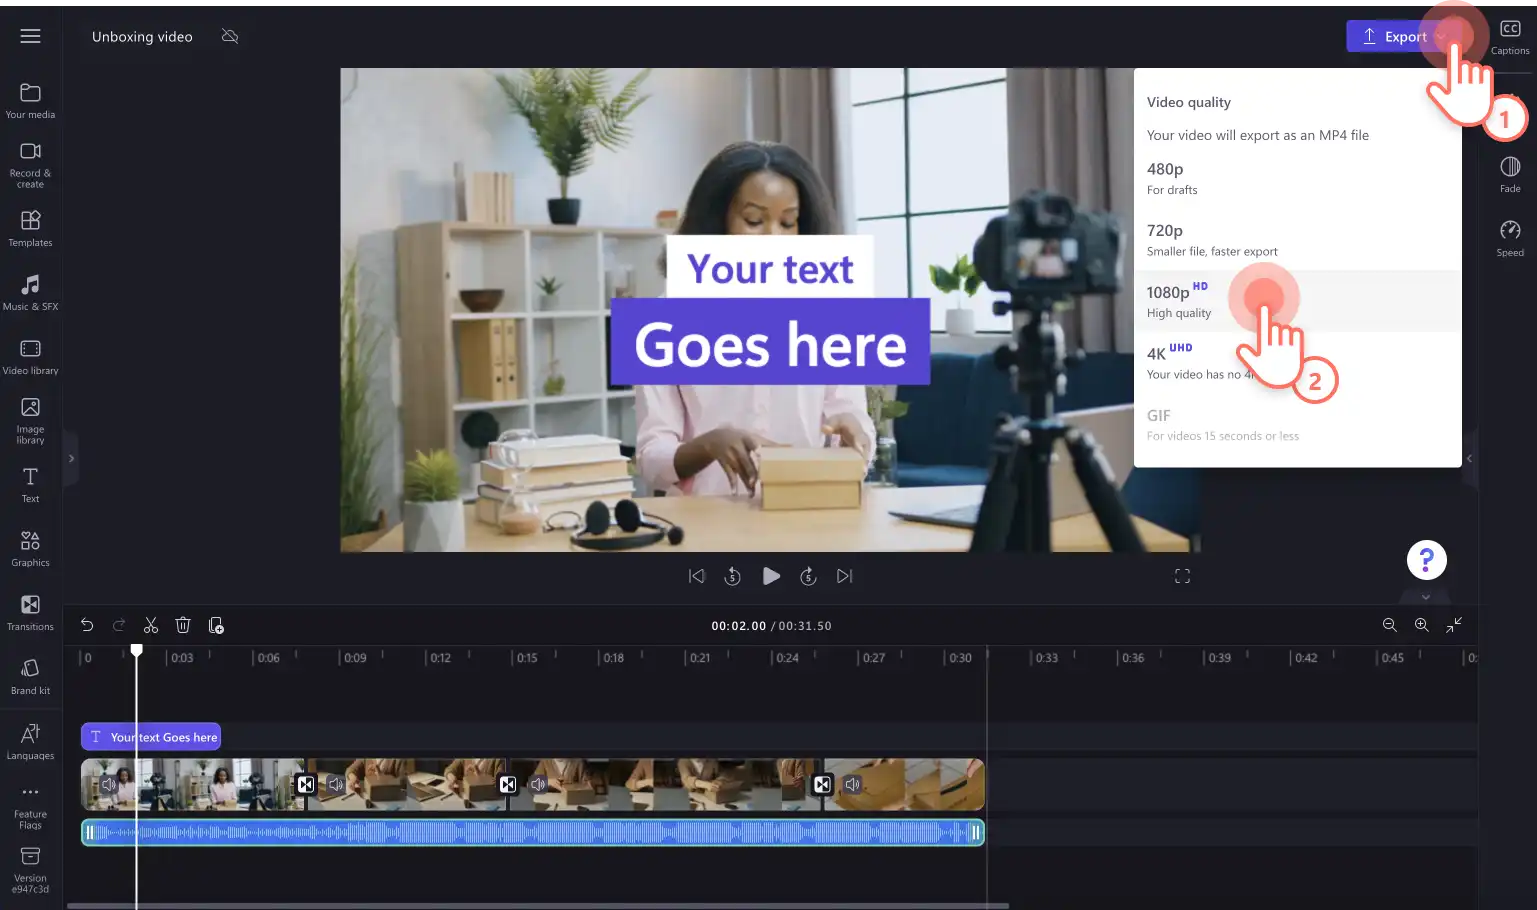
Step 4. Preview and save your unboxing video
Before saving your review video, make sure to preview by clicking on the play button. When you’re ready to save, click on the export button and select a video resolution. We recommend saving all videos in 1080p video resolution for the best quality. Paid subscribers can save in 4K video resolution.
Frequently asked questions
How to plan and record an unboxing video?
Planning your unboxing videos for social media is easy with the help of detailed storyboards and the beginner-friendly video editing timeline in Clipchamp. Just note your video ideas, create a plan, then make your video using the Clipchamp app online or the Clipchamp Windows video editor app.
Can I make an unboxing video without showing my face?
Unboxing videos don’t have to include your face if you would like to stay anonymous. Record your videos in a birds-eye view instead and create commentary using the AI voiceover feature to keep your voice unknown as well.
How do I add my reaction video in an unboxing video?
Express your reactions in unboxing videos using the split screen editing technique or picture-in-picture effect. You can record your reactions for free using the webcam recorder.
How to tell my followers about sponsored unboxing videos?
If you’re creating a PR unboxing video or UGC video, add a disclaimer in your video to let your viewers know the content is sponsored. YouTube sponsored videos and affiliate marketing is a great way to make money, but it’s also important to keep trust and loyalty between your videos and followers.
Create impressive unboxing videos for sponsored content or just for fun with Clipchamp video editor.
Want to learn more ways to edit review videos? Check out resize your video for any social media platform.
Heads up! The screenshots in this article are from Clipchamp for personal accounts. The same principles apply to Clipchamp for work and school accounts.